

Whirlpool WDP370PAHB Installation Manual

INSTALLATION INSTRUCTIONS
PORTABLE DISHWASHER
PLASTIC TUB
INSTRUCCIONES DE INSTALACIÓN
LAVAVAJILLAS EMPOTRADA
CON TINA PLÁSTICA
INSTRUCTIONS D’INSTALLATION
LAVE-VAISSELLE ENCASTRÉ
CUVE EN PLASTIQUE
Table of Contents ........................................................2
Indice ..........................................................................7
Table des matières ....................................................12
W10894879A

TABLE OF CONTENTS
DISHWASHER SAFETY ................................................... 2
INSTALLATION REQUIREMENTS ................................... 3
Tools and Parts ......................................................................... 3
Location Requirements .............................................................3
Water Supply Requirements .....................................................3
Electrical Requirements ............................................................3
INSTALLATION INSTRUCTIONS ..................................... 3
Caster Installation ..................................................................... 3
Prepare Dishwasher ..................................................................4
Connect Dishwasher .................................................................4
Disconnect Dishwasher ............................................................ 6
DISHWASHER SAFETY
Your safety and the safety of others are very important.
We have provided many important safety messages in this manual and on your appliance. Always read and obey all safety
messages.
This is the safety alert symbol.
This symbol alerts you to potential hazards that can kill or hurt you and others.
All safety messages will follow the safety alert symbol and either the word “DANGER” or “WARNING.”
These words mean:
You can be killed or seriously injured if you don't immediately
DANGER
WARNING
follow instructions.
You
can be killed or seriously injured if you don't
instructions.
follow
All safety messages will tell you what the potential hazard is, tell you how to reduce the chance of injury, and tell you what can
happen if the instructions are not followed.
You Need to:
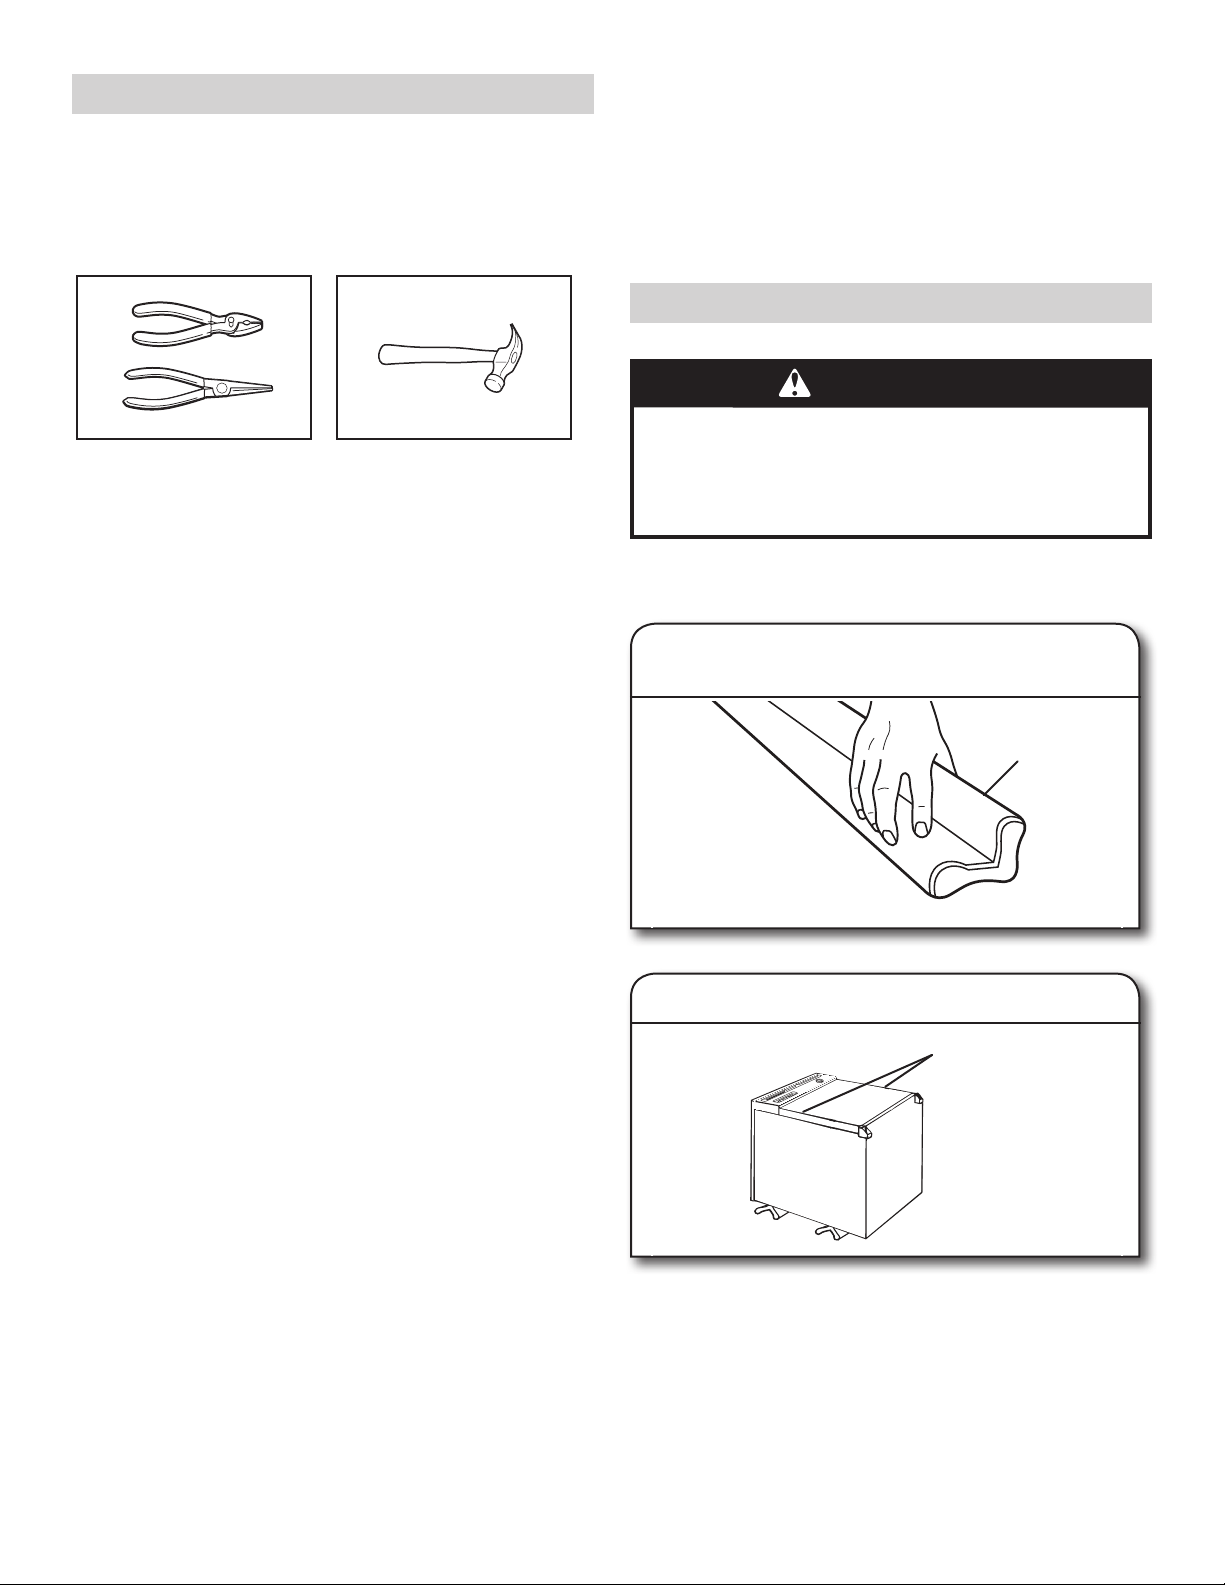
WARNING
Tip Over Hazard
Do not use dishwasher until completely installed.
Do not push down on open door.
Doing so can result in serious injury or cuts.
■ Slowly open dishwasher door while someone grasps the rear
of the dishwasher. Remove shipping materials and drain hose.
Close dishwasher door until latched.
NOTE: Each dishwasher is tested at the factory and may
contain some residual water in the tub as a result of the test.
■ Observe all governing codes and ordinances.
■ Prepare dishwasher and faucet as specified in these
instructions.
■ Have everything you need to properly install dishwasher.
The dishwasher must be installed to meet all electrical and
plumbing national and local codes and ordinances.
2
INSTALLATION REQUIREMENTS
TOOLS AND PARTS
Gather the recommended tools and parts before starting
installation. Read and follow the instructions provided with
any tools listed here.
Tools Needed:
Pliers Small hammer
Parts Supplied:
■ Faucet Adapter Kit Part Number W10254672
■ 4 casters
■ Literature package
Make sure all these parts were included in the parts bag.
Close and latch dishwasher door. See parts list for accessories
available for your dishwasher.
NOTE: Parts are available for purchase in plumbing supply
stores. Check local codes. Check existing electrical supply. See
the “Electrical Requirements” section. It is recommended that
electrical connections be made by a licensed electrical installer.
LOCATION REQUIREMENTS
You must have:
■ 120-volt, 60 Hz, AC-only, 15- or 20- amp, fused
electrical supply
■ Mating grounded electrical outlet
We recommend:
■ A time-delay fuse or circuit breaker
■ A separate circuit
INSTALLATION INSTRUCTIONS
WARNING
Excessive Weight Hazard
Use two or more people to move and install
dishwasher.
Failure to do so can result in back or other injury.
CASTER INSTALLATION
1. Place 2 corner posts on floor
behind dishwasher
Corner post
■ Grounded electrical supply is required.
■ Sink or laundry tub that can drain water at a minimum
carry-away capacity of 7 gal. (26 L) per minute
■ Top of sink or laundry tub that is at least 27" (68.6 cm)
high and not higher than 48" (122 cm) from the bottom
of dishwasher
■ Floor support for dishwasher weight of 180 lbs (81.6 kg).
■ Grounded electrical outlet
■ Hot water faucet or hot and cold single-spout water faucet
within 30" (76.2 cm) of the back of dishwasher
■ 20-120 psi (103-827 kPa) water pressure
WATER SUPPLY REQUIREMENTS
■ A hot water line with 20-120 psi (138-862 kPa) water
pressure can be verified by a licensed plumber.
■ 120°F (49°C) water at dishwasher
ELECTRICAL REQUIREMENTS
Be sure that the electrical connection and wire size are adequate
and in conformance with the National Electrical Code, ANSI/
NFPA 70 - latest edition, and all local codes and ordinances.
A copy of the above code standards can be obtained from:
National Fire Protection Association
1 Batterymarch Park
Quincy, MA 02269
2. Put dishwasher on its back
Dishwasher door frame
Grasp sides of dishwasher door frame and put dishwasher
on its back.
3

3. Attach casters
WARNING
Caster
Firmly push casters into holes at corners of dishwasher as
shown. Pull on each caster to check that casters are snug.
HELPFUL TIP: It may be helpful to place a piece of wood
between the caster wheels and then lightly tap the wood with
a hammer.
PREPARE DISHWASHER
WARNING
CONNECT DISHWASHER
Connecting the Faucet Adapter
NOTES:
■ A hose that attaches to a sink spray can burst if it is installed
on the same water line as the dishwasher. If your sink has a
spray hose, it is recommended that the hose be disconnected
and the hole plugged.
■ A special adapter must be installed on the faucet before the
dishwasher can be connected. Complete the instructions
below using the provided adapter.
When moving your dishwasher, make sure the door is latched.
Hold the dishwasher at the top front corners.
5. Prepare faucet
Washer
Screen
Screen holder
or aerator
Tip Over Hazard
Do not use dishwasher until completely installed.
Do not push down on open door.
Doing so can result in serious injury or cuts.
Excessive Weight Hazard
Use two or more people to move and install
dishwasher.
Failure to do so can result in back or other injury.
4. Stand dishwasher upright
Beaded foam
shipping pieces
Remove the screen holder or aerator, screen, and washer from
the end of the faucet. Use the faucet adapter kit that came
with your portable dishwasher to modify the faucet where the
dishwasher will be used.
NOTE: Remove and save the washer, screen, and screen holder
or aerator for future use.
DETERMINE FAUCET THREAD TYPE
6. Attach faucet adapter –
external threads
Thin washer
Screens
Faucet adapter
Insert the 2 screens and then the thin washer from the faucet
adapter kit into the faucet adapter. Attach the adapter onto
the end of the faucet.
NOTE: Do not use the thick washer.
Stand dishwasher upright. Open door and remove shipping
foam, cardboard tower, and any other shipping materials.
Close dishwasher door. Latch dishwasher door shut.
4

Attach faucet adapter – internal threads
Thick washer
Thin washer
Screens
Faucet adapter
8. Connect hose to faucet
Insert the 2 screens, the thin washer, and then the thick washer
from the faucet adapter kit into the faucet adapter. Attach the
adapter onto the end of the faucet.
NOTE: Use both washers.
Connecting to Water and Electrical Supply
Run water at the faucet until it is hot. Turn off the water.
7. Check hose connection
Pull the hoses out of their storage compartment on the back of
the dishwasher.
NOTE: Make sure the hoses are not kinked or twisted. Kinked
hoses reduce washing performance.
Pull down on the locking collar while lifting the hose connector
onto the faucet adapter. When the connector snaps into place,
release the locking collar. Turn the hot water on slowly until it is
all the way on.
9. Plug into a grounded 3 prong outlet.
5
 Loading...