

WHIRLPOOL W4D7 XC2 User Manual
E4D XX X X
E4D XX XX X
E4D XX X X
E4D XXX X X
English
Operating Instructions
REFRIGERATOR/FREEZER COMBINATION
Contents
Operating Instructions, 1
Assistance, 2
Description of the appliance, 4
Description of the appliance, 6
Installation, 8
Start-up and use, 8
Maintenance and care, 9
Precautions and tips, 10
Troubleshooting, 11
ET
Eesti keel
Kasutusjuhend
KOMBINEERITUD KÜLMIK/SÜGAVKÜLMIK
LV
Latviski
Lietošanas norādījumi
LEDUSSKAPIS/SALDĒTAVA
Saturs
Lietošanas norādījumi, 1
Palīdzība, 3
Ierīces apraksts, 5
Ierīces apraksts, 7
Montāža, 16
Ieslēgšana un lietošana, 16
Apkope un uzturēšana, 17
Piesardzības pasākumi un padomi, 18
Problēmu novēršana, 19
LT
Lietuvių
Naudojimo instrukcijos
KOMBINUOTASIS ŠALDYTUVAS / ŠALDIKLIS
Sisukord
Kasutusjuhend, 1
Kasutajatugi, 2
Seadme kirjeldus, 4
Seadme kirjeldus, 6
Paigaldamine, 12
Sisselülitamine ja kasutamine, 12
Hooldamine, 13
Ettevaatusabinõud ja näpunäited, 14
Tõrgete lahendamine, 15
Turinys
Naudojimo instrukcijos, 1
Pagalba, 3
Įrenginio aprašymas, 5
Įrenginio aprašymas, 7
Įrengimas, 20
Paleidimas ir naudojimas, 20
Techninė priežiūra, 21
Atsargumo priemonės ir patarimai, 22
Gedimų šalinimas, 23
ET
LV
LV
LT
Assistance
Before calling for Assistance:
• Check if the malfunction can be solved on your own (see
Troubleshooting).
• If after all the checks, the appliance still does not operate or
the problem persists, call the nearest Service Centre
Communicating:
• type of malfunction
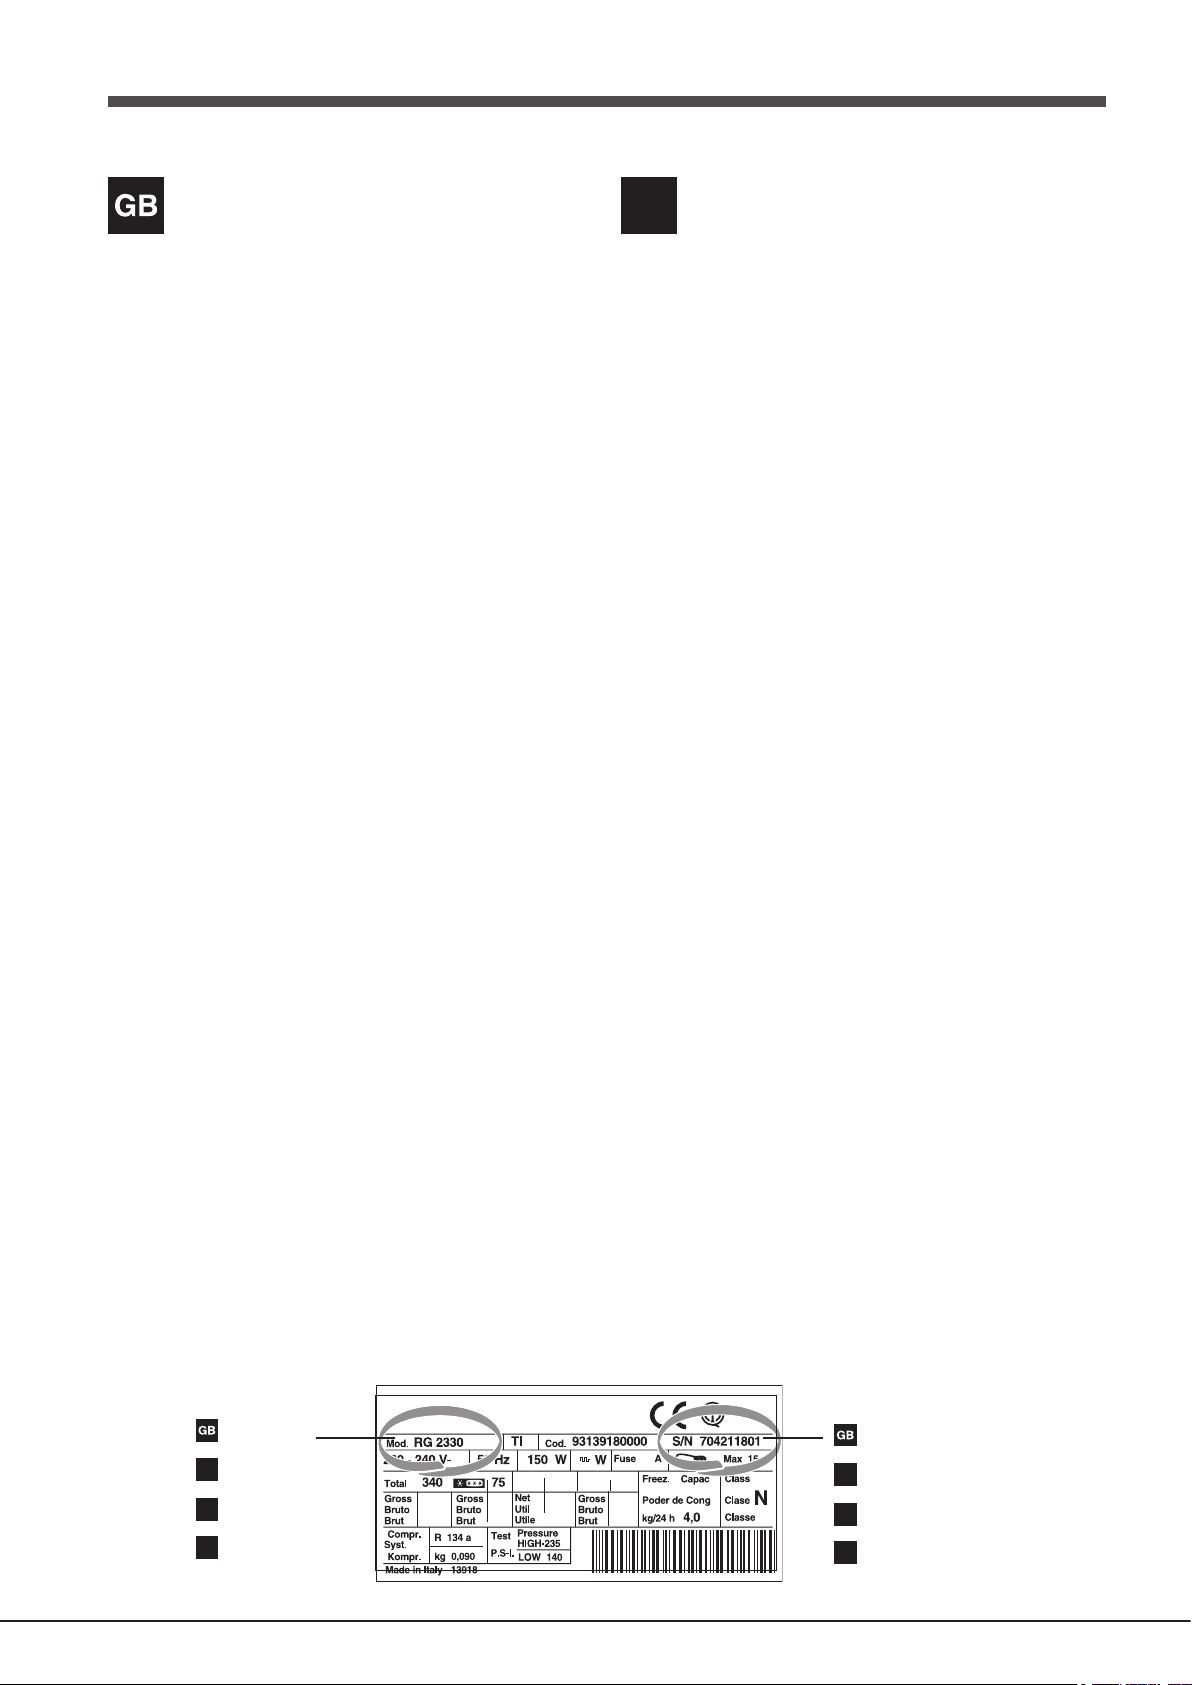
• appliance model (Mod.)
• serial number (S/N)
This information can be found on the data plate located on the
bottom left side of the refrigerator compartment.
Never call on unauthorized technicians and always refuse
spare parts which are not originals.
Kasutajatugi
Enne kasutajatoega ühenduse võtmist:
• Kontrollige, kas leiate tõrkele ise lahenduse (vt „Tõrgete
lahendamine“).
• Juhul kui seade pärast kõiki kontrolle ikkagi tööle ei hakka
või probleem ei kao, helistage lähimasse teeninduskeskusse.
Probleemi kirjeldamine:
• tõrke tüüp
• seadme mudel (mud.)
• seerianumber (S/N)
See teave on leitav külmikusektsiooni vasaku külje allosas asuvalt
andmesildilt.
Ärge kunagi kasutage volitamata tehnikute teenuseid ega
mitteoriginaalseid varuosi.
- model
ET
- mudel
– modelis
– modelis
2
- serial number
ET
- seerianumber
– sērijas numurs (S/N)
LT
– serijos numeris
LV
LV
LV
LT
LT
Palīdzība
Pirms zvanīt, lai lūgtu palīdzību, veiciet tālāk minētās
darbības.
• Pārbaudiet, vai varat darbības traucējumus novērst pats (skat.
Problēmu risināšana).
• Ja pēc visu pārbaužu veikšanas ierīce joprojām nedarbojas vai
problēma nav atrisināta, sazinieties ar tuvāko apkalpošanas
centru
nosaucot:
• darbības traucējuma veidu,
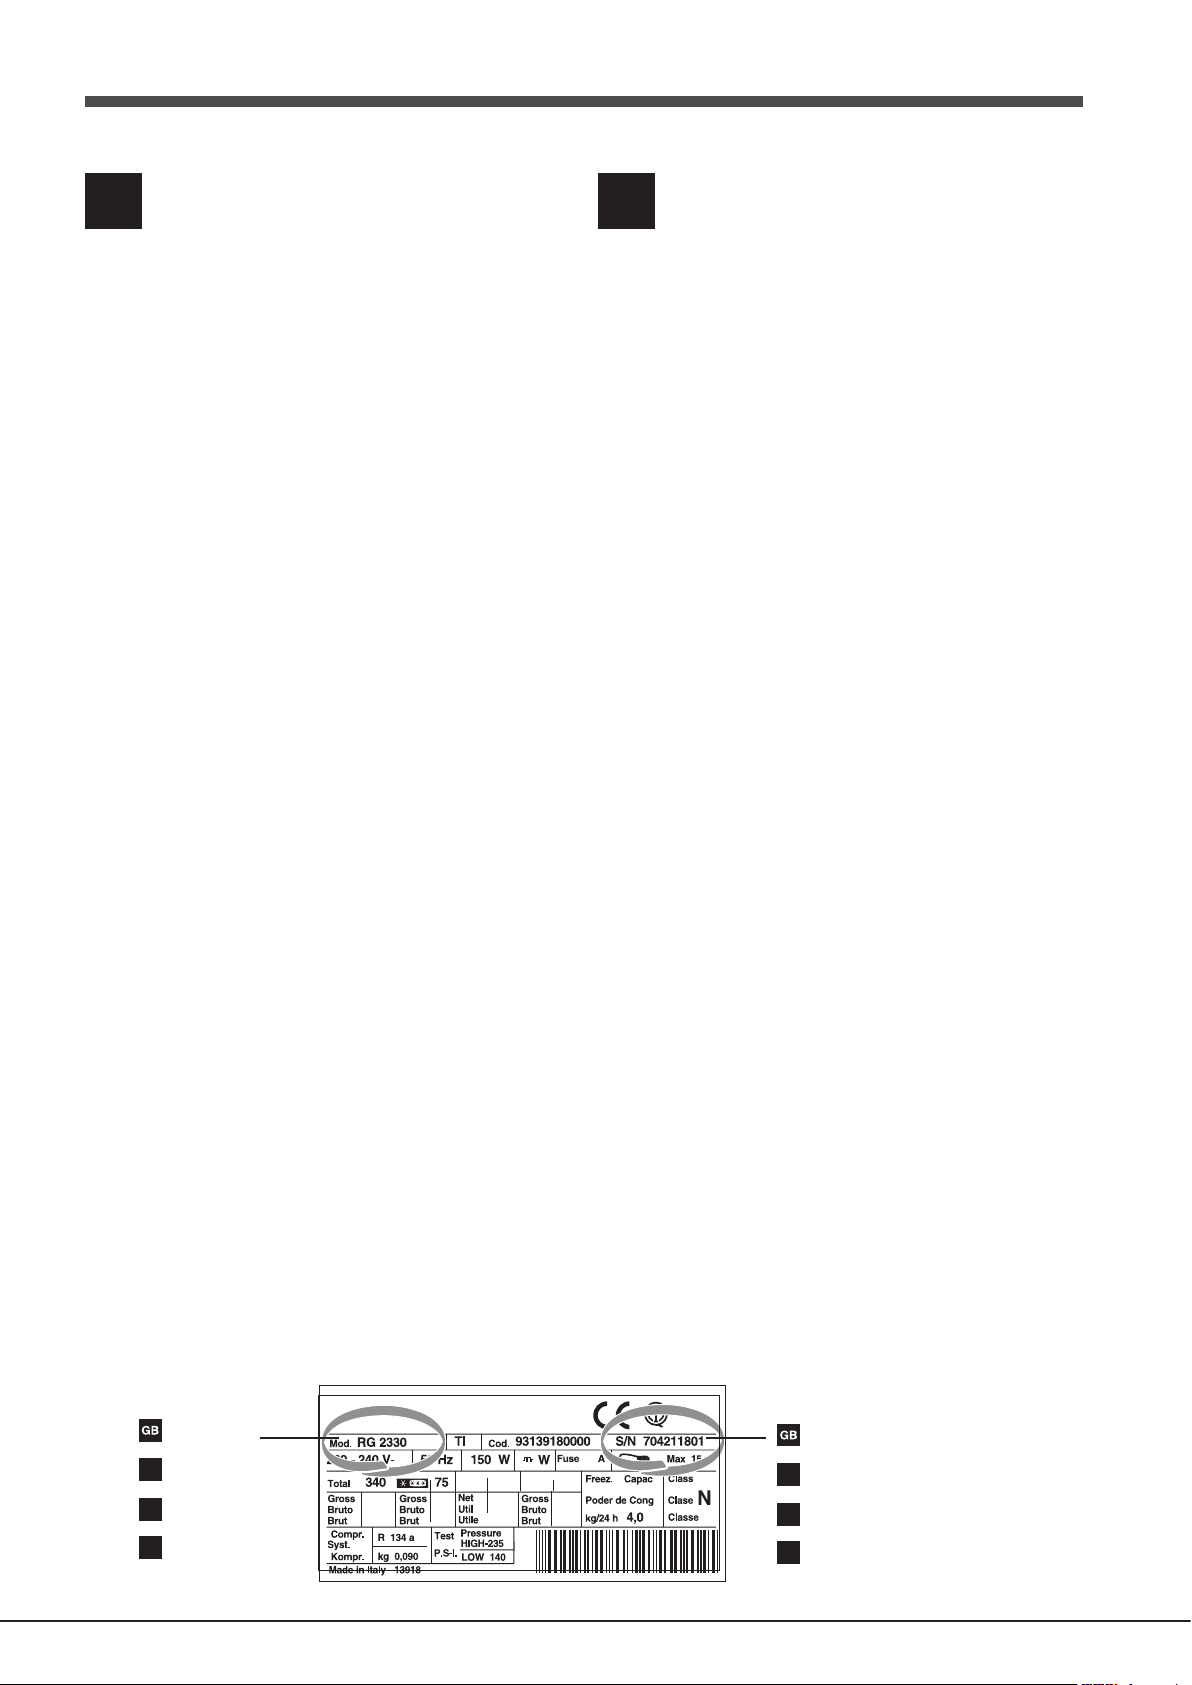
• ierīces modeli (Mod.),
• sērijas numuru (S/N).
Šo informāciju var atrast uz datu plāksnītes, kas atrodas ledusskapja
nodalījuma kreisajā apakšējā pusē.
Nekad neizsauciet nepilnvarotus tehniķus un vienmēr
atsakieties izmantot neorģinālas rezerves daļas.
Pagalba
Prieš kreipdamiesi pagalbos:
• patikrinkite, gal gedimą sugebėsite pašalinti patys (žr. „Gedimų
nustatymas ir šalinimas“);
• jeigu po visų tikrinimų prietaisas vis tiek neveikia arba problema
išlieka, kreipkitės į artimiausią techninės priežiūros centrą.
Ryšys:
• gedimo tipas
• prietaiso modelis (mod.)
• serijos numeris (S/N)
Šią informaciją galima rasti įrangos duomenų plokštelėje, kuri yra
apatinėje kairiojoje šaldytuvo skyriaus pusėje.
Niekada nesikreipkite į neįgaliotus technikus ir niekada
nenaudokite ne originalių atsarginių dalių.
- model
ET
- mudel
– modelis
– modelis
- serial number
ET
- seerianumber
– sērijas numurs (S/N)
LT
– serijos numeris
3
ET
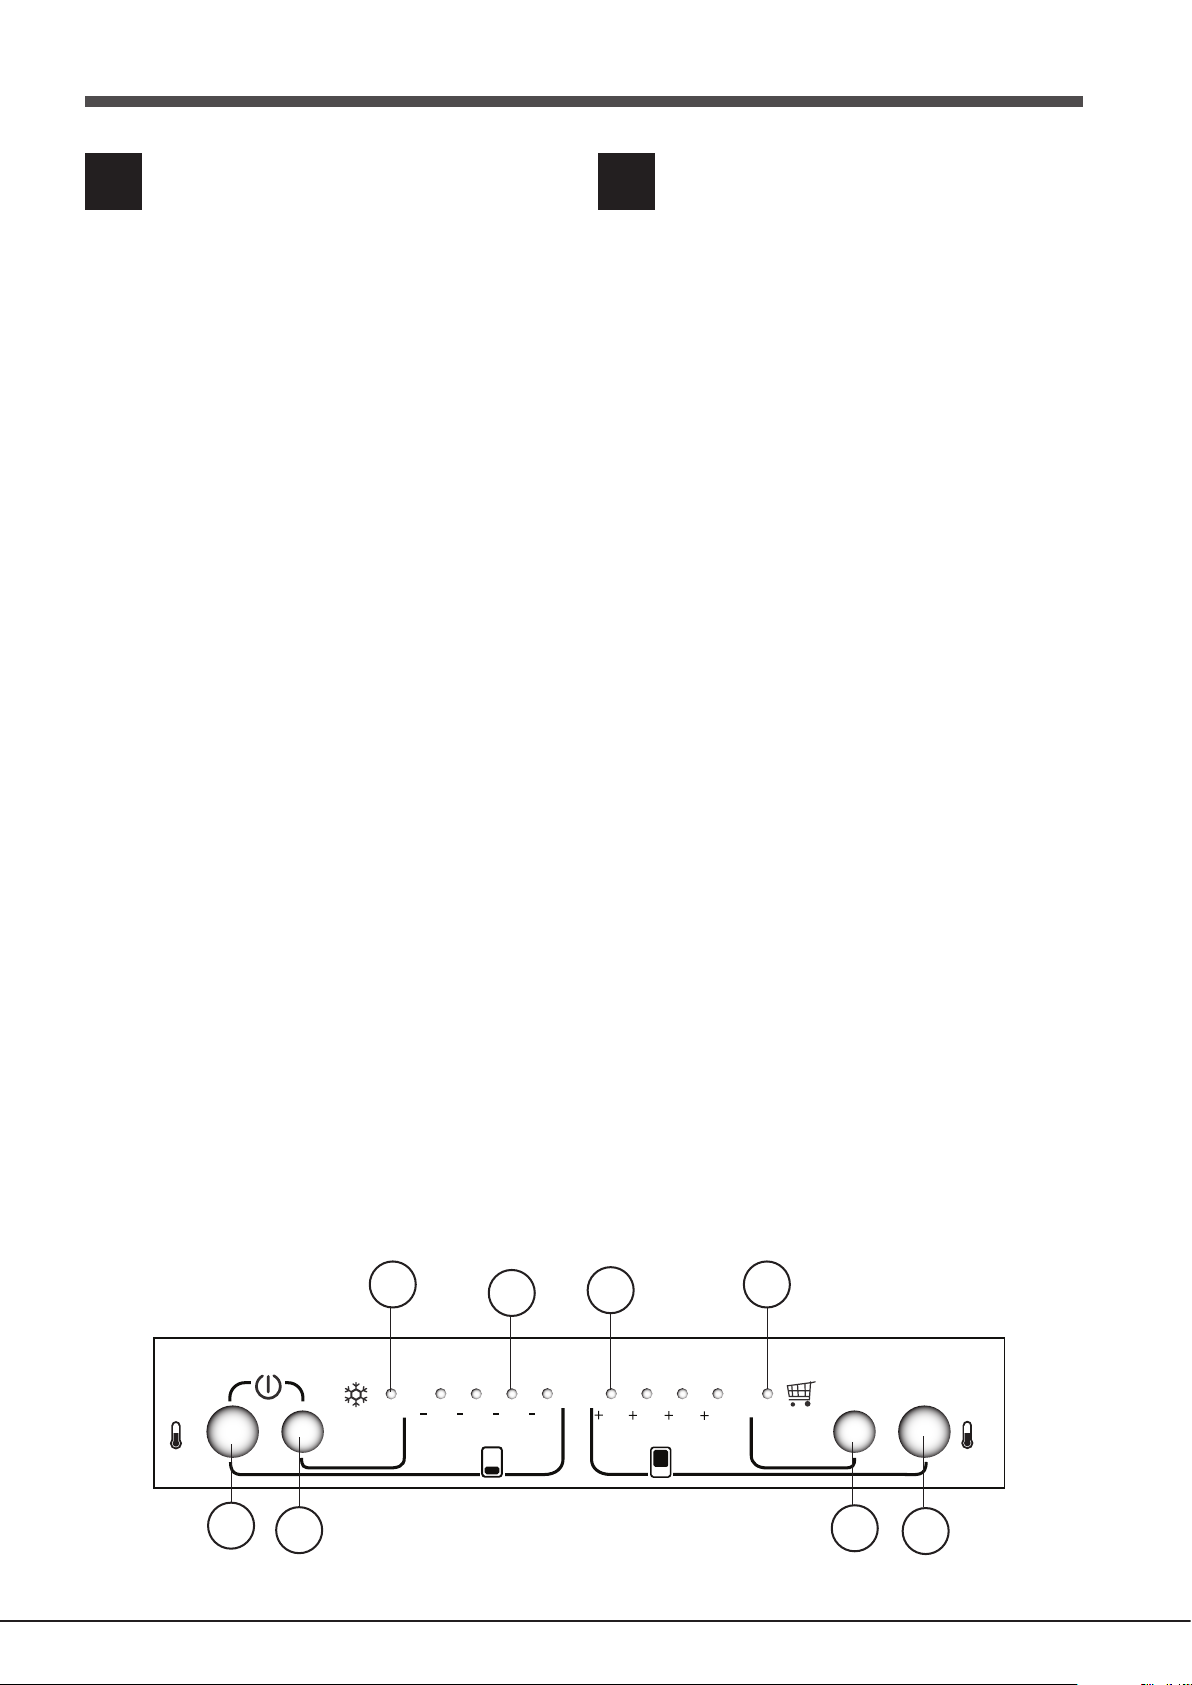
Description of the appliance
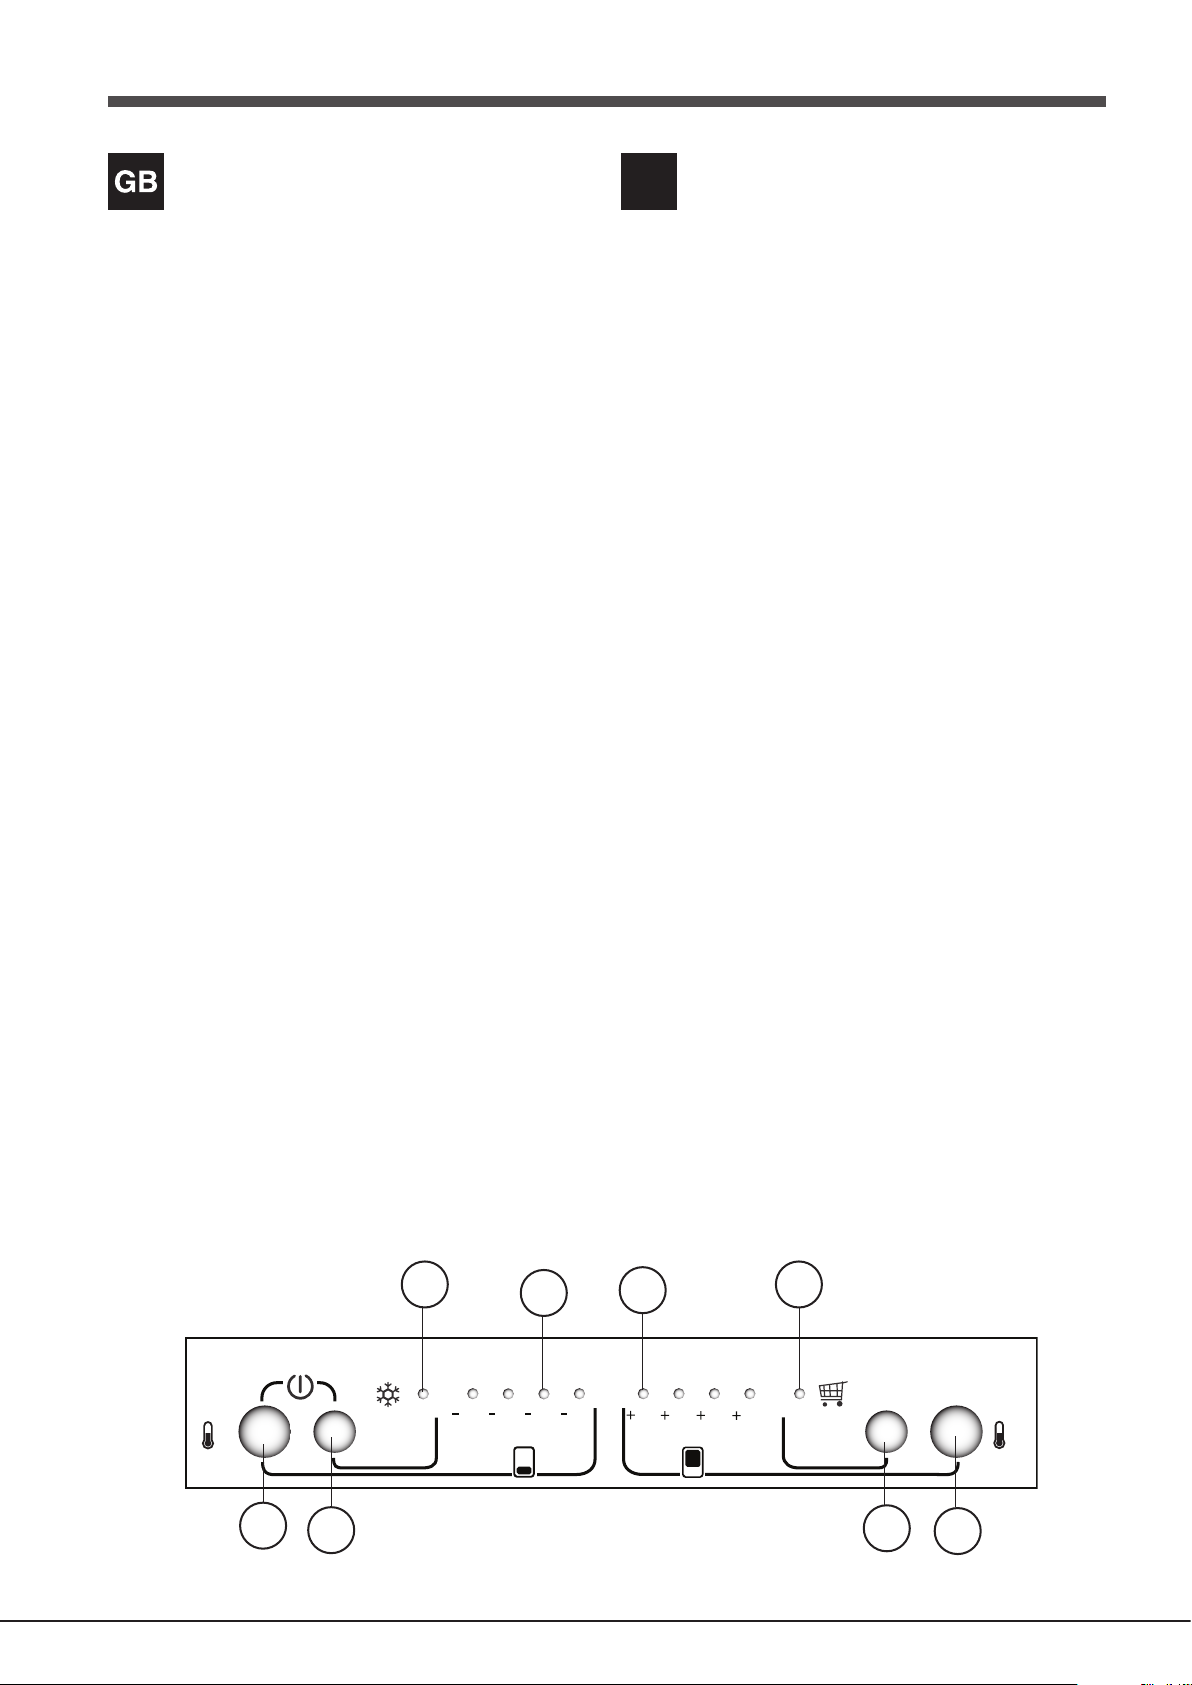
Control panel
1. FREEZER OPERATION
Button to regulate the temperature the freezer compartment.
Button is used with SUPER FREEZE Button to switch on/switch
off the product by pressing both 3 seconds
2. SUPER FREEZE
Button (rapid freezing) to freeze fresh food.
Press button for 3 seconds to switch on the product while it
is switched off
3. SUPER FREEZE
Blue light illuminates when SUPER FREEZE button is pressed.
4. FREEZER TEMPERATURE
Yellow light The temperature of the Freezer is consisted with
4 levels as indicated on serigraphy.
5. FRIDGE TEMPERATURE
Yellow light The temperature of the Fridge is consisted with 4
levels as indicated on serigraphy.
6. SUPER COOL
Blue light illuminates when SUPER COOL button is pressed.
7. SUPER COOL
Button (quick cool) to lower the temperature of the refrigerator
compartment rapidly.
8. REFRIGERATOR OPERATION
Button to regulate the temperature of the refrigerator
compartment.
!The indicator lights are also used to indicate an unusual
temperature increase in the freezer compartment (see
Troubleshooting).
Seadme kirjeldus
Juhtpaneel
1. SÜGAVKÜLMIKU TEMPERATUURINUPP
Nupp külmutussektsiooni temperatuuri reguleerimiseks.
Nuppu kasutatakse koos nupuga SUPER FREEZE seadme
sisse-/väljalülitamiseks, hoides mõlemat 3 sekundit all.
2. SUPER FREEZE (KIIRKÜLMUTUS)
Nupp (kiirkülmutus) värske toidu külmutamiseks.
Hoidke nuppu 3 sekundit all, et väljalülitatud seade sisse
lülitada.
3. SUPER FREEZE (KIIRKÜLMUTUS)
Nupu SUPER FREEZE vajutamise korral süttib sinine tuli.
4. SÜGAVKÜLMIKU TEMPERATUUR
Kollane tuli. Sügavkülmiku temperatuuril on 4 taset, nagu
joonisel näidatud.
5. KÜLMIKU TEMPERATUUR
Kollane tuli. Külmiku temperatuuril on 4 taset, nagu joonisel
näidatud.
6. SUPER COOL (KIIRJAHUTUS)
Nupu SUPER COOL vajutamise korral süttib sinine tuli.
7. SUPER COOL (KIIRJAHUTUS)
Nupp (kiirjahutus) külmikusektsiooni temperatuuri kiireks
langetamiseks.
8. KÜLMIKU TEMPERATUURINUPP
Nupp külmikusektsiooni temperatuuri reguleerimiseks.
!Märgutulesid kasutatakse lisaks ka külmutussektsiooni tavatule
temperatuurikasvule viitamiseks (vt „Tõrgete lahendamine“).
3
°C
1
4
SUPER
FREEZE
2
26 22 20 18
4
5
2468
6
SUPER
COOL
°C
7
8
LV
LT
Ierīces apraksts
Vadības panelis
1. SALDĒTAVAS DARBĪBA
Poga temperatūras regulēšanai saldētavas nodalījumā.
Poga tiek lietota ar pogu ĪPAŠI ĀTRA SALDĒŠANA, kas
paredzētas ierīces ieslēgšanai/izslēgšanai, nospiežot abas
pogas un pieturot tās 3 sekundes
2. ĪPAŠI ĀTRA SALDĒŠANA
Poga (ātra sasaldēšana) paredzēta svaigu pārtikas produktu
sasaldēšanai.
3 sekundes turiet nospiestu pogu, lai ieslēgtu ierīci, kad tā ir
izslēgta.
3. ĪPAŠI ĀTRA SALDĒŠANA
Kad poga ĪPAŠI ĀTRA SALDĒŠANA ir nospiesta, deg zils
gaismas indikators.
4. SALDĒTAVAS NODALĪJUMA TEMPERATŪRA
Dzeltena gaisma: saldētavas temperatūra iedalāma 4 līmeņos,
kā norādīts uz serigrājas.
5. LEDUSSKAPJA NODALĪJUMA TEMPERATŪRA
Dzeltena gaisma: ledusskapja temperatūra iedalāma 4 līmeņos,
kā norādīts uz serigrājas.
6. ĪPAŠI ĀTRĀ DZESĒŠANA
Ka ir nospiesta poga ĪPAŠI ĀTRĀ DZESĒŠANA, deg zils
gaismas indikators.
7. ĪPAŠI ĀTRĀ DZESĒŠANA
Poga (ātrā sasaldēšana) paredzēta, lai ātri pazeminātu
temperatūru ledusskapja nodalījumā.
8. LEDUSSKAPJA DARBĪBA
Poga temperatūras regulēšanai ledusskapja nodalījumā.
Įrenginio aprašymas
Valdymo skydelis
1. ŠALDIKLIO VALDYMAS
Šaldiklio skyriaus temperatūros reguliavimo mygtukas.
Šį mygtuką paspaudus ir palaikius 3 sek. kartu su SUPER
FREEZE mygtuku įjungiamas / išjungiamas gaminys.
2. SUPER FREEZE
Mygtuku (greitas užšaldymas) užšaldykite šviežią maistą.
Paspauskite mygtuką ir palaikykite 3 sekundes, jei norite įjungti
išjungtą gaminį
3. SUPER FREEZE
Nuspaudus mygtuką SUPER FREEZE šviečia mėlyna lemputė.
4. ŠALDIKLIO TEMPERATŪRA
Geltona lemputė. Šaldiklio temperatūra yra suskirstyta į 4 lygius,
kaip nurodyta dokumentuose.
5. ŠALDYTUVO TEMPERATŪRA
Geltona lemputė. Šaldytuvo temperatūra yra suskirstyta į 4
lygius, kaip nurodyta dokumentuose.
6. SUPER COOL
Nuspaudus mygtuką SUPER COOL šviečia mėlyna lemputė.
7. SUPER COOL
Naudokite greito atvėsinimo mygtuką, jei norite greitai sumažinti
temperatūrą šaldytuvo skyriuje.
8. ŠALDYTUVO VALDYMAS
Šiuo mygtuku reguliuojama šaldytuvo skyriaus temperatūra.
!Indikatorių lemputės taip pat parodo neįprastą temperatūros
padidėjimą šaldiklio skyriuje (žr. „Gedimų nustatymas ir šalinimas“).
!Gaismas indikatori tiek izmantoti arī, lai norādītu uz neparastu
temperatūras paaugstināšanos saldētavas nodalījumā (sk.
Problēmu risināšana).
3
°C
SUPER
FREEZE
26 22 20 18
4
5
2468
6
SUPER
°C
COOL
1
2
7
8
5
ET
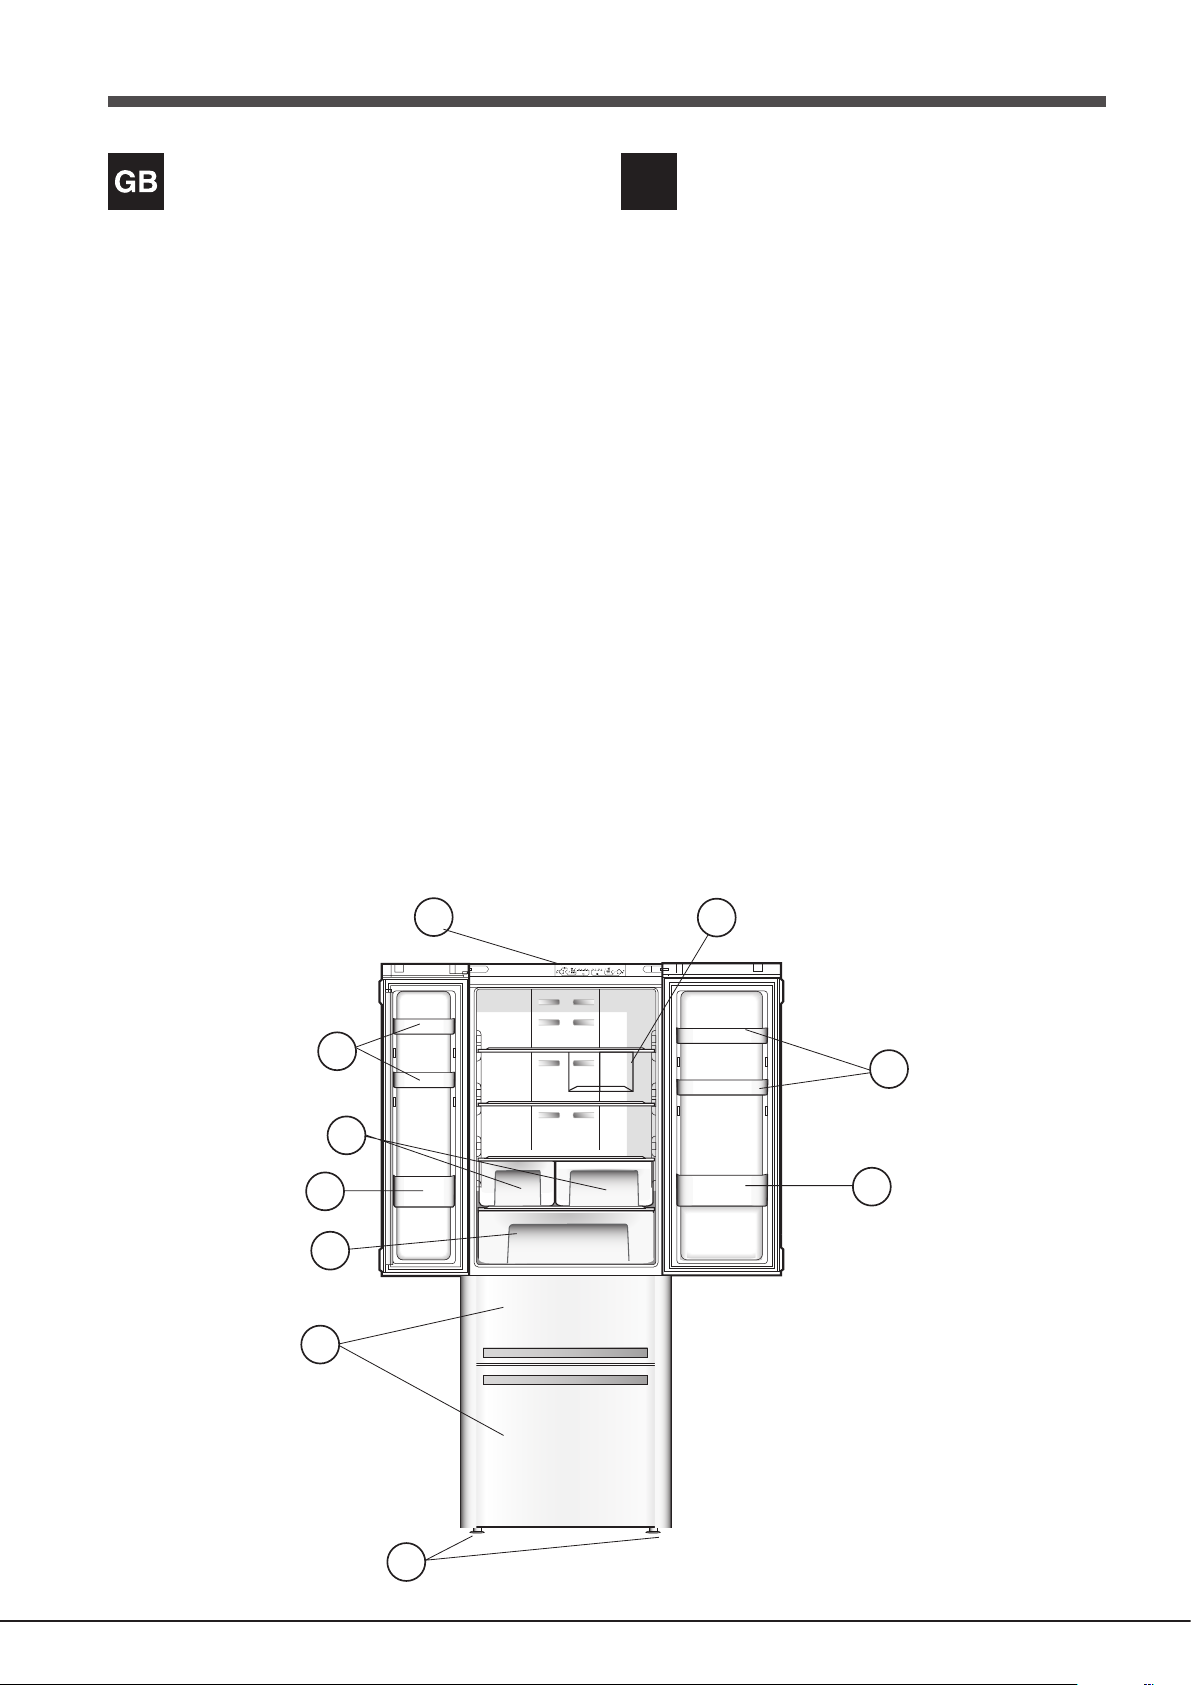
Description of the appliance
Overall view
The instructions contained in this manual are applicable to different
model refrigerators. The diagrams may not directly represent the
appliance purchased. For more complex features, consult the
following pages.
1. Levelling FEET
2. FREEZER and STORAGE compartment
3. BOTTLE shelf*
4. Food Care Zone / Food Care Zone 0°C / Safe Defrost*
5. FRUIT and VEGETABLE bin*
6. Removable multipurpose SHELVES*
7. Control panel.
8. WINE RACK*
* Varies by number and/or position, available only on certain
models.
Seadme kirjeldus
Ülevaade
Selles kasutusjuhendis toodud juhised kehtivad erinevatele
külmikumudelitele. Joonised ei pruugi seetõttu vastata üks-ühele
teie soetatud seadmele. Teavet keerulisemate funktsioonide kohta
leiate järgnevatelt lehekülgedelt.
1. Tasakaalu reguleerimise JALAD
2. SÜGAVKÜLMUTUS- ja SÄILITUSSAHTEL
3. PUDELIRIIUL*
4. Õrna toidu piirkond / õrna toidu pirkond 0 °C / ohutu
ülessulatamine*
5. PUU- ja KÖÖGIVILJA kast*
6. Äravõetavad mitmeotstarbelised RIIULID*
7. Juhtpaneel.
8. VEINIRIIUL *
* Arv ja/või asukoht varieeruvad, saadaval ainult teatud mudelitel.
7
8
6
6
5
3
3
4
2
461eps
1
6
LV
LT
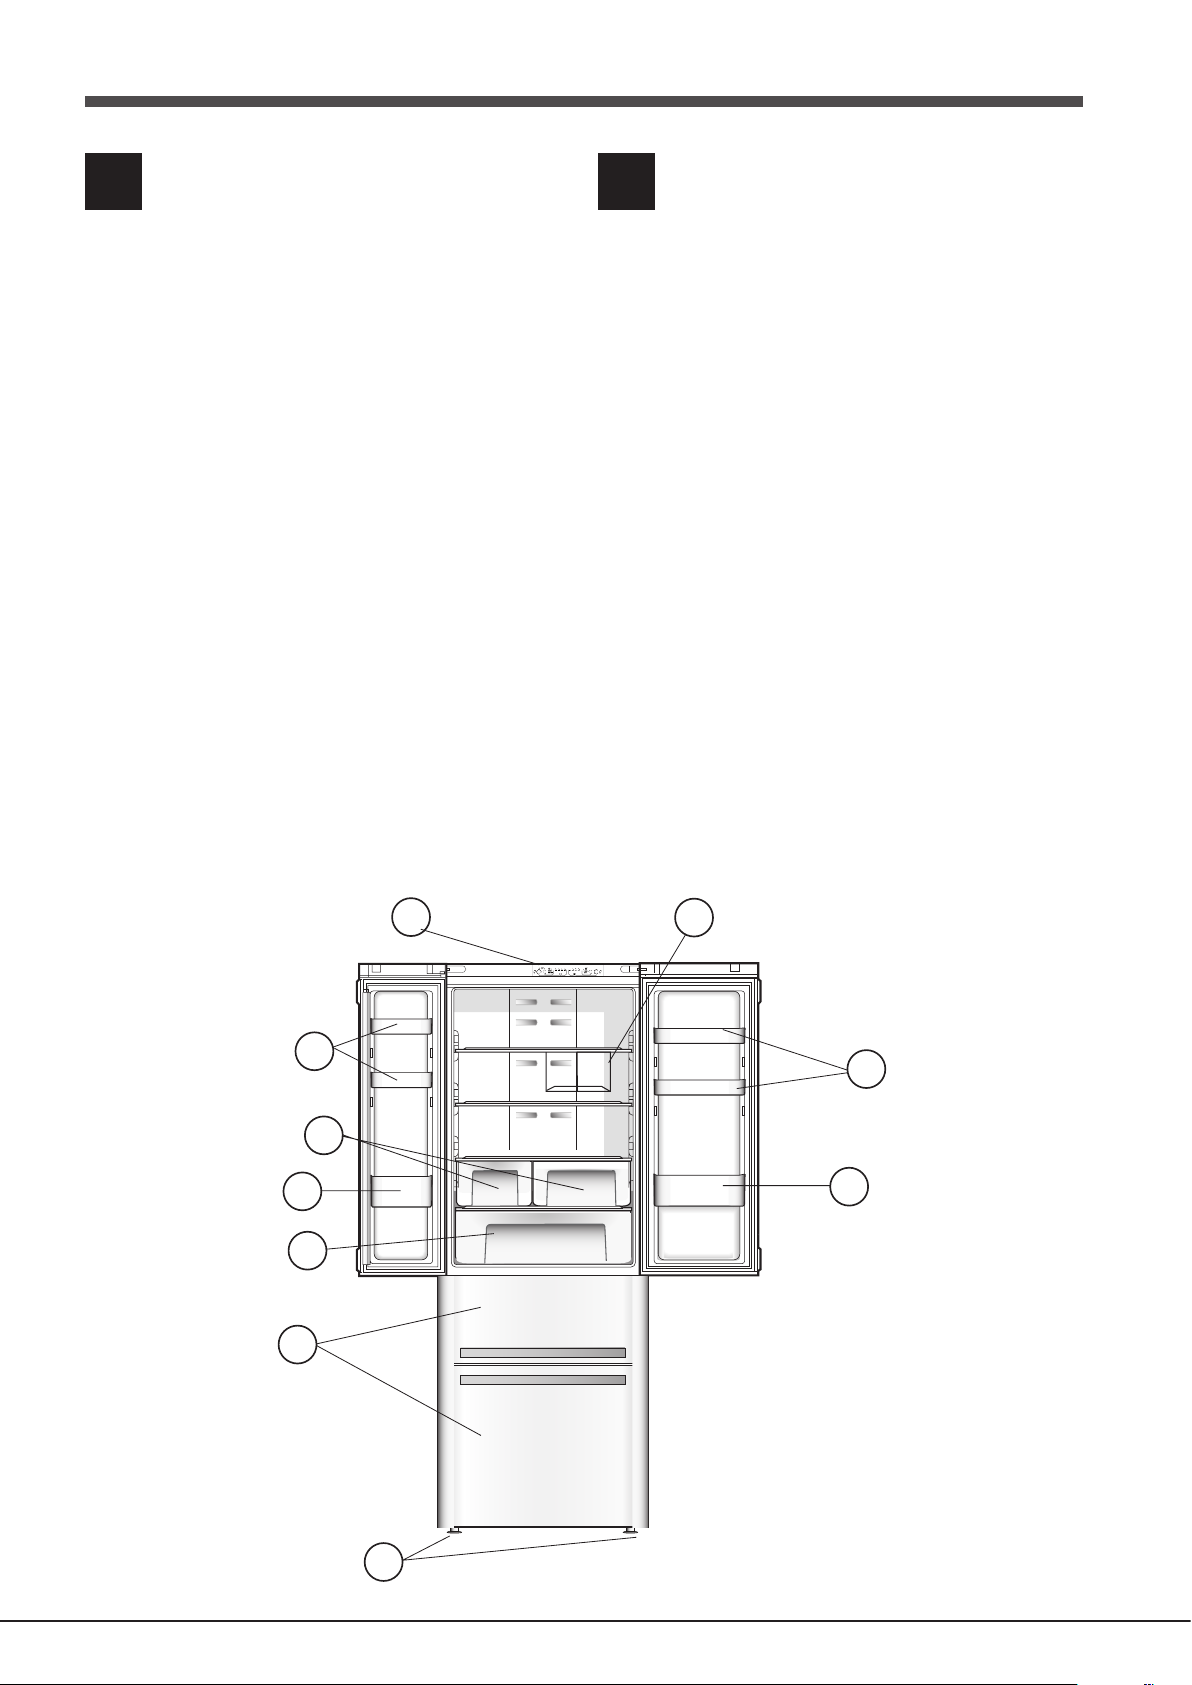
Ierīces apraksts
Pārskats
Šajā rokasgrāmatā iekļautās instrukcijas piemērojamas dažādu
modeļu ledusskapjiem. Attēlos redzamā ierīce var nedaudz
atšķirties no iegādātās ierīces. Informāciju par sarežģītākām
funkcijām skatīt nākamajās lappusēs.
1. Līmeņošana KĀJIŅAS
2. SALDĒTAVA un UZGLABĀŠANAS nodalījums
3. PUDEĻU plaukts*
4. Produktu uzturēšanas zona / Produktu uzturēšanas zona
0°C / Drošās atkausēšanas funkcija*
5. AUGĻU un DĀRZEŅU tvertne *
6. Izņemami daudzfunkcionāli PLAUKTI *
7. Vadības panelis.
8. VĪNA STATĪVS *
* Skaits un/vai novietojums atšķiras, pieejams tikai atsevišķiem
modeļiem.
Įrenginio aprašymas
Bendras vaizdas
Šiame vadove pateikiamos instrukcijos, taikomos skirtingų modelių
šaldytuvams. Iliustracijos gali ne visiškai atitikti jūsų įsigytą įrenginį.
Informacijos apie sudėtingesnes funkcijas rasite tolimesniuose
puslapiuose.
1. Išlyginimo KOJELĖ
2. ŠALDIKLIO ir LAIKYMO skyrius
3. BUTELIŲ lentyna*
4. Produktų tausojimo zona / Produktų tausojimo zona 0 °C
/ Saugusis atitirpinimas*
5. VAISIŲ ir DARŽOVIŲ talpykla *
6. Išimamos įvairios paskirties LENTYNOS *
7. Valdymo skydelis.
8. VYNO LENTYNA *
* Gali skirtis skaičius ir padėtis, yra tik kai kuriuose modeliuose.
7
8
6
6
5
3
3
4
2
461eps
1
7
Installation
GB
! Before placing your new appliance into operation please read
these operating instructions carefully. They contain important
information for safe use, for installation and for care of the
appliance.
! Please keep these operating instructions for future reference.
Pass them on to possible new owners of the appliance.
Positioning and connection
Positioning
1. Place the appliance in a well-ventilated humidity-free room.
2. Do not obstruct the rear fan grills. The compressor and
condenser give off heat and require good ventilation to operate
correctly and save energy.
3. Leave a space of at least 10 cm between the top part of the
appliance and any furniture above it, and at least 5 cm between
the sides and any furniture/side walls.
4. Ensure the appliance is away from any sources of heat (direct
sunlight, electric stove, etc.).
5. In order to maintain the correct distance between the appliance
and the wall behind it, fit the spacers supplied in the installation
kit, following the instructions provided.
Levelling
1. Install the appliance on a level and rigid floor.
2. If the floor is not perfectly horizontal, adjust the refrigerator by
tightening or loosening the front feet.
1. Insert the plug into the socket and switch on the product using
the appropriate button, ensure that yellow refrigerator and
freezer temperature lights illuminates.
2. After a few hours you will be able to put food in the refrigerator.
3. Press the SUPER FREEZE button (rapid freezing): the SUPER
FREEZE indicator light will illuminate. Once the refrigerator has
reached the optimal temperature, the indicator light goes out
and you can begin food storage.
Chiller system
No Frost
The No Frost system circulates cold air continuously to collect
humidity and prevent ice and frost formation. The system
maintains an optimal humidity level in the compartment,
preserving the original quality of the food, preventing the food
from sticking together and making defrosting a thing of the past.
Do not block the aeration cells by placing food or containers
near the refrigerating back panel.
! Close bottles and wrap food tightly.
Electrical connections
After the appliance has been transported, carefully place it
vertically and wait at least 3 hours before connecting it to the
electricity mains. Before inserting the plug into the electrical
socket ensure the following:
• The appliance is earthed and the plug is compliant with the law.
• The socket can withstand the maximum power of the appliance,
which is indicated on the data plate located on the bottom left
side of the fridge (e.g. 150 W).
• The voltage must be in the range between the values indicated
on the data plate located on the bottom left side (e.g. 220- 240V).
• The socket is compatible with the plug of the appliance. If
the socket is incompatible with the plug, ask an authorised
technician to replace it (see Assistance). Do not use extension
cords or multiple sockets.
! Once the appliance has been installed, the power supply cable
and the electrical socket must be easily accessible.
! The cable must not be bent or compressed.
! The cable must be checked regularly and replaced by authorised
technicians only (see Assistance).
! The manufacturer declines any liability should these safety
measures not be observed.
Using the refrigerator to its full potential
• Use the REFRIGERATOR OPERATION button to adjust the
temperature (see Description).
• Press the SUPER COOL button (rapid cooling) to lower the
temperature quickly. For example, when you place a large
number of new food items inside a fridge the internal temperature
will rise slightly. The function quickly cools the groceries by
temporarily reducing the temperature until it reaches the ideal
level.
• Place only cold or lukewarm foods in the compartment, not hot
foods (see Precautions and tips).
• Remember that cooked foods do not last longer than raw foods.
• Do not store liquids in open containers. They will increase
humidity in the refrigerator and cause condensation to form.
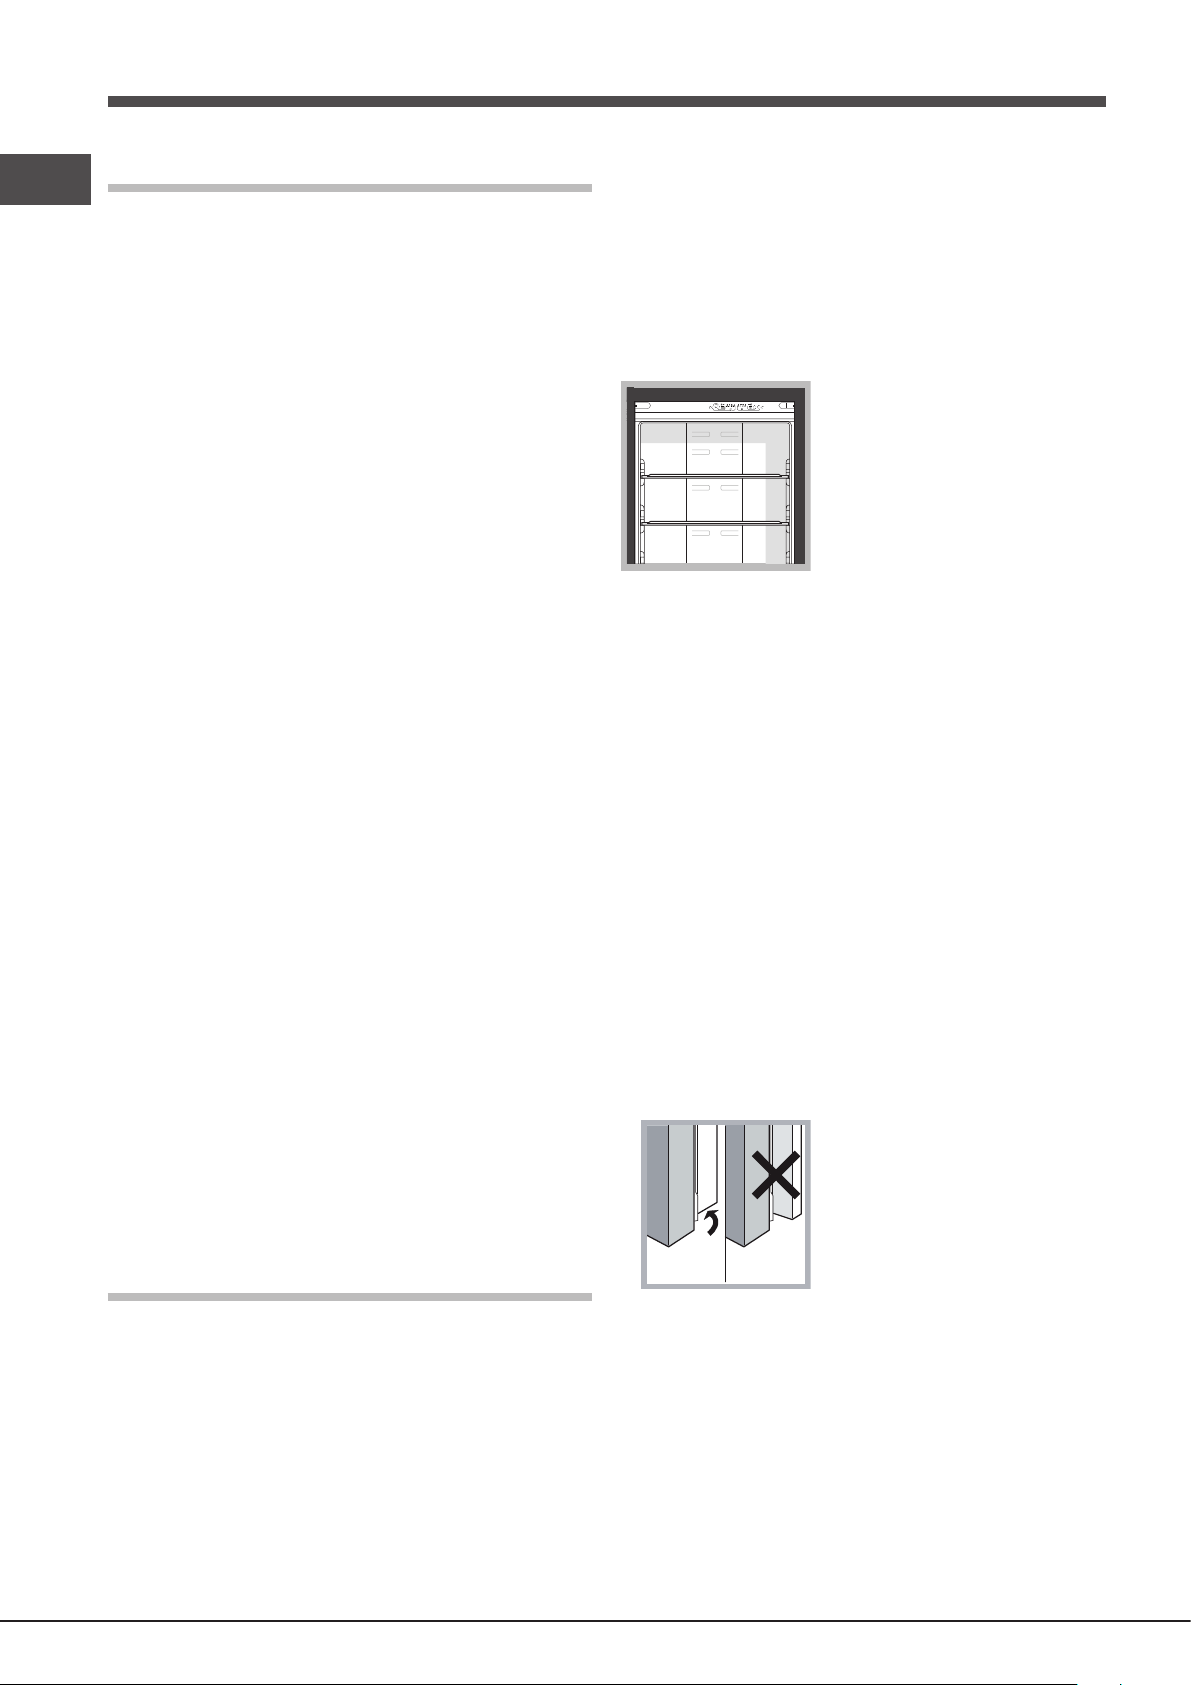
! To close the refrigerator door to pay attention to the vertical
bracket position (see figure)
Start-up and use
Starting the appliance
! Before starting the appliance, follow the installation
instructions (see Installation).
! Before connecting the appliance, clean the compartments and
accessories well with lukewarm water and bicarbonate.
! The appliance comes with a motor protection control system
which makes the compressor start approximately 8 minutes
after being switched on. The compressor also starts each time
the power supply is cut off whether voluntarily or involuntarily
(blackout).
SHELVES:
Due to the special guides the shelves are removable and the
height is adjustable, allowing easy storage of large containers
and food.
FRUIT and VEGETABLE bin*
The salad crispers fitted inside the fridge have been specially
designed for the purpose of keeping fruit and vegetables fresh
and crisp. Open the humidity regulator (position B) if you want to
store food in a less humid environment like fruit, or close it (position
A) to store food in a more humid environment like vegetables.
8
 Loading...