

Whirlpool W10178072B User Manual

PEDESTAL INSTALLATION INSTRUCTIONS
For use only with front load washers and dryers
INSTRUCTIONS D’INSTALLATION DU PIÉDESTAL
Pour utilisation avec les laveuses et sécheuses à chargement frontal
Para una versión de estas instrucciones en español, visite www.whirlpool.com
Table of Contents Table des matières
PEDESTAL SAFETY ......................................................1
INSTALLATION REQUIREMENTS ................................2
Location Requirements .........................................2
Tools and Parts .......................................................2
INSTALLATION INSTRUCTIONS ..................................3
Before Installing Pedestal .....................................3
INSTALLING THE PEDESTAL .......................................4
COMPLETE THE INSTALLATION. ................................5
WARRANTY ...................................................................7
INSTALLATION NOTES
Date of purchase: _________________________________
Date of installation: _______________________________
Installer: ________________________________________
Model number: ___________________________________
Serial number: ___________________________________
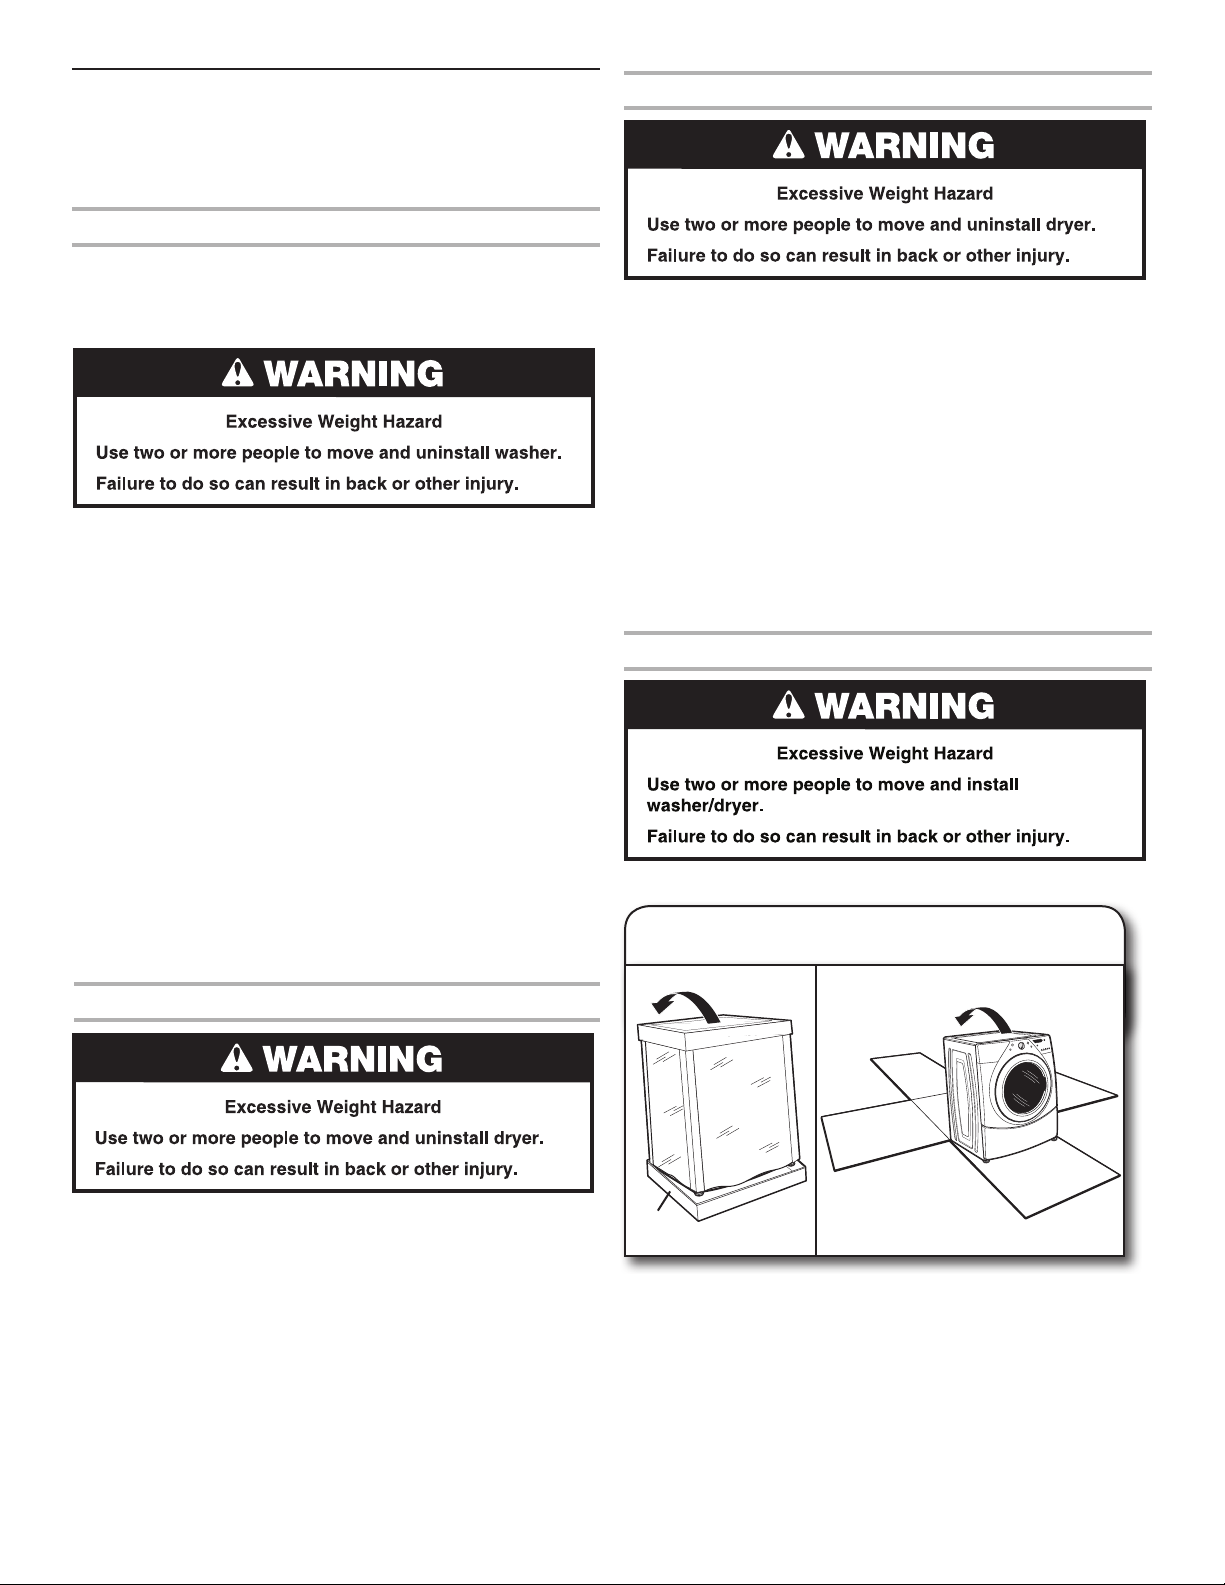
PEDESTAL SAFETY
SÉCURITÉ DU PIÉDESTAL ..........................................9
EXIGENCES D’INSTALLATION ....................................9
Exigences d’emplacement ....................................9
Outillage et pièces. ................................................9
INSTRUCTIONS D’INSTALLATION. ...........................10
Avant l’installation du piédestal.. ........................10
INSTALLATION DU PIÉDESTAL .................................11
ACHEVER L’INSTALLATION. ......................................13
GARANTIE ...................................................................15
NOTES CONCERNANT L’INSTALLATION
Date d’achat : _____________________________________
Date d’installation : ________________________________
Installateur : ______________________________________
Numéro de modèle : ________________________________
Numéro de série : __________________________________
W10178072B
W10348604B-SP
INSTALLATION REQUIREMENTS
LOCATION REQUIREMENTS
Additional items needed:
NOTE: If the washer/dryer and pedestal assembly are located
in a garage, 8" (203 mm) must be added under the pedestal so
that the washer/dryer is 18" (458 mm) above the garage oor.
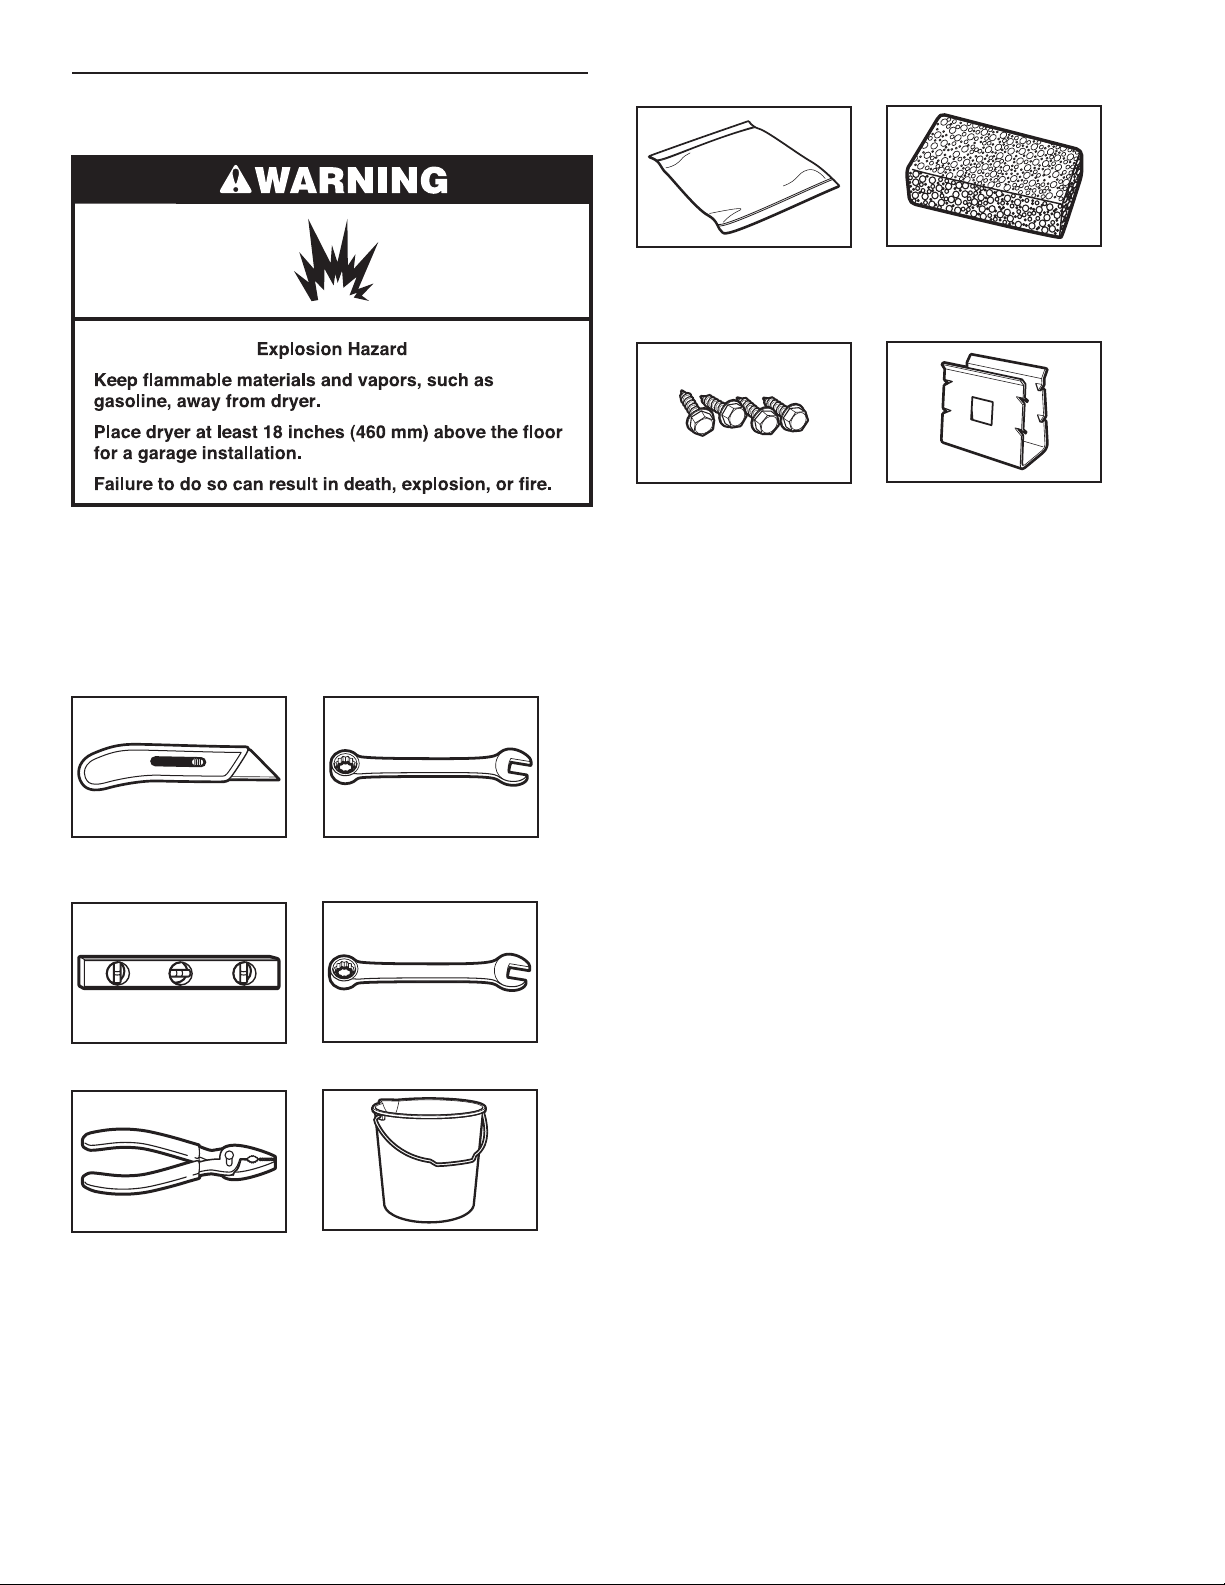
TOOLS AND PARTS
Gather the required tools and parts before starting installation.
Tools needed:
Towel
Parts supplied:
Four #12 x 5/8" hex-head
sheet metal screws
(in parts bag)
Sponge
Two retainer clips
(in parts bag)
Utility knife 1/4" hex-head ratchet or
Level
Pliers or slip-joint pliers
open-end wrench
9/16" open-end wrench
Bucket
2
INSTALLATION INSTRUCTIONS
BEFORE INSTALLING PEDESTAL
IMPORTANT: If your washer and dryer are already installed,
they must be uninstalled.
Uninstalling your washer
To avoid possible damage to the washer, the transport bolts on
the back of the washer must be in place before installing the
pedestal. For more information on transport bolts, see “Remove
Transport System” in washer Use and Care Guide.
NOTE: If the washer is to be transported, call your local
service center. To avoid suspension and structural damage,
your washer must be properly set up for relocation by a certied
technician.
1. Turn off the hot and cold water faucets.
2. Unplug the power supply cord.
3. Slowly loosen the ll hoses at the faucets to relieve the water
pressure. Use a sponge or towel to absorb the released water.
4. Remove the “HOT” and “COLD” ll hoses from the back of the
washer. Drain the water from the hoses into a bucket.
5. Remove the drain hose from the standpipe or laundry tub
and drain any water remaining in the hose into a bucket.
6. Pull the washer away from the wall so it can be tipped on its
back.
7. To avoid oor damage and ease installation and handling,
unfold the empty pedestal box at and place it next to the
washer. Lay the washer on its back (make sure that the power
supply cord is not under the washer) so that the cardboard is
under the entire lower back edge of the washer.
8. An additional small amount of water will drain out of the
washer when it is tipped back. Go to “Installing the Pedestal”.
Uninstalling your gas dryer
1. Unplug the power supply cord.
2. Turn off the gas supply.
3. Pull the dryer away from the wall enough to loosen the vent
clamp. Loosen the clamp and gently remove the exhaust vent
from the dryer exhaust outlet.
4. Disconnect the exible gas supply line from the dryer. Put a
piece of tape over the open ends of the gas line connection
ttings.
5. Pull the dryer away from the wall so that it can be tipped on
its back.
6. To avoid oor damage and ease installation and handling,
unfold the empty pedestal box at and place it next to the
dryer. Lay the dryer on its back (make sure that the power
supply cord is not under the dryer) so that the cardboard is
under the entire lower back edge of the dryer. Go to “Installing
the Pedestal”.
Installation of new washer/dryer
If your washer/dryer is still in the packaging:
1. Unpacking Washer/Dryer
Uninstalling your electric dryer
1. Unplug the power supply cord.
2. Pull the dryer away from the wall enough to loosen the vent
clamp. Loosen the clamp and gently remove the exhaust vent
from the dryer exhaust outlet.
3. Pull the dryer away from the wall so that it can be tipped on
its back.
4. To avoid oor damage and ease installation and handling,
unfold the empty pedestal box at and place it next to the
dryer. Lay the dryer on its back (make sure that the power
supply cord is not under the dryer) so that the cardboard
is under the entire lower back edge of the dryer. Go to
“Installing the Pedestal”.
Base
Washer: Cut plastic lm along dotted cut line around the base.
Do not remove the packaging.
Dryer: Cut carton around top and down corners along dotted
cut lines. Lay all four carton sides on oor. Discard carton top
and corner posts.
Washer
Dryer
3
2. Washer transport bolts
2. Prepare the washer/dryer
Locate the transport bolts on rear of washer. Transport bolts
must remain in washer while pedestal is installed. When laying
the washer on its back, hold the base down on the oor. Do
not remove the plastic lm, corner posts, or top cap.
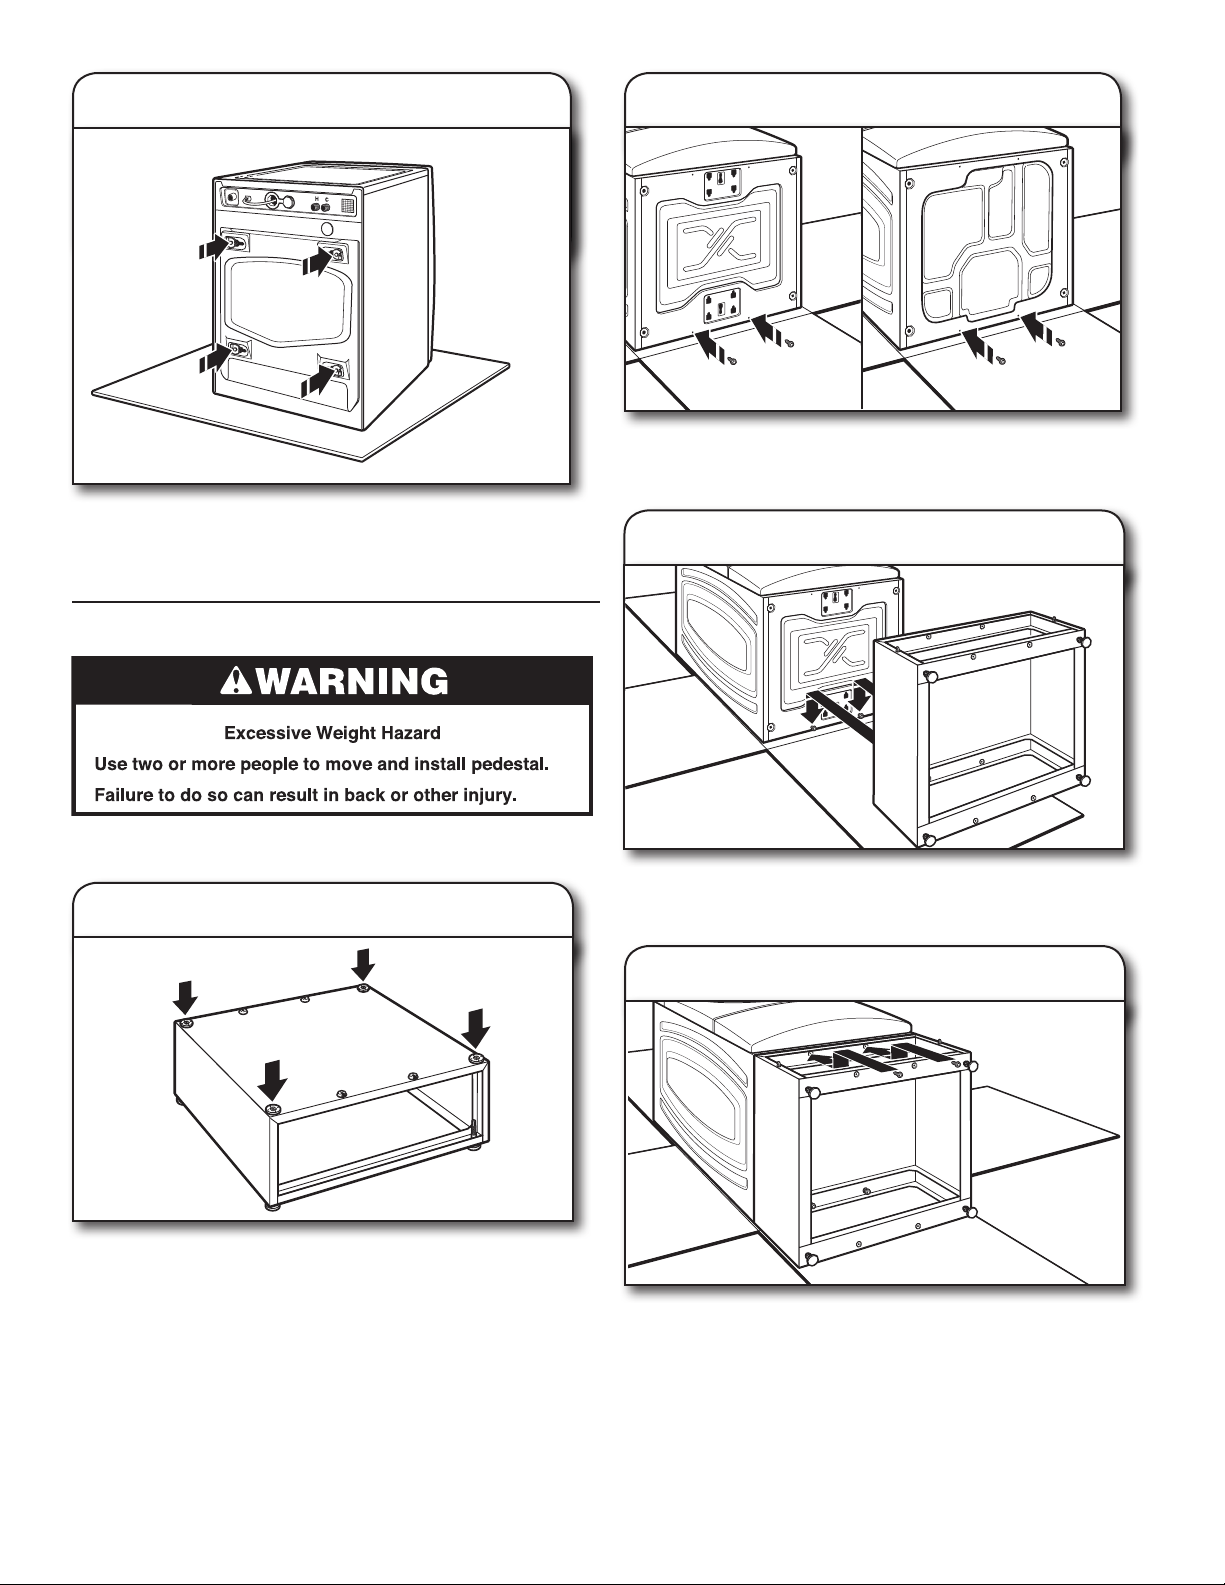
INSTALLING THE PEDESTAL
Follow these instructions to install the pedestal on a washer
or dryer.
1. Locate spacer pads
Washer Bottom
Partially install two of the #12 x 5/8" hex-head sheet metal
screws in the lower holes. Leave a space of about 3/8" (10 mm)
between the screw head and the bottom of the washer/dryer.
Dryer Bottom
3. Attach the pedestal
Move the pedestal against the washer/dryer bottom. Slide
the pedestal’s keyhole slots over the lower two partially
installed screws.
Make sure that all four spacer pads are in place on the top
of the pedestal. Spacer pads reduce vibration between the
pedestal and the washer/dryer.
NOTE: If your washer/dryer has feet installed, remove them.
4
4. Secure the pedestal
Position the pedestal toward the front of the washer/dryer and
install the two remaining hex-head sheet metal screws. Do not
tighten completely.
5. Align sides of pedestal
1"
(25 mm)
Align the sides of the pedestal so that they are even with the
sides of the washer/dryer. Reach inside the pedestal opening
and securely tighten all four pedestal screws.
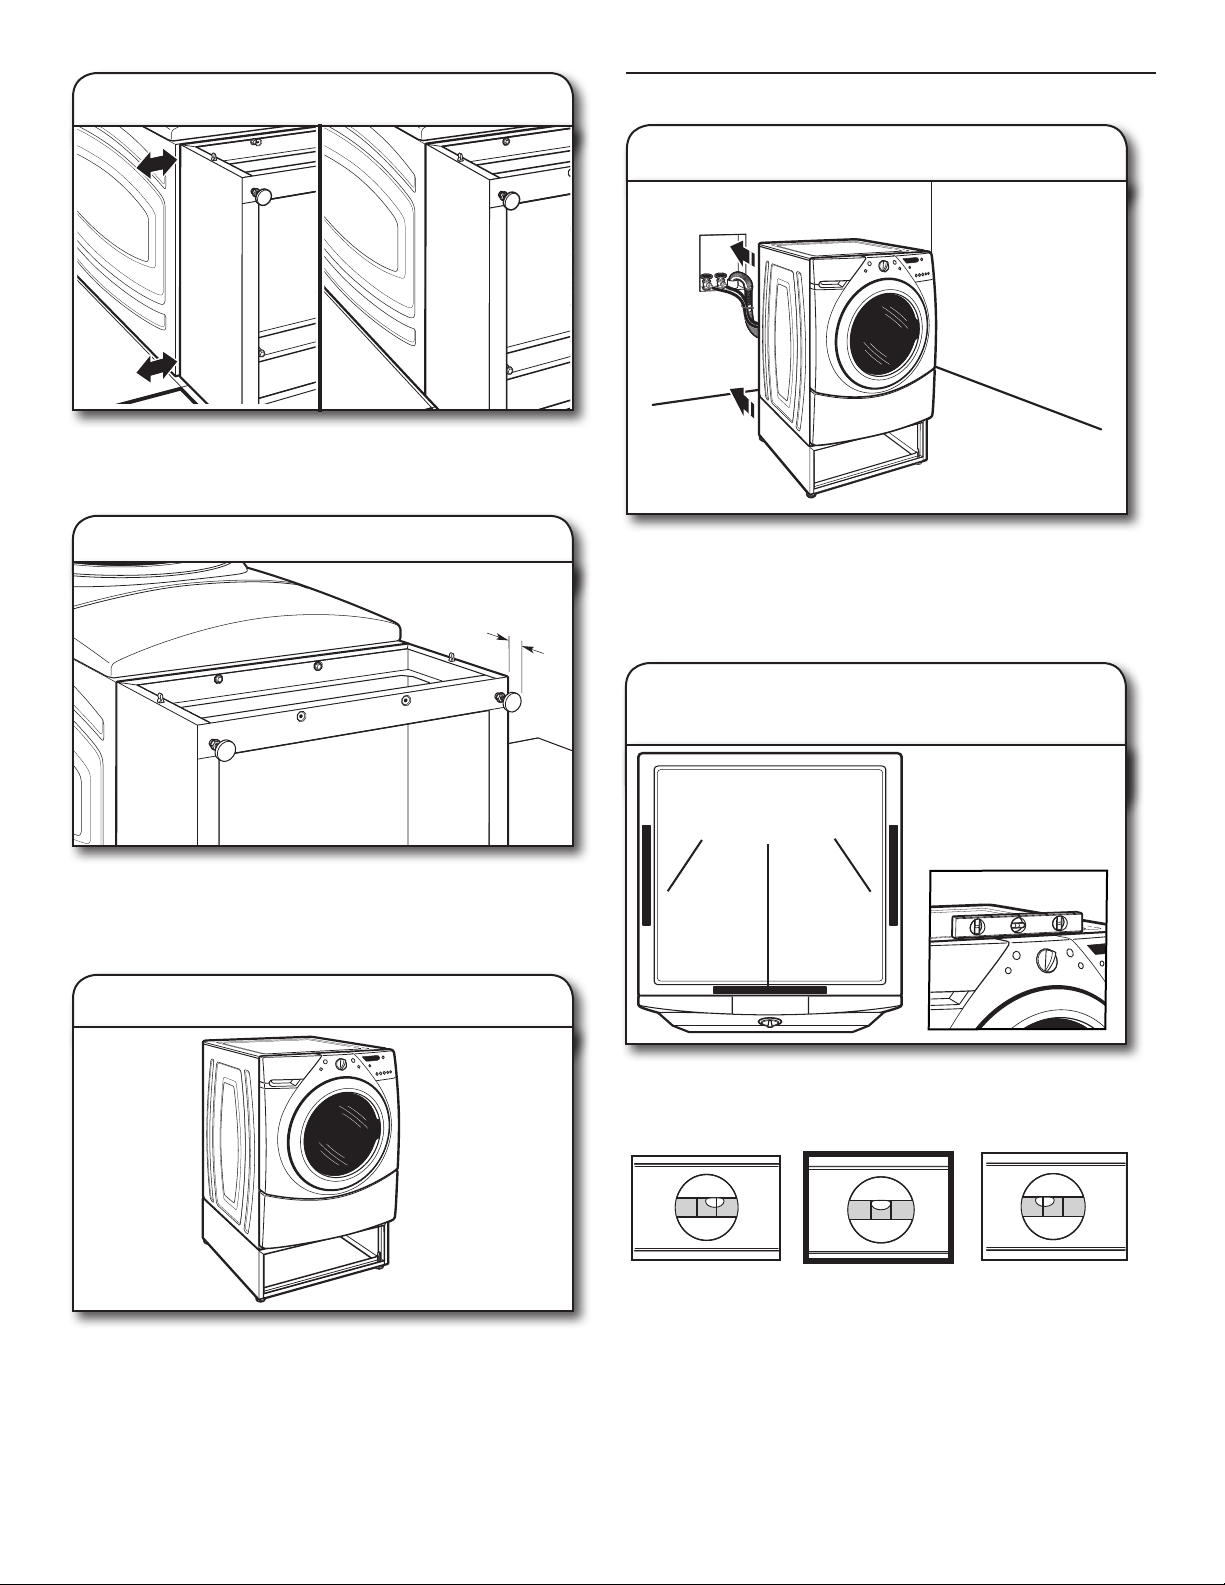
COMPLETE THE INSTALLATION
8. Move close to nal location
6. Prepare pedestal feet
The pedestal arrives with the feet tight against the bottom
of the unit. Using a 1/4" hex-head ratchet or open-end
wrench, lower the feet approximately 1" (25 mm) away
from the bottom of the pedestal.
7. Stand the washer/dryer upright
Follow the installation instructions that came with your model
to nish installing or reinstalling your washer/dryer (i.e., hoses,
vents, etc.).
NOTE: Be sure to remove the transport bolts from the back
of the washer.
9. Check levelness
of washer/dryer
Place level here
Place a level on top edges of washer/dryer, checking each
side and front. Rock washer/dryer back and forth to make
sure all four feet make solid contact with oor.
Tip the washer/dryer back to its upright position. Remove
and discard any remaining packaging material.
Not Level
If not level, adjust pedestal feet up or down, repeating as
necessary.
LEVEL
Not Level
5
 Loading...