

Whirlpool SF335ESRER User Manual
use&care guide
Whirlpool
SERIES
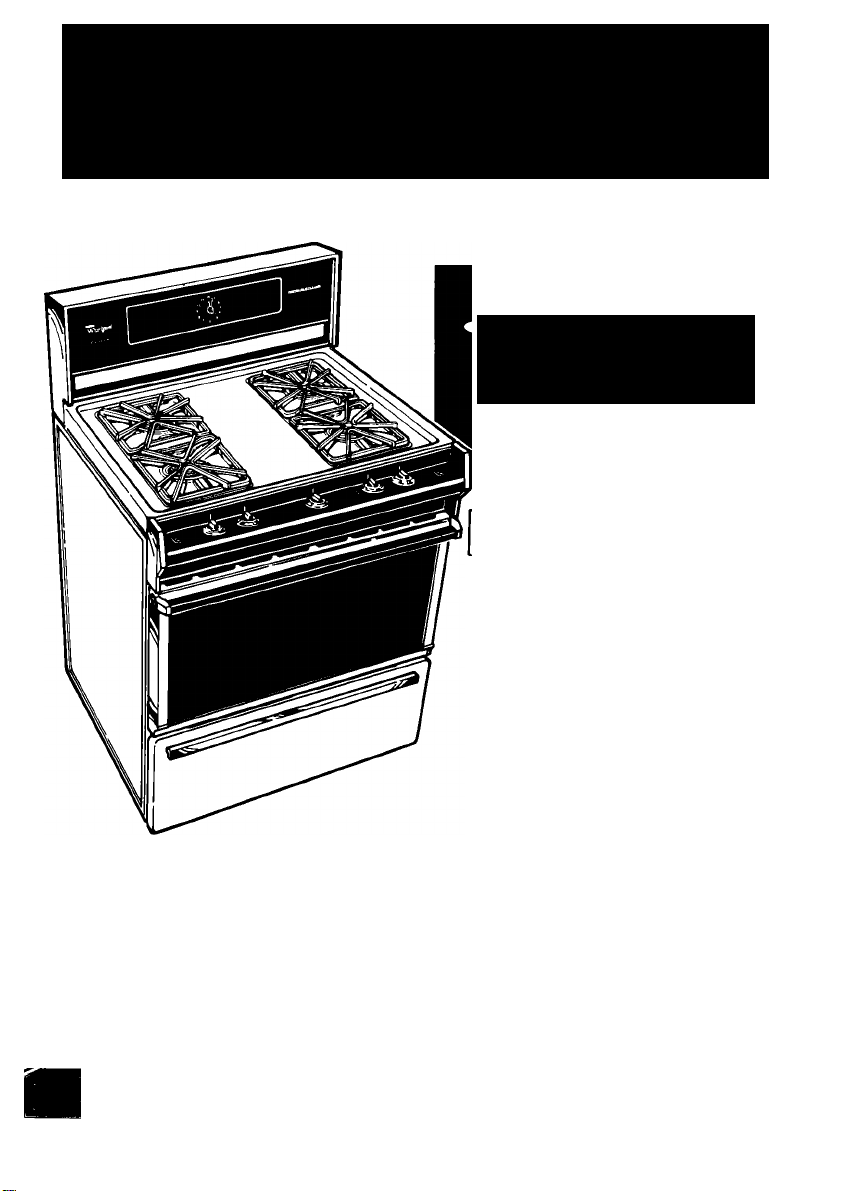
GAS
RANGE
Continuous-Cleaning
Model
SF335ESR/ER(Shown)
and Model
SF315ESR/ER
Microwave Ovens. Trash Compactors. Room Air Conditioners. Uehumidifiers. Automatic Washers. Clothes Dryers. Freezers. Refngerator-Fr
Contents
Before You Use Your Range...
Important Safety Instructions
Parts and Features
Using Your Range..................
Using the Surface Burners...
Setting the Clock
Using the Minute Timer
Using the Oven Control
Baking
Broiiing ............................
Oven Vent
Lighting Standing Pilots
Caring for Your Range
Control Panels
Surface Burner Grates and
Reflector Pans
..............................
................
................
............................
..........
...................
....................
©1986 Whirlpool Corporation
Page
. 2
. 3
. 5
. 6
. 6
. 7 Cleaning Chart
.....
. 8
.....
. 9
. 9 If You Need Service or
. 10
. 10 1. Before Calling for
....
. 11
. 12
. 12
. 13
Lift-Up Cooktop
Surface Burners
Oven Door
Continuous-Cleaning Oven
Standard Oven Cleaning .. . 16
Changing the Cooktop Light
Changing the Oven Light...
Assistance
Assistance.......................
2. If You Need Assistance .... 21
3. If You Need Service
4. If You Have a Problem_. 21
..............................
.................
................
...........................
....................
Before you use your range
Read and carefully follow the “INSTALLATION INSTRUCTIONS”
packed with your range.
Read this Use & Care Guide and the Cooking Guide for Important safety
Information.
.......
Page
. 13
. 14
. 14
. 15
. 17
19
. 20
. 20
. 20
. 21
• FOR YOUR SAFETY •
TO PREVENT FIRE AND
EXPLOSION, DO NOT
STORE OR USE
GASOLINE OR OTHER
FLAMMABLE VAPORS
AND LIQUIDS IN THE
VICINITY OF THIS OR
ANY OTHER APPLIANCE.
• FOR YOUR SAFETY •
IF YOU SMELL GAS:
1. OPEN WINDOWS.
2. DON'T TOUCH
ELECTRICAL
SWITCHES.
3. EXTINGUISH ANY
OPEN FLAMES.
4. IMMEDIATELY CALL
YOUR GAS SUPPLIER.
• FOR YOUR SAFETY •
DO NOT OBSTRUCT THE FLOW OF COMBUSTION AND
VENTILATION AIR.

You are personally responsible for:
• Reading and following all safety precautions in this Use & Care Guide and
the Cooking Guide.
• Having your range installed by a qualified installer.
• Installing the range where it is protected from the elements, and on a level
floor strong enough to hold its weight.
• Having your range properly connected to electrical supply and grounded.
(See "Installation Instructions’’.)
• Having your range properly connected to the proper gas supply and
checked for leaks. (See “Installation Instructions”)
• Making sure the range is not used by children or anyone unable to operate
it properly.
• Properly maintaining your range.
• Using the range only for jobs expected of a home range.
See “Cooking Guide” for Important safety and use Information.
IMPORTANT
SAFETY INSTRUCTIONS
WARNING - When using your range, follow basic precautions,
inciuding the following:
1. DO NOT allow children to use or
play with any part of the range,
or leave them unattended near
it. They could be burned or
injured.
2. DO NOT store things children
might want above the range.
Children could be burned
or injured while climbing on it.
3. DO NOT allow anyone to touch
a hot surface burner, oven
burner or areas around them.
They could be hot enough to
burn severely.
4. KEEP children away from the
range when it is on. The cooktop,
oven walls, racks and door can
be hot enough to cause burns.
5. DO NOT use a range to heat a
room. Persons in the room could
be burned or injured, or a fire
could start.
6. KEEP pan handles turned in, but
not over another surface burner
to prevent burns, injury and to
help prevent the utensil from
being pushed off the cooktop.
7. DO NOT use water on grease
fires. The fire will spread. Cover
fire with large lid or smother with
baking soda or salt.
8. DO NOT wear loose or hanging
garments when using the range.
Garments could ignite if they
touch a hot burner or surround
ing area and you could be
burned.
9. DO NOT heat unopened con
tainers. They could explode. The
hot contents could burn and
container particles could cause
injury.
10. When adding or removing food,
MAKE SURE to open the oven
door all the way to prevent bums.
continued on next page

11. DO NOT use a wet pot holder.
Steam burns can result. DO NOT
use a towel or bulky cloth as a
pot holder. They could catch fire
and burn you.
12. MAKE SURE the utensils you use
are large enough to contain
food and avoid boil-overs and
spill-overs. This will help prevent
hazardous build-ups of food.
Heavy splattering or spill-overs
left on a range can ignite and
burn you. Pan size is especially
important in deep fat frying.
DO NOT leave surface burners on
13
high heat settings. Boil-overs and
greasy spillovers could cause
steam, smoke and could ignite
and burn you.
• FOR YOUR SAFETY •
DO NOT STORE OR USE GASOLINE OR OTHER FLAMMABLE VAPORS AND LIQUIDS
IN THE VICINITY OF THIS OR ANY OTHER APPLIANCE. THEY COULD IGNITE
CAUSING EXPLOSION AND/OR FIRE.
14. GREASE is flammable and
should be handled carefully. Let
fat cool before attempting to
handle it. Do not allow grease to
collect around range or In
vents. Wipe spill-overs
immediately.
15. NEVER use a match or other
flame to look for a gas leak. Ex
plosion and injury could result.
16. DO NOT repair or replace any
parts unless specifically recom
mended in this manual. All other
servicing should be referred to a
qualified service technician.
17. DO NOT use oven for storage.
Stored items and range could
be damaged if oven is turned
on accidentally.
- SAVE THESE INSTRUCTIONS -
Copy your Model and Serial Numbers here...
If you need service, or call with a
question, have this information
ready:
1. Complete Model and Serial
Numbers (from the plate located
as shown).
Model Number
Serial Number
2. Purchase date from sales slip.
Copy this information in these
spaces. Keep this book, your war
ranty and sales slip together in a
handy place. Service Company Phone Number
Purchase Date
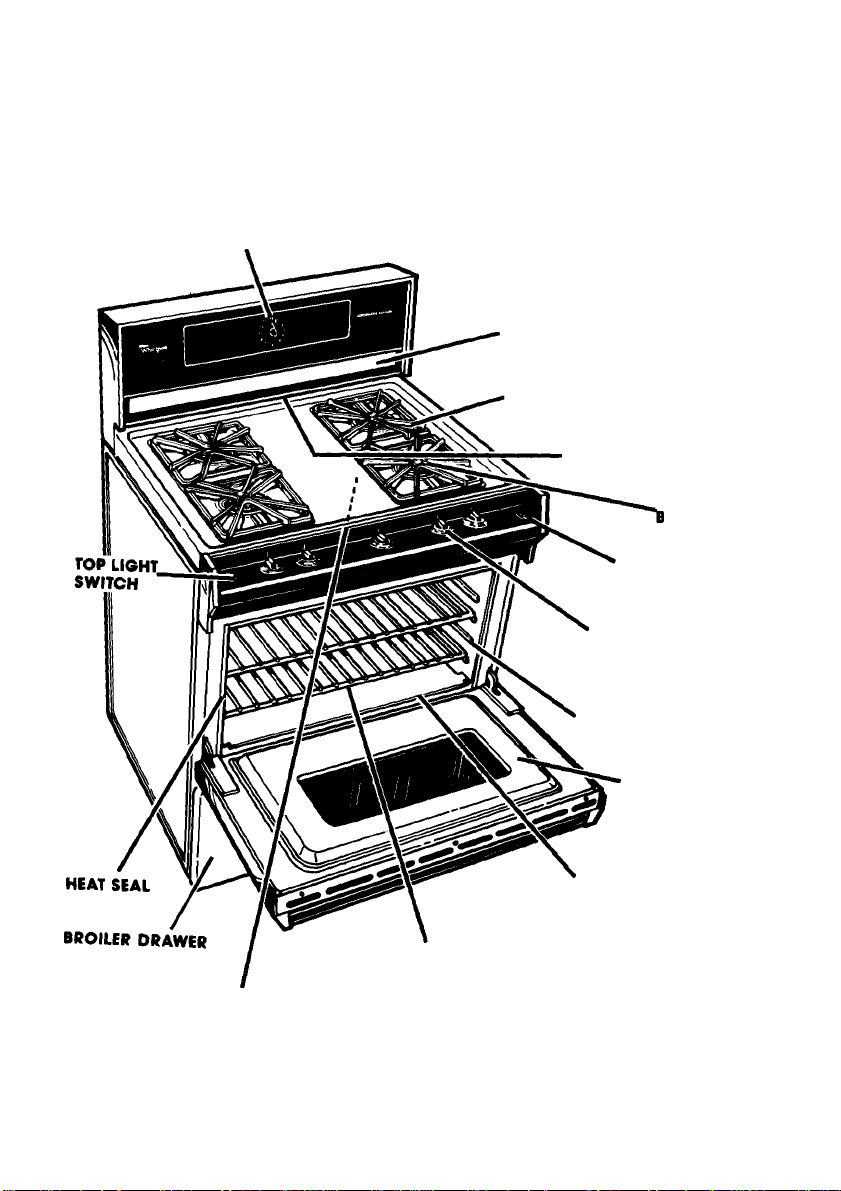
Parts and features
Models SF335ESR/ER and SF315ESR/ER
CLOCK/
MINUTE TIMER
TOP LIGHT
GRATES ANO CHROME
REFLECTOR PANS
OVEN VENT
SURFACE
URNERS
OVEN
LIGHT SWITCH
SURFACE BURNER
AND
OVEN CONTROLS
MODEL AND
SERIAL NUMBER
PLATE
OVEN RACK GUIDE
REMOVABLE
OVEN DOOR
OVEN BURNER
(not shown)
STANDARD
OVEN (SF315ESR/ER)
CONTINUOUS-
CLEANING OVEN
(SF335ESR/ER)

Using your range
TOP LIGHT
SWITCH
LEFT FRONT
CONTROL KNOB
OVEH TEMPERATURE
CONTROL
LEFT REAR
CONTROL KNOB
RIGHT FRONT
CONTROL KNOB
SURFACE
BURNER
INDICATORS
OVEN LIGHT
SWITCH
RIGHT REAR
CONTROL KNOB
Using the Surface Burners
These ranges are equipped with either standing pilots or electronic ignitors.
Standing pilots must be lit initially with a match following the directions on
page 11. The pilot light will remain lit when the burners are turned off. To turn a
burner on again, just push in and turn the control knob to LITE and the burner
will light. Electronic ignitors automatically light the burners each time theyare used.
Surface Burner Indicators
The solid dot in the surface burner
indicator shows which surface burner
is turned on by that knob.
WARNING: If the
flame should go out
while cooking, or if
Control knobs must be pushed in,
then turned to LITE position. On elec
tronic ignitor models, the clicking
sound is the ignitor sparking.
After the burner lights, turn the control
knob back to a desired setting. The
control knob has stops for HI and LO,
however it can be set anywhere be
tween HI and LO. Do not cook with
the control in the LITE position.
O
there is a strong gas odor, turn the
burners OFF. Wait five minutes for
the gas odor to disappear before
relighting burner. IF GAS ODOR IS
STILL PRESENT, SEE SAFETY NOTE ON
PAGE 2.
In Case of a Prolonged Power Failure
Surface burners with electronic ignitors can be manually lighted. Hold a lit
match nearthe burner and turn the control to the LITE position. After the burner
lights, turn the control to the desired setting. Power failures will not affect Stand
ing Pilots.
WARNING: Do not attempt to light the oven burner during a
power failure. Personal injury could result.
WARNING; Burner flame should not extend beyond the edge
of the cooking utensil. The flame can burn you and cause
poor cooking results.
SOe the “Cooking Guide” for Important utensil Information.
Until you get used to the settings, use the following as a guide.
Use LITE to light
the burner. After
the burner lights,
turn control
bock to o de
sired setting to
stop the clicking
of the ignition.
Do not cook
with the control
In the LITE posi
tion.
Use HI to start
foods cooking
or to bring liq
uids to a boil.
Use a medium
setting to start
cooking or to fry
chicken or pan
cakes; for gravy,
puddings and
icing or to cook
large amounts
of vegetables.
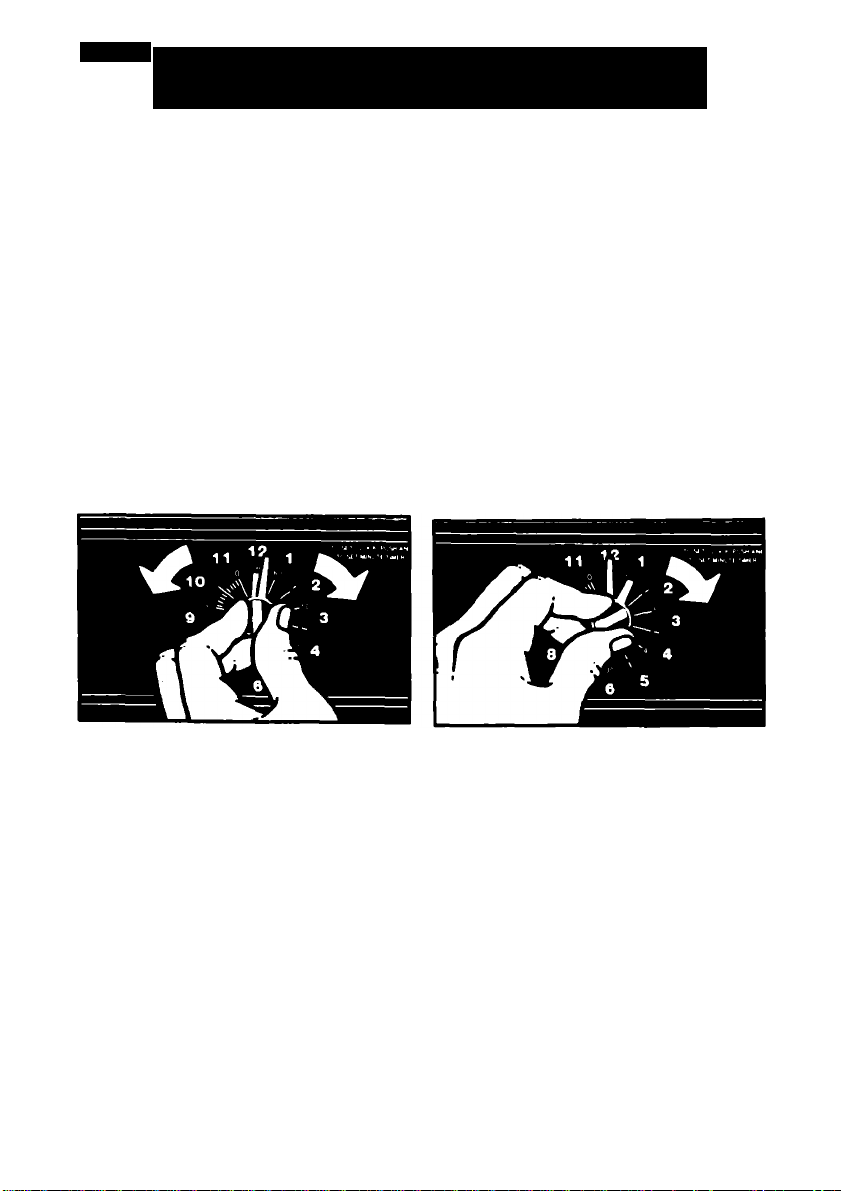
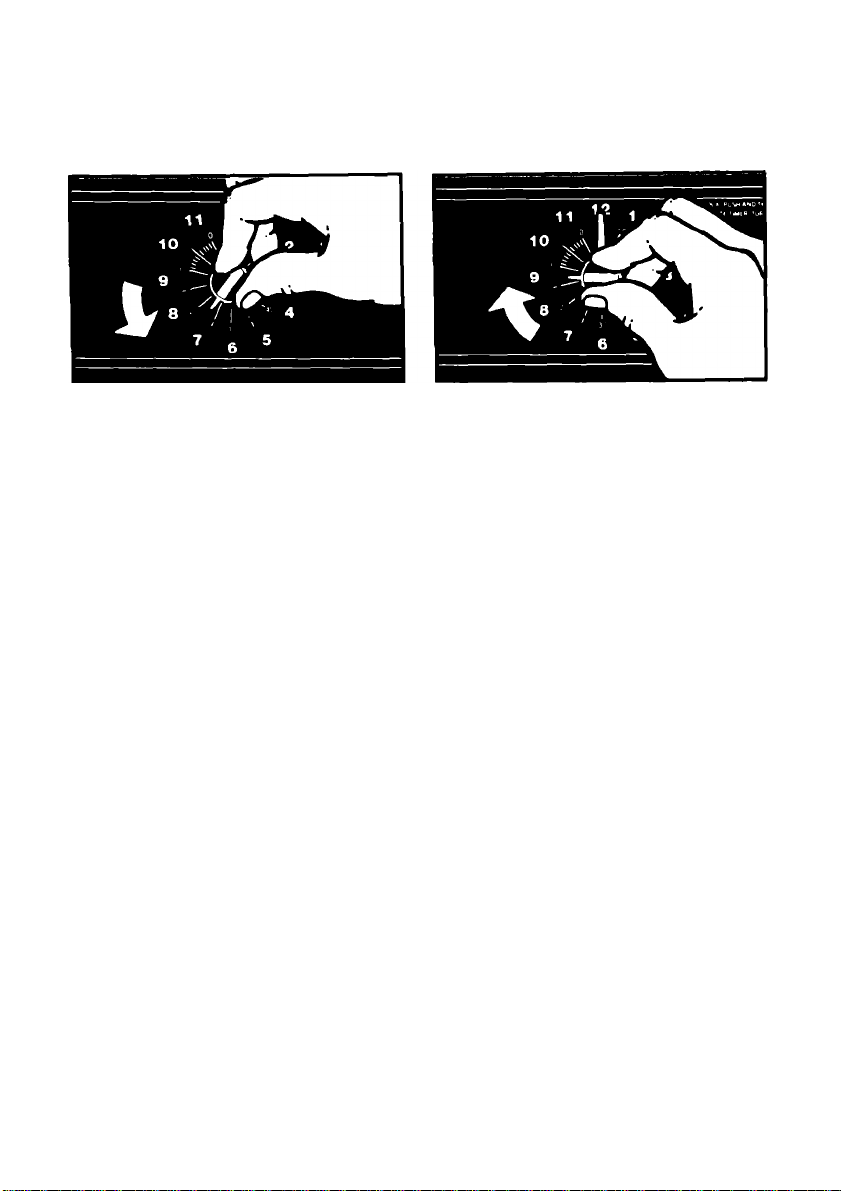
Setting the Clock
Push In and turn the Minute Timer Knob to set the Clock.
1. Push In Minute Timer Knob and
turn In either direction until clock
shows the right time of day.
2. l9t the Minute Timer Knob pop
out. Turn in either direction until
Minute Timer hand points to OFF.
The clock setting will change If
you push In the knob when
turning.
Use LO to
keep foods
warm until
ready to serve.
Using the Minute Timer
The Minute Timer does not start or stop the oven, it works like a kitchen timer.
Set it in minutes up to an hour. You will hear a buzzer when the set time is up.
DO NOT PUSH IN THE KNOB when setting the Minute Timer.
1. Without pushing It in, turn the
Minute Timer Knob until the hand
passes the setting you want.
PUSHING IN AND TURNING THE MINUTE TIMER KNOB CHANGES THE CLOCK
SETTING.
2. without pushing in, turn the knob
back to the setting you want.
When the time is up, a buzzer will
sound. To stop the buzzer, turn the
Minute Timer hand to OFF.
 Loading...