

Whirlpool SF335EEPW0 User Manual
GAS
RANGES
kR crrigcrrtor-Free2ers, Ice Makers. Dishwashers guilt-In Ovens and Surface Unit% Ranges, Microwave
Ovens, Compactors, Room Air Conditioners, Dehumidifiers, Automatic Washers, Clothes Dryers, Freezen, I
Your respons3bWes.. .
Proper installation and safe use of your appliance are your personal responsibilities. Read this
“Use and Care Guide” carefully for important use and safety information.
Installation
You must be sure your appliance is...
l
installed and leveled by a qualified installer or service
technician:
l
installed in a well-ventilated area protected from weather;
l
properly connected to the correct electric supply and
ground. (See page 20 of this booklet or the “Installation
Instructions”.)
l
properly connected to the correct gas supply. (See “lnstallation Instructions”.)
Proper Use
You must be sure your appliance is...
l
used only for jobs expected of home ranges;
l
used only by people who can operate it properly;
l
properly maintained.
Contents
Safety Precautions
Basic Range
Child Safety ........................................
SurfaceCooking
Oven Cooking
Utensils ..............................................
Constant Standing Pilots
Solid State Ignition (Manual Lighting) 4
Tri-Temp” Burner Adjustment 4
Basic Information on Surface Cooking
How Surface Burners Work
Surface
Surface Burners with Pilots ........................... 5
Selecting Correct Flame Size .5-6
Care Information
Special Features
Griddle and Fifth Burner
Clock, Minute Minder, Range Lights 8-9
Basic Information on Oven Cooking/Broiling
How Oven Works
Preheating
........................................
...................................
......................................
............................
...........................
Burners with Solid State Ignition ............. 5 Installation and Service information
...................................
.............................
...................................
......................................
10
..I 0
Low Temp Oven Setting
Roasting Hints .................................... 11
1
Baking Hints .................................. 12-13
1
Broiling Hints ..................................... 14
1
Care Information
2
Special Features
2
2
Continuous Cleaning Oven ........................ 18
Eye Level Range ................................... 18
Fan Noise Information .............................. 18
Programmed Oven Cooking
Delay Cook and Hold .............................. 19
5
Installation
Nameplate ....................................... 20
6
Disconnecting Electrical Power ................... 20
Pressure Regulators ............................... 20
8
If You Need Service or Assistance
1. Before Calling for Assistance .................... 21
2. If You Need Assistance .......................... 21
3. If You Need Service ............................. 21
4. If You Have a Problem
.......................................
...........................
..............................
.......................
...........................
10
15-17
19
20
21
Copy Your Model and Serial Numbers Here
If you have a question, or need service, have this infor-
mation ready:
1.
Complete
plate. (See page 20 for location.)
2. Purchase or installation date from your sales slip.
Copy this information in these spaces. Keep this book,
your warranty, and the sales slip together in a handy place,
Model and Serial Numbers from the name-
MODEL NUMBER
SERIAL NUMBER
PURCHASE/INSTALLATION DATE
SERVICE COMPANY AND PHONE NUMBER
SAFETY PRECAUTIONS
Read all instructions before using this appliance
BASIC RANGE SAFETY
l
Do not store combustible materials, gasoline or other
flammable vapors and liquids near a range.
l
If a range is installed neara window, properprecautions
should be taken to prevent curtains from blowing over
burners creating a FIRE HAZARD.
l
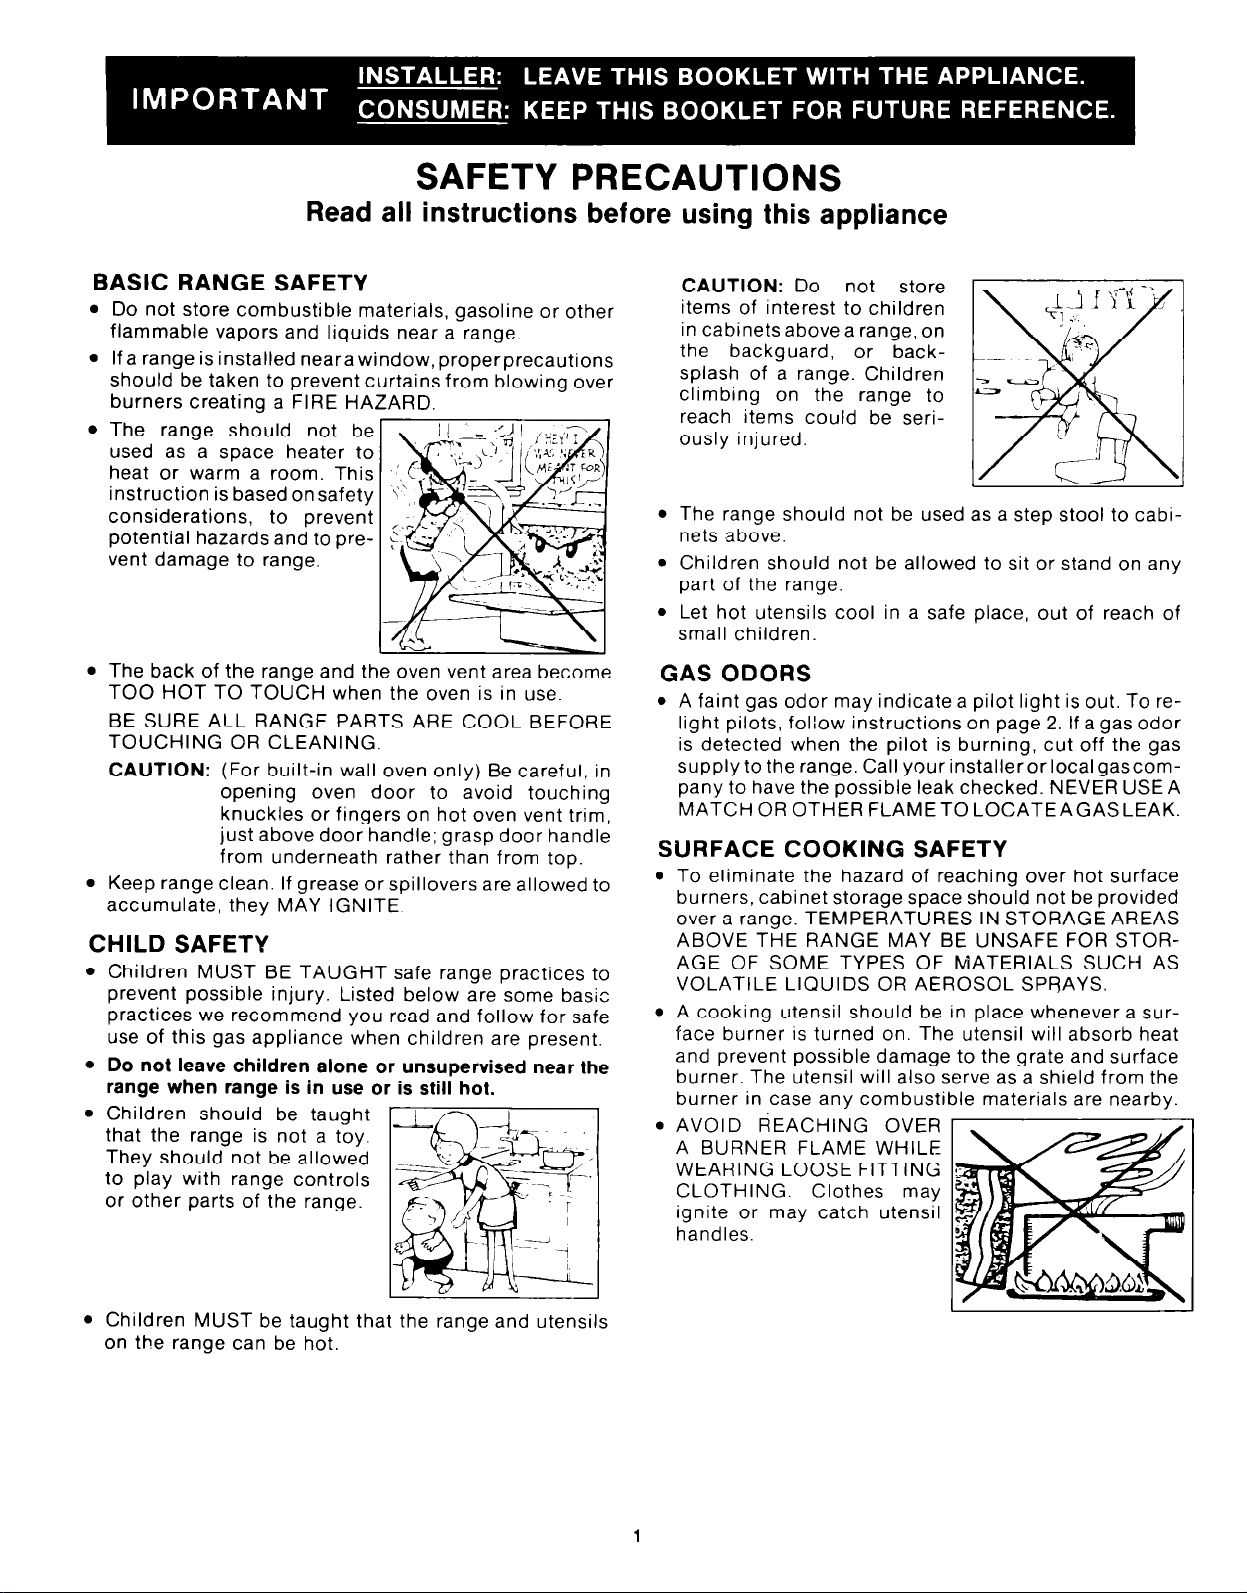
The range should not be
used as a space heater to
heat or warm a room. This
instruction is based on safety
considerations, to prevent
potential hazards and to prevent damage to range.
l
The back of the range and the oven vent area become
TOO HOT TO TOUCH when the oven is in use.
BE SURE ALL RANGE PARTS ARE COOL BEFORE
TOUCHING OR CLEANING.
CAUTION: (For built-in wall oven only) Be careful, in
opening oven door to avoid touching
knuckles or fingers on hot oven vent trim,
just above door handle; grasp door handle
from underneath rather than from top.
l
Keep range clean. If grease or spillovers are allowed to
accumulate, they MAY IGNITE
CHILD SAFETY
l
Children MUST BE TAUGHT safe range practices to
prevent possible injury. Listed below are some basic
practices we recommend you read and follow for safe
use of this gas appliance when children are present.
l
Do not leave children alone or unsupervised near the
range when range is in use or is still hot.
l
Children should be taught
that the range is not a toy.
They should not be allowed
to play with range controls
or other parts of the range.
CAUTION: Do not store
items of interest to children
in cabinets above a range, on
the backguard, or backsplash of a range. Children
climbing on the range to
reach items could be seriously injured.
l
The range should not be used as a step stool to cabinets above.
l
Children should not be allowed to sit or stand on any
part of the range.
l
Let hot utensils cool in a safe place, out of reach of
small children.
GAS ODORS
l
A faint gas odor may indicate a pilot light is out. To relight pilots, follow instructions on page 2. If a gas odor
is detected when the pilot is burning, cut off the gas
supply to the range. Call your installeror local gascompany to have the possible leak checked. NEVER USE A
MATCHOROTHERFLAMETOLOCATEAGASLEAK.
SURFACE COOKING SAFETY
l
To eliminate the hazard of reaching over hot surface
burners, cabinet storage space should not be provided
over a range. TEMPERATURES IN STORAGE AREAS
ABOVE THE RANGE MAY BE UNSAFE FOR STORAGE OF SOME TYPES OF MATERIALS SUCH AS
VOLATILE LIQUIDS OR AEROSOL SPRAYS.
l
A cooking utensil should be in place whenever a surface burner is turned on. The utensil will absorb heat
and prevent possible damage to the grate and surface
burner. The utensil will also serve as a shield from the
burner in case any combustible materials are nearby.
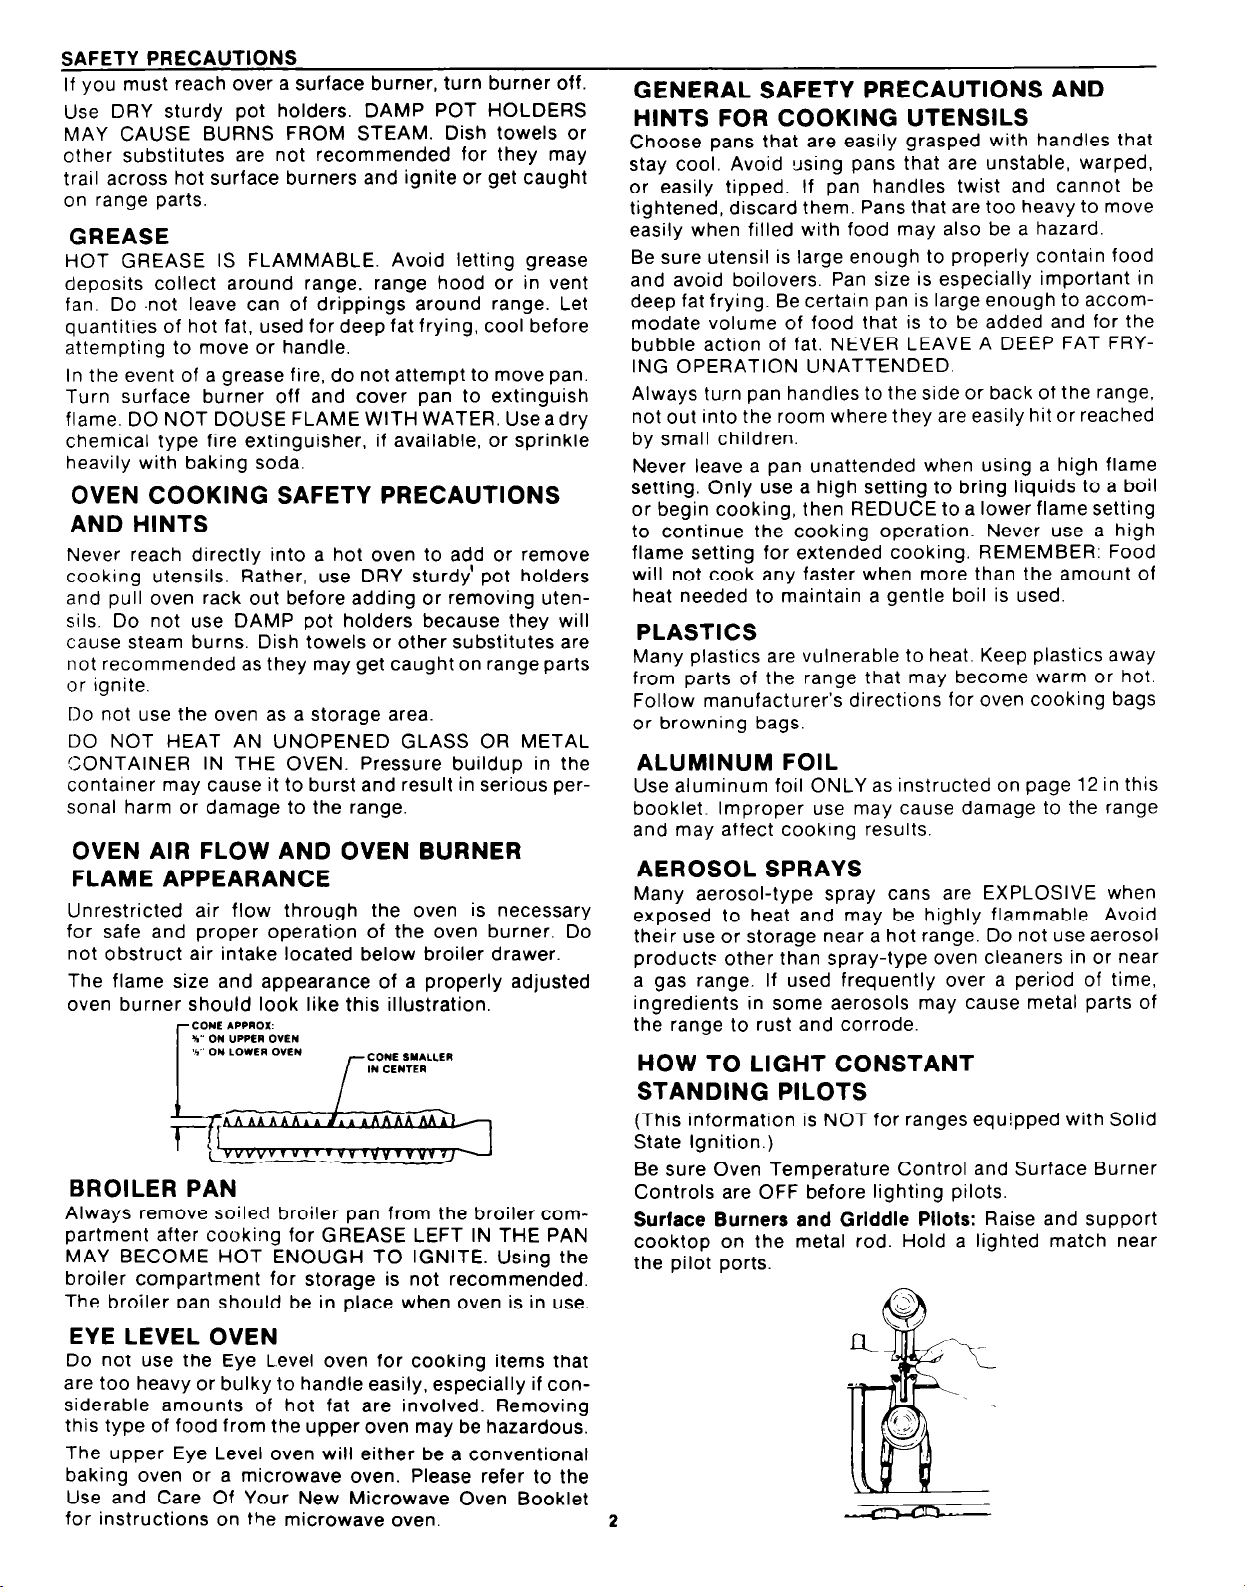
0 AVOID REACHING OVER
A BURNER FLAME WHILE
WEARING LOOSE FITTING
CLOTHING. Clothes may
ignite or may catch utensil
handles.
l
Children MUST be taught that the range and utensils
on the range can be hot.
SAFETY PRECAUTIONS
If you must reach over a surface burner, turn burner off.
Use DRY sturdy pot holders. DAMP POT HOLDERS
MAY CAUSE BURNS FROM STEAM. Dish towels or
other substitutes are not recommended for they may
trail across hot surface burners and ignite or get caught
on range parts.
GREASE
HOT GREASE IS FLAMMABLE. Avoid letting grease
deposits collect around range, range hood or in vent
fan. Do not leave can of drippings around range. Let
quantitres of hot fat, used for deep fat frying, cool before
attempting to move or handle.
In the event of a grease fire, do not attempt to move pan.
Turn surface burner off and cover pan to extinguish
flame. DO NOT DOUSE FLAME WITH WATER. Use a dry
chemical type fire extinguisher, if available, or sprinkle
heavily with baking soda.
OVEN COOKING SAFETY PRECAUTIONS
AND HINTS
Never reach directly into a hot oven to add or remove
cooking utensils. Rather, use DRY sturdy’ pot holders
and pull oven rack out before adding or removing utensils. Do not use DAMP pot holders because they will
cause steam burns. Dish towels or other substitutes are
not recommended as they may get caught on range parts
or ignite.
Do not use the oven as a storage area.
DO NOT HEAT AN UNOPENED GLASS OR METAL
CONTAINER IN THE OVEN. Pressure buildup in the
container may cause it to burst and result in serious personal harm or damage to the range.
OVEN AIR FLOW AND OVEN BURNER
FLAME APPEARANCE
Unrestricted air flow through the oven is necessary
for safe and proper operation of the oven burner. Do
not obstruct air intake located below broiler drawer.
The flame size and appearance of a properly adjusted
oven burner should look like this illustration.
GENERAL SAFETY PRECAUTIONS AND HINTS FOR COOKING UTENSILS
Choose pans that are easily grasped with handles that
stay cool. Avoid using pans that are unstable, warped,
or easily tipped. If pan handles twist and cannot be
tightened, discard them. Pans that are too heavy to move
easily when filled with food may also be a hazard.
Be sure utensil is large enough to properly contain food
and avoid boilovers. Pan size is especially important in
deep fat frying. Be certain pan is large enough to accom-
modate volume of food that is to be added and for the
bubble action of fat. NEVER LEAVE A DEEP FAT FRY-
ING OPERATION UNATTENDED.
Always turn pan handles to the side or back of the range,
not out into the room where they are easily hit or reached
by small children.
Never leave a pan unattended when using a high flame
setting. Only use a high setting to bring liquids to a boil
or begin cooking, then REDUCE to a lower flame setting
to continue the cooking operation. Never use a high
flame setting for extended cooking. REMEMBER: Food
will not cook any faster when more than the amount of
heat needed to maintain a gentle boil is used.
PLASTICS
Many plastics are vulnerable to heat. Keep plastics away
from parts of the range that may become warm or hot.
Follow manufacturer’s directions for oven cooking bags
or browning bags.
ALUMINUM FOIL
Use aluminum foil ONLY as instructed on page 12 in this
booklet. Improper use may cause damage to the range
and may affect cooking results.
AEROSOL SPRAYS
Many aerosol-type spray cans are EXPLOSIVE when
exposed to heat and may be highly flammable. Avoid
their use or storage near a hot range. Do not use aerosol
products other than spray-type oven cleaners in or near
a gas range. If used frequently over a period of time,
ingredients in some aerosols may cause metal parts of
the range to rust and corrode.
BROILER PAN
Always remove soiled broiler pan from the broiler compartment after cooking for GREASE LEFT IN THE PAN
MAY BECOME HOT ENOUGH TO IGNITE. Using the
broiler compartment for storage is not recommended.
The broiler oan should be in place when oven is in use.
EYE LEVEL OVEN
Do not use the Eye L.evel oven for cooking items that
are too heavy or bulky to handle easily, especially if con-
siderable amounts of hot fat are involved. Removing
this type of food from the upper oven may be hazardous.
The upper Eye Level oven will either be a conventional
baking oven or a microwave oven. Please refer to the
Use and Care Of Your New Microwave Oven Booklet
.
for instructions on the microwave oven.
HOW TO LIGHT CONSTANT
STANDING PILOTS
(This information is NOT for ranges equipped with Solid
State Ignition.)
Be sure Oven Temperature Control and Surface Burner
Controls are OFF before lighting pilots.
Surface Burners and Griddle Pllots: Raise and support
cooktop on the metal rod. Hold a lighted match near
the pilot ports.

Lower Oven Pllot: Remove oven racks and oven bottom.
Hold a lighted match to the pilot located at the far end
of the oven burner. When pilot is lighted, replace oven
bottom and oven racks. Be sure to secure the two screws
located at the front of the oven bottom.
n
n
Eye Level Oven Pilot: Remove oven racks and oven bottom. Hold a lighted match to the pilot located along the
left end of the burner. The pilot flame is partially hidden
by a metal shield so it may be difficult to actually see the
flame.
Replace oven bottom and oven racks. To check oven
ignition, turn Oven Temperature Control to a low setting.
After a 45 to 60 second delay, the oven burner will ignite
if the pilot is lighted.
HOW TO ADJUST CONSTANT STANDING
PILOTS FOR SURFACE BURNERS ONLY
(This information is NOT for ranges equipped with Solid
State Ignition.)
1. Remove cooktop and Oven Temperature Control knob.
Locate top burner and pilot adjusting screw.
(a) Adjusting screw is to the LEFT of the oven control
on the MANIFOLD PIPE for all freestanding ranges
without the Programmed Oven Cooking featureor
the Griddle/Fifth Burner feature and in the CENTER of the MANIFOLD PIPE for the Built-In Surface Unit.
(1) If range is NOT equipped with the Pro-
grammed Oven feature, the two screws are
located to the LEFT of the oven control on
either side of the griddle valve on the MANI-
FOLD PIPE. >
(2) If a range is equipped with the Programmed
Oven feature, the griddle pilot adjusting screw
(A) is located to the LEFT of the griddle valve
on the MANIFOLD PIPE and the surface burner pilot adjusting screw (B) is located on the
UPPER RIGHT SIDE of the oven control.
(b) Adjusting screw is on the UPPER RIGHT SIDE
of the oven control for all freestanding ranges with
the Programmed Oven Cooking feature but without
the Griddle/Fifth Burner feature.
(c) There are two (2) adjusting screws on 36-inch
ranges equipped with the Griddle/Fifth Burner
feature. One screw adjusts the surface burner
pilots and the other adjusts the Griddle/Fifth
Burner pilot.
Insert a small screwdriver into the adjusting screw and
turn the screw to the right or left until the flame on the
pilot is %-inch in height.
I
/
CAUTION: DO NOT TURN THE SCREW LOCATED
IN THE CENTER OF THE OVEN CONTROL STEM.
Replace cooktopand Oven Temperature Control knob.
3
HOW TO OPERATE APPLIANCE EQUIPPED
WITH SOLID STATE IGNITION IN THE EVENT
OF A PROLONGED POWER FAILURE
If a powerfailureshould occur, manually light the surface
burners by holding a lighted match near the surface
burner and turn the surface burner on.
Due to safety considerations, manual lighting of the
upper Eye Level oven is NOT recommended.
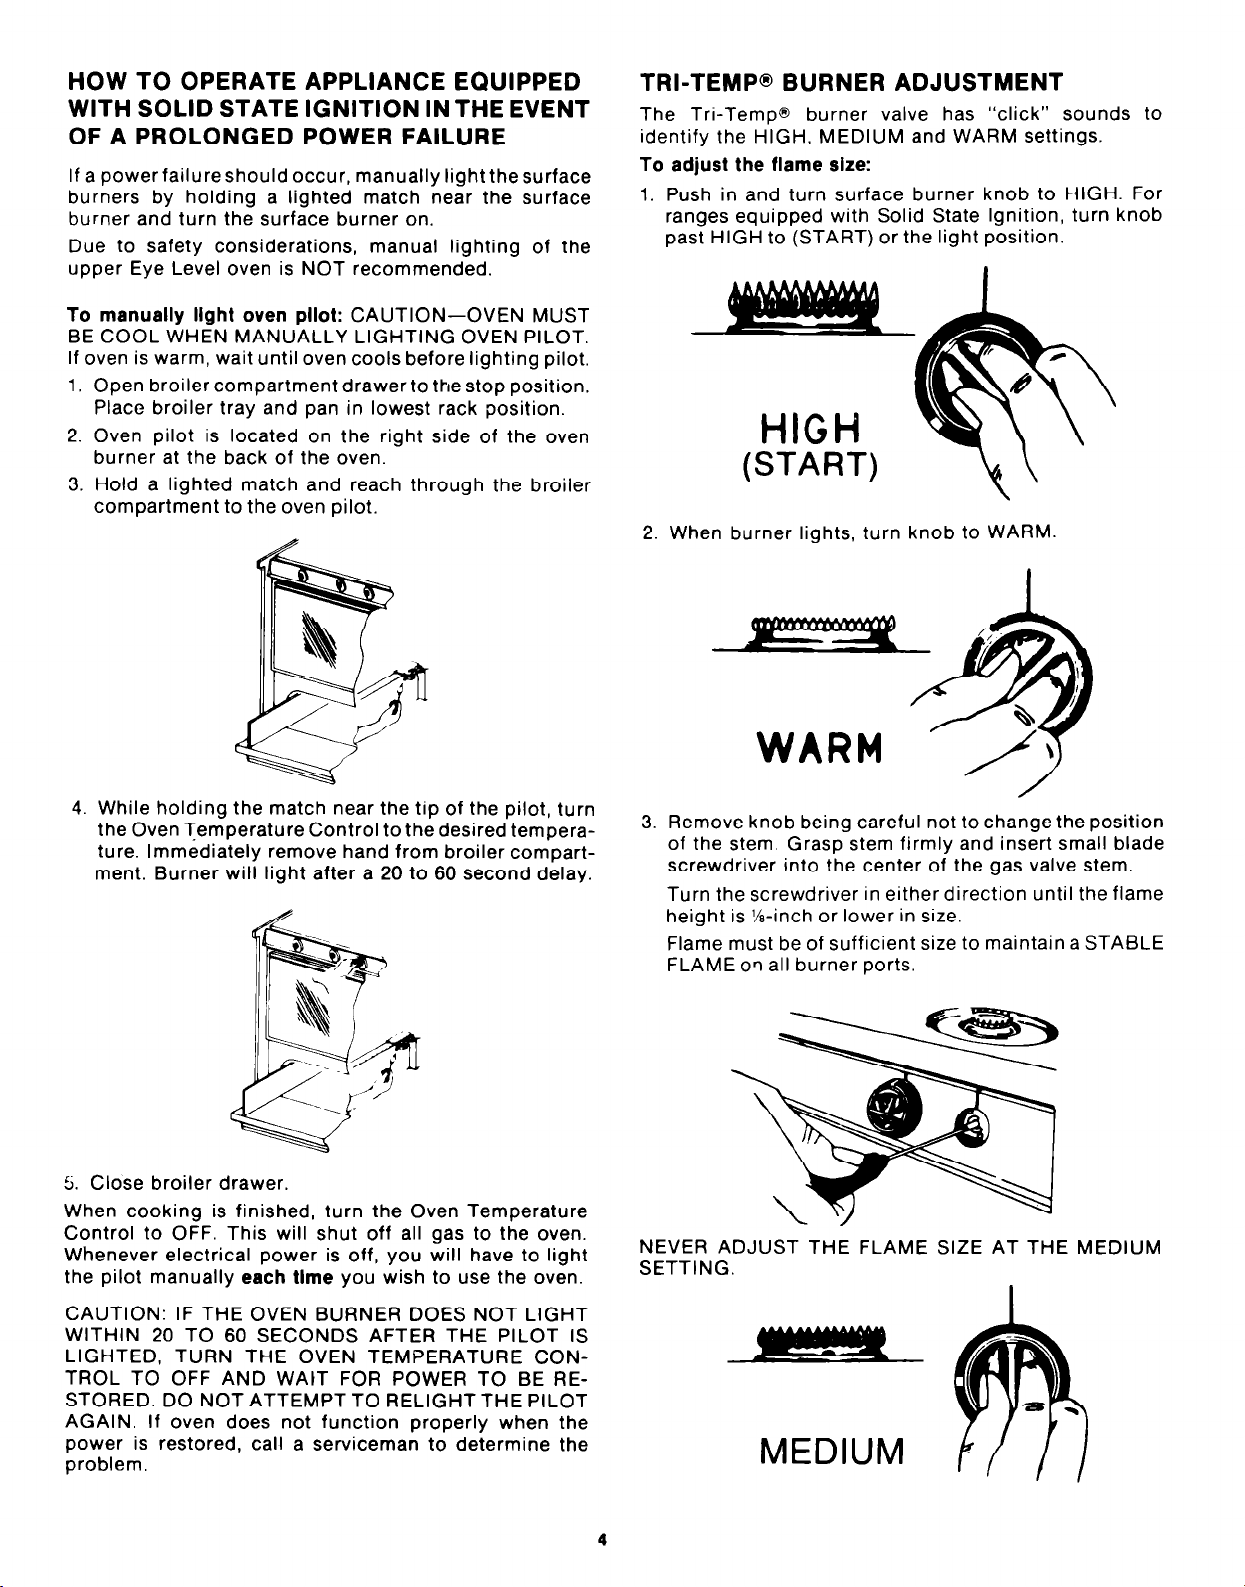
To manually light oven pllot: CAUTION-OVEN MUST
BE COOL WHEN MANUALLY LIGHTING OVEN PILOT.
If oven is warm, wait until oven cools before lighting pilot,
Open broiler compartment drawer to the stop position.
Place broiler tray and pan in lowest rack position.
Oven pilot is located on the right side of the oven
burner at the back of the oven.
Hold a lighted match and reach through the broiler
compartment to the oven pilot.
TRI-TEMP@ BURNER ADJUSTMENT
The Tri-Tempo burner valve has “click” sounds to
identify the HIGH, MEDIUM and WARM settings.
To adjust the flame size:
1. Push in and turn surface burner knob to HIGH. For
ranges equipped with Solid State Ignition, turn knob
past HIGH to (START) or the light position.
(START)
2. When burner lights, turn knob to WARM.
While holding the match near the tip of the pilot, turn
the Oven Temperature Control to the desired temperature. Immediately remove hand from broiler compart-
ment. Burner will light
5.
Close broiler drawer.
When cooking is finished, turn the Oven Temperature
Control to OFF. This will shut off all gas to the oven.
Whenever electrical power is off, you will have to light
the pilot manually each time you wish to use the oven.
CAUTION: IF THE OVEN BURNER DOES NOT LIGHT
WITHIN 20 TO 60 SECONDS AFTER THE PILOT IS
LIGHTED, TURN THE OVEN TEMPERATURE CONTROL TO OFF AND WAIT FOR POWER TO BE RESTORED. DO NOT ATTEMPT TO RELIGHT THE PILOT
AGAIN. If oven does not function properly when the
power is restored, call a serviceman to determine the
problem.
after a 20 to 60 second delay.
3. Remove knob being careful not to change the position
of the stem Grasp stem firmly and insert small blade
screwdriver into the center of the gas valve stem.
Turn the screwdriver in either direction until the flame
height is %-inch or lower in size.
Flame must be of sufficient size to maintain a STABLE
FLAME
NEVER ADJUST THE FLAME
SETTING.
OI
all burner ports.
SIZE
AT THE MEDIUM
MEDIUM
4
SURFACE COOKING INFORMATION
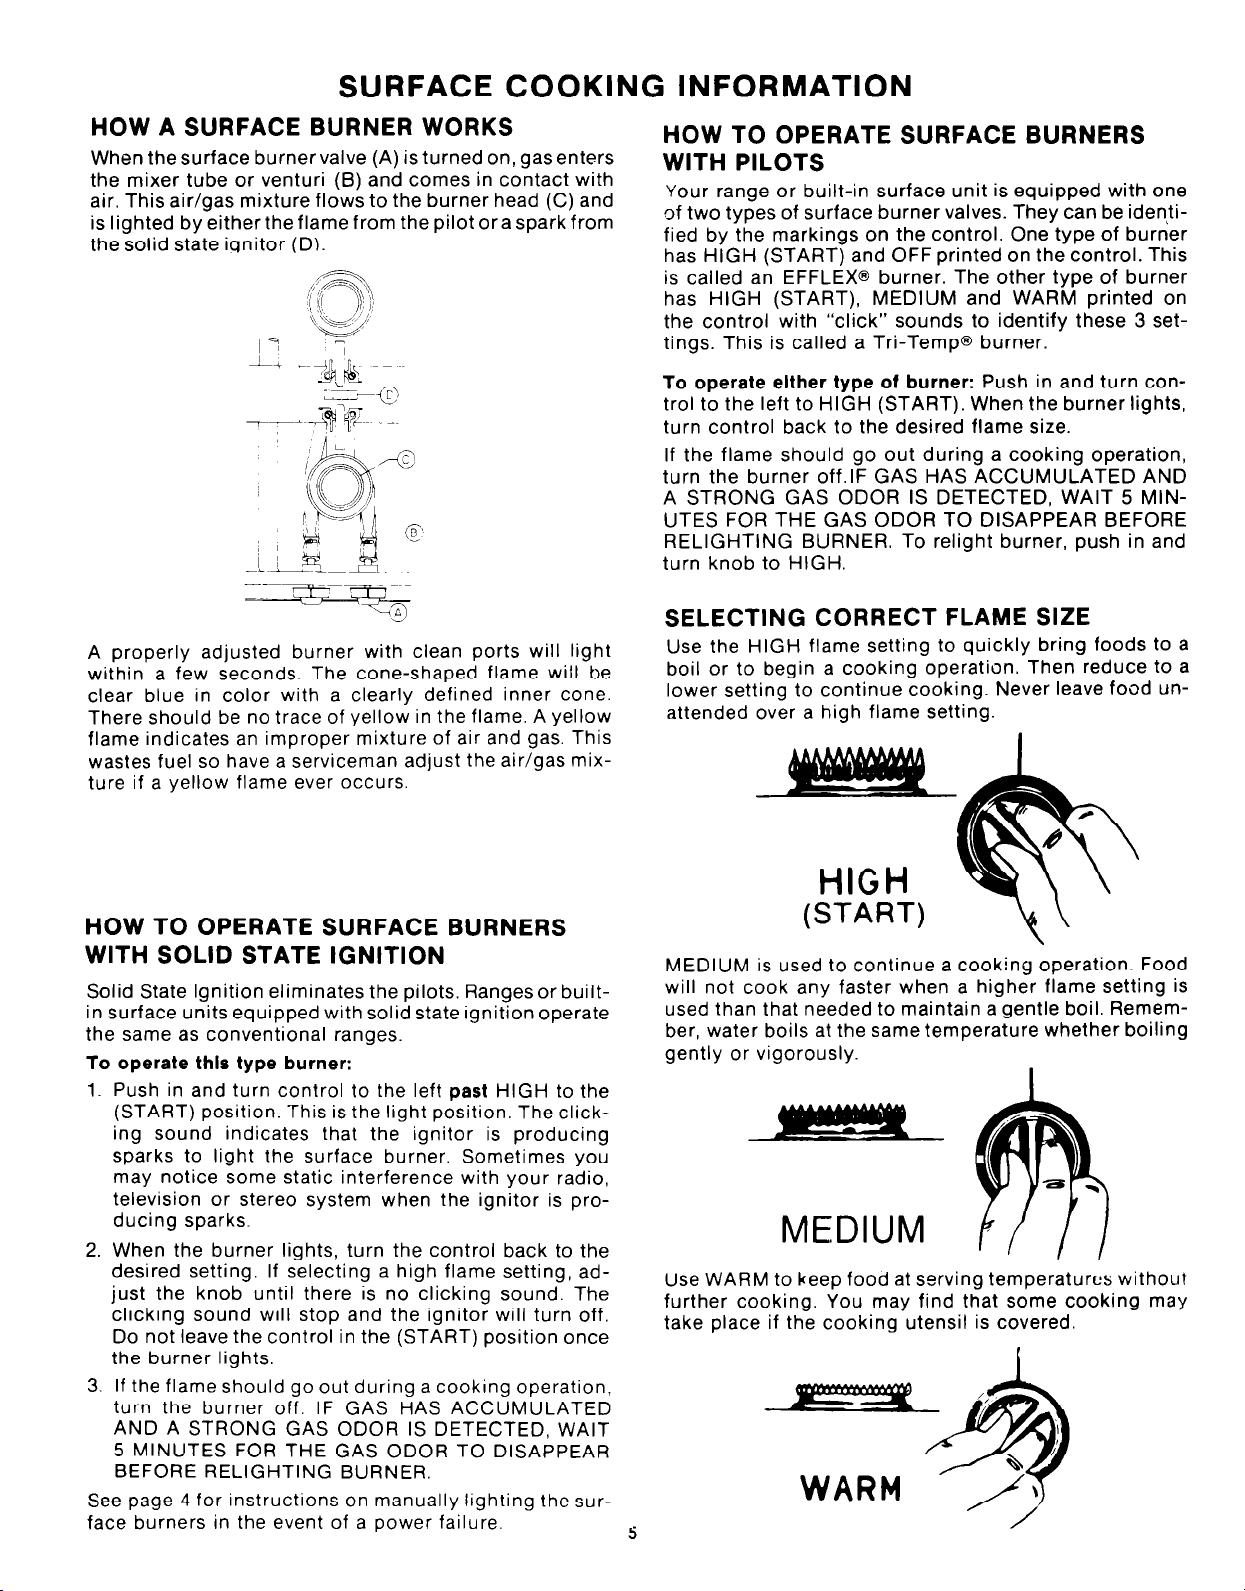
HOW A SURFACE BURNER WORKS
When the surface burner valve (A) is turned on, gas enters
the mixer tube or venturi (B) and comes in contact with
air. This air/gas mixture flows to the burner head (C) and
is lighted by either the flame from the pilot or a spark from
the solid state iqnitor (D).
A properly adjusted burner with clean ports will light
within a few seconds The cone-shaped flame will be
clear blue in color with a clearly defined inner cone.
There should be no trace of yellow in the flame. A yellow
flame indicates an improper mixture of air and gas. This
wastes fuel so have a serviceman adjust the air/gas mixture if a yellow flame ever occurs.
HOW TO OPERATE SURFACE BURNERS
WITH PILOTS
Your range or built-in surface unit is equipped with one
of two types of surface burner valves. They can be identi-
fied by the markings on the control. One type of burner
has HIGH (START) and OFF printed on the control. This
is called an EFFLEX@ burner. The other type of burner
has HIGH (START), MEDIUM and WARM printed on
the control with “click” sounds to identify these 3 set-
tings. This is called a Tri-Temp@ burner.
To operate elther type of burner: Push in and turn con-
trol to the left to HIGH (START). When the burner lights,
turn control back to the desired flame size.
If the flame should go out during a cooking operation,
turn the burner off.lF GAS HAS ACCUMULATED AND
A STRONG GAS ODOR IS DETECTED, WAIT 5 MIN-
UTES FOR THE GAS ODOR TO DISAPPEAR BEFORE
RELIGHTING BURNER. To relight burner, push in and
turn knob to HIGH.
SELECTING CORRECT FLAME SIZE
Use the HIGH flame setting to quickly bring foods to a
boil or to begin a cooking operation. Then reduce to a
lower setting to continue cooking. Never leave food unattended over a high flame setting.
HOW TO OPERATE SURFACE BURNERS
WITH SOLID STATE IGNITION
Solid State Ignition eliminates the pilots. Rangesor builtin surface units equipped with solid state ignition operate
the same as conventional ranges.
To operate this type burner:
Push in and turn control to the left past HIGH to the
(START) position. This is the light position. The clicking sound indicates that the ignitor is producing
sparks to light the surface burner. Sometimes you
may notice some static interference with your radio,
television or stereo system when the ignitor is producing sparks.
When the burner lights, turn the control back to the
desired setting. If selecting a high flame setting, ad-
just the knob until there is no clicking sound. The
clicking sound will stop and the ignitor will turn off.
Do not leave the control in the (START) position once
the burner lights.
If the flame should go out during a cooking operation,
turn the burner off. IF GAS HAS ACCUMULATED
AND A STRONG GAS ODOR IS DETECTED, WAIT
5 MINUTES FOR THE GAS ODOR TO DISAPPEAR
BEFORE RELIGHTING BURNER.
See page 4 for instructions on manually lighting the sur-
face burners in the event of a power failure.
HIGH
(START)
MEDIUM is used to continue a cooking operation. Food
will not cook any faster when a higher flame setting is
used than that needed to maintain a gentle boil. Remember, water boils at the same temperature whether boiling
gently or vigorously.
Use WARM to keep food at serving temperatures without
further cooking. You may find that some cooking may
take place if the cooking utensil is covered.
I
5
FACTORS TO CONSIDER WHEN
SELECTING CORRECT FLAME SIZE
SIZE OF COOKING UTENSIL: FLAME SIZE SHOULD
BE ADJUSTED SO IT DOES NOT EXTEND BEYOND
THE EDGE OF THE COOKING UTENSIL FOR YOUR
PERSONAL SAFETY AND TO PREVENT POSSIBLE
DAMAGE TO CABINETS ABOVE RANGE.
Adjusting the size of the flame to fit the size of the cooking utensil also helps to save fuel.
UTENSIL MATERIALS: Stainless steel, porcelain,
enamelware, glass, glass ceramic and Teflon@-coated
utensils designed for surface cooking usually heat slowly
and conduct heat poorly when a large flame size is used.
Adjust the flame size to extend only halfway between
center and edge of the utensil bottom for better cook-
ing results.
Aluminum utensils conduct heat more evenly; therefore,
a slightly larger flame size can be used. The flame can
be adjusted so it comes to the edge of the utensil, The
CARE INFORMATION
Be sure the range or built-in surface unit is cool before
removing any parts or cleaning the unit. Any parts removed in the cleaning should be replaced correctly.
flame should NEVER be adjusted so that it extends
beyond the bottom of the utensil.
COVERED UTENSILS: If the utensil is covered less fuel
will be needed; therefore, a lower flame size can be used.
REMEMBER: Food will not cook any faster when more
than the amount of heat needed to maintain a gentle
boil is used. See page 2 for additional information on
the safe use of utensils.
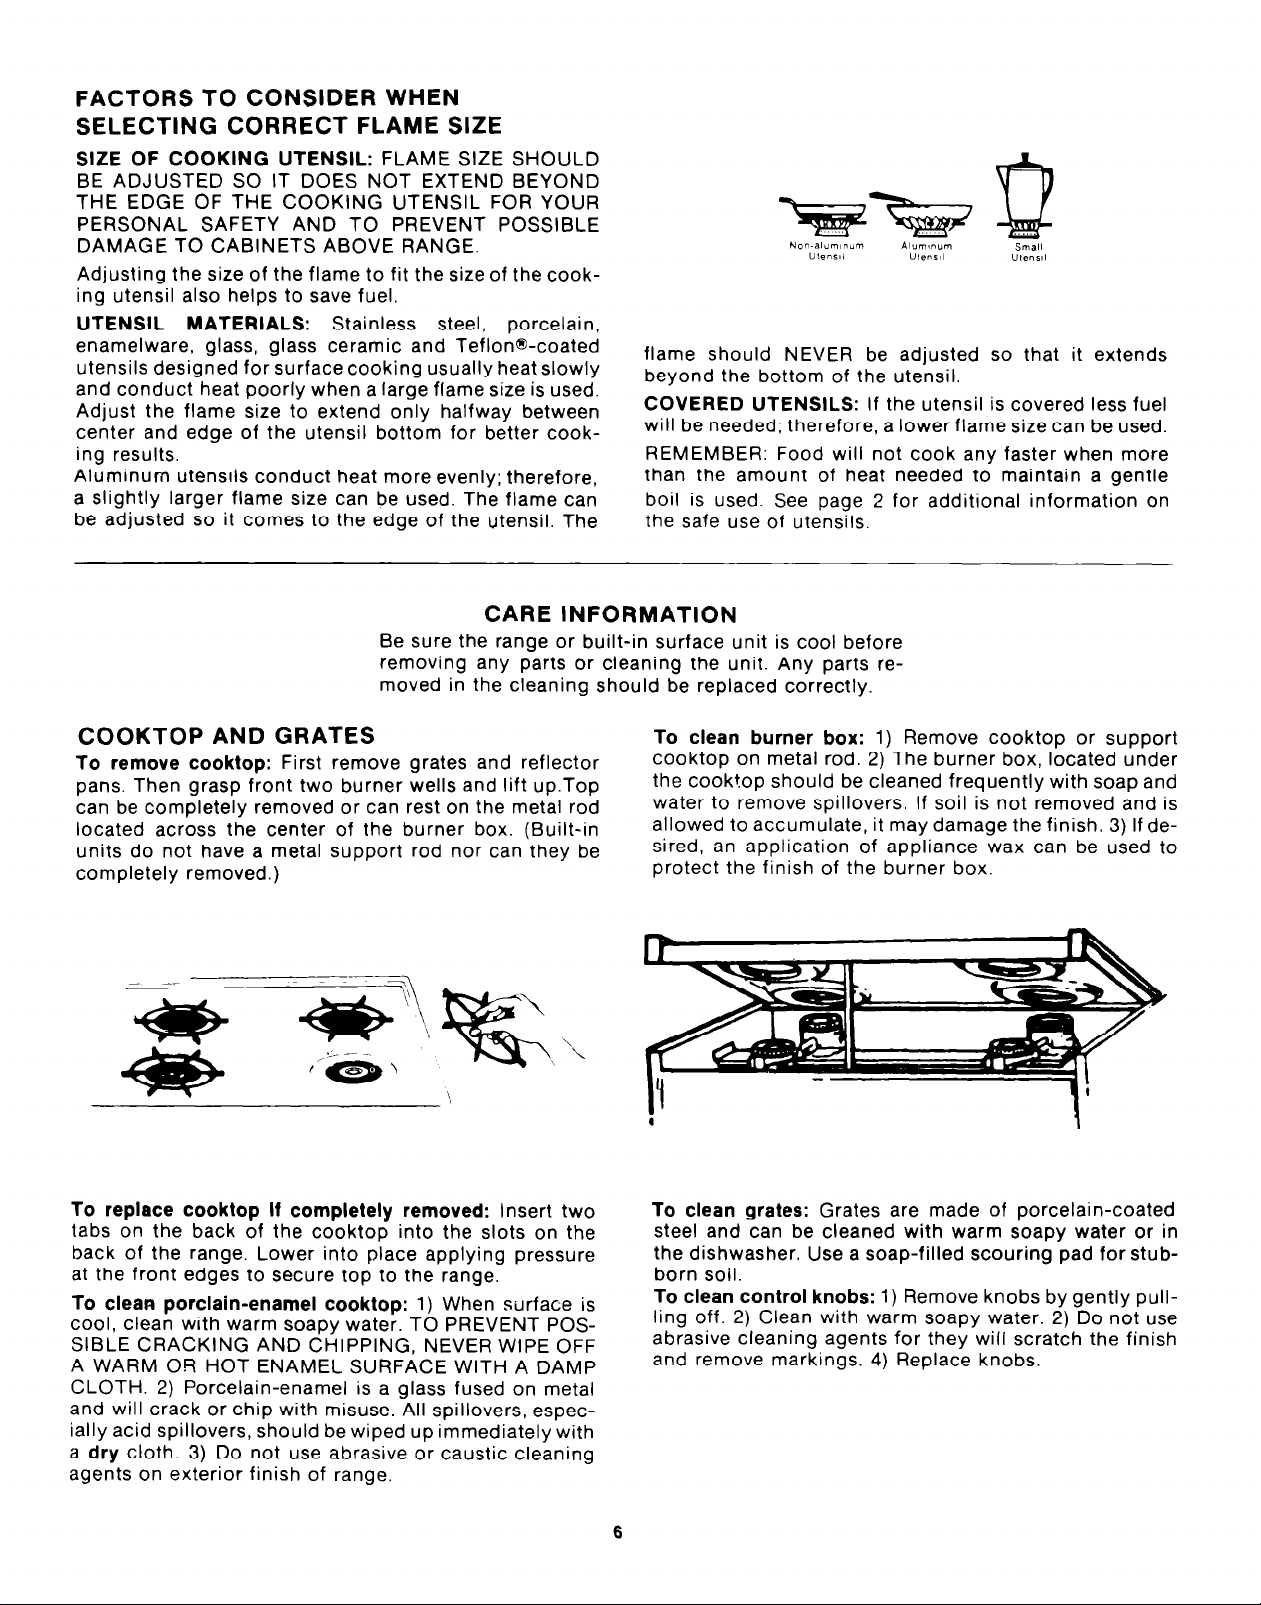
COOKTOP AND GRATES
To remove cooktop: First remove grates and reflector
pans. Then grasp front two burner wells and lift up.Top
can be completely removed or can rest on the metal rod
located across the center of the burner box. (Built-in
units do not have a metal support rod nor can they be
completely removed.)
To replace cooktop If completely removed: Insert two
tabs on the back of the cooktop into the slots on the
back of the range. Lower into place applying pressure
at the front edges to secure top to the range.
To clean porclain-enamel cooktop: 1) When surface is
cool, clean with warm soapy water. TO PREVENT POS-
SIBLE CRACKING AND CHIPPING, NEVER WIPE OFF
A WARM OR HOT ENAMEL SURFACE WITH A DAMP
CLOTH. 2) Porcelain-enamel is a glass fused on metal
and will crack or chip with misuse. All spillovers, especially acid spillovers, should be wiped up immediately with
a dry cloth. 3) Do not use abrasive or caustic cleaning
agents on exterior finish of range.
To clean burner box: 1) Remove cooktop or support
cooktop on metal rod. 2) The burner box, located under
the cooktop should be cleaned frequently with soap and
water to remove spillovers. If soil is not removed and is
allowed to accumulate, it may damage the finish. 3) If desired, an application of appliance wax can be used to
protect the finish of the burner box.
To clean grates: Grates are made of porcelain-coated
steel and can be cleaned with warm soapy water or in
the dishwasher. Use a soap-filled scouring pad for stubborn soil.
To clean control knobs: 1) Remove knobs by gently pullling off. 2) Clean with warm soapy water. 2) Do not use
abrasive cleaning agents for they will scratch the finish
and remove markings. 4) Replace knobs.
6
 Loading...