

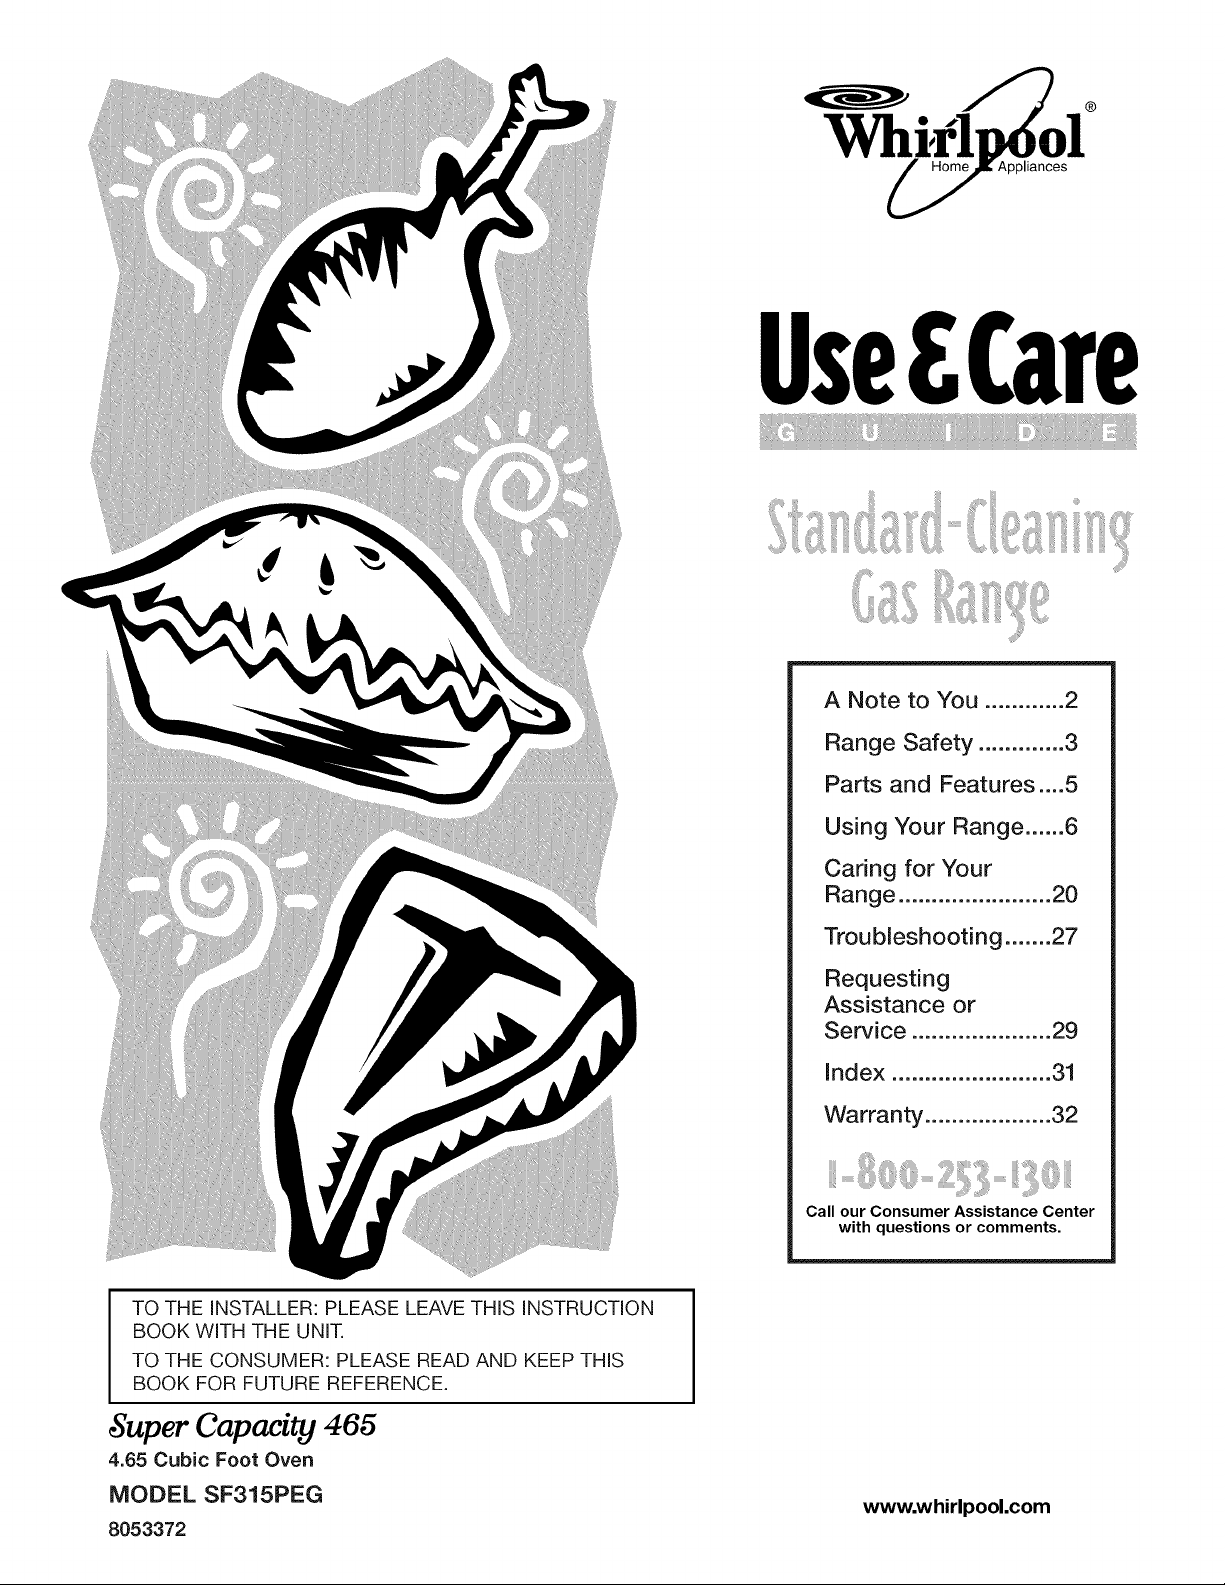
Whirlpool SF315PEGN0, SF315PEGN1, SF315PEGQ0, SF315PEGQ1, SF315PEGW0 Owner’s Manual
...
®
Appliances
UseCare
A Note to You ............ 2
Range Safety ............. 3
Parts and Features ....5
Using Your Range ...... 6
Caring for Your
Range ....................... 20
Troubleshooting ....... 27
Requesting
Assistance or
Service ..................... 29
Index ........................ 31
Warranty ................... 32
Call our Consumer Assistance Center
with questions or comments.
TO THE INSTALLER: PLEASE LEAVE THIS INSTRUCTION
BOOK WITH THE UNIT.
TO THE CONSUMER: PLEASE READ AND KEEP THIS
BOOK FOR FUTURE REFERENCE.
Super Capaei_ 465
4.65 Cubic Foot Oven
MODEL SF315PEG
8053372
www.whirlpool.com
ANOTETOYOU
The Whirlpool Brand is committed to designing quality products that consistently perform for you to make your
life easier. To ensure that you enjoy years of trouble-free operation, we developed this Use and Care Guide.
It is full of valuable information about how to operate and maintain your appliance properly and safely. Please
read it carefully.
Also, please complete and mail the Product Registration Card provided with your appliance. The card helps us
notify you about any new information on your appliance.
Whenever you call to request service for your appliance,
you need to know your complete model number and
serial number. You can find this information on the
model and serial number label/plate (see diagram in
the "Parts and Features" section).
Please also record the purchase date of your appliance
and your dealer's name, address, and telephone number.
Keep this book and the sales slip together in a safe place for future reference. It is important
for you to save your sales receipt showing the date of purchase. Proof of purchase will assure
you of in-warranty service.
WARNING: If the information in this manual is not followed exactly, a fire or
explosion may result causing property damage, personal injury or death.
Model Number.
Serial Number
Purchase Date
Dealer Name
Dealer Address
Dealer Phone
- Do not store or use gasoline or other flammable vapors and liquids in the vicinity
of this or any other appliance.
- WHAT TO DO IF YOU SMELL GAS
• Do not try to light any appliance.
• Do not touch any electrical switch; do not use any phone in your building.
• Immediately call your gas supplier from a neighbor's phone. Follow the gas
supplier's instructions.
• If you cannot reach your gas supplier, call the fire department.
- Installation and service must be performed by a qualified installer, service
agency or the gas supplier.
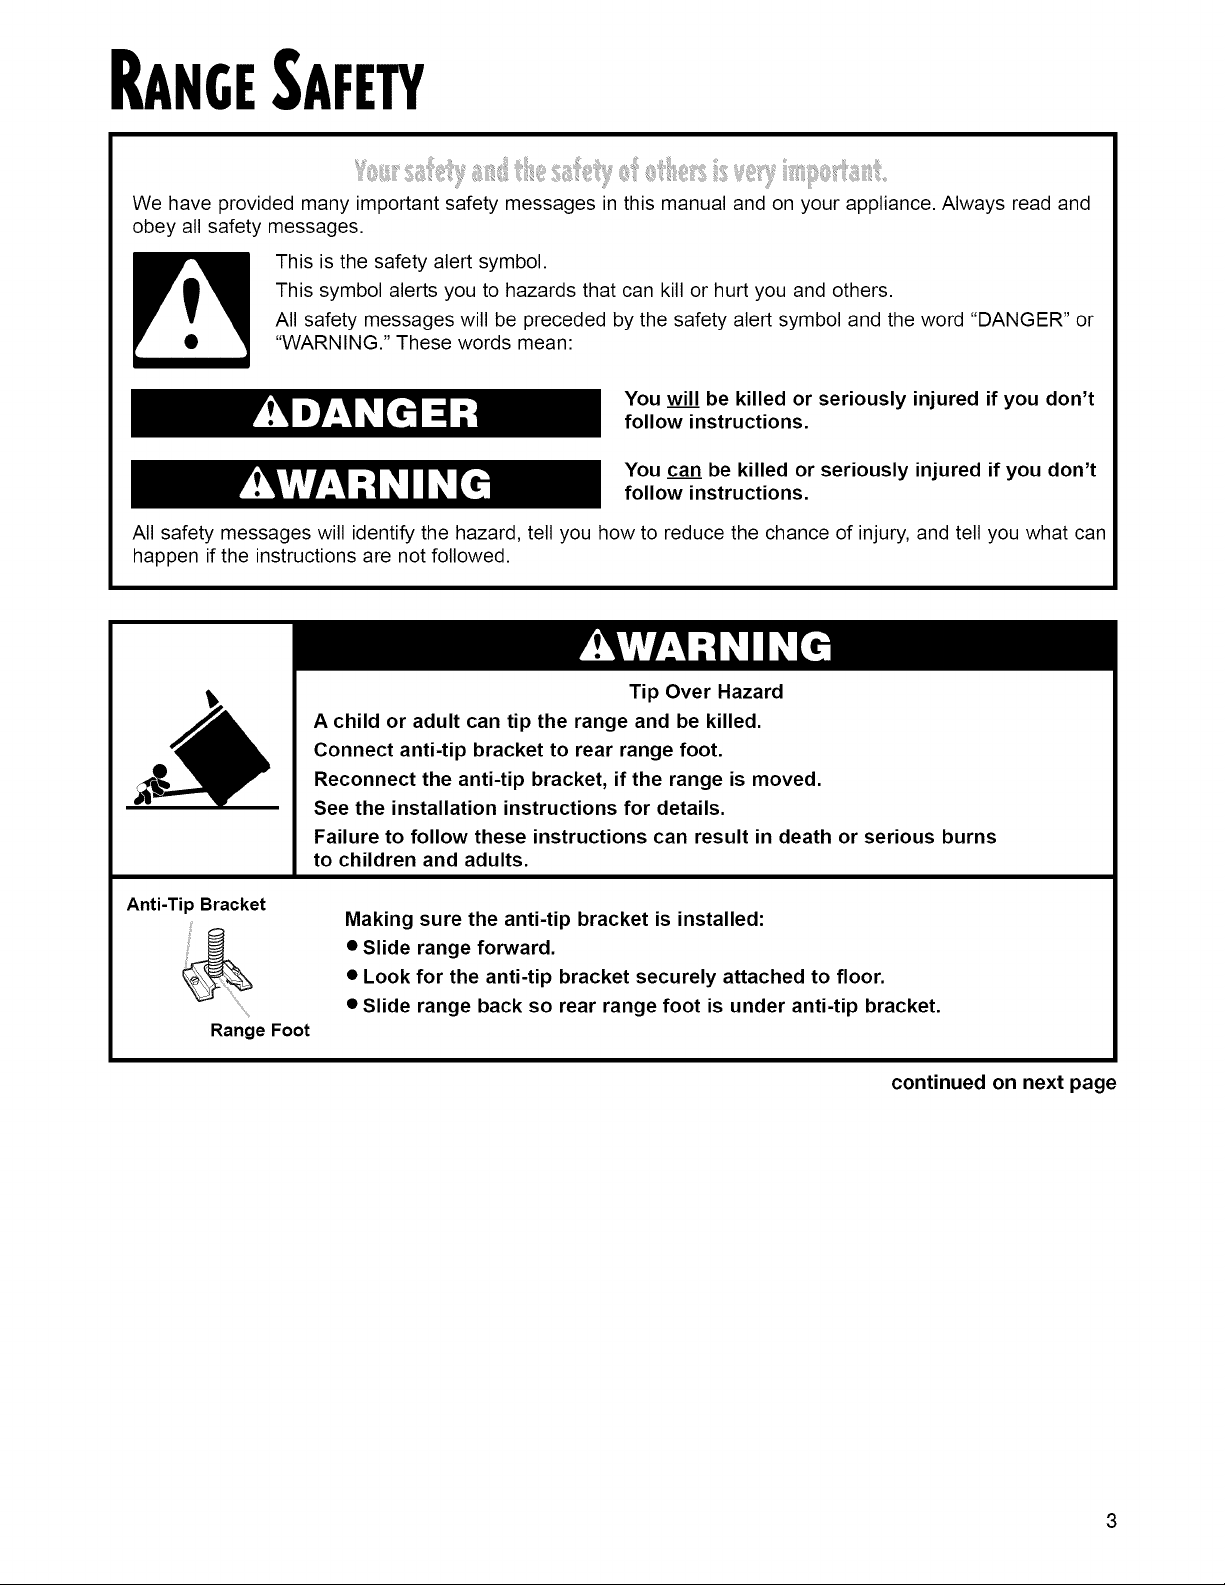
RANGESAFE
"ii_'_i,ii'i:__'_%i:'i::_ii!_'_i:i?¸_i_:t_::li:'_il'_i,:,!i,%i:_I'_l:_iiy_:i_i__:ii,_I_'iI"_!_i_'!i'_iii:!,;il;:'_'_!_!_,_"iiii,'¸iiiiii'_l_i_i_iiii_,2_ii_i,I""iii_i_:i'_t
We have provided many important safety messages in this manual and on your appliance. Always read and
obey all safety messages.
This is the safety alert symbol.
This symbol alerts you to hazards that can kill or hurt you and others.
All safety messages will be preceded by the safety alert symbol and the word "DANGER" or
"WARNING." These words mean:
You will be killed or seriously injured if you don't
follow instructions.
You can be killed or seriously injured if you don't
follow instructions.
All safety messages will identify the hazard, tell you how to reduce the chance of injury, and tell you what can
happen if the instructions are not followed.
Anti-Tip Bracket
Range Foot
Tip Over Hazard
A child or adult can tip the range and be killed.
Connect anti-tip bracket to rear range foot.
Reconnect the anti-tip bracket, if the range is moved.
See the installation instructions for details.
Failure to follow these instructions can result in death or serious burns
to children and adults.
Making sure the anti-tip bracket is installed:
• Slide range forward.
• Look for the anti-tip bracket securely attached to floor.
• Slide range back so rear range foot is under anti-tip bracket.
continued on next page
3
iMPORTANT SAFETY iNSTRUCTIONS
WARNING: To reduce the risk of fire, electrical
shock, injury to persons, or damage when using the
range, follow basic precautions, including the
following:
•WARNING - TO REDUCE THE RISK OF
TIPPING OF THE RANGE, THE RANGE MUST
BE SECURED BY PROPERLY INSTALLED
ANTI-TIP DEVICES. TO CHECK IF THE DEVICES
ARE INSTALLED PROPERLY, SLIDE RANGE
FORWARD, LOOK FOR ANTI-TIP BRACKET
SECURELY ATTACHED TO FLOOR, AND SLIDE
RANGE BACK SO REAR RANGE FOOT IS
UNDER ANTI-TIP BRACKET.
• CAUTION - Do not store items of interest to
children in cabinets above a range or on the
backguard of a range - children climbing on the
range to reach items could be seriously injured.
• Proper Installation - The range, when installed,
must be electrically grounded in accordance with
local codes or, in the absence of local codes, with
the National Electrical Code, ANS!/NFPA 70. Be
sure the range is properly installed and grounded
by a qualified technician.
• This range is equipped with a three-prong
grounding plug for your protection against shock
hazard and should be plugged directly into a
properly grounded receptacle. Do not cut or
remove the grounding prong from this plug.
• Disconnect the electrical supply before
servicing the appliance.
• Never Use the Range for Warming or Heating
the Room.
• Injuries may result from the misuse of appliance
doors or drawers such as stepping, leaning, or
sitting on the doors or drawers.
• Maintenance - Keep range area clear and free from
combustible materials, gasoline, and other
flammable vapors and liquids.
• Storage in or on the Range - Flammable
materials should not be stored in an oven or
near surface units.
• Top burner flame size should be adjusted so it
does not extend beyond the edge of the
cooking utensil.
For self-cleaning ranges =
• Before Self-Cleaning the Oven - Remove broiler
pan and other utensils. Wipe off all excessive
spillage before initiating the cleaning cycle.
-SAVE THESE INSTRUCTIONS-
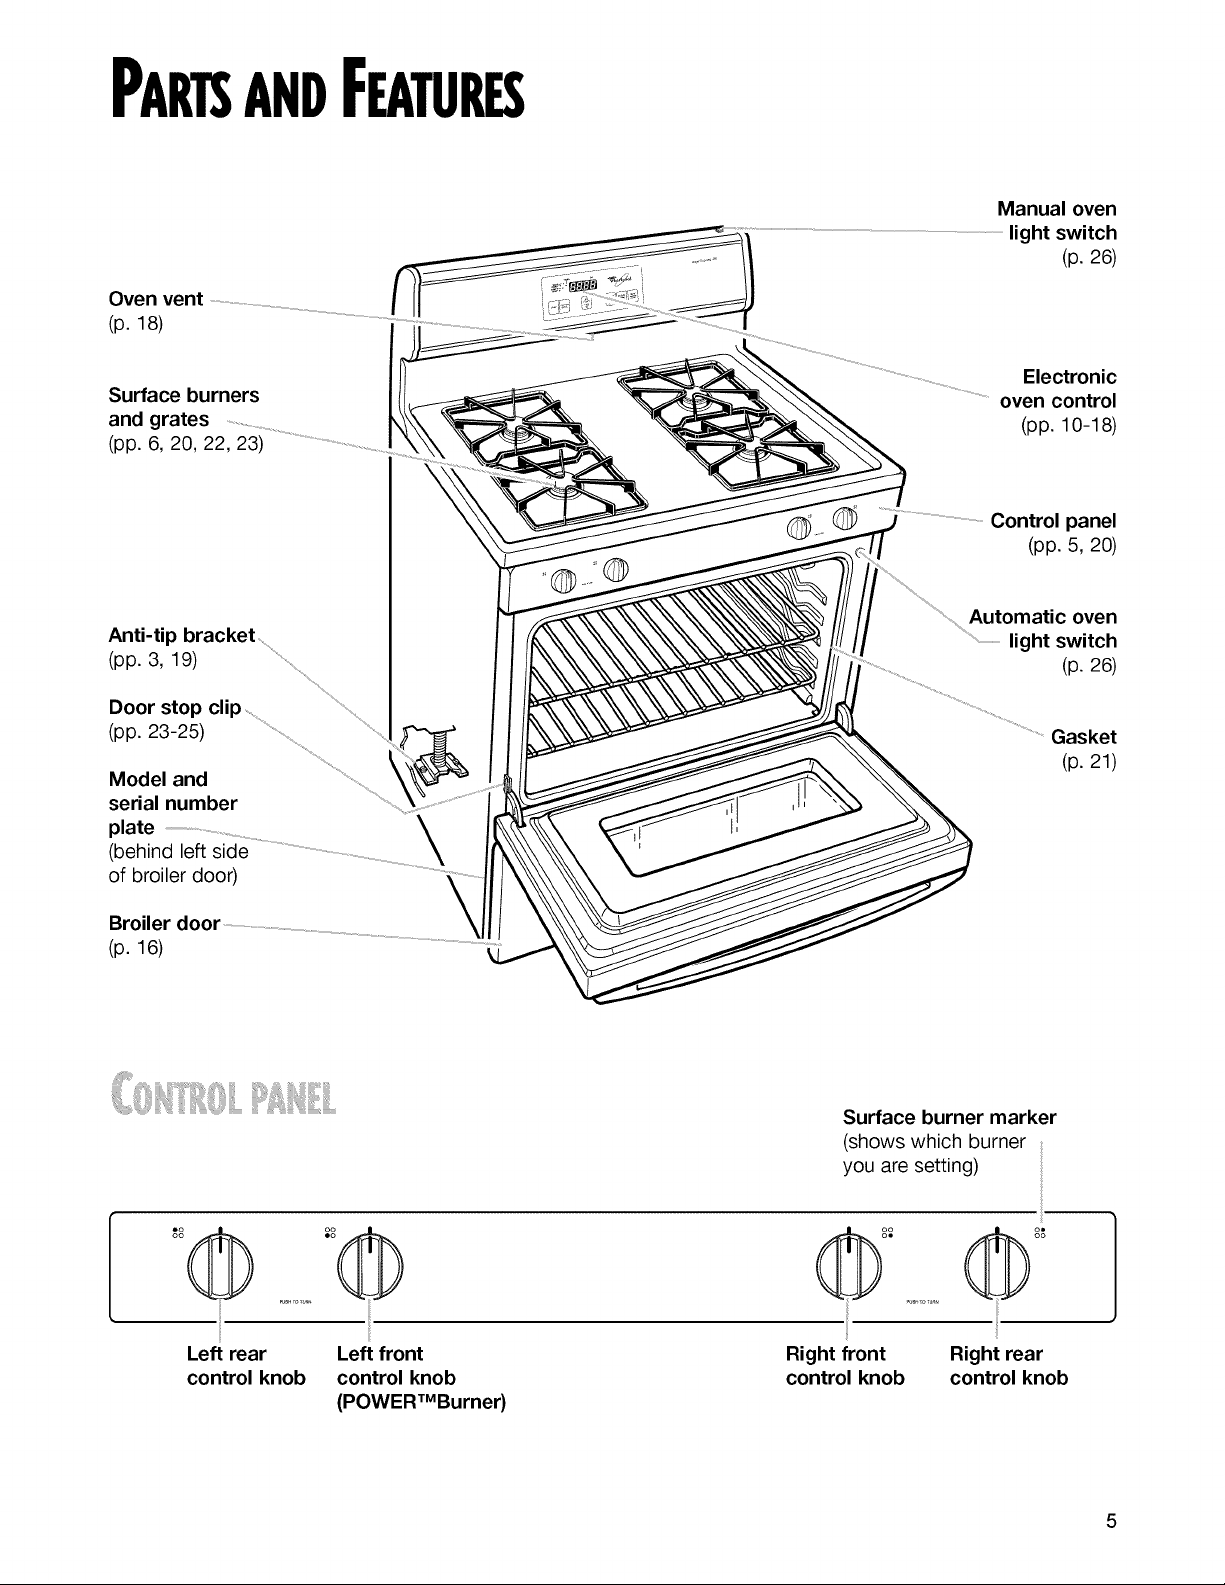
PARTSANDFEATURES
Oven vent
(p. 18)
Manual oven
light switch
(p. 26)
Surface burners
and grates
(pp. 6, 20, 22, 23)
Anti-tip bracket .....
(pp. 3, 19) .........
Door stop clip
(pp. 23-25) ................ ........
Model and
serial number
plate
(behind left side
of broiler door)
Broiler door \Ji
(p. 16) .................................
Electronic
oven control
(pp. 10-18)
Control panel
(pp. 5, 20)
Automatic oven
.............................................light switch
(p. 26)
Gasket
(p. 21)
oo oo
o@oo®
Left rear Left front
control knob control knob
(POWERTMBurner)
Surface burner marker
(shows which burner
you are setting)
_'_°°° ......... (@ °8
Right front Right rear
control knob control knob
5
USINGYOURRANGE
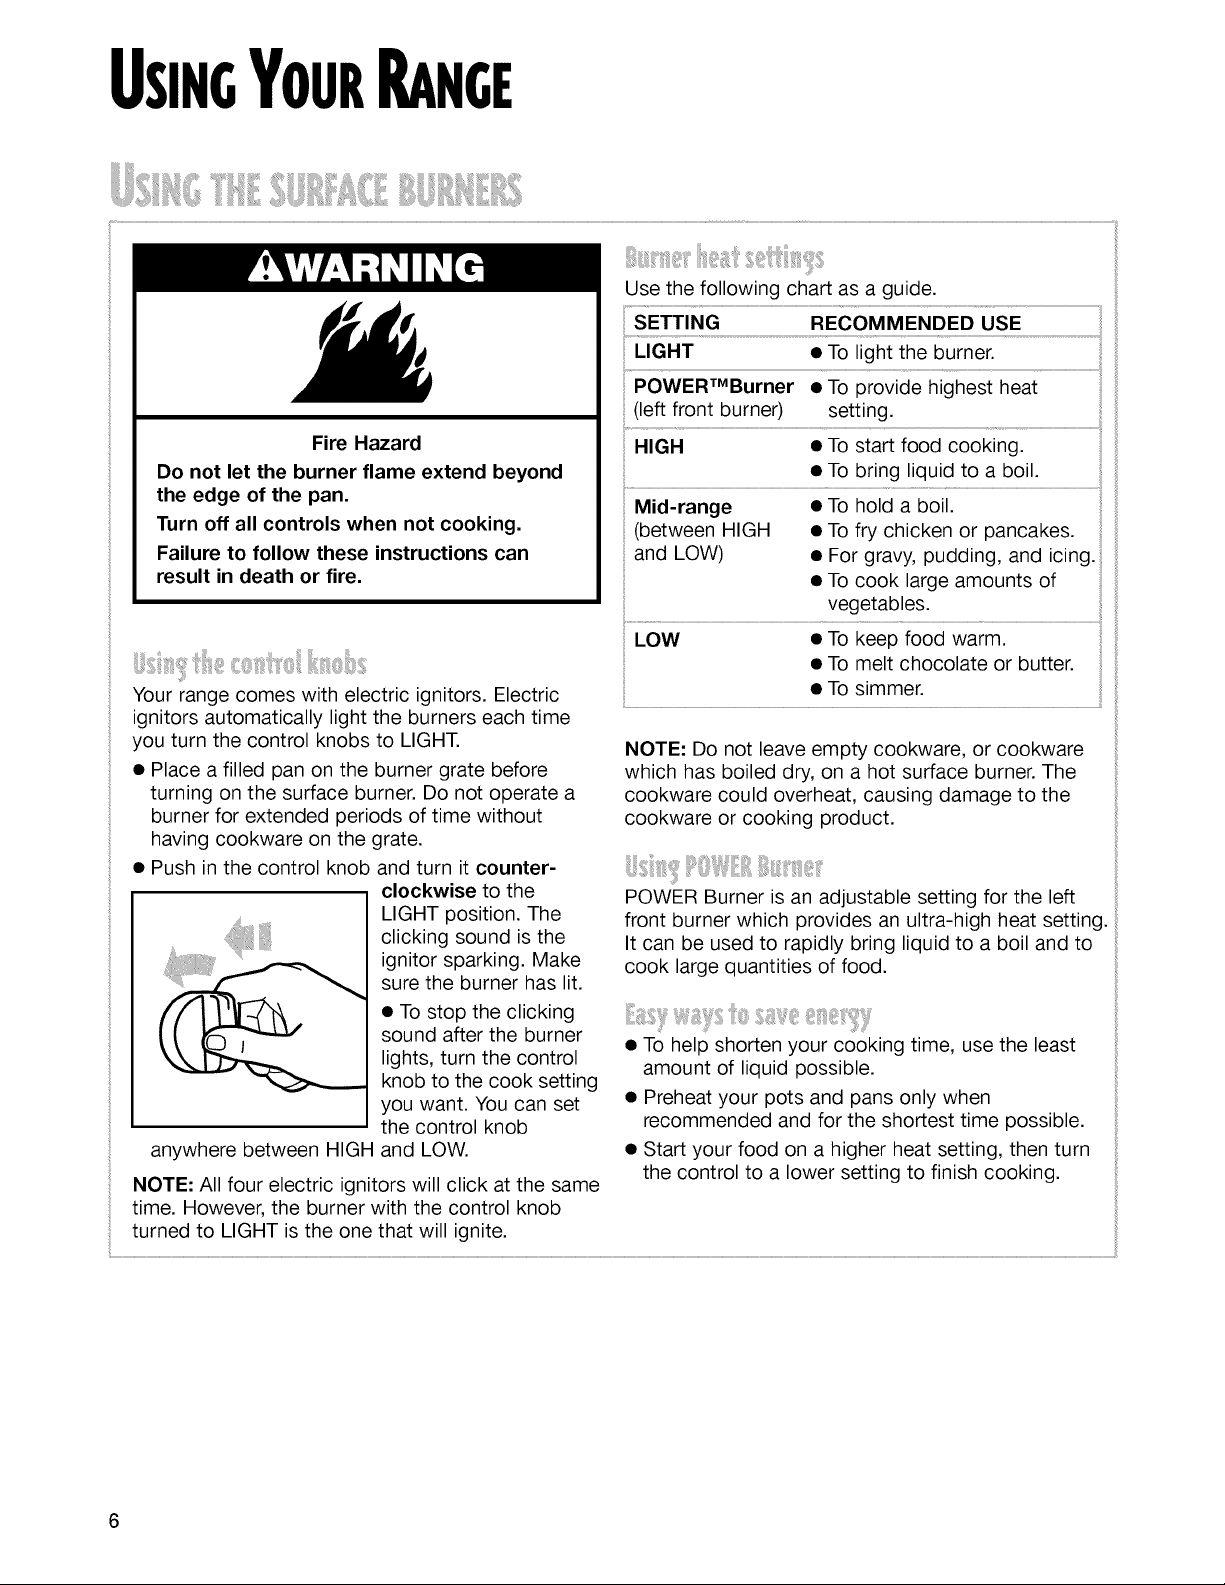
Fire Hazard
Do not let the burner flame extend beyond
the edge of the pan.
Turn off all controls when not cooking.
Failure to follow these instructions can
result in death or fire.
I;: !i;iiiiil!!iiil¸1:illii! ,
Your range comes with electric ignitors. Electric
ignitors automatically light the burners each time
you turn the control knobs to LIGHT.
• Place a filled pan on the burner grate before
turning on the surface burner. Do not operate a
burner for extended periods of time without
having cookware on the grate.
• Push in the control knob and turn it counter-
clockwise to the
LIGHT position. The
clicking sound is the
ignitor sparking. Make
sure the burner has lit.
• To stop the clicking
sound after the burner
lights, turn the control
knob to the cook setting
you want. You can set
the control knob
anywhere between HIGH and LOW.
NOTE: All four electric ignitors will click at the same
time. However, the burner with the control knob
turned to LIGHT is the one that will ignite.
Use the following chart as a guide.
!i...............................................................................................................................................................................................................................................iil
POWERTMBurner • To provide highest heat
(left front burner) setting.
HIGH e To siart food cooking: ...............................................................................
• To bring liquid to a boil.
Mid-range • To hold a boil.
(between HIGH • To fry chicken or pancakes.
and LOW) • For gravy, pudding, and icing.
• To cook large amounts of
vegetables.
LOW • To keep food warm.
• To melt chocolate or butter.
• To simmer.
NOTE: Do not leave empty cookware, or cookware
which has boiled dry, on a hot surface burner. The
cookware could overheat, causing damage to the
cookware or cooking product.
POWER Burner is an adjustable setting for the left
front burner which provides an ultra-high heat setting.
It can be used to rapidly bring liquid to a boil and to
cook large quantities of food.
• To help shorten your cooking time, use the least
amount of liquid possible.
• Preheat your pots and pans only when
recommended and for the shortest time possible.
• Start your food on a higher heat setting, then turn
the control to a lower setting to finish cooking.
¸ iyiiil J i ' i!i, '' ,
You can manually light surface burners. Hold a lit
match near a burner and turn the control knob to
the LIGHT position. After the burner lights, turn the
control knob to the setting you want.
The large diameter of most water-bath or pressure
canners combined with high heat settings for long
periods of time can cause damage to the cooktop.
To protect your range:
• Center the canner over the surface burner. Do
not extend more than 1 inch outside the burner
area.
• Do not place your canner on two surface burners
at the same time.
• Start with hot water, cover with a lid and bring to
a boil; then reduce heat to maintain a boil or
required pressure levels in a pressure canner.
• Refer to your canner manual for specific
instructions.
For up-to-date information on canning, contact your
local U.S. Government Agricultural Department
Extension Office or companies who manufacture
home canning products.
• The pan should have a flat bottom, straight sides,
and a well-fitting lid.
• Choose medium to heavy gauge (thickness)
cookware.
• The pan material (metal or glass) affects how
quickly and evenly the pan heats.
• When using glass or ceramic cookware, check to
make sure it is suitable for use on surface burners.
• To avoid tipping, make sure pots and pans are
centered on the grates.
The pan material affects how fast heat transfers from the surface cooking area through the pan material and how
evenly heat spreads over the pan bottom. Choose pans that provide the best cooking results.
Aluminum
Cast iron
Ceramic or
ceramic glass
Copper
Earthenware
Porcelain enamel-on-steel or
enamel-on-cast iron
Stainless steel
• Heats quickly and evenly.
• Use for all types of cooking.
• Medium or heavy thickness is best for most cooking.
• Used as a core or base in cookware to provide even heating.
• Heats slowly and evenly.
• Good for browning and frying.
• Maintains heat for slow cooking.
• Can be coated with porcelain enamel.
• Heats slowly and unevenly.
• Use on low to medium settings.
• Follow manufacturer's instructions.
• Heats very quickly and evenly.
• Used as a core or base in cookware to provide even heating.
• Can be used for cooktop cooking if recommended by the
manufacturer.
• Use on low settings.
• See cast iron and stainless steel.
• Heats quickly but unevenly.
• A core or base of aluminum or copper on the cookware provides
even heating.
• Can be coated with porcelain enamel.
7
Placetheovenrackswhereyouneedthembefore
Where to place pans:
turningontheoven.
• Tomovearack,pullitouttothestopposition,
raisethefrontedgeandliftit out.
• Besuretherack(s)islevel.
WHEN YOU HAVE PLACE
1 pan
2 pans Side by side or slightly
• Usepotholdersorovenmittsto protectyourhands
ifrack(s)mustbemovedwhiletheovenishot.
• Forbestperformance,cookononerack.Place
theracksothetopofthefoodwillbecenteredin
theoven.
3 or 4 pans In opposite corners on
each oven rack. Stagger
pans so no pan is directly
over another.
• Whencookingwithtworacks,arrangetheracks
onthe2ndand4thrackguides.Twosheetsof
cookiesmaybebakedifsheetsareswitchedat
approximately three quarters of the total bake time. FOOD RACK POSITION
Increase baking time, if necessary. Frozen pies, large 1st or 2nd rack ........
• For best results allow 2 inches of space around
each pan and between pans and oven walls.
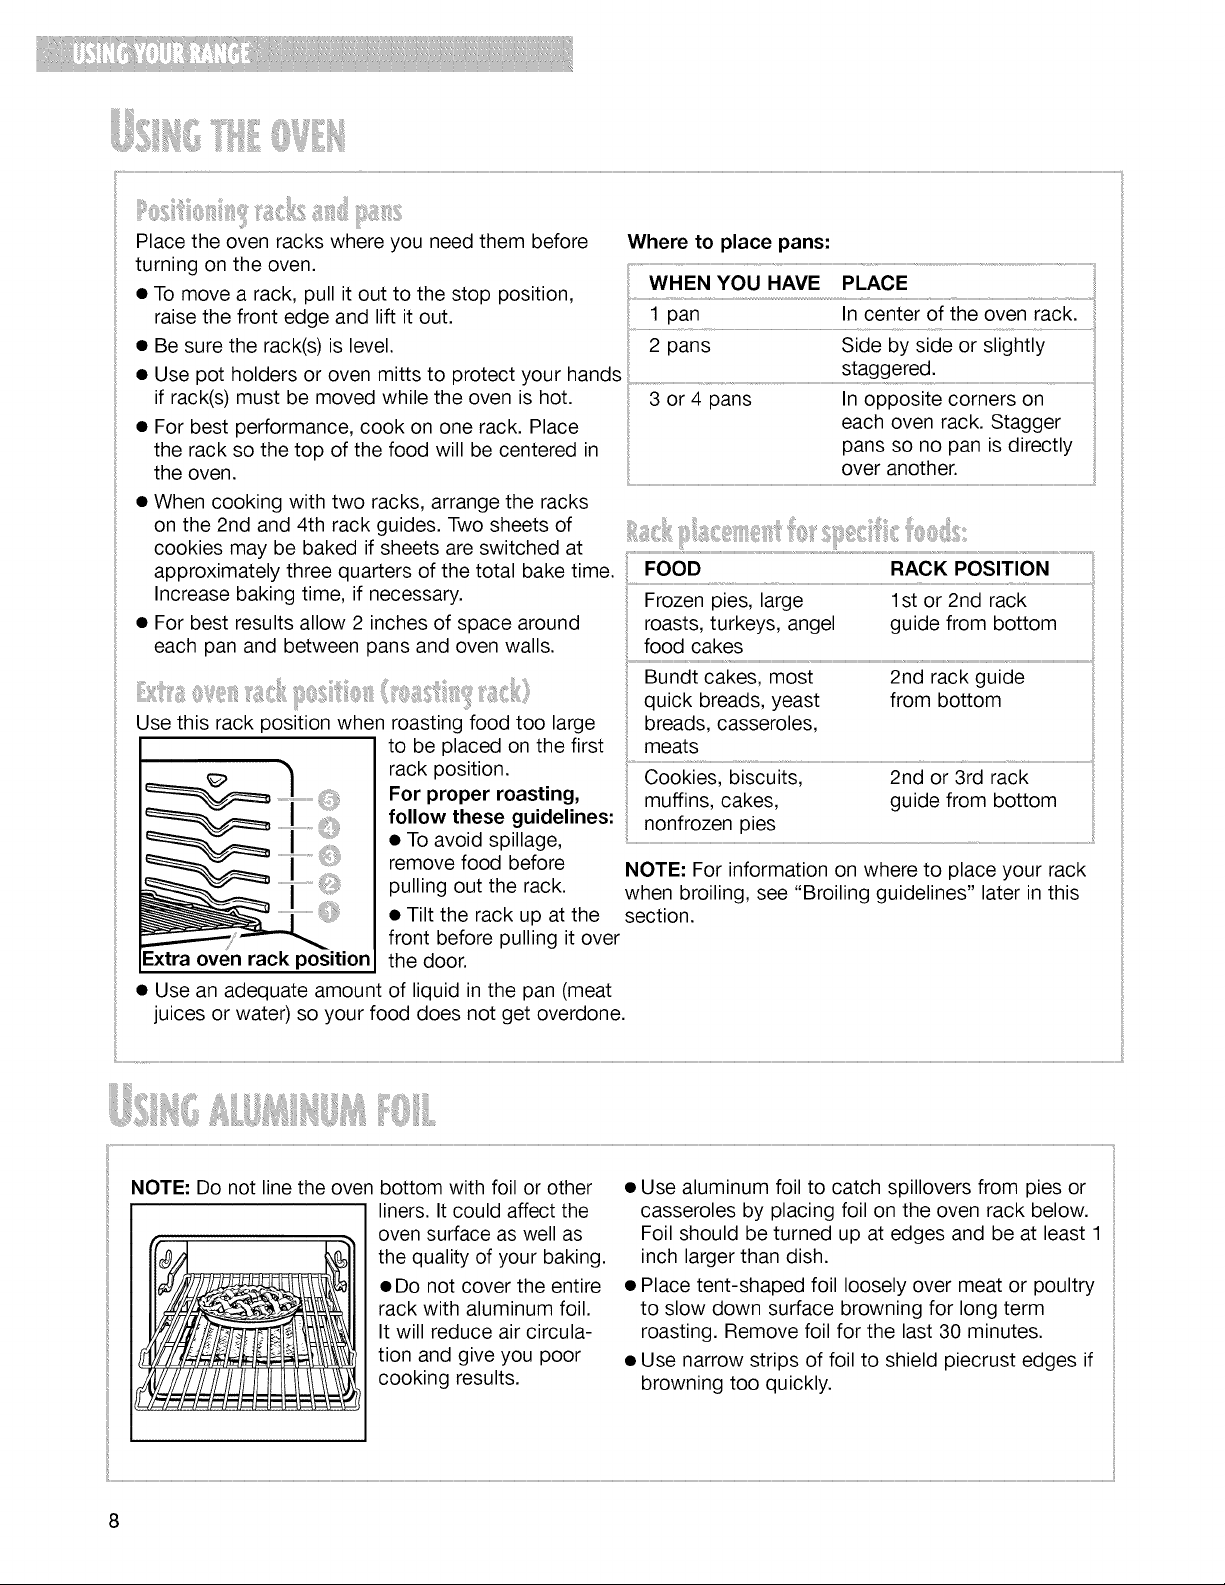
Use this rack position when roasting food too large
to be placed on the first
rack position.
For proper roasting,
follow these guidelines:
• To avoid spillage,
remove food before
pulling out the rack.
• Tilt the rack up at the
front before pulling it over
-xtra oven rack position
• Use an adequate amount of liquid in the pan (meat
juices or water) so your food does not get overdone.
the door.
NOTE: For information on where to place your rack
when broiling, see "Broiling guidelines" later in this
section.
NOTE."Do not line the oven bottom with foil or other
liners. It could affect the
oven surface as well as
the quality of your baking.
• Do not cover the entire
rack with aluminum foil.
It will reduce air circula-
tion and give you poor
cooking results.
• Use aluminum foil to catch spillovers from pies or
casseroles by placing foil on the oven rack below.
Foil should be turned up at edges and be at least 1
inch larger than dish.
• Place tent-shaped foil loosely over meat or poultry
to slow down surface browning for long term
roasting. Remove foil for the last 30 minutes.
• Use narrow strips of foil to shield piecrust edges if
browning too quickly.
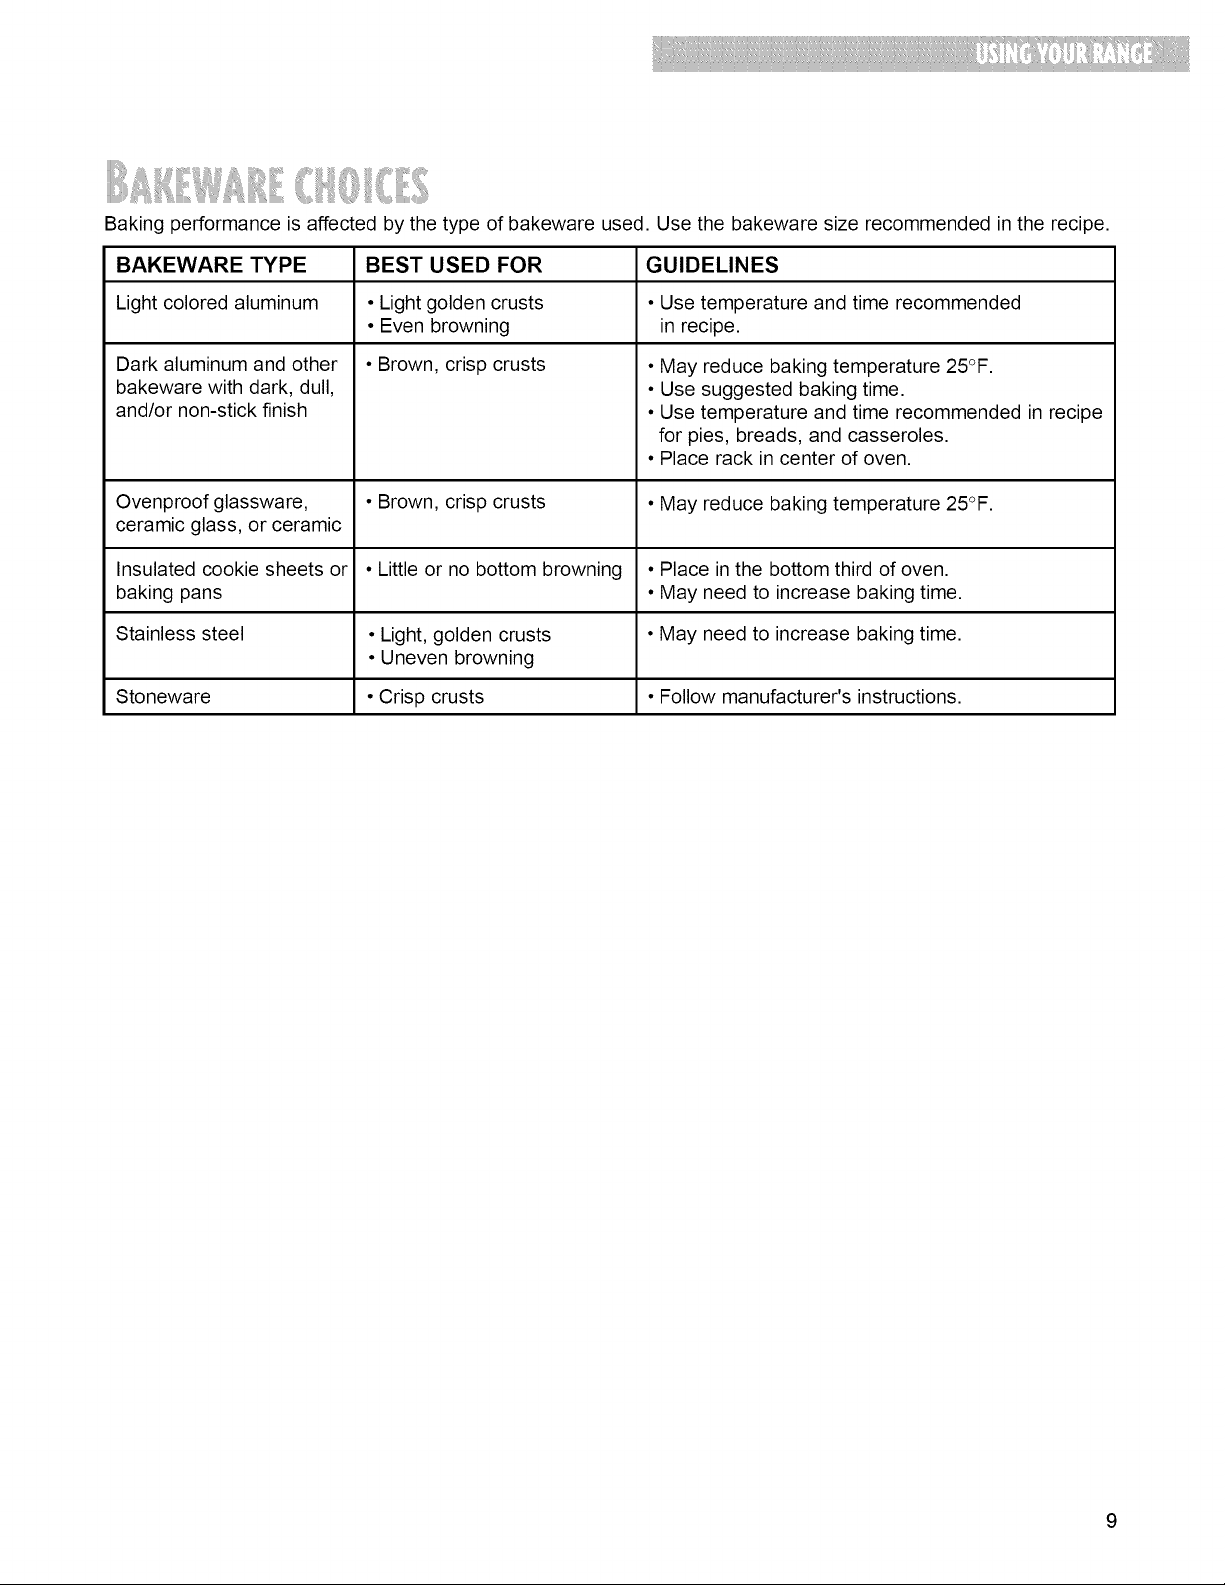
Bakingperformanceisaffectedbythetypeofbakewareused.Usethebakewaresizerecommendedintherecipe.
BAKEWARETYPE BESTUSEDFOR GUIDELINES
Lightcoloredaluminum • Lightgoldencrusts •Usetemperatureandtimerecommended
• Evenbrowning inrecipe.
Darkaluminumandother
bakewarewithdark,dull,
and/ornon-stickfinish
Ovenproofglassware, • Brown,crispcrusts • Mayreducebakingtemperature25°F.
ceramicglass,orceramic
Insulatedcookiesheetsor • Littleornobottombrowning • Placeinthebottomthirdofoven.
bakingpans • Mayneedtoincreasebakingtime.
Stainlesssteel •Light,goldencrusts •Mayneedtoincreasebakingtime.
Stoneware •Crispcrusts • Followmanufacturer'sinstructions.
• Brown,crispcrusts
•Unevenbrowning
• Mayreducebakingtemperature25°F.
• Usesuggestedbakingtime.
• Usetemperatureandtimerecommendedinrecipe
forpies,breads,andcasseroles.
• Placerackincenterofoven.
9

Indicator T.._. o,
(seelightsbelow) sT..T,_,T_,o,L.AK.--.7--.----"• .I_
Electronic
...................................................................................................................................................................................................................................................................."........................................................................................................display
.........................................................................................................Start/enter pad
_papkl3P,ad5)..............................................................................._R
Custom broil
pad
(p. 17)
• When you first plug in the range, "PF" will
appear on the display until you press any
command pad. If "PF" again appears on the
display, your electricity was off for a while.
• When you are using the oven, the display will
show preheat times and temperature settings.
• When you are not using the oven, the display will
show the time of day.
• When showing the time of day, the display will
show the hours and minutes.
• When you are using the minute timer, the display
will count down each minute.
• When setting a function, if you do not press
START/ENTER within 5 seconds, the Start?
indicator light will flash. If you do not press
START/ENTER within 5 minutes, the function
will be canceled.
Temperature/ Clock/timer pad
time pad (pp. 11, 12)
(pp. 11, 13,
15, 17)
I 11o_,,
EN_R O..O_L Off/cancel pad
] I (pp. 10,11,12,
14, 15, 17)
lo,s°ol!J.) (pp. 12, 14, 17)
The control lock lets you disable the control panel
command pads. The control lock comes in handy
when you want to prevent others from using
the oven.
NOTES:
• You can only use the control lock when the oven
is not in use or the control has not been set.
• Set the control lock when cleaning the control
panel to prevent yourself from accidentally turning
on the oven.
To lock the control panel:
Press and hold START/ENTER for 5 seconds.
appear on the temperature display for
5 seconds. "Loc" will then appear when-
You will hear a single tone and "Loc" will
ever a command pad is pressed.
To unlock the control panel:
Press and hold START/ENTER for 5 seconds.
An indicator light to the left of the display lights up
when you are in a setting. An indicator light on the
display lights up when the oven is on.
10
disappear from the temperature display.
You will hear a single tone and "Loc" will
 Loading...