

Whirlpool SERIES 400, SERIES 800, SERIES 806, SERIES 810, SERIES 840 Use And Care Manual
Use And Care
GUIDE
A Note to You ......................... 2
Dishwasher Safety ................. 3
Parts and Features................. 4
Starting Your Dishwasher ..... 6
Loading Your Dishwasher..... 8
Using the Dispensers .......... 11
Setting the Controls............. 13
Selecting a wash cycle ..... 13
Canceling a cycle ............. 14
Selecting cycle options ..... 14
Changing a cycle setting ... 15
Adding an item
during a cycle ................... 15
Washing Special Items ........ 16
Connecting a Portable
Dishwasher........................... 17
Caring for Your
Dishwasher........................... 20
Saving Energy ...................... 24
Solving Common
Dishwashing Problems ....... 25
Troubleshooting................... 28
Requesting Assistance
or Service ........................ 29-30
Index...................................... 31
Warranty ............................... 32
3376831
DISHWASHER MODEL SERIES 400, 800, 806, 810, 840
*
Home Appliances

2
A Note to You
Thank you for buying a Whirlpool* appliance.
Because your life is getting busier and more complicated, WHIRLPOOL dishwashers are
easy to use, save time, and help you manage your home better. To ensure you enjoy years
of trouble-free operation, we developed this Use and Care Guide. It contains valuable
information about how to operate and maintain your appliance properly and safely. Please
read it carefully.
Also, please complete and mail the Ownership Registration Card provided with your
appliance. This card helps us notify you about any new information on your appliance.
Please record your model’s information.
Whenever you call to request service for
your appliance, you need to know your
complete model number and serial number.
You can find this information on the model
and serial number label (see the “Parts and
Features” section).
Please also record the purchase date of
your appliance and your dealer’s name,
address, and telephone number.
Keep this book and the sales slip together in a safe place for future reference.
Help us help you
Please:
• Have your dishwasher installed by a
qualified installer.
• Install where dishwasher is protected from
the elements.
• Install and level dishwasher on a floor that
will hold the weight, and in an area suitable
for its size and use.
• Properly connect dishwasher to electricity,
water, and drain.
†
†
See Installation Instructions for complete
information.
• Remove all shipping plugs from hoses and
connectors (such as the cap on the drain
outlet) before installing.
†
• Remove all hang tags and temporary
labels.
• Make sure dishwasher is not used by
anyone unable to operate it properly.
• Properly maintain dishwasher. See the
“Caring for Your Dishwasher” section.
Model Number __________________________
Serial Number __________________________
Purchase Date __________________________
Dealer Name ___________________________
Dealer Address _________________________
Dealer Phone ___________________________

3
You will be killed or seriously injured
if you don’t follow instructions.
You can be killed or seriously injured
if you don’t follow instructions.
IMPORTANT SAFETY INSTRUCTIONS
• Do not operate the dishwasher unless
all enclosure panels are properly in
place.
• Do not tamper with controls.
• Do not abuse, sit on, or stand on the
door or dish racks of the dishwasher.
• To reduce the risk of injury, do not
allow children to play in or on the
dishwasher.
• Under certain conditions, hydrogen gas
may be produced in a hot water system
that has not been used for two weeks
or more. HYDROGEN GAS IS EXPLOSIVE. If the hot water system has not
been used for such a period, before
using the dishwasher turn on all hot
water faucets and let the water flow
from each for several minutes. This will
release any accumulated hydrogen gas.
As the gas is flammable, do not smoke
or use an open flame during this time.
• Remove the door to the washing
compartment when removing an old
dishwasher from service or discarding it.
WARNING – When using the
dishwasher, follow basic precautions,
including the following:
• Read all instructions before using the
dishwasher.
• Use the dishwasher only for its
intended function.
• Use only detergents or rinse agents
recommended for use in a dishwasher
and keep them out of the reach of
children.
• When loading items to be washed:
1) Locate sharp items so that they
are not likely to damage the door
seal; and
2) Load sharp knives with the handles
up to reduce the risk of cut-type
injuries.
• Do not wash plastic items unless they
are marked “dishwasher safe” or the
equivalent. For plastic items not so
marked, check the manufacturer’s
recommendations.
• Do not touch the heating element
during or immediately after use.
Your safety and the safety of others is very important.
We have provided many important safety messages in this manual and on your
appliance. Always read and obey all safety messages.
This is the safety alert symbol.
This symbol alerts you to hazards that can kill or hurt you and others.
All safety messages will be preceded by the safety alert symbol and the
word “DANGER” or “WARNING.” These words mean:
wDANGER
wWARNING
All safety messages will identify the hazard, tell you how to reduce the chance of injury,
and tell you what can happen if the instructions are not followed.
– SAVE THESE INSTRUCTIONS –
Dishwasher Safety
4
Parts and Features
Your dishwasher is illustrated below with the parts and features called out. To help you find
information on specific parts or features quickly, page references are included.
Third level wash
(on some models)
(p. 10)
Top rack
(p. 10)
Water inlet opening
(p. 9)
Rack bumper
(p. 9)
Bottom rack
(p. 9)
Heating element
Door latch
Door color panel
†
†
See Installation Instructions
for more information.
Spray tower
and protector
(p. 9)
Model and
serial number label
(on right side)
Spray arm
(p. 9)
Overfill protector
(p. 21)
Detergent
dispensers
(p. 11)
Rinse agent
dispenser
(p. 12)
Access panel
†
Silverware
basket
(p. 8)
5
OFF
RINSE
DRY
ENERGY SAVING
DRY SELECTOR
HEAT DRY
AIR DRY
NORMAL WASH
Option selector
switch
Cycle control knob
NORMAL WASHNORMAL WASH
OFF
LIGHT WASH
USE AIR DRYUSE AIR DRY
DRY
RINSE & HOLDRINSE & HOLD
ENERGY SAVING
DRY SELECTOR
HEAT DRY
AIR DRY
RINSE
Cycle control knobOption selector
switch
ENERGY SAVING
DRY SELECTOR
HEAT DRY
AIR DRY
POTS & PANSPOTS & PANS
NORMAL WASHNORMAL WASH
OFF
LIGHT WASH
RINSE
USE AIR DRYUSE AIR DRY
RINSE & HOLDRINSE & HOLD
DRY
POTS & PANSPOTS & PANS
NORMAL WASHNORMAL WASH
OFF
LIGHT WASH
RINSE
USE AIR DRYUSE AIR DRY
DRY
RINSE & HOLDRINSE & HOLD
POTS &
PANS
NORMAL
LIGHT
HEAT
DRY
AIR
DRY
Cycle control knob
Option selector
switch
Cycle control knobCycle selector
buttons
Option selector
buttons
Series 400 model
Series 800 and 806 models
Series 810 model
Series 840 model
PARTS AND FEATURES
6
Star ting Your Dishwasher
This section tells you how to start or stop your dishwasher. Refer to it for quick reference.
GROUNDING INSTRUCTIONS
• For a grounded, cord connected
dishwasher:
The dishwasher must be grounded. In
the event of a malfunction or breakdown,
grounding
will reduce the risk of
electric
shock by providing a path of least
resistance for electric current. The
dishwasher is equipped with a cord
having an equipment-grounding conductor and a grounding plug. The plug must
be plugged into an appropriate outlet that
is installed and grounded in accordance
with all local codes and ordinances.
WARNING – Improper connection of
the equipment-grounding conductor can
result in a risk of electric shock.
wWARNING
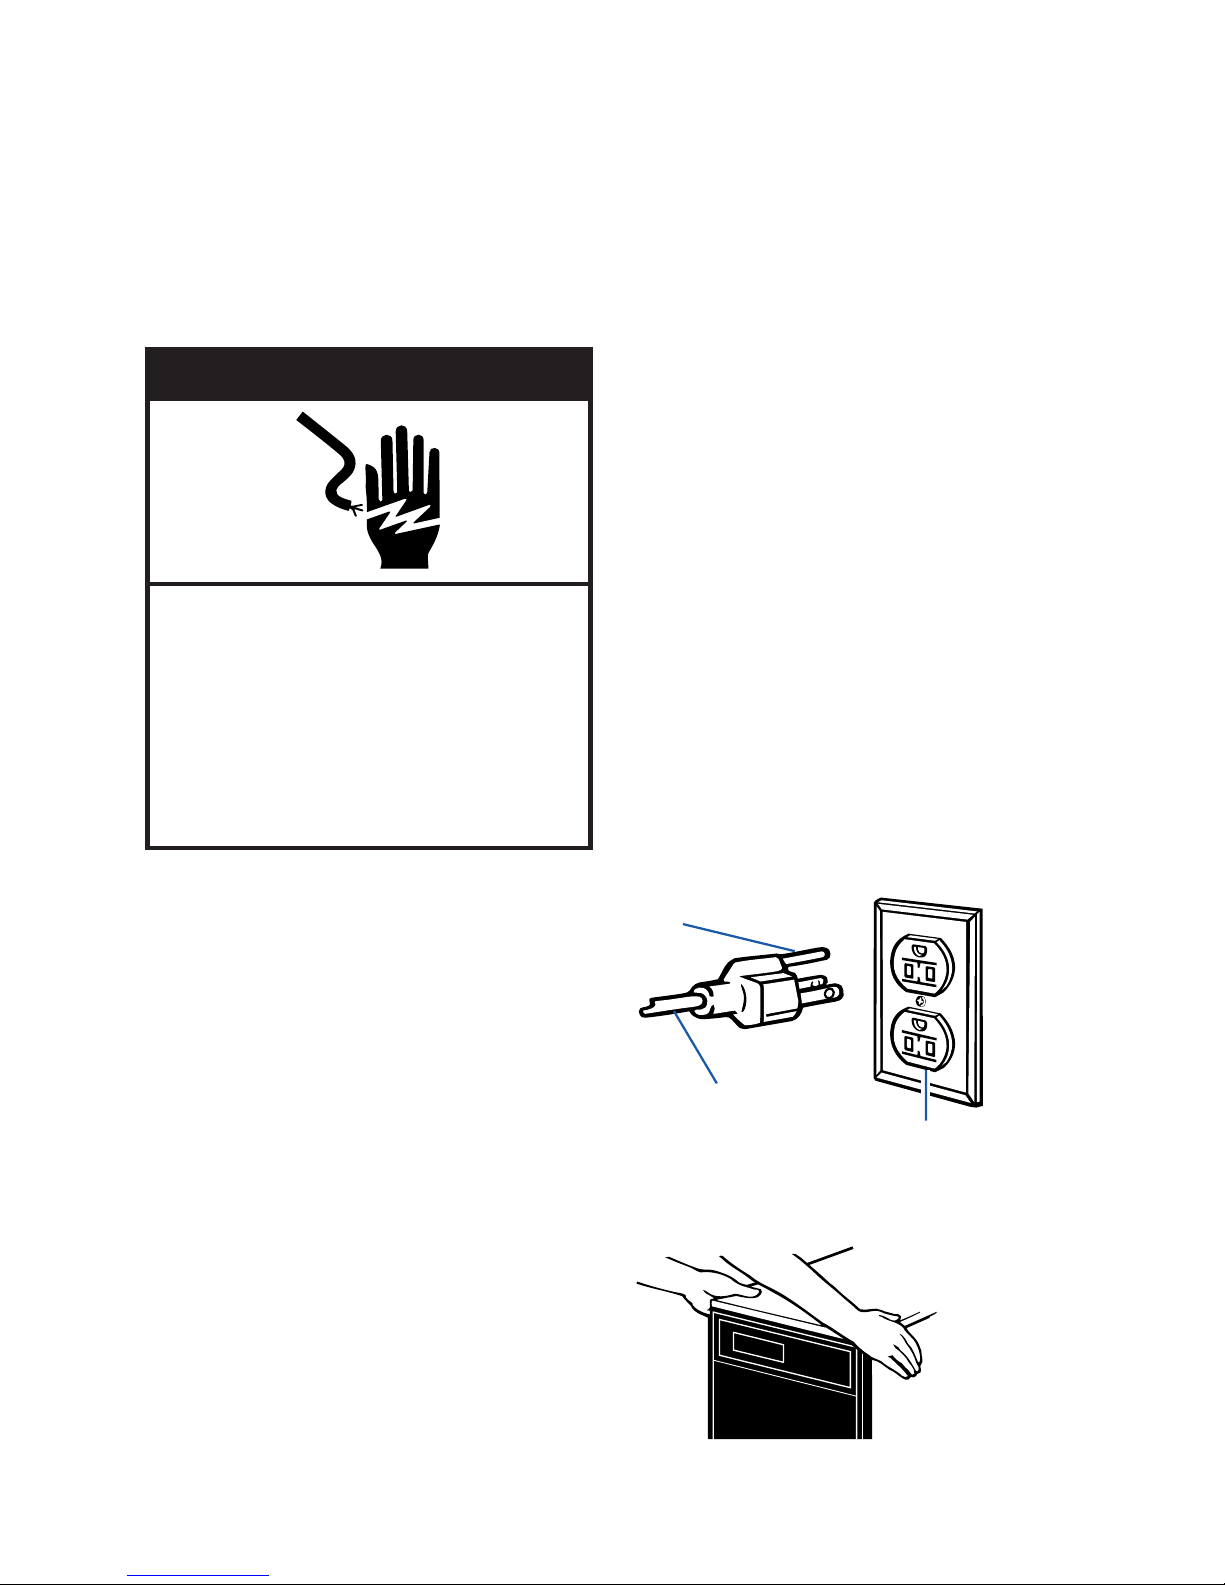
Electrical Shock Hazard
Electrically ground dishwasher.
Connect ground wire to green ground
connector in terminal box.
Do not use an extension cord.
Failure to do so can result in death,
fire, or electrical shock.
wWARNING
Tip Over Hazard
Do not use dishwasher until
completely installed.
Do not push down on open door.
Doing so can result in serious injury
or cuts.
Check with a qualified electrician or
service representative if you are in
doubt whether the dishwasher is
properly grounded. Do not modify the
plug provided with the dishwasher; if it
will not fit the outlet, have a proper
outlet installed by a qualified electrician.
• For a permanently connected
dishwasher:
The dishwasher must be connected to a
grounded metal, permanent wiring
system, or an equipment-grounding
conductor must be run with the circuit
conductors and connected to the
equipment-grounding terminal or lead
on the dishwasher.
– SAVE THESE INSTRUCTIONS –
7
STARTING YOUR DISHWASHER
1. Load the dishwasher. See the “Loading
Your Dishwasher” section.
2. Spin the spray arm. Itshould turn freely.
3. Add detergent. See the “Using the
Dispensers” section.
4. Add rinse agent, if needed.
5. Close door firmly until it latches.
Stopping the dishwasher
You can stop your dishwasher anytime
during a cycle. All you have to do is:
• Open the door slightly. Wait for any filling
or spraying action to stop before opening
the door all the way. Close the door to
continue the cycle.
OR
• Turn the Cycle Control Knob slowly
clockwise until you hear water draining.
Let the dishwasher drain completely. Then
open the door and turn the Cycle Control
Knob to Off.
6. Run hot water at the sink nearest the
dishwasher until water is hot.
Turn off water.
7. Select a drying option. (See the “Setting
the Controls” section.) For
models with buttons, the
indicator above the button
will show red when the option
has been selected. For
models with rocker switches, the switch
indicates which option has been selected.
NOTE: Select Air Dry for the Rinse &
Hold cycle. For Series 840
models, push a Cycle button
for the desired cycle. Normal
Wash, Light Wash, and Rinse
& Hold cycles share the same
button. The Cycle Control Knob determines which cycle operates.
8. Turn the Cycle Control Knob clockwise to
the desired cycle. You will
feel a definite “stop” at each
cycle mark. The dishwasher
automatically starts the cycle
you select.
NOTE: If the door is latched, you will hear
the cycles start and stop as the control
knob passes each cycle mark. This is
normal and does not hurt the dishwasher.
If you prefer, you can set the Cycle
Control Knob with the door unlatched.
8
Loading Your Dishwasher
This section tells how to properly load your dishwasher for best washing and rinsing results.
Preparing to load your dishwasher
• To save water and energy, do not rinse
dishes before putting them into the
dishwasher.
• Remove large pieces of food, bones, and
other hard items.
• Foods like eggs, rice, pasta, and cooked
cereals may be hard to remove if left to dry
over a period of time. Run a Rinse & Hold
cycle to keep dishes moist if you do not
plan to wash them soon.
• Load dishes so soiled surfaces face the
rotating spray arm.
• Load dishes so they are not stacked or
overlapping. It is important for the water
spray to reach all soiled surfaces for best
washing. For best drying, water must be
able to drain from all surfaces.
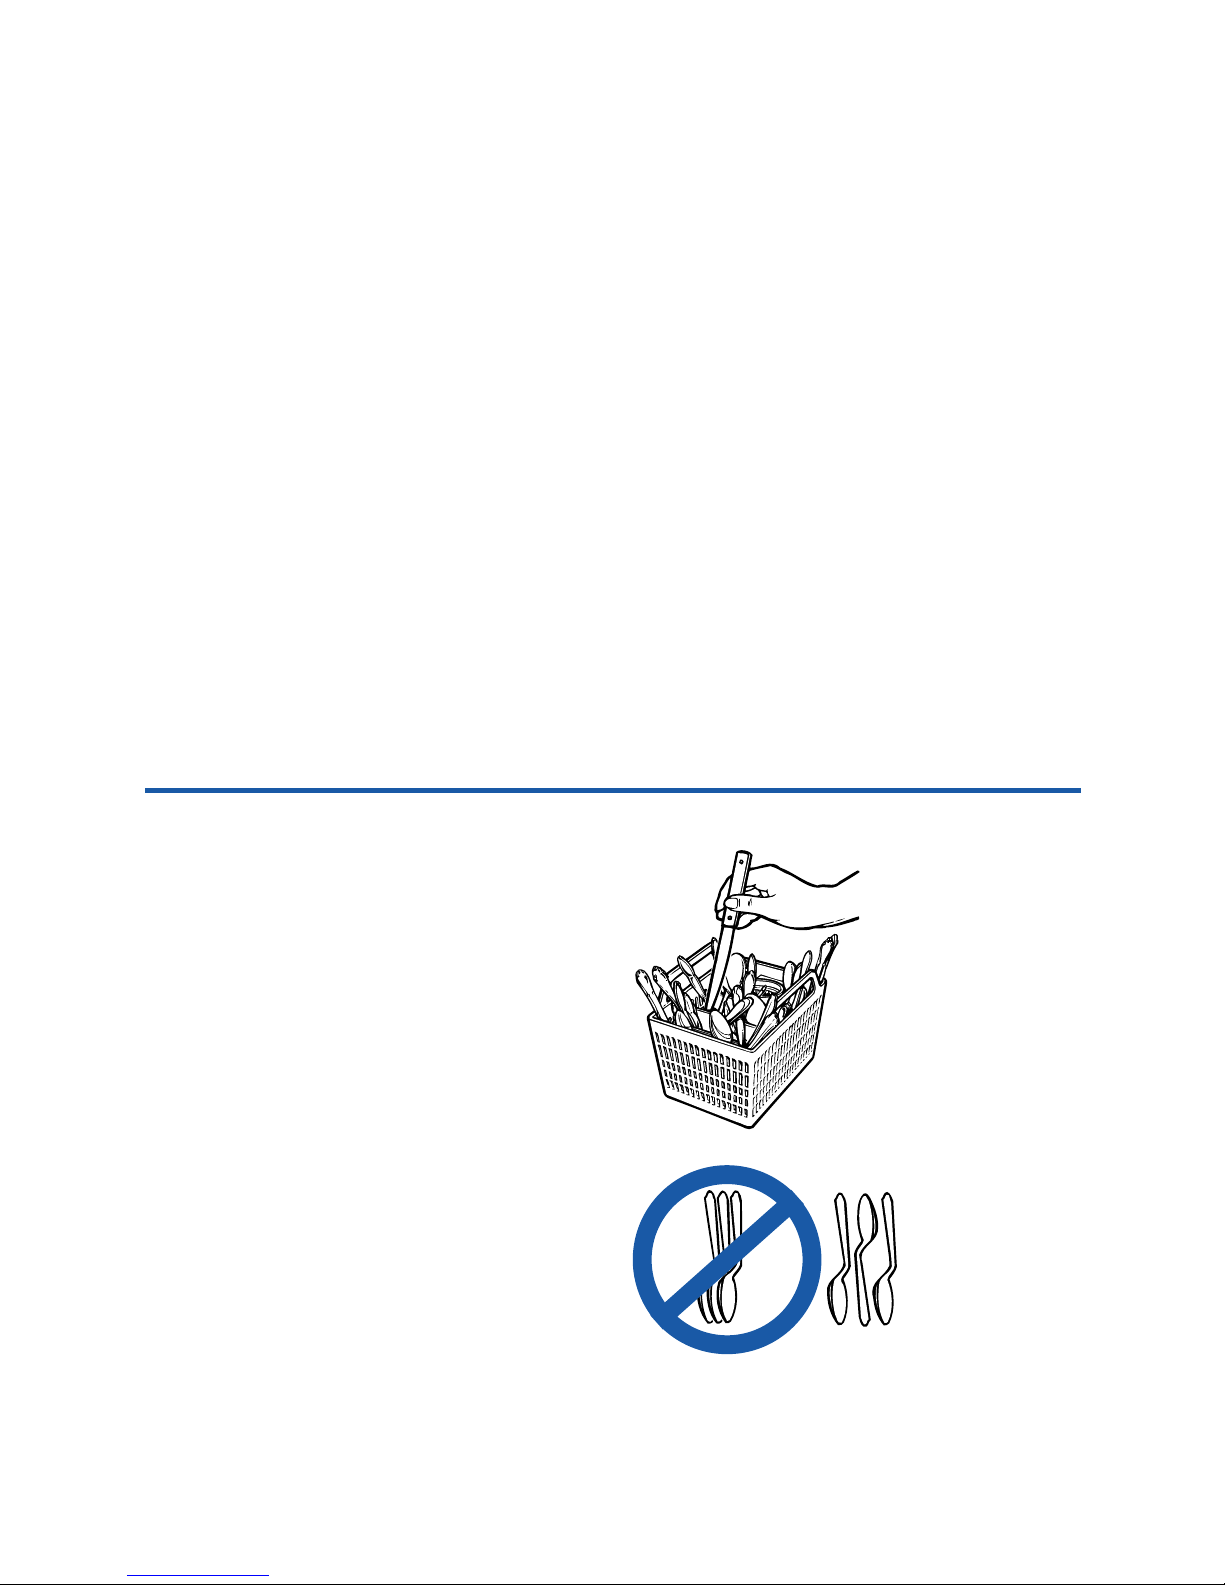
Loading the silverware basket
• Load the silverware basket while it is in the
bottom rack or take the basket out for
loading on a counter or table.
NOTE: The loaded basket must be placed
in the center front (over the spray tower) of
the bottom rack for proper washing.
• Mix items in each section of the basket
with some pointing up and some down
to avoid nesting. Spray cannot reach
nested items.
IMPORTANT: Always load sharp items
(knives, skewers, forks, etc.) pointing down.
• Put small items (baby bottle caps, jar lids,
etc.) in any section.
• You can also remove the basket for easy
unloading. Always unload or remove the
basket before unloading the racks to avoid
spilling water on the silverware.
Loading for quiet operation
• Secure lightweight load items in the racks.
• Pot lids and handles, pizza pans, cookie
sheets, etc., should not touch interior
walls, interfere with the spray arm’s
rotation, or cover the spray tower.
• Load dishes so they do not touch
one another.
NOTE: Keep sink drain plugs inserted
during dishwasher operation to prevent
noise transfer through drains.
9
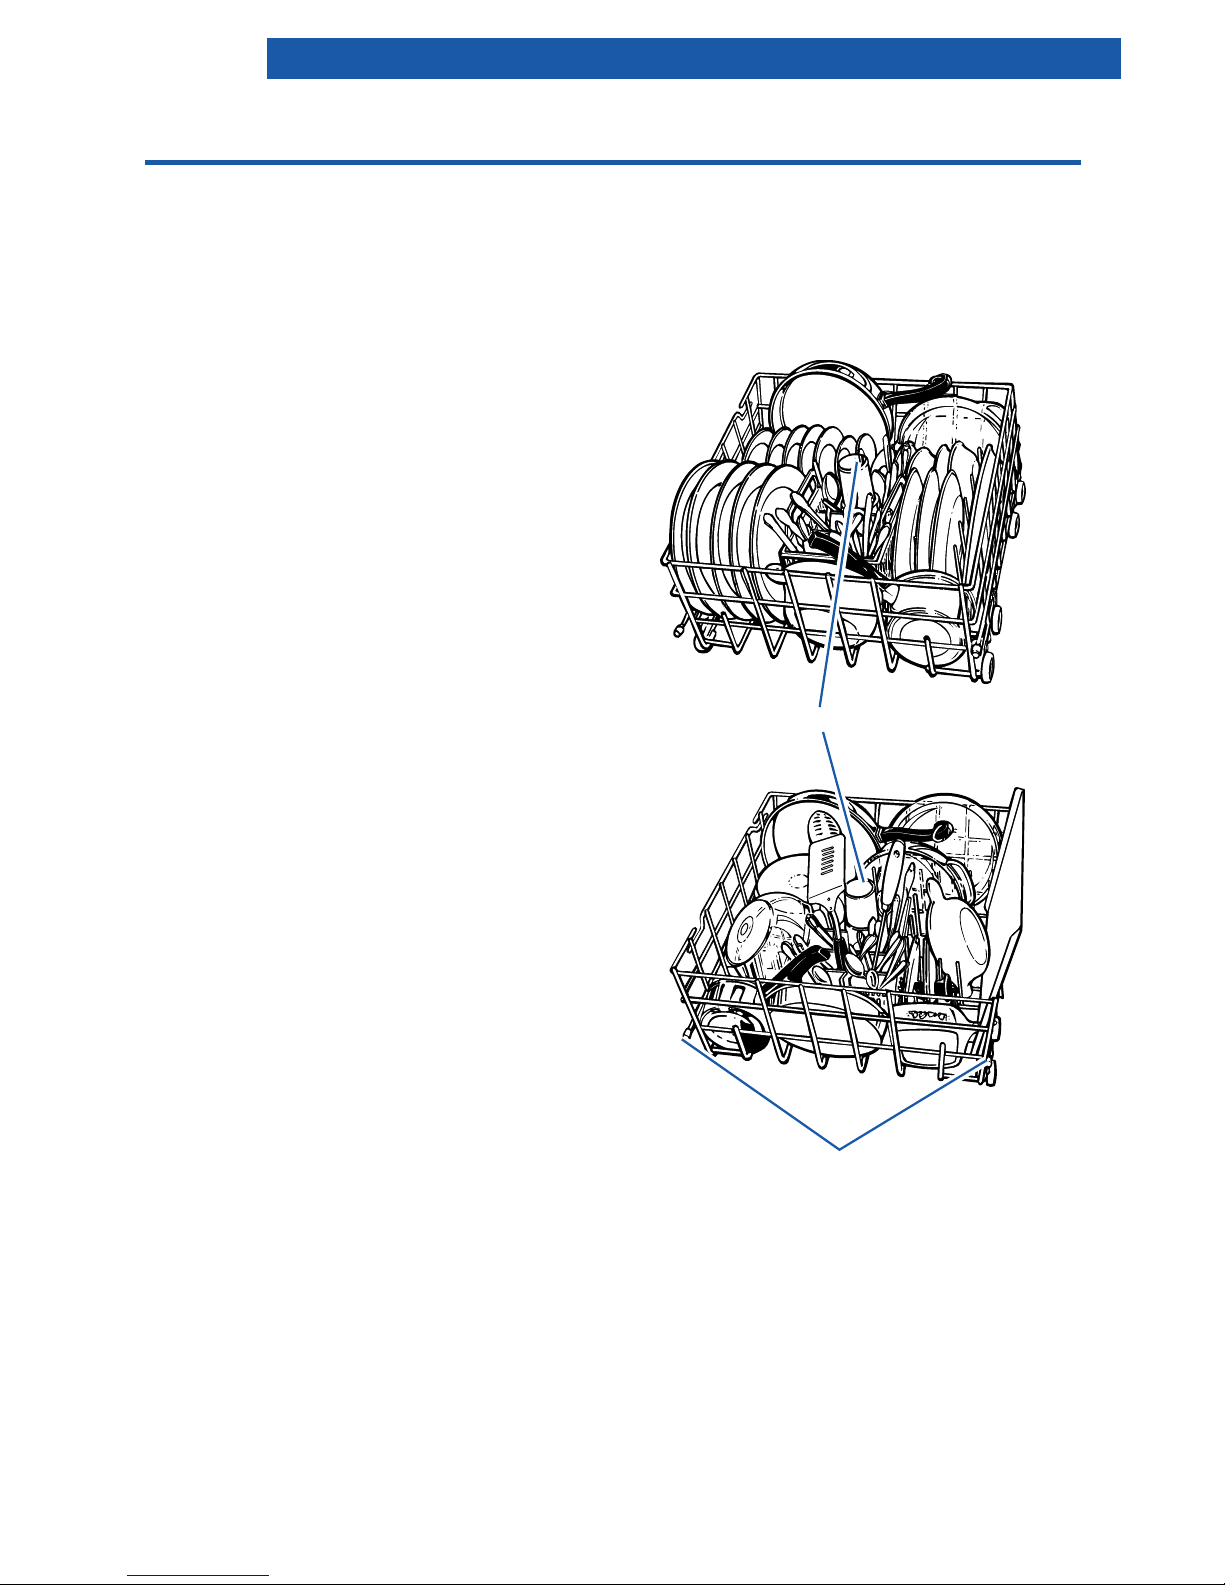
Loading the bottom rack
Load items with cooked-on or dried-on food
in the bottom rack, with soiled surfaces
facing inward to the spray.
Mixed load
• Load plates, soup bowls, etc., between
prongs and facing inward to the spray.
• Make sure pot handles and other items do
not stop rotation of the spray arm. Spray
arm must move freely.
• Load items so they do not block or cover
the spray tower.
• Load heavily soiled cookware face down
in rack.
• Do not stack or overlap dishes. Water
spray must reach all soiled surfaces for
best results.
Utensil load
• Load cookie sheets, cake pans, and other
large items at sides and back. Loading
such items in front may keep water spray
from reaching detergent dispenser and
silverware basket.
NOTES:
• Do not load glasses, cups, or plastic items
in the bottom rack.
• Do not load items between the bottom rack
and the dishwasher tub. This can block the
water inlet opening.
• If you have removed the bottom rack for
unloading or cleaning, replace it with
bumpers in front.
Do not cover spray tower
Mixed load
Utensil load
LOADING YOUR DISHWASHER
Bumpers must face dishwasher door
10
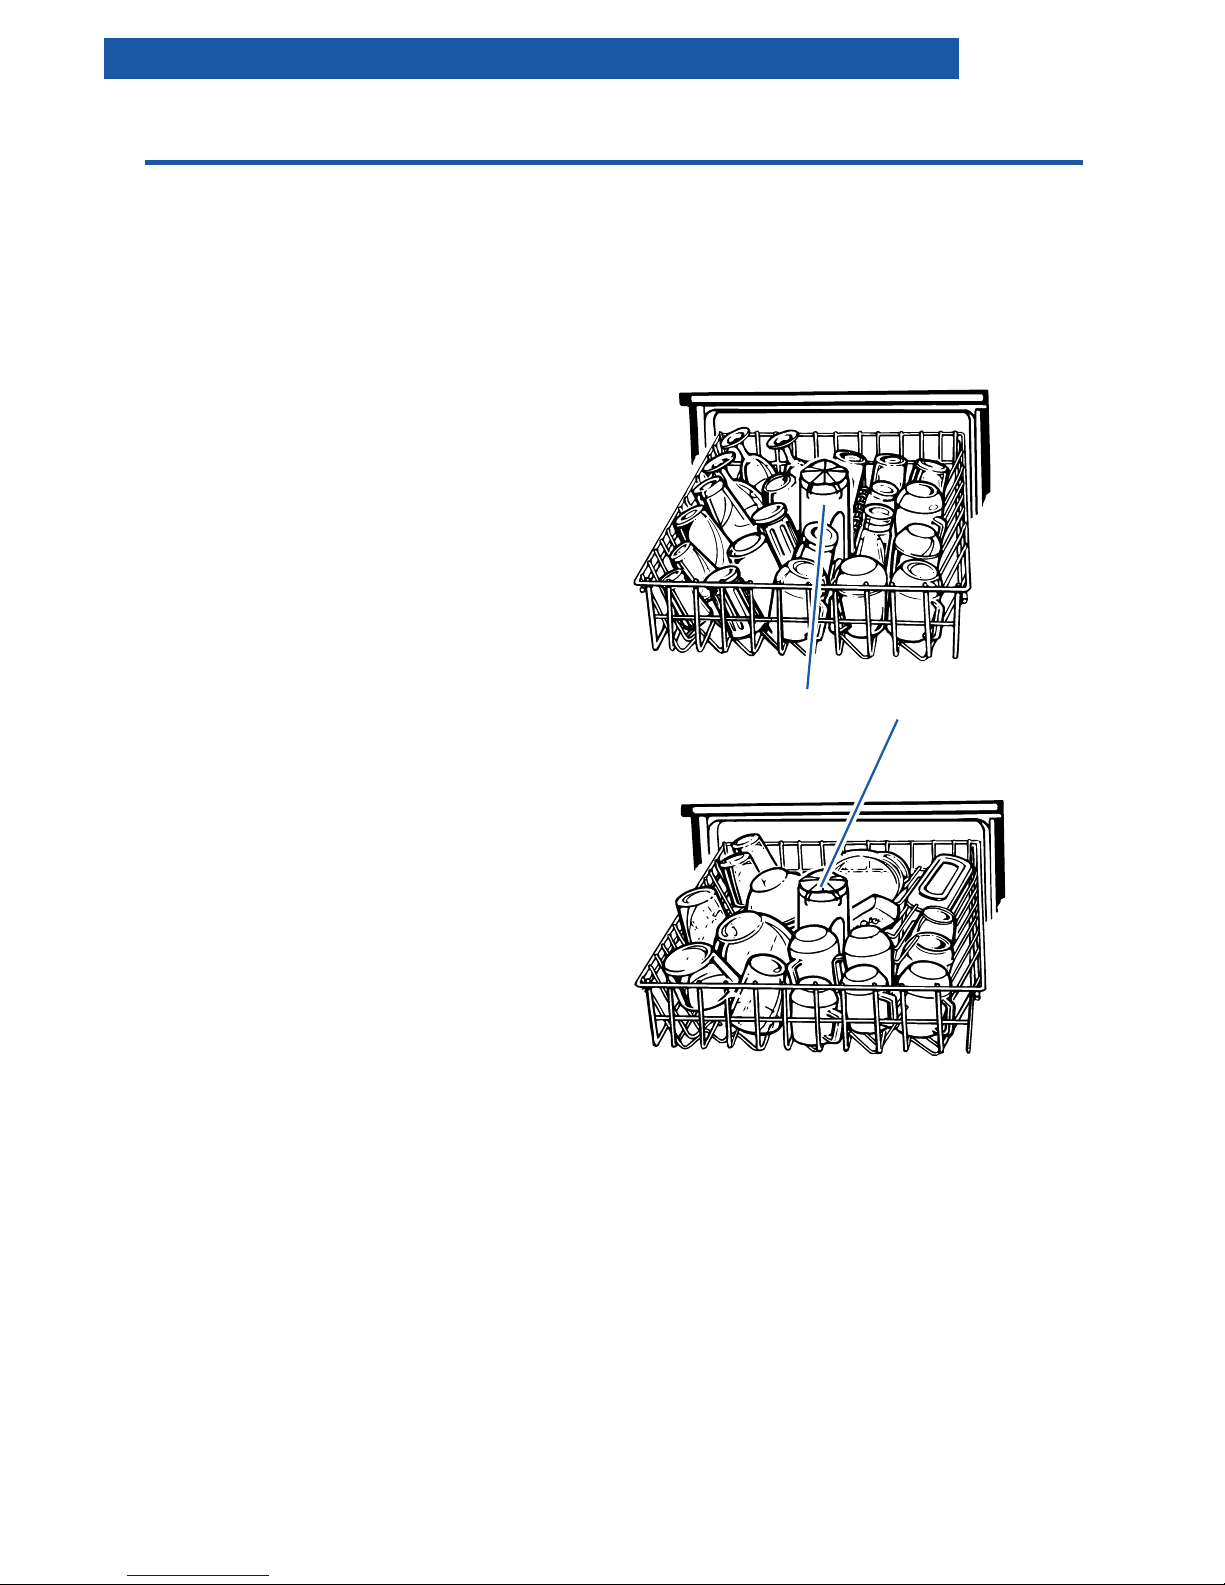
Loading the top rack
Load the top rack with cups, glasses, and
smaller items. Do not cover the third level
wash (on some models) when loading the
top rack.
Cup and glass load
• Load so open ends face down for cleaning
and draining.
• Load glasses in top rack only – bottom
rack is not designed for glasses. Damage
can occur.
• Place items in the rows between prongs.
Placing them over the prongs may lead
to breakage.
• Secure lightweight items.
• China, crystal, and other delicate items
must not touch each other during dishwasher operation. Damage may occur.
Mixed load
• Small bowls, pans, and other utensils can
be placed in the top rack.
• Load plastic items in the top rack only.
Plastic items may melt in the bottom rack.
• Wash only plastic items marked “dish-
washer safe.”
• Load plastic items so the force of the spray
does not move them during the cycle.
Cup and glass load
Mixed load
LOADING YOUR DISHWASHER
Do not cover third level wash
(on some models)
11
WHERE TO FILL
Top of
3rd step
(3 tbs)
Top of
2nd step
(2 tbs)
Top of
1st step
(1 tbs)
How much detergent to use
• The amount of detergent to use depends
on the hardness of your water and the type
of detergent. If you use too little, dishes
won’t be clean. If you use too much in soft
water, glassware will etch.
• Different brands of dishwasher detergent
have different amounts of phosphorus for
softening water. If you have hard water
and use low phosphorous content detergent (6.0% or less), you may need to use
more detergent or use a detergent with a
higher phosphorous content (8.7%).
• Find out your water’s hardness by asking
your local water department, water softener company, or county extension agent.
WATER TYPE
Hard
8+ grains per gallon
136+ parts per million
Medium
5-7 grains per gallon
85-119 parts per million
Soft
0-4 grains per gallon
0-68 parts per million
Fill amounts shown are for standard
powdered detergent. Amounts may vary if
you use liquid or concentrated powdered
detergent. Follow manufacturer’s directions
when using liquid dishwasher detergent or
concentrated powdered detergent.
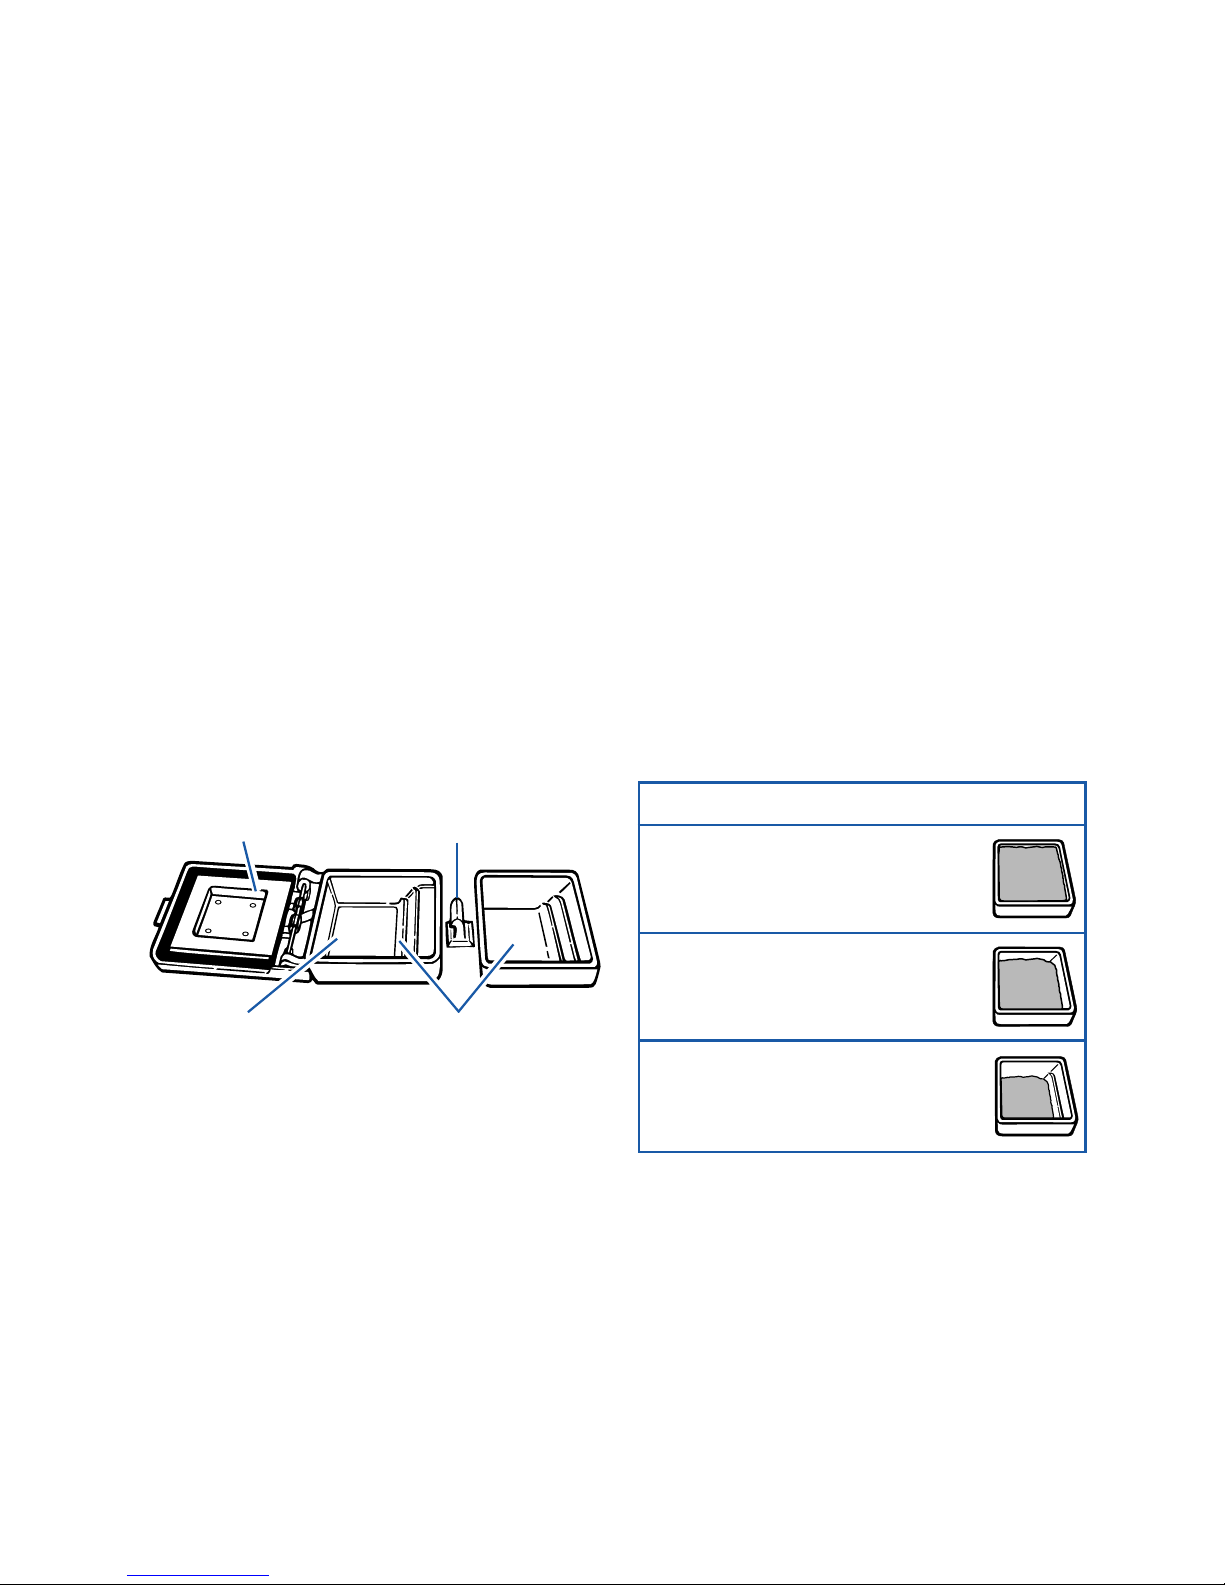
Cover LatchCover
Use only covered
section for:
– Light Wash
†
Use both sections for:
– Normal Wash
– Pots & Pans
†
†
Cycle on some models only.
Using the Dispensers
For best washing results, review the information below. It is important to use detergents and
rinse agents properly.
Using the detergent dispenser
• Use automatic dishwashing detergent
only. Other detergents are too mild and
much too sudsy.
• Add detergent just before starting cycle.
• Store detergent tightly closed in a cool, dry
place. Fresh automatic dishwasher
detergent results in better cleaning.
Filling the detergent dispenser
The detergent dispenser has one section
with a cover and one without. Push cover
down firmly until it latches. Detergent in the
open section falls into the dishwasher when
closing the door. The covered section opens
automatically for the main wash.
NOTE: It is normal for the cover to open
partially when dispensing detergent.
12
Using the rinse agent dispenser
Keep the rinse agent dispenser filled with a
liquid rinse agent. A rinse agent greatly
improves dish drying by helping water
flow off during the last rinse. A rinse
agent also keeps water from forming
droplets and drying as spots or streaks.
A small amount of rinse agent automatically releases into the rinse water during the
final rinse of each cycle. For best drying
results, check dispenser periodically to
see if it needs filling.
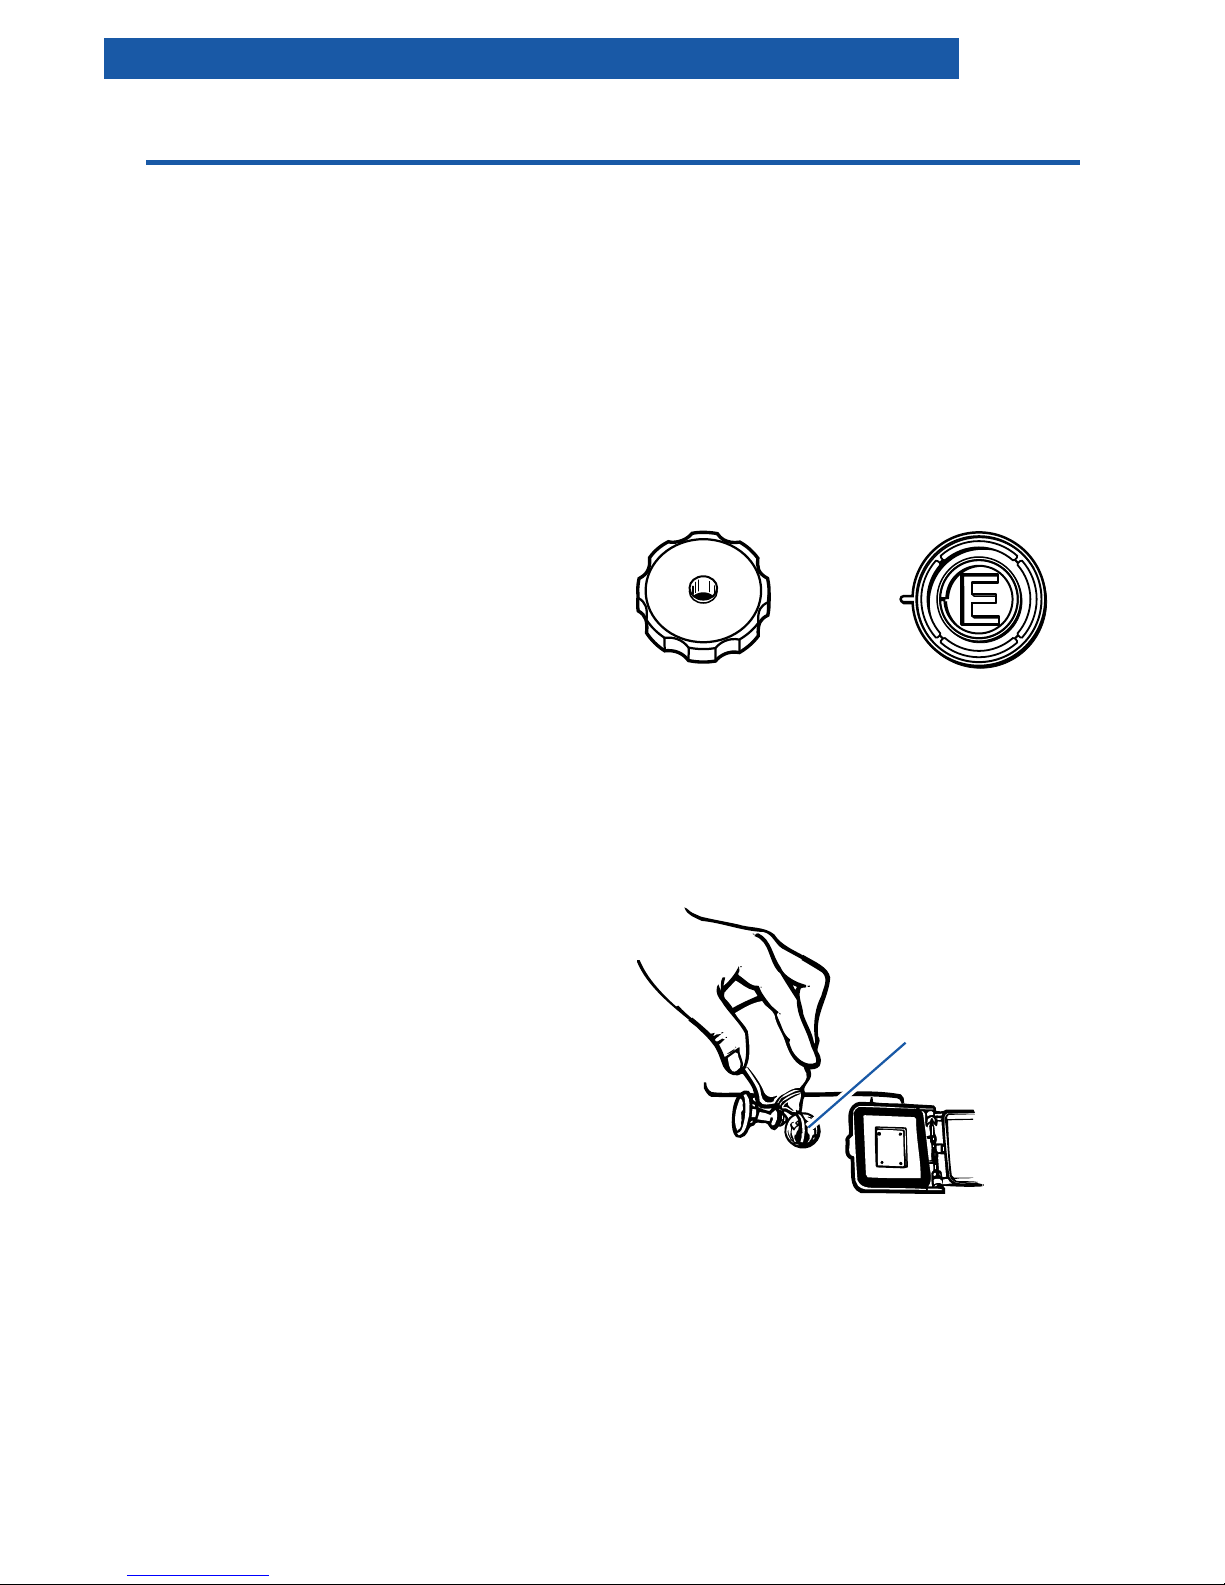
To check dispenser:
• Check center of Fill Indicator Cap. Clear
means it needs filling.
OR
• Remove Fill Indicator Cap. An “E” is visible
when dispenser is empty.
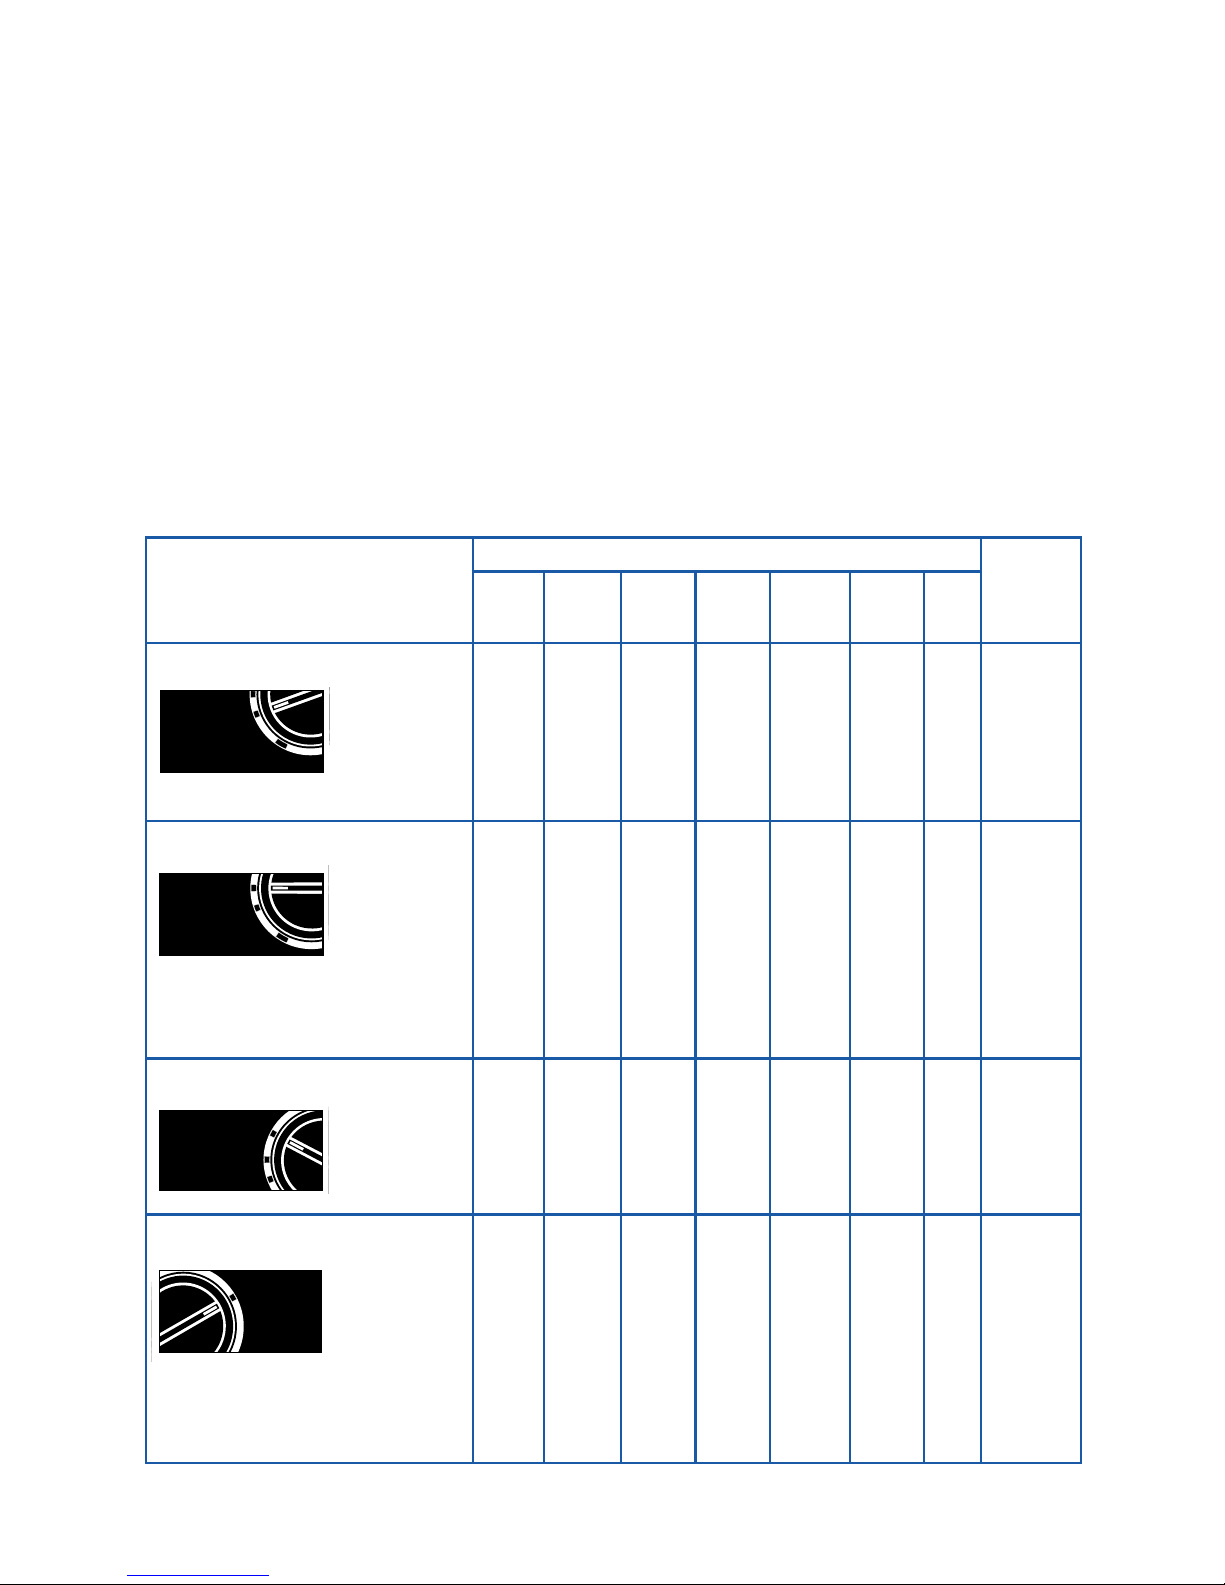
To fill dispenser:
The rinse agent dispenser holds 6 ounces
(175 mL). Under normal conditions, this
lasts about 3 months.
1. Open dishwasher door completely.
2. Remove Fill Indicator Cap.
3. Add rinse agent. Fill to smallest opening
in lower part of dispenser only. Overfilling
may cause rinse agent to leak out. This
will not harm the dishwasher, but could
cause oversudsing.
4. Clean up any spilled rinse agent with
a damp cloth.
5. Replace Fill Indicator Cap. Keep it
closed tightly.
NOTE: You do not have to wait until the
dispenser is empty before refilling, but do
not overfill it. Your dishwasher is designed
to use a liquid rinse agent. You do not need
to use a solid or bar-type rinse agent.
USING THE DISPENSERS
“E” visible
when empty
R
I
N
S
E
A
I
D
I
N
D
I
C
A
T
O
R
OR
Cap center clear
when empty
Do not fill past
smallest opening
Keep dispenser filled for best drying results
13
POTS & PANS
Double
wash for
maximum
cleaning of
cooked-on or baked-on foods.
NORMAL WASH
Double
wash for
normal,
everyday
soiled loads. (The Energy
Guide label is based on this
cycle.)
LIGHT WASH
Single wash
for prerinsed
or lightly
soiled loads.
RINSE & HOLD
For rinsing a
few items to
be washed
one or more
days later.
• Do not use detergent.
• Use Air Dry option.
FINAL
RINSE
MAIN
WASH
A “•” shows what each cycle includes
RINSERINSE
CYCLE
TIME
(Minutes)RINSE
••
••
90
†
••
•
• 98
†
••
85
†
••••
•
•• 20
•
•
DRY
POTS & PANS
OFF
DRY
NORMAL WASH
OFF
LIGHT WASH
USE AIR DRY
RINSE & HOLD
CYCLE WASH
Setting the Controls
Operating your dishwasher’s controls properly helps you obtain the best possible washing
results. This section tells you how to select wash cycles and options.
Selecting a wash cycle
For Series 400, 800, 806, and 810 models:
Turn Cycle Control Knob to desired cycle.
For Series 840 model:
Press a cycle button, then turn the Cycle
Control Knob to desired cycle. Normal
Wash, Light Wash, and Rinse & Hold all
share the same cycle pad.
•
†
Cycle time includes dry time.
NOTE: Your model may have all or some of
the cycles shown.
14
Canceling a cycle
You can cancel a cycle at any time.
1. Turn the Cycle Control Knob slowly
clockwise until you hear water draining.
Let the dishwasher drain completely.
2. Open the door.
3. Turn the Cycle Control Knob to Off.
Selecting cycle options
You can select a drying option after the
dishwasher starts as long as the Cycle
Control Knob has not reached Dry.
Heat Dry option
If the Heat Dry option is selected, air in the
dishwasher is heated during the “dry” part
of the cycle. For best results, use a liquid
rinse agent.
Air Dry option
When Air Dry is selected, the air in the
dishwasher is not heated during the “dry”
portion of a cycle. Using Air Dry helps save
energy, but dishes take longer to dry and
some spotting can occur. Some items (such
as plastics) may need towel drying. For best
drying, use a liquid rinse agent.
NOTE: You must choose either Air Dry or
Heat Dry for each wash cycle. Select Air Dry
when using the Rinse & Hold cycle (Series
800, 806, 810, and 840 models).
Series 840
model
ENERGY SAVING
DRY SELECTOR
HEAT DRY
AIR DRY
OR
HEAT
DRY
Series 400, 800,
806, and 810
models
AIR
DRY
Series 400,
800, 806, and
810 models
ENERGY SAVING
DRY SELECTOR
HEAT DRY
AIR DRY
Series 840
model
SETTING THE CONTROLS
OR

15
Changing a cycle setting
(on some models)
You can change a cycle setting anytime
during any cycle.
1. Lift up the door latch to stop the cycle.
2. Turn the Cycle Control Knob clockwise to
the desired cycle.
3. Check the detergent dispensers. They
must be filled properly for the new cycle.
NOTE: Turning the Cycle Control Knob
can cause the covered section of the
detergent dispenser to open and release
the detergent. Check the covered
section if setting Normal Wash or Pots &
Pans cycle.
4. Close the door firmly until it latches. The
dishwasher starts the new cycle.
Adding an item during a cycle
(on some models)
You can add an item to the dishwasher
anytime before the Cycle Control Knob
reaches Light Wash. Items added after the
Cycle Control Knob reaches Light Wash will
only be rinsed.
1. Lift up the door latch to stop the cycle.
Wait for spraying action to stop before
opening the door.
2. Open the door and add the item.
3. Close the door, but do not latch it. Wait
30 seconds for the air in the dishwasher
to warm up. Doing so reduces the amount
of moisture in the vent when restarting
a cycle.
4. Close the door firmly until it latches. The
dishwasher resumes the cycle.
SETTING THE CONTROLS

16
Washing Special Items
If you have any doubts about washing a particular piece of dishware, check with the manufacturer to see if it is dishwasher safe.
MATERIAL
Aluminum
Bottles
and Cans
Cast Iron
China/
Stoneware
Crystal
Gold
Glass
HollowHandle
Knives
Pewter
Disposable
Plastics
Plastics
Stainless
Steel
Sterling
Silver or
Silver Plate
Tin
Wooden
Ware
DISHWASHER SAFE?
Yes
No
No
Yes
Yes
No
Yes
No
No
No
Yes
Yes
Yes
No
No
EXCEPTIONS/SPECIAL INFORMATION
High water temperature and detergents can pit
finish of anodized aluminum.
Wash bottles and cans by hand. Labels attached
with glue can loosen in your dishwasher. Loose
labels and glue can clog spray arm or the pump
and will reduce washing performance.
Seasoning will be removed and iron will rust.
Always check manufacturer’s recommendations
before washing. Antique, hand-painted, or overthe-glaze patterns may fade. Gold leaf can
discolor or fade.
Always check manufacturer’s recommendations
before washing. Some types of leaded crystal can
etch with repeated washings.
Gold-colored flatware will discolor.
Milk glass will yellow with repeated dishwasher
washing.
Handles of some knives are attached to the blade
with adhesives which may loosen if washed in the
dishwasher.
High water temperatures and detergent can
discolor or pit finish.
Cannot withstand high water temperatures
and detergents.
Always check manufacturer’s recommendations
before washing. Plastics vary in their capacity to
withstand high water temperatures and detergents. Load plastics in top rack only.
Run the Rinse & Hold cycle if not washing
immediately. Prolonged contact with food containing salt, vinegar, milk products, or fruit juice can
damage finish.
Run the Rinse & Hold cycle if not washing
immediately. Prolonged contact with food containing salt, acid, or sulfide (eggs, mayonnaise, and
seafood) can damage finish.
Can rust.
Always check manufacturer’s recommendations
before washing. Untreated wood can warp, crack,
or lose its finish.
17
Connecting a Portable
Dishwasher
Electrical connection
A power supply of 120 volts, 60Hz AC, 15 or
20 amps, is required. For your personal
safety, this appliance must be grounded. This
appliance is equipped with a power supply
cord having a 3-prong grounding plug. To
minimize possible shock hazard it must be
plugged into a mating 3-prong grounding type
wall receptacle, grounded in accordance with
the National Electrical Code and local codes
and ordinances. If a mating wall receptacle is
not available, it is the responsibility and
obligation of the customer to have a properly
grounded 3-prong wall receptacle installed by
a qualified electrician.
NOTE: A special adapter must be installed
on the faucet before the dishwasher can be
connected. Complete instructions and the
adapter are packed with your dishwasher.
When moving your dishwasher make sure
the door is latched. Hold the dishwasher at
the top front corners.
Power supply
cord
3-prong grounding
type wall receptacle
3-prong
grounding
plug
wWARNING
Electrical Shock Hazard
Plug into a grounded 3 prong outlet.
Do not remove ground prong.
Do not use an adapter.
Do not use an extension cord.
Failure to follow these instructions
can result in death, fire, or
electrical shock.
18
Connecting the dishwasher
1. Run water at faucet until it is hot. Turn
water off.
2. Pull hoses out of their storage compart-
ment on the back of the dishwasher.
NOTE: Make sure the hoses are not
kinked or twisted. Kinked hoses reduce
washing performance.
3. Pull down on the locking collar while
lifting the hose connector onto the faucet
adapter.
4. When the connector snaps into place,
release the locking collar.
5. Turn the hot water on slowly until it is
all the way on.
6. Plug in power supply cord.
7. See the “Starting Your Dishwasher”
section for instructions on how to start
the dishwasher.
Drawing water when dishwasher is
connected
You can draw water from the faucet while
the dishwasher is connected. Do not draw
water while the dishwasher is filling or while
water is being pumped out. (This helps
prevent a low fill when dishwasher is filling
or mixing drain water with fresh water.)
• Press the red button on the hose connec-
tor to draw water from faucet. (The faucet
is set on hot. Adjust faucet for the water
temperature you want.)
NOTE: Turn hot water back on after you
draw water from faucet. Turn off cold water.
CONNECTING A PORTABLE DISHWASHER
Locking collar
Hose connector
19
CONNECTING A PORTABLE DISHWASHER
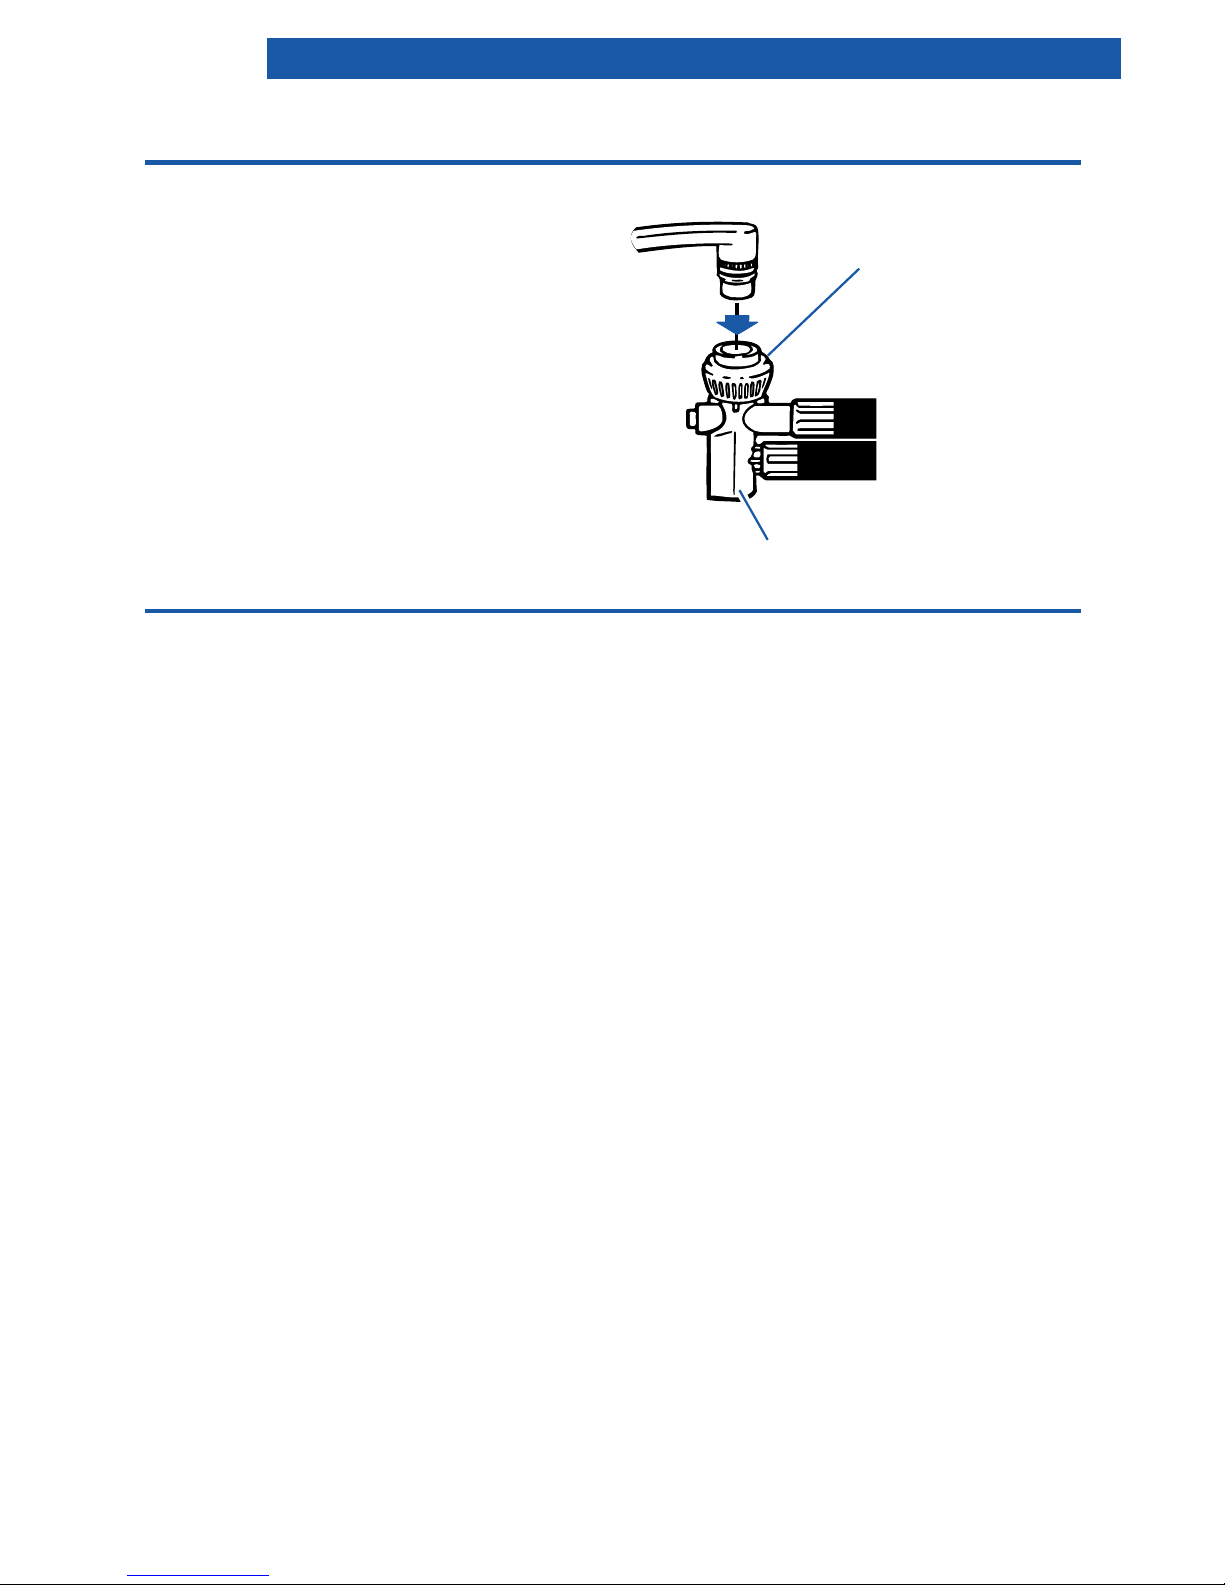
Disconnecting the dishwasher
1. Turn hot water off. (This can be done
after the last rinse.)
2. Press the red button on the connector to
release the water pressure.
3. Lift slightly on the hose connector while
pulling down the locking collar. Pull down
on the connector.
4. Empty any remaining water from the
connector by turning the connector
upside down.
5. Unplug power supply cord and return to
storage compartment.
6. Return hoses to storage compartment.
Locking collar
Hose connector
Converting a portable dishwasher
to a built-in
Your WHIRLPOOL* Portable Dishwasher
can be converted to a built-in (undercounter)
model by using conversion kit No. 4317856.
The kit is available at your Whirlpool dealer
or authorized Whirlpool service company.
Instructions are included with the kit.

20
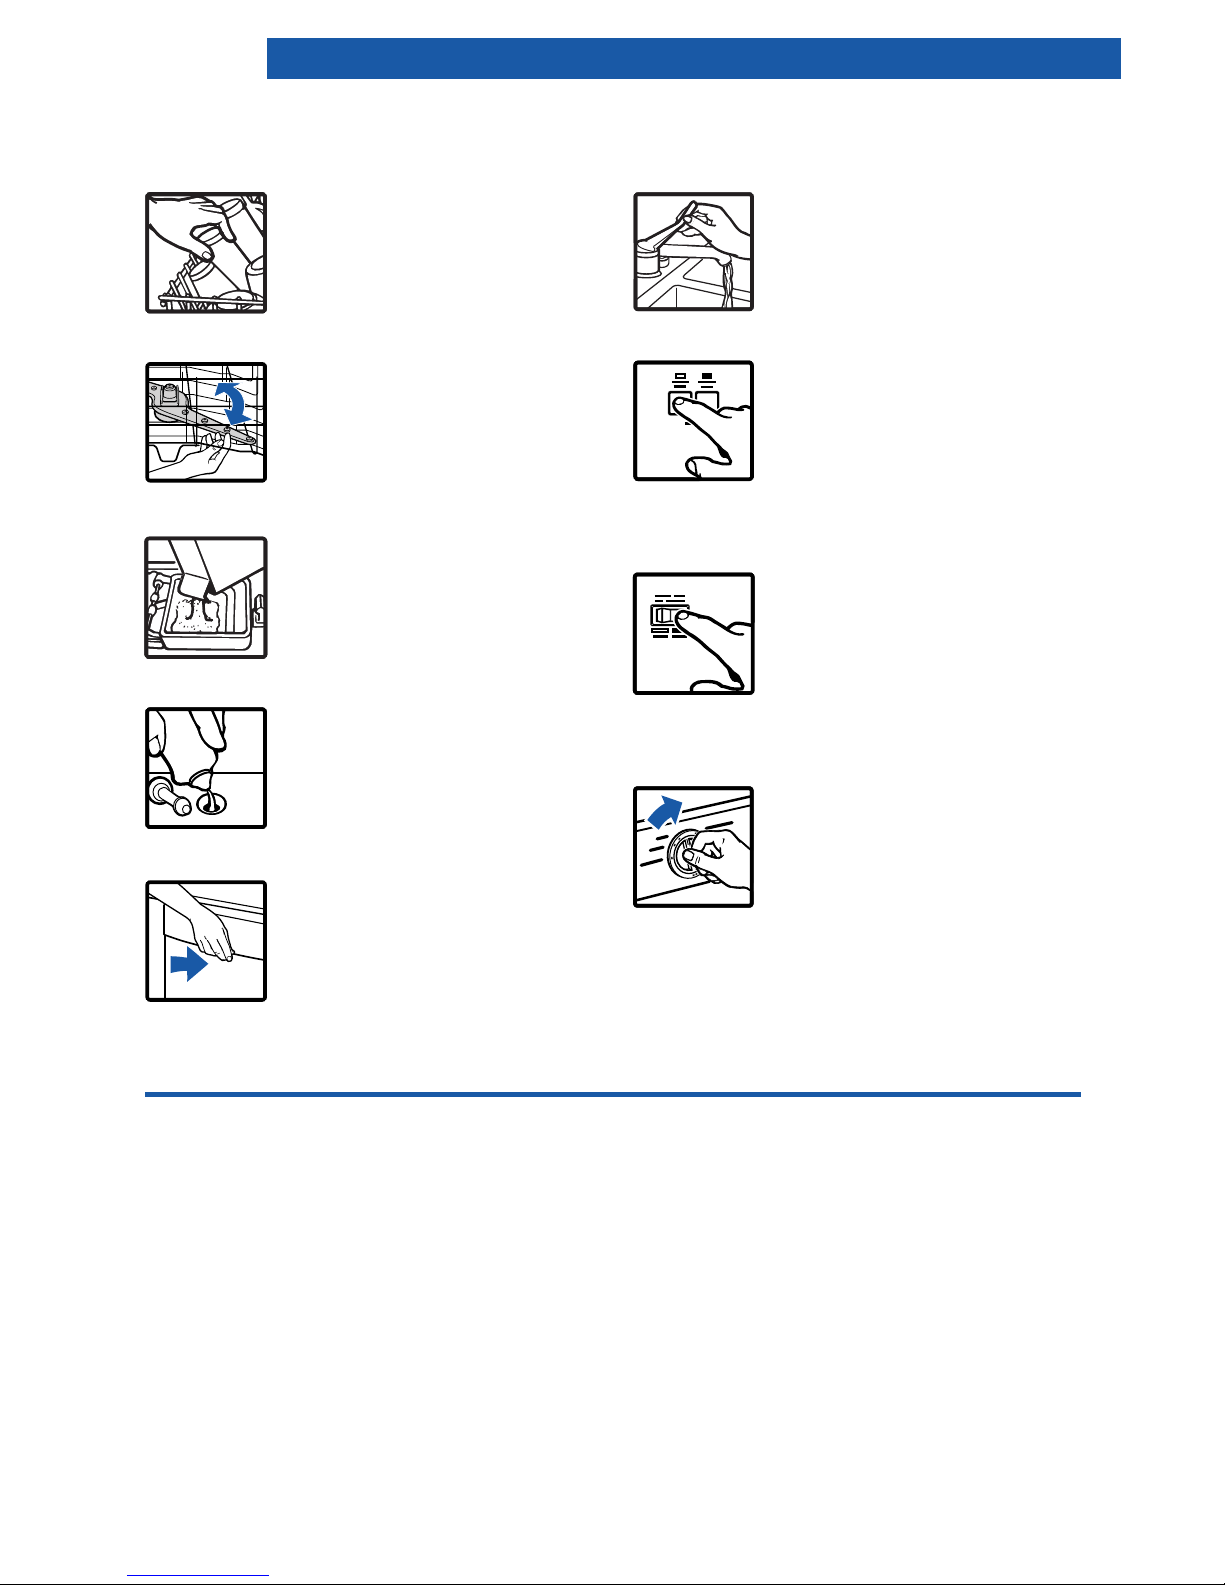
Caring for Your Dishwasher
Your new dishwasher is designed to give you many years of dependable service. There
are a few things you can do to maintain your dishwasher properly. This section tells you how
to clean and care for your dishwasher. Refer to the “Solving Common Dishwasher Problems”
section for special cleaning problems. See Installation Instructions for information on storing
your dishwasher and for cleaning the drain air gap.
Caring for simulated wood top
(on portable models)
The simulated wood top can be used as a
utility work surface for most kitchen jobs. It is
stronger and more easily cleaned than genuine wood. The top can be used as a cutting
board. Knife marks will be visible, but will not
seriously damage top. Hot items from the
oven can be placed on the top. Clean top
with warm, soapy water. For dried-on foods,
use a scouring pad.
Cleaning the exterior
In most cases, regular use of a soft, damp
cloth or sponge and a mild detergent is all
that is necessary to keep the outside of your
dishwasher nice looking and clean.
21
Cleaning the interior
Hard water minerals may cause a white film
to build up on the inside surfaces, especially
just beneath the door area.
To clean interior:
• Apply powdered dishwasher detergent to a
damp sponge to make a paste.
OR
• Use liquid automatic dishwasher detergent
and clean with damp sponge.
Do not clean the dishwasher interior until it
has cooled.
Wear rubber gloves. Do not use any type of
cleanser other than dishwasher detergent
because it can cause foaming or sudsing.
NOTE: See “Removing spots and film” in the
“Solving Common Dishwashing Problems”
section to clean your dishwasher with white
vinegar. Remember, this procedure is
intended for occasional use only. Vinegar is
an acid. Excessive use can damage your
dishwasher.
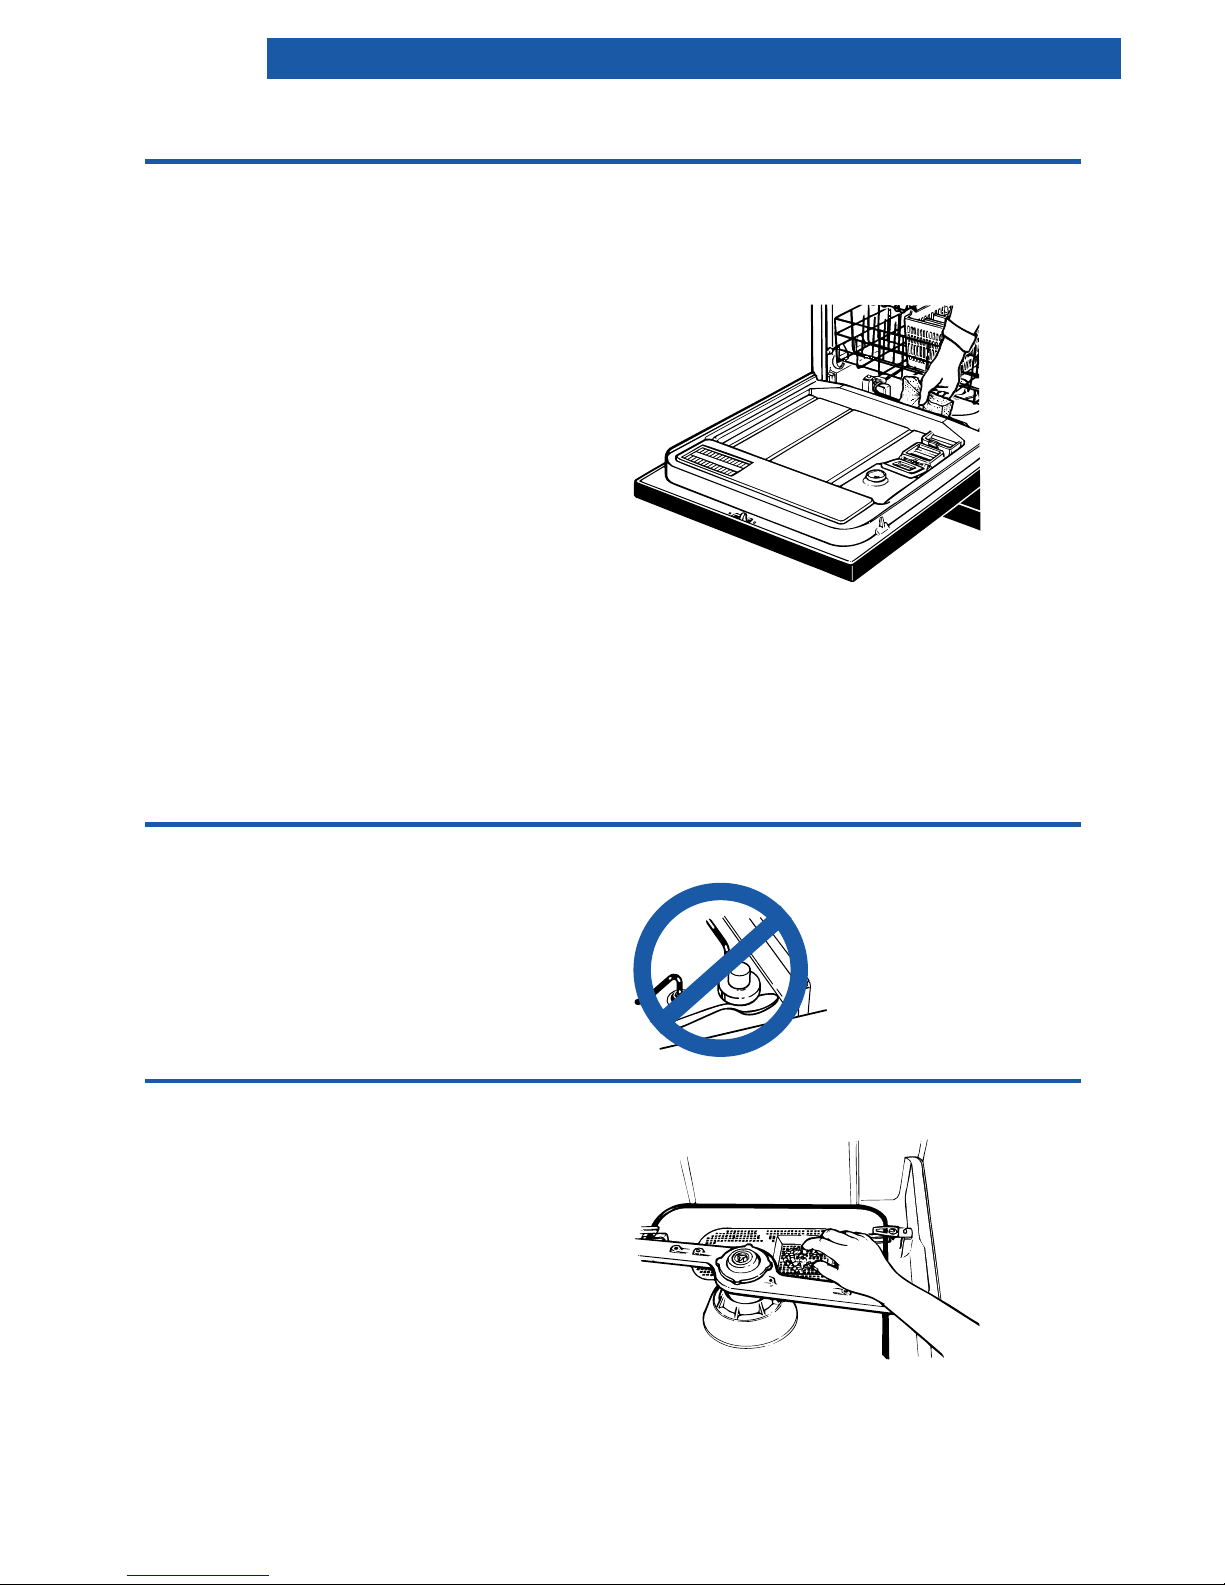
Overfill protector
The overfill protector (in the front right corner
of the dishwasher tub) keeps the dishwasher
from overfilling. It must be in place for the
dishwasher to operate.
Check under the float for objects that may
keep the protector from moving up or down.
Cleaning the filter screen
The filter system requires periodic cleaning
as needed. To clean screen:
1. Unload and slide the bottom rack forward.
(Remove bottom rack if necessary to
reach filter screen.)
2. Remove collected particles from the
screen with your fingers or paper towel.
3. Return the bottom rack to original position.
CARING FOR YOUR DISHWASHER
 Loading...