

Whirlpool RS6300XKW0, RS6300XKW1, RS6300XKW2, RS6300XKW3 Owner’s Manual

tlse
30-1NCH SET-INCONTINUOUS-CLEANING
ELECTRICRANGE
Models RS6300XK;
RS630PXK
Oven Vent
Surface Unit
Control Panel
One-Piece
Chrome Reflector
Bowl
Piug-ln
Surface Unit
Monuo_ Oven
Light Switch
Model anti Serial
Number Plate
Sillcone
Fall Liner
Copy Your Model and Serial Numbers Here
If you need service, or call with a question, have this
information ready Model Number
Oven Control
Panel
Automatic Oven
Light Switch
Broil Element
Oven Rack
Guide
Bake Element
Air-Flow
Oven Door
1 Complete Model and Serial Numbers [from the plate
just behind the oven door}.
2. Purchase date from your sales slip
Copy this information in these spaces. Keep this book,
your warranty and the sales slip together in a handy
place,
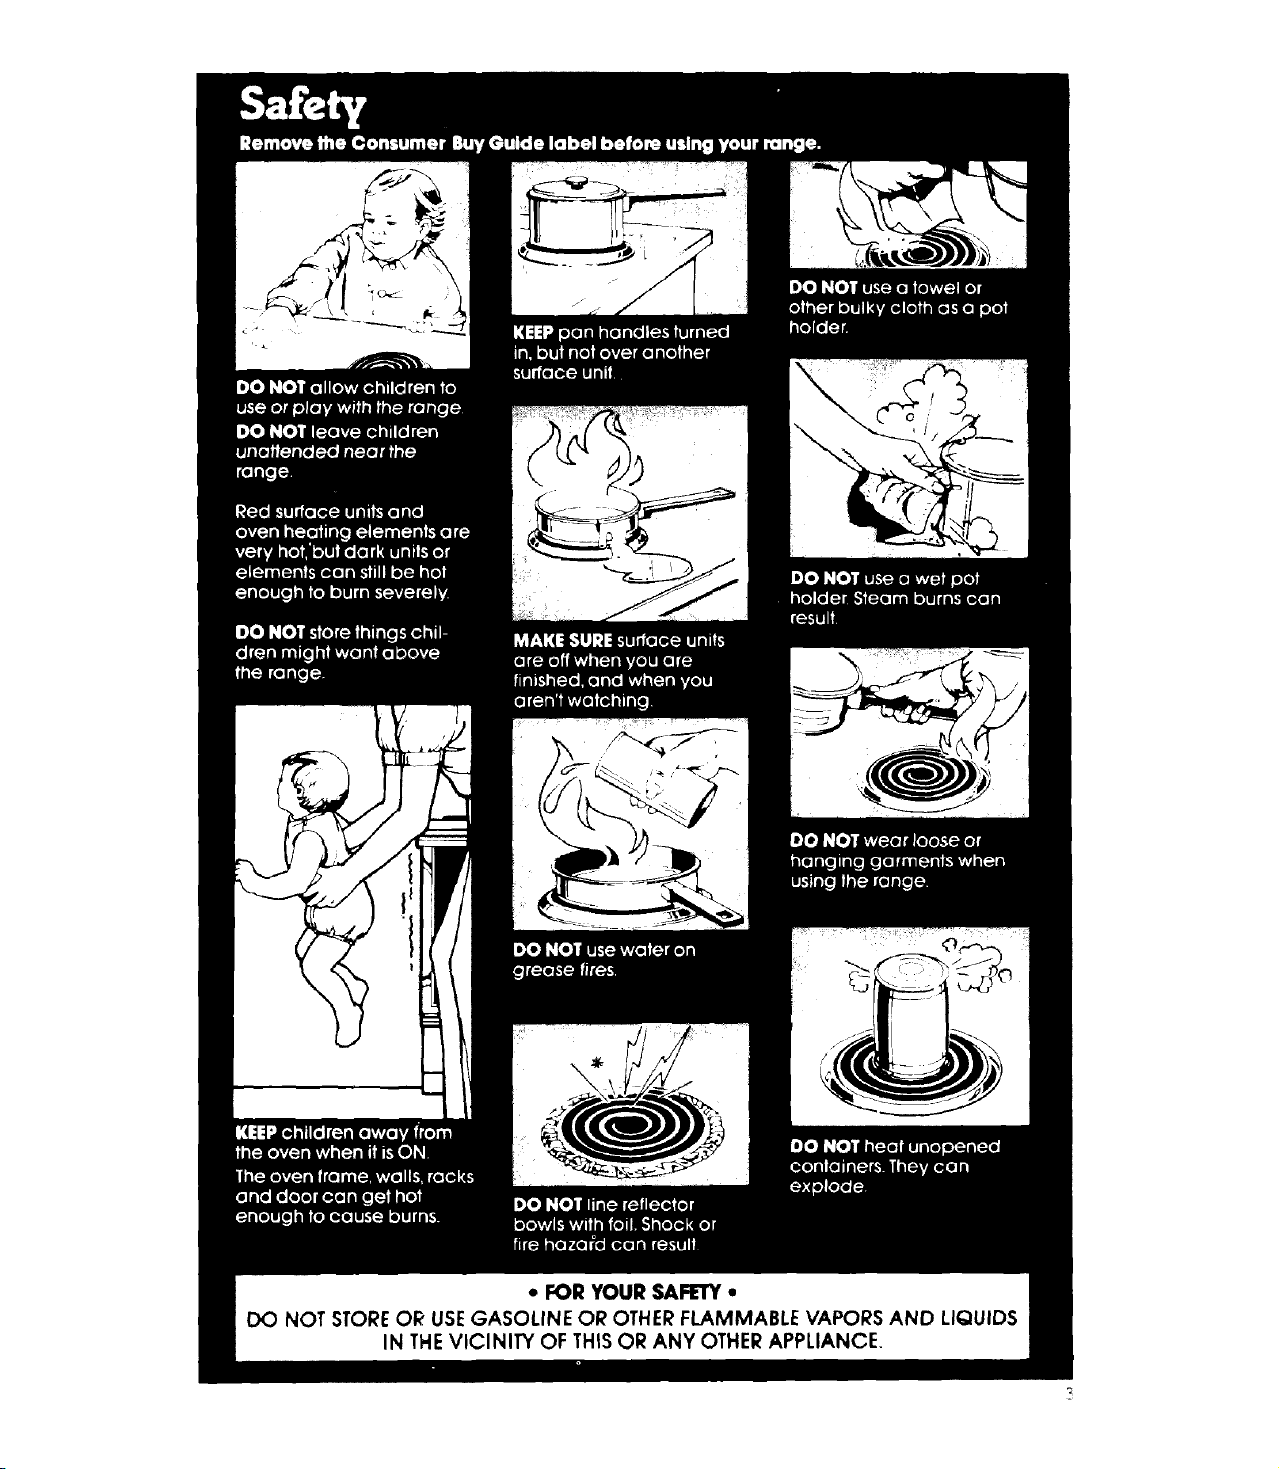
See the "Cooking Guide" for important safety information.
Serial Number
Purchase Dale
Service Company and Phone Number

Your responsibilities...
Proper installation and safe use of the range are your personai
responsibilities. Read this "Use and Care Guide" and the "Cooking
Guide" carefullyforimportant use and safety information.
Installation
YoumL_stbe sure your ronge is...
• installed and leveled in ,u cabs- • properly connected to the cor-
net and on :_'floor that '_ L ho!d rect electric supply and
the weight: grounding, (See "Installation
• installed in (:: weli-,,,entl ted !nstruetions."]
area protec*ed from th_
weather: j|
Proper use
/
J
')

Using your range
AutomaticMEALTIMER Clock
Surface Unit
Controls Clock and Minute Timer StartTime Knob
SURFACE UNIT CONTROLS
Controlknobs must be
pushed in before turning them
to a setting, They can be set
anywhere between HI and OFF
One of the signal lights will
glow when a surface unit is on.
Be sure all lights are o11when
Indicators
Signal Light
PUSH IN
Turn to setting.
Until you get used to the settings, use the to!
lowing as a guide•
_ o _o
Usei"llto start Use MED-HI to Use MED for
foods cooking or hold a rapid boil gravy, puddings
to bring liquidsto or to frychicken and icingsor to
a boil. or pancakes, cook large
you are not cooking.
°V
o_ vegetables,
Stop Time Knob
a mounts of
Use MED-LO to
keep food
cooking after
startingiton a
higher setting
See The Accessory Canning Kit' {page 9) and
your 'Cooking Guide for _mportant utensi_
information.
4
UNITs:SURFACE
_,> -_ Element will be
Use LO to keep
food warm until
ready to serve.
Set the heat
higher or lower
withinthe LO
band to keep
food ot the
temperature you
want.
black during
cooking if contact
with bottom of pan
is good Element
will Qot torn red it
_ood _':Orqtaot IS
made
Trek
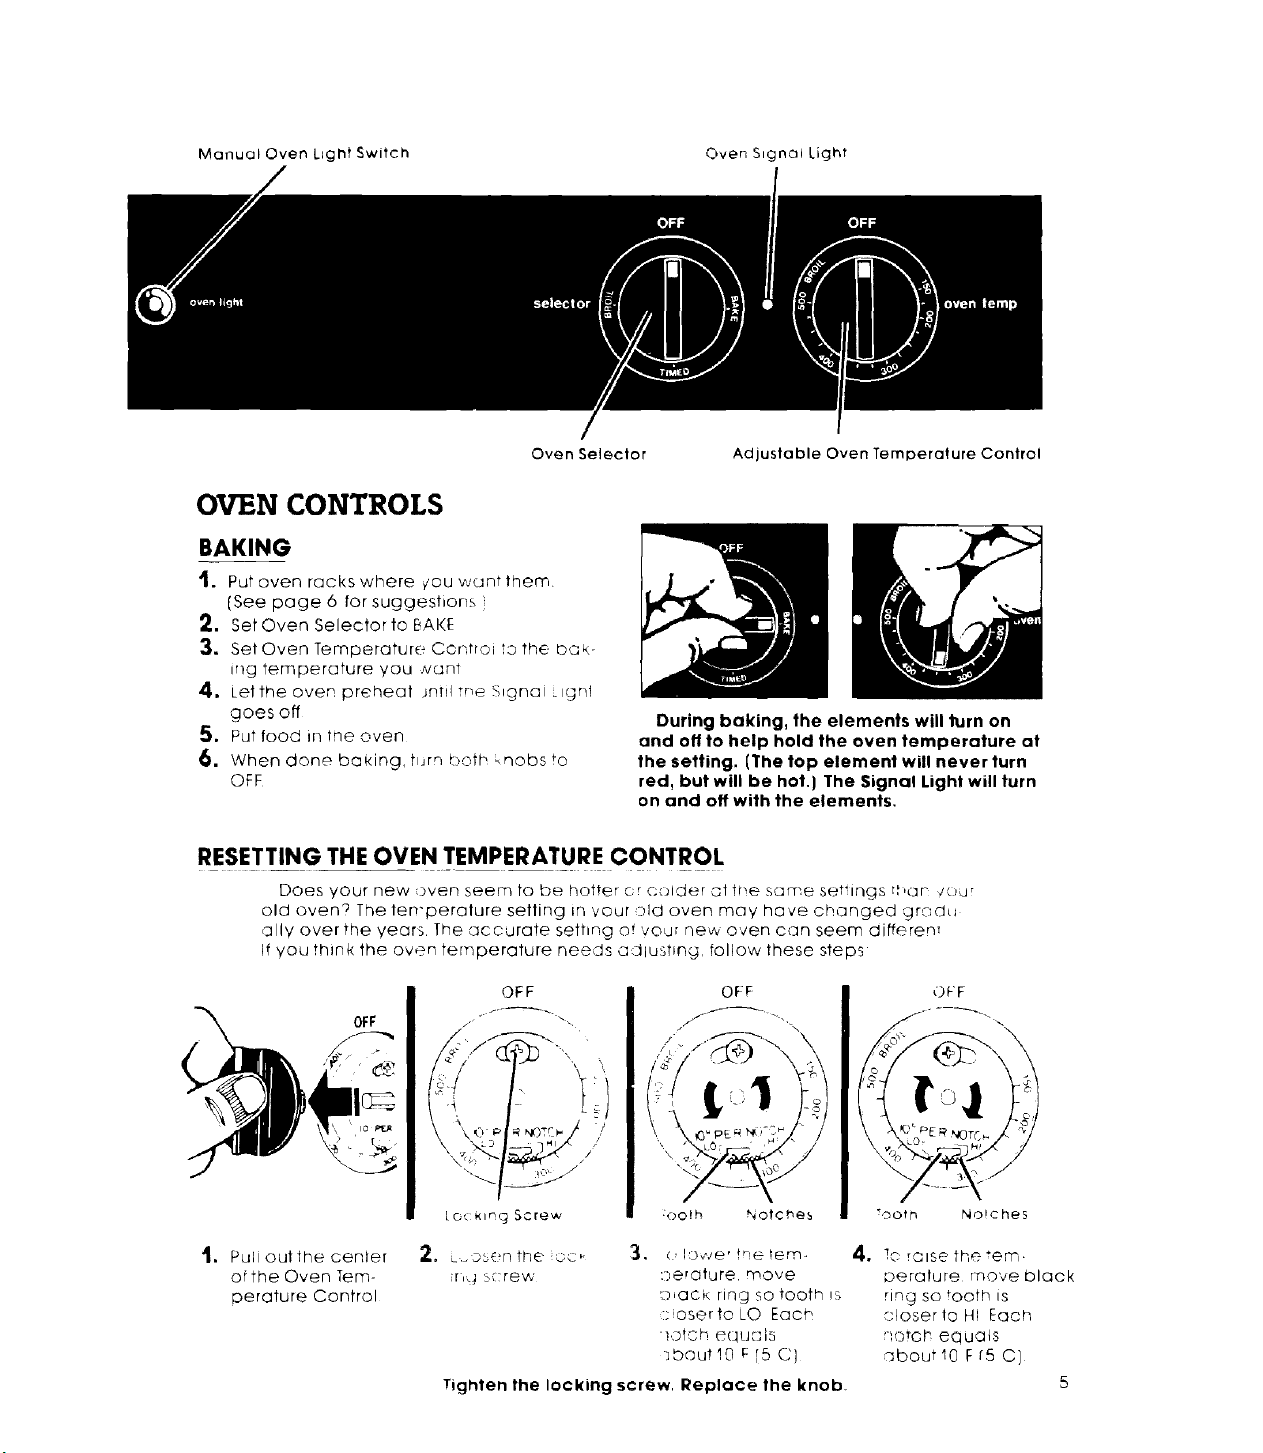
Manual Oven Light Switch Oven Signal Light
Oven Selector
OVEN CONTROLS
BAKING
t. Put oven rackswhere ¢ou w_untthern.
[See page 6 for suggestions )
2. Set Oven Selector to BAKE
:3. Set Oven Temperature Controi to the bQk
ir_g temperature you _vc_nt
4. Let the oven preheat Jrltiitne Signal ignl
goesofl
S. Put food in tne oven
6. When done baking, turn _:)oth knobs to
OFF
RESETTING THE OVEN TEMPERATURE CONTROL
Does your new oven seem to be hotter cr C'older at the some settings t,nan /our
old oven? The len'perature setting in vour :rid oven may have changed grodu
ally over the years The "accurate sethng of voor Dew oven can seem differen:
if you think the oven temperature needs adlushng, follow these steps
OFF
OFF
During baking, the elements will turn on
and o11 to help hold the oven temperature at
the setting. [The top element will never turn
red, but will be hot.) The Signal Light will turn
on and off with the elements.
// ,-'_ \
Adjustable Oven Temperature Control
OFF
OFF
.
Pull out the cenlef
ofthe Oven Tem-
oerature Control
[o, _lng Screw
2, L..osonthe oc,, _, (,!D_ve'tneter,'n
ir,_ b{:rew ::)erature move
Tighten the locking screw. Replace the knob_
:oo_h Notches
L_ack ring So tooth !s
:;,osertoLO Each
_otch equc,'Is
}bout!O F[5 C]
Tooth Noiche5
4. 1C rOlSe the "err'.
©eralure rnoveblQck
ring so tooth ts
oloserle Hi Each
i10toh eq UC1tS
sbout10 F r5 C}
5
 Loading...