

Whirlpool RS610PXE User Manual
TM
Use And Care
GUIDE
Table of Contents
(complete) ................... 2
A Note to You................. 3
Range Safety...............4-7
STANDARD-CLEANING ELECTRIC DROP-IN RANGE
PART NO. 4450273
Getting to Know
Your Range .................... 8
Using Your Range ......... 9
Caring for
Your Range ..................38
Troubleshooting .......... 44
Requesting
Assistance
or Service ..................... 46
Index ............................. 50
Warranty .......................52
1-800-253-1301
Call us with
questions or comments.
MODEL RS610PXE

Table of Contents
A Note to You ........................................... 3
Range Safety ......................................... 4-7
Getting to Know Your Range ................... 8
Using Your Range ..................................... 9
Using the coil elements......................... 9
Positioning racks and pans ..................11
For best air circulation ........................ 12
Using aluminum foil for baking ............ 12
The electronic oven control................. 13
Starting a function............................... 14
Canceling a function ........................... 14
Setting the clock ................................. 15
Using the electronic Minute Timer....... 16
Audible signals ................................... 17
Baking/roasting................................... 18
Roasting tips ...................................... 20
Adjusting the oven
temperature control ............................ 20
Broiling ............................................... 22
Broiling tips......................................... 25
Energy saving tips .............................. 25
Using the electronic
MEAL TIMER™ control ....................... 26
The oven vent .................................... 37
Caring for Your Range ............................ 38
Cleaning chart .................................... 38
Coil elements and reflector bowls ....... 40
Removing the oven door..................... 42
The oven lights ................................... 43
Troubleshooting ..................................... 44
Requesting Assistance or Service ........ 46
Index ....................................................... 50
Warranty ................................................. 52
2

A Note to You
Thank you for buying a WHIRLPOOL® appliance.
Because your life is getting busier and more complicated, WHIRLPOOL appliances are
easy to use, save time, and help you manage your home better. To ensure that you enjoy
years of trouble-free operation, we developed this Use and Care Guide. It is full of valuable
information about how to operate and maintain your appliance properly and safely. Please
read it carefully.
Also, please complete and mail the Product Registration Card provided with your appliance.
The card helps us notify you about any new information on your appliance.
Please record your model’s information.
Whenever you call to request service for
your appliance, you need to know your
complete model number and serial number.
You can find this information on the model
and serial number plate (see diagram in the
“Getting to Know” section).
Please also record the purchase date of
your appliance and your dealer’s name,
address, and telephone number.
Keep this book and the sales slip together in a safe place for future reference.
Model Number __________________________
Serial Number __________________________
Purchase Date __________________________
Dealer Name ___________________________
Dealer Address _________________________
Dealer Phone ___________________________
Our Consumer Assistance Center
number is toll-free.
1-800-253-1301
3
Range Safety
Your safety and the safety of others is very important.
We have provided many important safety messages in this manual and on your
appliance. Always read and obey all safety messages.
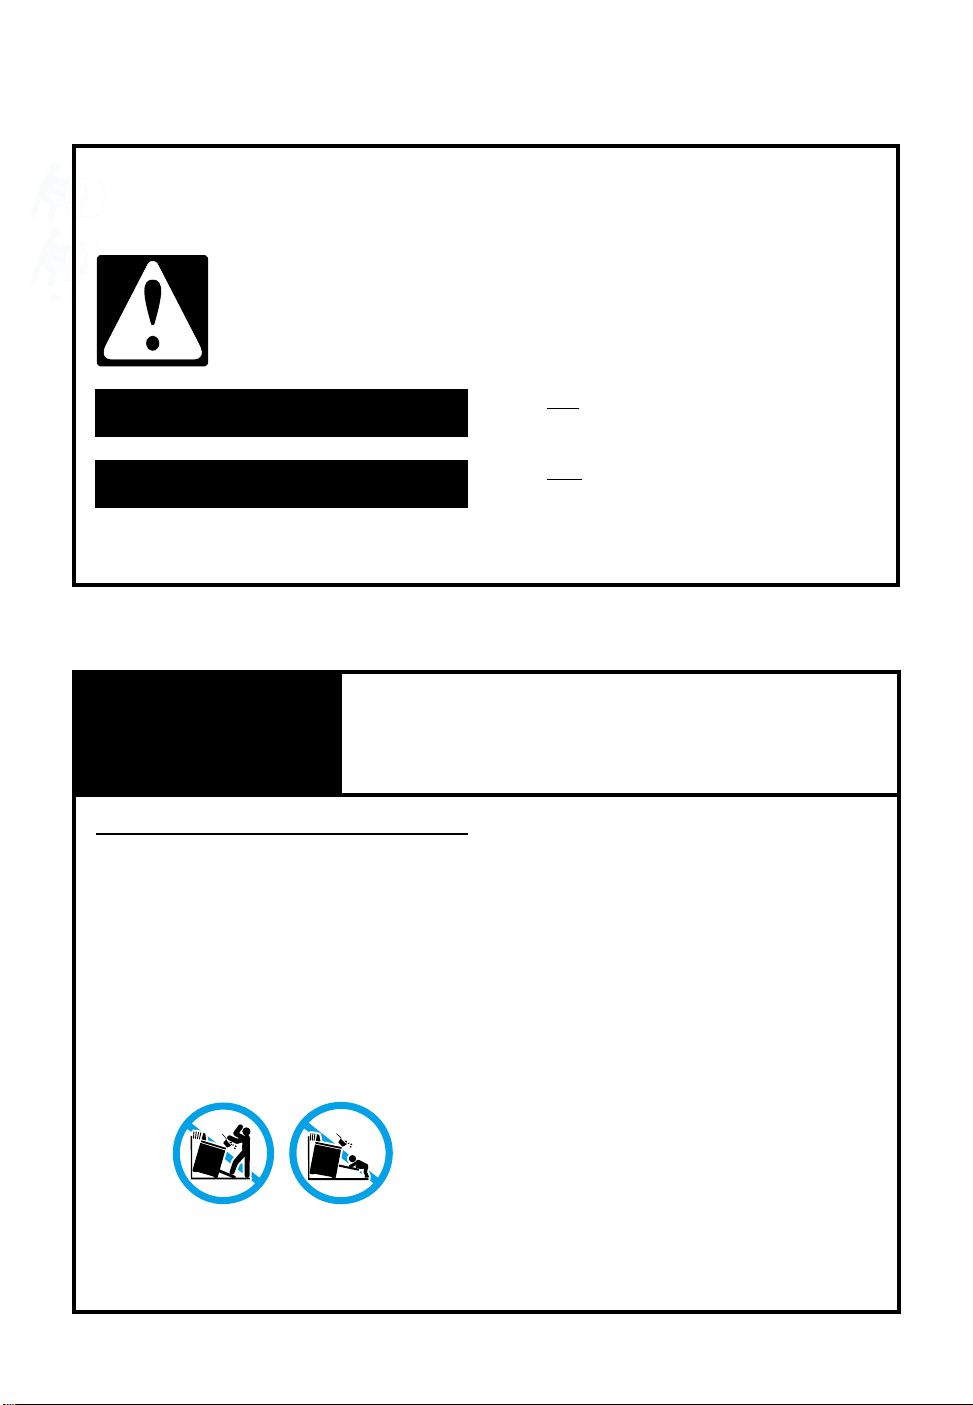
This is the safety alert symbol.
This symbol alerts you to hazards that can kill or hurt you and others.
All safety messages will be preceded by the safety alert symbol and the
word “DANGER” or “WARNING.” These words mean:
You will be killed or seriously injured
wDANGER
wWARNING
All safety messages will identify the hazard, tell you how to reduce the chance of injury,
and tell you what can happen if the instructions are not followed.
IMPORTANT SAFETY INSTRUCTIONS
if you don’t follow instructions.
You can be killed or seriously injured
if you don’t follow instructions.
wWARNING
To reduce the risk of fire, electrical shock,
injury to persons, or damage when using
the range, follow basic precautions,
including the following:
General
•Read all instructions before using
the range.
•Install or locate the range only in
accordance with the provided
Installation Instructions. The
range must be installed by a
qualified installer. The range
must be properly connected to
electrical supply and grounded.
WARNING: To reduce the risk of
tipping of the appliance, the appliance must be secured by properly
installed anti-tip devices. To
check if the devices are installed
properly, open the oven door,
remove a screw at the bottom of
each side trim, remove the side
trims, and verify that the anti-tip
devices are engaged to cabinets
with two screws through the
mounting holes in the mounting
rail of the oven.
4

RANGE SAFETY
•CAUTION: Do not store things
children might want above the
range. C hildren could be burned
or injured while climbing on it.
•Do not leave children alone or
unattended in area where the
range is in use. They should never
be allowed to sit or stand on any
part of the range. They could be
burned or injured.
•Do not operate the range if it
is damaged or not working
properly.
•Do not use the range for warm-
ing or heating the room. Persons
could be burned or injured, or a
fire could start.
•Use the range only for its in-
tended use as described in this
manual.
•Do not touch surface units, areas
near units, heating elements, or
interior surfaces of oven. Surface
units and heating elements may
be hot even though they are dark
in color. Areas near surface units
and interior surfaces of an oven
become hot enough to cause
burns. During and after use, do
not touch, or let clothing or other
flammable materials contact
surface units, areas near units,
heating elements, or interior
surfaces of oven until they have
had sufficient time to cool. Other
surfaces of the range, such as
the oven vent opening, the surface near the vent opening, the
cooktop, and the oven door and
window, could also become hot
enough to cause burns.
•Do not wear loose or hanging
garments when using the range.
They could ignite if they touch
a hot surface unit and you could
be burned.
•Use only dry pot holders. Moist or
damp pot holders on hot surfaces
could result in burns from steam.
Do not let pot holder touch hot
heating elements. Do not use a
towel or bulky cloth for a pot
holder. It could catch on fire.
•Keep range vents unobstructed.
continued on next page
5
RANGE SAFETY
•Do not heat unopened containers.
They could explode. The hot
contents could cause burns and
container particles could cause
injury.
•Use only cookware approved for
oven use. Follow cookware
manufacturer’s instructions, especially when using glass or plastic
cookware.
•Do not store flammable materials
on or near the range. The fumes
could create an explosion and/or
fire hazard.
When using the cooktop
•Make sure the reflector bowls are
in place during cooking. Cooking
without reflector bowls could subject the wiring and components
underneath them to damage.
•Do not line reflector bowls with
aluminum foil or other liners.
Improper installation of these
liners could result in a risk of
electric shock or fire.
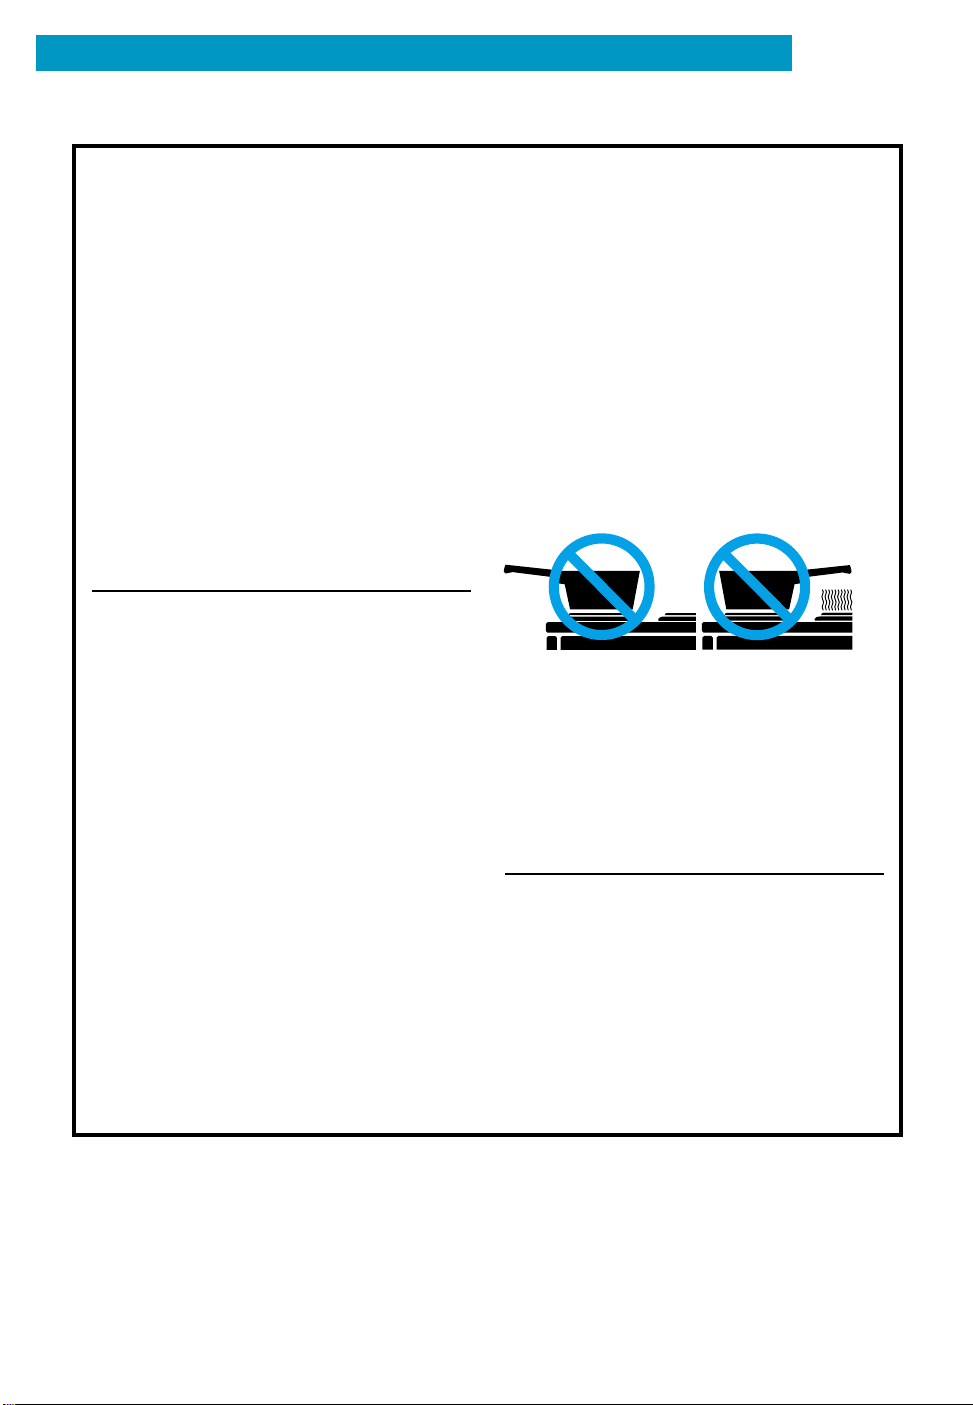
•Select a pan with a flat bottom
that is about the same size as the
surface unit. If pan is smaller than
the surface unit, some of the
heating element will be exposed
and could result in the igniting of
clothing or pot holders. Correct
pan size also improves cooking
efficiency.
•Check to be sure glass cookware
is safe for use on the range. Only
certain types of glass, glassceramic, ceramic, earthenware,
or other glazed cookware are
suitable for cooktops without
breaking due to the sudden
change in temperature.
•Never leave surface units
unattended at high heat settings.
A boilover could result and cause
smoking and greasy spillovers
that could ignite.
•Turn pan handles inward, but
not over other surface units.
This will help reduce the chance
of burns, igniting of flammable
materials, and spills due to
bumping of the pan.
When using the oven
•Always position oven rack(s) in
desired location while oven is
cool. If a rack must be removed
while oven is hot, do not let pot
holder contact hot heating
element in oven.
•Use care when opening oven
door. Let hot air or steam escape
before removing or replacing food.
6
RANGE SAFETY
Grease
•Grease is flammable. Do not
allow grease to collect around
cooktop. Wipe spillovers
immediately.
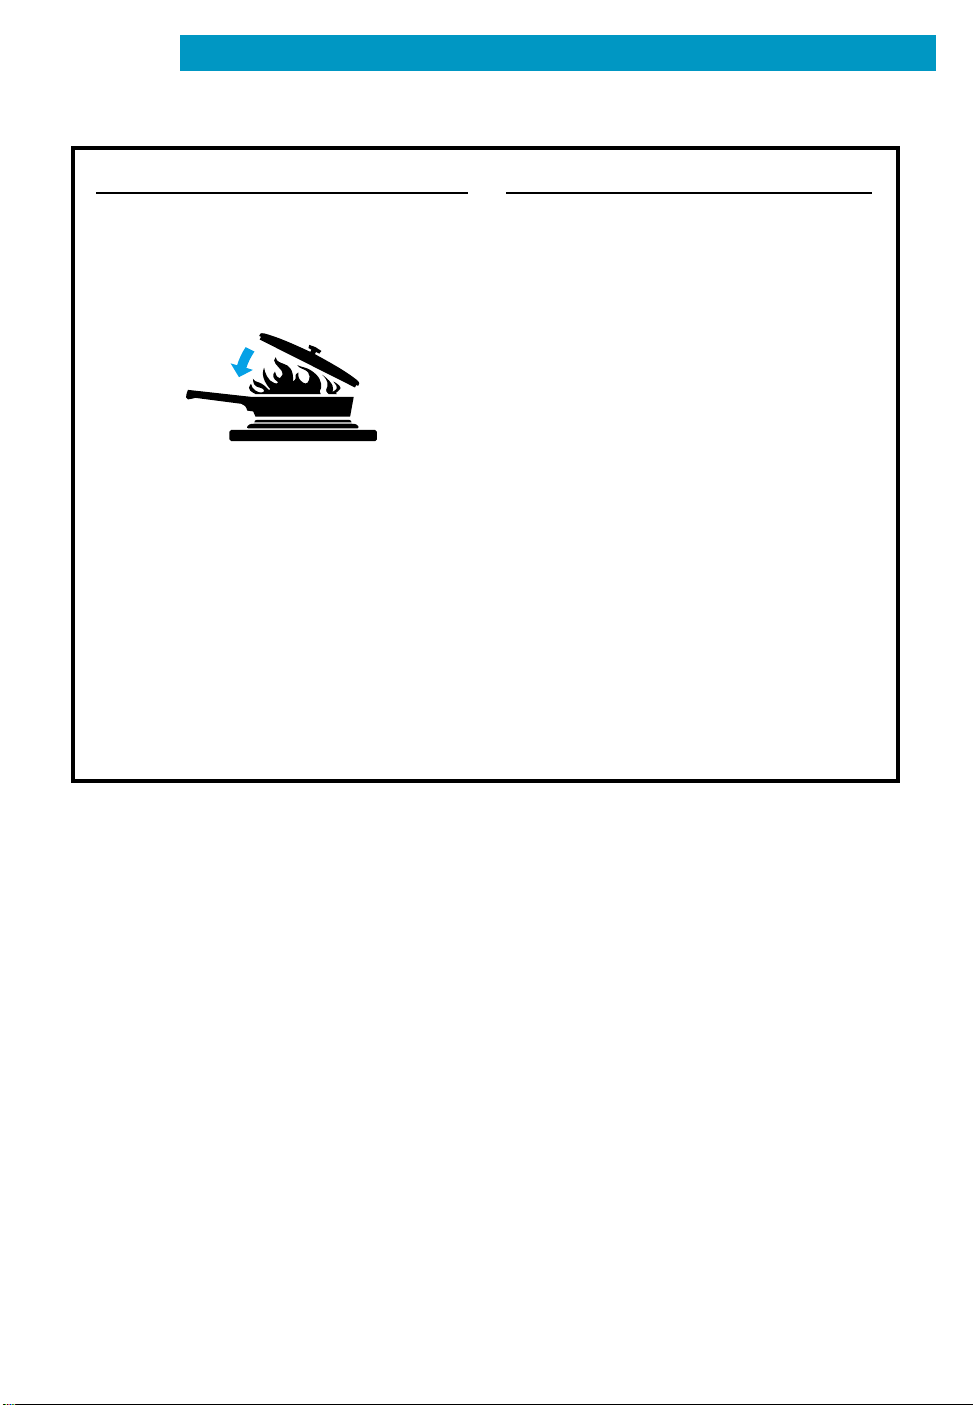
•Do not use water on grease fires.
Never pick up a flaming pan.
Smother flaming pan on range
by covering with a well-fitted lid,
cookie sheet, or flat tray. Flaming
grease outside of pan can be
extinguished with baking soda
or, if available, a multipurpose
dry chemical or foam-type
extinguisher.
– SAVE THESE INSTRUCTIONS –
Care and cleaning
•Do not soak removable heating
elements in water. The element
will be damaged and shock or
fire could result.
•Do not clean door gasket. It is
essential for a good seal. Care
should be taken not to rub,
damage, or move the gasket.
Clean only parts recommended
in this Use and Care Guide.
•Do not repair or replace any
part of the range unless specifically recommended in this
manual. All other servicing
should be referred to a qualified
technician.
•Disconnect the electrical supply
before servicing the range.
7
OFF
HI
LO
OFF
HI
LO
OFF
HI
LO
OFF
HI
LO
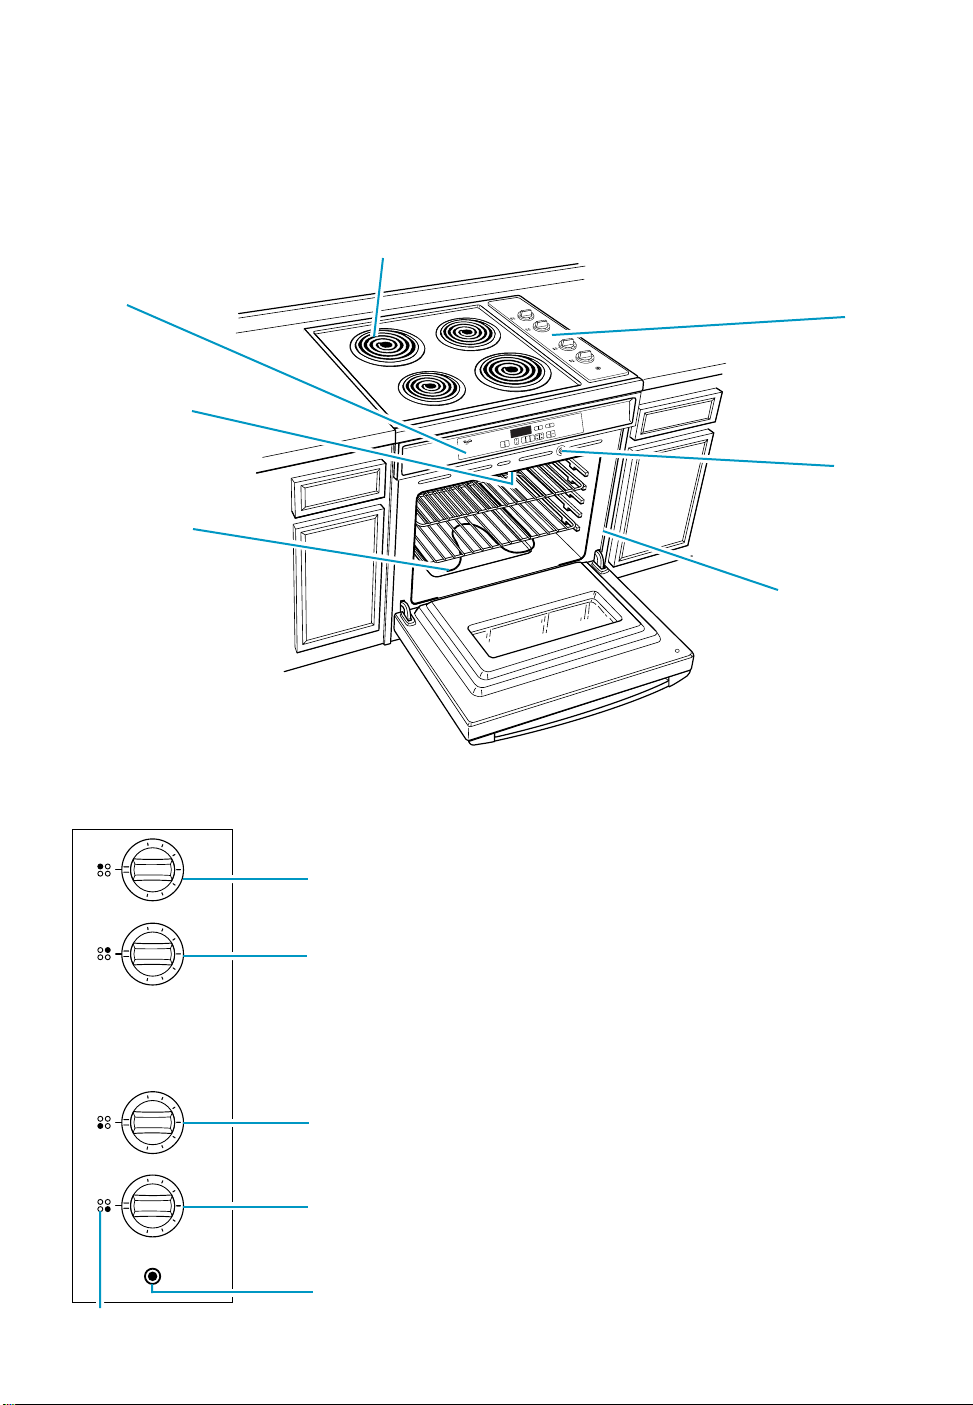
Getting to Know Your Range
This section tells you what features your range has and where they are located. Please review
this information before using your range. To help you find information on specific parts or
features quickly, page references are included.
Plug-in coil element with
Oven
control
panel
(p. 13)
one-piece chrome reflector bowl
(p. 9)
LOLO
OFFOFF
HIHI
LOLO
F
F
O
OFF
HIHI
LOLO
OFFOFF
HIHI
Cooktop control
panel
LOLO
F
F
O
OFF
HIHI
(p. 9)
Broil element
(not shown)
(p. 22)
Bake element
(p. 19)
Cooktop control panel
Left rear
control
knob
Right rear
control
knob
CLOCKCLOCK LIGHTLIGHT
TIMERTIMER
TIMERTIMER
OFFOFF
SETSET
STOPSTOP
RTIMETIME
CLEANCLEAN
LOCKEDLOCKED
TIMETIME
N
O
COOKCOOK
L
E
STSTARARTOFFOFF
C
N
A
CANCEL
HEATHEAT
R
BAKEBAKE
E
T
N
ENTER C
E
DELAYDELAY
BROILBROIL
MIN MIN
DTIMETIME STARTSTART?
C
E
S
5
5 SEC
HR HR
STSTOPOP
DELADELAY
TIMETIME
STSTARART
COOKCOOK
TIMETIME
TIMETIME
TEMPTEMP
CUSCUSTOMOM
L
O
BROILBROIL
R
T
BAKEBAKE
N
O
C
N
E
V
O
IC
N
O
R
T
C
E
L
ELECTRONIC OVEN CONTROL
E
Model and serial
(on mounting rail)
NOTE: Oven cooling fan remains on when
oven is off until cavity temperature cools
down.
Automatic
oven light
switch
(p. 43)
number plate
Coil element marker
8
Left front
control
knob
Right front
control
knob
Hot surface
indictor
light
Using Your Range
To get the best cooking results, you should use your range the correct way. This section tells
you what you need to know to use your range safely and efficiently.
Using the coil elements
Push in control knobs before turning
them to a setting. You can set them anywhere between HI and OFF.
Coil element markers
The solid dot in the coil element marker
shows which coil element is turned on by
that knob.
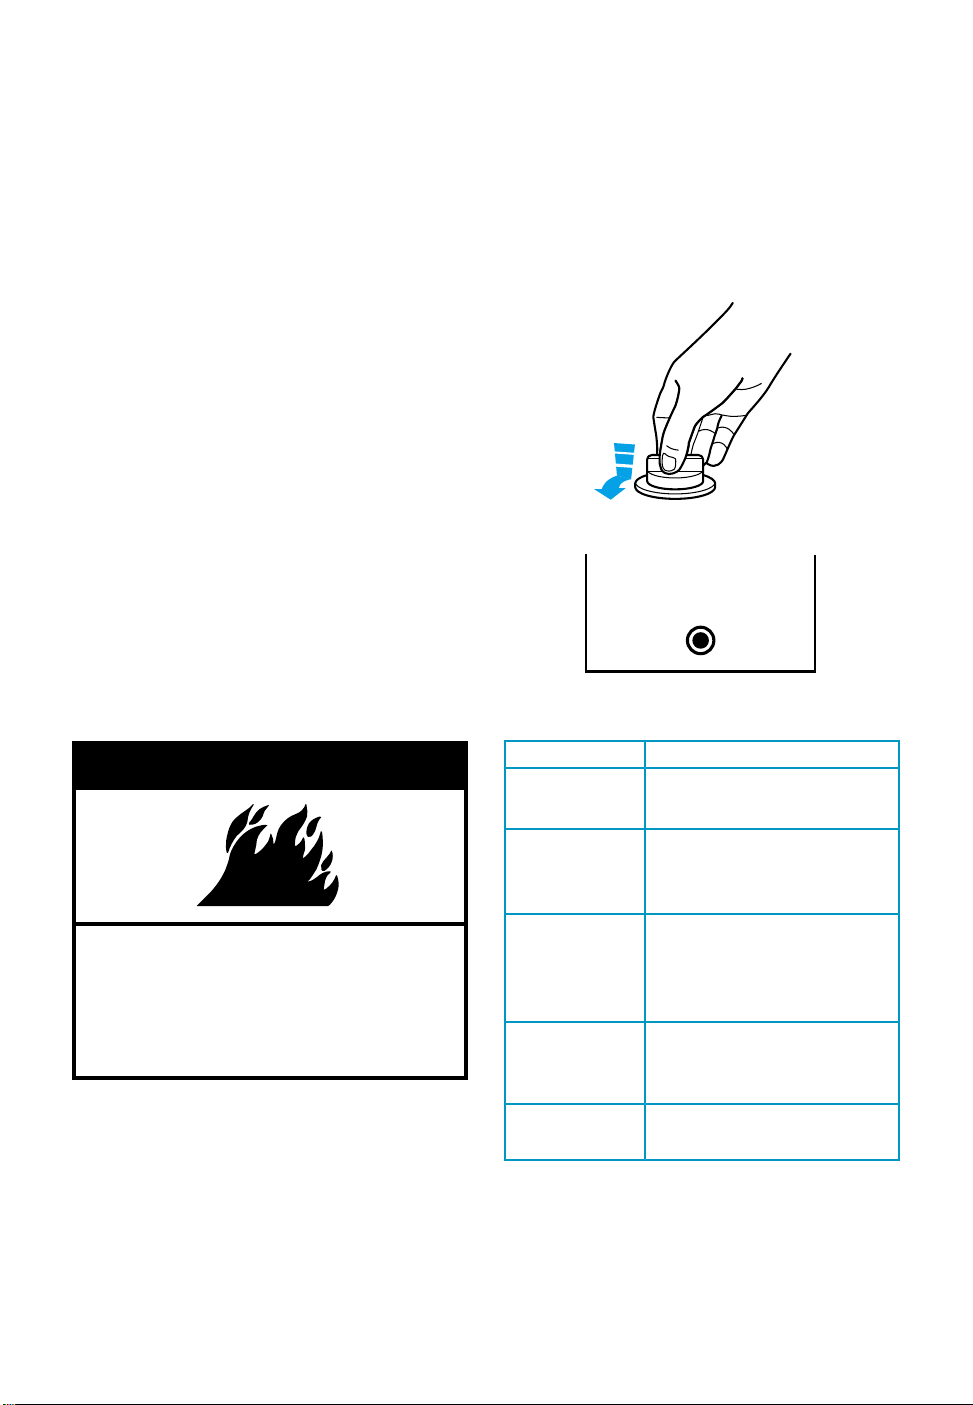
Hot surface indicator light
The Hot Surface Indicator Light on the
cooktop surface will glow when any of the
coil elements are turned on. The Indicator
Light will continue to glow as long as the coil
elements are too hot to touch, even after
they are turned off.
wWARNING
Fire Hazard
Turn off all controls when done
cooking.
Failure to do so can result in death,
fire, or burns.
Until you become familiar with the
settings, use the chart at right as a guide.
For best results, start cooking at the high
setting; then turn the control knob down to
continue cooking.
SETTING RECOMMENDED USE
HI • To start foods cooking.
• To bring liquids to a boil.
Medium-high • To hold a rapid boil.
• To fry chicken or
pancakes.
Medium • For gravy, pudding,
(opposite OFF)
(opposite OFF • To cook large amounts
Medium-low • To keep food cooking
LO • To keep food warm until
and icing.
of vegetables.
after starting it on a
higher setting.
ready to serve.
9

USING YOUR RANGE
center over
coil element
1 inch
maximum
overhang
1" 1"
Cookware tips
• Use the correct cookware to prevent
damage to the coil elements, cooktop,
wiring, and surrounding areas.
• If the cookware is too small for the coil
element or the bottom is not flat, the coil
element could stay glowing red for an
extended length of time causing damage
to the range.
• If you start cooking on high, it is impor-
tant to turn the control down to a lower
setting to complete cooking.
• Flat-bottomed cookware, including woks,
canners, and teakettles, will provide better
contact with the coil element and provide
the best cooking results.
• Warped, dented, and ribbed-bottomed
cookware can result in uneven cooking
due to incomplete contact with the coil
element.
• Cookware that has been designed with
slightly indented bottoms or small expansion channels can be used.
• Choose medium to heavy gauge
(thickness) cookware.
• The pan material (type of metal or
glass) affects how quickly and evenly
the pan heats.
NOTE: Do not leave empty cookware, or
cookware which has boiled dry, on a hot coil
element. The cookware could overheat
causing damage to the cookware or coil
element.
Home canning information
• Use flat-bottomed canners/pans for
best results.
• Use the largest coil element for best
results. Also, use a canner/pan that you
can center over the coil element and that
does not extend more than 1 inch outside
the coil element area. Large diameter
canners/pans, if not centered correctly,
trap heat and can cause damage to the
cooktop.
• Do not place your canner on 2 coil
elements at the same time. Too much heat
will build up and damage the cooktop.
• Start with hot water. This reduces the
time the control is set on high. Reduce the
heat setting to the lowest position needed
to keep water boiling.
• Keep reflector bowls clean for best heat
reflection.
• When canning for long periods of time,
alternate use of the coil elements between
batches to allow the coil elements to cool
down, or prepare food in small batches.
• Refer to your canner manual for specific
instructions.
Optional canning kit
The large diameter of most water-bath or
pressure canners combined with high heat
settings for long periods of time can shorten
the life of regular coil elements and cause
damage to the cooktop.
If you plan to use the cooktop for canning,
we recommend the installation of a Canning
Kit. Order the kit (Part No. 242905) from
your Whirlpool dealer or authorized
WHIRLPOOL
Service Company.
10

Positioning racks and pans
General guidelines
• Before turning on the oven, place oven
racks where you need them.
• To move rack(s), lift rack(s) at front and
pull out.
• Be sure the rack(s) is level.
• Use pot holders or oven mitts to protect
your hands, if rack(s) must be moved while
the oven is hot.
• For baking/roasting with 1 rack, place
the rack so the top of the food will be
centered in the oven.
• When baking/roasting on 2 racks,
position racks in oven to allow good
circulation of air around all the food.
Bakeware tips
• When baking with insulated cookie
sheets or baking pans, place them in the
bottom third of the oven. You may need to
increase the recommended baking times,
so test for doneness before removing from
the oven.
• When using ovenproof glassware or
dark bakeware, reduce the oven temperature by 25°F, but use the same baking
time. Because these pans absorb heat,
producing darker bottom browning and
crispier crusts, place the rack in the center
of the oven. When baking pies and bread,
you can use the temperature suggested in
the recipe.
Rack placement for specific
foods:
FOOD
Frozen pies, large
roasts, turkeys, angel
food cakes
Bundt cakes, most
quick breads, yeast
breads, casseroles,
meats
Cookies, biscuits,
muffins, cakes,
nonfrozen pies
NOTE: For recommended rack placement
when broiling, see the “Broiling rack position
chart.”
USING YOUR RANGE
RACK POSITION
Lowest level or
2nd level from
bottom
2nd level from
bottom
2nd or 3rd level
from bottom
11
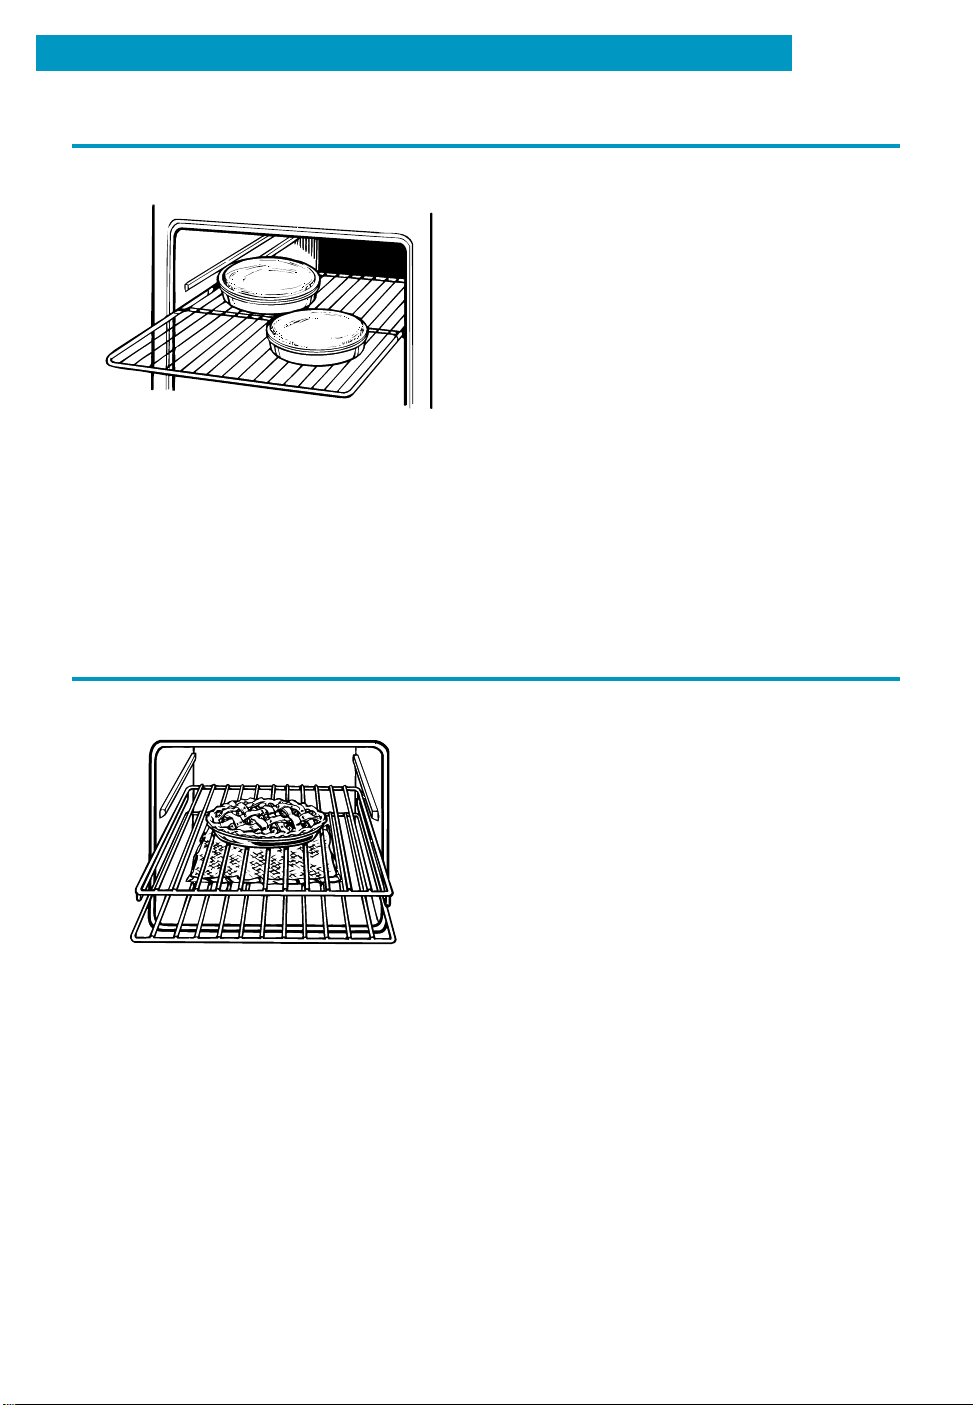
USING YOUR RANGE
For best air circulation
Hot air must circulate around the pans in the
oven for even heat to reach all parts of the
oven. This results in better baking.
• Place the pans so that one is not directly
over the other.
• For best results, allow 11⁄2 to 2 inches
of space around each pan and between
pans and oven walls.
• Use only one cookie sheet in the oven at
a time.
Use the following as a guide to determine
where to place the pans:
1 pan
Place in the center of the oven rack.
2 pans
Place in opposite corners of the oven rack.
3 or 4 pans
Place in opposite corners on each oven
rack. Stagger pans so no pan is directly
over another.
Using aluminum foil for baking
Use aluminum foil to catch spillovers
from pies or casseroles:
• Place the foil on the oven rack below the
rack with the food. Turn up foil edges and
make sure foil is about 1 inch larger all
around than the dish holding the food.
• Do not cover the entire rack with alumi-
num foil. It will reduce air circulation and
cause poor cooking results.
• Do not line oven bottom with foil or other
liners. It could affect the quality of your
baking.
12
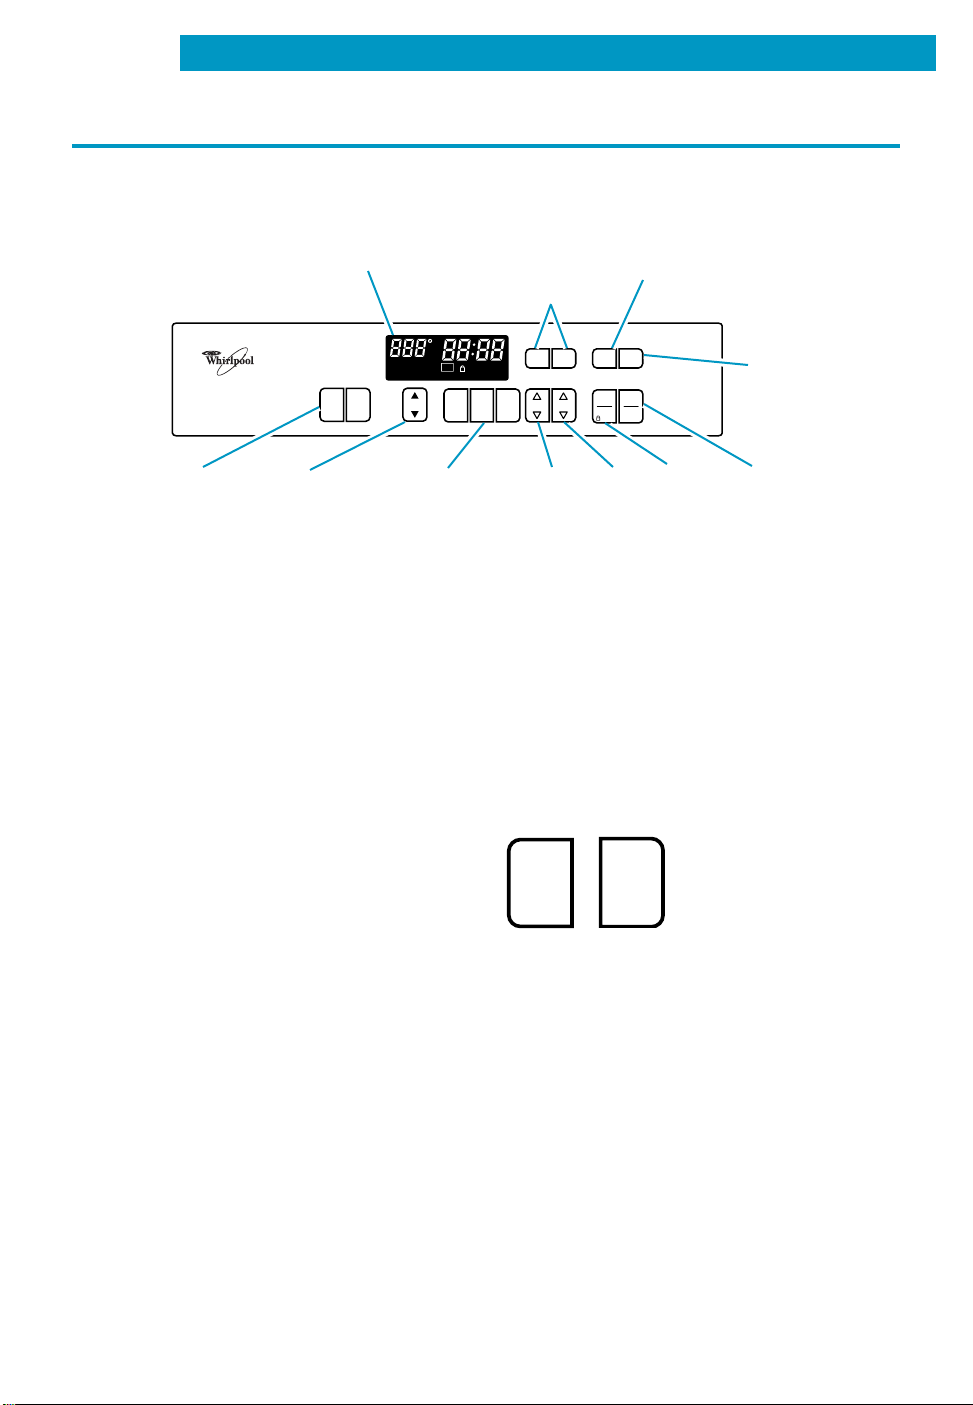
The electronic oven control
STOP
TIME
Timer set
ELECTRONIC OVEN CONTROL
Electronic
display
CUSTOM
BAKE
BROIL
HEAT
BAKE
DELAY
BROIL
DTIME START?
TEMP
C
F
O
N
COOK
TIME
LOCKED
COOK
DELAY
START
TIME
STOP
RTIME
CLEAN
TIME
and off
pads
(pp. 16, 17)
TIMER
TIMER
SET
OFF
STOP
HR MIN
TIME
USING YOUR RANGE
Clock pad
(p. 15)
Manual
oven
CLOCK LIGHT
START OFF
ENTER CANCEL
5 SEC
light
pad
(p. 43)
Oven
setting
pads
Temperature
pads
Electronic
MEALTIMER™
control pads
(p. 26)
Display/clock
• When you first plug in the oven, every-
thing on the display will light up for a few
seconds, then a time of day and “PF” will
appear on the temperature display. If after
you set the clock (see “Setting the clock”),
“PF” again appears on the display, your
electricity was off for a while. Reset the
clock.
• The clock displays the time of day
except when the oven is preheating,
timed baking, and when display is disabled (see “Disabling the clock display”
in the “Setting the clock” section).
• When you are using the oven or Minute
Timer, the display will show times, temperature settings, and what command
pads have been pressed.
• When showing the time of day, the
display will show the hour and minutes.
Hour
pads
Minute
pads
Start/
enter
pad
(p. 14)
Off/
cancel
pad
(p. 14)
• When you are using the Minute Timer,
the display will show hours, minutes, and
seconds in the following sequence:
–For settings from 1-59 minutes, the
display will count down each second
(minutes and seconds displayed).
–For settings 1 hour or over, the display
will count down each minute (hours and
minutes displayed).
• When you are using Cook Time and/or
Stop Time, the display
COOK
TIME
will show cooking time
counting down.
–For settings from 1-59 minutes, the
display will count down each second
(minutes and seconds displayed).
–For settings 1 hour or over, the display
will count down each minute (hours and
minutes displayed).
13
USING YOUR RANGE
Command pads
The command pads tell the oven what to
do and in what order. Some command pads
have an Indicator Light. The Indicator Light
comes on when you press the command
pad. The ON Indicator Light comes on
when you press the Start/Enter pad for an
oven function.
Using the control lock
The control lock prevents unwanted use of
the oven by disabling most of the control
panel command pads (except CLOCK and
TIMER SET/OFF).
NOTES:
• Control lock is only available when oven
is not in use or control has not been set.
• Set control lock when cleaning the control
panel to prevent oven from accidentally
turning on.
Starting a function
After programming a function, you must
press the Start/Enter pad to
START
ENTER
as a reminder. The control will return to time
of day mode after 5 minutes if Start/Enter is
not pressed.
start the function. If you do not
press the Start/Enter pad within
5 seconds of programming,
5 SEC
“START?” will show on the display
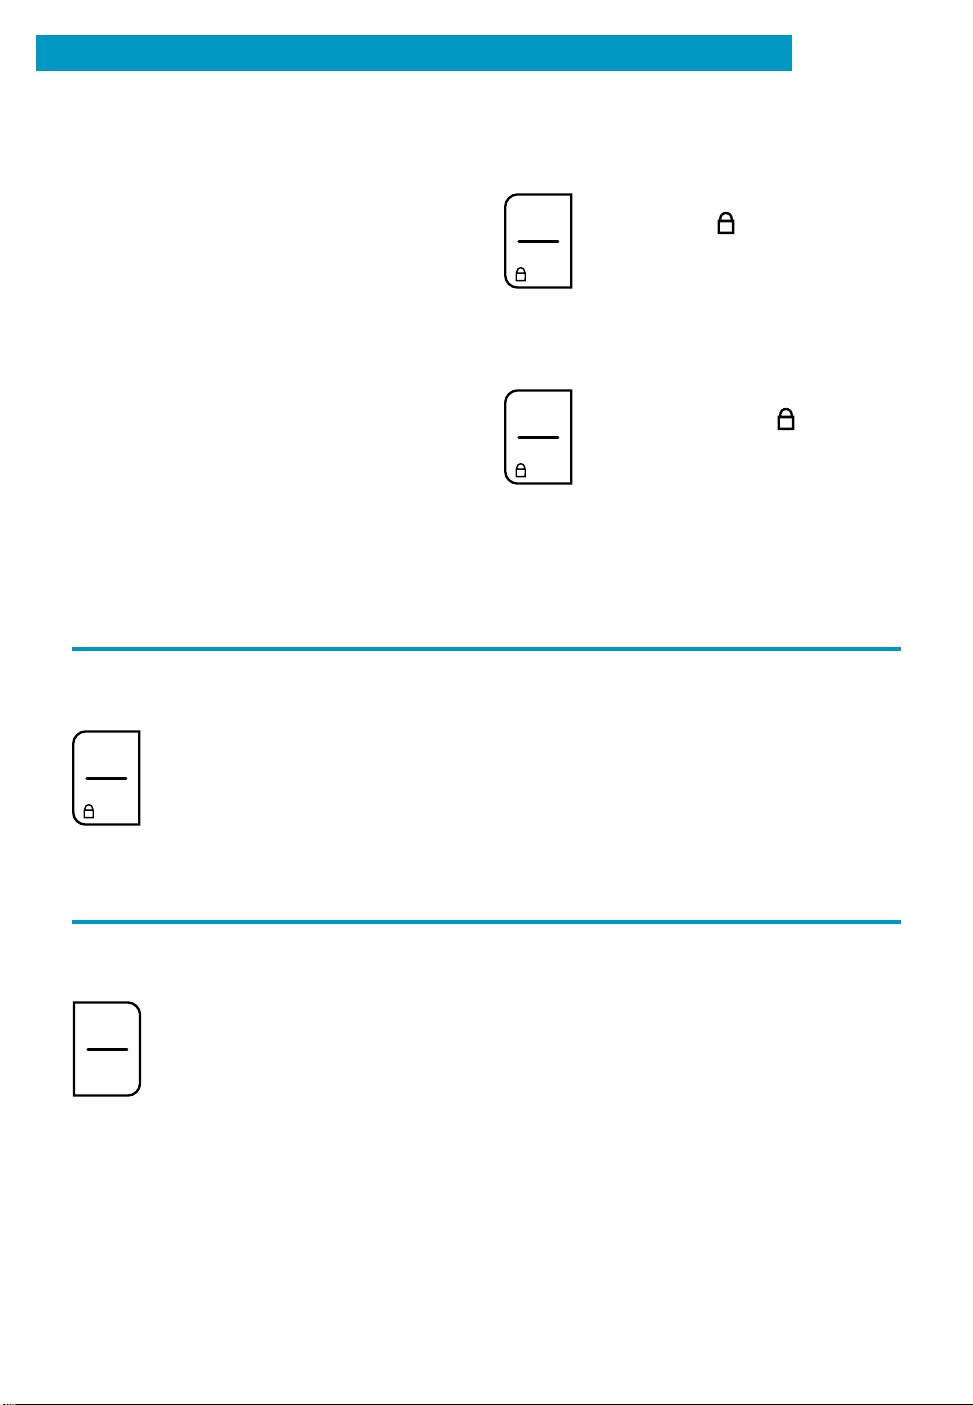
To lock or deactivate the control panel:
Press and hold the Start/Enter pad for
5 seconds. A single tone will sound
START
ENTER
and “Loc” and will appear on
the temperature display. When the
control is locked, “START?” will
5 SEC
appear on the display if you press
any command pad.
To unlock the control panel:
Press and hold the Start/Enter pad for
5 seconds. A single tone will
START
ENTER
sound and “Loc” and will
disappear from the temperature
display.
5 SEC
Canceling a function
The Off/Cancel pad will cancel any function
except for the Clock and Timer Set
OFF
CANCEL
remaining. To cancel the Minute Timer see
“Using the electronic Minute Timer” section.
14
functions. When you press the Off/
Cancel pad, the display will show
the time of day or, if Minute Timer
is also being used, the time
NOTE: You may hear a fan blowing in
the oven even after you press the Off/
Cancel pad. This is the cooling fan. It will
turn off when the oven cools down.
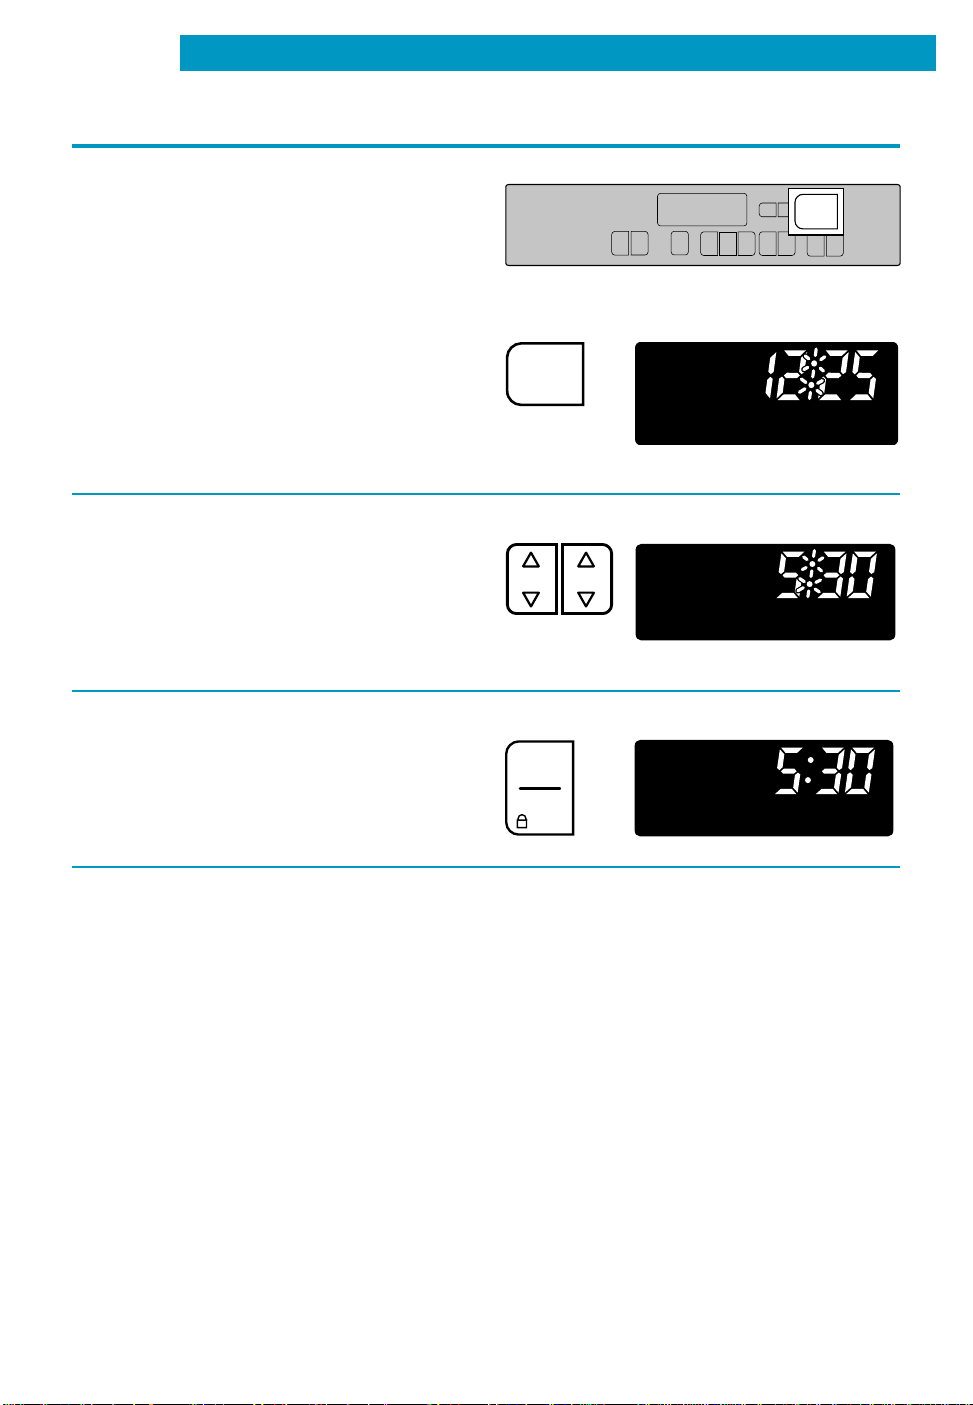
Setting the clock
HR MIN
ELECTRONIC OVEN CONTROL
USING YOUR RANGE
C
F
TIMER
TIMER
LIGHT
CLOCK
SET
OFF
HEAT
ON
BAKE
DELAY
BROIL
TIMED LOCKED?
CUSTOM
BAKE
BROIL
DELAY
COOK
TEMP
START
TIME
TIME
CLOCK
START
STOP
HR MIN
TIME
OFF
ENTER
CANCEL
5 SEC
1. Press Clock pad.
2. Set time.
Press the “up” (▲) or “down” (▼) pad(s)
until the correct time shows on the
display.
3. Start clock.
Disabling the clock display:
If you do not want the clock time displayed,
press and hold the Clock pad for 5 seconds.
To display the clock time again, press and
hold the Clock pad for 5 seconds. You
should not have to reset the time.
PRESS YOU SEE
CLOCK
TIME
(last time of day remembered)
PRESS YOU SEE
TIME
(example for 5:30)
PRESS YOU SEE
START
ENTER
5 SEC
15
HR MIN
USING YOUR RANGE
Using the electronic Minute Timer
The Minute Timer does not start or stop the
oven. It works like a kitchen timer. It can be
set in hours and minutes up to 12 hours
59 minutes. The Minute Timer will display
minutes and seconds for settings under
1 hour. You will hear four 1-second tones
when the set time is up unless reminder
tones are disabled (see “Disabling the timer
reminder tones.”)
ELECTRONIC OVEN CONTROL
UPPER
OVEN
LOWER
OVEN
CUSTOM
BAKE
BROIL
TEMP
C
F
HEAT
BAKE
DELAY
BROIL
TIMED LOCKED?
DELAY
COOK
START
TIME
TIME
TIMER
ON
SET
STOP
TIME
TIMER
SET
HR MIN
TIMER
TIMER
OFF
OFF
LIGHT
CLOCK
START
OFF
ENTER
CANCEL
5 SEC
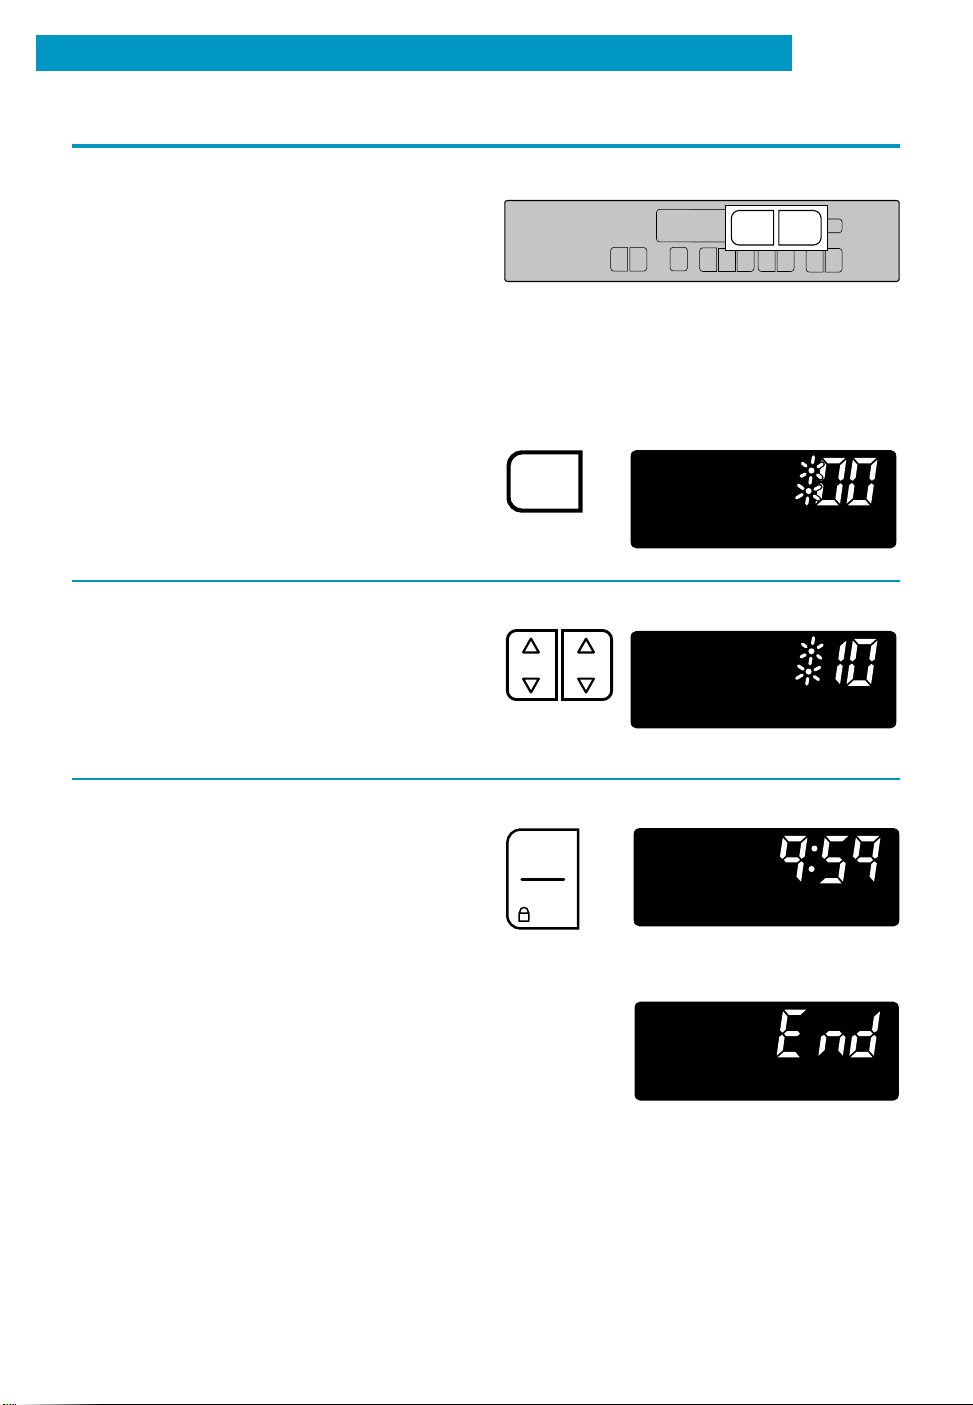
1. Press Timer Set pad.
2. Set time.
Press the “up” (▲) or “down” (▼) pad(s)
until the correct time shows on the display.
3. Start Minute Timer.
The Minute Timer will begin counting
down immediately after the timer is
started.
When the time is up:
You will hear four 1-second tones, then
four 1-second reminder tones every
minute until you press the Timer Off pad.
PRESS YOU SEE
TIMER
SET
PRESS YOU SEE
(example for 10 minutes)
PRESS YOU SEE
START
ENTER
5 SEC
(display counts down)
YOU SEE
RTIME
RTIME
RTIME
RTIME
16
 Loading...