

Whirlpool RM288PXS Use & Care Manual
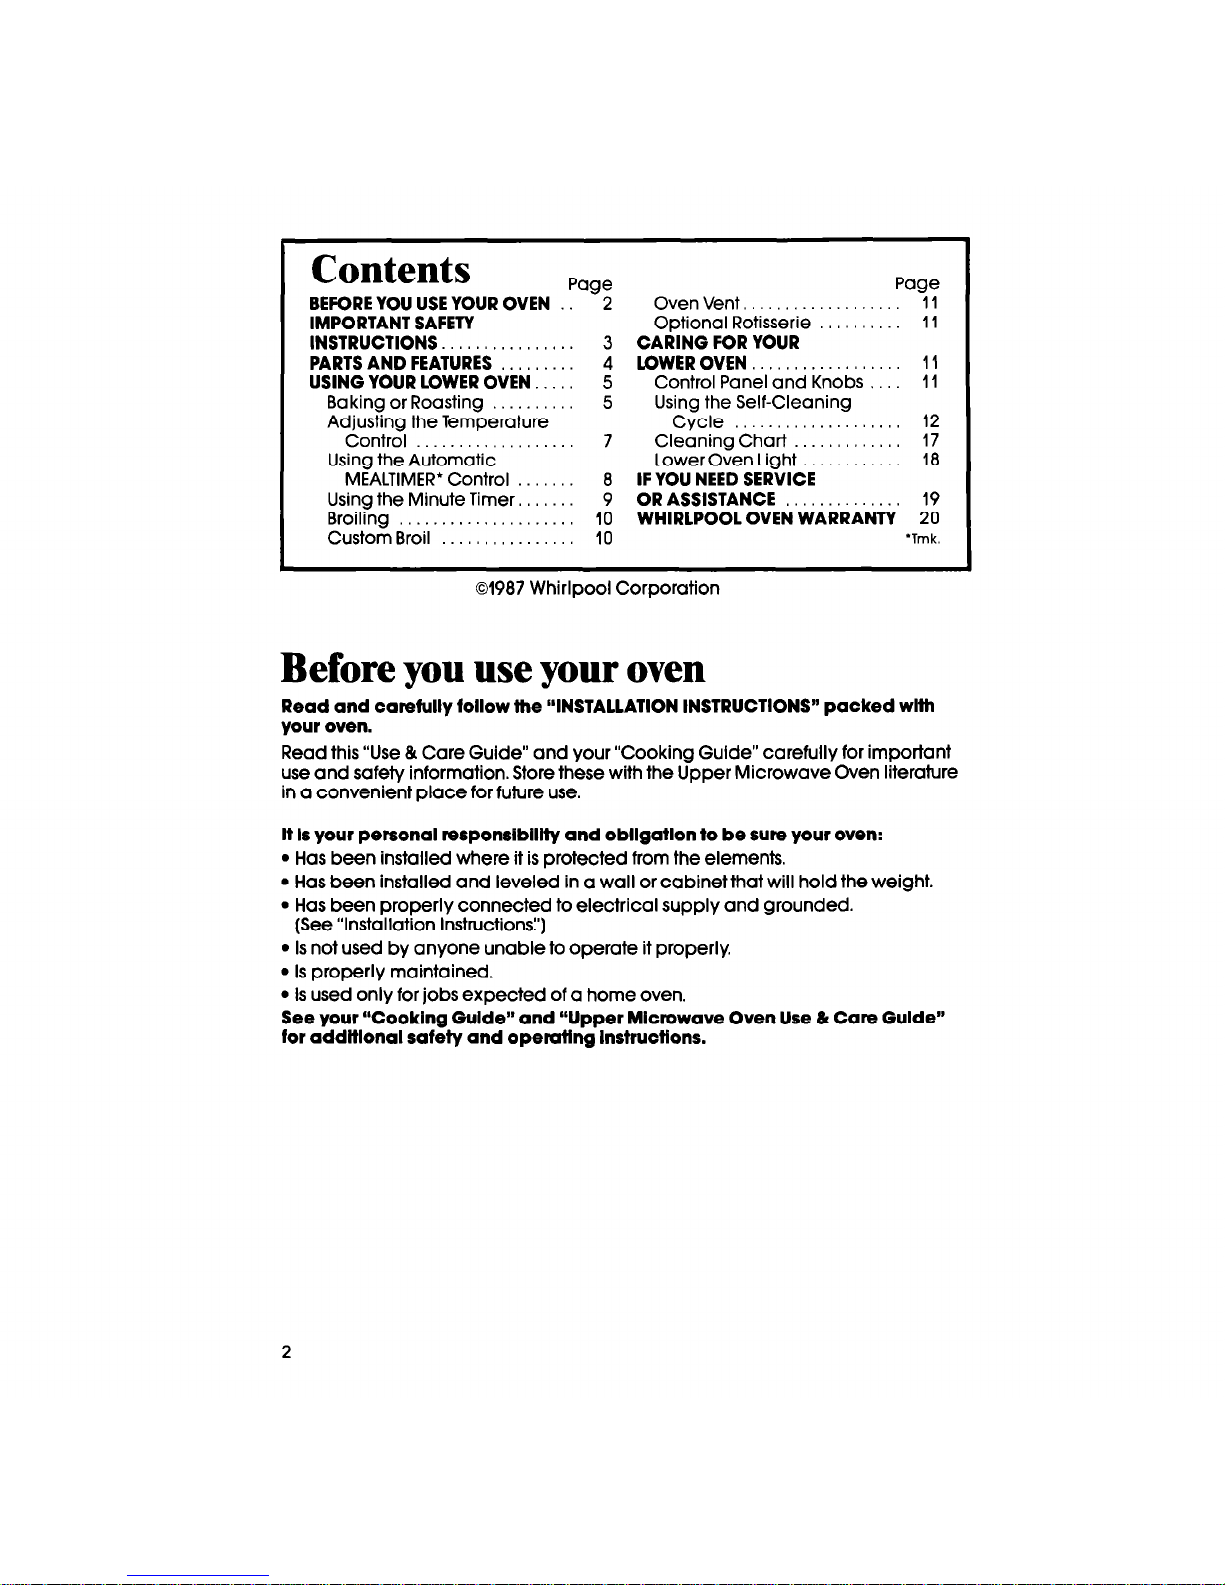
Contents
BEFORE YOU USE YOUR OVEN
IMPORTANT SAFETY
INSTRUCTIONS . . . .
PARTS AND FEATURES . .
USING YOUR LOWER OVEN..
Baking or Roasting
Adjusting the Temperature
Control .
Using the Automatic
MEALTIMER* Control
Using the Minute Timer.
Broiling . . . .
Custom Broil , .
Page
2
. 3
4
5
5
7
8
9
10
10
Page
Oven Vent, 11
Optional Rotisserie 11
CARING FOR YOUR
LOWER OVEN . . . . 11
Control Panel and Knobs , 11
Using the Self-Cleaning
Cycle . . . . . . . . . . . . . . . . . . . . 12
Cleaning Chart 17
Lower Oven Light 18
IF YOU NEED SERVICE
OR ASSISTANCE
19
WHIRLPOOL OVEN WARRANTY 20
‘Tmk.
01987 Whirlpool Corporation
Before you use your oven
Read and carefully follow the “INSTALLATION INSTRUCTIONS” packed with
your oven.
Read this “Use & Care Guide” and your “Cooking Guide” carefully for important
use and safety information. Store these with the Upper Microwave Oven literature
in a convenient place for future use.
It Is your personal responslblllty and obllgatlon to be sure your oven:
l Has been installed where it is protected from the elements.
l Has been installed and leveled in a wall or cabinet that will hold the weight.
l Has been properly connected to electrical supply and grounded.
(See “Installation Instructionsl’)
l Is not used by anyone unable to operate it properly.
l Is properly maintained.
l Is used only for jobs expected of a home oven.
See your “Cooking Guide” and “Upper Microwave Oven Use 6 Care Guide”
for addltlonal safety and operating Instructions.
2

IMPORTANT
SAFETY INSTRUCTIONS
1. DO NOT
allow children to use or
l Let steam and hot air escape
play with any part of the oven, or
from the oven before removing
leave them unattended near it.
food to prevent burns.
They could be burned or injured. 4.
DO NOT use
the oven to heat a
2.
DO NOT
store things children
room. Persons in the room could
might want above the oven.
be burned or injured, or a fire
Children could be injured while
could start.
climbing on the door and the
door could be damaged.
5.
DO NOT
wear loose or hanging
3. KEEP
children away from the oven
garments when using the oven.
They could ignite if they touch a
when it is on. The oven walls, racks
heating element and you could
and door can get hot enough to be burned.
cause burns.
6.
DO NOT
heat unopened con-
* Put oven racks where you want
tainers, they could explode. The
them before turning on the oven.
hot contents could burn you and
Heated racks could cause severe
container particles could cause
burns.
injury
l Do not touch any part of the
7. MAKE SURE
to open the oven
oven, especially the heating el-
door all the way when adding or
ements, until you know they are
removing food to prevent burns.
completely cool. Dark elements
can still be hot enough to cause
severe burns.
. FOR YOUR SAFETY.
DO NOT STORE OR USE GASOLINE OR OTHER FLAMMABLE VAPORS
AND LIQUIDS IN THE VICINITY OF THIS OR ANY OTHER APPLIANCE.
THEY COULD IGNITE CAUSING EXPLOSION AND/OR FIRE.
- SAW THESE INSTRUCTIONS -
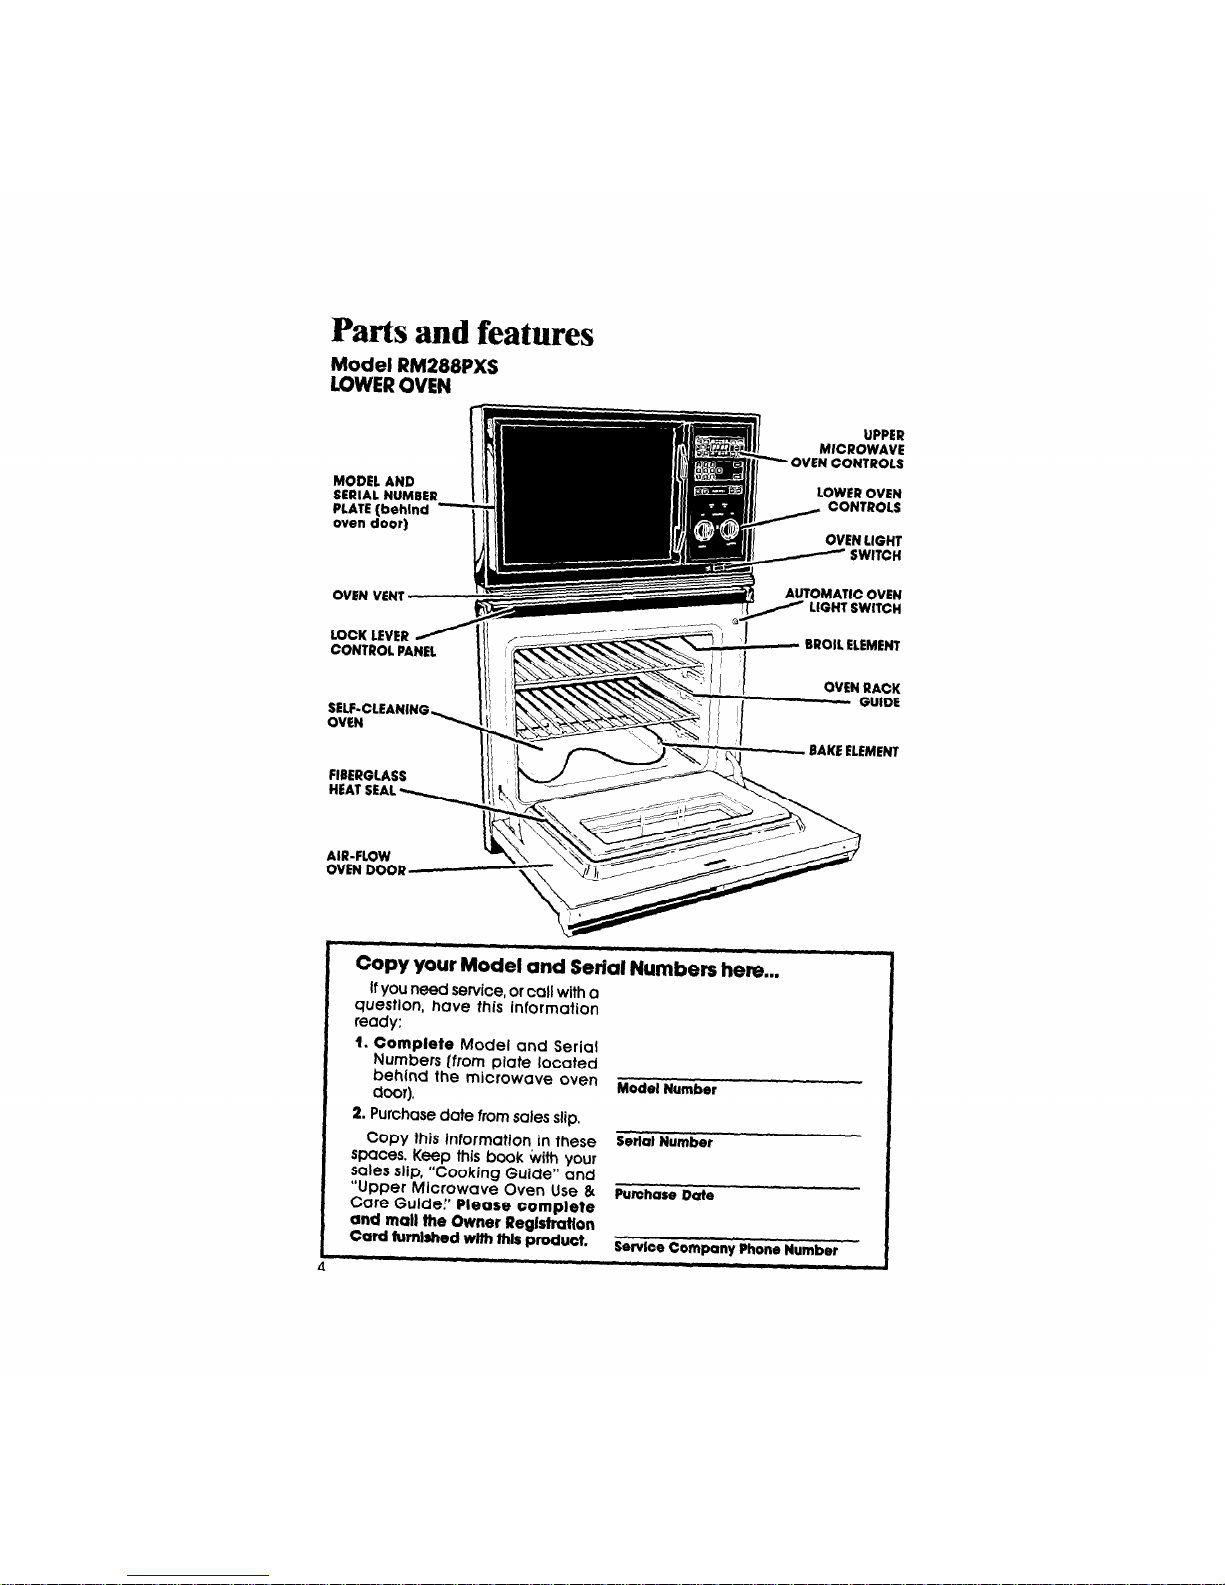
Parts and features
Model RM288PXS
LOWER OVEN
MlCROWAVi
OVEN CONTROLS
MODEL AND
SERIAL NUMBER
LOWER OVEN
- CONTROLS
OVEN LIGHT
UPPER
BROIL ELEMENT
AIR-FLOW
Copy your Model and Serial Numbers here...
If you need service, or call with a
question, have this information
ready:
1. Complete
Model and Serial
Numbers (from plate located
behind the microwave oven
dOOr).
Mode, Number
2. Purchase date from sales slip.
Copy this information in these
Seti Number
spaces. Keep this book with your
sales slip, “Cooking Guide” and
“Upper Microwave Oven Use &
Care Guldei’
Please complete
Puwhase note
and mall the Owner Reghatlon
Card furnIshed with this product.
Service Company Phone Number
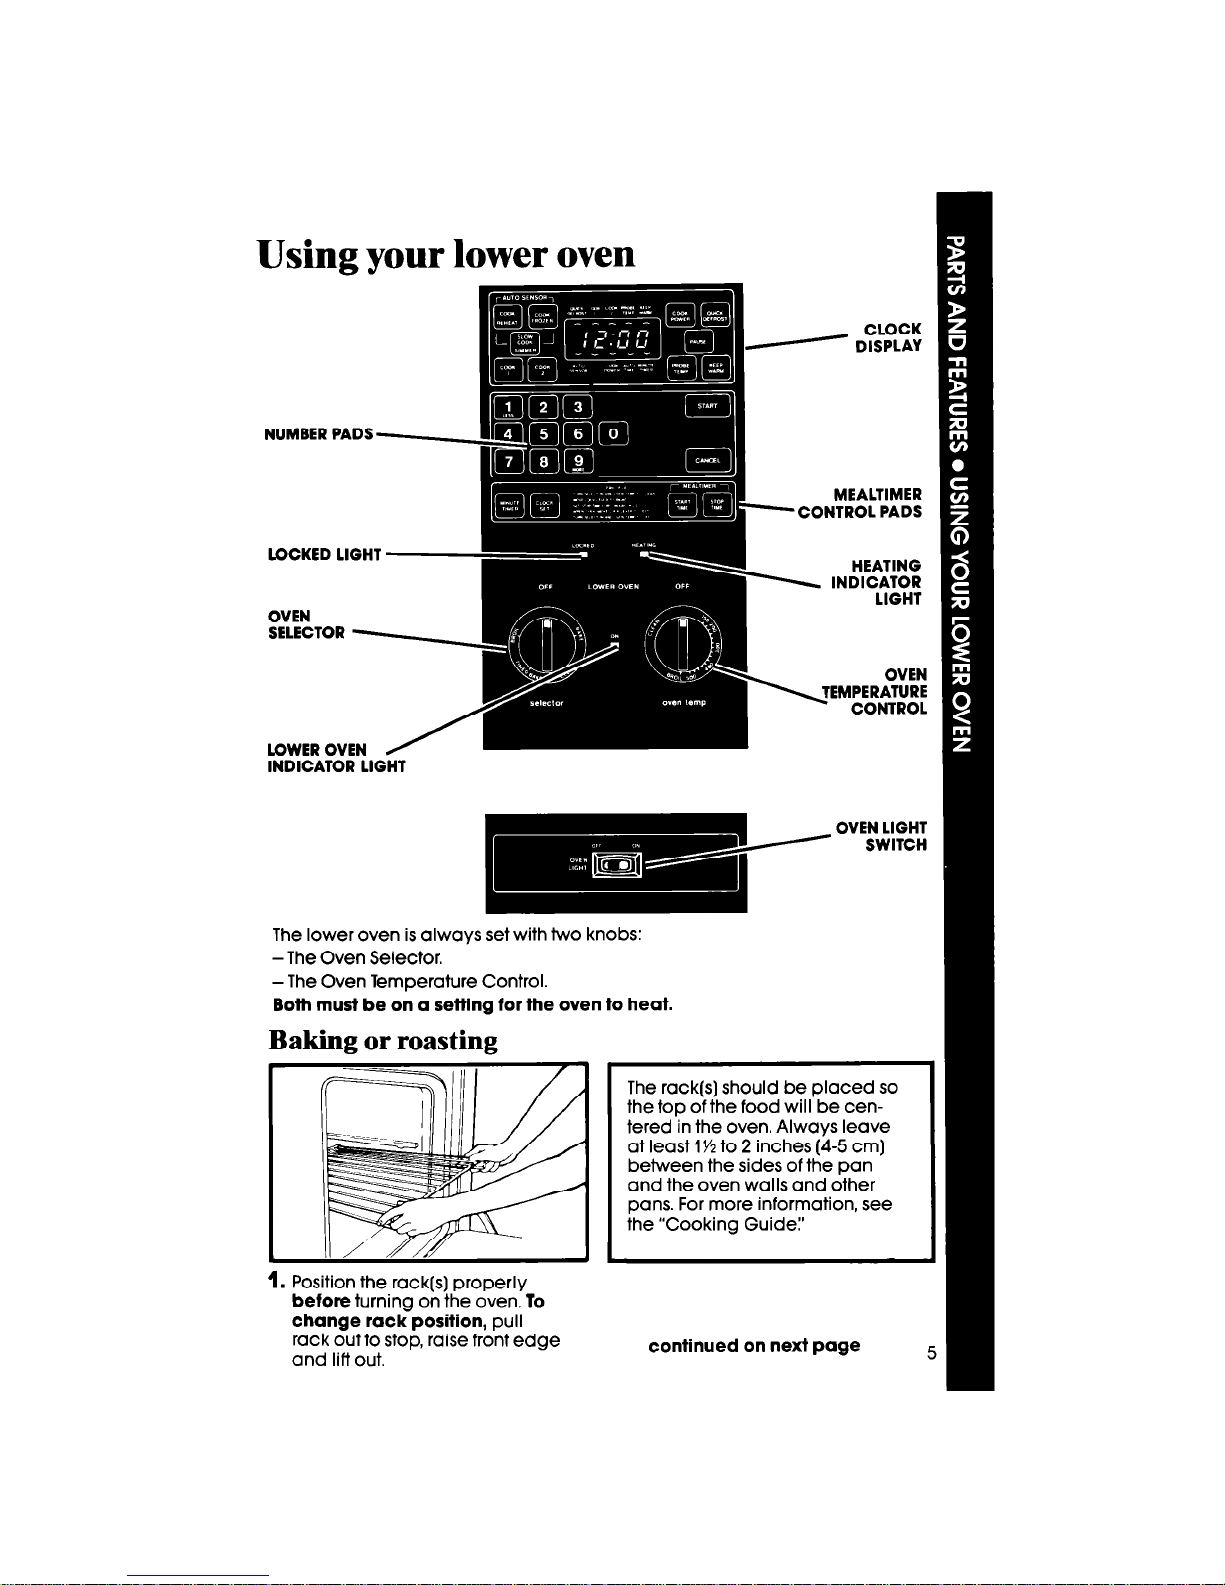
Using your lower oven
NUMBER PADS
MEALTIMER
CONTROL PADS
LOCKED LIGHT
OVEN
SELECTOR
LOWER OVEN
INDICATOR LIGHT
The lower oven is always set with two knobs:
-The Oven Selector.
-The Oven Temperature Control.
Both must be on a setting for the oven to heat.
The rack(s) should be placed so
the top of the food will be centered in the oven. Always leave
at least 1 YZ to 2 inches (4-5 cm)
between the sides of the pan
and the oven walls and other
pans. For more information, see
the “Cooking Guide:’
1.
Position the rack(s) properly
before
turning on the oven. To
change rack position,
pull
rack out to stop, raise front edge
and lift out.
continued on next page
5
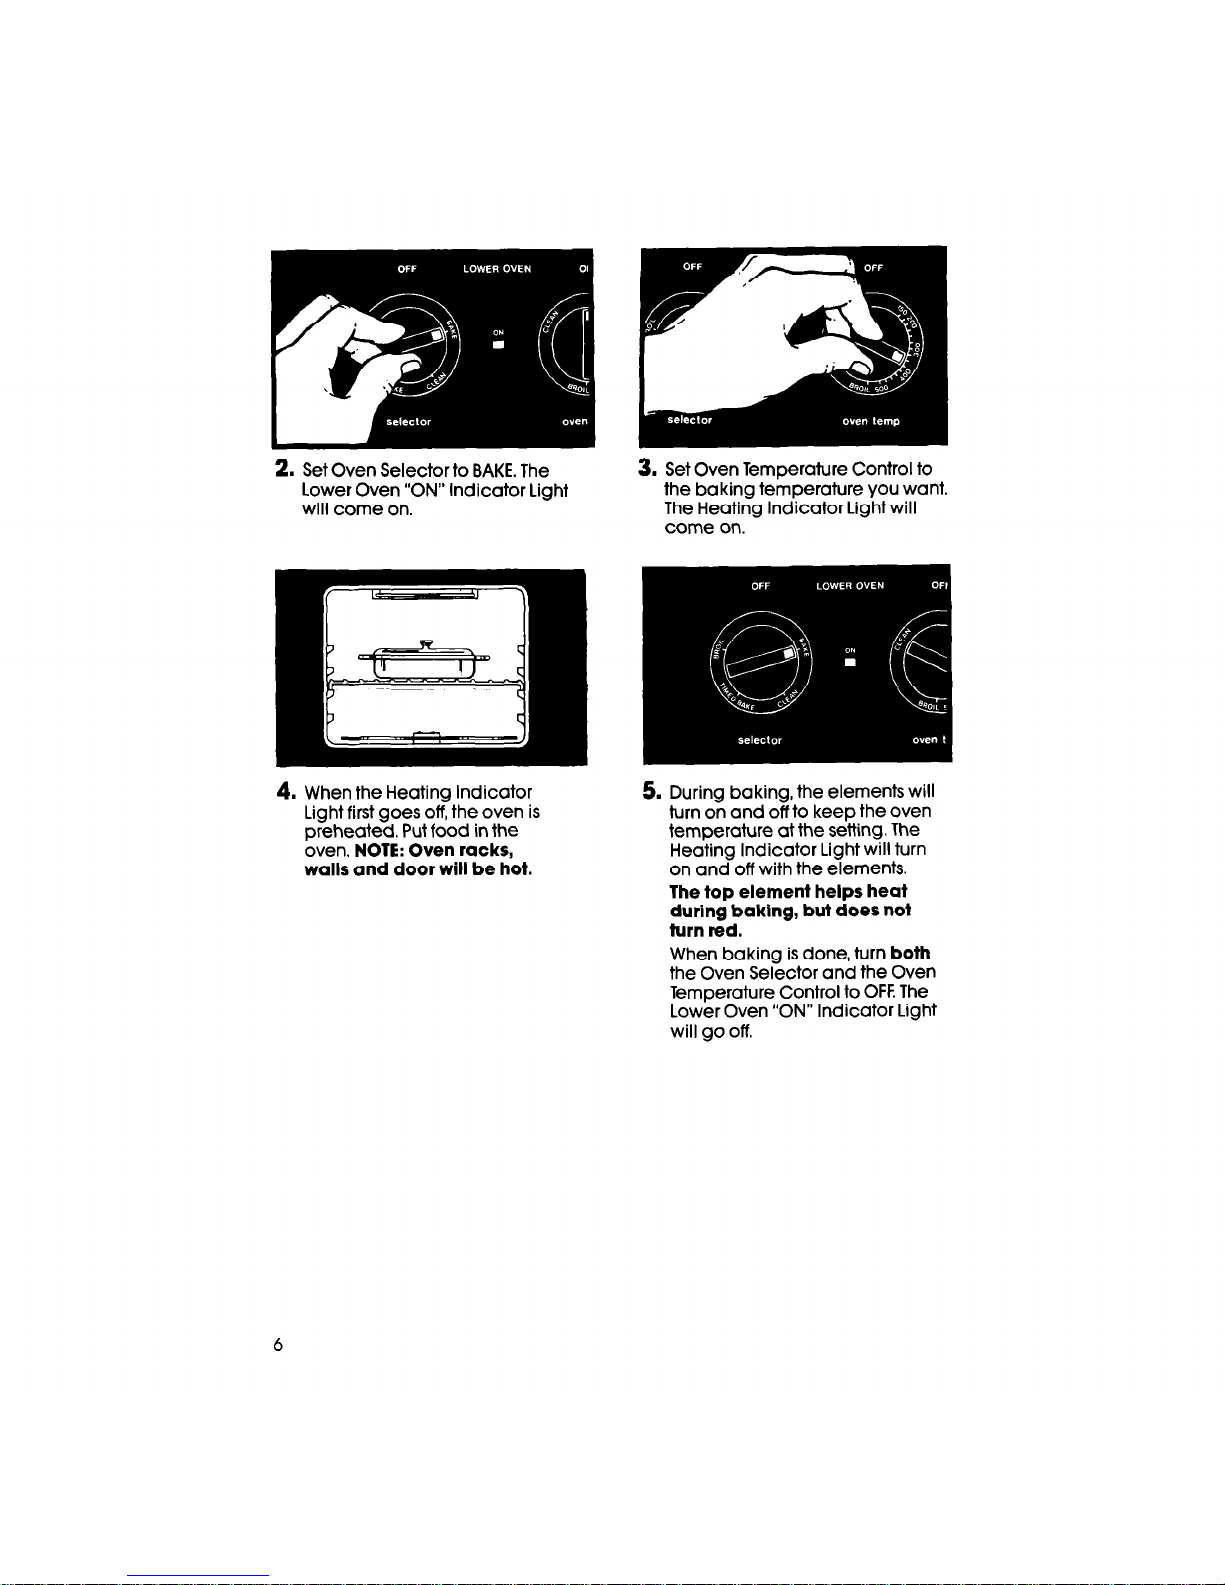
2. Set Oven Selector to BAKE. The
Lower Oven “ON” Indicator Light
will come on.
4. When the Heating Indicator
Light first goes off, the oven is
preheated. Put food in the
oven.
NOTE: Oven racks,
walls and door will be hot.
3. Set Oven Temperature Control to
the baking temperature you want.
The Heating Indicator Light will
come on.
5. During baking, the elements will
turn on and off to keep the oven
temperature at the setting. The
Heating Indicator Light will turn
on and off with the elements.
The top element helps heat
during baking, but does not
turn red.
When baking is done, turn
both
the Oven Selector and the Oven
Temperature Control to OFF. The
Lower Oven “ON” Indicator Light
will go off.
6
 Loading...