

Whirlpool RF395PXP User Manual
ELECTRIC
RANGE
Self-Cleaning
Model RF395PXP
Microwawe Owens, Trash Compactors. Room Air Condltloners. Oehumldlflers. Automatic Washers, Clothes Dryers, Freezers. Refrigerator-Frl
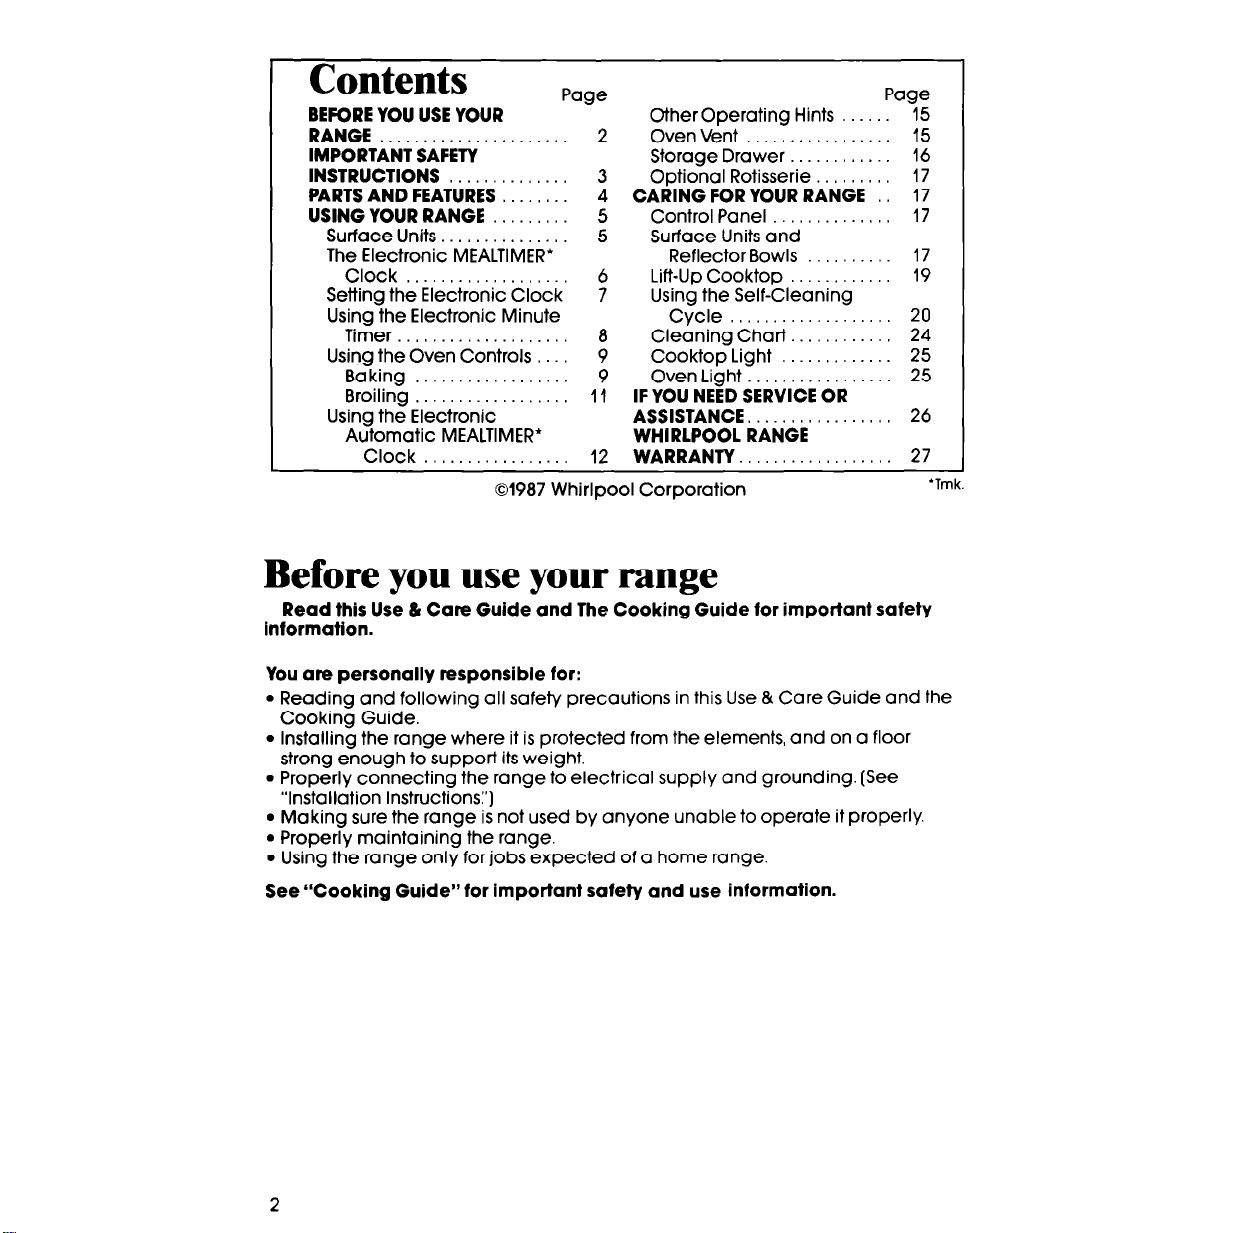
Contents
BEFORE YOU USE YOUR
RANGE . . 2
IMPORTANT SAFETY
INSTRUCTIONS 3
PARTS AND FEATURES 4
USING YOUR RANGE 5
Surface Units . . . . 5
The Electronic MEALTIMER’
Clock . 6
Setting the Electronic Clock 7
Us;i-gFe,Electronic Minute
Page
Other Operatina Hints
Oven Vent .... T. ........
Storage Drawer .........
Optional Rotisserie ......
CARING FOR YOUR RANGE
Control Panel ...........
Surface Units and
Reflector Bowls .......
Lift-Up Cooktop .........
Using the Self-Cleaning
Cycle ................
Cleaning Chart .........
Using the &en ‘C&r& : : : : 8 9
Baking . . 9
Broiling . . 11
Using the Electronic
Automatic MEALTIMER’
Clock . . . 12
Cooktop Light ..........
Oven Light ..............
IF YOU NEED SERVICE OR
ASSISTANCE, .............
WHIRLPOOL RANGE
WARRANTY. ..............
01987 Whirlpool Corporation
Before you use your range
Read this Use b Care Guide and The Cooking Guide for important safety
Information.
Page
15
15
16
17
17
17
17
19
20
., 24
25
25
26
27
‘Tmk.
You are personally responsible for:
l
Reading and following all safety precautions in this Use & Care Guide and the
Cooking Guide.
l
Installing the range where it is protected from the elements, and on a floor
strong enough to support its weight.
l
Properly connecting the range to electrical supply and grounding. (See
“Installation Instructions:‘)
l
Making sure the range is not used by anyone unable to operate it properly.
l
Properly maintaining the range.
l
Using the range only for jobs expected of a home range.
See “Cooking Guide” for important safety and use information.
2
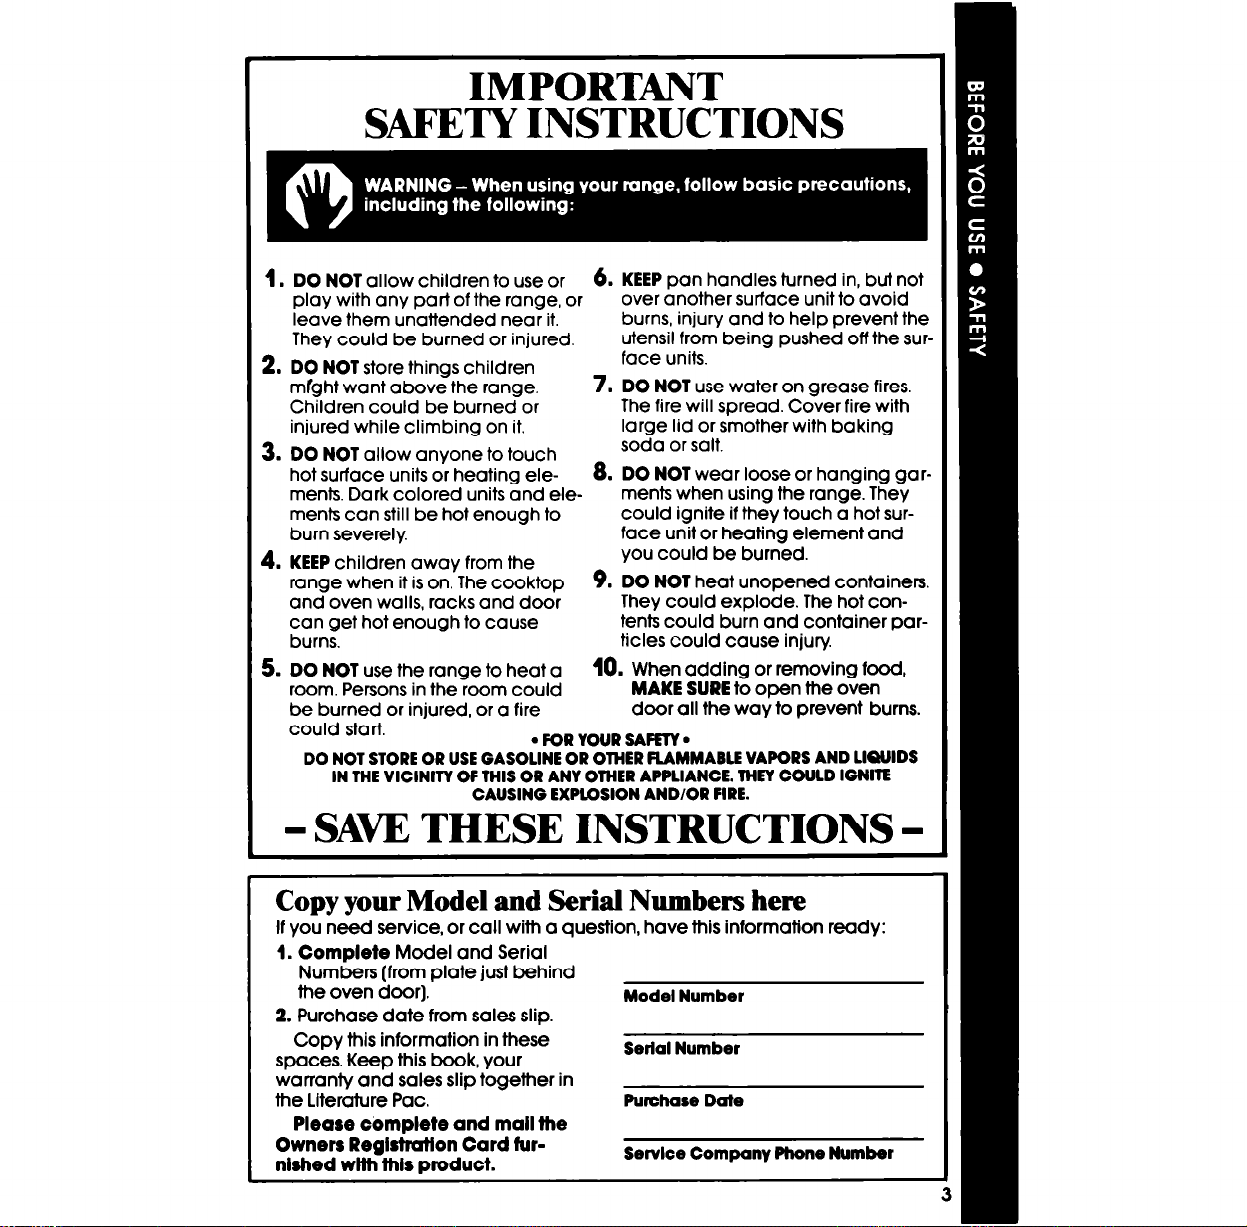
IMPORTANT
SAFETY INSTRUCTIONS
1. DO NOT allow children to use or
play with any part of the range, or
leave them unattended near it.
They could be burned or injured.
2. DO NOT store things children
mfght want above the range.
Children could be burned or
injured while climbing on it.
3. DO NOT allow anyone to touch
hot surface units or heating elements. Dark colored units and elemenk can still be hot enough to
burn severely.
4. KEEP children away from the
range when it is on. The cooktop
and oven walls, racks and door
can get hot enough to cause
burns.
5. DO NOT use the range to heat a
room. Persons in the room could
be burned or injured, or a fire
could start.
DO NOT STORE OR USE GASOLINE OR OTHER FLAMMABLE VAPORS AND
IN THE VICINITY OF THIS OR ANY OTHER APPLIANCE. THEY COULD IGNITE
l
CAUSING EXPLOSION AND/OR FIRE.
6. KEEP pan handles turned in, but not
over another surface unit to avoid
burns, injury and to help prevent the
utensil from being pushed off the surface units.
7. DO NOT use water on grease fires.
The fire will spread. Cover fire with
large lid or smother with baking
soda or salt.
8. DO NOT wear loose or hanging gar-
ments when using the range. They
could ignite if they touch a hot surface unit or heating element and
you could be burned.
9. DO NOT heat unopened containers.
They could explode. The hot contenk could burn and container partitles could cause injury.
10. When adding or removing food,
MAKE SURE to open the oven
door all the way to prevent burns.
FOR YOUR SAFETY.
LIQUIDS
- SAW THESE INSTRUCTIONS -
Copy your Model and Serial Numbers here
If you need service, or call with a question, have this information ready:
1. Complete Model and Serial
Numbers (from plate just behind
the oven door].
2. Purchase date from sales slip.
Copy this information in these
spaces. Keec~ this book, vour
warranty and sales slip together in
the Lfterature Pac.
Please complete and mall the
Owners Reglhatlon Card turnlshed
wlth ihls DrOdUCt.
Model Number
Serial Number
Purohase Date
Servloe Company Phone Number

Parts and features
Model RF395PXP
ELECTRONIC MEALTIMER’
CLOCK/MINUTE TIMER
CONTROL KNOB
CONTROL PANEL\
PLUG-IN
SURFACE UNIT
MODEL AND SERI
NUMBER PLATE
SELF-CLEANING
FIBERGLASS
SURFACE UNIT
SIGNAL LIGHT
I
‘a
l.ER REAR
CONTROL KNOB
&I
SURFACE UNIT
INDICATOR
PORCELAIN-ENAMEL
REFLECTOR
CHROME TRIM RING
FLIP TOP
INSTRUCTIONS
BOWL AND
AUTOMATIC
REMOVABLE
STORAGE DRAWER
‘Tmk.
Q
OVEN DOOR
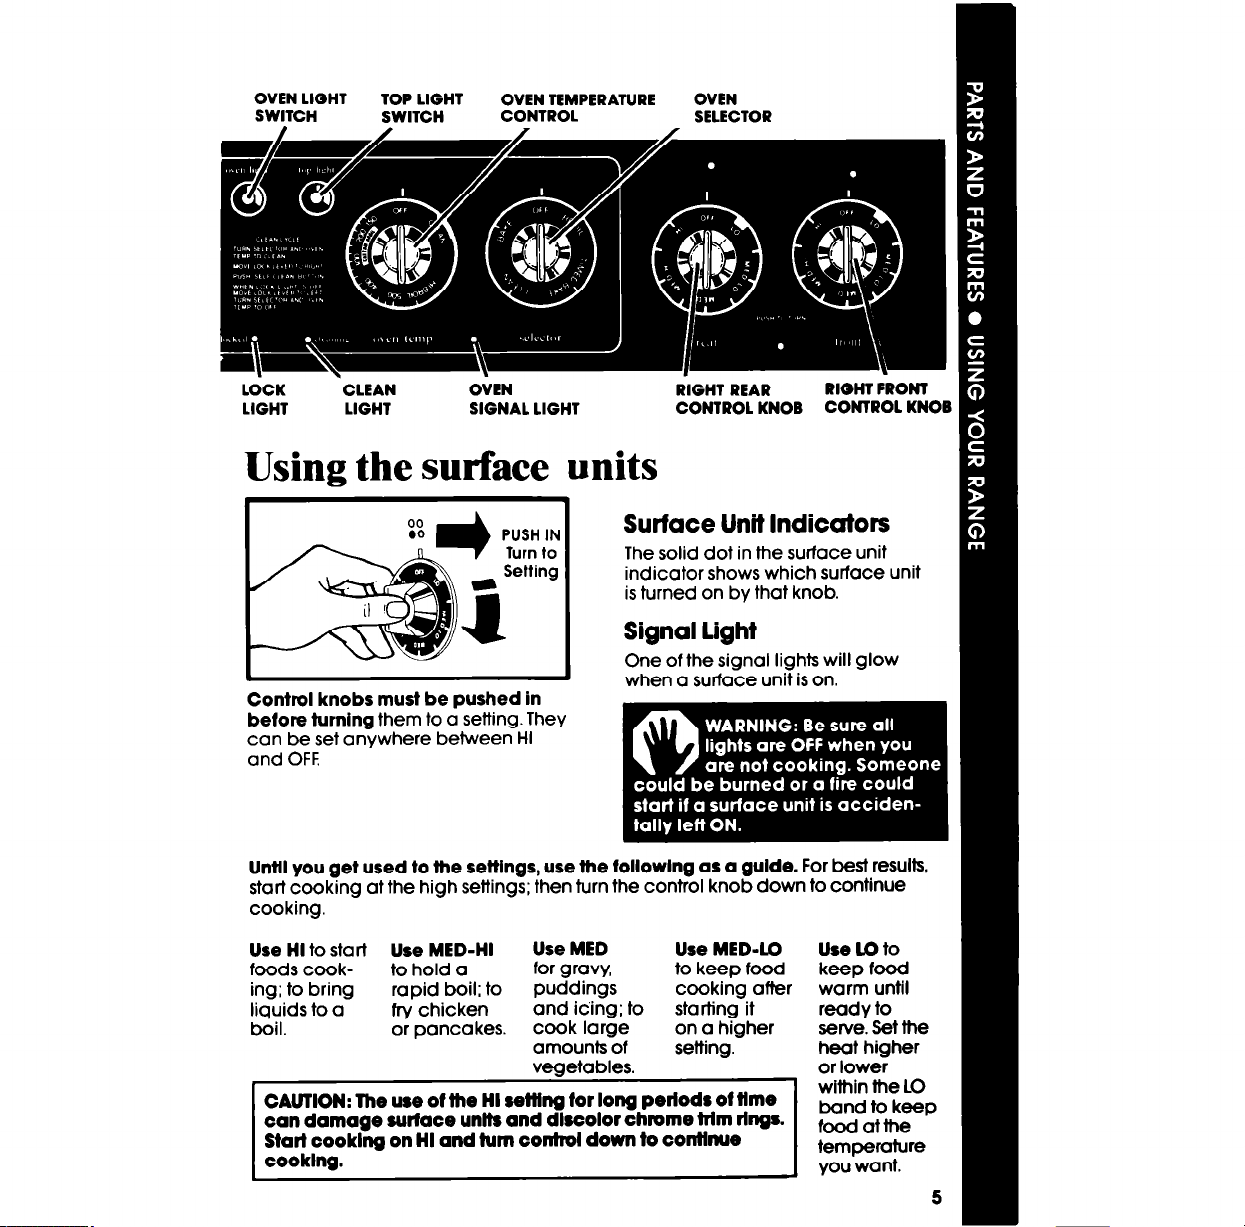
OVEN LIGHT
SWITCH
TOP LIGHT
SWITCH
OVEN TEMPERATURE OVEN
CONTROL
SELECTOR
L&K
LIGHT LIGHT SIGNAL LIGHT
.
CLEAN
0;EN
RIGHT REAR
CONTROL KNOB CONTROL KNOB
RIGHT F-RONT
Using the surface units
Surface Unit Indicators
The solid dot in the surface unit
indicator shows which surface unit
is turned on by that knob.
Signal Light
One of the signal lights will glow
Control knobs must be pushed in
before turning them to a setting. They
can be set anywhere between HI
and OFF.
Until you get used to the settings, use the following as a guide.
start cooking at the high settings; then turn the control knob down to continue
cooking.
Use Hi to
foods cook- to hold a
ing; to bring rapid boil; to
liquids to a fry chicken
boil. or pancakes.
start
Use MED-Hi
Use MED
for gravy, to keep food
puddings cooking after
and icing; to
cook large on a higher
amounts of setting.
vegetables.
CAUTION: The use of the Hi sefflng for long periods of time
can damage surface units and discolor chrome lrlm rings.
Start cooking on Hi and turn contmi down to conilnue
cooking.
when a surface unit is on.
For best results,
Use MED-LO
starting it
Use LO
keep food
warm until
ready to
serve. Set the
heat higher
or lower
within the LO
band to keep
food at the
tempemture
you want.
to
5
Use only fiat-bottomed utensils for best cooking results and to prevent damage
to the cooktop. Specialty items with rounded or ridged bottoms (woks, ridged
bottom canners or tea kettles) are not recommended.
See the “Cooking Guide” for important utensil information.
Optional Canning Kit (Part
NO.
242905)
The large diameter of most water-bath or pressure canners combined with
high heat settings for long periods of time can shorten the life of regular surface
units and cause damage to the cooktop.
If you plan to use the cooktop for canning, we recommend the installation
of a Canning Kit. Order the kit from your Whirlpool Dealer or Tech-Care@ Service
Company.
See the “Cooking Guide” for important canning information.
The Electronic MEALTIMER* Clock
The Electronic MEALTIMER’ Clock handles many different types of functions.
The following operating hints may be helpful when using the clock:
l
The numbers on the display change rapidly when turning the Set Knob.
l
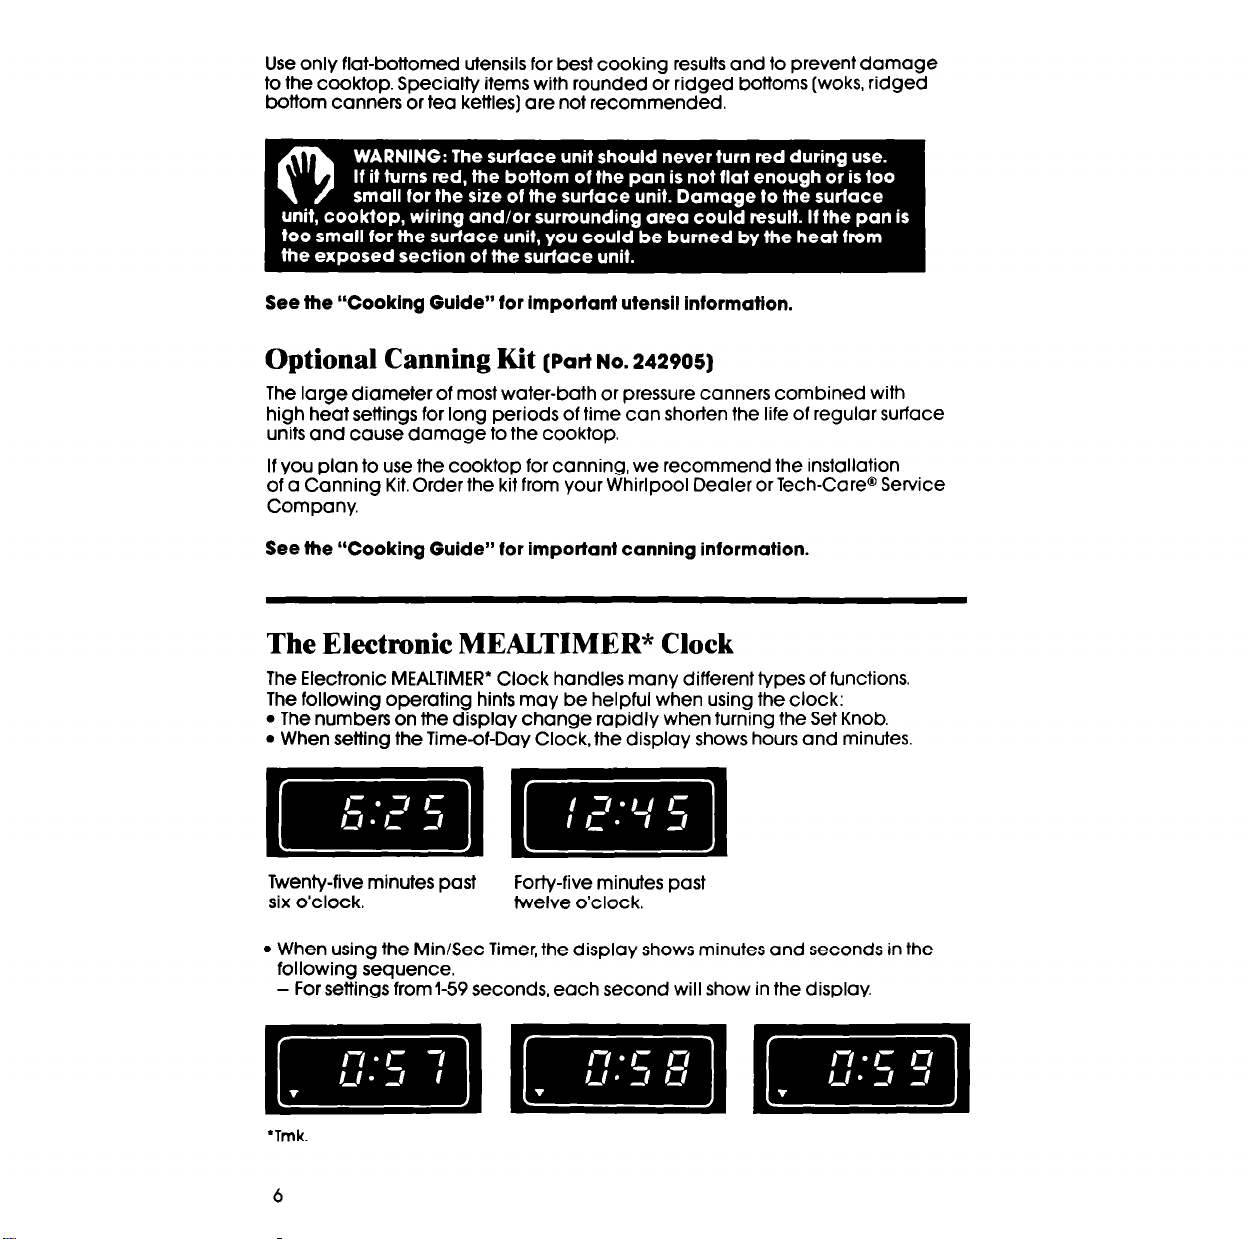
When setting the Time-of-Day Clock, the display shows hours and minutes
Twenty-five minutes past
six o’clock.
Forty-five minutes past
twelve o’clock.
l
When using the Min/Sec Timer, the display shows minutes and seconds in the
following sequence.
- For settings from139 seconds, each second will show in the display.
‘Tmk.
6
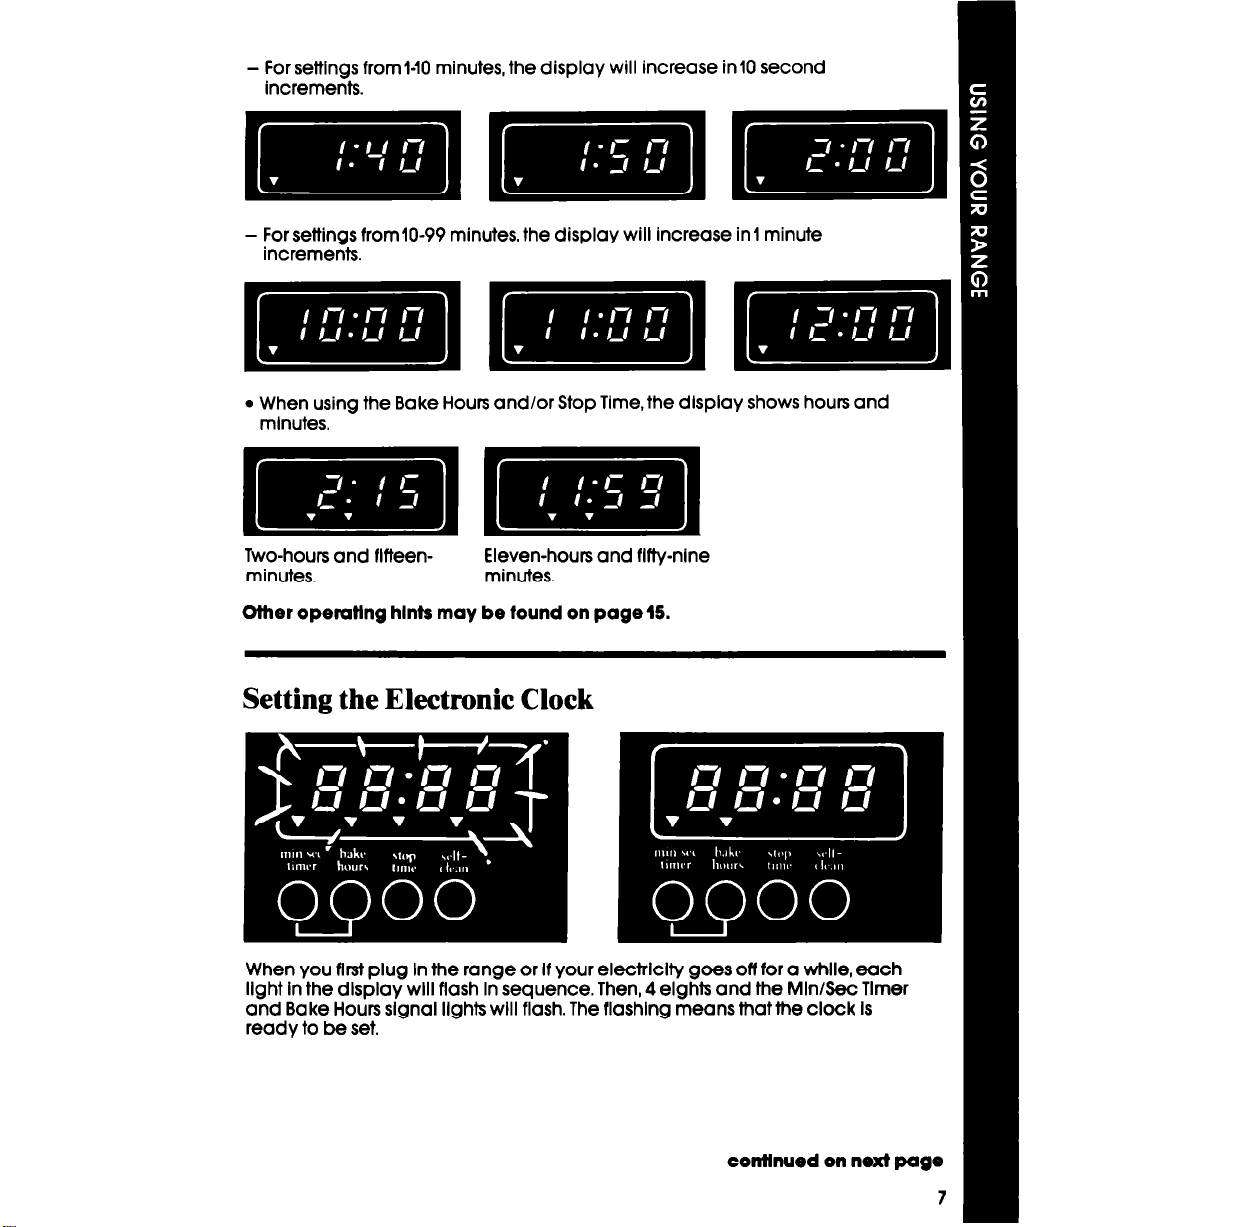
- For settlngs from140 minutes, the display will increase in10 second
increments.
- For settings from10-99 minutes, the display will increase in 1 minute
increments.
l
When using the Bake Hours and/or Stop Tlme, the display shows hours and
mlnutes.
Two-hours and flfteen-
minutes.
Eleven-hours and fifty-nlne
minutes.
Ofher operafing hinfs may be found on page 15.
When you first plug In the range or If your electrlcity goes off for a while, each
light in the display wlil flash In sequence. Then, 4 elghts and the MinlSec Timer
and Bake Hours slgnal lights wtll flash. The flashing means thatthe clock Is
ready to be set.
confinued on next page
7
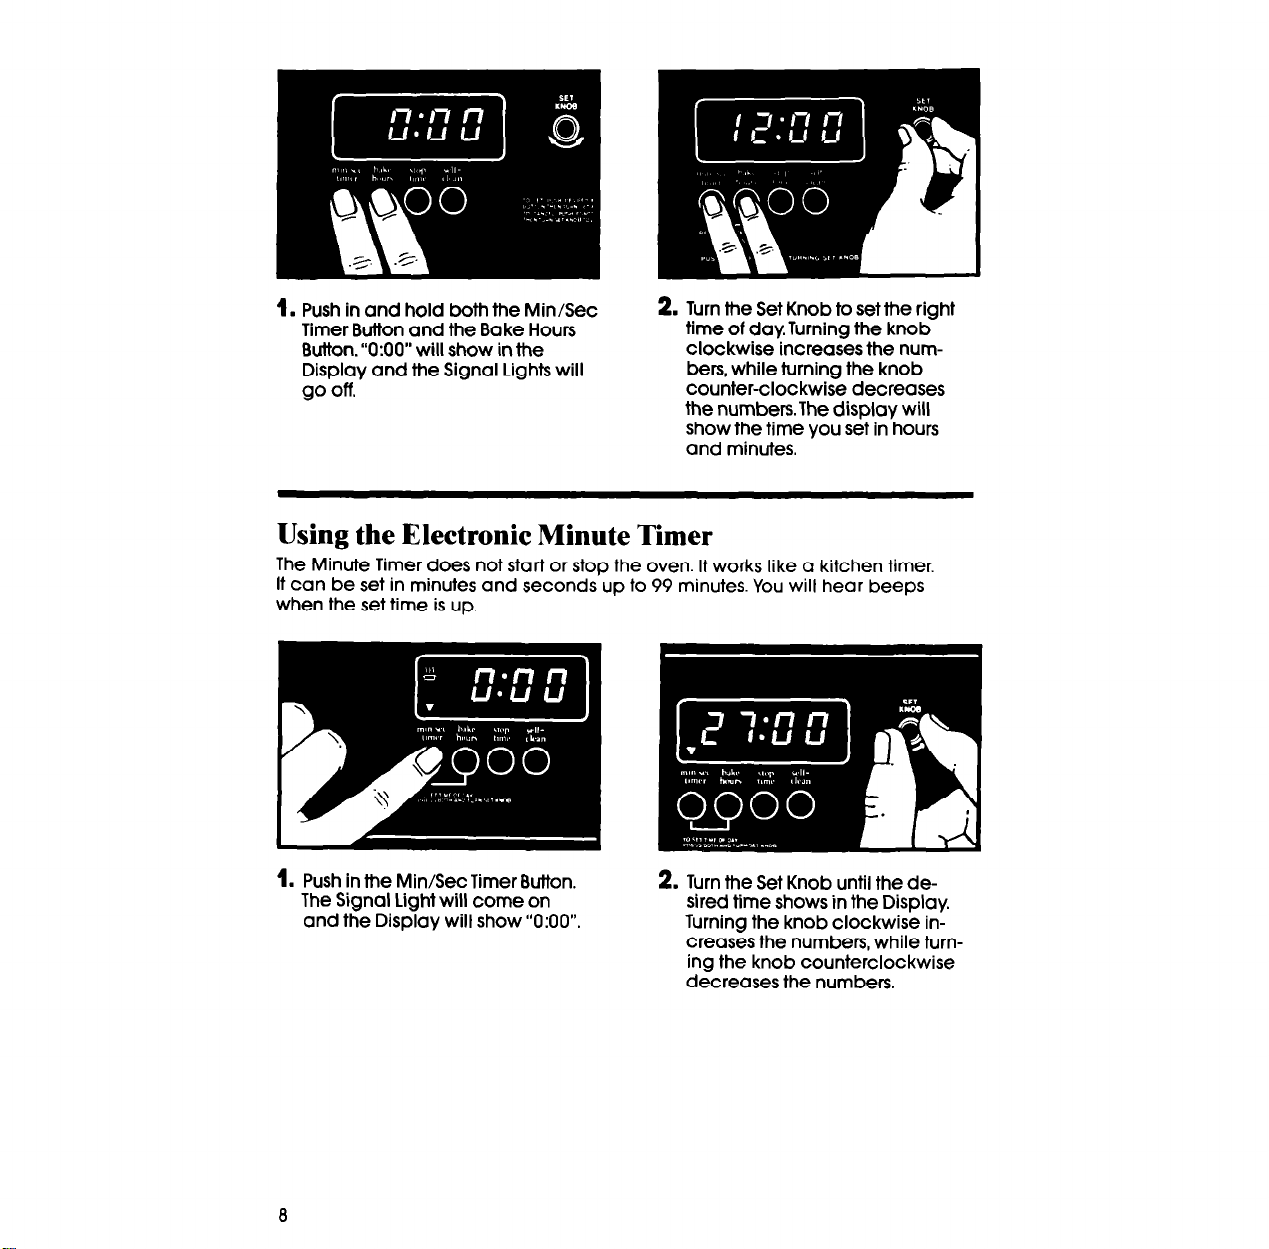
1. Push in and hold both the Min/Sec
Timer Button and the Bake Hours
Button. “0:OO” will show in the
Display and the Signal Lights will
go off.
2. Turn the Set Knob to setthe right
time of day. Turning the knob
clockwise increases the num-
hers, while turning the knob
counter-clockwise decreases
the numbersThe display will
show the time you set in hours
and minutes.
Using the Electronic Minute Timer
The Minute Timer does not start or stop the oven. it works like a kitchen timer.
It can be set in minutes and seconds up to 99 minutes. You will hear beeps
when the set time is up.
1. Push in the Min/Sec Timer Button.
The Signal Light will come on
and the Display will show “0:OO”.
2. Turn the Set Knob until the desired time shows in the Display.
Turning the knob clockwise increases the numbers, while turn-
ing the knob counterclockwise
decreases the numbers.
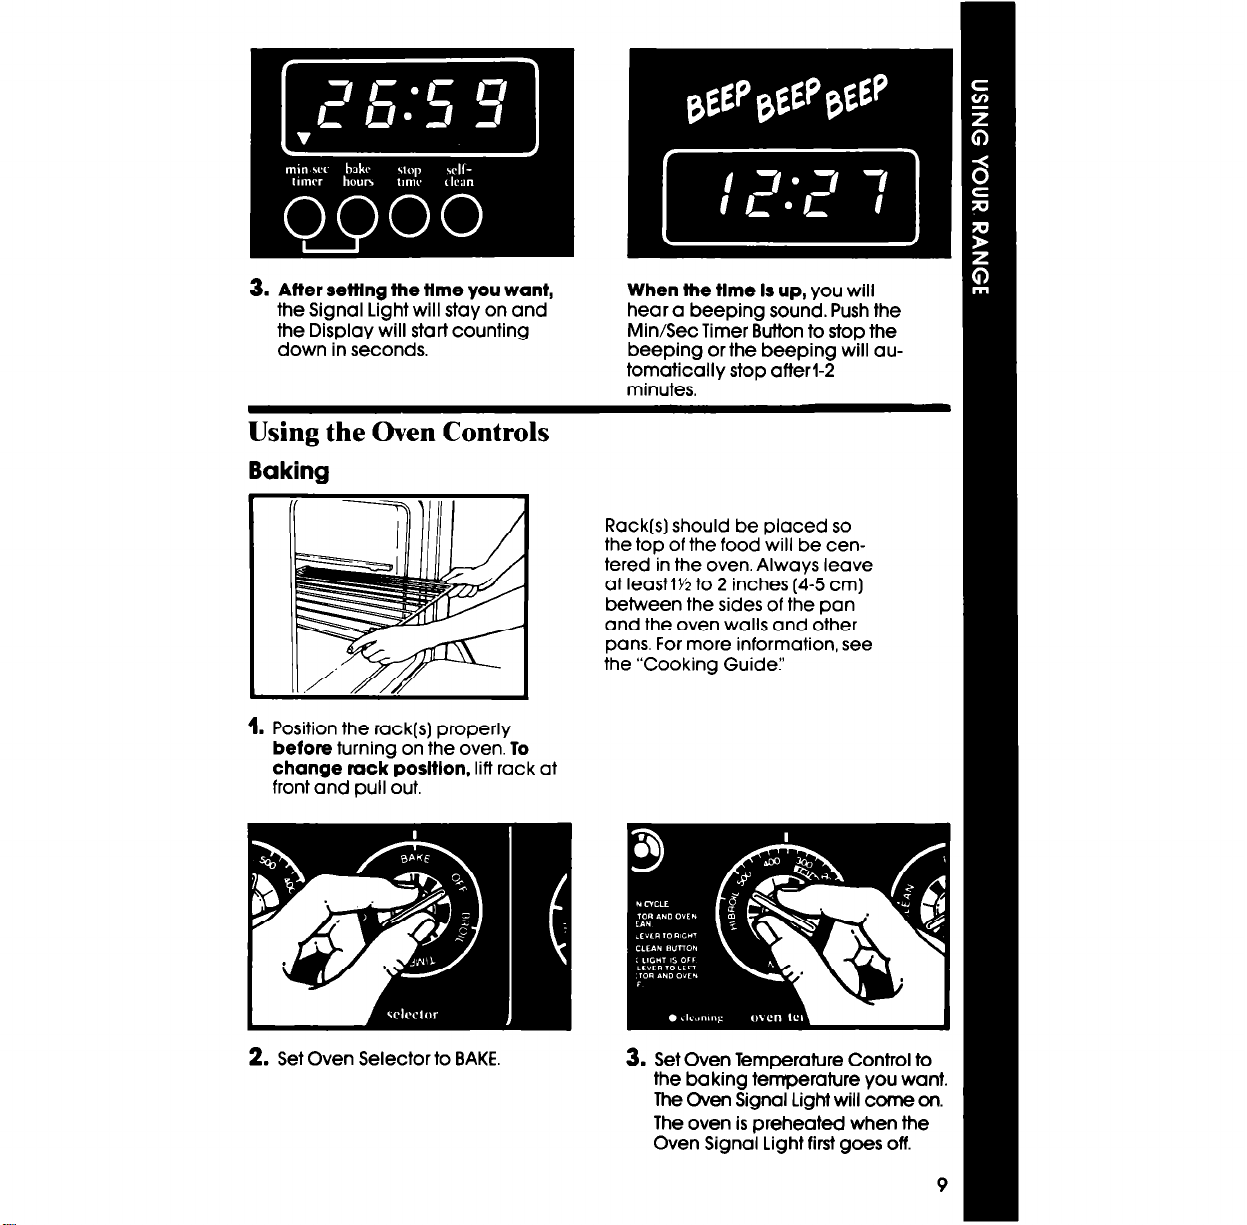
3.
Affer sefflng the fime you want,
the Signal Light will stay on and
the Display will start counting
down in seconds.
Using the Oven Controls
Baking
1. Position the rack(s) property
before turning on the oven. To
change rack position, lift rack at
front and pull out.
When the time is up, you will
hear a beeping sound. Push the
Min/Sec Timer Button to stop the
beeping or the beeping will automatically stop afterl-2
minutes.
Rack(s) should be placed so
the top of the food will be centered in the oven. Always leave
at IeastlYz to 2 inches (4-5 cm)
between the sides of the pan
and the oven wails and other
pans. For more information, see
the Cooking Guide:’
2. Set Oven Selector to BAKE.
3. Set Oven Temperature Control to
the baking temperature you want.
The Oven Signal Light will come on.
The oven is preheated when the
Oven Signal Light first goes off.
9
 Loading...