

Whirlpool RF335EXP User Manual
Continuous-Cleaning
Model
~~~ ~-~~~
-8.e II ,:- : .,a: *,,*y5*
MIcrowave Ovens. Trash Compactors, Room Au Condltloners. Oehumldlflers. Aulomatx Washers, Clolhes Dryers, Freezers, Relrigeralor-F
. 7, ,.a. I
,_/ ‘- z+il;. :.>.;: ;??qg. 4
e*etp.+.~;*g

Contents
IMPORTANT SAFETY
INSTRUCTIONS ...............
PARTS AND FEATURES. ........
USING YOUR RANGE. .........
Using the Surface Units. .....
Optional Canning Kit .......
Using the Oven Controls ....
Baking
Broiling ..................
Optional Rotisserie Kit ......
Oven Vent. .................
Storage Drawer ............
...................
Paae
-.z-
10
10
2 BEFORE YOU USE YOUR RANGE
CARING FOR YOUR RANGE . 11
Control Panel . . 11
3
Surface Units and
4
5
5
6
Reflector Bowls . 12
Lift-Up Cooktop , 14
Oven Door . . 14
Continuous-Cleaning Oven 15
Cleaning Chart 17
:
IF YOU NEED SERVICE OR
9
ASSISTANCE . . . 18
9
WHIRLPOOL RANGE
WARRANTY . . . . 20
Page
01987 Whirlpool Corporation
Before you use your range
Read lhls Use 81 Care Guide and The CookIng Guide for lmporlanl saiety
Information.
You are personally responsible for:
l
Reading and following all safety precautions in this Use & Care Guide and the
Cooking Guide.
l
Installing the range where It is protected from the elements, and on a floor
strong enough to support its weight.
l
Properly connecting the range to electrical supply and grounding. (See
“Installation Instructions:‘)
l
Maklng sure the range is not used by anyone unable to operate it properly.
l
Properly maintalnlng the range.
l
Using jhe range only for jobs expected of a home range.
See “Cooking Guide” for lmpoitant saiety and use Information.

IMPORTANT
SAFETY INSTRUCTIONS
1. DO NOT allow children to use or
play with any part of the range, or
leave them unattended near it.
They could be burned or injured.
2. DO NOT store things children
might want above the range.
Children could be burned or
injured while climbing on it.
3. DO NOT allow anyone to touch
hot surface units or heating elements. Dark colored units and elements can still be hot enough to
burn severely.
4. KEEP children away from the
range when it is on. The cooktop
and oven walls, racks and door
can get hot enough to cause
burns.
5. DO NOT use the range to heat a
room. Persons in the room could
be burned or injured, or a fire
could start.
6. KEEP pan handles turned in, but not
over another surface unit to avoid
burns, injury and to help prevent the
utensil from being pushed off the surface units.
7. DO NOT use water on grease fires.
The fire will spread. Cover fire with
large lid or smother with baking
soda or salt.
8. DO NOT wear loose or hanging gar-
ments when using the range. They
could ignite if they touch a hot surface unit or heating element and
you could be burned.
9. DO NOT heat unopened containers.
They could explode. The hot contents could burn and container partitles could cause injury.
10. When adding or removing
food, MAKE SURE to open the
oven door all the way to
VAPORS AND LIGUIDS
HEY COULD IGNITE
r call with a question, have this information ready:
the oven door).
2. Purchase date from sales Slip
Copy this information in these
spaces. Keep this book, your
warranty and sales slip together in
the Literature Pac.
te and
mail the
Model Number
Serial Number
Purchase Date
I
I
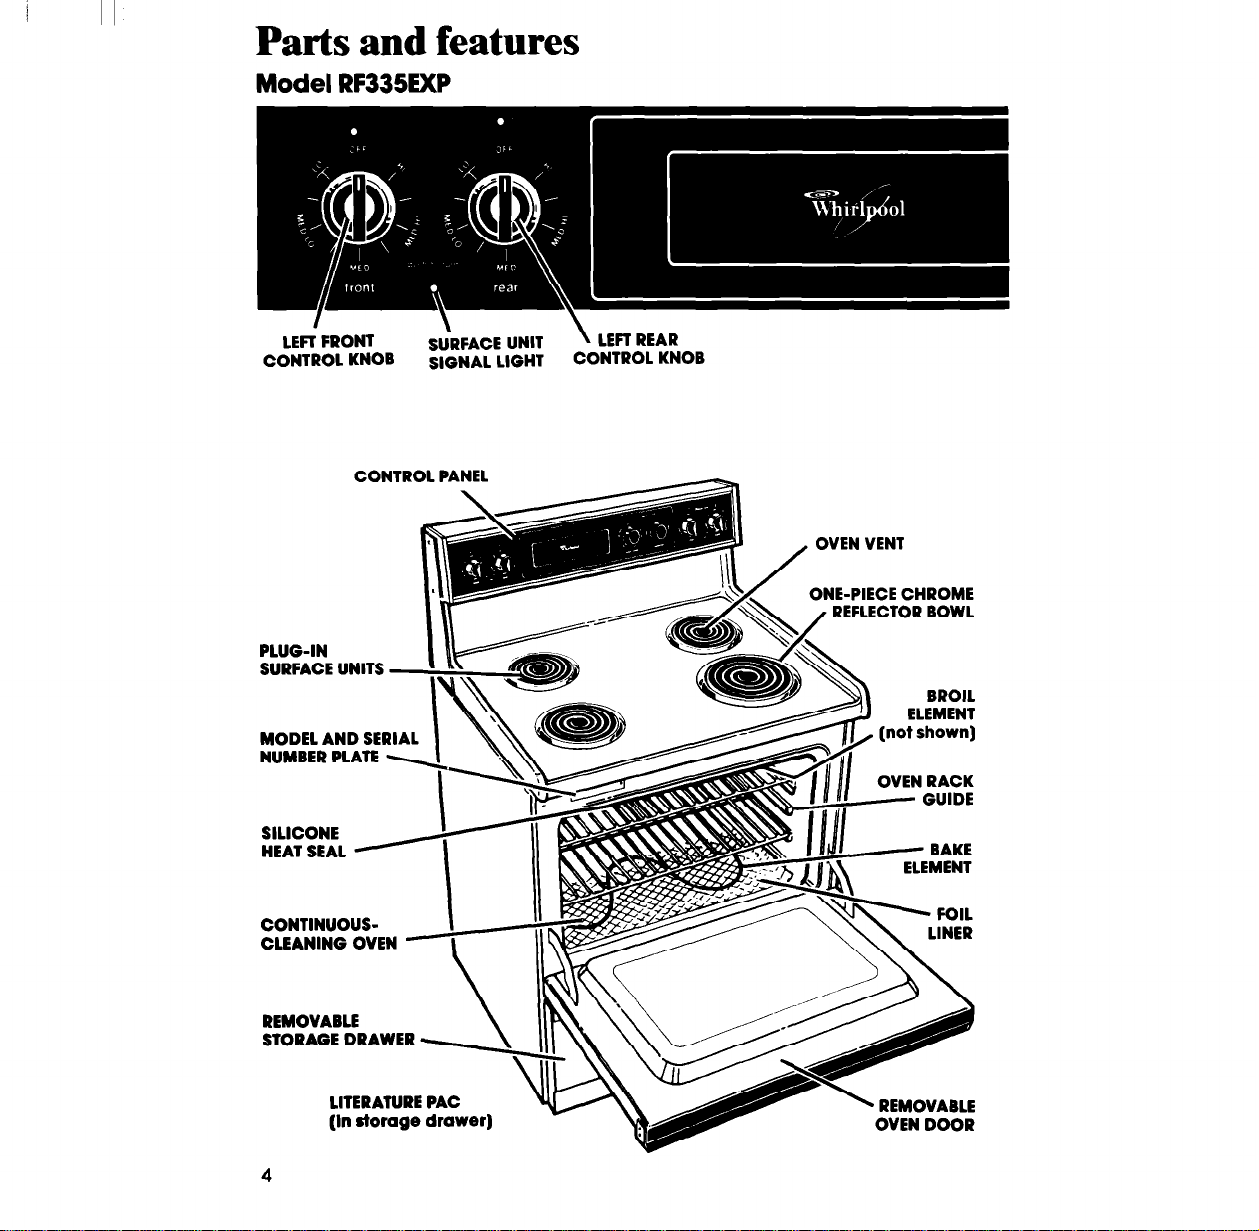
Parts and features
Model RF335EXP
LEti FRONT
CONTROL KNOB
CONTROL PAI
PLUG-IN
SURFACE UNITS
MODEL AND SERIAL
NUMBER PLATE
SILICONE
HEAT SEAL
SiRFACE UNIT
SIGNAL LIGHT
LEFT REAR
CONTROL KNOB
OVEN VENT
ONE-PIECE CHROME
I REFLECTOR BOWL
CONTINUOUSCLEANING OVEN
REMOVABLE
STORAGE DRAWER
LITERATURE PAC
(In storage drawer)
4
OVEN DOOR

I
I I
OVEN TEMPERATURE
CONTROL
OVEN SIGNAL OVEN
LIGHT SELECTOR
Rl6HT FRONT
CONTROL KNOB
Using the surface units
Surface Unit Indicators
The solid dot in the surface unit
indicator shows which surface unit
is turned on by that knob.
Signal light
One of the signal lights will glow
Control knobs must be pushed in
before turning
can be set anywhere between HI
and OFF.
them to a setting. They
Until you get used to the settings, use the following as a guide.
start cooking at the high settings; then turn the control knob down to continue
cooking. -
Use HI
foods cook- to hold a
ing; to bring rapid boil; to
liquids to a
boil.
to start
CAUTION: The use of the HI selilng for long periods of lime
can damage surface units and discolor chrome reflector
bowls.
tlnue cooklng.
Start
Use MED-HI
fry chicken
or pancakes.
cooklng on HI and lum control down to con-
Use MED
for gravy, to keep food
puddings cooking after
and icing; to
cook large on a higher
amounts of setting.
vegetables.
when a surface unit is on.
For best results,
Use MED-LO
starting it
Use LO
keep food
warm until
ready to
serve. Set the
heat higher
or lower
within the LO
band to keep
food at the
temperature
you want.
I
to
Use only flat-bottomed utensils for best cooking results and to prevent damage
to the cooktop. Specialty items with rounded or ridged bottoms (woks, ridged
bottom canners or tea kettles) are not recommended.
See the “Cooking Guide” for important utensil information.
Optional Canning Kit (Part
The large diameter of most water-bath or pressure canners combined with
high heat settings for long periods of time can shorten the life of regular surface
units and cause damage to the cooktop.
If you plan to use the cooktop for canning, we recommend the installation
of a Canning Kit. Order the kit from your Whirlpool Dealer or Tech-Care” Service
Company.
See the “Cooking Guide” for important canning information.
NO.
242905)
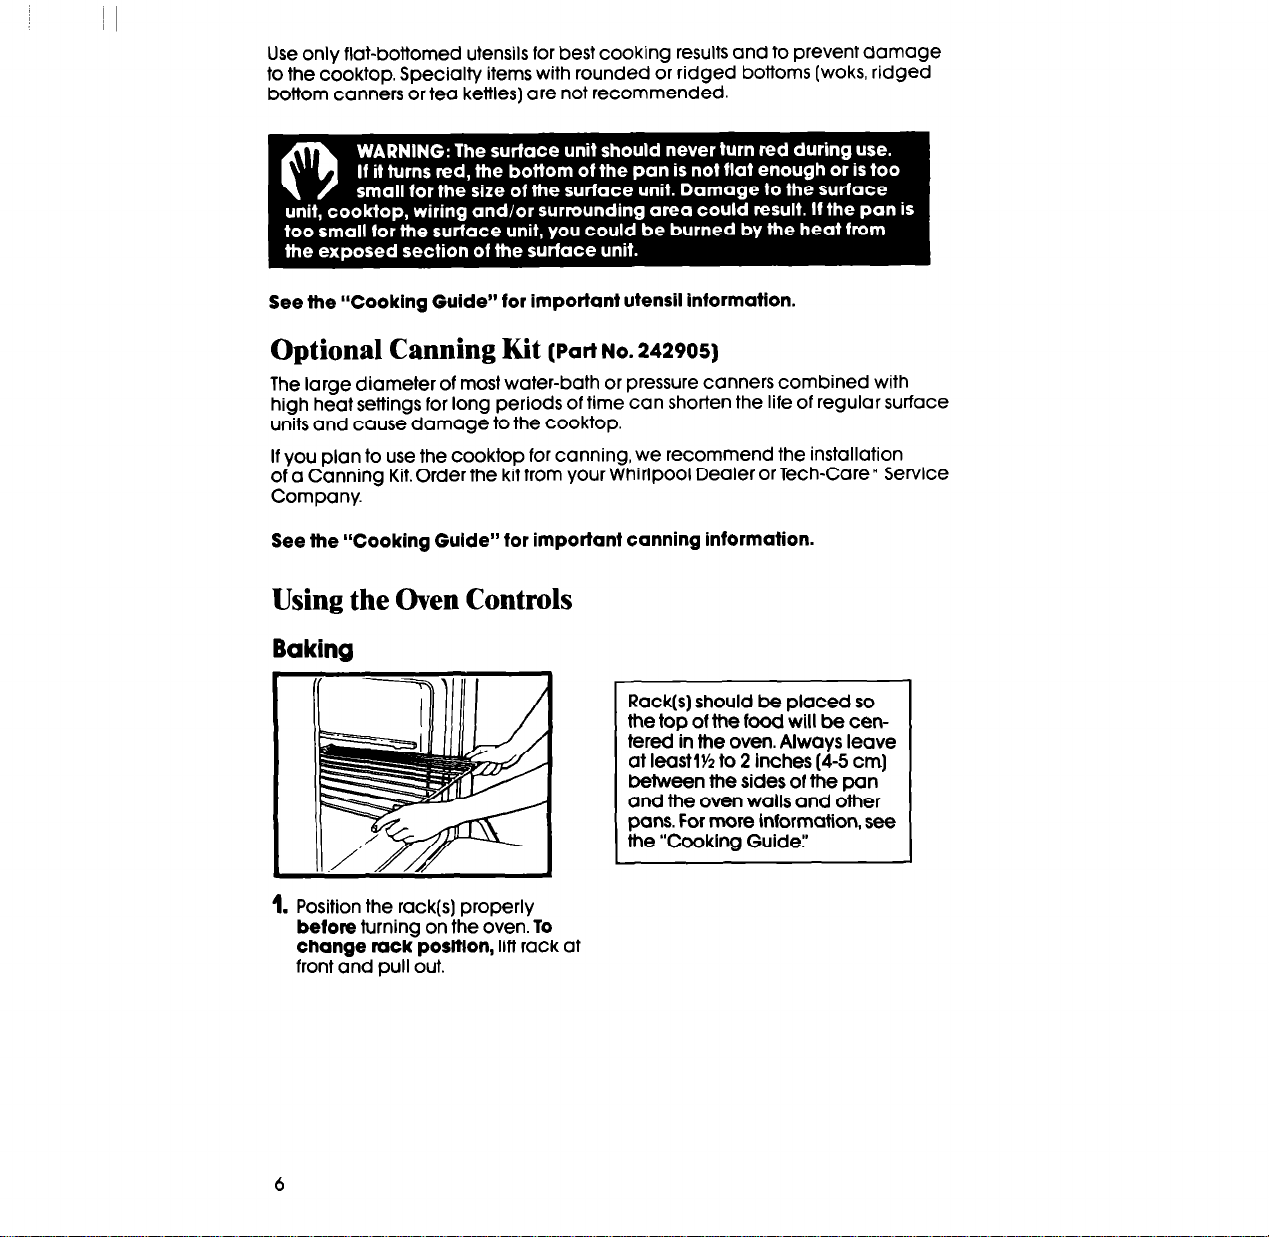
Using the Oven Controls
Baking
Rack(s) should be placed so
the top of the food will be centered In the oven. Always leave
at leastlY2 to 2 inches (4-5 cm]
between the sides of the pan
and the oven walls and other
pans. For mare Information, see
the “Caoklng Guide:
1. Position the rack(s) properly
before
change rack posltlon,
front and pull out.
turning on the oven.
lifl rack at
To
 Loading...