

Whirlpool MW8400XS Use And Care Manual
~mlmmmm~mmm~mmmmmmmm~mmmm~mmmm~mmm~
mmmmmmmmmmmmmRmmmm~
0 ,jlt.l ~0jer.s anl Sur tat,e InIls,
Ranl,e.
Q k WOW~V~ learns llash f,orWct lrs.
RIJC~I ur Ccnd tmni rs O!hrlm dll
Contents
Parts and Features.
Before You Install Your
Microwave Oven.
Before You Use Your Microwave Oven
Precautions to Avoid Possible
Exposure to Excessive
Mlcrowave Energy
Important Safety Instructions.
Using Your Mlcrowave Oven.
Microwave Oven Controls
Cooking in Your Microwave Oven
Setting the Controls.
3
3
Page
Cooking with the Temperature Probe
7
Bi-Level Cooking Rack
10
Installation Instructions
11
Grounding Instructions
12
Building In Your Microwave Oven
13
Caring for Your Microwave Oven
13
Cleaning the Microwave Oven
13
Replacing the Light Bulb
13
How Your Microwave Oven Works..
14
Operating Safety Precautions
15
If You Need Service or Assistance.
17
01986 Whirlpool Corporation
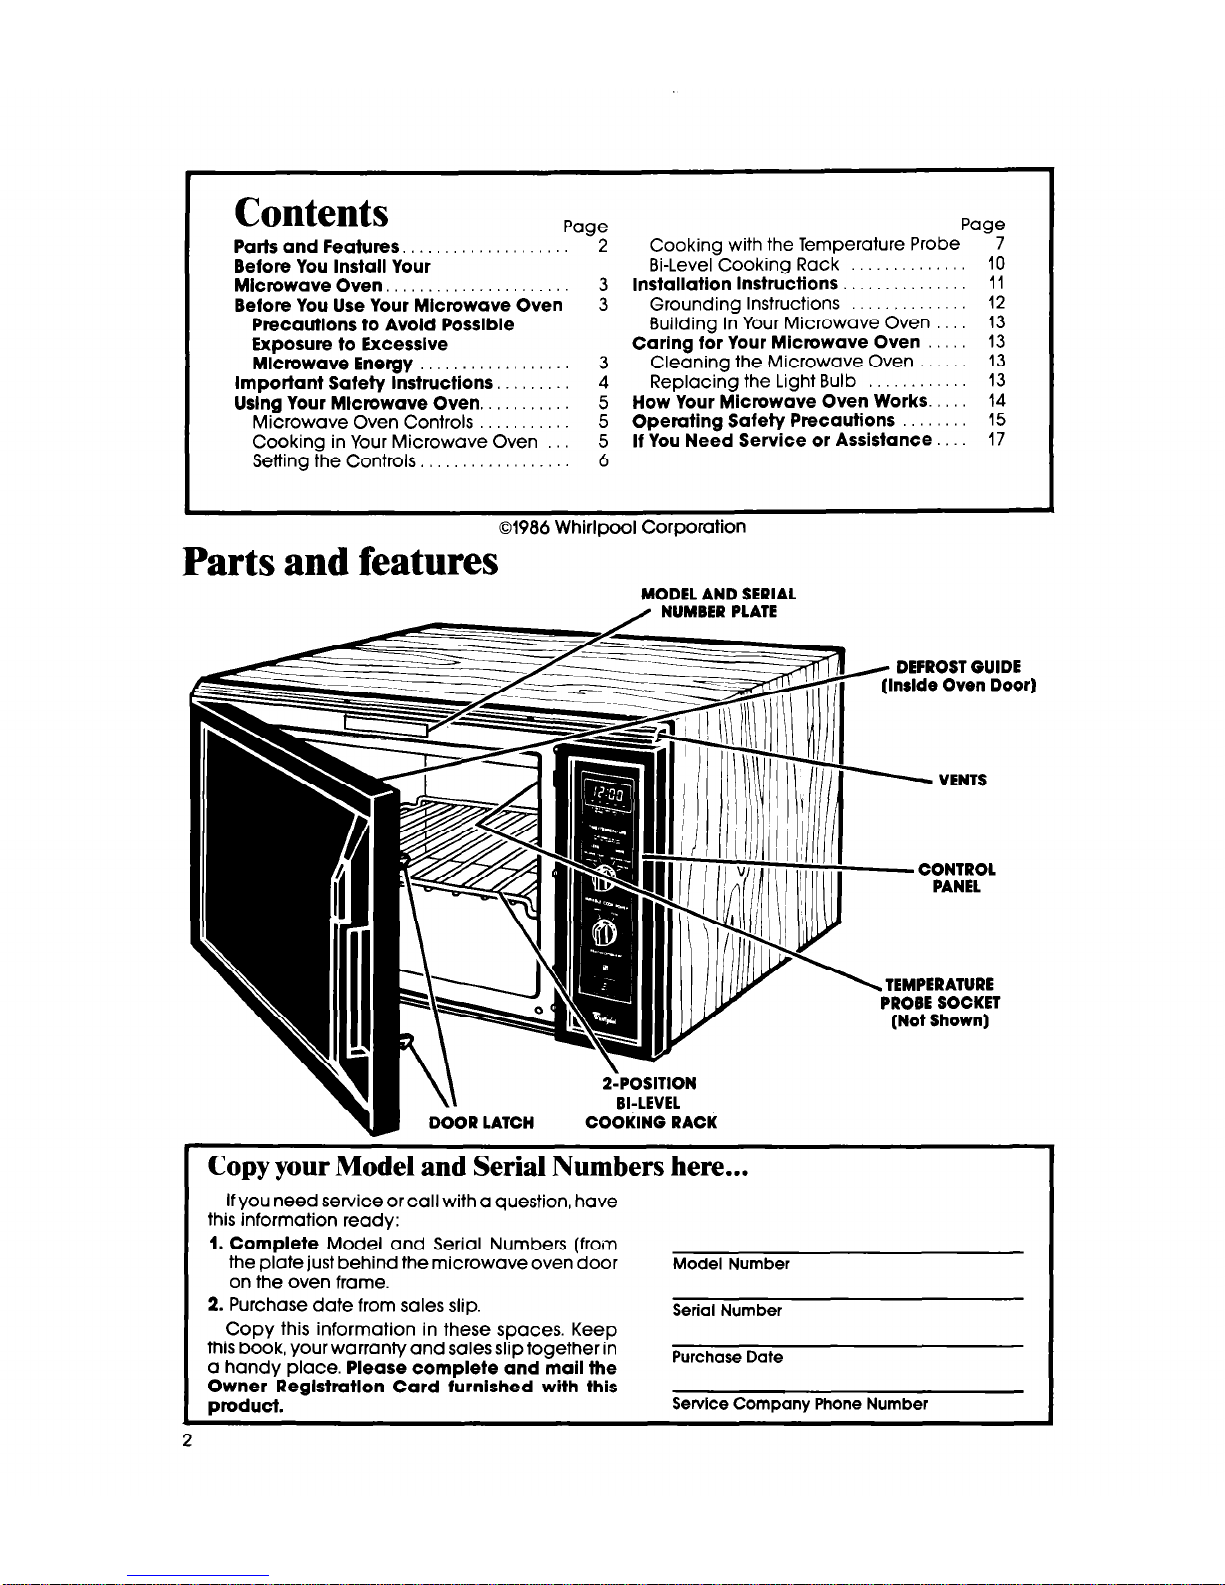
Parts and features
MODEL AND SERIAL
/ NUMBER PLATE
I, II llIlllllII II IIIIVVENT~
III i
CONTROL
PANEL
. TEMPERATURE
PROBE SOCKET
(Not Shown)
I COPYY
our Model and Serial Numbers here...
If you need service or call with a question, have
this information ready:
~ 1. Complete
Model and Serial Numbers (from
the plate just behind the microwave oven door
on the oven
frame.
2. Purchase date from sales slip.
Copy this information in these spaces. Keep
this book, your warranty and sales slip together in
a handy place.
Please complete and mail the
Owner Reglstratlon Card furnished with this
product.
Model Number
Serial Number
Purchase Date
Servlce Company Phone Number
Fill out and return the
Wlcrowave
Reglstratlon Card” Included wllh
your
oven.
If the card is
missing, please send the model number of your microwave oven with your name and address to...
Whirlpool Corporation
Microwave Registration Department
Administrative Center
2000 U.S. 33 North
Benton Harbor, Michigan 49022
This information will help us reach you if there is ever a need to pass along information about your
microwave oven.
Before you install your microwave oven
Read and carefully follow fhe ‘VNSTALLATION INSTRUCTIONS”
found on page 9 of this “Use & Care Guide!’
Before you use your microwave oven
Read this “Use & Care Guide” carefully for important use and safety information.
Store in a convenient place for future use.
It is your personal responsibility and obligation to be sure your microwave oven:
l Has been installed where It is protected from the elements. The microwave
oven
should be at a temperature above 50°F (10°C) for proper operation.
l Has been installed on o surface strong enough to support its weight.
l Has been properly connected to electrical supply and grounded.
l Is not used by children or anyone unable to operate it properly.
l Is properly maintained.
l Is used only for jobs expected of a home microwave oven
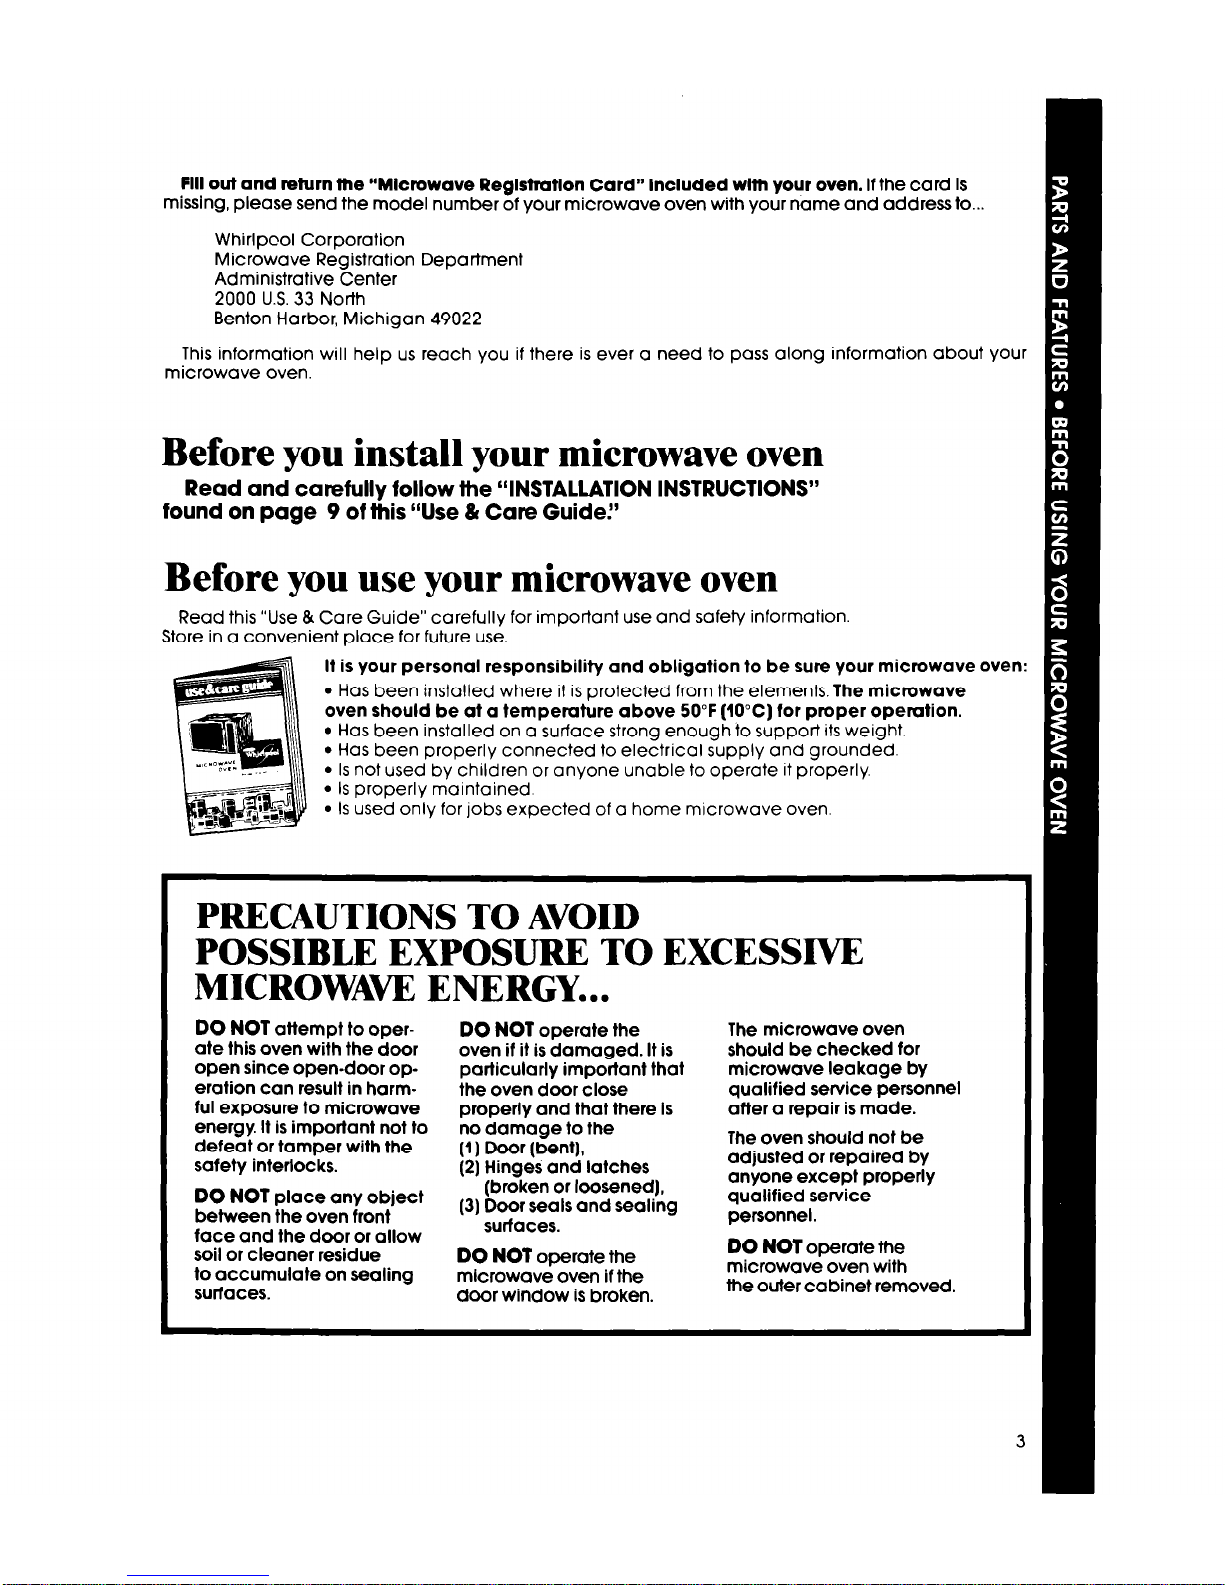
PRECAUTIONS TO AVOID
POSSIBLE EXPOSURE TO EXCESSIVE
MICROWAVE ENERGY...
DO NOT
attempt to operate this oven with the door
open since open-door operation can result in harmful exposure to microwave
energy. It is important not to
defeat or tamper with the
safety interlocks.
DO NOT
place any object
between the oven front
face and the door or allow
soil or cleaner residue
to accumulate on sealing
suriaces.
DO NOT
operate the
oven if it is damaged. It is
particularly important that
the oven door close
properly and that there is
no damage to the
(1) Door (bent),
(21 Hinges and latches
(broken or loosened),
(31 Door seals and sealing
surfaces.
DO NOT
operate the
mlcrowave oven if the
door window is broken.
The microwave oven
should be checked for
microwave leakage by
qualified service personnel
after a repair is made.
The oven should not be
adjusted or repaired by
anyone except properly
qualified service
personnel.
DO NOT
operate the
microwave oven with
the outer cabinet removed.
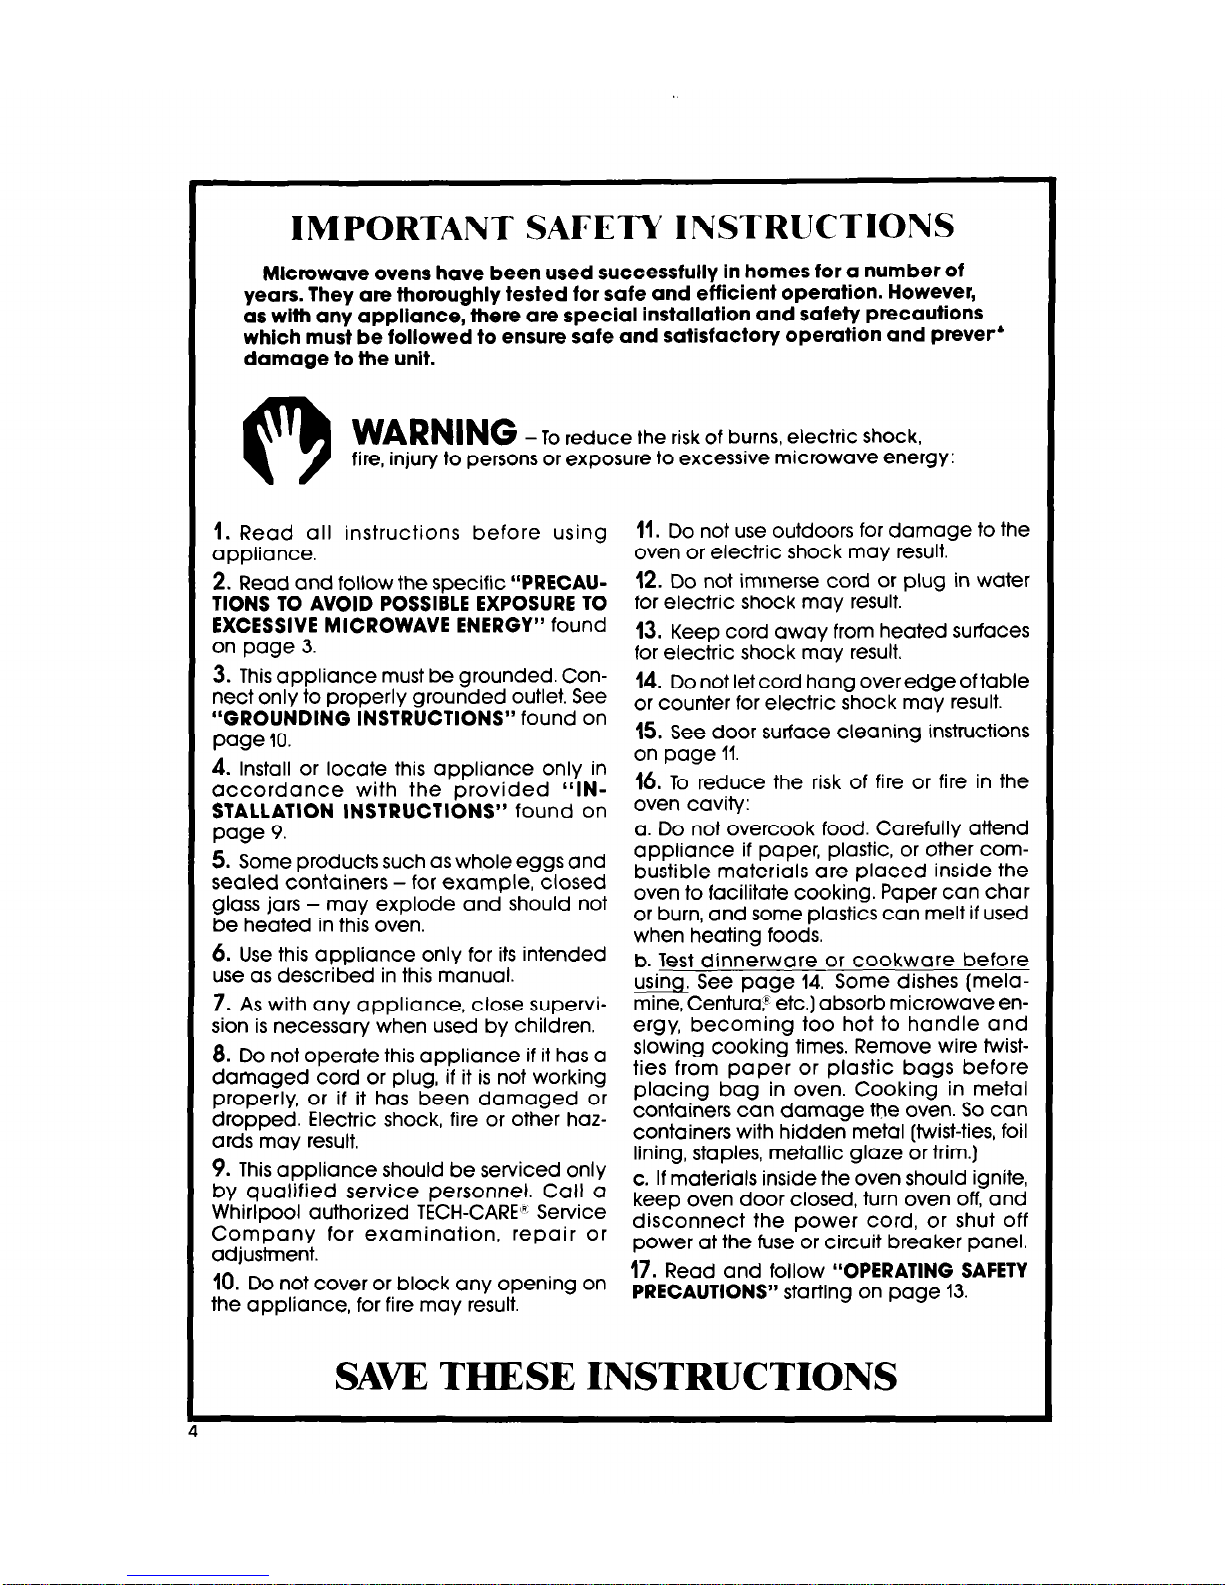
IMPORTANT SAFETY INSTRUCTIONS
Microwave ovens have been used successfully in homes for a number of
years. They are thoroughly tested for safe and efficient operation. However,
as with any appliance, there are special installation and safety precautions
which must be followed to ensure safe and satisfactory operation and prever*
damage to the unit.
WARNING -
To reduce the risk of burns, electric shock,
fire, injury to
persons or exposure to excessive microwave energy:
1.
Read all instructions before using
appliance.
2. Read and follow the specific “PRECAUTIONS TO AVOID POSSIBLE EXPOSURE TO
EXCESSIVE MICROWAVE ENERGY” found
on page 3.
3. This appliance must be grounded. Connect only to properly grounded outlet. See
4’GROUNDiNG INSTRUCTIONS” found on
page 10.
4. Install or locate this appliance only in
accordance with the provided “INSTALLATION INSTRUCTIONS9 found on
page 9.
5. Some products such as whole eggs and
sealed containers - for example, closed
glass jars - may explode and should not
be heated in this oven.
6.
Use this appliance only for its intended
use as described in this manual.
7. As with any appliance, close supervi-
sion is necessary when used by children.
8. Do not operate this appliance if it has a
damaged cord or plug, if it is not working
properly, or if it has been damaged or
dropped. Electric shock, fire or other hazards may result,
9. This appliance should be serviced only
by qualified service personnel. Call a
Whirlpool authorized TECH-CARE” Service
Company for examination, repair or
adjustment.
10.
Do not cover or block any opening on
the appliance, for fire may result.
11.
Do not use outdoors for damage to the
oven or electric shock may result.
12. Do not immerse cord or plug in water
for electric shock may result.
13. Keep cord away from heated surfaces
for electric shock may result,
14. Do not let cord hang over edge of table
or counter for electric shock may result.
15.
See door surface cleaning instructions
on page 11.
16.
To reduce the risk of fire or fire in the
oven cavity:
a. Do not overcook food. Carefully attend
appliance if paper, plastic, or other com-
bustible materials are placed inside the
oven to facilitate cooking. Paper can char
or burn, and some plastics can melt if used
when heating foods.
b. Test dinnerware or cookware before
usinq See page 14. Some dishes (melamine, Centuraff etc.] absorb microwave energy, becoming too hot to handle and
slowing cooking times. Remove wire twistties from paper or plastic bags before
placing bag in oven. Cooking in metal
containers can damage the oven. So can
containers with hidden metal [twist-ties, foil
lining, staples, metallic glaze or trim.)
c. If materials inside the oven should ignite,
keep oven door closed, turn oven off, and
disconnect the power cord, or shut off
power at the fuse or circuit breaker panel.
17. Read and follow “OPERATING SAFETY
PRECAUTIONS” starting on page 13.
SAW THESE INSTRUCTIONS
Sing your
microwave oven
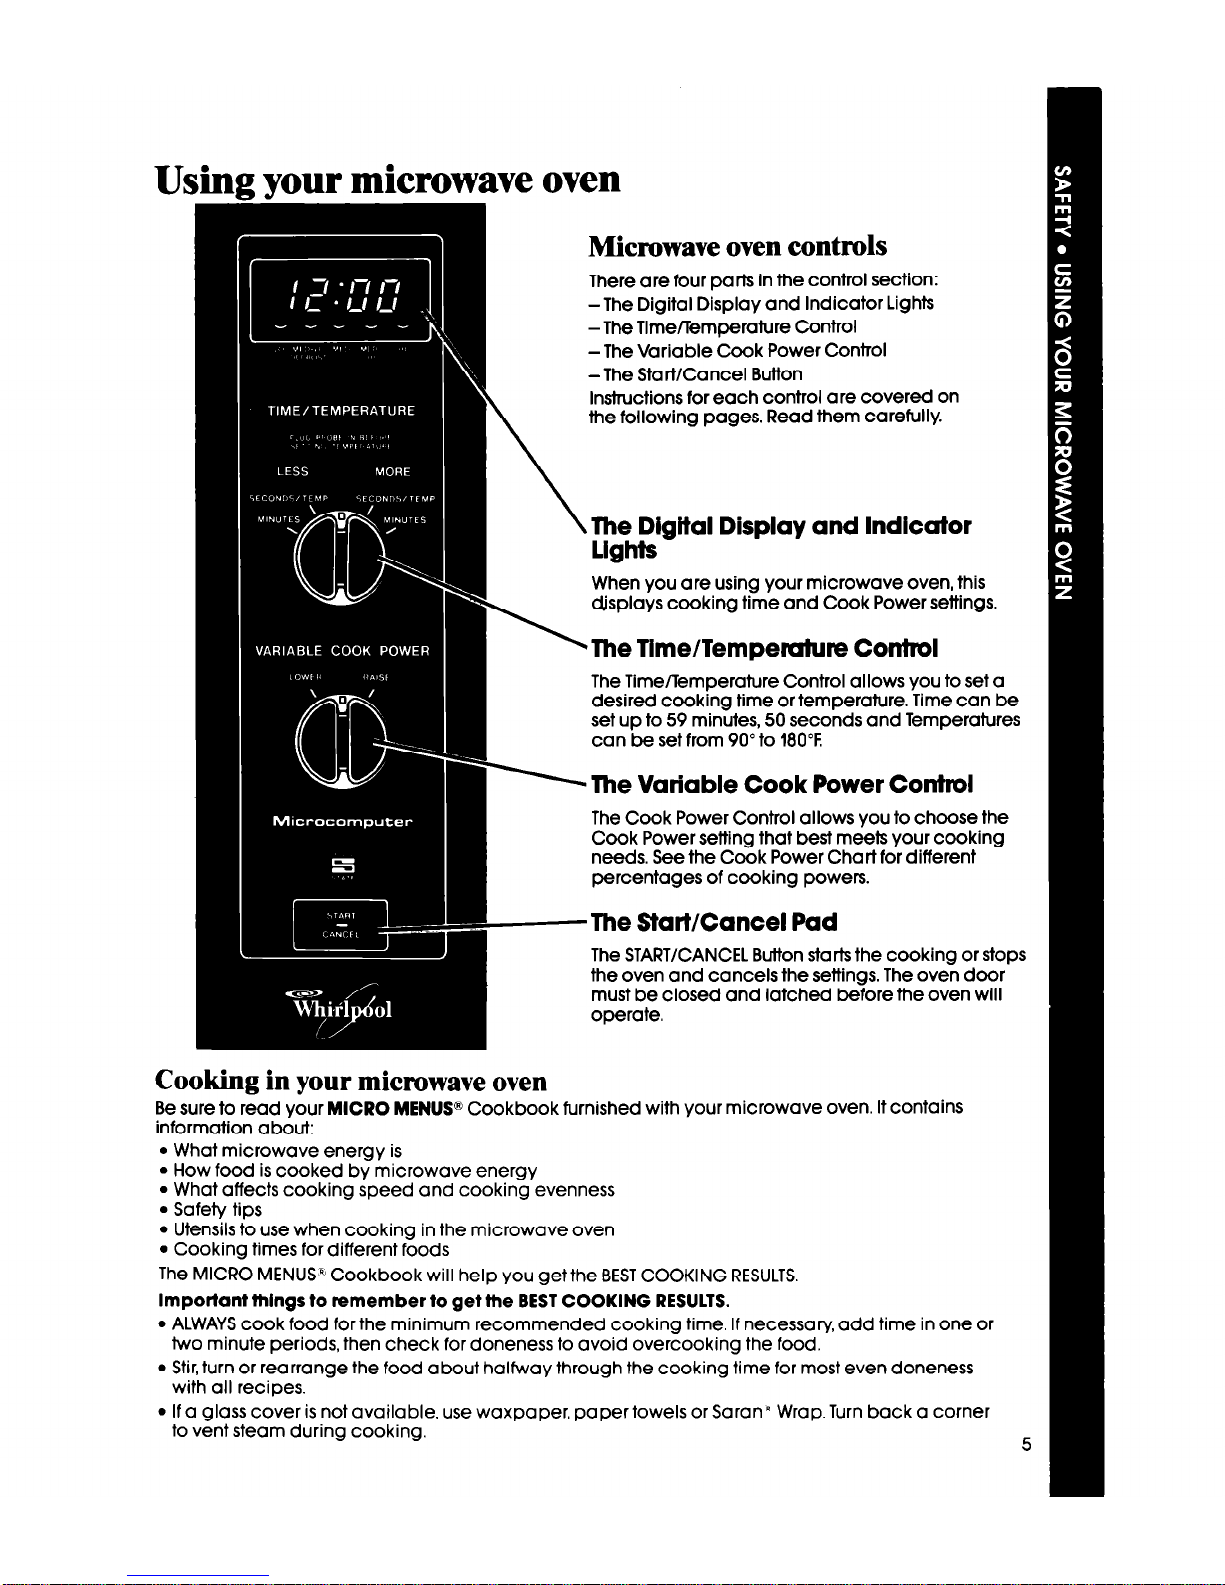
Microwave oven controls
There are four parts in the control section:
-The Digital Display and Indicator Lights
-The Time/Temperature Control
-The Variable Cook Power Control
-The Start/Cancel Button
Instructions for each control are covered on
the following pages. Read them carefully.
, The Digital Display and Indicator
lights
When you are using your microwave oven, this
displays cooking time and Cook Power settings.
The Time/Temperature Control
The Time/Temperature Control allows you to set a
desired cooking time or temperature. Time can be
set up to 59 minutes, 50 seconds and Temperatures
can be set from 90” to 180°F.
‘The Variable Cook Power Contml
The Cook Power Control allows you to choose the
Cook Power setting that best meets your cooking
needs. See the Cook Power Chart for different
percentages of cooking powers.
The Start/Cancel Pad
The START/CANCEL Button starts the cooking or stops
the oven and cancels the settings. The oven door
must be closed and latched before the oven will
operate.
Cooking in your microwave oven
Be sure to read your
MICRO MENUS@
Cookbook furnished with your microwave oven. It COntCIinS
information about:
l What microwave energy is
l How food is cooked by microwave energy
l What affects cooking speed and cooking evenness
l Safety tips
l Utensils to use when cooking in the microwave oven
l Cooking times for different foods
The MICRO MENUS) Cookbook will help you get the BEST COOKING RESULTS,
Important thlngr to remember to get the BEST COOKING RESULTS.
l ALWAYS cook food for the minimum recommended cooking time. If necessary, add time in one or
two minute periods, then check for doneness to avoid overcooking the food.
l Stir, turn or rearrange the food about halfway through the cooking time for most even doneness
with all recipes.
l If a glass cover is not available, use waxpaper, papertowels or SaranR Wrap. Turn back a corner
to vent steam during cooking.
5
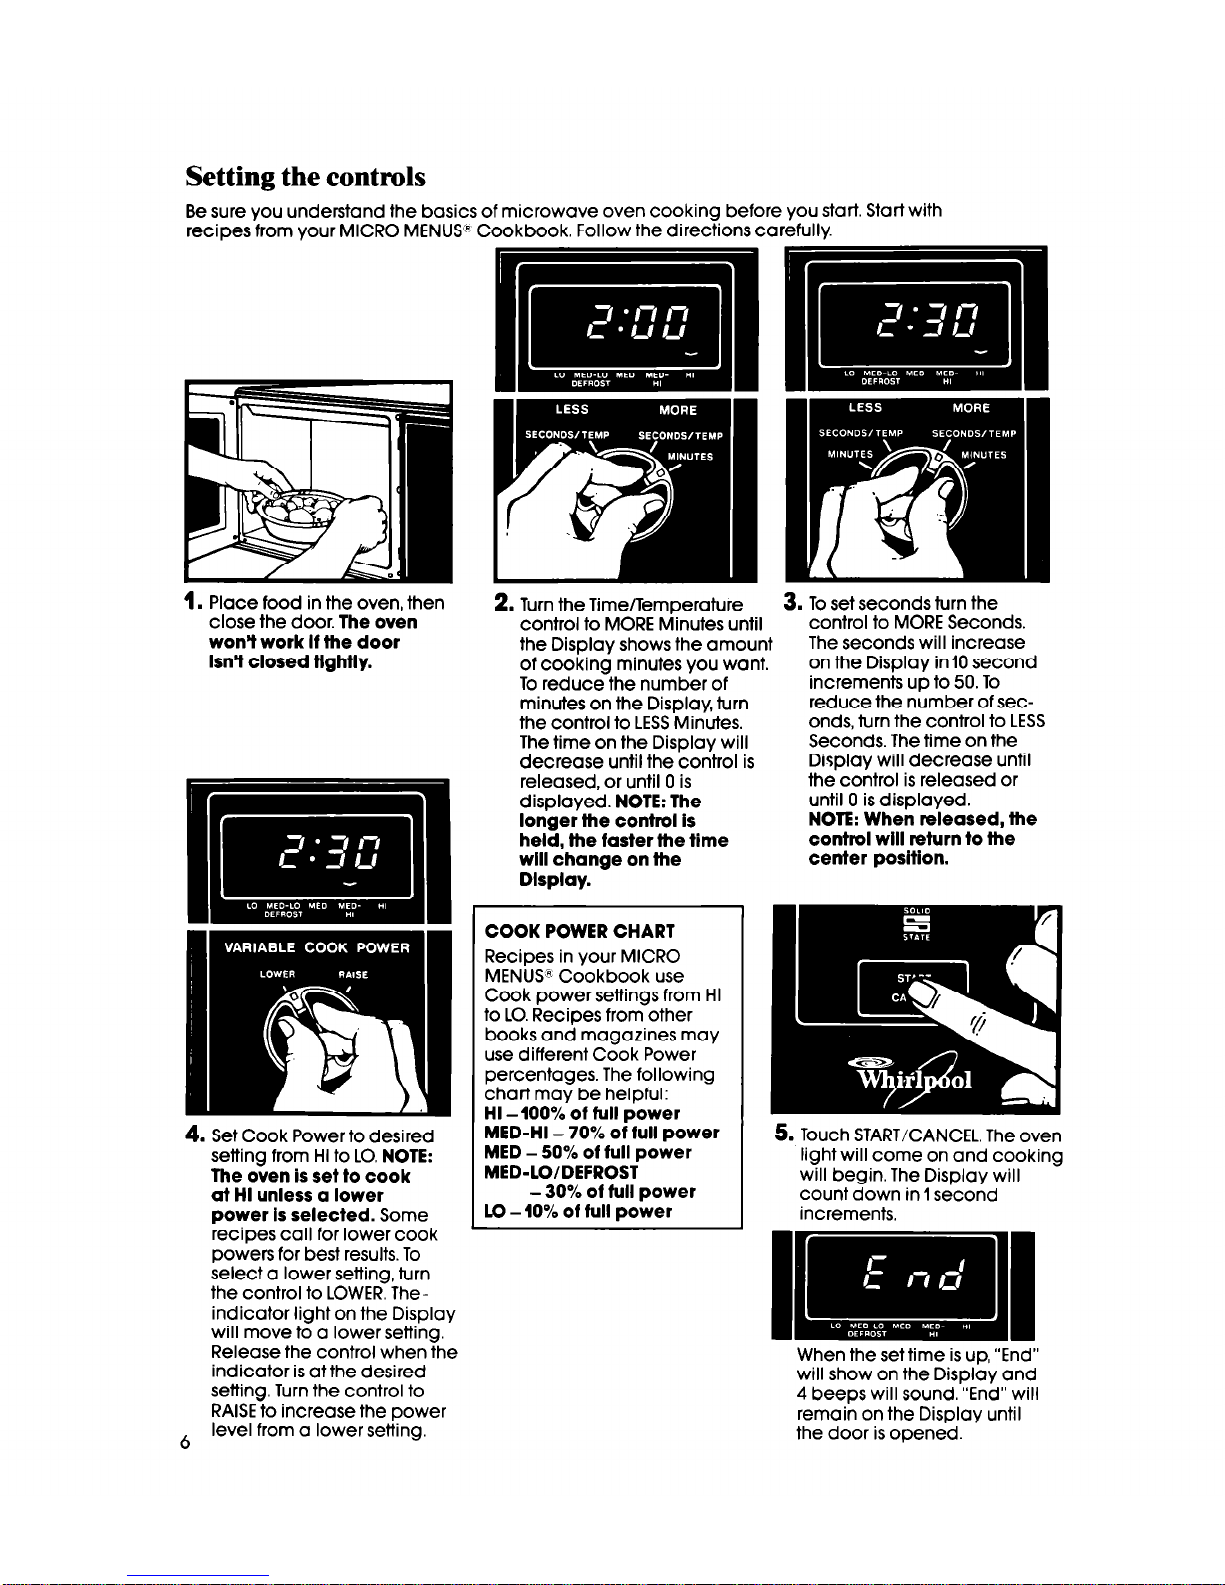
Setting the controls
Be sure you understand the basics of microwave oven cooking before you start. Start with
recipes from your MICRO MENUS@ Cookbook. Follow the directions carefully.
1.
Place food in the oven, then
close the door.
The oven
won’t work If the door
IsnV closed ttghtly.
4. Set Cook Power to desired
setting from HI to LO.
NOTE:
The oven is set to cook
at HI unless a lower
power Is selected.
Some
recipes call for lower cook
powers for best results. To
select a lower setting, turn
the control to LOWER. The-
indicator light on the Display
will move to a lower setting.
Release the control when the
indicator is at the desired
setting. Turn the control to
RAISE to increase the power
6 level from a lower setting.
2. Turn the Time/Temperature
control to MORE Minutes until
the Display shows the amount
of cooking minutes you want.
To reduce the number of
minutes on the Display, turn
the control to LESS Minutes.
The time on the Display will
decrease until the control is
released, or until 0 is
displayed.
NOTE: The
longer the control Is
held, the faster the time
will change on the
Display.
3. To set seconds turn the
control to MORE Seconds.
The seconds will increase
on the Display in 10 second
increments up to 50. To
reduce the number of seconds, turn the control to LESS
Seconds. The time on the
Display will decrease until
the control is released or
until 0 is displayed.
NOTE: When released, the
control will return to the
center position.
COOK POWER CHART
Recipes in your MICRO
MENUS8 Cookbook use
Cook power settings from HI
to LO. Recipes from other
books and magazines may
use different Cook Power
percentages. The following
chart may be helpful:
HI -100% of full power
MED-HI - 70% of full power
MED - 50% of full power
MED-LO/DEFROST
- 30% of full power
LO - 10% of full power
5. Touch START/CANCEL. The oven
light will come on and cooking
will begin. The Display will
count down in 1 second
increments,
When the set time is up, “End”
will show on the Display and
4 beeps will sound. “End” will
remain on the Display until
the door is opened.
 Loading...