

Whirlpool MW82OOXL User Manual
Microwave Oven Model MW82OOXL
-1
us$fsgrel
--
-
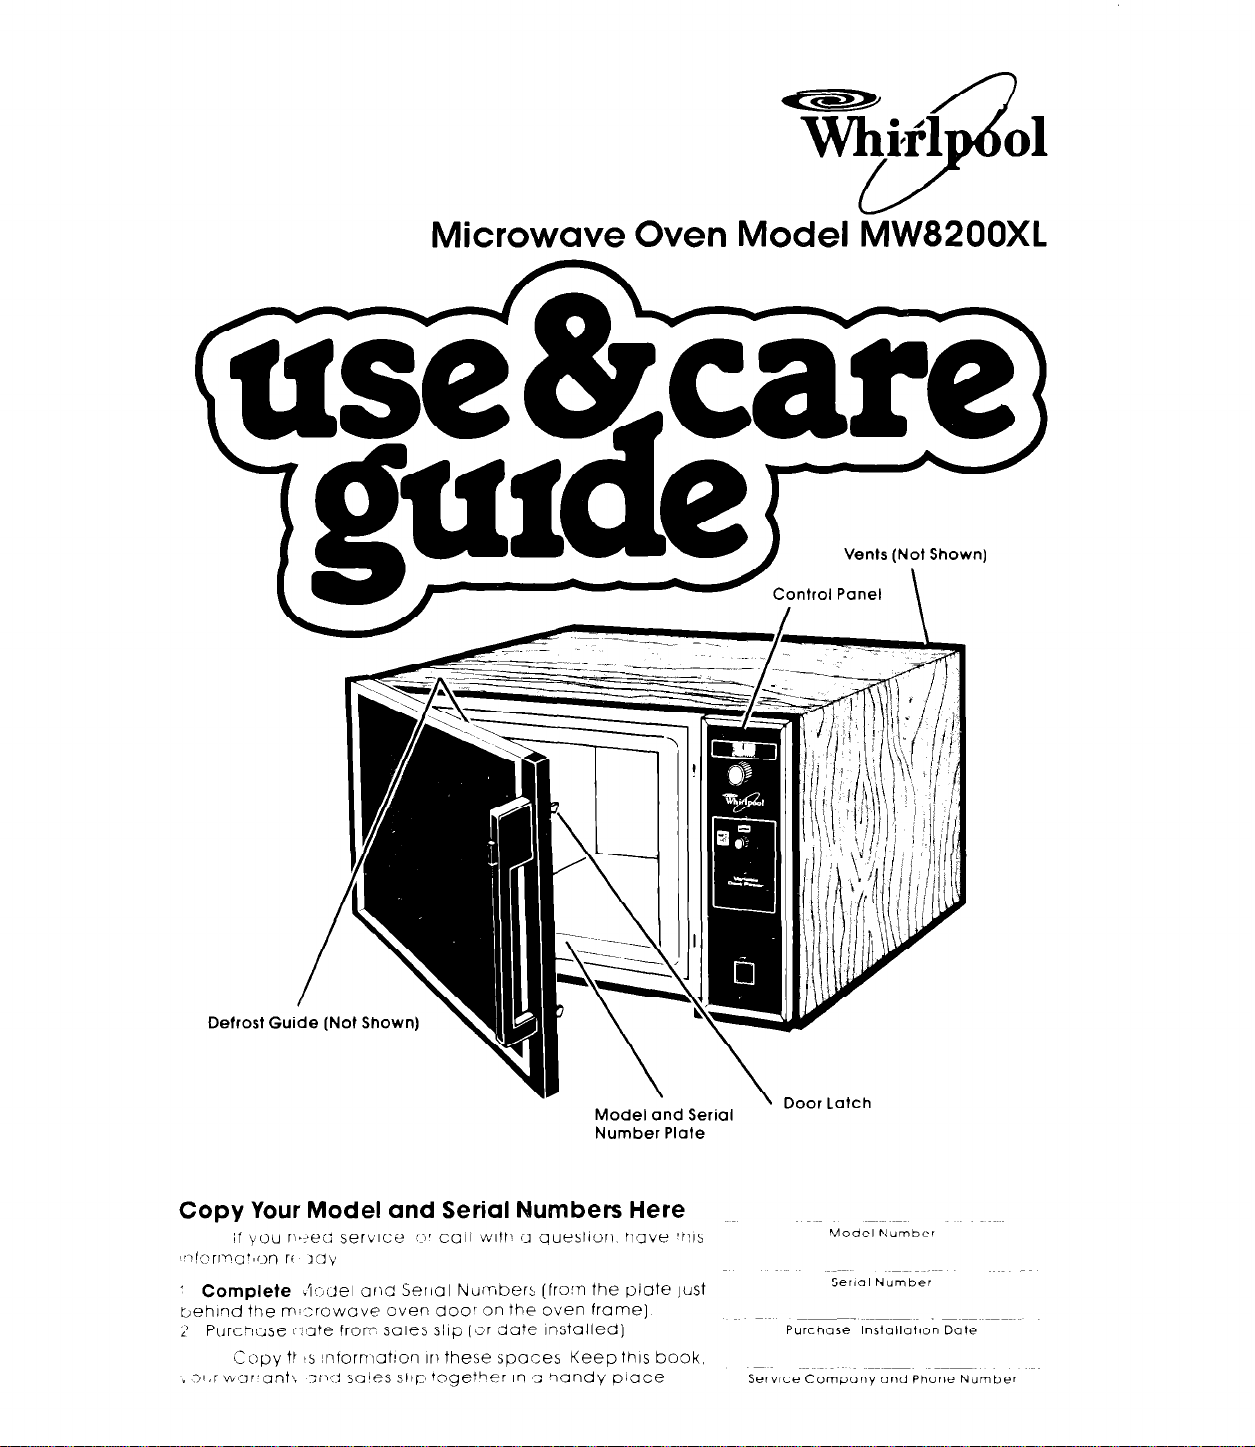
Vents (Not Shown]
5
Detrost Guide (Not Shown)
g
~--control Panel \
A
.-
Model and Serial
Number Plate
.
Door Latch
Copy Your Model and Serial Numbers Here
’ Complete +‘lr,clel ar>C Serial Numbers [from the piate just
behInd the rn.:;rowave oven door on the oven frame]
; PurcQase (,‘=lte from sales slop (or date Installed)
Copy tk 8s !ntornlot!orl In these spaces Keep this book,
i 31~1 vvar.ant\,
;ntl 5oles slt&, together In 3 “landy place
Model Number
Serial Number
Purchase Inslollal~on Dale
Service Company and Phone Number
Contents
Page
Responsibilities
Installation ., ., .,
Proper, Safe Use
Precautions to Avoid Possible
Exposure to Excessive
Microwave Energy
Using Your Microwave Oven
Setting the Controls
Defrosting
Cleaning the Microwave Oven
Your responsibilities.. .
Fill out and return the “Microwave Registration Card”attached to the oven door.
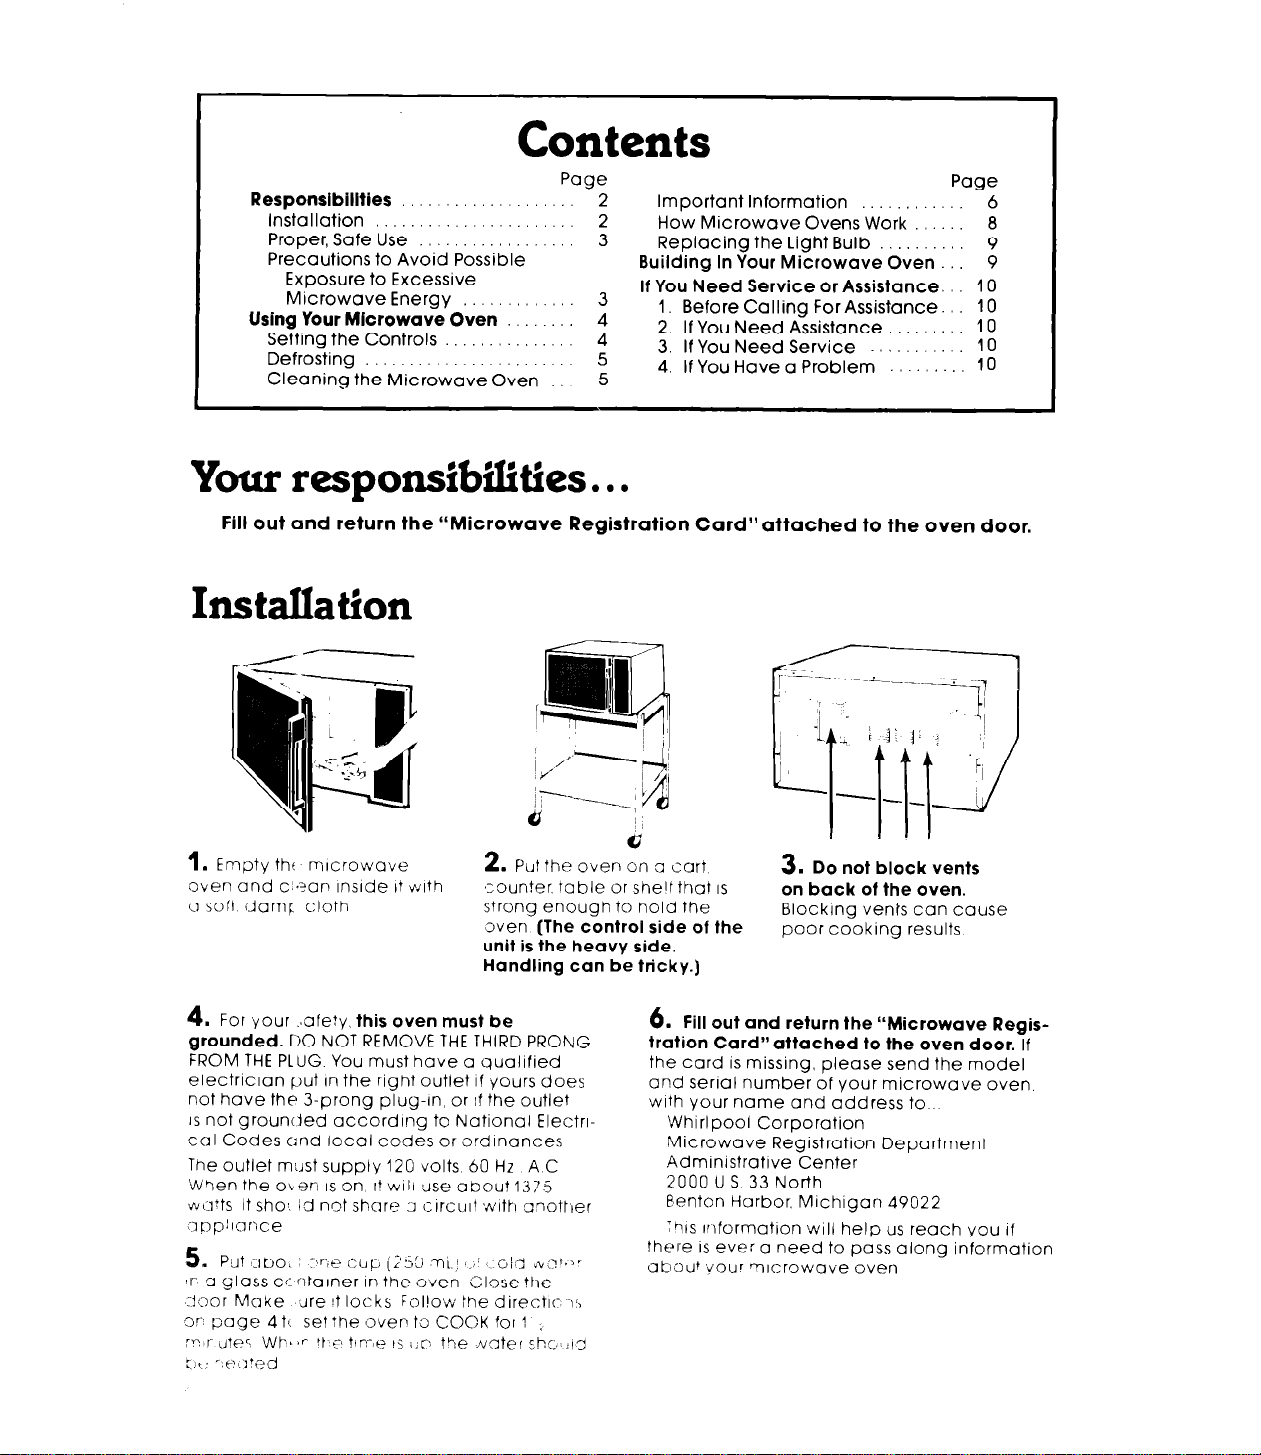
Installation
2
2
3
3
4
4
5
5
Important Information
How Microwave Ovens Work
Replacing the Light Bulb
Building In Your Microwave Oven
If You Need Service or Assistance
1. Before Calling For Assistance
2. If You Need Assistance
3. If You Need Service
4. If You Have a Problem
Page
6
B
9
9
,, 10
,, 10
10
10
., 10
1.
Empty thi mIcrowave
Oven and c!ean Inside It with
cl soft darn1 cloth
4.
For your ..afety,
grounded. DO NOT REMOVE
FROM
THE
electrIcian put In the right outlet if yours does
not have the 3-prong plug-in, or rt the outlet
IS not grounded according to National Electra
cc11 Codes and local codes or ordinances
The outlet
W?en the oven
watts It she, id not share :J clrcult ‘with anolfler
~1 n p 1 I cl I: c e
5.
:r’# a glass c~:*,Ia~ner in the oven Close the
:l,>or Make Jre !t locks FoI!o~v the directI<-, IL,
3r- page 4 t: set :he oven to COC?K for 1 ~
r” r
-,p;!+pd
:lt.
PLUG. You must have a qualified
m:JSt
Put ‘IIbOL
?Jte:‘. WP.‘? !t~p?iR-‘c? I5 i.r tCIe .lvater ChC::lg
this oven must be
supply 120 volts 60 Hz A C
IS
on, It WIII use about 1375
:“;‘-;’ ~>UL, i;‘sLl T).’ I-_’ ,_Gi,; ,~(.?TP”
2.
Put the oven on a cart
,zounter, table or shelf that
strong enough to hold the
oven
(The control side of the
unit is the heavy side.
Handling can be tricky.)
THE THIRD PRONG
3.
IS
Do not block vents
on back of the oven.
BlockIng vents can cause
poor cooking results
6. Fill out and return the “Microwave Regis-
tration Card’lattached to the oven door.
the
card is missing, please send the model
and serial number of your microwave oven.
with your name and address to
Whirlpool Corporation
Microwave Registration Department
Administrative Center
2000 U S 33 North
Penton Harbor. Michigan 49022
;hls Ir\formatlon WIII help us reach you If
there IS ever a need to pass along information
ab3u?o1~r rr7lcrowave oven
If
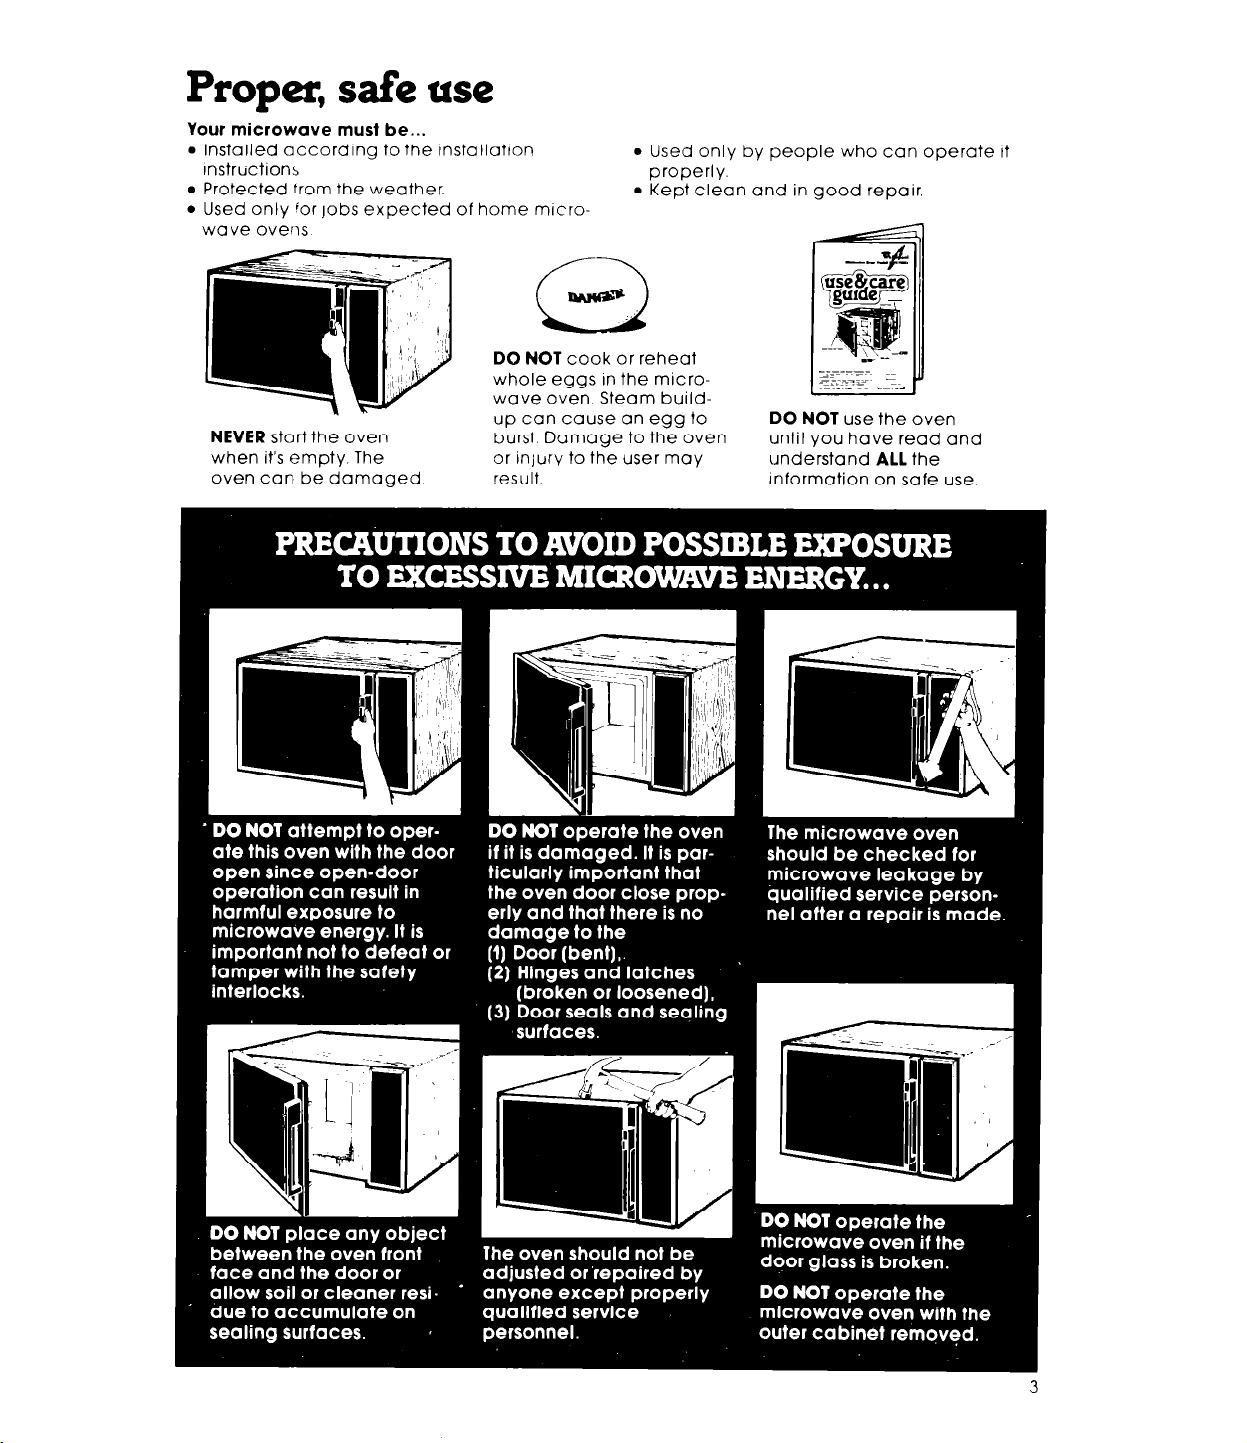
Proper, safe use
Your microwave must be...
l
Installed according to the tnstallatton
Instruction5
l
Protected from the weather
l
Used only ‘or jobs expected of home micro-
wave ovens
l
Used only by people who can operate It
properly.
l
Kept clean and in
good repair.
. -
NEVER
start the oven
when it’s empty. The
oven can be damaged
up can cause an egg to
burst. Damage to the oven
or injurv to the user may
result.
DO NOT
until you have read and
understand
Information on safe use.
use the oven
ALL
the
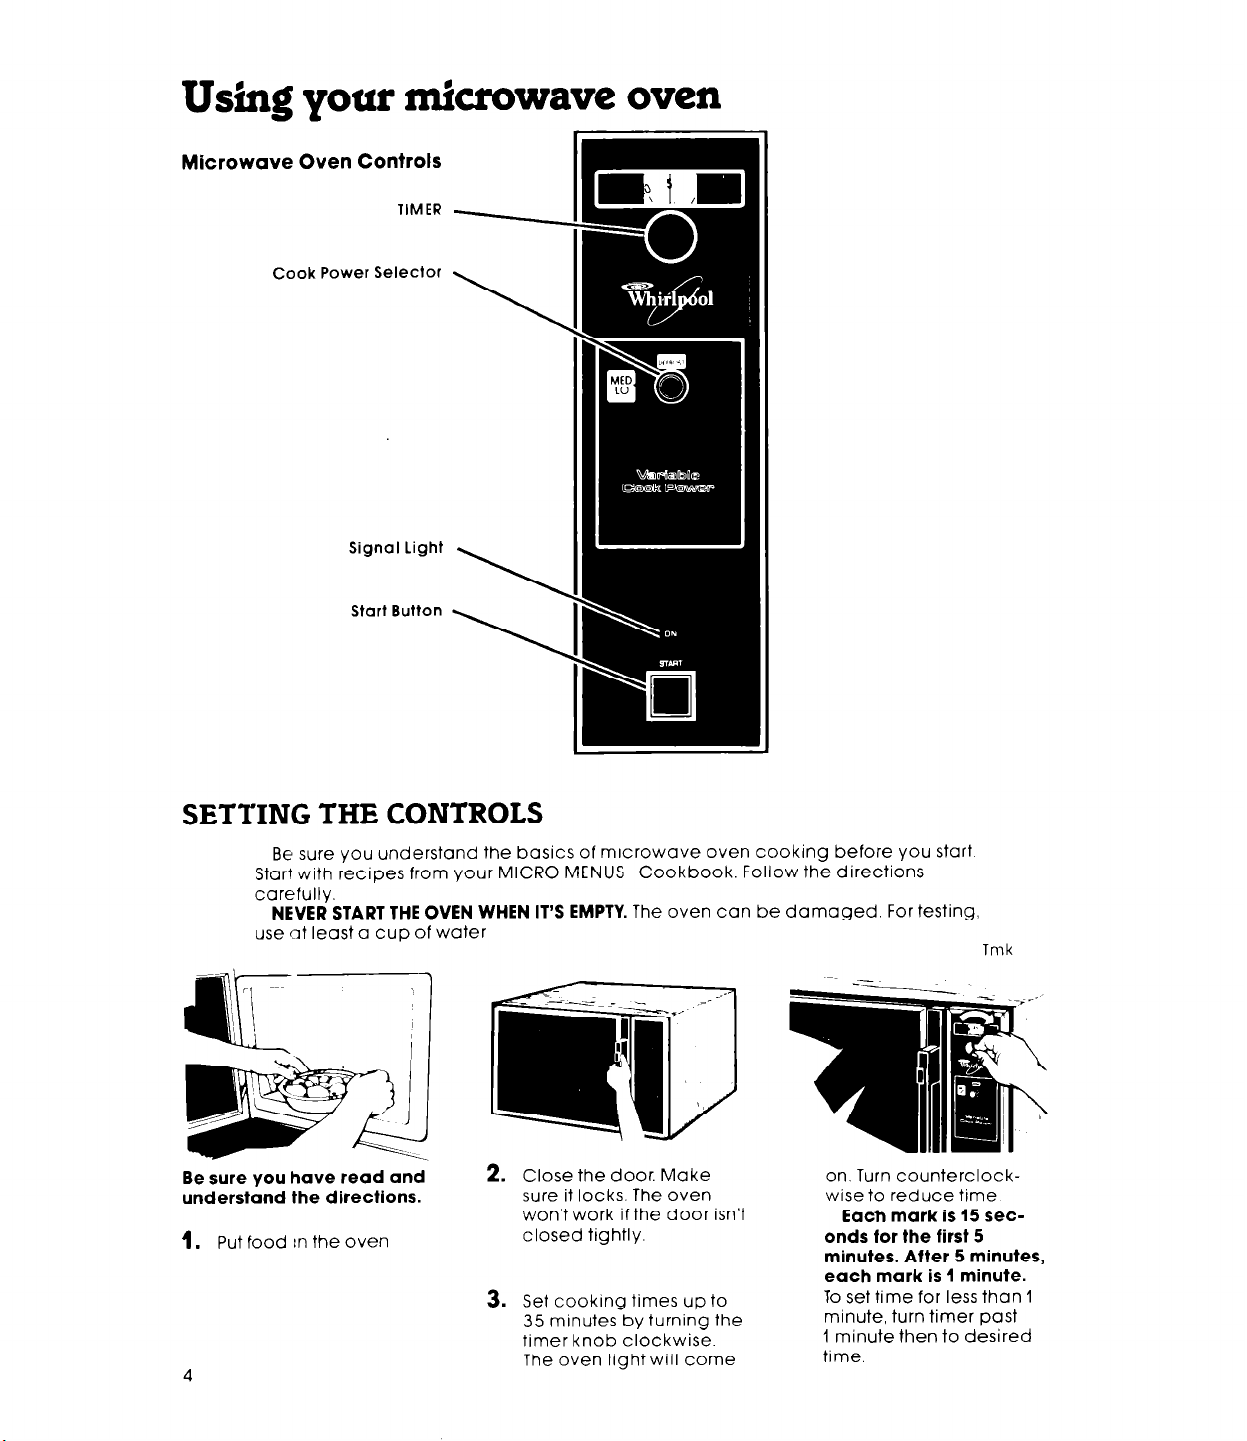
Using your fnicrowave oven
Microwave Oven Controls
TIMER
Cook Power Selector
Signol Light
Start Button
SETTING THE CONTROLS
Be sure you understand the basics of mrcrowave oven cooking before you start
Start with recipes from your MICRO MENUS
carefully.
NEVER START THE OVEN WHEN IT’S EMPTY.
use at least a cup of water
Be sure You have read and
understand the directions.
1.
Put food rn the oven
2. Close the door. Make
sure it locks. The oven
won’t work if the door isn’t
closed tightly.
3. Set cooking times up to
35 minutes by turning the
timer knob clockwise.
The oven light will come
Cookbook. Follow the directions
The oven can be damaged. For testing,
Tmk
on. Turn counterclockwise to reduce time
Each mark is 15 seconds for the first 5
minutes. After 5 minutes,
each mark is 1 minute.
To set time for less than 1
minute, turn timer past
1 minute then to desired
time.
 Loading...