

Whirlpool MMB 6040 AAS INSTALLATION
AU
QUICK REFERENCE GUIDE
MMB 6040
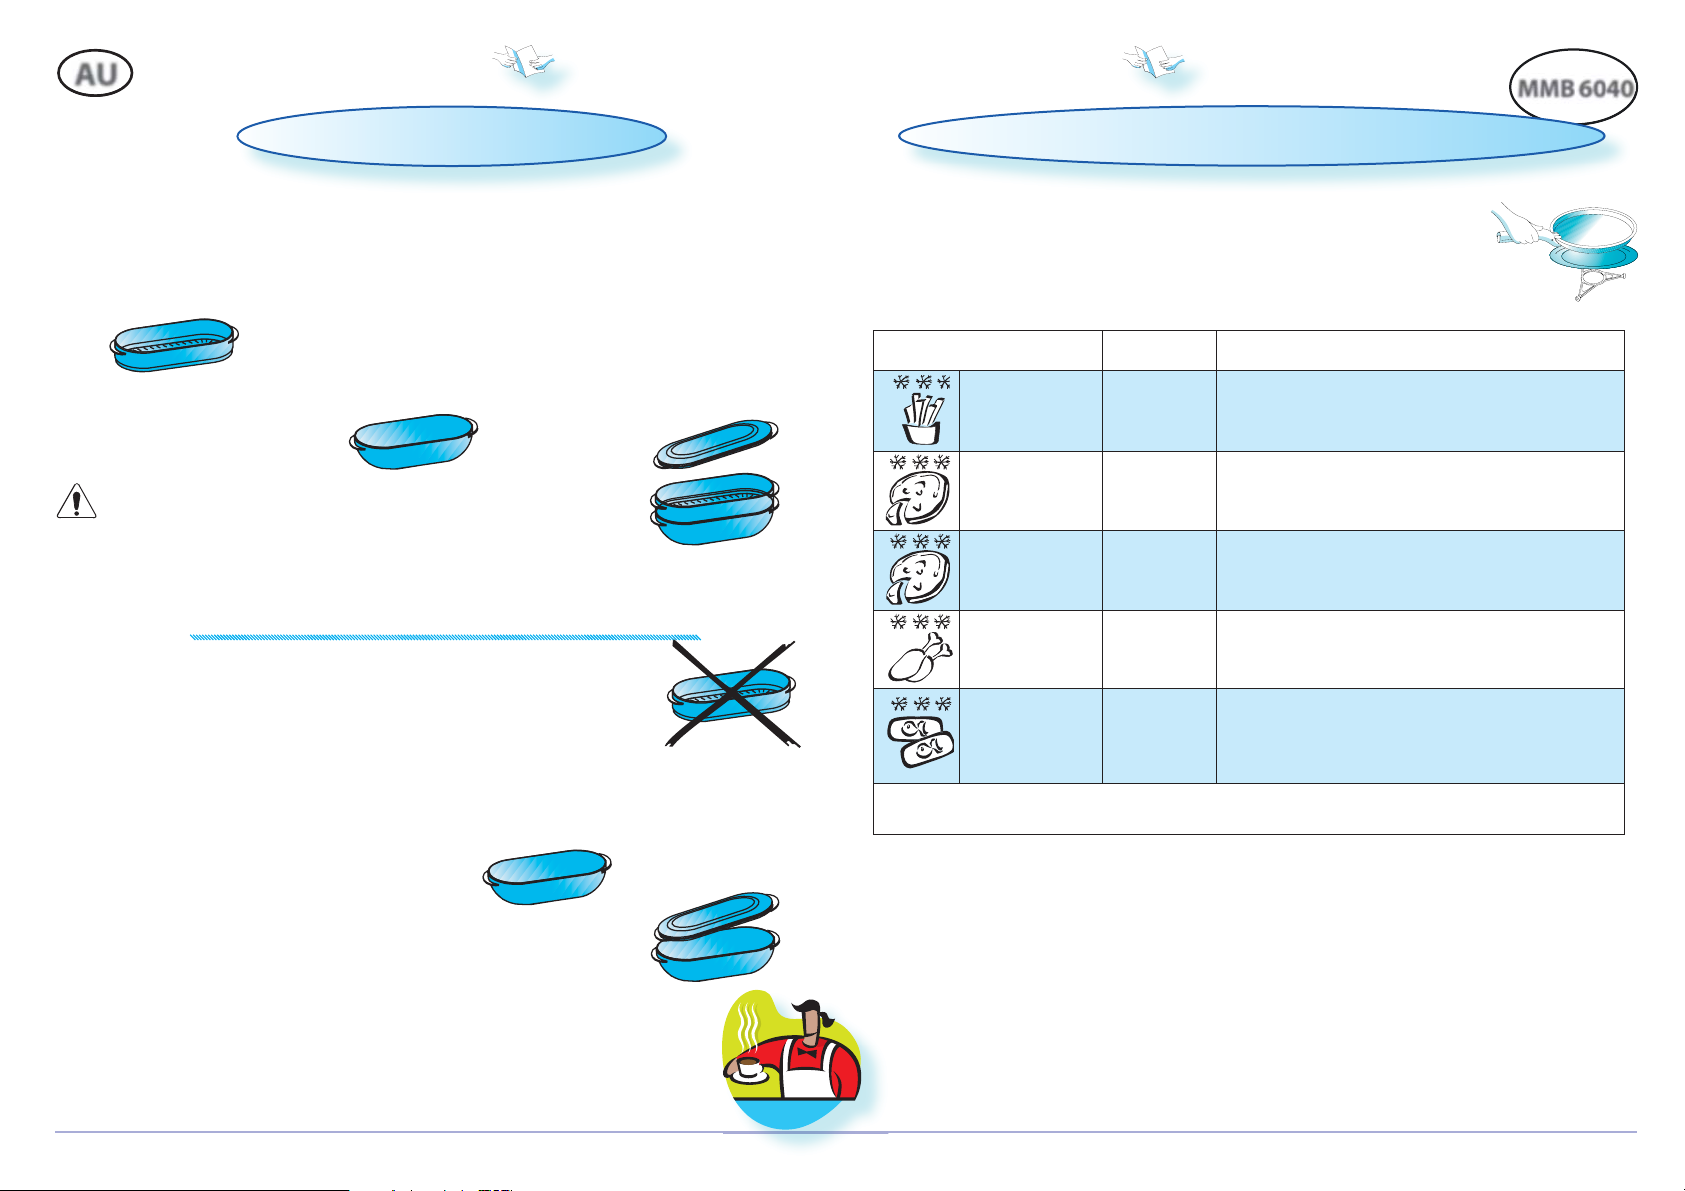
DYNAMIC INTELLISENSE STEAM
HIS FUNCTION WO RKS IN 2 STEPS.
USE THIS FUNCTION FO R such food as vegetables, fi sh,
potatoes, rice and pasta.
PLACE the food on the strainer.
T
The fi rst step quickly brings the food to
boiling temperature.
The second step automatically adjusts to sim-
mering temperature in order to avoid over
boiling.
A
DD 100 ml (1dl) water in the bottom part of the steamer.
HE STEAMER IS designed to be used with microwaves only!
T
EVER USE IT WITH ANY OTHER FUNCTION AT ALL.
N
USING THE STEAMER in any other function may cause damage.
A
LWAYS ENSURE that the turntable is able to turn freely before starting the oven.
LWAYS PLACE the steamer on the Glass Turntable.
A
SOME FOODS DO NOT REQUIRE THE STRAINER.
R
EMOVE the strainer.
RICE
U
SE THE RECOMMENDATIONS ON THE PACK AGE regarding
the cooking time, the amount of water & rice.
PLACE THE INGREDIENTS IN THE BOTTOM PART, cover with
the lid and set the time. Press the start button.
PAS TA
SE THE RECOMMENDATIONS ON THE PACK AGE regarding
U
the cooking time.
PLACE WATER , OIL & SALT IN THE BOTTOM PART, cover
with the lid and let it boil up.
ADD THE PASTA, set the time and press the start
button.
A
DD water & rice (see recommendations
on the package) in the bottom part of the
steamer.
C
OVER with the lid.
C
OVER with the lid.
RECOMMENDED WEIGHTS FOR DYNAMIC INTELLISENSE CRISP
SE THIS FUNCTION to quickly reheat your food from
U
frozen to serving temperature. This function is
used only for frozen pre-cooked food.
FOOD AMOUNT HINTS
q FRENCH FRIES
w PIZZA
e PAN PIZZA
r CHICKEN WINGS
t FISH FINGERS
OR FOOD NOT LISTED IN THIS TAB LE and if the weight is lesser or greater than recommended weight, you
F
should follow the procedure for the manual Crisp function.
250G - 600G
250G - 600G For pizzas with thin crust.
300
G - 800G For pizzas with thick crust
250G - 600G
200G - 600G
NLY USE the supplied Crisp plate with this func-
O
tion. Other available Crisp
plates on the market will not
give the correct result when
using this function.
Spread out th fries in an even layer on the crisp plate.
Sprinkle with salt if crispier fries are desired.
Spread out the chicken wings in an even layer on the
crisp plate.
Preheat the crisp plate with a little butter or oil. Add
the fi sh fi ngers when the oven stops and prompts
you to Add Food. Turn the fi sh when the oven stops
and prompts you to Turn Food.
AU
QUICK REFERENCE GUIDE
MMB 6040
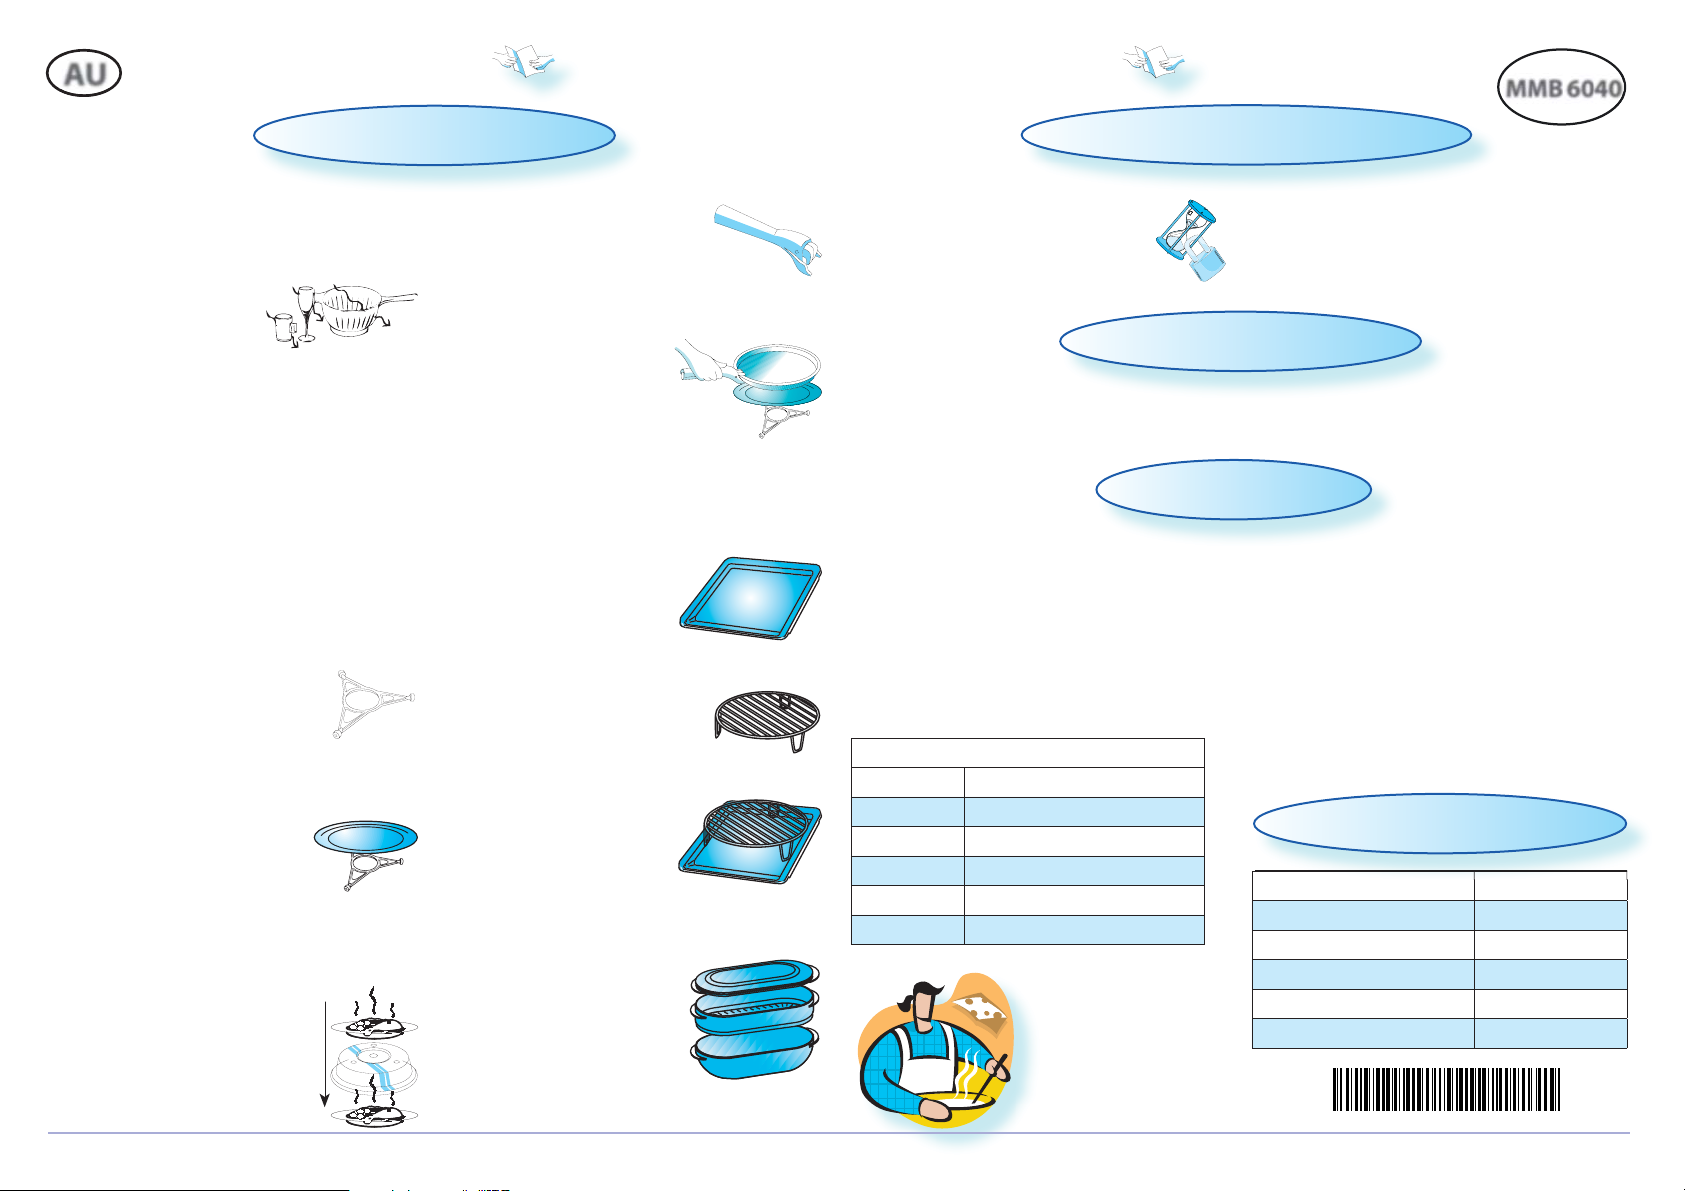
ACCESSORIES
GENERAL
T
HERE ARE a number of accessories available on
the market. Before you buy, ensure they are suitable for microwave use.
ENSURE THAT THE UTENSILS YOU USE are oven
proof and allow microwaves to
pass through them before
cooking.
WHEN YOU PUT FOOD AND ACCE SSORIES in the microwave oven, ensure that they do not come in
contact with the interior of the oven.
This is especially important with accessories
made of metal or metal parts.
I
F ACCESSOR IES CONTAINING METAL comes in contact
with the oven interior, while the oven is in operation, sparking can occur and the oven could be
damaged.
LWAYS ENSURE that the turntable is able to turn
A
freely before starting the oven.
TURNTABLE SUPPORT
USE THE TURNTABLE SUPPORT under the Glass turntable. Never put any other utensils on
the turntable support.
Fit the turntable support in the
oven.
GLASS TURNTABLE
USE THE GLASS TURNTABLE with all cooking methods.
It collects the dripping juices and
food particles that otherwise
would stain and soil the interior of
the oven.
Place the Glass turntable on
the turntable support.
COVER
T
HE COVER is used to cover food during cooking
and reheating with microwaves only and
helps to reduce spattering, retain
food moisture as well as reducing
the time needed.
U
SE the cover for two level reheat-
ing.
CRISP HANDLE
SE THE SUPPLIED SPECIAL CRISP HANDLE
U
to remove the hot Crisp plate from
the oven.
CRISP-PLATE
PLACE THE FOOD DIRECTLY ON THE CRISP-PLATE.
Always use the Glass turntable as support when using
the Crisp-plate.
DO NOT PLACE ANY UTENSILS on the
Crisp-plate since it will quickly become
very hot and is likely to cause damage to
the utensil.
THE CRISP-PLATE may be preheated before use
(max. 3 min..). Always use the Crisp function
when preheating the crisp-plate.
BAKING PLATE
Use the bakingplate when
cooking in forced air only or
when grilling. Never use it in
combination with microwaves.
WIRE RACK
Use the Wire rack when
cooking and baking with Forced
Air, Grill, Forced Air Combi, Auto
Forced Air Combi or Turbo Grill
Combi.
When grilling without
microwaves, place the wire
rack on the baking plate in
order to elevate the food
closer to the grill element in
the ceiling.
STEAMER
SE THE STEAMER WITH THE STRAINER
U
in place for such foods as fi sh,
vegetables and potatoes.
USE THE STEAMER WITHOUT THE
STRAINER in place for such foods
as rice, pasta and white beans.
ALWAYS PLACE the steamer on the Glass Turntable.
START PROTECTION / CHILD LOCK
THIS AUTOMATIC SAFETY FU NCTION IS ACTIVATED ONE MINUTE
AFTER the oven has returned to “stand by
mode“. (The oven is in “stand by” when
the 24-hour clock is displayed or if the
clock has not been set, when the display
is blank).
COOLING DOWN
WHEN A FUNCTION IS FINIS HED, the oven carries out a
cooling procedure. This is normal.
After this procedure the oven switches off automatically.
DEGREE OF DONENESS
DONENESS IS AVAIL ABLE IN THE FOLLOWI NG FUNCTIONS:
DYNAMIC INTELLISENSE REHEAT
DYNAMIC INTELLISENSE CRISP
IN THE ABOVE functions, you have the possibility
to personally control the end result through the
Adjust doneness feature. This feature enables you
to achieve higher or lower end temperature compared to the default standard setting.
DONENESS
EVEL EFFECT
L
DONENESS +2 YIELDS HIGHEST END TEMPERATURE
DONENESS +1 YIELDS HIGHER END TEMPERATURE
DONENESS 0 DEFAULT STANDARD SETTING
DONENESS -1 YIELDS LOWER END TEMPERATURE
DONENESS -2 YIELDS LOWEST END TEMPERATURE
HE DOOR MUST BE OPENED AND CLOSED e.g. putting
T
food into it, before the safety lock is released.
Else the display will show “
DOOR“.
d OOR
T
HE COOLIN G PROCEDURE can be interrupted without
any harm to the oven by opening the door.
W
HEN USING one of these functions the oven
chooses the default standard setting. This setting
normally gives you the best result. But if the food
you heated became too warm to eat at once, you
can easily adjust this before you use that function
the next time. This is done by selecting a Doneness level with the adjust knob right after you
have pressed the Start button.
N
OTE:
THE DONENESS can only be set or altered during the
fi rst 20 seconds of operation.
TECHNICAL SPECIFICATION
SUPPLY VOLTAGE 230 V/50 HZ
RATE D POWER INPUT 2800 W
USE 16 A
F
OUTPUT POWER 900 W
MW
UTER DIMENSIONS (HXWXD) 455 X 595 X 560
O
NNER DIMENSIONS (HXWXD) 210 X 450 X 420
I
4619- 694- 65381
 Loading...