

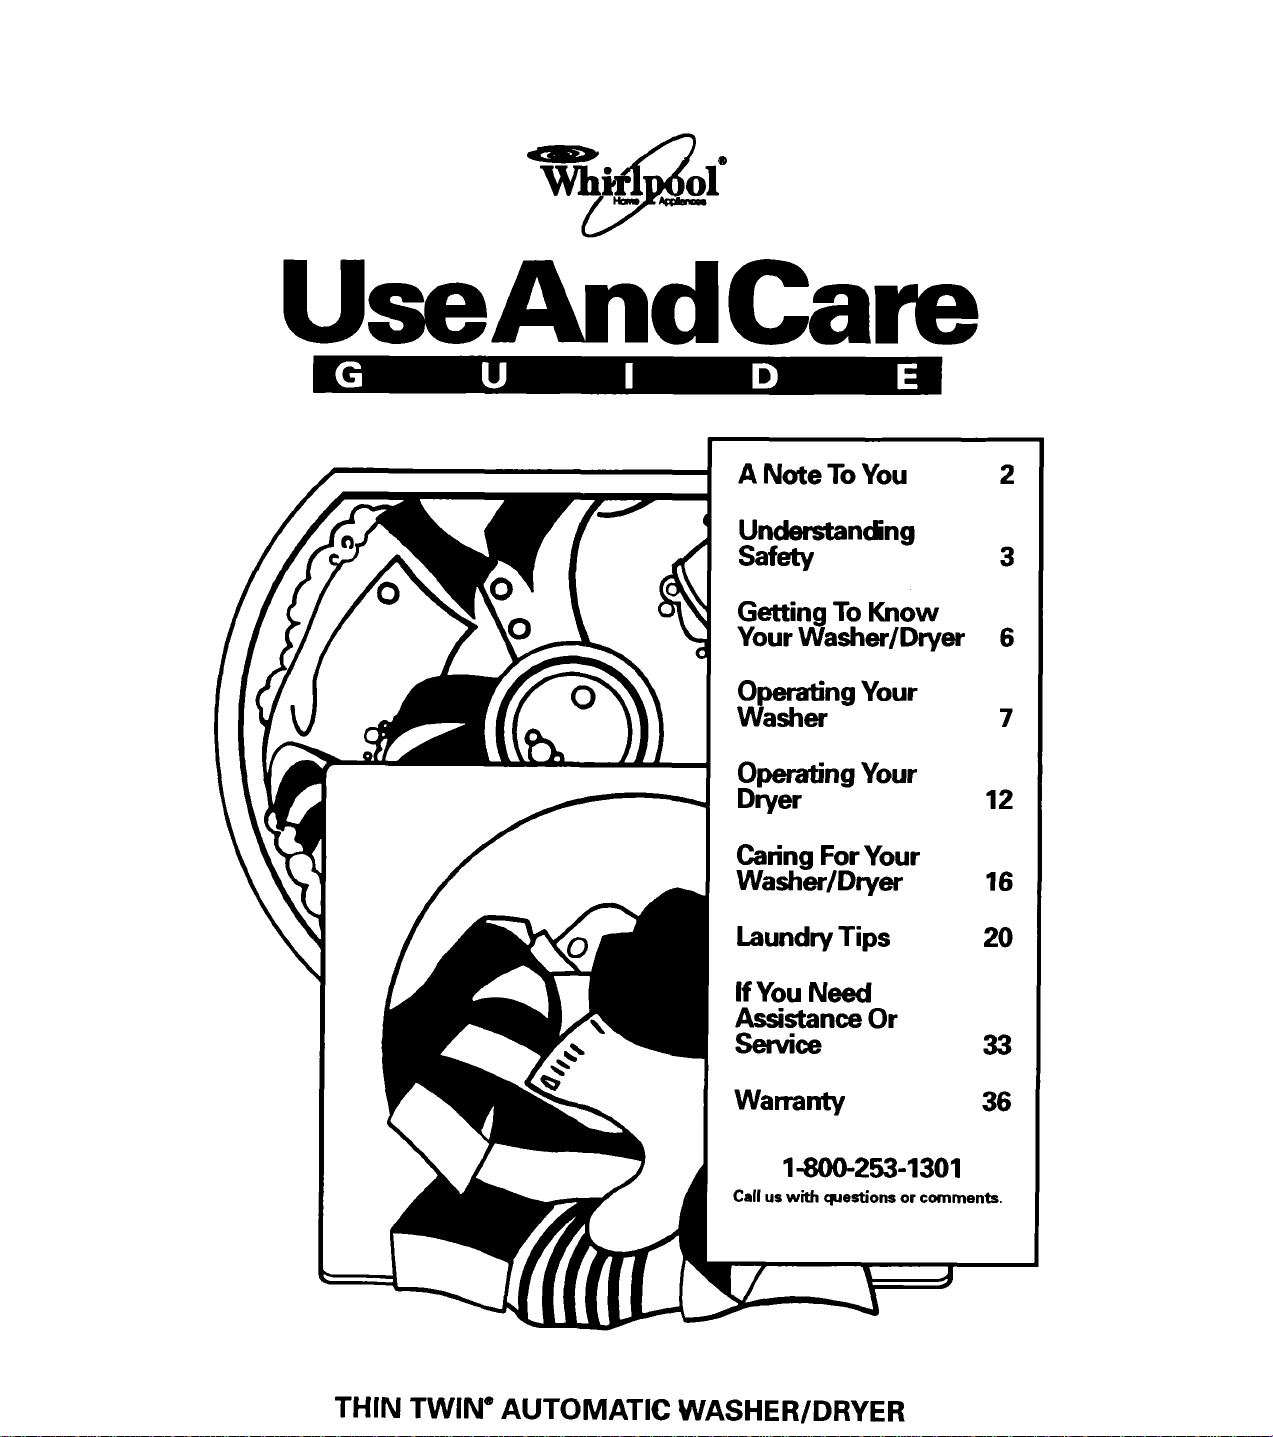
UseAndCare
A Note ToYou 2
Understanding
Safety
Getting To Know
Your Washer/Dryer
Operating Your
Washer
Operating Your
Dryer
Caring For Your
Washer/Dryer
3
6
7
12
16
Laundry Tips
If You Need
Assistance Or
Service
Warranty 36
1-800-253-1301
Call us with questions or comments.
THIN TWIN" AUTOMATIC WASHER/DRYER
20
33

A Note To You
Thank you for buying a Whirlpool ® appliance.
You have purchased a quality, world-classhome appliance.Years ofengineeringexperience have
gone intoitsmanufacturing.To ensure manyyears of trouble-free operation,we have developed
this Use and Care Guide. It isfull ofvaluable informationon howto operate and maintainyour
appliance properlyandsafely. Please read itcarefully.Also, please complete and mail the Owner-
ship RegistrationCard providedwith yourappliance. This will help us notifyyouabout any new
informationon your appliance.
Your safety is important to us.
This guide contains safety symbols and statements. Please pay special attentionto these symbols
and follow any instructionsgiven.Here is a briefexplanationofthe use of each symbol.
This symbol will help alert you to such
dangers as personal injury, burns, fire
and electricalshock.
This symbolwillhelp you avoidactions
whichcould cause productdamage
(scratches,dents, etc.) and damage
toyour personalproperty.
Our Consumer Assistance Center number, 1-800-253-1301, is
toll-free 24 hours a day.
ifyou have a questionconcerningyour appliance'soperation, or ifyou need service,first see =If
You Need AssistanceOr Service" on page 33. If you need further help, call us. When calling,you
will need to knowyour appliance's complete model numberand serial number.You can find this
informationon the model and serial numberlabel (see diagram on page 6). For your convenience,
we have includeda handy place below foryou to recordthese numbers, the purchase date from
the salesslip and your dealer's name and telephone number. Keepthis book and the sales slip
together in a safe place for future reference.
Model Number
Serial Number
Purchase Date
Dealer Name
Dealer Phone
Understanding Safety
For your safety, the information in this manual must
be followed to minimize the risk of fire or explosion
or to prevent property damage, personal injury or
loss of life.
-Do not store or use gasoline or other flammable vapors and liquids
in the vicinity of this or any other appliance.
-WHAT TO DO IF YOU SMELL GAS:
• Do not try to light any appliance.
• Do not touch any electrical switch; do not use any phone in your
building.
• Clear the room, building or area of all occupants.
• Immediately call your gas supplier from a neighbor's phone.
Follow the gas supplier's instructions.
• If you cannot reach your gas supplier, call the fire department.
Installation and service must be performed by a qualified installer,
service agency or the gas supplier.
IMPORTANT SAFETY INSTRUCTIONS
To reduce the risk of fire, electrical shock or injury to persons
when using your washer/dryer, follow basic precautions, including
the following:
• Read all instructionsbefore usingyour
THIN "I'WIN®washer/dryer.
• Do not machinewash or machine dry
itemscleaned, washed, soaked in, or
spottedwith wax, paint, gasoline,oil, dry
cleaningsolvents,or otherflammable
fluids. The fumes can create a fire hazard
or explosion.Always handwash and line
dry items containingthese materials.
• Flammable fluids (dry-cleaningsolvents,
kerosene, gasoline,etc.) shouldnot be
used or stored in or near yourwasher/
dryer. Do notadd flammable fluids to your
wash water. These substancesgive off
vapors that can create a fire hazard or
explosion.
• Do notallowchildrento operate, play with,
or crawl on or insideyour washer/dryer.
Supervise childrencloselywhen your
washer/dryer is used near them.
• Beforeyourwasher/dryer is removed from
service or discarded, remove the lid and
doorto prevent accidentalentrapment.
• After starting a cycle, donot reach intothe
basket unlessthewasher Cycle Control
Knob is pushed in and allmotionstops.
• Do notreach into yourdryer if the drum is
moving.
• Do notdry rubber, rubber-like,or heat-
sensitivematerials withheat.
• Do nottamper with the controls.
• Ifyour hotwater has not been used
recently(usually2 weeks or longer),
hydrogengases may build up inyour
water heater and your hotwater pipes.
HYDROGEN GAS IS EXPLOSIVE. To
preventinjury or damage, beforeusing
yourwasher/dryer, turnon all hotwater
faucets and allow water torun forseveral
minutes. This will allow gases to escape.
Do not smoke or use any open flame near
yourfaucet while itisopen.
Please ...
• Installand level washer/dryer in a well-
ventilated room and ona floor that can
supportthe weight.*
• Connect washer/dryer to the correct
3-prongoutlet, electricalsupply, water
supply,and drain.*
• Ground washer/dryer properly.*
• Have only a qualifiedperson install,
repair, or replace partson washer/dryer.
• Protectwasher/dryerfrom the weather
and keep itwhere the temperature is
above 45°F (7°C).
• Maintain washer/dryerproperly.
• Use only fabric softeners specifically
labeled as not being harmfulto the dryer.
• Do not allowlintto buildup insidethe
dryeror exhaust system. Cleaning should
be done periodicallyby a qualified
person.
• Clean lintscreen before or after each
load.
• Do not letdust, lint, paper, rags, chemi-
cals, etc. pile up aroundor under your
washer/dryer.
*See the Installation Instructions.
-SAVETHESEINSTRUCTIONS-

Understanding your responsibilities
• Unplug the powersupply cord or turnoff
electrical power before attemptingto
serviceyour washer/dryer. Shut offgas
valve ifyou have a gas washer/dryer.
• Do not wash or dry items that are soiled
withvegetable or cookingoil. These items
may contain some oilafter laundering.
Due to the remainingoil, the fabric may
smoke or catch fire by itself.
• Store flammable solvents orfluids away
from your washer/dryer.
• Dry cleaningsolventsor fluidsshould
never be put directlyintoyour washer/
dryer.
• Store detergent, laundryaids and other
materialsin a cool,dry place where
childrencannot reach them (in a locked
cabinet ifpossible).
• Read and follow instructionson packages
of detergent and laundryaids, especially
warningsand precautions.
• Do notusechlorine bleachand ammonia
or acids (suchas vinegar or rust remover)
in the same wash. Hazardous fumes can
form.
• Unplug power supplycordbefore attempt-
ingto serviceyour washer/dryer.
• Do not machine wash or dry fiberglass
materials. Small particles can stick to the
fabrics in following loads and cause skin
irritation.
• Never operate your washer/dryer if:
-it is notworking right (i.e. noisy, too hot).
-it is damaged.
-parts are missing.
-all panels are notin place.
-the lintscreen is loose, damaged, or
missing.
• Be sure thatyourwasher/dryer:
-is properlyconnectedto fuel and exhaust
systems(gas dryers must be vented
outdoors).*
-is not installedagainstdraperies or
curtains,or on carpet.*
-is usedonly for jobs normallyexpected
ofa home washer/dryer.
-is not usedbyanyone unableto operate
itproperly.
*See the InstallationInstructions.
-SAVETHESEINSTRUCTIONS-
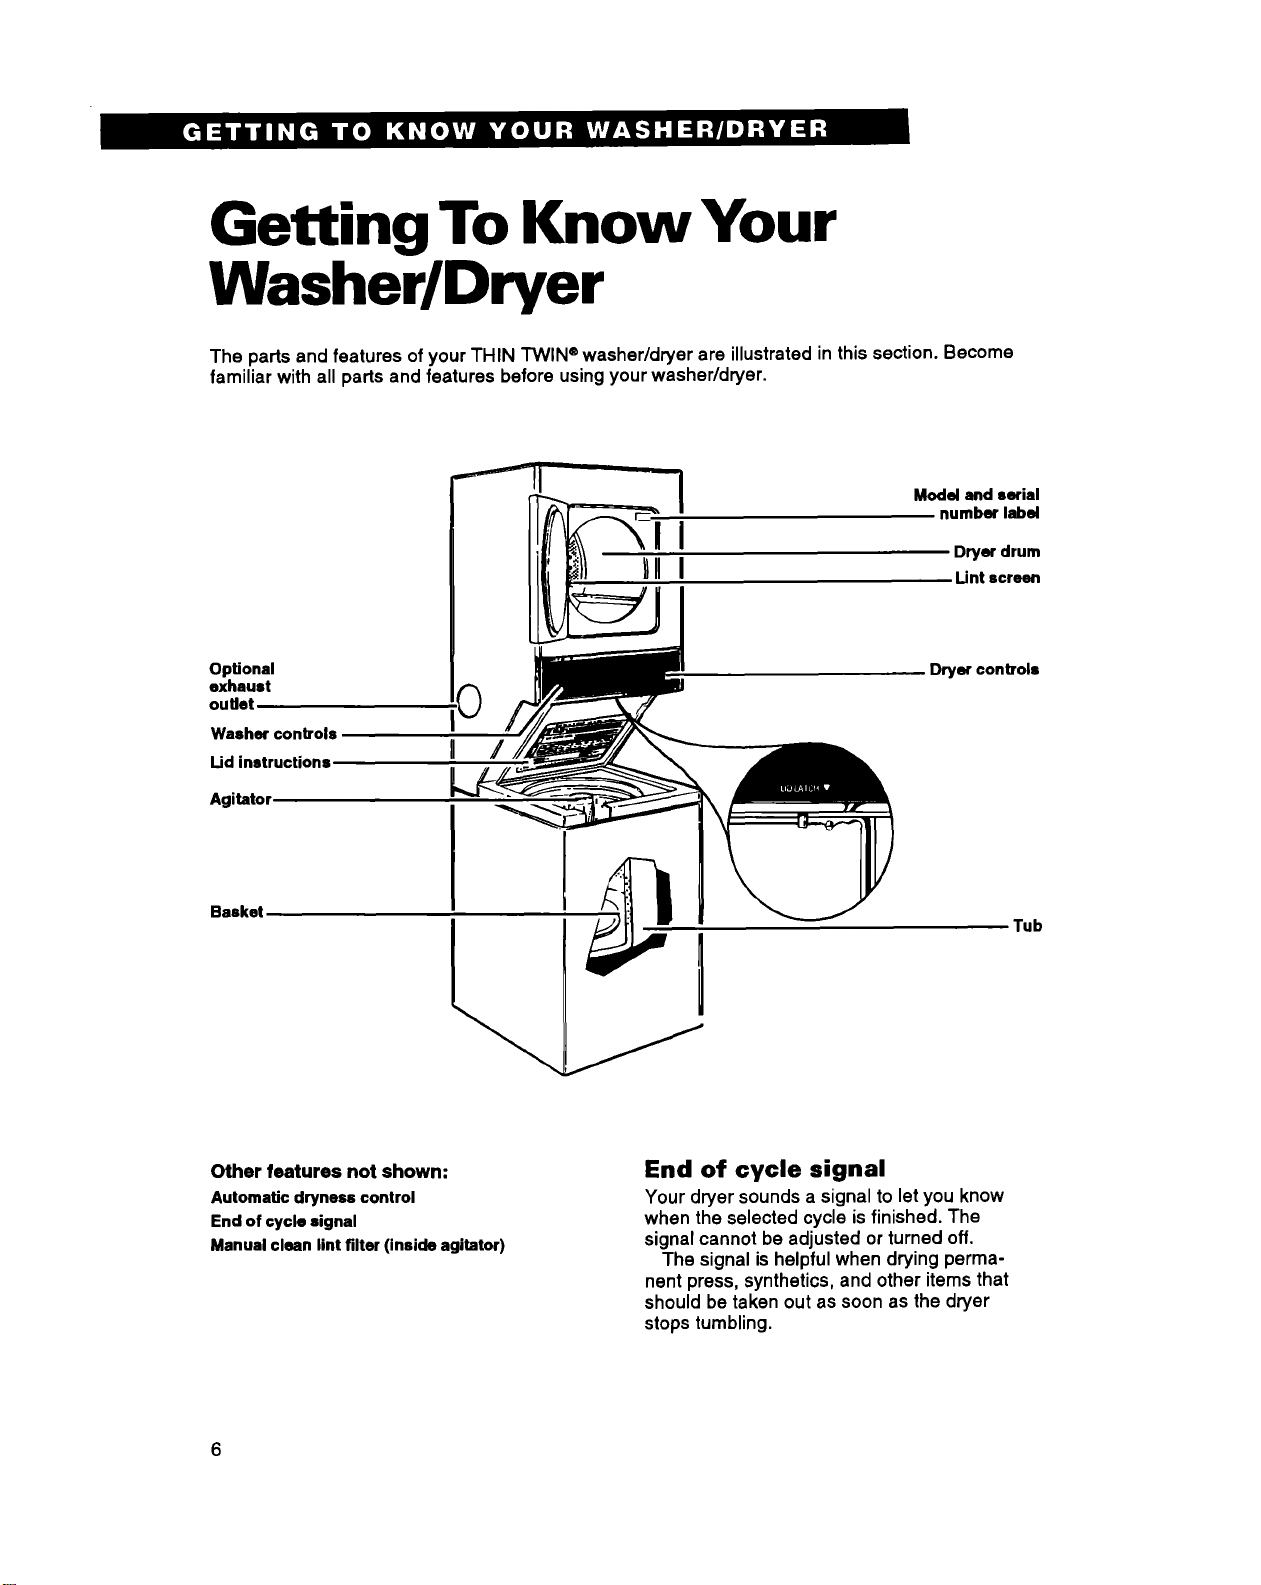
Getting To Know Your
Washer/Dryer
The parts and features of yourTHIN TWIN®washer/dryer are illustratedin this section.Become
familiarwith all parts and features beforeusingyour washer/dryer.
Model and serial
number label
Dryer drum
Lint screen
Optional
exhaust
outlet
Washer conbols
Lid instructions
Agitatol
Basket
Other features not shown:
Automatic dryness control
End of cycle signal
Manual clean lint filter (inside agitator)
Dryer controls
/
Tub
End of cycle signal
Your dryer soundsa signalto letyou know
when the selected cycle is finished. The
signal cannot be adjusted or turned off.
The signal is helpful when drying perma-
nent press, synthetics, and other items that
should be taken out as soon as the dryer
stops tumbling.

Operating Your Washer
In This Section
Page
Before starting your washer .............................. 7
Starling or stopping your washer ..................... 7
SelecUng a load size .......................................... 7
SeleclJng wash-rinse temperatures .................. 8
Operating yourwasher properlyensures maximum washingefficiency.This section givesyou
importantinformationto help you toselect a cycle, time, and temperaturefor your wash load.
SelecUng a cycle and Urne .............................. 8
Using rinse and spin ...................................... 10
Using drain and spin ..................................... 10
What happens in each cycle ......................... 11
Page
Before starting your washer
Add measured detergent. Then place asorted NOTE: Ifyour washer/dryer has a Consumer
loadin the washer beforestarting. See page 20 Features Guide, remove it and place it in your
for additional=Beforeyou wash or dry" Use and Care Guide.
information.
Starting or stopping your washer
Starting your washer:
1. Select loadsize and water temperatures.
2. Push in the Cycle Control Knob and turn it
clockwise. Stop when the indicatoron the
knob'souter ringpointsto the number in the
wash cycleyou want. The numbers are
minutesof wash time.
3. Pullout the Cycle Control Knob.
Refer to pages8-10 for additionalinformation
to helpyou makeselections.
Stopping and restarting your washer:
• To stopthe washer at any time, pushin the
Cycle ControlKnob.
• To restartthe washer, close the lid(if neces-
sary) and pull out the CycleControl Knob.
Selecting a load size
Position the LoadSize Selector at the setting
that correspondsto the size loadyou want to
wash. Select a loadsize based uponthe size
of the load and the fabric you are washing. See
pages 20-21 for additionalloadinginformation.
To changethe load size settingafter the
washer has startedto fill, move the Selector to
RESET, then to the desired newsetting.
Load size tips
• Items should move freely in the washer. Do
notoverload the machineor select a load size
that is toosmall for the wash load.
• Use a large load size settingfor best results
with permanent pressclothes.
• Reduce wash time when usinga smallload
size setting. Loadswith only a few small items
need less wash time.
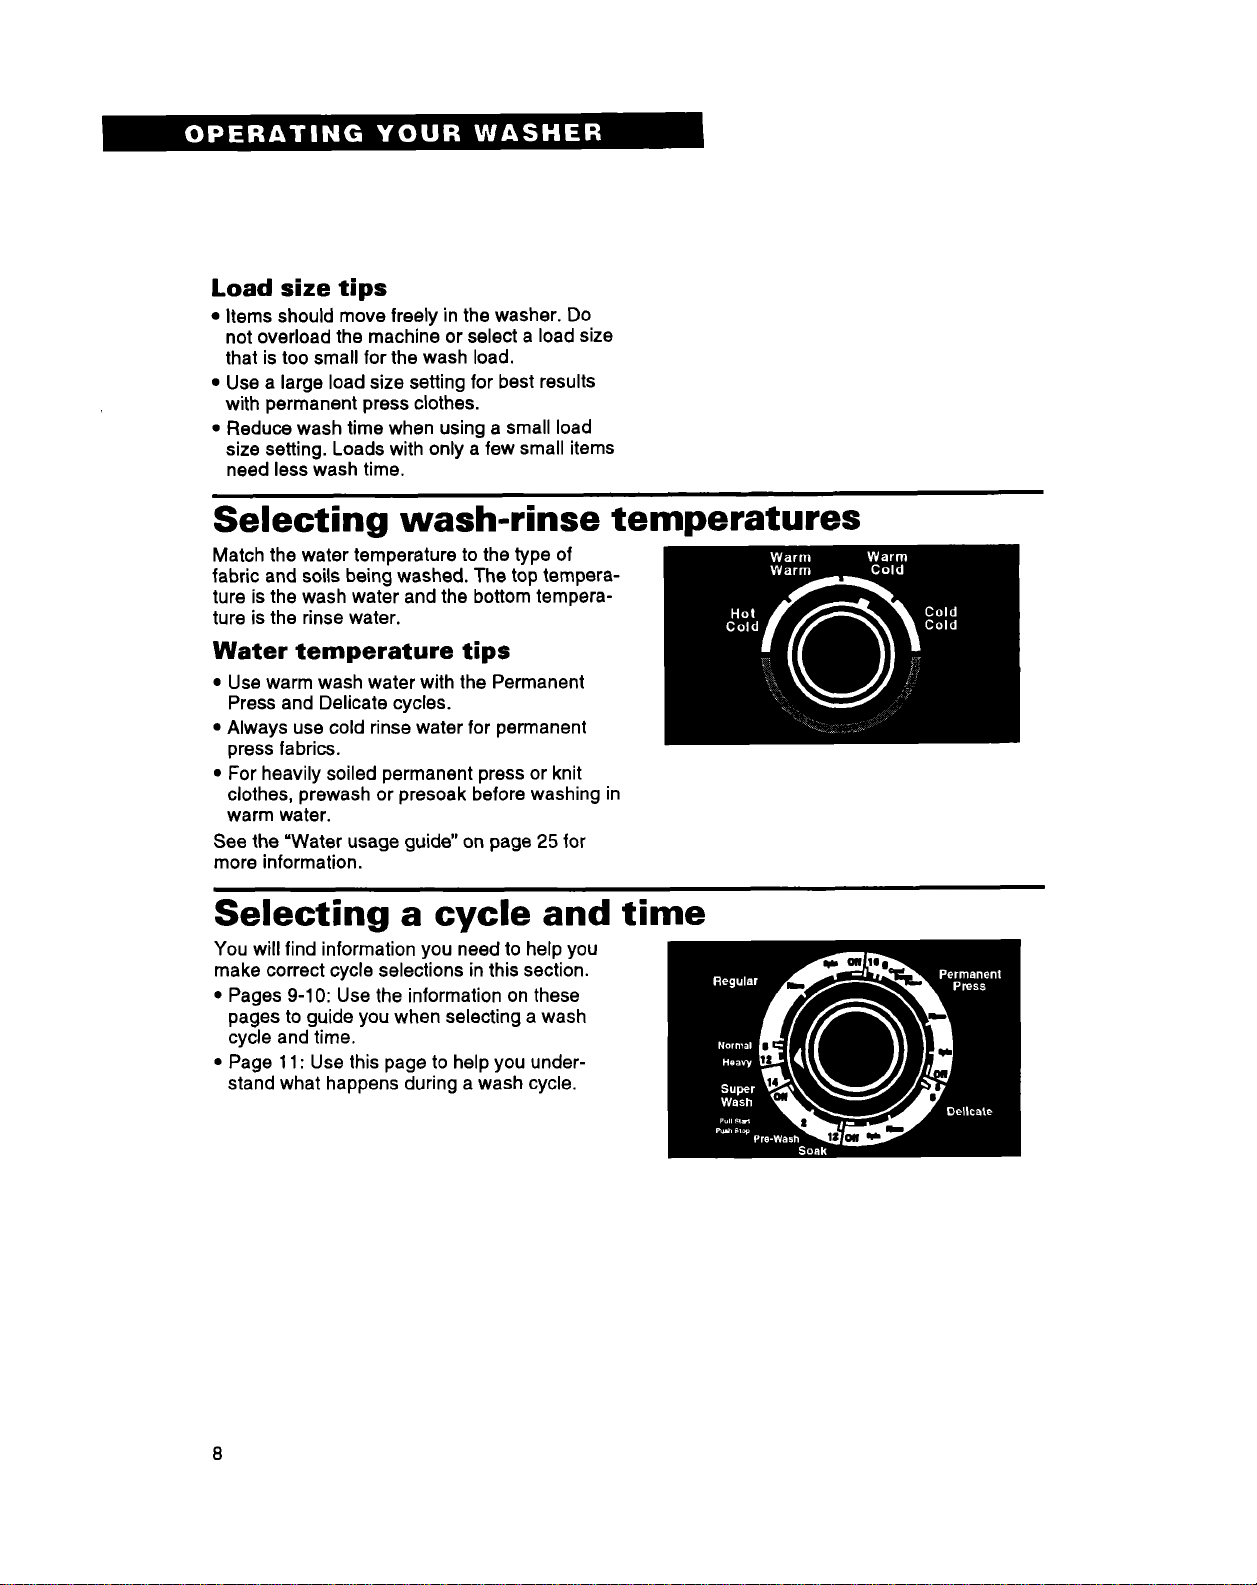
Selecting wash-rinse temperatures
Match the water temperatureto the type of
fabric and soilsbeing washed. The top tempera-
ture is the wash water and the bottom tempera-
ture is the rinsewater.
Water temperature tips
• Use warm wash water withthe Permanent
Press and Delicate cycles.
• Always use cold rinse water for permanent
pressfabrics.
• For heavilysoiled permanent pressor knit
clothes, prewash or presoak before washing in
warm water.
See the =Water usageguide"on page 25 for
more information.
Selecting a cycle and time
You will find information you need to help you
make correct cycle selectionsin this section.
• Pages 9-10: Use the information on these
pages to guide you when selecting awash
cycle and time.
• Page 11: Use this page to help you under-
stand what happens during a wash cycle.

Regular cycle
The Regular cycle features the Gentle Wash
system and highspin speeds to shorten drying
time.
• Use HEAVY, 12 minutesof wash time, to
clean sturdily-constructedcottonand linen
fabrics that are heavily soiled.
• Use NORMAL, 8 minutesof wash time, to
clean cottonand linenfabrics that are lightly
to moderately soiled.
Permanent Press cycle
The Permanent Press cycle features the
Gentle Wash system, a cool-downrinse, and
low spin speeds to reduce wrinkling.
• Use 10 minutesof wash time to clean
permanent press and some syntheticfabrics
thatare moderatelysoiled.
• Use 6 minutesofwash time to clean perma-
nent press and somesyntheticsthatare
lightlysoiled.
NOTE; The washer pauses brieflyduringthe
wash cycle. This isnormal for washer
operation.
Delicate cycle
The Delicate cycle features a reducedagitation
speed for gentle soil removal. Low spin speeds
reducewrinkling.
• Use 8 minutes ofwash time to clean delicate
itemsand washable knitsthat are moderately
soiled.
• Use 6 minutes of wash time to clean delicate
items and washable knits that are lightly
soiled.
Soak cycle
The Soak cycle features brief periods of
agitationand soak time to help remove heavy
soilsand stains that need pretreatment.
• Use warm water when soaking laundry.(Hot
water can set stains.)See pages 22-24 for
stain removal information.
• Use the amountof detergent or presoak
additive recommended by manufacturer.
• After the Soak cycle ends, add detergent
and set a new wash cycle.
Regular cycle
Permanent press cycle
Delicate cycle
Soak cycle
9

Pre-Wash
Pre-Wash features a briefperiodof highspeed
agitationto help removeheavy soilsand stains
that need pretreatment.
• Use warm water for prewashingstained
laundry. (Hot water can set stains.) See
pages 22-24 for stain removal information.
• After Pre-Wash ends, add detergent and set
a new wash cycle.
Super Wash cycle
Super Wash automaticallyprewashesthe
laundryand advances into the Regular wash
cycle. (The washer does notneed to be reset
after the Super Wash cycle.) Use thiscycle
when washing heavily soiledloads that need
maximumsoil removal.
• For proper cleaning, use doublethe amount
of detergent recommended for a wash cycle.
NOTE: The machine pauses duringSuper
Wash. This is normalfor washer operation.
Using rinse and spin
When using extra detergent for heavily soiled
clothes,or washing special-care items, you
may want an extra rinseand spin.
1. Push Cycle Control Knobin and turn
clockwiseto RINSE, as illustrated.
2. PullCycle Control Knob out. The washer
fills to selected loadsize, agitates,drains,
and spins.
Pr_,wuh
Super wash cycle
Using drain and spin
A drain and spin may help shorten drying times
for some heavy fabrics or special-care items
by removing excess water.
1. Push Cycle Control Knob in and turn
clockwise to SPIN, as illustrated.
2. Pull Cycle Control Knob out. The washer
drains, and then spins.
10

What happens in each cycle
When the Cycle Control Knobis set to a
number and pulledout,the washer fills (to the
selected load size) before agitationand timing
start. The washerwill beginagitating immedi-
ately after filling; agitation can occur with the
washer lid up or down. After agitationstarts,
the Cycle Control Knob turns clockwiseuntilit
pointsto OFF and the cycle ends.
The washer pauses briefly throughout each
cycle. These pauses are normal for washer
operation.
NOTE: A Gentle Wash systemhelps protect
yourfabrics by reducingwash agitationspeed
duringthe last few minutesof wash agitationin
the Regularand Permanent Press cycles.
WASH
Fill
Wash*
°Agital_onspeedisreducedinthe last few
minutesof mostcycles.This provides
betterfabric care.
_j Drain (or partialdrain*)
*The Permanent Press cycle partially
drains, fills, agitates briefly, and drains.
_[_ Spin
No agitation
RINSE
Fill
Rinse
_ Drain-No agitation
_ Spin-Spray rinse
Spin
U Off
11

Operating Your Dryer
In This Section
Page
Before starting your dryer ................................ 12
Star'dng your dryer ............................................ 12
Stopping your dryer .......................................... 12
The information in this section helps you learn to use your dryer efficientlyand safely. Refer to
=Laundry Tips" on page20 for additionalcontrolsetting,sorting,and loadinginformation.
Resta_ng your dryer ........................................ 12
Understanding your cycles .............................. 13
SelecUng the right cycle and setting ............... 15
Page
Before starting your dryer
Wipe thedryer drum with a dampclothbefore If your dryerhas a Consumer Features Guide,
using to remove dustfrom storingand remove it and place itwith your Use and Care
shipping. Guide.
Starting your dryer
1. Loadclothes intothe dryer and close the
door.
2. Turn the Cycle Control Knobeitherway to
the desired setting.
3. Pushthe Start Button.
NOTE: Your dryer stopsautomaticallywhen a
cycle ends.
Stopping your dryer
You can stop your dryer anytime during a cycle.
Open the dryer door or turn the Cycle Control
Knob to OFF.
NOTE: The Cycle Control Knobshould point to
an OFF area when the dryer is notin use.If you
want to stopthe dryer beforethe cycleis
finished, turn the Cycle Control Knobto an OFF
area.
Restarting your dryer
1. Close the door.
2. Select a new cycle and temperature(if
necessary).
3. Pressthe Start Button.
12
Push to start

Understanding your cycles
See the chart belowfor descriptionsof the cyclesthatare onyour dryer. See page 15 forhelp in
selectingthe right cycle.
NOTES:
• Use the Energy Preferred Automatic
Setting (,) to dry most loads. (See page 14.)
• Shaded areas in the illustrationsshow cycle
locations.
• The lastfew minutes of all cyclesare without
heat to make the load easierto handle.
CYCLES CYCLE CONTROL KNOB
Timed cycle
Use your Timed cycle to complete drying if
some itemsare damp after automaticdrying.
This cycle is also usefulfor small loads or
large bulkyitems.
• For adamp dry,turn the Cycle Control
Knobto 30 minutesor less.
using the TUMBLE PRESS ®
cycle
The TUMBLE PRESS cycle removes
wrinkles from clothes that have been
packed in a suitcase, or from items not
removed from the dryer at the end of a
cycle. Put only a few items in your dryer for
best results when using this cycle. As soon
as the dryer stops,fold or put the items on
hangers.
• To help reduce wrinkling,remove the load
fromthe dryer as soon astumblingstops.
This isimportantfor permanent press,knits,
and syntheticfabrics.
Fluff Air cycle (no heat)
The Fluff Air cycle is unheated. Use this
cycle to fluff or air dry bedding, plastic
tablecloths, foam pillows, sneakers, etc.
See Warning on page 15.
continued on next page
13

CYCLES CYCLE CONTROL KNOB
Automatic cycle(s)
Use an automaUc cycle to dry most loads.
• Your automaticcycle shutsoft when the
selected dryness is reached.
• The Cycle ControlKnobwillnot move until
the load is almost dry. Afterthe cool-down,
the Cycle ControlKnobautomatically
moves to an OFF area and tumbling
stops.
Dry most loads using the Energy
Preferred Automatic Setting (*),
• If the load isdrier than you like, select a
settingcloserto LESS DRY the next time
you dry a similarload.
• Ifthe load isnot as dryas you like, com-
plete drying usinga Timed cycle. Select a
settingcloserto VERY DRY the nexttime
you dry a similarload.
Automatic Regular
The (*) indicatesthe Energy Preferred
Automatic Setting.This cyclecan be used for
heavy and mediumweight cottonitems, such
as towels, bluejeans, corduroys,bedspreads,
and linens.
*Energy preferred automaUc =etUng
Automatic Permanent Press
Use this cycle to dry permanent press items,
knits,and other syntheticfabrics.
14

Selecting the right cycle and setting
Use the chart below to guide youwhen making
drying selections.
• Do not overdry.Overdryingcan cause
shrinkage, staticcling,and damage tosome
fabrics.
Do not dry heat-sensitivefabrics, plastic,
rubber,or somestuffed items with heat.
Use the Air cycle, or line dry.
Failureto do so could resultin fire or
damaged items.
TYPE OF LOAD CYCLE TIME
COI-FONS AND LINENS
Extra Heavy-Bedspreads, mattresspads,quilts
Heavyweight-Towels, jeans, corduroys,workclothes
Mediumweight-Sheets, cottonunderwear, diapers
Lightweight-Batistes, organdies, lingerie
Automatic Regular
Automatic Regular
Automatic Regular
Automatic Perm Press
PERMANENT PRESS, SYNTHETICS AND BLENDS
Heavyweight-Work clothes,jackets, raincoats
Mediumweight-Shirts, play clothes,sheets, slacks
Lightweight-Lingerie, blouses, dresses
Automatic Perm Press
Automatic Perm Press
Automatic Perm Press
KNITS
Heavyweight-Cottons, rayons,blends, T-shirts,
Automatic Perm Press
slacks, shirts
Mediumweight-Synthetics (polyester, acrylic,etc.),
Automatic Perm Press
dress slacks, skirts,sweaters
Lightweight-Synthetics (polyester, acrylic,etc.) and
Automatic Perm Press
blends, lingerie,blouses,dresses
Fire Hazard
DELICATE FABRICS
Sheer curtains (2 or 3 panels), gauze, lace, etc.
RUBBER, PLASTIC, HEAT-SENSITIVE FABRICS
Foam Rubber-Pillows, bras, stuffedtoys
Plastic-Shower curtains,tablecloths
Rubber-backed rugs
Olefin, Polypropylene,Sheer nylon
Fluff Air
Fluff Air
20-30 rain
20-30 min
20-30 min
40-50 min
10-20 min
15

Caring For Your Washer/Dryer
In This Section
Page
Maintenance-every load ................................... 16
Maintenance-as needed ................................... 16
Washers and dryers requireregularmaintenance. Followthe suggestionsbelow to maintainyour
washer/dryer properly.
13ps for caring for your washer/dryer .......... 19
Care during periods of non-use ................... 19
Page
Maintenance-every load
Cleaning the washer lint filter
Clean the filter at the bottomofthe agitator
after every load for the best filteringresults.
To clean:
1. Liftoff the agitator barrel.
2. Wash orwipe the filterclean in the bottom
of the agitator barrel.The filteris not
removable.
3. Replace agitator barrel.Snap it intoplace.
Cleaning the dryer lint screen
The lintscreen is located insidethe dryer
drum, on the backwall. Clean It before each
load. A screen blockedby lintcan increase
dryingtime.
1. Open the door and pullthe lint screen
straightout.
2. Squeeze the body of the lintscreen lightly
while pullingthe coveroff. (See illustration.)
3. Roll lintoffthe screen withyour fingers. Do
not rinse orwash the screen to remove lint.
Wet lintis hardto remove.
4. Replace cover on lintscreen body. Push the
lintscreen firmly back into place and close
the door.
Manual clean
lint filter
Product and Fabric Damage Hazard
Do not runthe dryerwith the lintscreen
loose, damaged, blockedor missing.
Doingso can cause overheating and
damage to boththe dryerand fabrics.
Lint screen body
Maintenance-as needed
Use the followingsuggestionsabout cleaning
and lint removal to maintain yourwasher/dryer
and keep it operating efficiently.
16

Cleaning the washer/dryer
interior
Washer:
• If the washer interiorneeds cleaning, put
1/2cup (125 mL) of chlorinebleachand
1 cup (250 mL) of detergent inthe washer.
Runthrough a complete cycleusing hot
water.
Dryer:
Electrical Shock,
Personal Injury and Fire and
Explosion Hazard
• Turn offthe electricalpower before
cleaningthe interior.
• Make sure the dryer is cool.
• Use nonflammablecleaner.
Failure to do so could resultin electrical
shockor injury,fire or explosion.
Garments whichcontainunstable dyes, such
as denim blue jeans or brightly coloredcotton
items, may discolorthe dryer interior.
Ifyou want to removestains from the dryer
drum, use powdered laundrydetergent.
1. Make a paste with detergent and very warm
water.
2. Apply pasteto a softcloth and scrubarea
until all excess dye is removed.
3. Wipe thoroughlywitha dampcloth.
4. Tumble a load ofrags to dry.
Cleaning a clogged lint screen
Laundrydetergents andfabric softeners can
cause a residue buildup on the lintscreen. A
clogged lintscreen can extend dryingtimes.
Clean the lintscreen with a nylonbrush every
six months,or morefrequently, ifit becomes
clogged due to a residue buildup.Use the
following method:
1. Wet bothsides of lint screen with hotwater.
2. Wet a nylon brushwith hotwater and liquid
detergent.
3. Scrub lint screen with the brushuntilall
residue buildupis removed.
4. Rinsewith hotwater.
5. Thoroughly dry lintscreen with a clean
towel and replace in dryer.
17

Removing accumulated lint
from the dryer
Lintcan gatherinside the dryerand be fuelfor
a fire. It is recommended that lintbe removed
every 2 to 3 years, or more often, depending
on dryer usage. Cleaning shouldbe done by a
qualified person. If you have any questions,
please call our Consumer Assistance Center
at 1-800-253-1301.
Electrical Shock, Personal Injury and
Product Damage Hazard
• Unplugthe power supplycord or turn
offthe electricalpower before removing
dryer panels.
• Make sure the dryeris cool.
• Dryer parts can have sharp edges. Use
care when handling.
• More than one personis requiredto lift,
tilt or move machine because of its
weight and size.
• Truck onlyfrom rear.
Failureto follow the above instructions
could result in electricalshock,personal
injuryor productdamage.
1. Unplug the power supply cord or turnoff the
electrical power.
2. Remove back panel. See Installation
Instructions.
3. Remove lint from shaded area in illustration
with a softbrushor vacuum cleaner. Avoid
damagingwires, thermostats,funnel (gas),
or ignitor(gas),
4. Replace panel; reconnectand level dryer
again, if necessary.
18
Heat inlet duct Thermostats Motor
Electric dryer with back panel removed

Tips for caring for your washer/dryer
• Wipe up detergent, bleach and other spills with
a soft, damp cloth or sponge as they occur.
• Remove hard water deposits using only
cleaners labeled as washer safe.
• After tinting or dyeing, put chlorine bleach
and detergent in the washer. Run through a
complete cycle using hot water to remove
excess dye or tint. If staining occurs on
following loads, repeat the process.
• Sharp or metal objects can damage your
washer/dryer. Check pockets for pins, clips,
money, bolts, nuts, etc. Do not lay these
objects on your washer after emptying
pockets.
NOTE: Operate your washer/dryeronlywhen
you are at home.
Care during periods of non-use
Winter storage or moving care
Install and store your washer/dryer where it will
not freeze. Because some water stays in the
washer, freezing can damage it. If your
washer/dryer is stored or moved during
freezing weather, winterize it.
1. Shut off both water faucets. Disconnect the
drain water inlet hoses.
2. Put 1 quart (1 L) of R.V.-type antifreeze in
the washer basket.
3. Run washer on a drain and spin setting for
about 30 seconds (see page 10) to mix
antifreeze and water.
4. Unplug power supply cord.
To use the washer again:
1. Flush water pipes and hoses.
2. Reconnect water inlet hoses.
3. Turn on both water faucets.
4. Reconnect power supply cord.
5. Run the washer through a complete cycle
with 1/2cup (125 mL) of detergent to clean
out antifreeze.
Non-use/vacation care
1. Unplug power supply cord or turn off
electrical power.
2. Clean lint screen and lint filter.
3. Turn off water supply leading to your
washer/dryer. This will help avoid acciden-
tal flooding while you are away (for ex-
ample, due to a water pressure surge).
19

Laundry Tips
In This Section
Page
Before you wash or dry .................................... 20
Removing steins ............................................... 22
Water usage guide ............................................ 25
Washing special-care item0 ............................ 26
Thissection reviews proper launderingtechniques, givesyou additionallaunderinginformation,
and discusses causes or solutions to common laundering problems.
Saving energy ................................................ 27
Drying special-care items ............................. 28
Solving laundering problems ....................... 30
Using laundry aids ......................................... 32
Page
Before you wash or dry
Before usingyour washer/dryer,see
pages 3-5 for Important Safety Information.
* Close zippers, snaps and hookstoavoid
pins,bucklesand otherhard
objectsto avoid scratchingthe
L_ naggingotheritems. Remove
and ornaments, or heat-sensitivetrim that
can be damaged by drying.
• Stained or wet garmentsshouldbe washed
promptlyfor best results.
• Check garments to make sureall spotsand
stainswere removed duringthe wash. See
pages 22-24 for pretreatment and stain
removal information.If stainswere not
removed, do not tumbledry. Heat may
permanentlyset stain.Soiled items can also
leave stainson the dryerdrum. These stains
can be pickedup by other items inthe load.
• Turn down cuffs and brushaway lintand dirt.
• Turn synthetics insideout to avoid pilling.
• Mend tears, loose hems, and seams.
• Sharp or metal objectscan damage your
emptying pockets.
• Turn lint takers and dark items inside out to
help prevent lint pickup.
• Tie strings and sashes so they will not
tangle.
• Place small items such as baby socks or
hankies in a mesh bag for easier removal.
• Articles to be ironed should be removed from
the dryer while still damp.
washer interiororthe dryer
drum. Remove unwashabletrim
washer. Check pocketsfor
pins, clips, money,bolts, nuts,
etc. and turn pocketsinside
out. Do notlay these objects
on your washer after
Sorting
• Items properly sorted for washing are usually
_,,..! Separate heavilysoiled items
from lightlysoiled ones even if
_ properlysortedfor drying.
(towels,chenille) from linttakers (corduroy,
synthetics,permanent press). When pos-
sible, turn lint takers insideout.
• Separate heavyfabrics (denim, towels) from
light fabrics (synthetics,permanent press).
• Separate dark from lightcolors;colorfast
from noncolorfast.
they would normally be washed
together. Separate lintgivers
Load sizes
• Drop items into washer loosely.Fillto the top
ofthe basket. Do notpack or
Items shouldmove easily
wrap items around agitator.
throughwash water for best
cleaning and wrinkle-free
results.Watch for rollover.
Itemsshould sink and reappear later.
• To reduce wrinkling,permanent press and
syntheticknitsshould have moreroom to
move in the water than heavy items(towels,
jeans).
• Do notoverloadthe washer/dryer. Over-
crowdingcauses poor cleaning, uneven
dryingand wrinkling,and can cause itemsto
wear out faster (because of pilling).
20

• Mix large and smallitemsin each load. Load
• For bettertumblingactionwhen drying only a
few small items, add one or twolint-free
balance. An off-balance load
can make the machine vibrate
evenly to maintainwasher
duringspin. Load the dryerby
the amount of space itemstake
up, not by their weight.
towels.This alsoprevents small, lightweight
itemsfrom blockingairflow.
• You may need to rearrange large items
(sheets, blankets,tablecloths)duringa
dryingcycle to reduce bailingor rollingup.
• Reduce wrinklingof permanent press and
syntheticsby drying smaller loads and
removingitems from the dryer as soonas
tumblingstops.
Washer loading suggestions
For these suggested full-sized loads, use the highest water level setting.
COM PACT WASH ERS
Heavy Work
Clothes
3 work shirts
2 pair pants
Towels
9 bath towels
-or-
6 bath towels
3 hand towels
6 wash cloths
Knits
2 slacks
2 shirts
-or-
3 dresses
Dellcates
1 camisole
2 slips
2 panties
2 bras
1 nightie
Mixed Load
1 pair slacks
2 pillowcases
2 shirts
1 T-shirts
Permanent Press
6 shirts
-or-
2 double sheets
2 pillowcases
--or-
2 singlesheets
2 pillowcases
1 half slip
21

Removing stains
Stained, heavily soiled or greasy items may
need to be prewashed orsoaked for best
results. Soaking helps remove protein-type
stains like blood, milk, or grass. Prewashing
helps loosen soil before washing.
Prewashing or soaking
Use warm water for soaking or prewashing
stained laundry. Hot water can set stains.
Stain removal rules
• Most stains are easier to remove when they
are fresh. Old or set stains may not come out.
Follow package directions for pretreatment
products,
• Before treating any stain, find out ...
1. What kind of stain it is.
2. What kind of fabric it is and if it is colorfast.
(Check label.)
3. How old the stain is. (Washing and drying
can set some stains.)
• Start with cold or warm water. Hot water can
set some stains.
• When bleach is recommended, use a bleach
that is safe for the fabric. Dilute chlorine
bleach.
• Test stain removers on an inside seam or
hidden corner of the item to see if the color is
removed.
• Put the stained area face down on a paper
towel or white cloth. Apply the stain remover
to the back of the stain. This can force the
stain off the fabric instead of through it.
• Meat tenderizer or enzyme presoaks help
break down some protein stains so they are
easier to remove.
22

Stain removal guide
STAIN TO REMOVE
Alcoholic These stains turn brown with age, so treat immediately. Sponge or soak fresh
beverage stains with cold water. Wash. If stain remains, soak 15 minutes in a solution of
lukewarm water, liquid detergent and a few drops of white vinegar. Rinse. Wash.
Blood Rinse immediately or soak in cold water with enzyme presoak for 30 minutes or
longer. Rinse. Rub detergent into any remaining stains. Rinse. If stain remains,
put a few drops of 3% hydrogen peroxide on stain for 3-5 minutes. Rinse
thoroughly. Wash.
Chewing Use ice to make gum hard. Scrape off what you can. Sponge with a nonflam-
gum mable fabric cleaner. Let dry. Wash.
Chocolate or Sponge immediately with a nonflammable fabric cleaner or apply a prewash soil
coffee and stain remover. Rinse. Wash. If stain remains, apply a liquid detergent to
stain or soak in warm water with an enzyme presoak. Rewash.
Crayon and Scrape off excess with a dull knife. Place fabric between two blotters or facial
candle wax tissue. Press with warm iron. Remove color stain with nonflammable fabric
cleaner. Hand wash until stain is gone. If full load is crayon stained, take to
cleaners or coin-operated dry cleaning machine.
Cream, milk Sponge with a nonflammable fabric cleaner, or a prewash soil and stain re-
or ice cream mover. Rinse. Wash. Repeat if necessary. If stain remains, apply a few drops of
liquid detergent and a few drops of ammonia. Blot dry and rinse. If stain remains,
soak in an enzyme presoak. Wash.
Deodorants Light stain: Treat with liquid detergent or your regular laundry detergent. Wash
and anti- in hottest water safe for fabric.
perspirants Heavy stain: Place face down on towel and treat with a paste of ammonia and
all-fabric bleach. Let stand for 30 minutes. Wash in hottest water safe for fabric.
Fat, grease
or oil
Items soiledwith vegetable or cookingoil should not be washed or dried. See
Vegetable/Cooking Oil Warning on page 5. For othertypesof greasy stains, use
one of the methodsbelow:
• Use pretreatment stain remover. Followlabel directions.Wash in hottestwater
safe for fabric.
• Use talcumpowder toabsorb as muchgrease as possible.Sponge with a
nonflammablefabric cleaner. Rinse. Wash.
• Treat withliquiddetergentor ruba detergentpaste on the stain.Wash using
hottestwatersafe forfabric.
Fruit stains
Fresh stains: Soak immediatelyin coolwater. Wash. If stain remains, cover
area with a pastemade ofall-fabricbleach, a few drops of hotwater and a few
drops of ammonia. Wait 15 to 30 minutes.Wash.
Old stains: Sponge with whitevinegar. Rinse. Repeat procedure for fresh
stains.
Grass or
green
vegetables
Soak inwarm or coldwater with an enzyme presoak for at least 30 minutes, or
spongewith denatured alcohol.Wash inwater temperature and bleach safe for
the fabric. For coloredfabrics, checkcolorfastnessbefore applyingalcohol. For
acetate, sponge with a nonflammablefabric cleaner. Ifstain remains, bleach
with 3% hydrogenperoxide. Rinse. Rewash.
Inkor
ballpoint
pen ink
Spray stain withan aerosol hair spray or rubbingalcohol. Sponge stain continu-
ouslyuntilall bleedingstops. Let dry. Repeat ifnecessary. Wash. If stain
remains, bleach if safe for fabric. (India and other indelibleinks are almost
impossible to remove completely.)
continued on next page
23

STAIN TOREMOVE
Ironorrust ColoredornoncolorfastItems:Applylemonjuiceandsalt.Placeinthesun
todry.Rinsethoroughly.Repeatifnecessary.
WhIteorcolorfastItems:Tryarustremover.Testfirstoninsideseamor
hem.Somerustremoversarenotwashersafe.Followpackagedirections.
Ketchupor Spongeimmediatelywithanonflammablefabriccleanerorapplya prewash
tomato soilandstainremover.Rinse.Wash.Ifstainremains,applyaliquiddetergent
products tostainorsoakinwarmwaterwithanenzymepresoak.Rewash.
Lipstick Applynonflammable fabriccleaner orprewash soil and stain remover.Blot with
absorbent material. Repeat ifnecessary. Rinse. Ifstainstillremains, rubwith
liquiddetergent. Wash.
Meat juice, Scrape offexcess with a dullknife.Soak in cold or warm water with enzyme
egg presoakat least30 minutes, or treatstains with a nonflammablefabric cleaner.
Mildew
Mustard
Paint
Perspiration
Scorch
Soft drinks Sponge immediately with cold water and alcohol. Heat and detergent may set
Wash.
Wash in hottestwater safe forfabric.If stain remains, soak inwarm water and
an all-fabricbleach for 15 to 30 minutes.Rewash. (Oldmildewstains are
almost impossibleto remove. Mildewfungus destroysorweakens fabrics.)
An alternativeto bleach is to treat withsalt and lemonjuice and dryin direct
sunlight.Rinseand rewash. Mildew may form if wet ordamp laundry remainsin
your washer forextended periods of time. To prevent mildew, promptly dry
laundryafter washing.
Treat immediately. Scrape offexcess mustard. Sponge with a nonflammable
fabriccleaner ora prewashsoil and stain remover. Rinse. Work liquiddeter-
gent and a few drops of vinegar intostain. Rinse. If stain remains, apply3%
hydrogenperoxide. Rinse andwash.
Hand wash paint-staineditems.
Water base: Treat stainswhile stillwet. (These paintscannotbe removed after
they have dried.) Rinse inwarm water to flush outpaint. Sponge with a
nonflammablefabric cleaner. Rinse. Wash.
OII base: Scrape offfresh paint. Sponge with a nonflammablefabric cleaner or
treatstain with recommendedthinner.While stainis stillwet withsolvent,rub
liquiddetergent into it.Wash with hottestwater safe for fabric.
Remove stainsbefore ironing.Perspiration stainsmay weaken fabric. Wash or
sponge stain thoroughlywith detergentand warm water. If perspirationhas
changed the colorof the fabric, useone ofthe following treatments:
Fresh stains: Apply ammoniato stain. Rinse. Launder to remove ammonia
odor.
Old stains: Applywhitevinegar to stain.Rinse. Launderto remove vinegar
odor.
Severe scorchcannotbe removed. Wet stainwith 3% hydrogen peroxide.
Cover with a dry cloth and presswith an ironas hot as is safe for fabric.Rinse
well. Wash.
OR
Wet with lemonjuiceand spread in the sun to dry. Wash.
stain.
24

Water usage guide
Water tern
WASH
HOT
130 °F (54°C)
or above
WARM
90°-110°F
(32o-44oc)
COLD
70o.90OF
(21°-32oc)
)erature
RINSE USE FOR COMMENTS
COLD
COLD/
WARM*
• Heavy soils
• Work clothes
• Sturdywhites and
colorfastpastels
• Diapers
• Lightand moderatesoils
• Dark or noncolorfast
colors
• Gives best cleaningfor heavy
soils.
• Removes oils, perspiration,greasy
soilsand stains.
• Preventsgrayingand yellowing.
• Safe for most fabric finishes.
• Less fading and dye bleeding.
• Reduces wrinkling.
• Moderately soiledperma-
nent press
• Nylons,polyesters,
acrylics,silks,woolens
• Knitsand delicate fabrics
• Prewash, soak
COLD
• Very lightly soiled items
• Moderately soileditems if
extra detergent is added
• Extra sensitivecolors
(noncolorfast)
• Rinsing,for all fabrics
• Saves hot water.
• Less effective cleaning than hot or
warm water.
• Use longest wash time in cycle
selected.
• Use liquid detergent, or dissolve
powdered detergent in warm water
before adding to cold wash water.
• Pretreat spots, stains and heavy or
greasy soils.
Warm rinse water provides betterwater extractionthan cold rinse water, butmay increase
wrinklingwhen line drying.In coldclimates, warm rinsewater alsoprovidesa more comfortable
temperature for handlingthewash load.
To check your hot water temperature with a
candy or cooking thermometer:
1. Fill a panwith the hottestwater available
from the faucet that will fill your washer.
2. Place a candy or cookingthermometer in
water tocheck the temperature.
Ifyou do not have a faucet at your wash site,
collectwater from the faucet closestto your
washer.
NOTE: In wash-water temperatures colder
than 70°F (21°C):
• Detergents do not dissolve well.
• Soils are difficult to remove.
• Some fabrics will retain wear wrinkles and
may have increased pilling.
Water hardness
Many poor washingresultscan be traced to
wash-water hardness. To check yourwater
hardness:
• Citywater-ask your citywater company.
• Well water-call your Cooperative Extension
Service.
Ask for the mineral content in grains-per-gallon
or parts-per-million. If your water is 9 or more
grains-per-gallon or more than 153 parts-per-
million:
• Consider installing a water softener.
• Use more detergent.
• Use a packaged water conditioner.
• Do not use soap.
25

Washing special-care items
Most garments and householdtextileshave care labels with laundering instructions. Always follow
label directionswhen theyare available. General washinginstructionsfor some special washables
are includedin thissection.
Blankets, electric
and woolen
Curtains, drapes,
slipcovers
Diapers
Pretreat spotsand stains. Select water temperature, cycle, and time
accordingto the type of blanket being washed.Two rinses may be
necessary. If manufacturer recommendsmachine washing:
1. Measure blanketbefore washing.
2. Add mild detergent to washer. Filland agitate brieflyto dissolve
detergent.
3. Stop washer. Load blanket evenly around agitator.Soak 10 to
15 minutes.
4. Set CycleControlKnobto Drainand Spin. Start washer.Spin 1to
2 minutes.
5. Fillwasher for finalrinse. Stop washer. Allowto soak.
6. Set CycleControl Knobto Drain and Spin. Start washer. Allowwasher
to finish cycle.
7. Lay blanket on flat surface and blockby gently stretchingtooriginal
measurement. Woolens tend to shrinkmore the first timethey are
washed. This is normal.
Wash small loads. Crowding will cause wrinkling.
1. Shake orvacuum toremove loosedirt.
2. Wash followingmanufacturer'sinstructions.
NOTES:
• Sun-damaged curtainsand draperieswill tear whether handor machine
washed.
• Replace slipcoverswhilestill slightlydamp.They willdry to fit tightly.
When usingchlorinebleach for soaking,add detergent to load. Avoid
overuseof fabric softeners.Absorbencywill be reduced.
1. Rinse immediately. Soak in a solutionof lukewarmwater and a small
amountof detergent untilyou are ready to wash them.You may wishto
use bleachor aspecial soaking productwhen soaking.
2. Spinexcess water from diapers beforewashing.
3. Wash diapersas you wouldwash white cottonsand linens.
Elastic, apandex
Flame-retardant Items will be clearly labeled as flame-retardant. Followmanufacturer's
clothing instructionsto retain flame retardantqualities.
26
Elasticpicks up oilfromthe body.Oil can damage elastic. Wash oftento
helpreduce the damage. Usewarm water and sufficientdetergent to
remove oils.

Fiberglass Do not wash fiberglass materials in your washer. Glass particles could
materiels stick to the next load and cause skin irritation.
Knits
Pillows, stuffed
toys
Plastic, rubber
items
Quilts,
bedspreads
Scatter rugs
Snowsuits,
jackets, etc.
Knits are comfortable to wear because they stretch. However, this means
that knits are more likely to be stretched and damaged when washed
(especially bulky knits). Knits made of synthetic fabrics such as polyester,
nylon, and acrylic tend to keep their original shape more than a knit made
of cotton or ramie.
1. Close zippers, fasten hooks and eyes to prevent snagging.
2. Wash small loads to reduce pilling and lint.
Washing feather pillowsisnot recommended unlessthey are dryerdried.
1. Adddetergent then partiallyfill washer with water; agitate untildetergent
isdissolved.
2. Place two pillowson opposite sides ofthe agitatorto balance the load.
3. Allow washer to fillcompletelyand continuethroughthe cycle.
4. Stopthe washer occasionallyto pressair from item(s)being washed.
Treat as delicate items.Wash inwarm water. Wash small items in a mesh
bag.
Do not wash cotton-filled comforters unless they are quilted or stitched;
tucked cotton batting tends to slip and become lumpy.
1. Shake orvacuum to remove loosedirt.
2. Wash morethan one small rugat a time. If you wash only one rug,add
bath towels to balancethe load. A largerrugshould be distributed
aroundthe agitatorto balance the load.
1. Wash onlyone ortwo itemsat atime. Load evenly around the agitator.
2. Stop the washeroccasionallyto pressair from item(s) beingwashed.
3. Two rinsesmay be necessary.
Saving energy
• Use hot water only when washing heavy,
greasy soils or whites.
• Use cold rinses.
• Wash full loads.
• Use lowerwater levelswhen washingsmall
loads.
• Avoid rewashing. Use enoughdetergent;
pretreatstains or heavy soils;do notover-
load;use the cyclesand washtimes recom-
mended forthe fabric and soil;sort properly.
• Use yourwasher/dryer duringoff-peak
hours-usually early morningand late
evening. (Ask your power company.)
• Use your automatic cycle to dry most loads.
• Dry onlyfull loads without overdrying.
• Avoidoverloadingdryer, adding wet items
to a partlydriedload, oropeningthe door
unnecessarily.
• Plan your laundryto dry one loadafter
another.A warm dryer shortensdryingtime.
• Shorten dryingtimes by exhaustingdryer
properlyand cleaningexhaust ductas
needed.
-Keep the lintscreen clean.
- Use your dryer in a roomwhere roomair
temperature is above 45°F (7°C).
- Sortloadsby fabricweightand type.
27

Drying special-care items
Most garments and householdtextileshave care labelswith laundering instructions.Always follow
label directionswhen theyare available.General dryinginstructions for some specialwashables
are includedin thissection.
Air drying
(heat sensitive
items)
Heat-senslUve
fabrics
• Olefin, polypropy-
lene, sheer nylon
• Cotton and
canvas shoes
Pillows, stuffed
toys
• Feather, foam,
polyester
Plastic, rubber
• Shower curtains,
tablecloths,baby
panties
Scatter rugs
Blankets and
woolens
• Cotton, rayon,
synthetic blankets
• Electric blankets,
electricsheets,
woolen blankets, 2.
washable woolen
garments 3.
Heat sensitivefabrics, plastic,rubberor some stuffed itemsrequire
dryingwithoutheat. Use an Air setting or linedry.The Air settingis
usefulfor fluffingbedding and pillows,and dusting draperies and
clothing.See Warning on page 15.
Followcare label directions.
Ifshoes can be machine laundered:
1. Place several bath towels inthe dryer to act as a buffer,or place
shoes on dryingrack if your dryerhas one.
2. If rubberor foam rubbermaterialsare partof the shoe, use an Air
setting.For other materials, see page 15 for cycle,time,
or temperature recommendations.
3. Remove shoes from dryer while still damp and allow to airdry.
If manufacturer recommends machine drying, dry one pillow at
a time and:
1. Make sure coveringsare securelystitched.
2. Shake and fluffthe items by hand several times duringthe cycle.
3. Make sure pillowsare completelydry. Feather pillowstake a long
timeto dry.
Follow care label directions.
Follow care label directions.
Machine drying knitted woolensis not recommended. Block to shape
when wet and allow to air dry. Line dry blankets inshade on a breezy day
over two lines. Pin edges together and straighten them. When partly dry,
turn the blanket over, repin and restraighten. When dry, brush nap.
Dry as recommended for permanent press fabrics on page 15.
If manufacturer recommends machine drying:
1. Place one or two dry towels in the dryerand preheat 3-5 minutes on
a highsetting.Thiswill dry blanketsfaster and helpavoid pilling.
Put blanketin dryer withwarm towels. Set controlfor 20 minutes.
Check after 10 minutes. Remove when stilldamp. Overdrying and
longtumblingcan cause shrinkingand pilling.
4.
Place blanket on flat surface orovertwo lines to finish drying.Gently
stretch to originalsize and shape.
5.
When completelydry, brushgentlyto raise nap. Press bindingwith
cooliron ifneeded.
28

Curtains,
Remove draperyweights and hooksbefore laundering.
slipcovers
• Draperies,
slipcovers
1. Use lowesttemperature or an Airsetting.
2. Leave roomin dryerfor load to fluff.
3. Remove from dryerwhile slightlydamp. Do not overdry.
Forslipcovers,replace slipcoverswhile stillslightlydamp. They willdry
tofit tightly.
• Sheers, some
synthetic curtains
• Bonded or
laminated fabrics
Diapers, baby
clothes
Dryonlya few minutes.
Do not overdry ortumble in high heat. Overdrying loosens the adhesive
and causes fabrics to separate.
Wash and dry small itemsin a mesh bag or pillowcasefor convenient
handling.
1. Dry accordingtofabric and cyclesettings listedon page 15.
2. Remove diapersand cotton knititems while stillslightlydamp. They
willfeel softer, shrinklessand be easierto fold.
Elastic Items Dry at lowesttemperaturesetting. Remove from dryerwhilestillslightly
damp.
Fiberglass Do not machine wash or dry fiberglassmaterials. Small particles can stick
materials tofabrics washed ordried infollowing loads and cause skinirritation.
Flame- Some itemshave been treated with a flame-retardant finish to improve
retardant theirresistanceto burning.Such itemsare clearlylabeled. To retain
finishes flame-retardant qualitiesthroughcontinuoususe and washing, clean and
dry accordingto the manufacturer's instructions.
Napped Dryseparately orwithsimilarcolors to avoid linttransfer. Follow care
Items label directions.
• Corduroy,
velveteen
Quilted, down-
filledItems
SnowsuIts,
lackets
• Nylon,
polyester-base
1. Dry accordingto fabric and cyclesettingsshown on page 15.
2. Remove from dryerwhile there is stilla trace of moisture.
3. Smooth, reshape andair dry before puttingaway.
Followcare label instructions.
1.Dryone ata time.
2. Remove from dryer and shake or fluff the item during the dryingcycle.
3. Smoothand reshape before puttingaway.
Check label for fiber content,then see page 15 for cycle and temperature
recommendations.
Followcare label directions.
1. Dry garment for about 10 minutes. Remove and turninsideout. Dry
for 10 more minutes.
2. Remove from dryerimmediatelyand hang on a nonrustinghangerto
finish drying.This will help eliminate wrinkles.
continued on next page
29

Tinted, dyed or
noncolorfast
itoms
Towels
Washable knits
Dry accordingto fabric, weightand care label instructions.Wipe the dryer
drumcarefullyto remove any dye or lintthat can be transferred to other
loads. See "Cleaningthe washer/dryer interior"on page 17.
Select cycleaccordingtofabric type. Some towels,particularlythose
made of a blendofsyntheticfibers and naturalfibers (polyester and
cottonblends),may shed morelintthan othertowelscausing your dryer's
lintscreento get full faster. Be sure to removelint from the dryer lint
screen before and after dryingnew towels.
Do notoverdry knits.Overdrying can cause shrinkingand staticcling.
1. Select cycle accordingto fabric and construction.
2. Turn syntheticsand blendsinsideout when dryingto avoid pilling.
3. Remove cotton and rayon knitswhile stillslightlydamp. Stretchinto
shape and lay flat to finish drying.
Solving laundering problems
Most laundering problems are easilysolved ifyou understandthe cause. Check the following
listfor problemsyou may have and possiblecauses. Ifyou need additionalhelp, check the
=Assistance orService"sectionof thisbook.
PROBLEM CAUSE
Brown, yellow • Chlorine staining
stains • Iron inwater heater or pipes
• Ironand manganese inwater
Dyetransfer • Impropersorting
• Load not immediatelyremovedfrom washer afterend ofcycle
Gray whites, • Impropersorting
dingy colors • Water temperaturetoo low
• Not enoughdetergent
• Usingsoap invery hardwater (use detergent if you have hard water)
Greasy looking
spots
Lint
Loadtoo wet • Cold rinses
after spin • Lidis opened beforespinningiscompleted
30
• Undilutedfabric softener or fabric softener poured directlyon load
• Fabricsoftener inwash water
• Not enoughdetergent
• Improper use of dryer fabric softener
• Dryingsoiled items
• Improper sorting
• Paper or tissue in pockets
• Pilling being mistakenfor lint
• Overloading
• Not enoughdetergent
• Clogged lintfilter
• Clogged dryer lintscreen
• Static electricityis attractinglint

PROBLEM CAUSE
Shrinking • Fabrictype (some knitsstretchduring manufacturing-laundering returns
fabricto originalsize)
• Care label directionsnotfollowed
• Items overdried
Slow drying
• Large amount of moisture inthe load
• Cold rinse water
• Room temperature below 45°F (7°C)
• Dryer improperlyexhausted
• Clogged lint screen
• Improperelectricalsupply
Snags, rips,
holes
• Items damaged beforewashing
• Misuse of chlorinebleach
• Sharp articles not removedfrom pockets
• Overloading
• Fasteners notfastened
Static
electrlclty
• Load overdried
• Fabricsoftenernot used
• Synthetics,syntheticblends, permanent press, and knitsin load
Stiff, rough
fabrics (usually
cottons)
Twisting,
tangling
• Using soap in very hardwater (use detergent ifyou have hardwater)
• Not enough detergent
• Line drying
• Overloading
• Improperloading (do not wrap large itemsaroundagitator)
Wrinkling • Overloading
• Load notimmediatelyremovedfrom washer after endof cycle
• Improper rinsetemperature
• Cycle selectionis incorrect(basedon fabrictype)
Yellow areas • Water temperature too low
(from body oils) • Not enough detergent
31

Using laundry aids
Followpackage instructionswhen using
laundry aids. (See =Removing Stains" on
pages 22-24 for more information.)
Chlorine bleach
1. Let thewasher fill and begin agitatingthe
load.
2. Measure bleach.Never use more than
V2cup (125 mL) for a full load. Dilutemea-
sured bleach in 1 quart (1 L) ofwater.
3. Add bleach to the wash cycle so it can be
removed in the rinsecycle. Pourbleach
around agitator,not directlyon load.
• Followdirectionson care labels. Donot use
chlorine bleach on wool, silk, spandex, ace-
tates or some flame-retardant fabrics.
• When soaking with chlorinebleach, add
detergent to soak water.
NOTE: Undiluted bleach will damage any fabric
ittouches. The damage appears as rips,holes,
tears, or colorloss and may not show up until
several washings later.
All-fabric bleach
• Powdered or liquidall-fabricbleach may be
used on alltypesof fabrics.
Fabric softeners (washer)
• Add diluted fabric softener onlyin the final
rinse.
• Always dilutefabricsoftenerswith 112to 1 cup
(125 to 250 mL) warm water. Undilutedfabric
softenercan stainfabrics.
• Fabricsoftenersshould not be mixed with other
laundryproducts because greasy stains may
form. Ifstains form, remove bywetting the stain
and rubbingwith liquiddetergent or a barof
soap. Rewash the stained item.
• Too muchfabric softener can make some items
(diapersand towels)nonabsorbent. If this
happens, use less fabric softener ordo not use
iteverytime.
Fabric softeners (dryer)
• Put fabric softenersheet on top of the load
before starting the dryer. Do notadd fabric
softenersheet after the cycle has started.
Instantheat can cause the fabric softenerto
spot fabrics.
• Some fabric softenerscan clogthe lint
screen and slowdrying. Use fabric softeners
labeled as dryersafe.
Detergent
• Using too little detergent isa commoncause
of laundryproblems.Followmanufacturer's
directions.Measure accurately, especiallywhen
using ultra detergents. Package directionsare
usuallybased on:
-moderate water hardness (4-6 grains)
-lightly soiled items
-normal wash loads.
• Use more detergent for:
-hard water -full loads
--coolerwash water -heavily soiled items.
• Do notjudge the amount ofdetergent to use
bythe amount ofsuds in the machine. Low
sudsingdetergents do not create as many
suds as normalsudsingdetergents.
• If the recommended amountof normal
sudsingdetergent creates too manysuds or
suds are presentin the rinsewater, trya low
sudsingdetergent.
32
Fire or Explosion Hazard
• Store flammablesolvents or liquidsaway
from your washer.
• Dry cleaningsolventsor fluids shouldnot
be put directlyintoyour washer.
• Items treatedwith solventsshould be
rinsed and air dried beforewashing in
yourwasher.
The fumes from these substances can
create a fire hazard or explosion.
Personal Injury Hazard
• Never use chlorinebleachwith ammonia
or acids. Hazardous fumes can form.
• Keep stain removal products out of the
reach of children ... preferably in a locked
cabinet.

If You Need Assistance
Or Service
1. Before calling for assistance ...
Is the power cord plugged
in?
Is your water turned on? I_ll@
-,qp,-
_1 Is lint screen clogged with
PROBLEM
Washer will not fill
Washer does not spin
lint?
Have you blowna fuse or
trippedthe circuitbreaker? If you need more help, checkthe chart below.
Is the power cord firmly plugged into a live circuit with proper
voltage?
Has a household fuse blown or circuit breaker tripped? Has a
time-delay fuse been used?
Are both hot and cold water faucets open?
Are the water supply hoses kinked?
Is the Cycle Control Knob set and pulled out?
Isthe lidclosed?
Is the power cord firmly plugged into a live circuit with proper
voltage?
Has a household fuse blown or circuit breaker tripped? Has a time-
delay fuse been used?
exhaust hood clogged with
lint?
Is exhaust duct or outside
CHECK THE FOLLOWING
Washer stops during
a cycle
Washer fills and drains Is the Cycle Control Knob pointing to a number in the cycle?
without running
Washer drains during Adjust the drain hose so that it is higher than the water level in the
wash and rinse cycles, washer.
or water siphons out
Washer pauses briefly at different times in each cycle. These
pauses are normal.
Is the power cord firmly plugged into a live circuit with proper
voltage?
Has a household fuse blown or circuit breaker tripped? Has a
time-delay fuse been used?
continued on next page 33

PROBLEM
Dryer will not run
Dryer will not heat
Drying time too long
CHECK THE FOLLOWING
Is the power cord firmly plugged into a live circuit with proper
voltage?
Has a household fuse blown or circuit breaker tripped? Has a
time-delay fuse been used?
Is the dryer door firmly closed?
Did you firmly push the Start Button?
Are the controls set in an ON position?
Is the cycle in the last few minutes? (There is no heat during that
time.)
Has a household fuse blown or circuit breaker tripped? Has a
time-delay fuse been used?
If you have a gas dryer, are the valves open on both the dryer and
thesupply line?
Is your lint screen clean? (See the =Slowdrying" section ofthe
table on page 31 for additionalinformation.)
Isyour exhaustductor outside exhaust hood cloggedwith lint?
34

2. If you need assistance* ...
Call Whirlpool Consumer Assistance
Center telephone number. Dial toll-free
from anywhere In the U.S.A.:
1-800-253-1301
and talk with one of ourtrained consultants.
The consultantcan instructyou in howto
obtainsatisfactoryoperation from your appli-
ance or, if service is necessary, recommenda
qualifiedservice company inyour area.
Ifyou prefer, write to:
Mr. William Clark
Consumer AssistanceRepresentative
WhirlpoolCorporation
2000 M-63
Benton Harbor, MI49022
Please includea daytime phone number in
yourcorrespondence.
3. If you need service* ...
Whirlpool has a nationwidenetworkof
authorizedWhirlpool®service companies.
Whirlpoolservice techniciansare trained to
fulfill the productwarranty and provideafter-
warranty service,anywhere in the United
States. To locatethe authorizedWhirlpool
service company inyour area, callour
Consumer AssistanceCenter telephone
number (see Step 2) orlookin your telephone
directoryYellow Pages under:
4. If you need FSP e replace-
ment parts ...
FSP is a registeredtrademark of Whirlpool
Corporationfor qualityparts. Look for this
symbolof qualitywhenever you need a
replacement part for your Whirlpoole appliance.
FSP replacement partswill fit rightandwork
right,because they are made to the same
exactingspecificationsused to build every new
Whirlpoolappliance.
To locate FSP replacement parts in your
area, refer to Step 3 aboveor call the
WhirlpoolConsumerAssistance Center
number inStep 2.
5. If you are not satisfied with
how the problem was
solved ...
• Contactthe Major Appliance Consumer
Action Panel (MACAP). MACAP is a group of
independentconsumerexperts that voices
consumer views at the highestlevels of the
majorappliance industry.
• Contact MACAP onlywhen the dealer,
authorizedservicer and Whirlpoolhave failed
toresolveyour problem.
Major Appliance ConsumerAction Panel
20 North Wacker Drive
Chicago, IL 60606
• MACAP willin turn informus of your action.
• APPLIANCE-HOUSEHOLD-
MAJOR, SERVICE & REPAIR
. See: Whirlpool Appliances or
Authorized Whirlpool Servi_
(Example: XYZ Service Co.)
• WAmtlNG MACHINES &
DRYERS, SERVICE & REPAIR
. See: Whirlpool Appliances or
Authorized Whirlpool ServJol)
(Example: XYZ Service Co.)
*When asking for help or service:
Please provide a detailed description of the
problem,your appliance'scompletemodel
and serial numbersand the purchasedate.
(See page 2.) This informationwillhelp us
respondproperlytoyour request.
assembly covered
Gearcase
by your warranty
35

WHIRLPOOU
THIN TWIN *Washer/Dryer
Warranty
LENGTH OF WARRANTY WHIRLPOOL WILL PAY FOR
FULL ONE-YEAR FSI:_ replacement parts and repair labor to correct defects in
WARRANTY materials or workmanship. Service must be provided by an
From Date of Purchase authorized Whirlpool service company.
LIMITED FIVE-YEAR FSP replacement parts for any part of gearcase assembly if defec-
WARRANTY tive in materials or workmanship. The gearcase assembly is shown
From Date of Purchase inthe "Assistance or Service" section of this book.
FSP replacement parts for any top and lid rust.
LIMITED TEN-YEAR FSP replacement of outer tub should it crack, or fail to contain
WARRANTY water, due to defective materials or workmanship.
From Date of Purchase
WHIRLPOOL WILL NOT PAY FOR
A. Service calls to:
1. Correct the installation of your washer/dryer.
2. Instruct you how to use your washer/dryer.
3. Replace house fuses or correct house wiring or plumbing.
4. Replace light bulbs.
BI
Repairs when your washer/dryer is used in other than normal, single-family household use.
C.
Pickup and delivery. Your washer/dryer is designed to be repaired in the home.
D,
Damage to your washer/dryer caused by accident, misuse, fire, flood, acts of God or use of
products not approved by Whirlpool.
E,
Any labor costs during the limited warranties.
F.
Repairs to parts or systems caused by unauthorized modifications made to the appliance.
8-82
WHIRLPOOL CORPORATION SHALL NOT BE LIABLE FOR INCIDENTAL OR CONSEQUEN-
TIAL DAMAGES. Some states do not allow the exclusion or limitation of incidental or consequential
damages, so this limitation or exclusion may not apply to you. This warranty gives you specific
legal rights, and you may also have other rights which vary from state to state.
Outside the United States, a different warranty may apply. For details, please contact your
authorized Whirlpool distributor or military exchange.
If you need service, first see the =Assistance or Service" section of this book. After checking
=Assistance or Service," additional help can be found by calling our Consumer Assistance Center
telephone number, 1-800-253-1301, from anywhere in the U.S.A.
_) Pdnted on recycled paper-
PART NO. 3396312
© 1994 Whirlpool Corporation ® Registered Trademark of Whirlpool Corporation. Printed in U.S.A.
10% post consumer waste
;50% recovered materials
 Loading...