

Whirlpool LE6400XK, LG6401XK User Manual
Models LE6400XK:
LG6401XK
WhirlpOOl
Use&
Care
Guide
DRYER
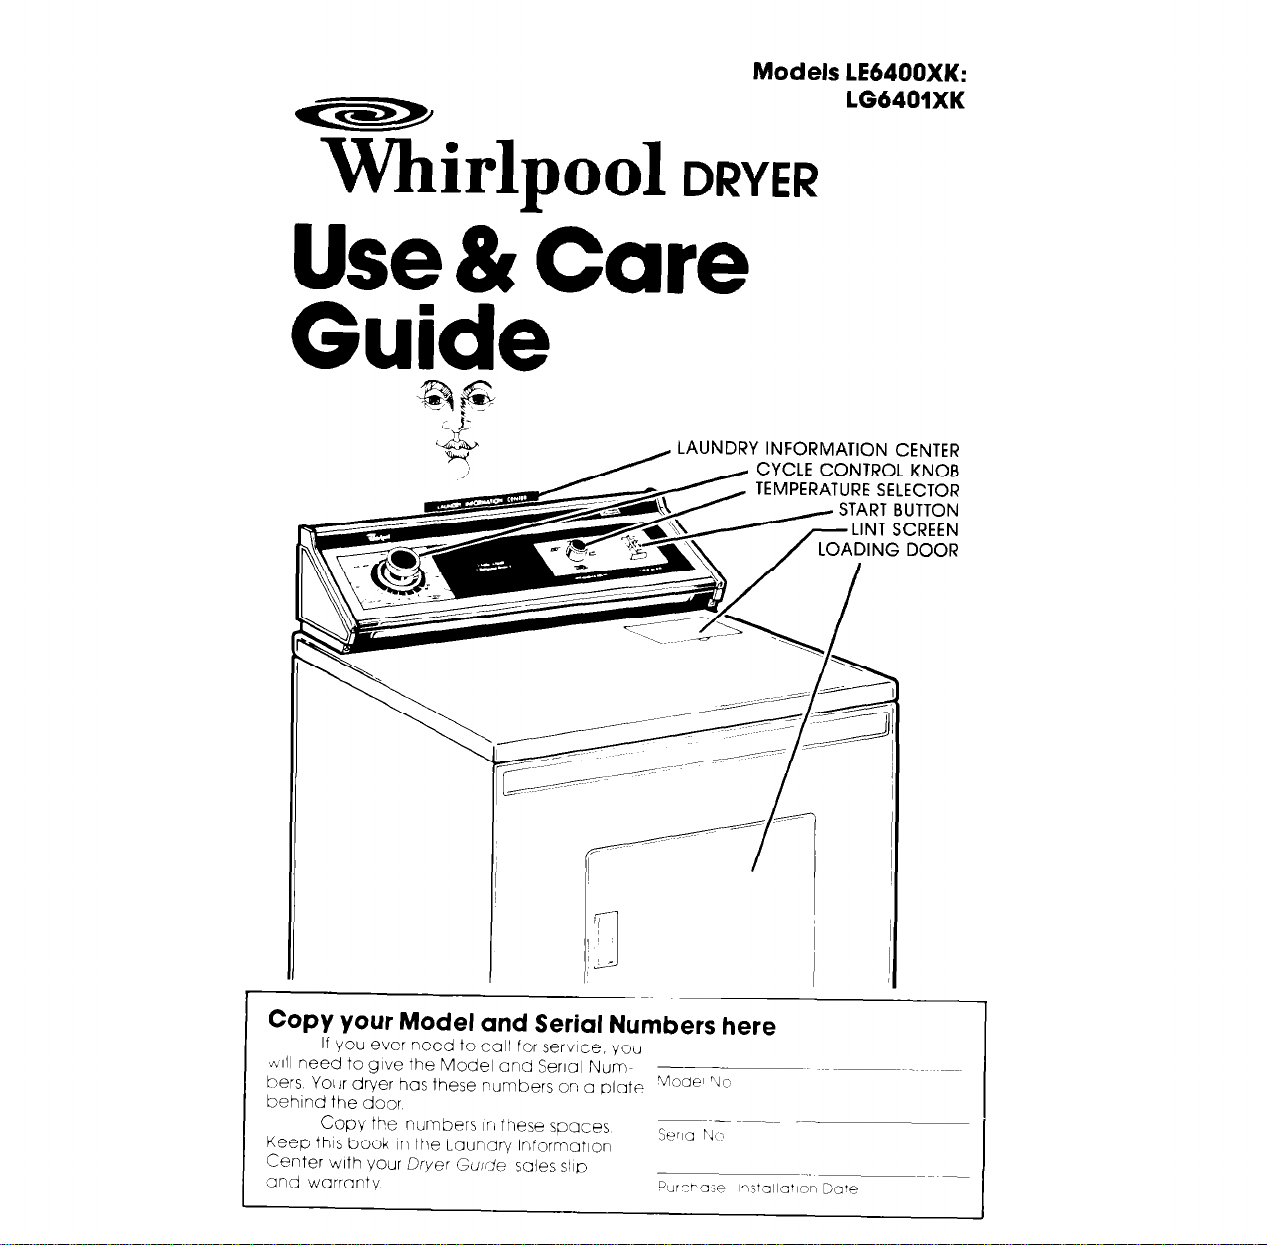
Copy your Model and Serial Numbers here
If you ever need to call for service, you
SUIII need to give the Model and Serial Numbers Yol,r dryer has these rumbers on a plate %lode’ “’
behind the door
Copy Fe numbers I~I these spaces
Keep this book in the Laundry InformatIon
Center with your Drver Gu/:le sales ~1113
ond warranty
‘I
Before using
your Dryer
Please read this lnooklet to be
sure your dryer IS Installed and used
properly It WIII help you get the best
results and longest ilfe your dryer was
deslgned to give>
You are personally responsible for making sure that your dryer...
l
Is Installed by o qualified Installer.
l
Is properly installed and leveled In a
well ventilated room on a floor that
can support the weight
l
Is connected t,I the right kind of outlet.
electric supply and grounding
l
Is properly corlnected to fuel and
exhaust systems
l
Is used only for jobs normally
expected of home clothes dryers
l
Is properly mantained
l
Is out of the weother
l
Is not run where ‘here may be exploslve fumes
l
Is not used by children or anyone
unable to operate t properly.
Remove
Guide label before using your dryer It
WIII be easier to remove
Wpe out the drum with a damp
cloth to remove =In\i dust
SPECIAL INSTRUCTIONS: See the
Dryer Guide for drying tips, information about permanent press and
knits, instructions for drying special
items and for things not to be dried in
your dryer.
See the lnstalla:~o~ lr’structlons for
complete informa+ion
FOR YOUR SAFETY
If you smell gas:
1. Open windows
2. Don’t touch
electrical switches
3. Extinguish any open
flame
4 Immediately call
your gas supplier
?he Consumer
Buy
FOR YOUR SAFETY
Do not store or use
gasoline or other
flammable vapors and
liquids in the vicinity of
this or any other
appliance.
Please read this manual
Follow the InstructIons to help
you get the best drying results
Save the manual for future use
I
Contents
Before Using Your Dryer
Loading Your Dryer
Lint Screen
Understanding Your Dryer
Selecting Cycles and
Temperature Settings
Selecting Drying Times
TUMBLE PRESS” Control
FLUFF AIR
If You Need Service or Help
1 Before Calling for Service
2.
If You Need Service
3 If You Have A Problem
I
7
8
2
loading your Dryer
For best dn/ir-ig results and energy
savings, sort dryer loads carefully
Separate loads
the type of fabric and weight For
example
l
Dry heavy fabrics (denims, towels,
cottons] separately from light fabrics
[permanent press, synthetics).
l
Separate lint givers (towels, sweatshirts, etc ) from IInt takers (synthetics.
blends, permanent press]
l
Keep dark colors and light colors
separate
l
Keep colorfast Items away from noncolorfast fabrics.
Allow room
freely The load
wrinkles
When drying permanent press,
dry smaller-than-normal
best wrinkle removal.
Use a mesh bag
items such as baby socks
Read the Dryer Guide
hints on sorting and loading
/I- -
according to
for Items to tumble
will
dry faster with fewer
loads for the
to hold small
for more
The cool-down time
the laundry
dryer stops tumbling
PRESS. This cycle has a longer cooldown time at the end This extra time
designed to give permanent press fab-
rics the extra Wrinkle protection they
need
suggestions on the way to use your dryer
to get the best results and longest useful
life from your dryer Please read it
carefullv.
WI//
not be too hot w7en the
1 When a load of hot laundry
not tumbling, wrinkles can set in
2 A load of hot laundry can
be too hot to handle comfortably
The other cycle
This Use & Care Guide contains
IS
built in
IS
PERMANENT
SO
IS
IS
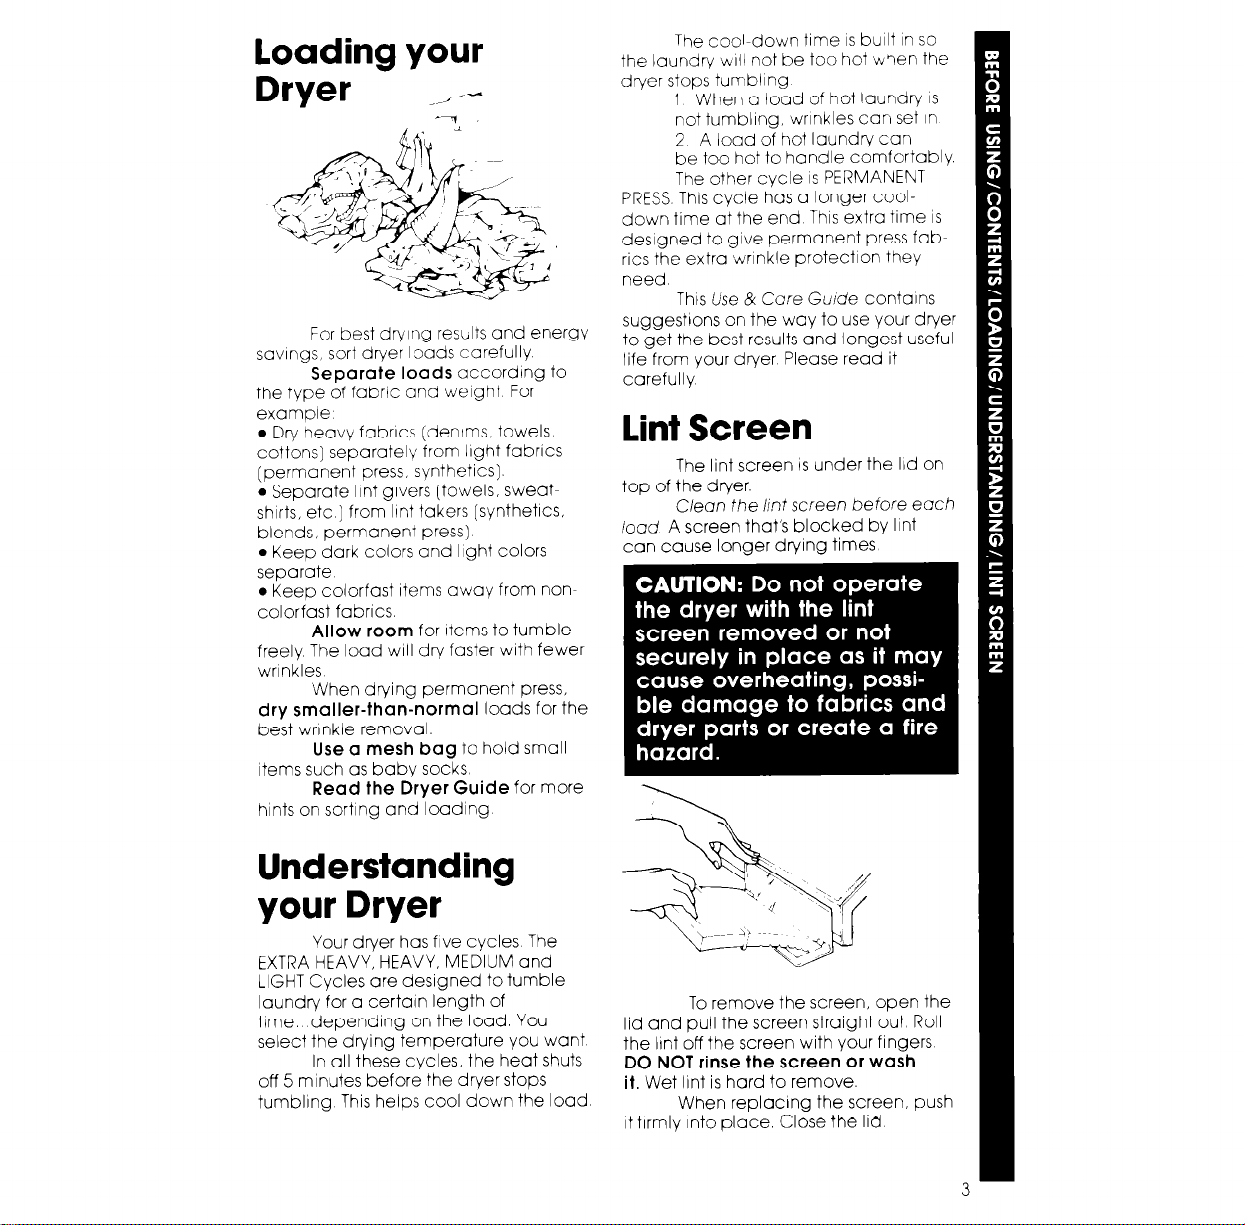
lint Screen
The lint screen IS under the lid on
top of the dryer.
C/eon the ht screen before each
iood A screen that’s blocked by lint
can cause longer drying times
Understanding
your Dryer
Your dryer has five cycles The
EXTRA HEAVY, HEAVY, MEDIUM and
LIGHT Cycles are designed to tumble
laundry for a certain length of
time. depending on the load. You
select the drying temperature you want
In all these cycles, the heat shuts
off 5 minutes before the dryer stops
tumbling This helps cool down the load
To remove the screen, open the
lid and pull the screen straight out Roll
the lint off the screen with your fingers
DO NOT rinse the screen or wash
it.
Wet lint is hard to remove.
When replacing the screen, push
it firmly Into place. Close the
110
 Loading...