

Whirlpool LE5780XK, LQ5781XK User Manual
Guide
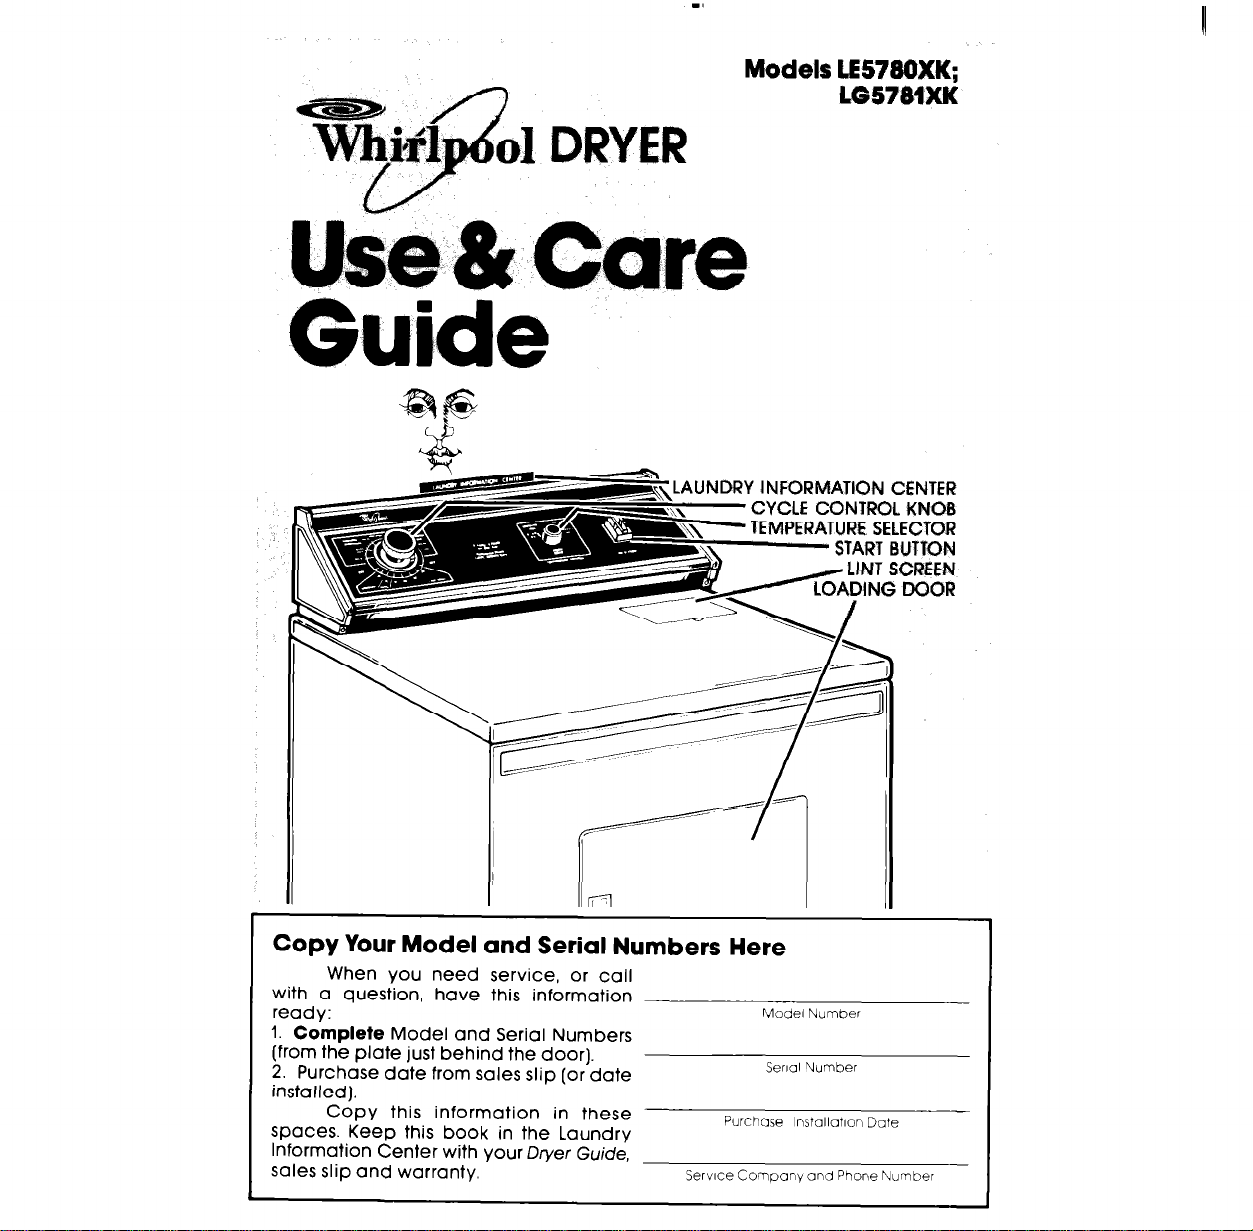
Models LE578axx;
L05781xK
Copy Your Model and Serial Numbers Here
When you need service, or call
with a question, have this information
ready:
1.
Complete Model and Serial Numbers
(from the plate just behind the door).
2. Purchase date from sales slip [or date
installed 1.
Copy this information in these
spaces. Keep this book in the Laundry
Information Center with your Dryer
sales slip and warranty.
Guide,
Service Company and Phone Number
Model Number
Smol Number
Purchase lnstallatlon Date
Before using
your Dryer
Please read this booklet to be
sure your dryer IS installed and used
properly It will help you get the best
results and longest life your dryer was
designed to give.
You are personally responsible for maklng sure that your dryer...
l
Is installed by a qualified installer.
l
Is installed in an area protected from
the weather.
l
Is properly installed and leveled in a
well ventilated room’ on a floor that
can support the weight.
l
Is located in an area where the temperature IS above 45’F (7.2-C).
l
Is connected to the right kind of outlet,
electric supply and grounding
l
Is properly connected to fuel and
exhaust systems. ’
l
Is used only for jobs normally
expected of home clothes dryers.
l
Is properly maintained.
l
Is not run where there may be explo-
sive fumes.
l
Is not used by children or anyone
unable to operate it properly.
Remove the Consumer Buy
Guide label before using your dryer. It
will be easier to remove.
Wipe out the drum with a damp
cloth to remove any dust.
SPECIAL INSTRUCTIONS: See the
Dryer Gulde tar drying tips, Informa-
tlon about permanent press and
knits, lnstructlons for drylng special
Items and for things not to be drled in
your dryer.
-‘See the “Installation Instructions” for
complete information.
‘See Setting Drying Times, page 4.
\
FOR YOUR SAFETY
Do not store or use
gasoline or other
flammable vapors and
liquids in the vicinity of
this or any other
appliance.
/
2
FOR YOUR SAFETY
If you smell gas:
1. Open windows
2. Don’t touch
electrical switches
3. Extinguish any open
flame
4. Immediately call
your gas supplier:
Please read this manual
follow the InstructIons to help
you get the best drying results
Save the manual for future use
Contents
Before Using Your Dryer 2
Loading Your Dryer 3
Lint Screen 3
Using Your Dryer : : : : : : : : 1
Setting Drying Times 4
Selecting Cycles and
Temperature Settings
Using the Automatic Settings
FLUFF AIR 6
TUMBLE PRESS” Control
If You Need Service or
Assistance 6
I. Before Calling for Assistance 7
2. If You Need Assistance 7
3. If You Need Service 7
4. If You Have a Problem 7
,
1
4
5
6
6
loading your
-,
For best dryng results and energy
savrngs, sort dryer loads carefully.
Separate loads according to
the type of fabrrc and weight. For
example
l
Dry heavy fabrrcs (denims, towels,
cottons) separately from light fabrics
(permanent press, synthetics)
l
Separate lint givers [towels, sweat-
shirts, etc.) from lint takers [synthetics,
blends, permanent press).
l
Keep dark colors and light colors
separate.
l
Keep colorfast items away from non-
colorfast fabrics.
Allow room for Hems to tumble
freely. The load WIII dry faster wrth fewer
wrinkles.
When drying permanent press,
dry smaller-than-normal loads for the
best wrinkle removal.
Use a mesh bag to hold small
items such as baby socks.
Read the Dryer Guide for more
hints on sorting and loading.
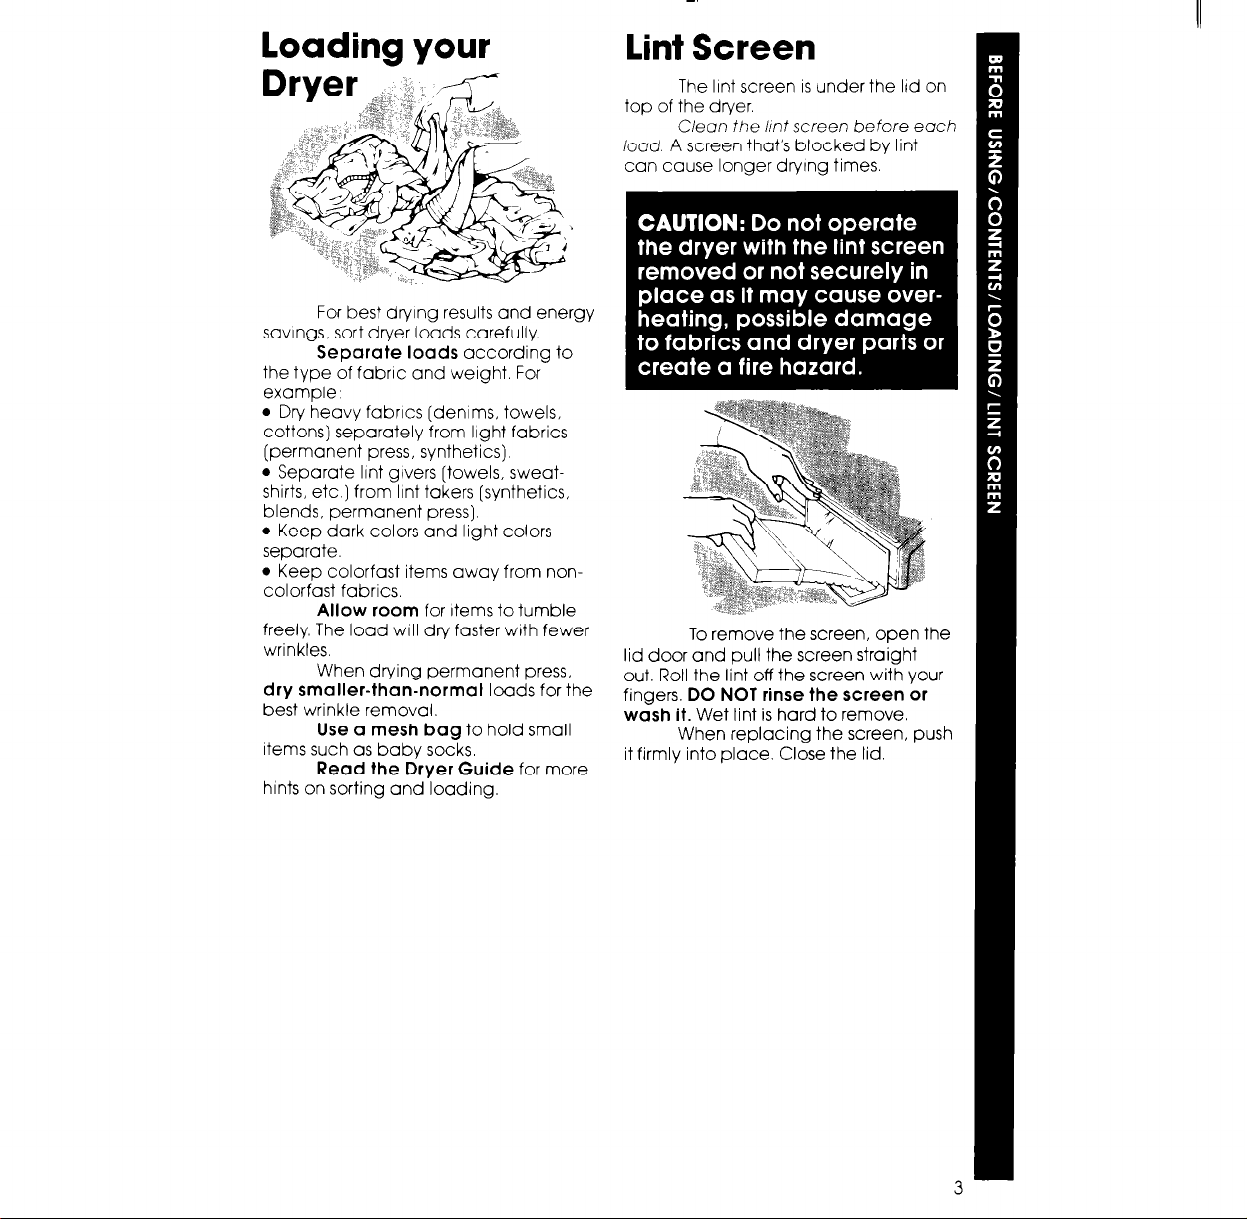
lint Screen
The lint screen is under the Itd on
top of the dryer.
C/eon
iood A screen that’s blocked by lint
can cause longer dryrng times.
lid door and pull the screen straight
out. Roll the lint off the screen with your
fingers. DO NOT rinse the screen or
wash it. Wet lint is hard to remove.
it firmly into place. Close the lid.
the hnt screen before each
To remove the screen, open the
When replacing the screen, push
 Loading...