

Whirlpool LC4900XM Use & Care Manual

AUTOMATIC
WASHER
Convertible
Compact
Model
LC49OOXM
vave Ovens. Trash Compactors, Room Air Condltloners. Dehumldlllers, Automatlc Washers. Clothes Oryers. Freezers. Refrl~@ratOr-Freezers.
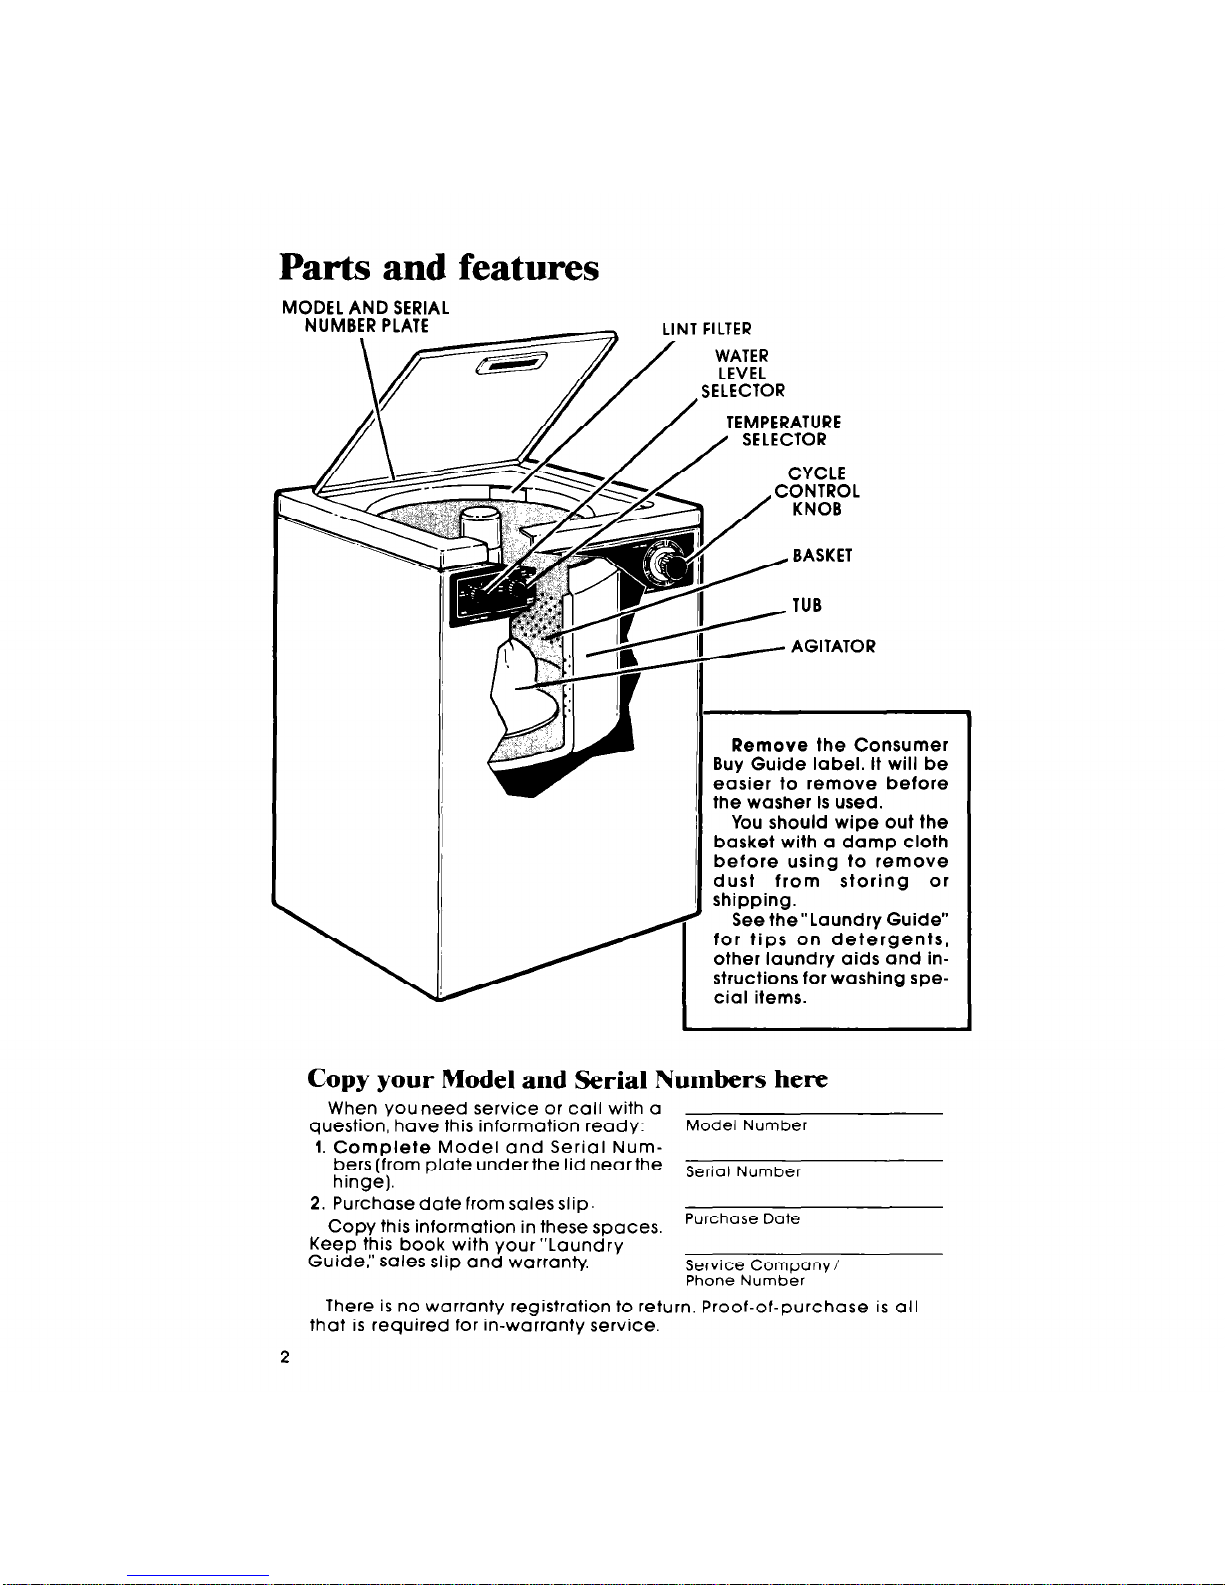
Parts and features
MODEL AND SERIAL
NUMBER PLATE
LINT FILTER
. CONTROL
/
KNOB
YTUB
/ AGITATOR
Remove the Consumer
Buy Guide label. It will be
easier to remove before
the washer is used.
You should wipe out the
basket with a damp cloth
before using to remove
dust from storing or
shipping.
See the”Laundry Guide”
for tips on detergents,
other laundry aids and instructions for washing special items.
Copy your Model and Serial Numbers here
When you need service or call with a
question, have this information ready.
Model Number
1. Complete Model and Serial Numbers(from plate underthe lid nearthe
hinge).
Serial Number
2. Purchase date from sales slip.
Copy this information in these spaces.
Purchase Date
Keep this book with your”Laundry
Guide,” sales slip and warranty
Service Company/
Phone Number
There is no warranty registration to return. Proof-of-purchase is all
that is required for in-warranty service.
2
Your responsibilities
Read this “Use and Care Guide”
and your “Laundry Guide” carefully for important use and safety
information.
You are personally responsible
for making sure that your
washer..
l
is installed by a qualifiedinstaller.
l
is properly installed and
leveled on a floor that can
support the weight.-
* is connected to the right kind
of outlet, electric supply, water
supply and drain:
l
is properly grounded
l
is used only for jobs normally
expected of home automatic
washers.
l
is properly maintained.
l
is protected from the weather
and kept where the temperature will not fall below freezing.
l
is not run by children or anyone
unable to operate it properly.
‘See the “Installation Instructions”
for comolete information.
Contents
Page
PARTS AND FEATURES
2
YOUR RESPONSIBILITIES 3
SAFETY FIRST 3
WASHER CONNECTIONS 4
LOADING INFORMATION 5
STARTING YOUR WASHER 6
WHAT HAPPENS IN
EACH CYCLE
8
REGULAR HEAVY 8
PERMANENTPRESS 8
KNIT 8
GENTLE 10
SUPER WASH 10
OTHER OPERATING
INSTRUCTIONS 12
CARING FOR YOUR WASHER 13
Winterizing 14
IF YOU NEED SERVICE OR
ASSISTANCE
15
-SAVE THESE INSTRUCTIONS 3
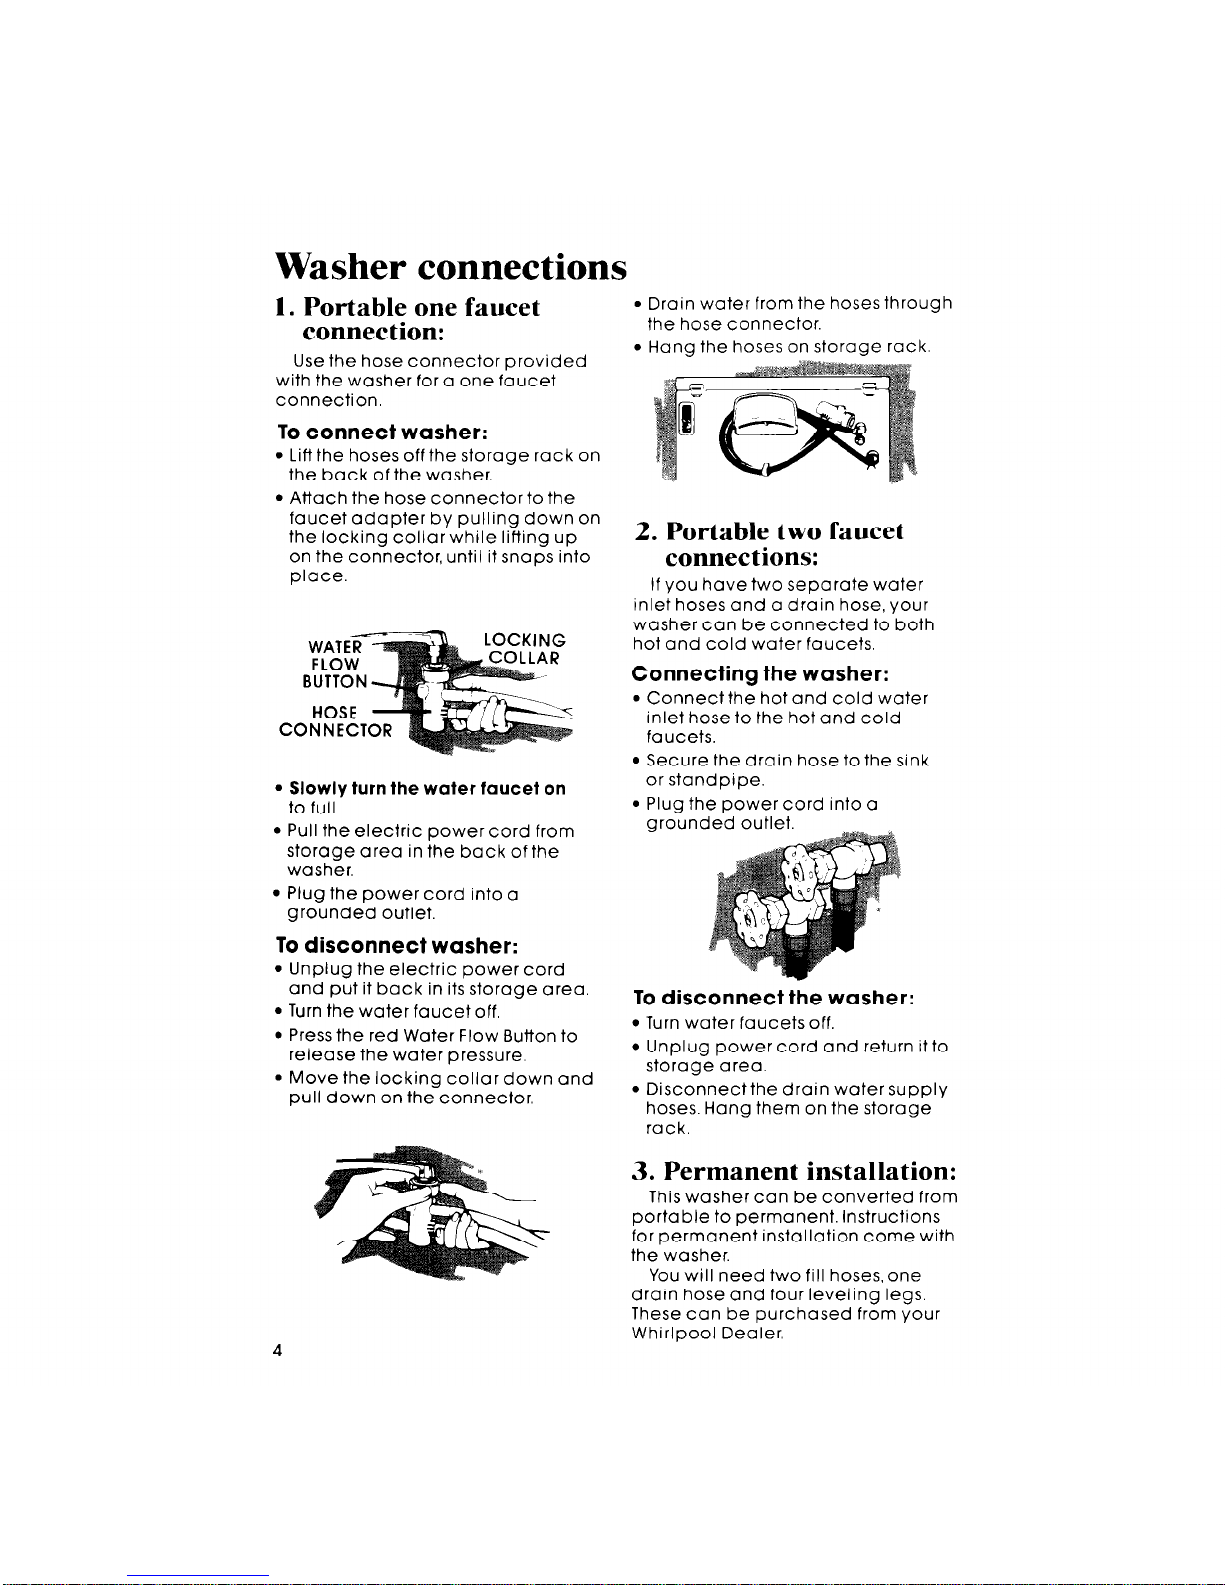
Washer connections
1. Portable one faucet
connection:
Use the hose connector provided
with the washer for a one faucet
connection,
To connect washer:
l
Lift the hoses off the storage rack on
the back of the washer.
l
Attach the hose connector to the
faucet adapter by pulling down on
the locking collarwhile lifting up
on the connector, until it snaps into
place.
l
Slowly turn the water faucet on
to full.
l
Pull the electric power cord from
storage area in the back of the
washer.
l
Plug the power cord into a
grounded outlet.
To disconnect washer:
l
Unplug the electric power cord
and put it back in its storage area.
l
Turn the water faucet off.
l
Press the red Water Flow Button to
release the water pressure.
l
Move the locking collar down and
pulldown on the connector.
.
.
Drain water from the hoses through
the hose connector.
t-tang the hoses on storage rack.
2. Portable two faucet
connections:
If you have two separate water
inlet hoses and a drain hose, your
washer can be connected to both
hot and cold water faucets.
Connecting the washer:
l
Connect the hot and cold water
inlet hose to the hot and cold
faucets.
l
Secure the drain hose to the sink
or standpipe.
l
Plug the power cord into a
grounded outlet.
To disconnect the washer:
l
Turn water faucets off.
l
Unplug power cord and return it to
storage area.
l
Disconnect the drain water supply
hoses. Hang them on the storage
rack.
3. Permanent installation:
This washer can be converted from
portable to permanent. Instructions
for permanent installation come with
the washer.
You will need two fill hoses, one
drain hose and four leveling legs.
These can be purchased from your
Whirlpool Dealer.

Loading information
DO NOT OVERLOAD
0
Overloading or packing can...
l
cause poor cleaning;
l
increase wrinkling;
l
cause excessive lint;
l
wear out or tear items.
See the chart below for suggested load sizes.
Suggested load sizes
FABRIC TYPE
Permanent press
or knits
MIXED LOAD
UNMIXED LOAD
1 dress
6 shirts OR
2 pairs slacks
2 pantsuits OR
2 blouses
3-4 dresses
Medium weight
1 pair pajamas
1 king or queen-Size
2 pillowcases
sheet OR
3 shirts 1 double sheet and 2
2 sets of underwear
pillowcases OR
2 single sheets and
2 pillowcases
Heavyweight
3 work shirts
2 work pants
8 bath towels OR
6 bath towels,
3 hand towels and
6 washcloths OR
3 pairs of jeans
WATER HARDNESS IN GRAINS
O-4 Grains
4-10 Grains
IO-20 Grains
Powdered Detergents
Low Suds ’
z-34
cup
34-I cup
1 cup
(125-175 ml]
(175250 ml]
(250 mL)
Normal Suds
1 cup
1’4-1’ 2 cups
I”2 cups
(250 ml)
(300-350 mL)
(350 mL)
High Suds
1-1’4 cups
1’2 cups
134 cups
(250-300 mL)
(350 mL)
(425 mL)
No phosphate
-
Follow package recommendations -
Liquid Detergents
14 to 23 cups (60 to 180 ml], depending on the
brand and amount of soil. Follow package
recommendations.
‘These recommendations do not apply...
9 In areas where phosphates are banned.
l
In areas with laws limiting (by weight or percentage) the amount
of detergent used in a wash load.
 Loading...