

Page 1
Congratulations!
This Bauknecht appliance offers you top technical features combined with maximum comfort and performance.
This new appliance is designed to the highest technical standards. Your appliance is equipped with energy-saving devices
that allow you to behave in an environment-friendly way.
Good reading and .....
Thanks!
2
Page 2
TABLE OF CONTENTS GB
DESCRIPTION OF THE APPLIANCE Page 14
CONTROLS Page 15
BEFORE USING THE APPLIANCE Page 16
PRECAUTIONS AND GENERAL SUGGESTIONS Page 16
HOW TO USE THE REFRIGERATOR COMPARTMENT Page 18
HOW TO USE THE FREEZER COMPARTMENT Page 19
HOW TO DEFROST AND CLEAN THE APPLIANCE Page 20
TROUBLE-SHOOTING GUIDE Page 20
AFTER-SALE SERVICE Page 21
INSTALLATION Page 21
3
Page 3

DESCRIPTION OF THE APPLIANCE
z u i
A
C
q
r
w
t
A) Refrigerator Compartment
(for storing of fresh food)
1.
Shelve (partially adjustable in height)
2.
Fruit and vegetables drawers
3.
Inside of the door with
(if available):
a. Tubeholder
b. Door box - top
c. Door box - bottom
d. Sausagehooks
e. Sliced food box
4.
Defrost water run-off
5.
Rating plate
B
e
X
q
e
c
X
b
X
a
X
B) Freezer Compartment (if available)
(with the
and/or storing of fresh and frozen food,
storing of deep-frozen food and making ice
cubes).
6.
Freezer grid (only in
(not shown in the Figure - if available).
7.
Freezing section
8.
Icecubetrays
C) Controls
3orç
ç
d
X
symbol, for freezing
appliances)
4
Page 4
CONTROLS
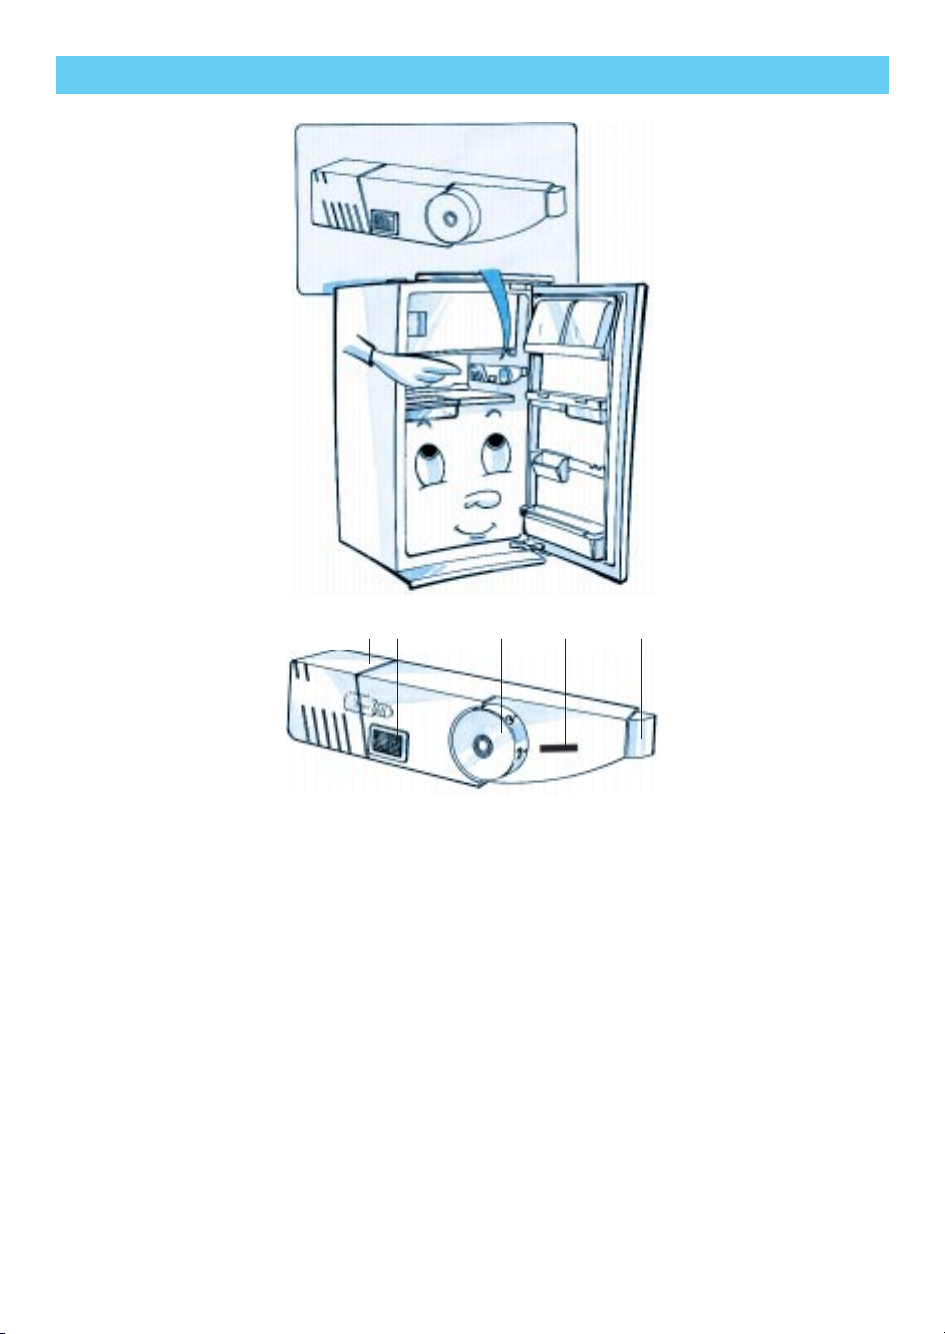
3 4 1 5 2
1.
Thermostat knob
2.
Light switch
3.
Light shield
4.
Pilot light switch (if available)
5.
Scale marking
5
Page 5

BEFORE USING THE APPLIANCE
x After unpacking, make sure that the appliance
is undamaged and that the door closes tightly.
Any damage must be reported to your retailer
within 24 hours after delivery of the appliance.
x
Before connecting the appliance to the power
supply, let it stand for 2 hours.
PRECAUTIONS AND GENERAL SUGGESTIONS
x Use the refrigerator compartment only for the
storage of fresh food and the freezer
compartment only for the storage of frozen
food, the freezing of fresh food and to make
ice cubes.
x Do not cover or close the vents of the
appliance.
x Do not store glass containers with liquids in the
freezer since they may burst.
x Do not eat ice cubes or ice lollies immediately
after taking them out of the freezer since they
may cause “cold” burns.
x Before carrying out any cleaning or
maintenance, always unplug the appliance or
switch the power supply off.
x To avoid the risk of children being trapped and
therefore suffocating, do not allow them to
play or hide inside the refrigerator.
x The power cable of this appliance may only be
replaced by personnel authorised by the
Manufacturer since special tools are required.
x The electrical connection and the installation of
theappliancemustbecarriedoutexactlyas
specified by the Manufacturer. If you have any
doubts, please contact a qualified technician.
The local electrical connection specifications
must correspond to the rating plate data.
x The appliance is built with re-usable material.
Follow the local disposal regulations.
x Make sure that the installation and the
electrical connection are carried out by a
qualified technician according to the
Manufacturer’s instructions and local safety
regulations.
x Do not eat nor drink the contents of the
artificial ice blocks.
x All necessary repairs must be carried out by a
qualified technician.
Declaration of conformity
x This appliance is intended to come into contact
with foodstuffs and conforms to D.L. 108 of
25.01.1992 (European Directive 89/109/EEC).
x This appliance has been tested for leaks and
conforms to VBG 20 safety standards for
refrigerating units.
x When scrapping, make the appliance unusable
by cutting the power cable off.
x Do not dump the appliance. Take it to the
local disposal centre so that the refrigerant
may be properly recovered and treated.
Information
x This appliance is CFC-free (refrigerant circuit
contains R 34 a) or FHC-free (refrigerant
circuit contains R 600 a-Isobutane). For more
details, please refer to the rating plate on the
appliance.
For appliances with Isobutane (R 600 a)
The refrigerant Isobutane is a natural gas of
high environmental compatibility but
inflammable. Therefore, it is essential to ensure
that the refrigerant circuit is not damaged.
6
Page 6
FOR GREAT BRITAIN ONLY - ELECTRICAL INFORMATION
“Warning - this appliance must be
earthed”
Fuse replacement.
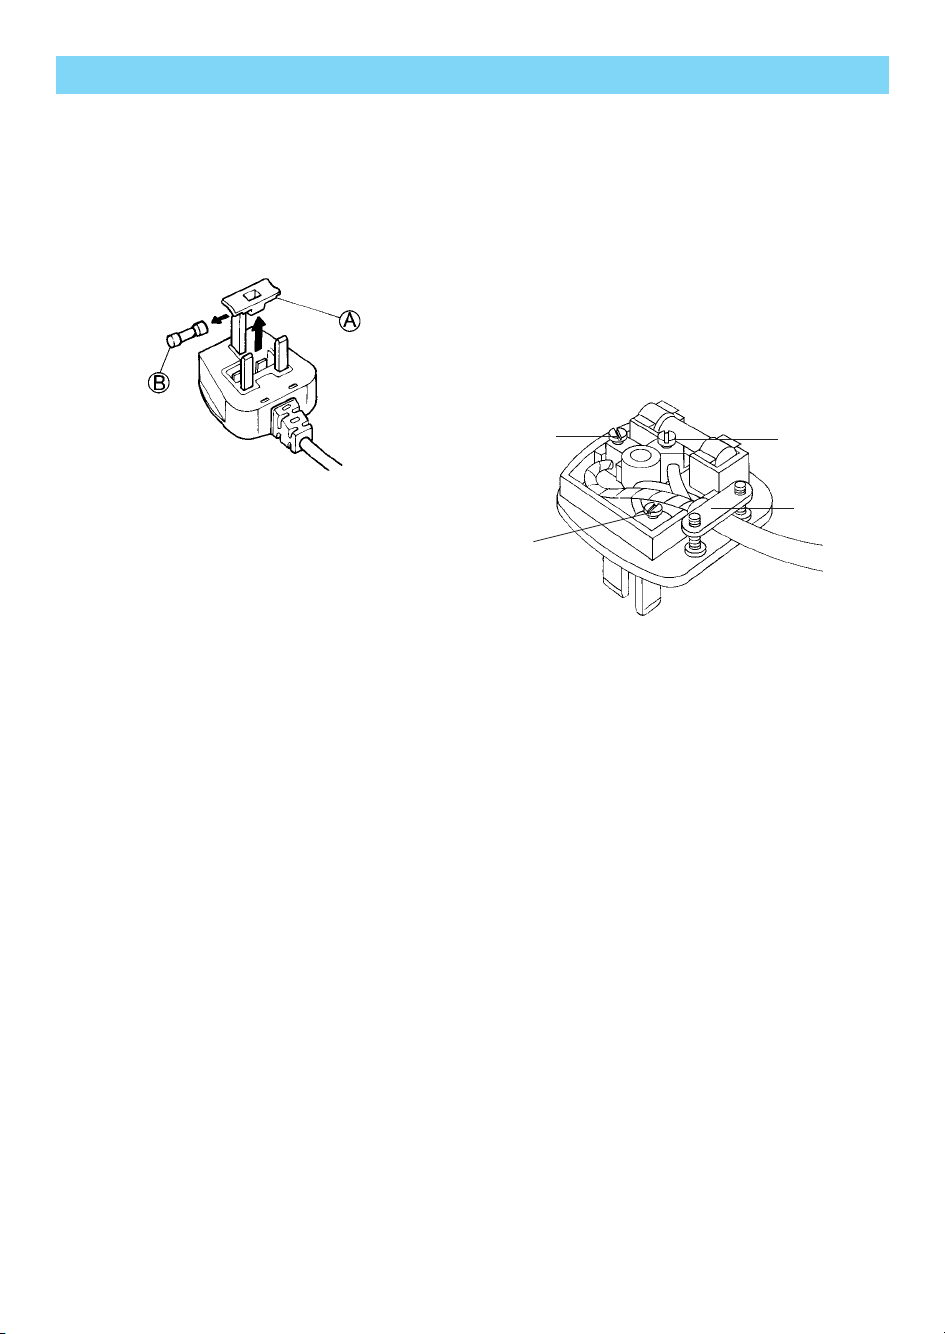
If the mains lead of this appliance is fitted with a BS 1363A
13 amp fused plug, to change a fuse in this type of plug
use an A.S.T.A. approved fuse to BS 1362 type and proceed
as follows:
1. Remove the fuse cover (A) and fuse (B).
2. Fit replacement 13A fuse into fuse cover.
3. Refit both into plug.
Important: The fuse cover must be refitted when
changing a fuse and if the fuse cover is lost the plug must
not be used until a correct replacement is fitted.
Correct replacement are identified by the colour insert or
the colour embossed in words on the base of the plug.
Replacement fuse covers are available from your local
electrical store.
Connection to a rewireable plug
If the fitted plug is not suitable for your socket outlet, then
it should be cut off and disposed of in order to avoid a
possible shock hazard should it be inserted into a 13A
socket elsewhere.
A suitable altenative plug should then be fitted to the cable.
The wires in this mains lead are coloured in accordance
with the following code;
BLUE - “NEUTRAL” (“N”)
BROWN - “LIVE” (“L”)
GREEN AND YELLOW - “EARTH” (“E”)
1. The GREEN AND YELLOW wire must be connected to
the terminal in the plug which is marked with the letter “E”
or by the Earth symbol
or coloured green or green and
4
yellow.
2. The BLUE wire must be connected to the terminal which
is marked with the letter “N” or coloured black.
3. The BROWN wire must be connected to the terminal
which is marked with the letter “L” or coloured red.
GREEN AND
YELLOW (“E”)
BLUE (“N”)
Connection to a
typical 13 amp plug
BROWN (“L”)
CABLE CLAMP.
For the Republic of Ireland only
The information given in respect of Great Britain will
frequently apply, but a third type of plug and socket is also
used, the 2-pin, side earth type. In this case, the wire which
is coloured GREEN AND YELLOW must be connected to the
EARTH contact, and the other two wires to the two pins,
irrespective of colour. The supply to the socket must be
fittedwitha16ampfuse.
7
Page 7
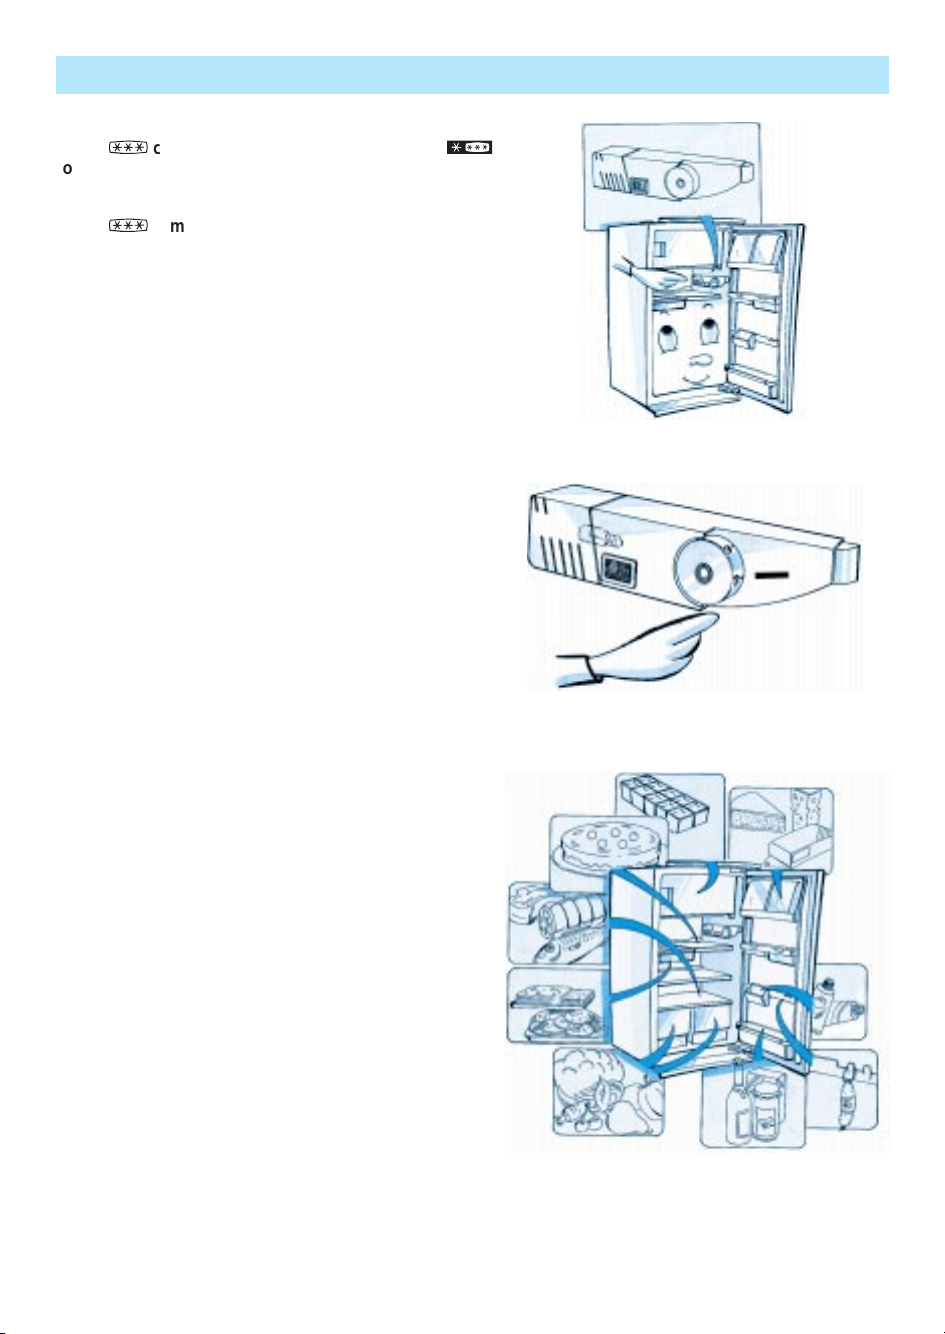
HOW TO USE THE REFRIGERATOR COMPARTMENT
This appliance is either a refrigerator, or a refrigerator
3
with a
compartment, or a refrigerator with a
ç
compartment.
The appliance has been designed to run at a room
temperature ranging from +10
with a
3
o
Cto+38oC.
+16
1X.
Getting started
compartment without pilot light ( 4), from
o
Cto+38oC. For appliances
After the appliance has been connected to the power supply,
the inside light turns on when the refrigerator door is opened
and the thermostat knob is not on position
x
. After the
temperature has been set, as described below, the appliance
is ready for use.
2X.
To set the temperature:
x
Thermostat knob (1) onx: no cooling and light off.
x
Thermostat knob (1) on 1: minimum cooling
x
Thermostat knob (1) on 3-4: average cooling
x
Thermostat knob (1) on 7: maximum cooling
Important:
x
Press the pilot light switch (4) when you freeze food and/or
when room temperature drops below 16
o
C. The pilot light
(4) turns on.
x
When room temperature rises above 16oC turn the pilot light
switch (4) off.
x
Inside temperatures are affected by the position of the
appliance, room temperature and frequency of door openings.
Thermostat setting (1) may have to be changed depending
on these factors.
X
X
1
2
How to store food in the refrigerator
compartment
3X.
We suggest to arrange food as shown in the figure on the
side:
1. Cooked food
2. Dairy products, tinned products, cheese, butter
3. Fish, meat
4. Sliced food
5. Fruit and vegetables
6. Tubes, small tins
7. Sausage
8. Bottles
Notes:
x
Do not store food in an open container since it would dry up.
x
Do not store food that is still warm in the refrigerator
compartment.
x
Make sure that air circulates freely between stored food.
Defrosting of the refrigerator compartment is
completely automatic.
8
3
X
2
3
4
5
8
6
7
Page 8
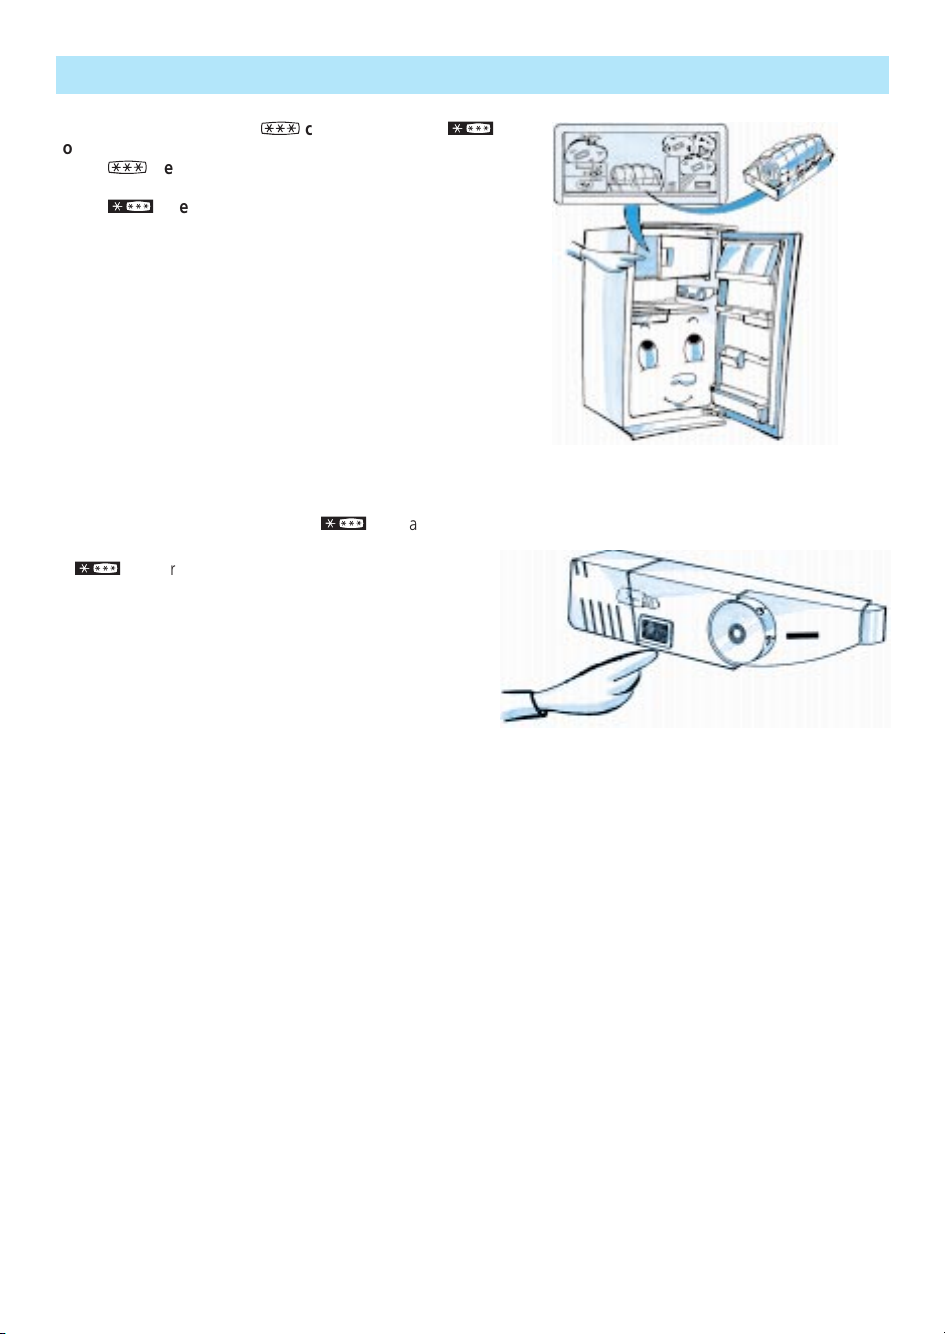
HOW TO USE THE FREEZER COMPARTMENT
Only for appliances with a
3
compartmentora
ç
compartment:
4X.
The
3
freezer compartment is for the storing of
frozen food.
The
ç
freezer compartment allows to store frozen
food for several months. It also possible to freeze food.
The quantity (in Kg) of fresh food which c an be fr ozen
in a 24 hour period is stated on the rating pl ate (5 ).
Freezing of foods:
5X.
Press the pilot light (4) 12 hours before putting the food that
has to be frozen inside the compartment.
The pilot light (4) switches on.
x
Set the thermostat (1) on intermediate position.
x
Take the freezer grid (6) outofthe
x
Place the food that has to be frozen in the middle of the
ç
compartment.
ç
compartment.
Caution
Make sure that the food that has to be frozen doesn’t touch the
already frozen food. Distance of ca. 20 mm.
x
Turn the pilot light (4) off after 24 hours.
The pilot light (4) turns off.
Reposition the thermostat (1) on the normal position.
X
X
4
5
Important:
x
Wrap and seal food in aluminium foil, cling film, air- and
watertight plastic bags, polyethylene containers with lids,
containers suitable for freezers.
When buying frozen food, make sure that:
x
Wrapper or package is intact as the food may deteriorate. If it
bulges or has spots of moisture on it, it means that it has not
been stored in adequate conditions and that the contents
may have started to thaw.
x
Always use thermal bags or cold boxes for transport.
x
Frozen food should always be purchased last.
x
When at home, immediately store it in the freezer.
x
Any food, even if partially thawed, cannot be re-frozen but
mustbeeatenwithin24hours.
x
Any rise in temperature of frozen food should be avoided or
kept as short as possible. Frozen food should not be kept
beyondthedateindicatedonthepackage.
x
Always follow the instructions on how to store frozen food
writtenonthepackaging.
Making ice cubes
x
Fill the ice cube trays (8) 3/4 full of water and place them on
the bottom of the freezer compartment.
x
Use the handle of a spoon to free the ice cube trays if they
are stuck.
Do not use sharp or pointed tools.
9
Page 9
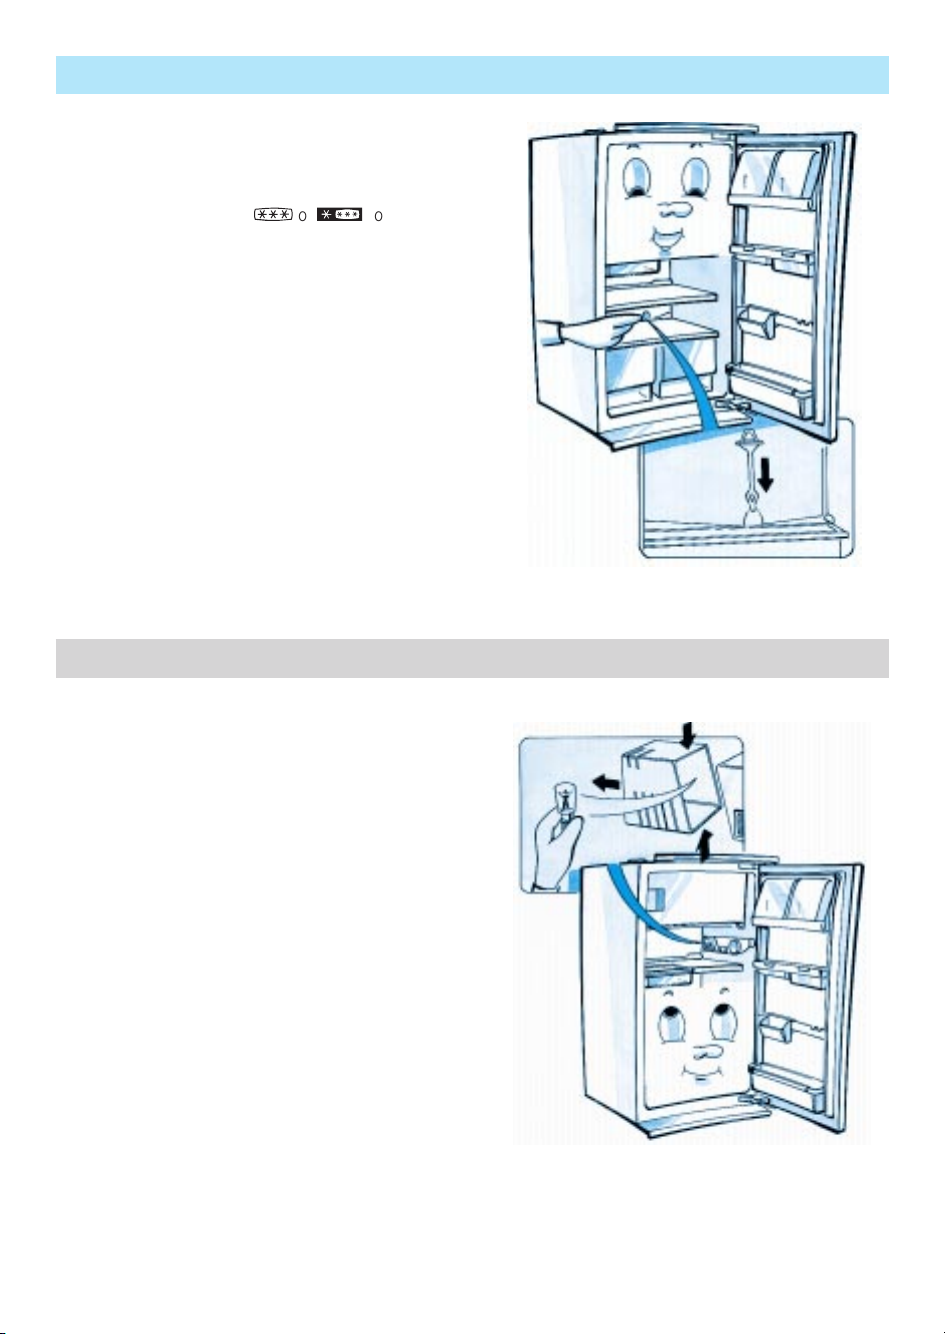
HOW TO DEFROST AND CLEAN THE APPLIANCE
Before carrying out any cleaning or maintenance, always
unplug the appliance.
You should defrost the freezer compartment when frost
build-up reaches 3 mm in thickness.
x
Remove all food from the
turn the thermostat knob to
x
Wrap all food in paper orablanket and put it in a cool place.
x
Periodically clean the inside of the appliance with a sponge
3orç
x
.
compartment and
dampened in a solution of warm water and neutral pH
detergent.
x
Rinse and dry.
x
Defrosting of the refrigerator compartment is completely
automatic.
6X.
Regularly clean the defrost water run-off with the supplied
brush so that the defrost water will flow down unhindered.
After having cleaned the appliance, plug it in.
Do not use abrasives.
Long vacation
x
Empty the appliance.
x
Unplug the appliance.
x
Defrost and clean the inside.
x
Leave the door open to prevent odour from setting in.
TROUBLE-SHOOTING GUIDE
X
6
1. The temperature is not cold enough
x
Is the food preventing the door from closing
properly?
x
Is the thermostat on the correct setting?
x
Is air circulation blocked?
2. The temperature in the refrigerator compartment
is too cold
x
Is the thermostat on the correct setting?
3. The appliance i s excessively noisy
x
Has the appliance been properly installed?
x
Do the pipes on the back touch and rattle?
x
Gurgling noises inside the refrigerating circuit
are normal.
4. The appliance does not work
x
Is there a power failure?
x
Is the plug properly inserted in the socket?
x
Has the fuse blown?
x
Is the appliance switched on?
5. There is water on the bottom of the refrigerator
compartment
x
Is the thermostat on the correct setting?
x
Is the defrost water run-off clogged?
7
6. The inside light does not work
First check point 4, then:
x
Unplug the appliance.
x
1. Press the light shield (3).
X
.
2. Remove the light shield (3).
x
Replace the bulb (220-240 V, 15 W).
20
1.
X
7
2.
Page 10
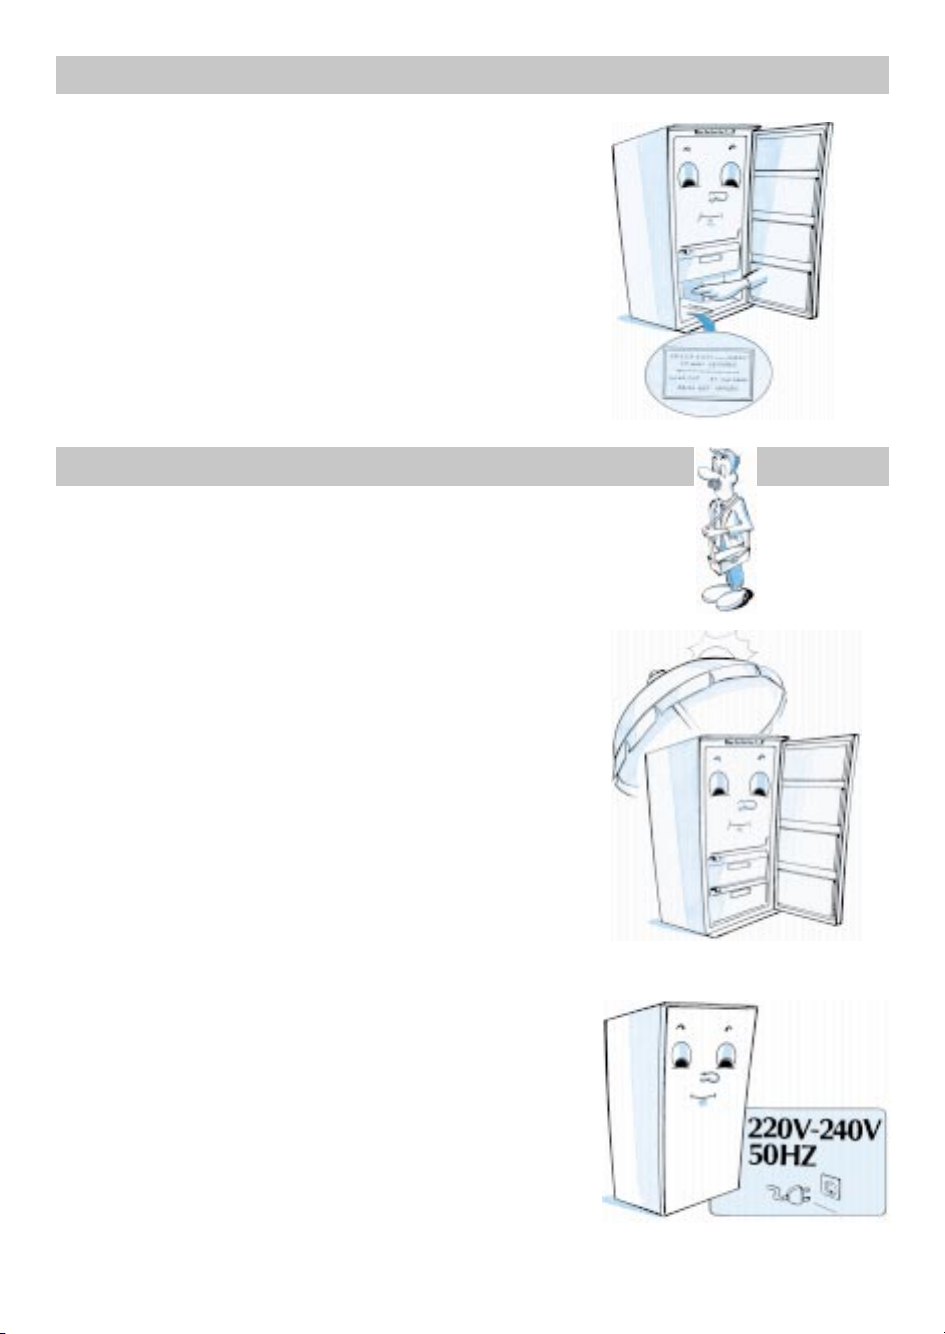
AFTER-SALES SERVICE
If the freezer does not work correctly even after
you have consulted the trouble-shooting guide,
contact After-Sales Service specifying the service
number which is found on the rating plate (insi de
the freezer at the bottom left) and also in the
appliance documentation.
INSTALLATION
x
Do not install the appliance close to any heat source.
High room temperatures, direct sunlight, or location near
heating or stoves increase the power consumtion and shoul
be avoided. If it is not possible to avoid placing the appliance
next to a source of heat, note that the following spacings
should be maintained:
to coal oil ovens or heaters 30 cm
to electric cookers/Hotplates 3 cm
x
The appliance must be placed in a dry and well-ventilated
room.
x
Clean the interior (see “DEFROSTING AND CLEANING THE
APPLIANCE”).
x
Assemble the accessories.
x
Check the efficiency of the door seal, especially after the
appliance has been built in and the door opening direction
has been changed.
Electrical connection
x
Check that the voltage shown on the rating plate corresponds
to the voltage in your home.
x
The appliance must be earthed in accordance with the law.
The Manufacturer cannot be held liable for any injury to
persons or damage to property resulting from the failure to
comply with this requirement.
x
If the appliance plug and the wall socket are incompatible, the
socket must be replaced by a qualified electrician.
x
Do not use adapters, multiple sockets or extension cables.
2
 Loading...