

Whirlpool GSX 4756/3 TW PROGRAM CHART
GB
GSX 4756
Further indications are given in the pages to follow and in the user instructions.
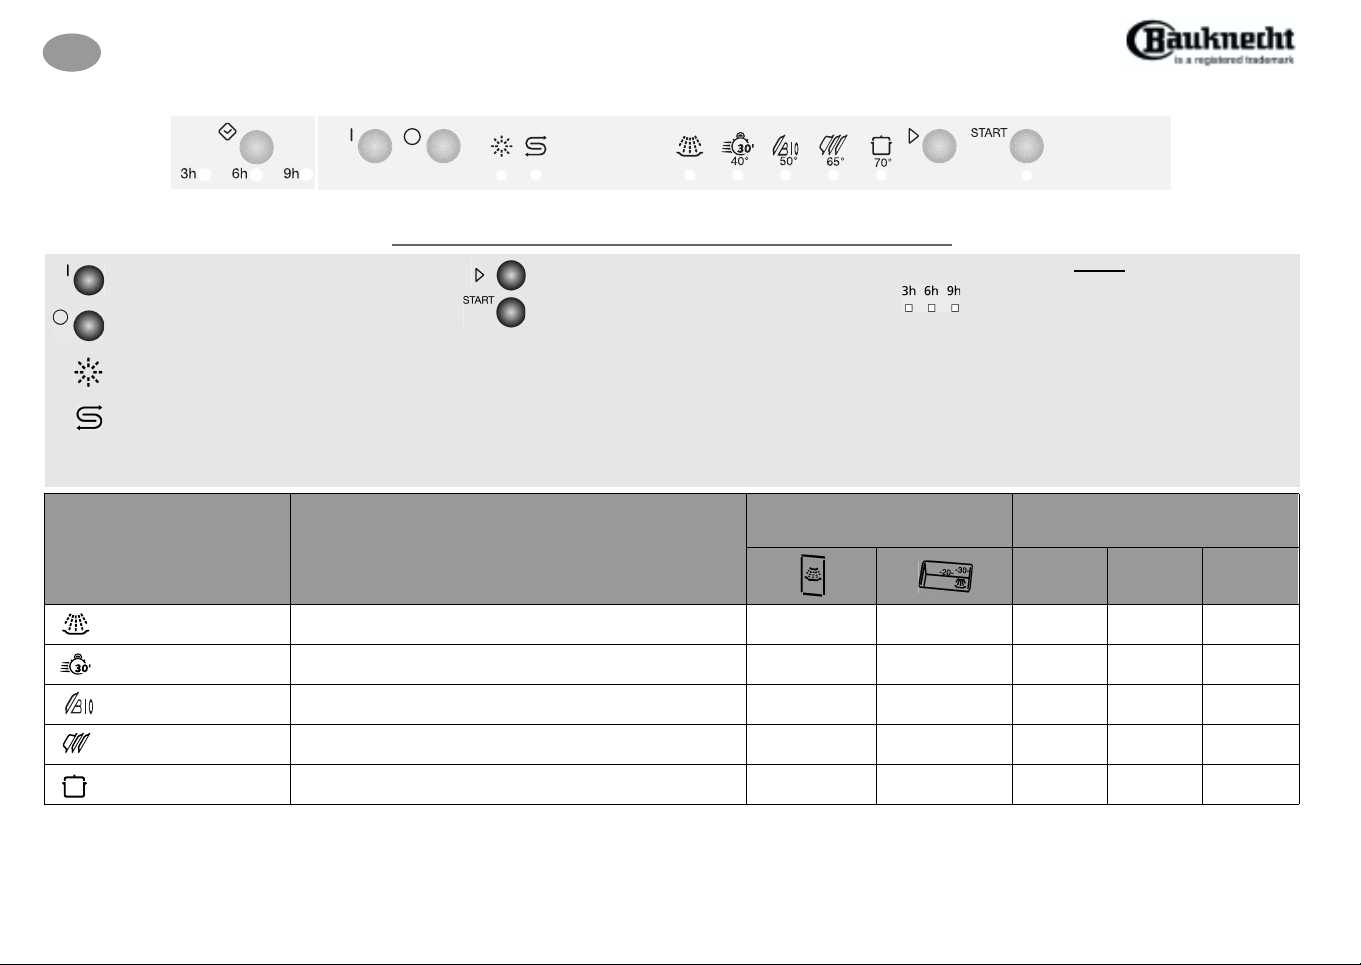
On button
Off button
Rinse aid level indicator
Add rinse aid.
Salt level indicator
Add regeneration salt; only add regeneration salt
immediately before starting a wash programme.
Quick Reference Guide
Programme selection button
Start button
Indicator lamp lit while the dishwasher is operating.
Flashes when a fault occurs.
Switches off at the end of the programme.
Option
Delayed start button
The wash cycle can be programmed to start
after 3-6-9 hours.
Then press the Start button.
The dishwasher will start at the set time.
Programme Symbol
and Temperature
Pre-wash
Rapid 40° C
Bio-Normal 50° C
Normal 65° C
Intensive 70° C
1) Values may vary in relation to usage, e.g.: different loads,
water temperatures - above or below 15° C -, water hardness and power supply voltage, etc.
2) Programme recommended when using detergents of type B (enzyme-based detergents).
Reference programme for energy label.
3) Programme recommended when using detergents of type A (non enzyme-based detergents).
3)
Crockery to be washed later.
Lightly soiled crockery with no dried-on food.
Normally or heavily soiled crockery with dried-on food.
2)
Normally or heavily soiled crockery with dried-on food.
Heavily soiled pans and saucepans.
Programme selection and
recommended load type
Place the detergent in the:
small large
compartment compartment
Water
(Litres)
- - 5.0 0.02 9
- X 13.0 0.85 30
X X 16.0 1.35 86
X X 16.0 1.55 86
X X 21.5 1.70 93
Consumption
Normal load
Energy
(kWh)
5019 100 90261
(We reserve the right to make technical modifications)
1)
Time
(Min.)
B
A
C
How to use the dishwasher
1. After loading the dishwasher, turn on
the water supply tap and open the
dishwasher door.
2. Press the On button to switch the
dishwasher on.
indicator lamps will light up.
3. Press the programme selector button
until the corresponding indicator lamp
switches on. If required, select options
(if supplied).
4. Press the Start button to start the
selected wash programme.
indicator lamp will switch on.
set, the programmed data cannot be
altered by pressing the programme
selector buttons.
once the Start button
Note:
has been pressed, the dishwasher
memorises the last programme
selected. This information remains in
the memory even during interruption of
the power supply.
To change the selected program me,
open the door
scalding from steam!)
Start button for about 5 seconds,
the Start indicator lamp switches
off.
the programme selector knob and
press the Start button.
if the dishwasher is switched off
Note:
during a wash programme, when
switched on again it will resume the wash
cycle from where it was interrupted.
Only open the dishwasher door if
strictly necessary during a wash cycle
and exercise maximum caution.
Danger of scalding from steam.
5. To indicate the end of a programme, an
acoustic signal is activated 4 times, the
Start indicator lamp switches off and
the
End indicator lamp (if fitted)
lights up
One of the programme
The Start
Once
(caution: danger of
Select a new programme using
(for about 30 min.)
and press the
until
.
6. Only open the door once the wash cycle
has terminated (caution: danger of
scalding from steam) and press the OFF
button to switch the dishwasher off.
the indicator lamps switch off.
7. Unload the lower rack before the upper
one. Close the water tap.
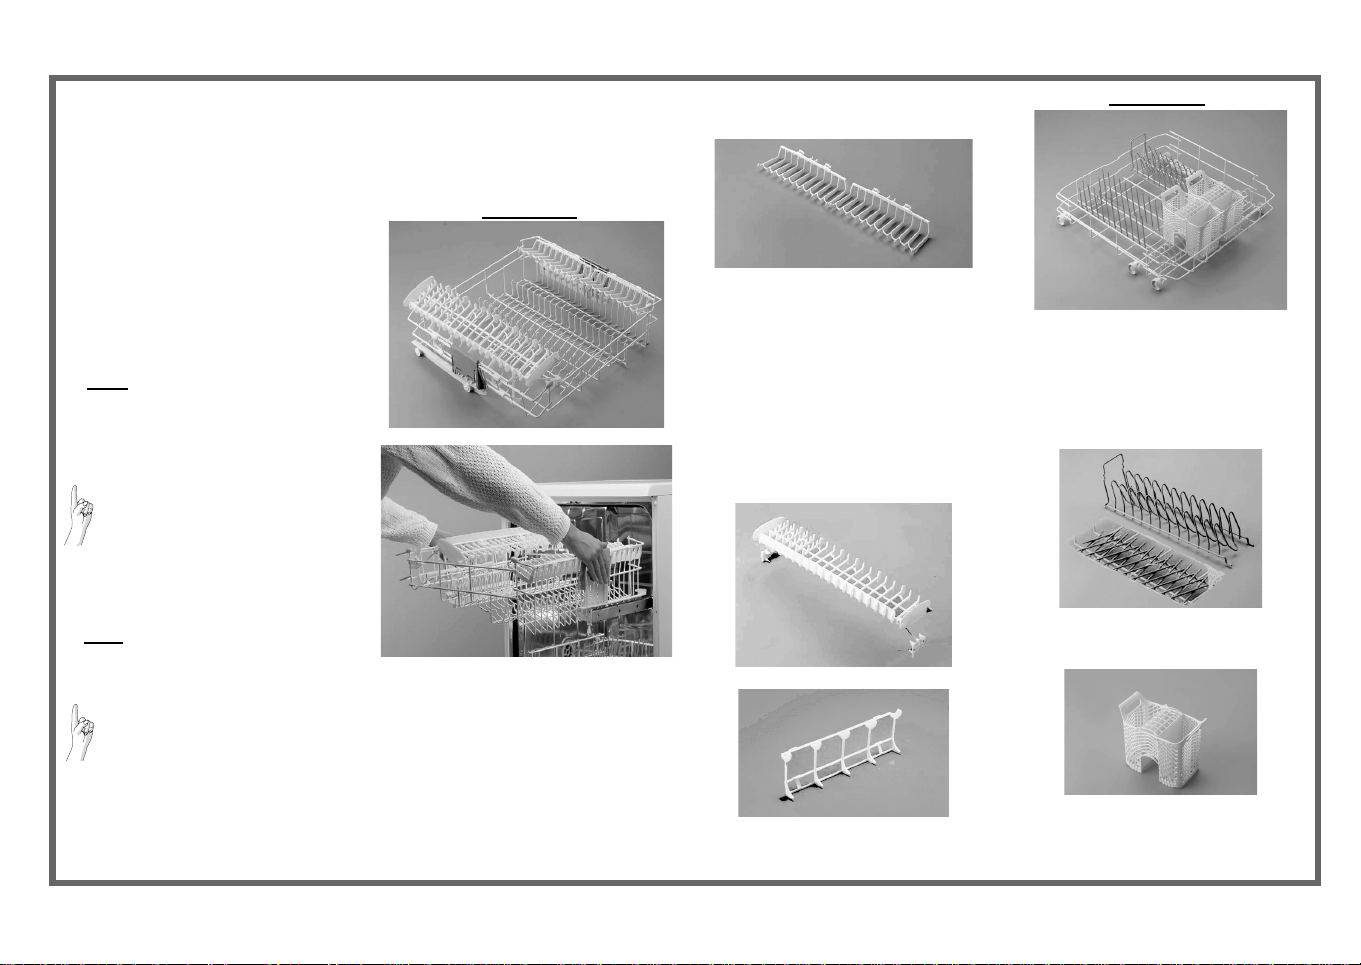
All
Upper rack
Rack height adjustment:
(The dishwasher is delivered with the upper
rack in the top position).
The rack height can also be changed
when loaded.
• To lower: pull out the
handles and gently lower the rack.
• To raise: pull up the
until the rack clicks into place.
• The rack must be level on both
sides.
two
side handles
two
side
Upper and lower rack
Crockery holders:
• Down: cups and long-stemmed glasses.
•
Up: plates.
“Vario Organizer” multi-purpose
support:
• To be used, for example, for longhandled utensils
with the blade facing downwards),
cups and glasses.
• May be used in three different
positions (see also “Dishwasher
loading instructions” on Page 4).
1. Upon the left-hand side of the rack.
2. Upside-down, towards the c entre of
the rack.
3. Upside-down, towards the left side.
Glass holder:
(arrange knives
Lower rack
B
A
C
Plate holders:
• May be lowered to increase
available space (A).
• May be removed to increase
available space (B). To remove:
pull the handle up.
Cutlery basket:
The cutlery basket can be removed to
increase (C) available space.
Please read the user instructions carefully.
 Loading...