

WHIRLPOOL FWDG97168WS IL Daily Reference Guide
DAILY REFERENCE GUIDE
WWW
EN
THANK YOU FOR BUYING A WHIRLPOOL PRODUCT.
Please read the content of the Health &
Safety and Installation Guides thoroughly
before you use this appliance.
The transit bolts must be removed
before the appliance is used.
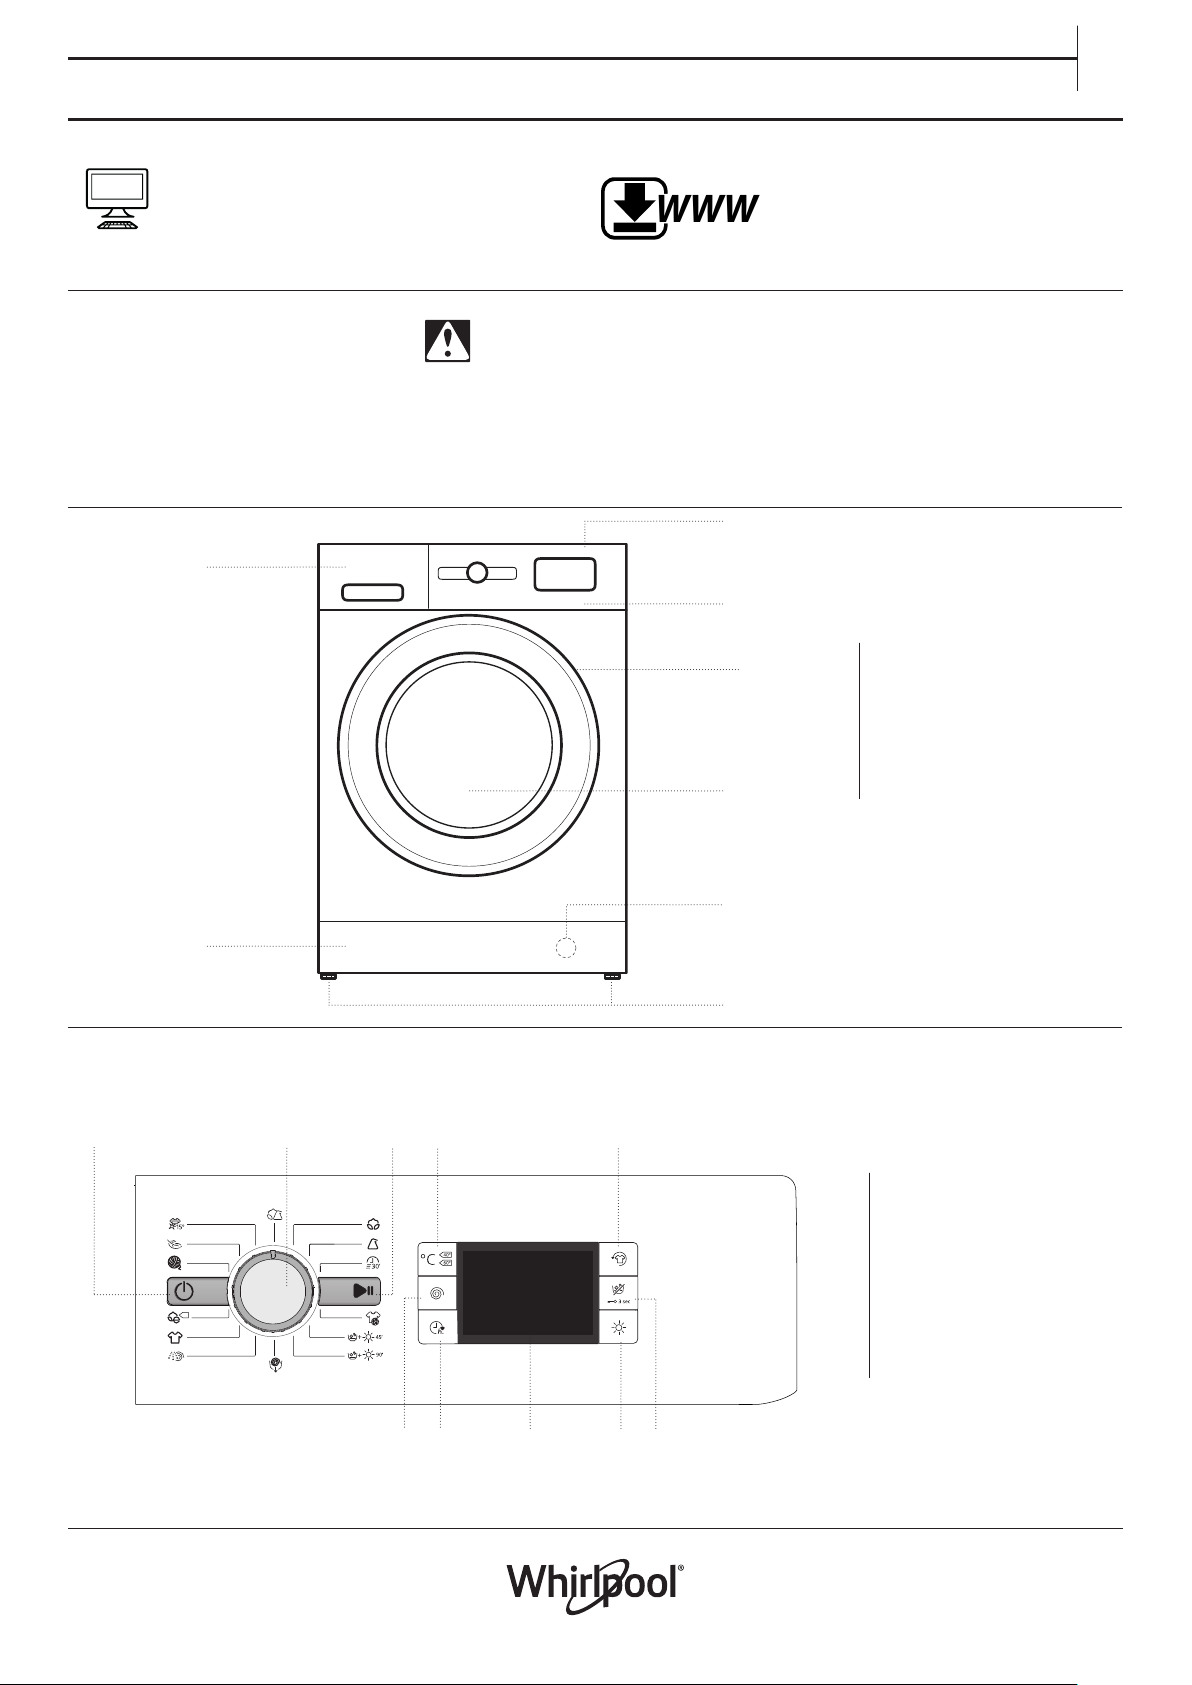
PRODUCT DESCRIPTION
APPLIANCE
2.
Download the Instructions for use from the
website http://docs.whirlpool.eu
Follow the procedure described on the last
page.
See the Health & Safety and Installation
Guides for detailed instructions on how to
remove the transit bolts
1.
3.
4.
5.
1. Top
2. Detergent dispenser
3. Control Panel
4. Lid handle
5. Door
6. Water lter - behind kick panel
7. Removable kick panel
8. Adjustable feet (2)
7.
CONTROL PANEL
1.
6.
8.
2.
3. 4.
9.
10. 6.
8.
5.
1. On/O button
2. Programme selector
3. Start/Pause button
4. Temperature button
5. FreshCare+ button
6. Dry Only button / Lock button
7. Drying settings button
8. Display
9. Start delay button
10. Spin speed button
7.
9
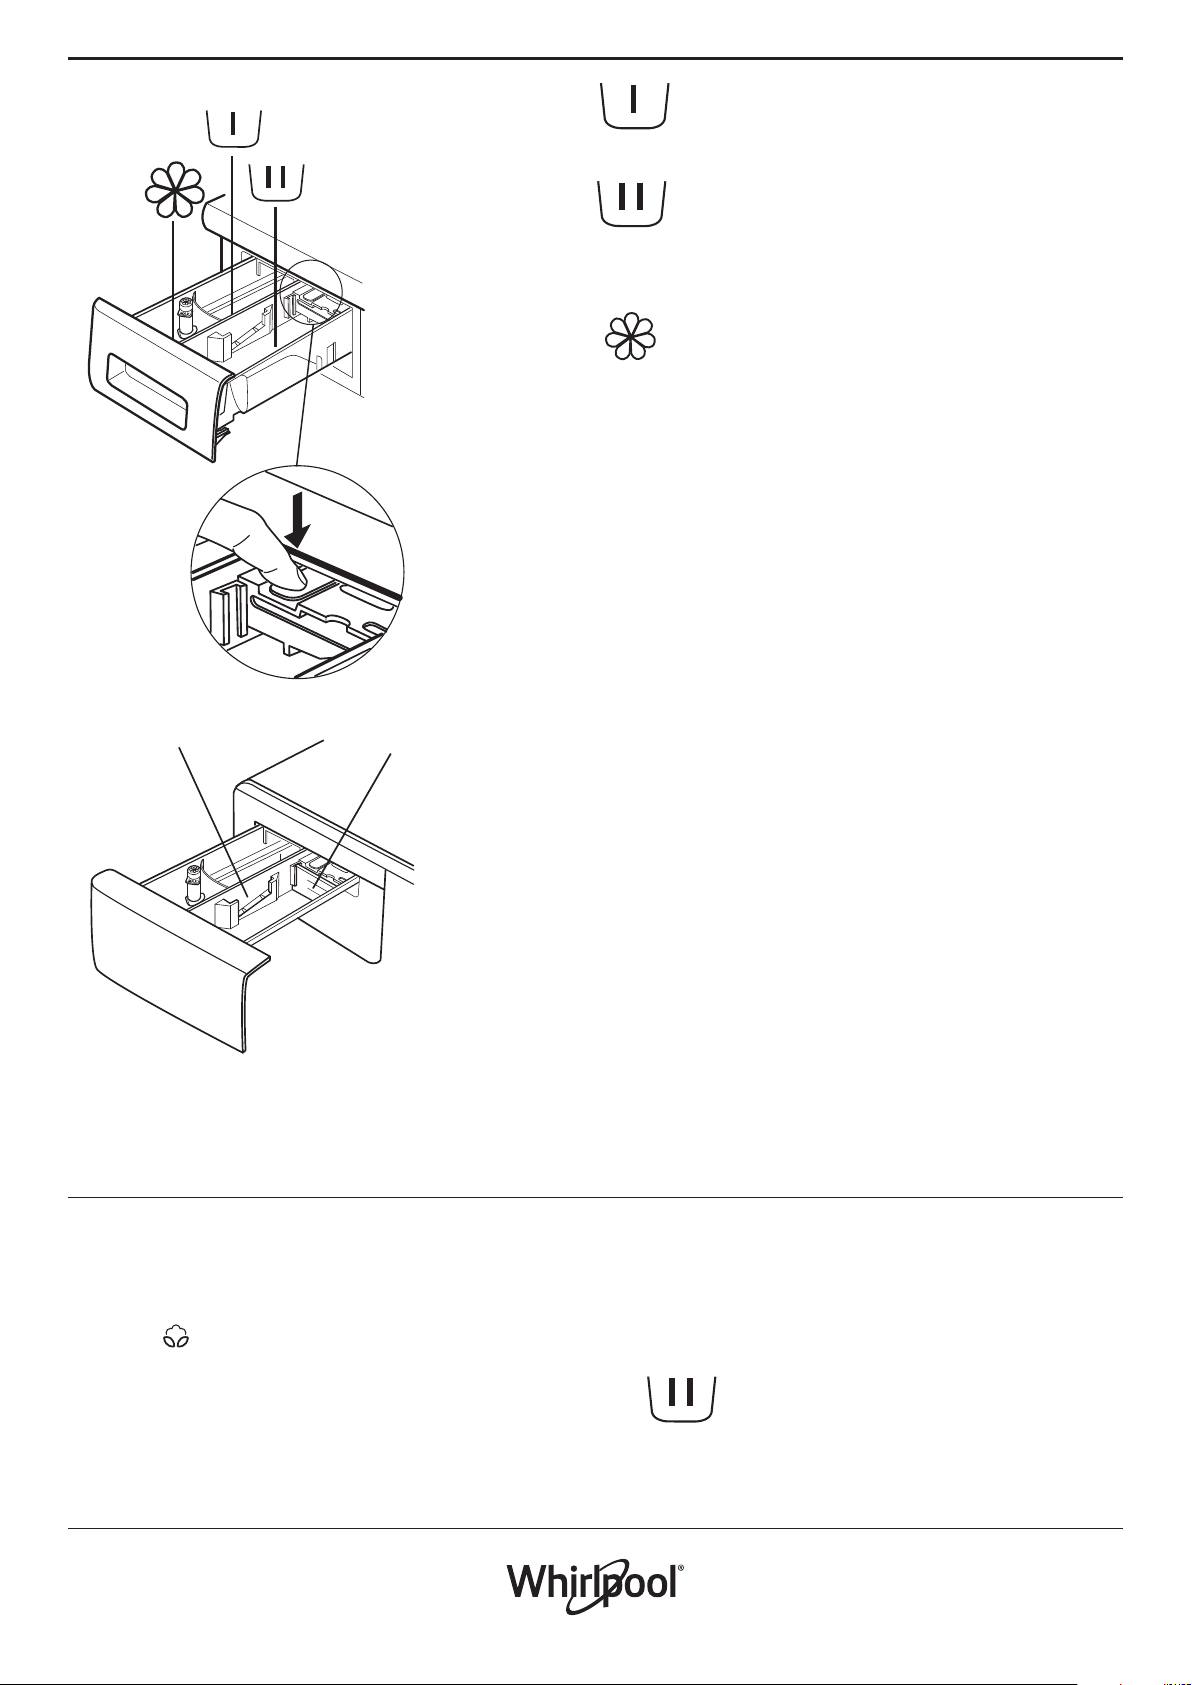
DETERGENT DISPENSER
Prewash Compartment
• Detergent for prewash
Main Wash Compartment
• Detergent for the main wash
• Stain remover
• Water softener
Softener compartment
• Softener
• Liquid starch
Pour softener or starch solution into the
compartment without exceeding the “max” level.
Release button
(press to remove tray for cleaning).
B
A
FIRST TIME USE
See the section DAILY USE for instructions on selecting and starting a
programme.
First cycle operation
Remove any manufacturing debris:
1. Select the programme with a temperature setting of 60 °C.
2. Pour a small quantity of detergent powder into the main wash
compartment of the detergent dispenser (maximum 1/3 of the
quantity the detergent manufacturer recommends for lightly soiled
laundry).
3. Start the programme without loading the washer dryer machine
(with empty drum).
Preferably use the partition A when
washing with a liquid detergent for
washing, to ensure that the correct
quantity of detergent is used (the
partition is included in the bag
containing the instructions).
Move the partition into slot B when
using detergent powder.
10
DAILY USE
EN
For more information on functions, a more detailed guide may
be requested or downloaded from the website following the
instructions given on the last page.
WWW
1. LOADING LAUNDRY.
• Prepare the laundry, following the
recommendations given in the section “HINTS AND
TIPS”. - Open the door and load the laundry into the
drum, without exceeding the maximum load
capacities indicated in the Programme Chart.
• Close the door, pressing until the latch
audibly locks, and check that there is no
laundry trapped between the door glass
and the rubber seal.
2. OPEN THE WATER TAP
Check that the washer dryer is connected correctly
to the water mains. Open the water tap.
3. SWITCHING ON THE WASHER DRYER MACHINE.
Press button ; the lamp ashes slowly.
4. SELECTING A PROGRAMME AND CUSTOMISING A CYCLE.
The following functions are possible with this appliance:
• Wash only
• Wash and dry
• Dry only
Wash only
Select the required programme with the PROGRAMME
selector dial. The duration of the wash cycle is shown on the
display. The washer dryer machine automatically displays the
maximum temperature and spin speed settings possible for
the selected programme. Adjust the temperature and/or spin
speed settings if needed with the relative buttons.
• Press button “ ” to cycle through progressively lower
temperature settings until cold wash is set (“- -“) shown on
display.
• Press button “ ” to cycle through progressively lower
spin speed settings until the spin cycle is turned o (“0”
shown on display).
Pressing the button again sets the highest possible setting.
Select the required options (if necessary).
• Press the button to select the option; the respective button
lamp illuminates.
• Press the button again to cancel the option; the lamp
extinguishes.
! If the selected option is not compatible with the
programme set, an error warning tone sounds and the
indicator lamp ashes three times. The option is not selected.
Wash and dry
To wash and dry a load with no interruption between the
wash and dry cycles, make sure that the load does not
exceed the maximum permissible drying load for the
selected programme (see the column “Max. load for drying
cycle” in the Programme chart).
1. Follow the instructions given in the paragraph “Wash Only”
to select and, if necessary, customise the required
programme.
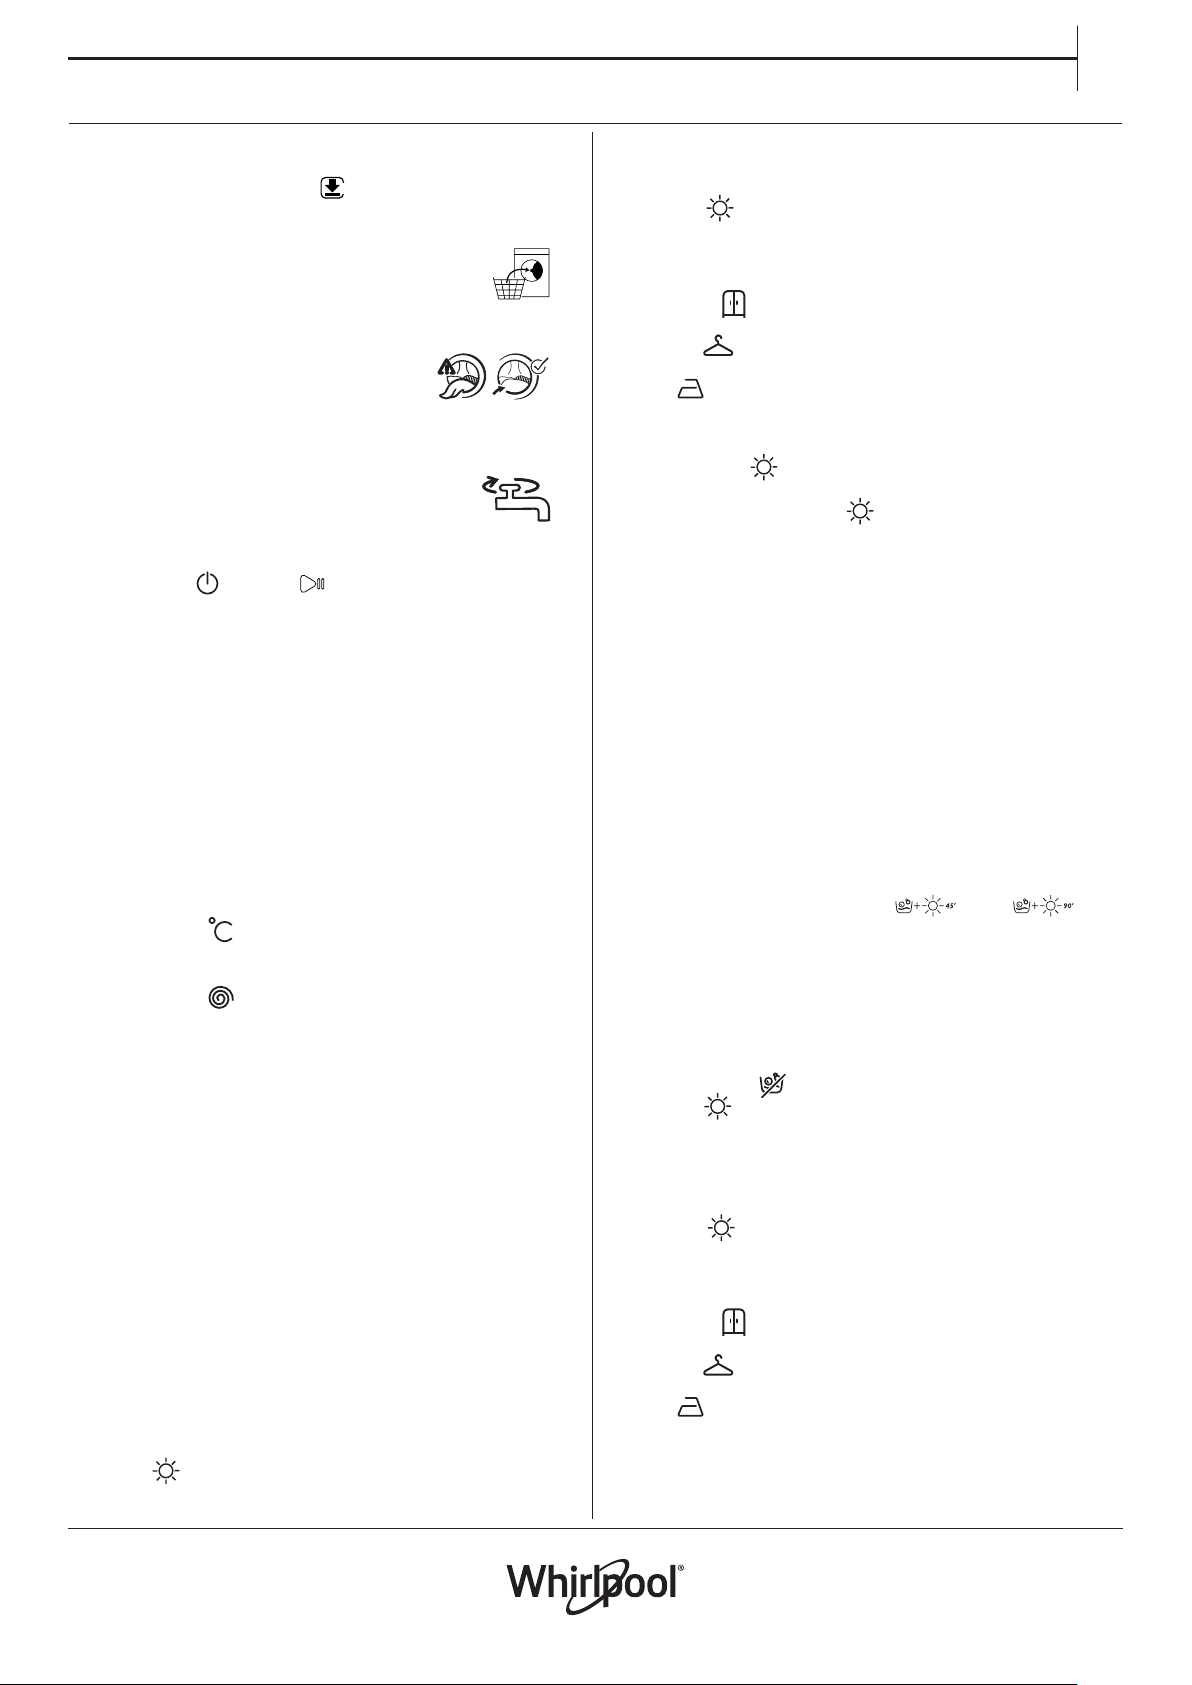
2. Press “ ” to select the required drying mode. Two drying
modes are available: automatic or timer.
- Automatic drying with selectable levels:
In automatic drying mode, the washer dryer machine dries the
laundry until the set level of dryness is reached. Pressing
button “ ” once automatically selects the highest drying
level available for the selected programme. Press the button
again to reduce the drying level.
The following levels are available:
Wardrobe : laundry is completely dry and ready to be put
away in the wardrobe without ironing.
Hanger : laundry is left slightly damp to minimise
creasing. Garments must be hung to air dry completely.
Iron : garments are left reasonably damp to make ironing
easier.
- Timer drying mode:
Press button “ ” repeatedly to set timer drying mode.
After cycling through all the automatic drying levels,
continue pressing button “ ” until the desired time is
displayed. Values from 210 to 30 minutes are settable.
To wash a load of laundry larger than the maximum
permissible load for drying (see the column “Max. load for
drying cycle” in the Programme chart), remove a few garments
once the washing cycle has nished before starting the
drying cycle. Proceed as follows:
1. Follow the instructions given in the paragraph “Wash Only”
to select and, if necessary, customise the required
programme.
2. Do not include a drying cycle.
3. Once the washing cycle is nished, open the door and
remove a few garments to reduce the load. Now follow the
instructions for “Dry only”.
N.B.: always allow a cooling down period after drying before
opening the door.
When using the two preset cycles “ ’” and “ ’”, it
is not necessary to select and start a drying cycle.
Dry only
This function is used to simply dry a wet load washed
previously in the washer dryer or by hand.
1. Select a suitable programme for the laundry you want to dry
(e.g. select cotton to dry wet cotton laundry).
2. Press button “ ” to dry without a wash cycle.
3. Press “ ” to select the required drying mode. Two drying
modes are available: automatic or timer.
- Automatic drying with selectable levels:
In automatic drying mode, the washer dryer machine dries
the laundry until the set level of dryness is reached. Pressing
button “ ” once automatically selects the highest drying
level available for the selected programme. Press the button
again to reduce the drying level.
The following levels are available:
Wardrobe : laundry is completely dry and ready to be put
away in the wardrobe without ironing.
Hanger : laundry is left slightly damp to minimise
creasing. Garments must be hung to air dry completely.
Iron : garments are left reasonably damp to make ironing
easier.
11
 Loading...