

Whirlpool EV200NXK User Manual
Xfl 01
4a
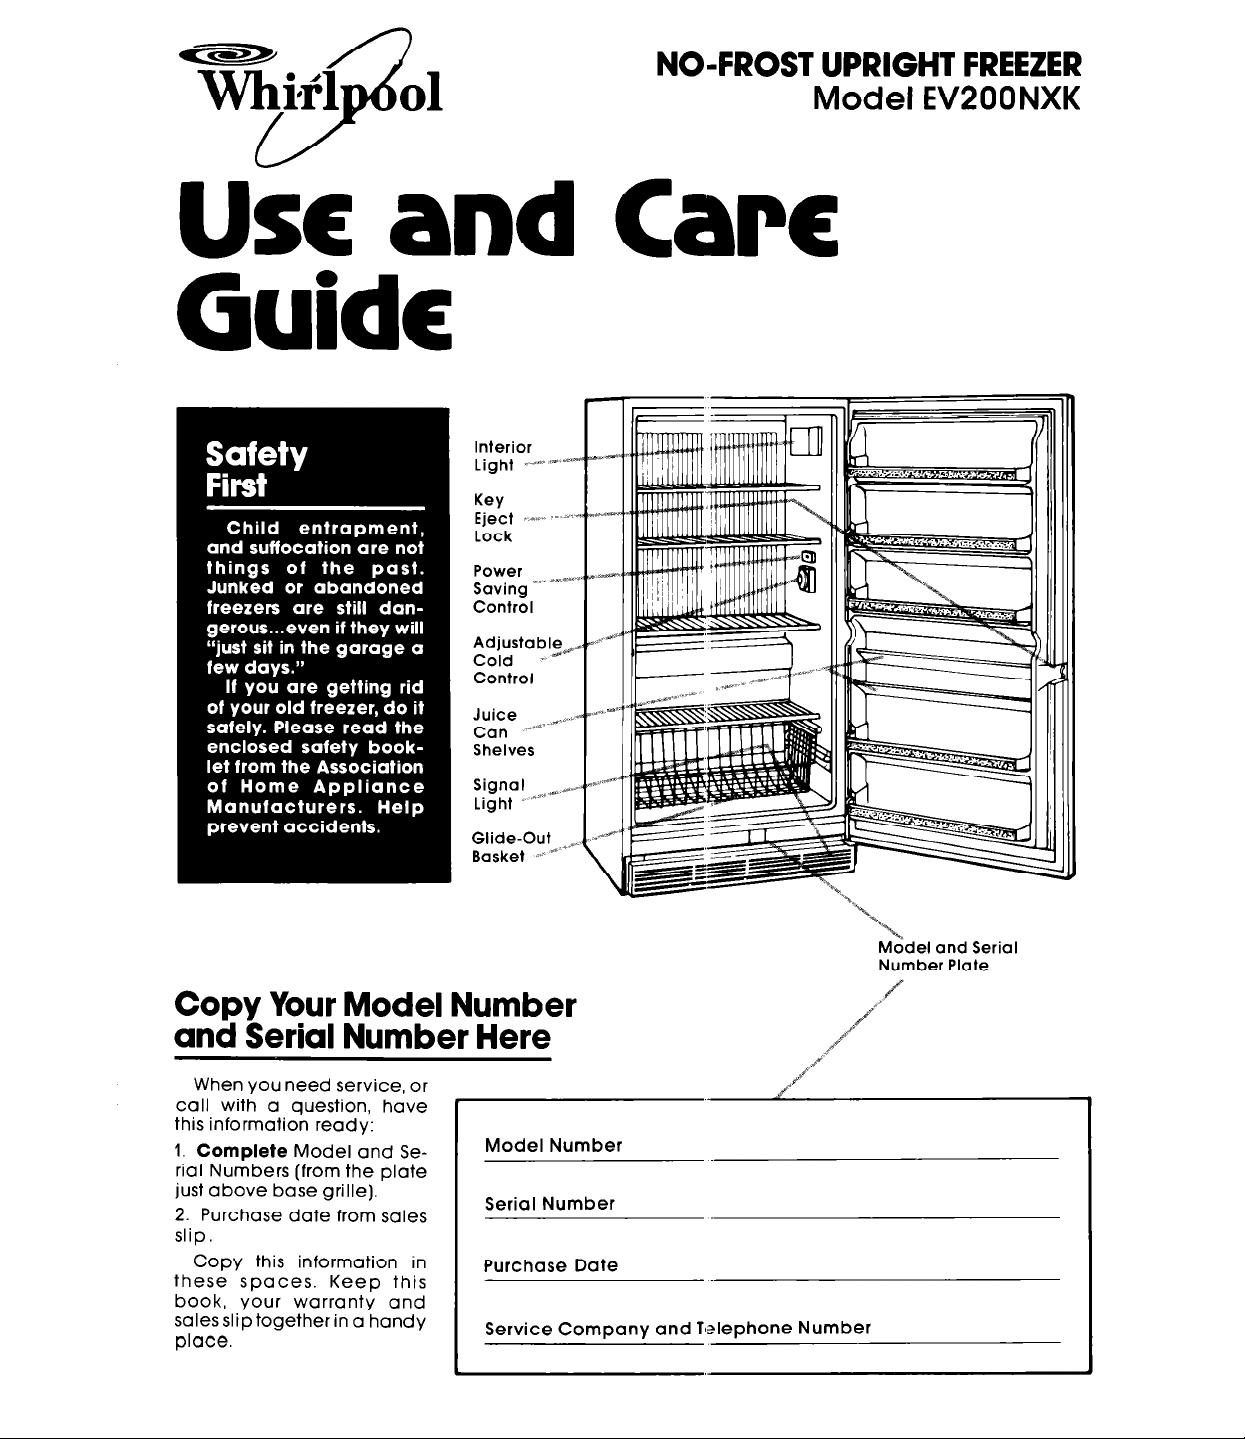
NO-FROST UPRIGHT FREEZER
Model EV200NXK
Use
and Cart
Guide
Interior
Light -_n
Key
Eject s-l_j-
Lock
Power
Shelves
I llll I I I I I
Glide-Out
Basket ^+ *-
Copy Your Model Number
and Serial Number Here
When you need service, or
call with a question, have
this information ready:
1. Complete Model and Serial Numbers (from the plate
just above base grille).
2. Purchase date from sales
slip.
Copy this information in
these spaces. Keep this
book, your warranty and
sales slip together in a handy
place.
Model Number
Serial Number
Purchase Date
Service Company and
Model and Serial
Number Plate
Tlalephone Number

Before you plug if in
Before using your freezer, you are personally
responsible for making sure that it...
l
is installed and leveled on a floor that will
hold the weight, and in an area suitable for
its size and use.
l
is connected only to the right kind of outlet,
with the right electrical supply and
grounding.
l
is used only for jobs expected of home
freezers.
l
is not near an oven, radiator or other heat
source.
l
is prc Derly maintained.
l
is in c: dry sheltered place.
l
is use 3 in an area where the room tempera-
ture v~,ill not exceed 110 F (43.3 C].
l
is not
run
where there are explosive
l
is not Iused by children or others who may not
unde stand how it should be used.
l
is not loaded with food before it has time to
get p.operly cold.
fUmeS.
Install Properly...
Flush
against back wall
and cabinets
1. Check the strength of the floor. It should hold
the weight of fully loaded freezer.
2. Pick a safe place, indoors, away from inflammables such as gasoline.
3. Freezer may be installed flush against wall in
back and cabinets on each side.
level Freezer.. .
so that door will stay open at any position.
1. Remove base grille (see page 4 ).
Remove Sales labels...
Rem,)ve the Consumer Buy Guide label and
any in ide labels before using the freezer. Remove c:ny left over glue with rubbing alcohol.
Note: DO NOT REMOVE the Tech Sheet fastene j behind the base grille.
I
Cleali It...
Clec.1 your freezer before using it. See cleaning insiluctions on page 5.
Plug it in...
Freeze
power 1:
Recommended Grounding Method
A 121 Volt, 60 Hz., AC only, 15 ampere fused
electric,al supply is required. It is recommended
that a separate circuit serving only this appliance t le provided. The receptacle should not
be controlled by a wall switch or pull chain.
Do not use an extension cord.
See Individual electrical requirements and
grouncilng instruction sheet in your literature
packal:je.
I
Raise
Lower
Using your freezer
Setting the Cold Control...
To start, turn control to the middle of the dial.
This setting will maintain zero zone temperatures
under normal operatrng conditions.
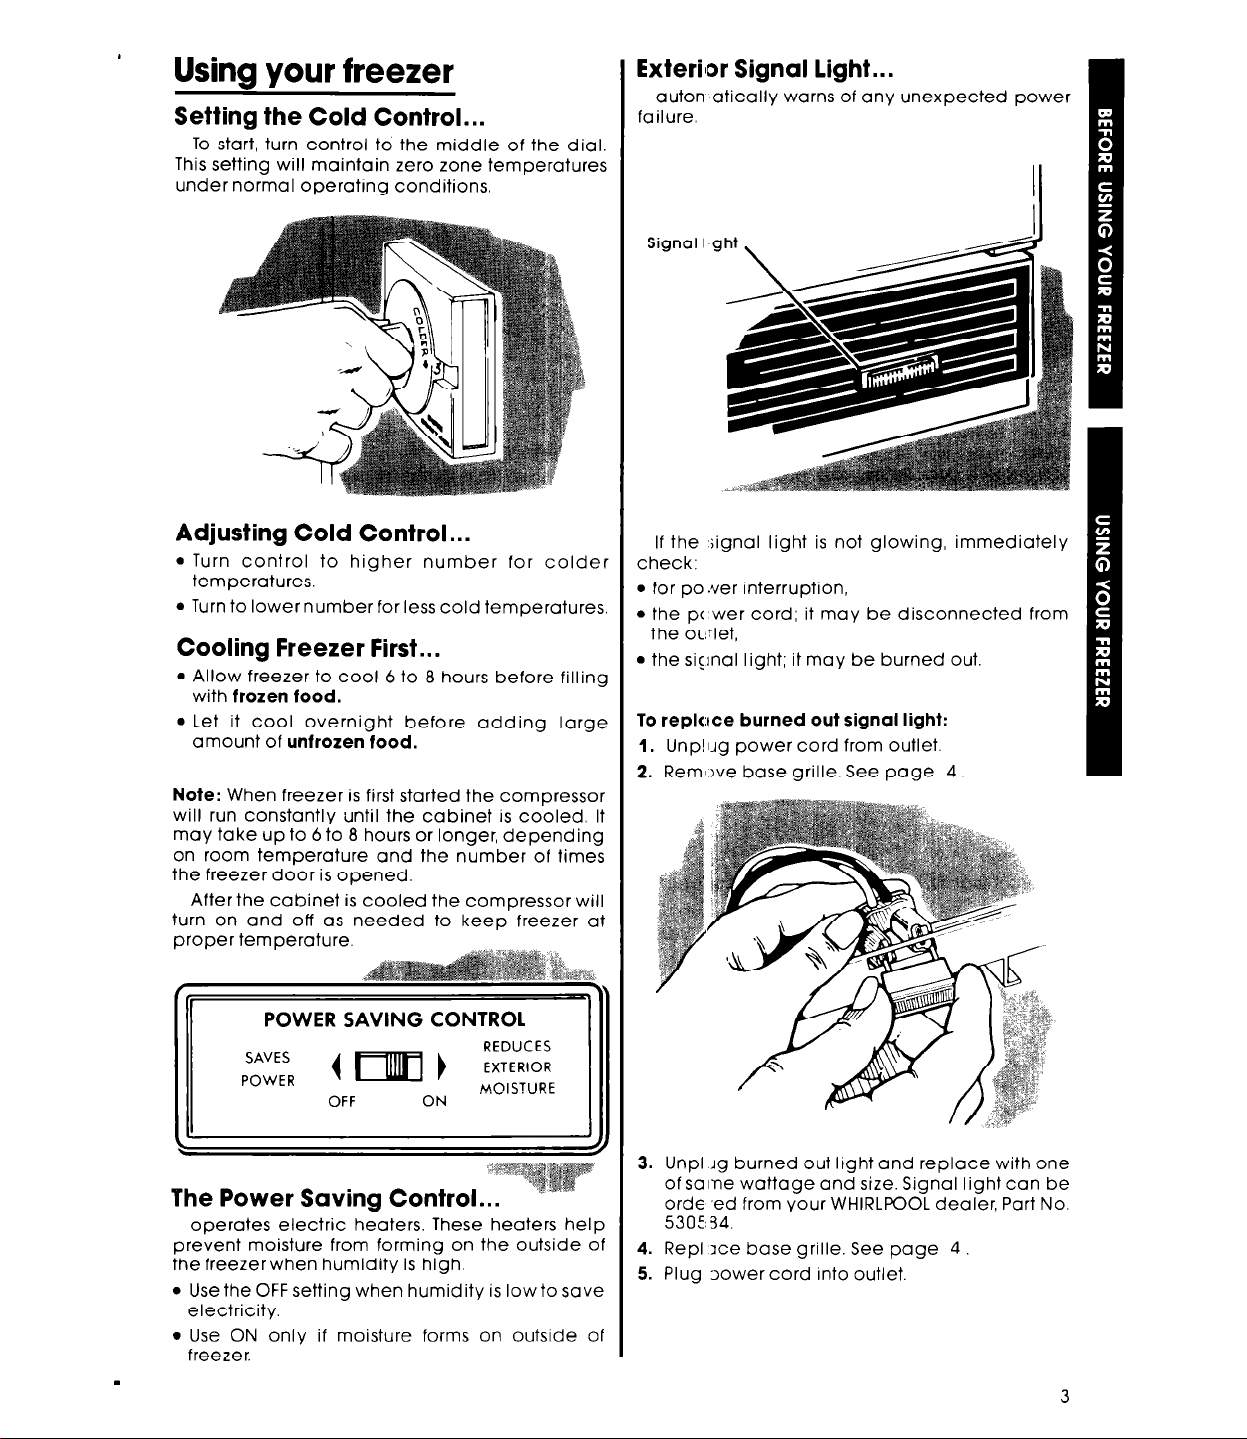
Exterilor Signal light...
auton ‘atically warns of any unexpected power
failure.
Adjusting Cold Control...
l
Turn control to higher number for colder
temperatures.
l
Turn to lower number for less cold temperatures.
Cooling Freezer First . . .
l
Allow freezer to cool 6 to 8 hours before filling
with frozen food.
l
Let it cool overnight before adding large
amount of unfrozen food.
Note: When freezer is first started the compressor
will run constantly until the cabinet is cooled. It
may take up to 6 to 8 hours or longer, depending
on room temperature and the number of times
the freezer door is opened.
Afterthe cabinet is cooled the compressor will
turn on and off as needed to keep freezer at
proper temperature.
II
POWER SAVING CONTROL
I II
If the ;ignal light is not glowing, immediately
check:
l
for po .ver interruption,
l
the p( wer cord; it may be disconnected from
the oc.?let,
l
the siclnal light; it may be burned out.
To repktce burned out signal light:
1. Unp!lJg power cord from outlet.
2. Remove base grille. See page 4.
The Power Saving Control...
operates electric heaters. These heaters help
prevent moisture from forming on the outside of
the freezerwhen humidity is high.
l
Use the OFF setting when humidity is low to save
electricity.
l
Use ON only if moisture forms on outside of
freezer.
3. Unpl Ag burned out light and replace with one
of solne wattage and size. Signal light can be
orde -ed from your WHIRLPOOL dealer, Part No.
5305: 34.
4. Rep1 Ice base grille. See page 4.
5. Plug oower cord Into outlet.
3
 Loading...