

Page 1
1gb58913.fm Page 9 Friday, March 5, 2004 12:29 PM
CONTENTS GB
BEFORE USING THE GLASS CERAMIC HOB
INSTALLATION
ELECTRICAL CONNECTION
ENERGY SAVING TIPS
PROTECTING THE ENVIRONMENT
PRECAUTIONS AND GENERAL
RECOMMENDATIONS
COOKTOP ACCESSORIES
CARE AND MAINTENANCE OF THE
GLASS-CERAMIC COOKTOP
PAGE
PAGE
PAGE
PAGE
PAGE
PAGE
PAGE
PAGE
10
10
11
12
12
12
13
13
TROUBLESHOOTING GUIDE
AFTER SALES SERVICE
PAGE
PAGE
13
14
9
Page 2
1gb58913.fm Page 10 Friday, March 5, 2004 12:29 PM
BEFORE USING THE GLASS CERAMIC HOB
• To make the most of your new appliances read the
users instructions carefully and keep them on
hand for consultation in the future.
INSTALLATION
Cooktop
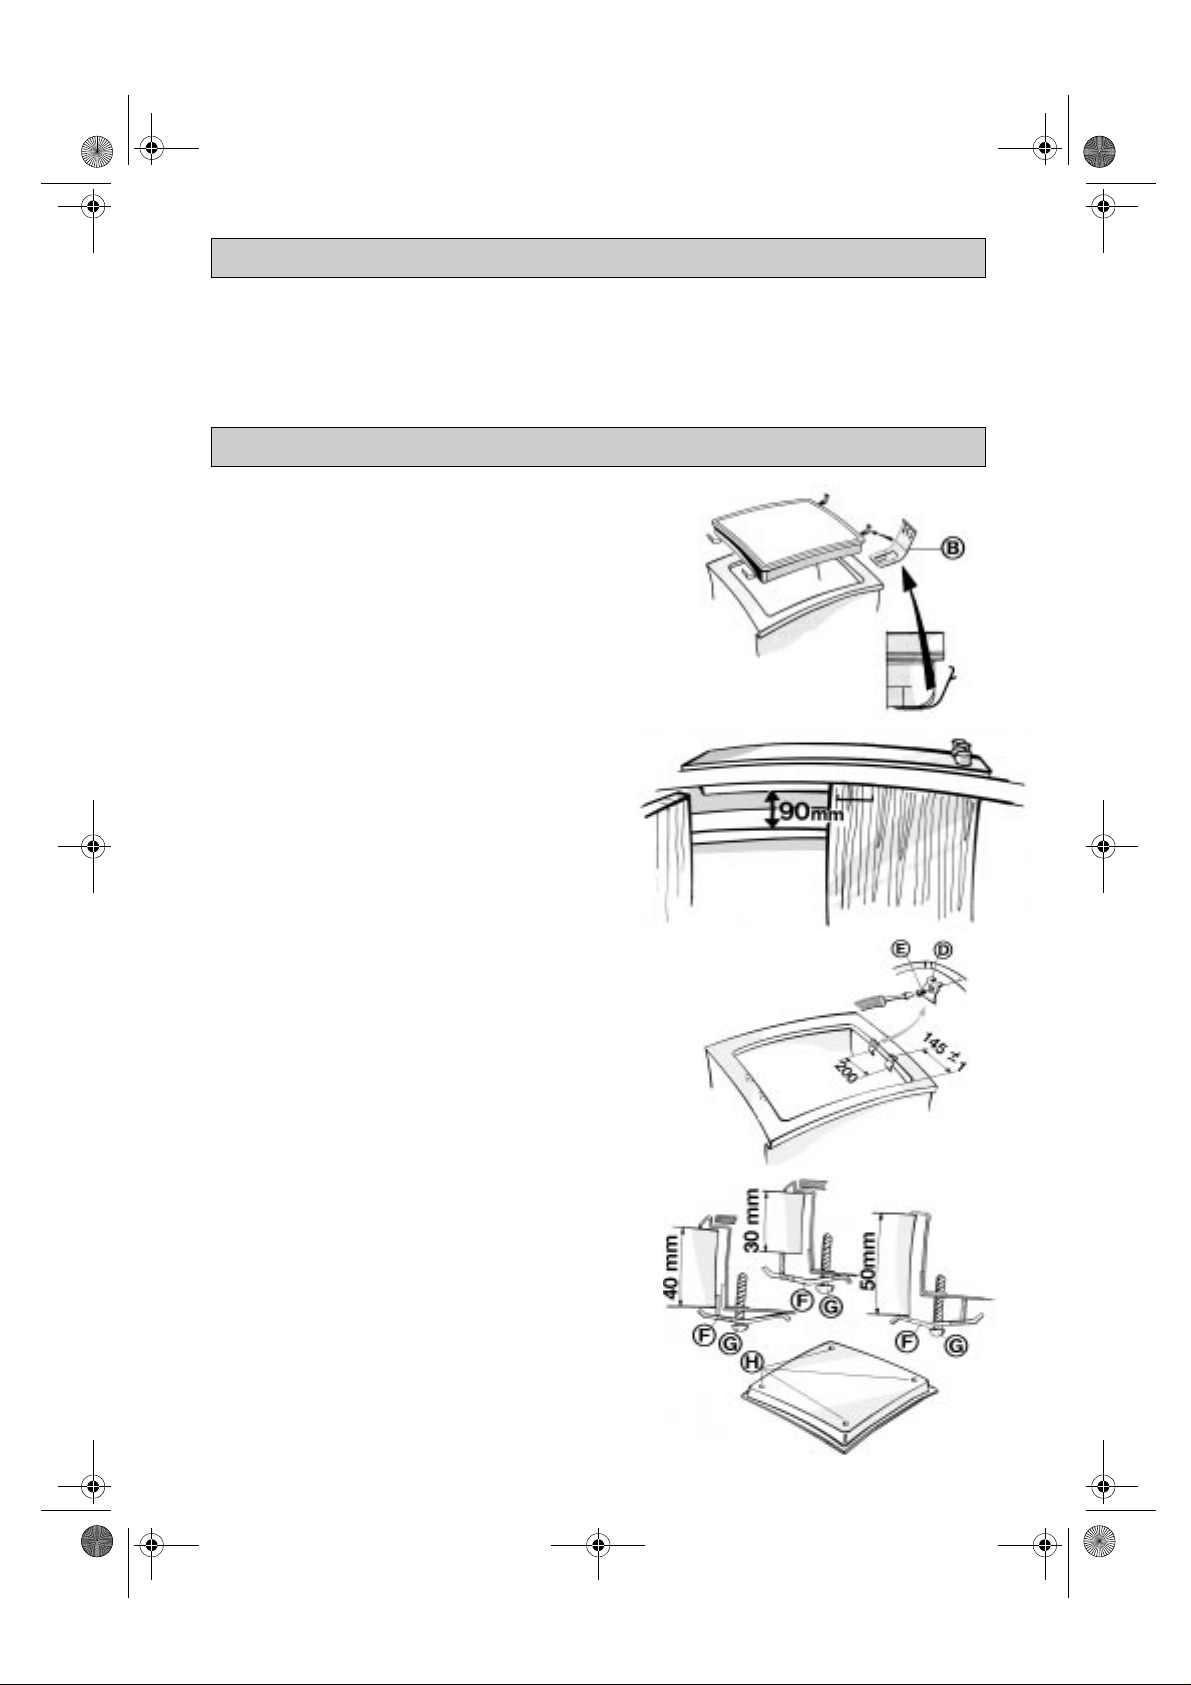
• The cooktop must be set into a worktop
between 20 mm and 50 mm thick.
• Insert a separator panel at a minimum distance
of 90mm from the bottom of the hob so that it
is inaccessible to the user.
• If the cooktop is to be installed next to a
column unit, leave a distance of at least 100
mm from the edge of the cooktop to the side of
the column unit.
• Cut an opening in the worktop of the dimensions
shown in the Product Description Sheet supplied
separately.
• If not already present, fit the supplied seal to the
cooktop flange after cleaning the contact area as
shown in the figure.
N.B.: Remove the protective film before installing the
cooktop.
• If the worktop is made of wood, use the supplied
spring clips and screws.
1. Position the 4 clips (D) as shown and at the
specified dimensions.
2. Secure the clips using screws (E).
3. Fit the cooktop into the worktop.
• If the worktop is made of marble, plastic,
ceramics, natural stone, etc., the cooktop must
be secured with brackets (F) code 4819 404 78697
(to be requested from After-Sales Service).
1. Fit the cooktop into the worktop.
2. Position the 4 brackets (F) as shown in the figure,
in accordance with the thickness of the worktop.
3. Fix the 4 screws (G) in holes (H).
10
Page 3
1gb58913.fm Page 11 Friday, March 5, 2004 12:29 PM
ELECTRICAL CONNECTION
• Make sure the appliance is installed and
connected to the electricity supply by a
qualified technician in accordance with
the manufacturer’s instructions and in
compliance with local regulations.
• The installer is responsible for the correct
electrical connection of the appliance and
the observance of the relative safety
prescriptions.
• The appliance must be connected to the
electricity supply by means of an all-pole
disconnect switch with minimum contact
gap of 3 mm.
• The appliance must be earthed by law.
• Do not use multiple plug adapters or
extension leads.
• After the appliance has been installed, the
electrical components must be inaccessible.
• No liability for damage or injury to
persons or property will be accepted from
non-observance of these requirements.
Connection to the mains
Attention: The supply cord must have such a
length to allow the removal of the hob from the
top and it must be positioned so as to avoid
damages or overheating caused by any contact
with the base.
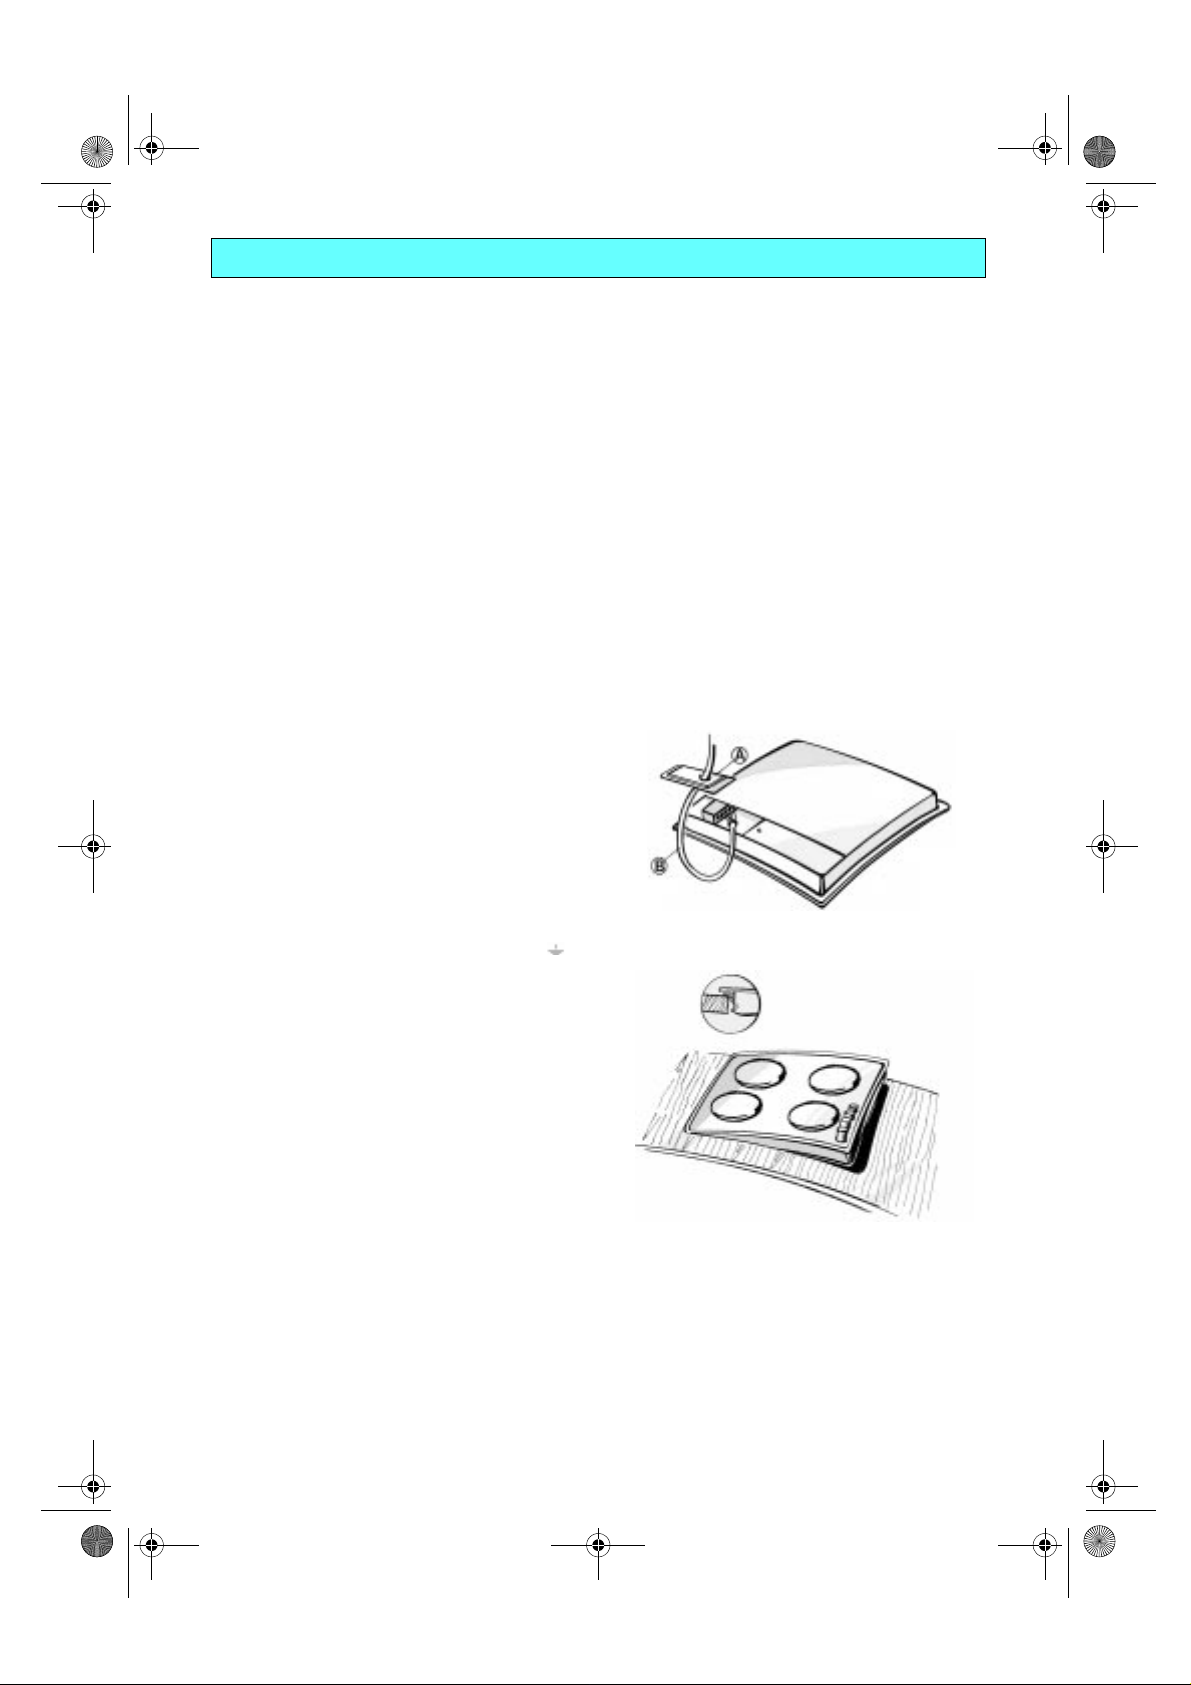
For the electrical connection, use a supply cable
type HO5RR-F according to the table on the
Product Description Sheet.
Note: The earth wire (green and yellow) must be
connected to the screw marked by symbol .
• Cut the external sheath of the supply cord (B)
for 70 mm approx.
• Bare the wires for 10 mm approx. Insert cord
(B) through the opening in the cover (A).
• Insert the supply cord in the strain release
and connect the wires to the junction block
following the indications given in the sc heme
printed on the cover.
• Tighten the supply cord (B) by means of the
strain release.
• Mount and fix the cover (A).
• After the electrical connection, fit the hob
from the top and hook it to the support
springs, according to the illustration.
11
Page 4
1gb58913.fm Page 12 Friday, March 5, 2004 12:29 PM
ENERGY SAVING TIPS
• Use pots and pans whose bottom diameter is
equal to that of the cooking zone or slightly
larger.
• Only use flat-bottomed pots and pans.
• If possible, keep the pot covered when
cooking.
• Cook vegetables, potatoes, et. with little
water in order to cut down cooking time.
• A pressure cooker allows you to save even
more energy and time.
PROTECTING THE ENVIRONMENT
1. Packing
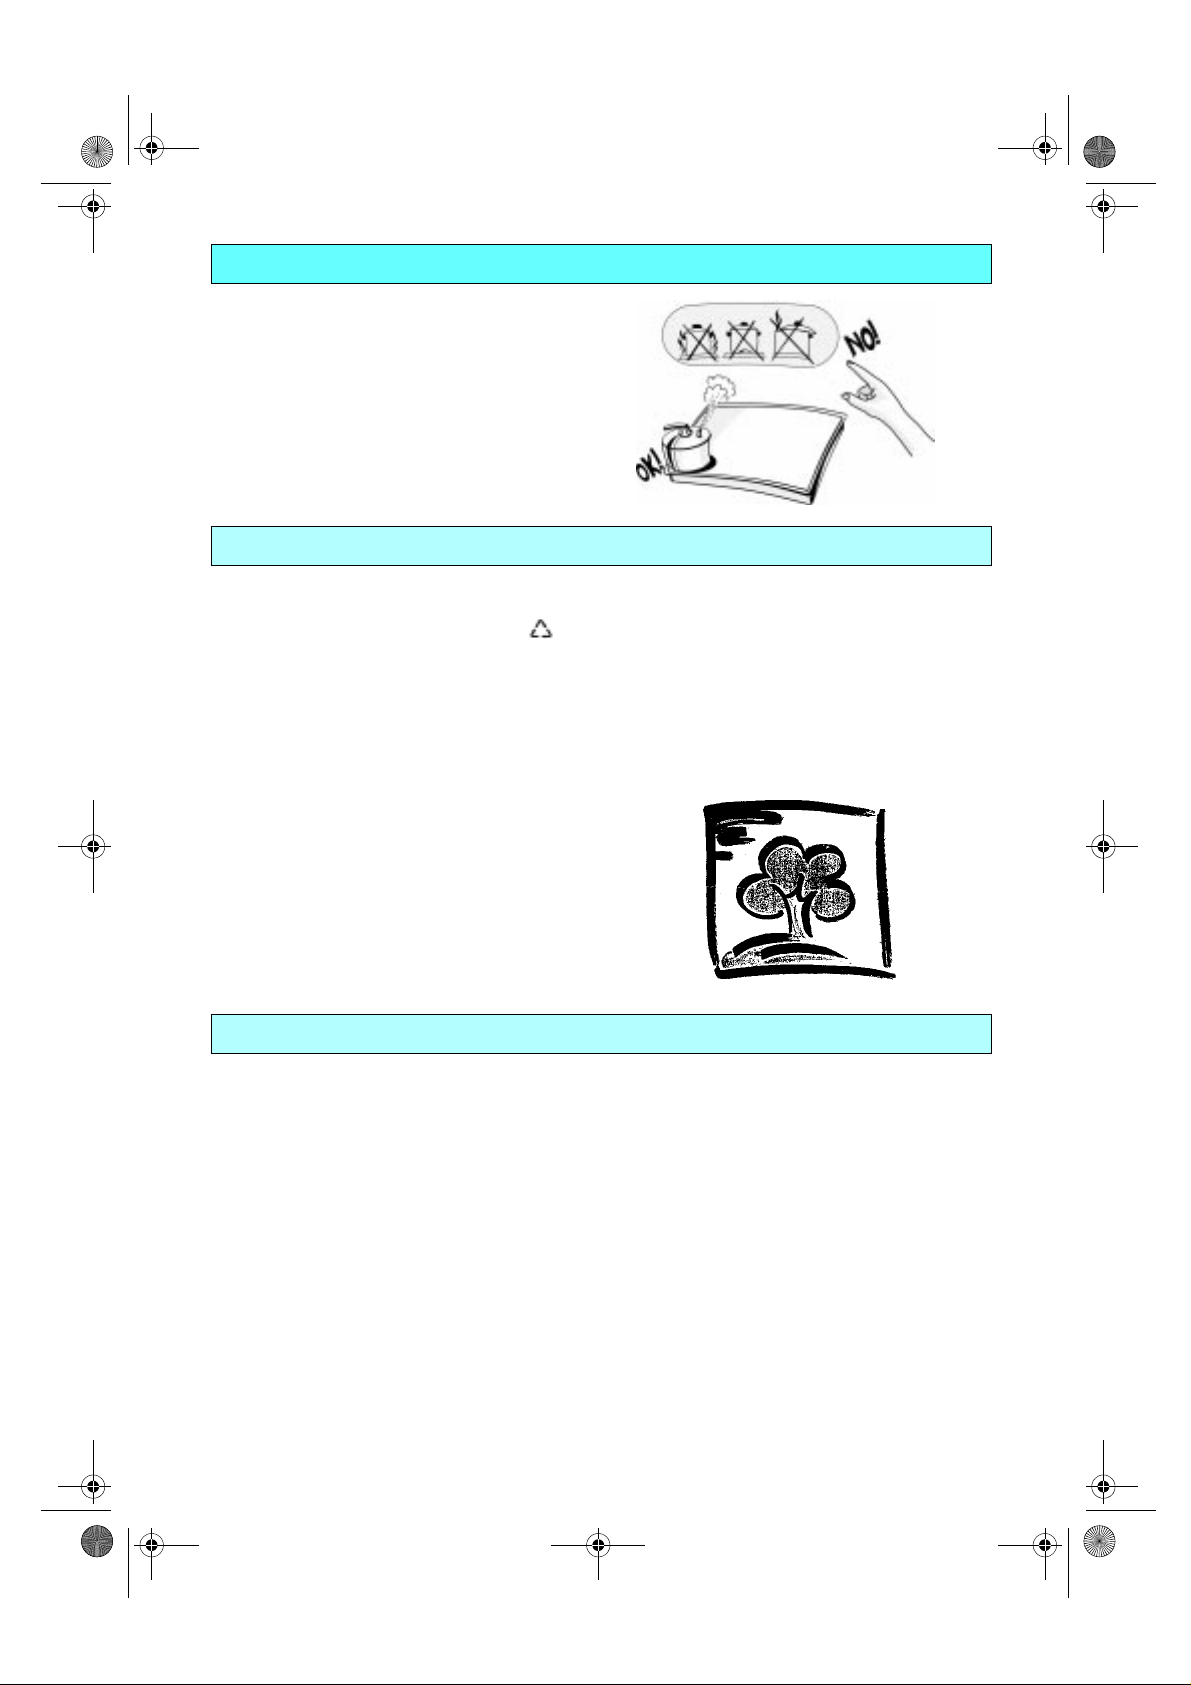
• The packaging material can be100% recycled,
as confirmed by the recycling symbol ( ).
2. Products
• The appliances are built from recyclable
materials. If you decide to scrap the
appliances act responsibly and observe local
waste disposal by laws. Cut off the power
cords so that the appliances cannot be
connected to the mains.
.
• The appliances are designed, built and sold
in compliance with:
• The safety requirements of “Low Voltage”
Directive 73/23/EEC.
• The protection requirements of EMC
Directive 89/336/EEC.
• The requirement of Directive 93/68/EEC.
• This appliance complies with Class “Y” fire
protection category.
Declaration of conformity CE
• These appliances are designed to come into
contact with foodstuffs and they are
constructed in compliance with Directive
89/109/EEC.
• The appliances are designed sole ly for use as
cooking appliances. Any other use of the
appliances (e.g. for room heating) is considered
as improper use and potentially d angerous.
.
PRECAUTIONS AND GENERAL RECOMMENDATIONS
• Before any maintenance on the appliance
disconnect it from the electrical power supply.
• Keep children away from the appliances
when they are in use.
• The appliances must be repaired or adjusted
exclusively by a qualified technician.
• Make sure that the electrical wires of other
electrical appliances near the cooktop do not
come into contact with hot parts.
• Do not switch on the hotplates/cooking
zones when there is no pan in position.
• The cooktop features different size hotplates/
cooking zones. Use pans whose base
diameter is the same as or slightly larger than
the diameter of the hotplate/cooking zone. To
avoid permanently damaging the glassceramic top, do not use:
- Pots with bottoms that are not perfectly flat;
- Metal pots with enamelled bottom.
12
• Do not use the cooktop as a work surface or
a support surface.
• Do not leave the appliance unattended when
frying food -risk of fire.
• If the glass ceramic surface should break or
crack due to violent impact (falling objects,
etc...) do not use it and call After-Sales
Service immediately.
• Do not place food wrapped in aluminium foil,
plastic containers or cloths on the hot
cooking zones.
• Do not drag pans across the glass-ceramic
surface - risk of scratches.
• Avoid spilling sugar and similar substances
on the cooktop. If necessary, clean the
cooktop immediately following the care and
maintenance instructions in this handbook.
Page 5
1gb58913.fm Page 13 Friday, March 5, 2004 12:29 PM
COOKTOP ACCESSORIES
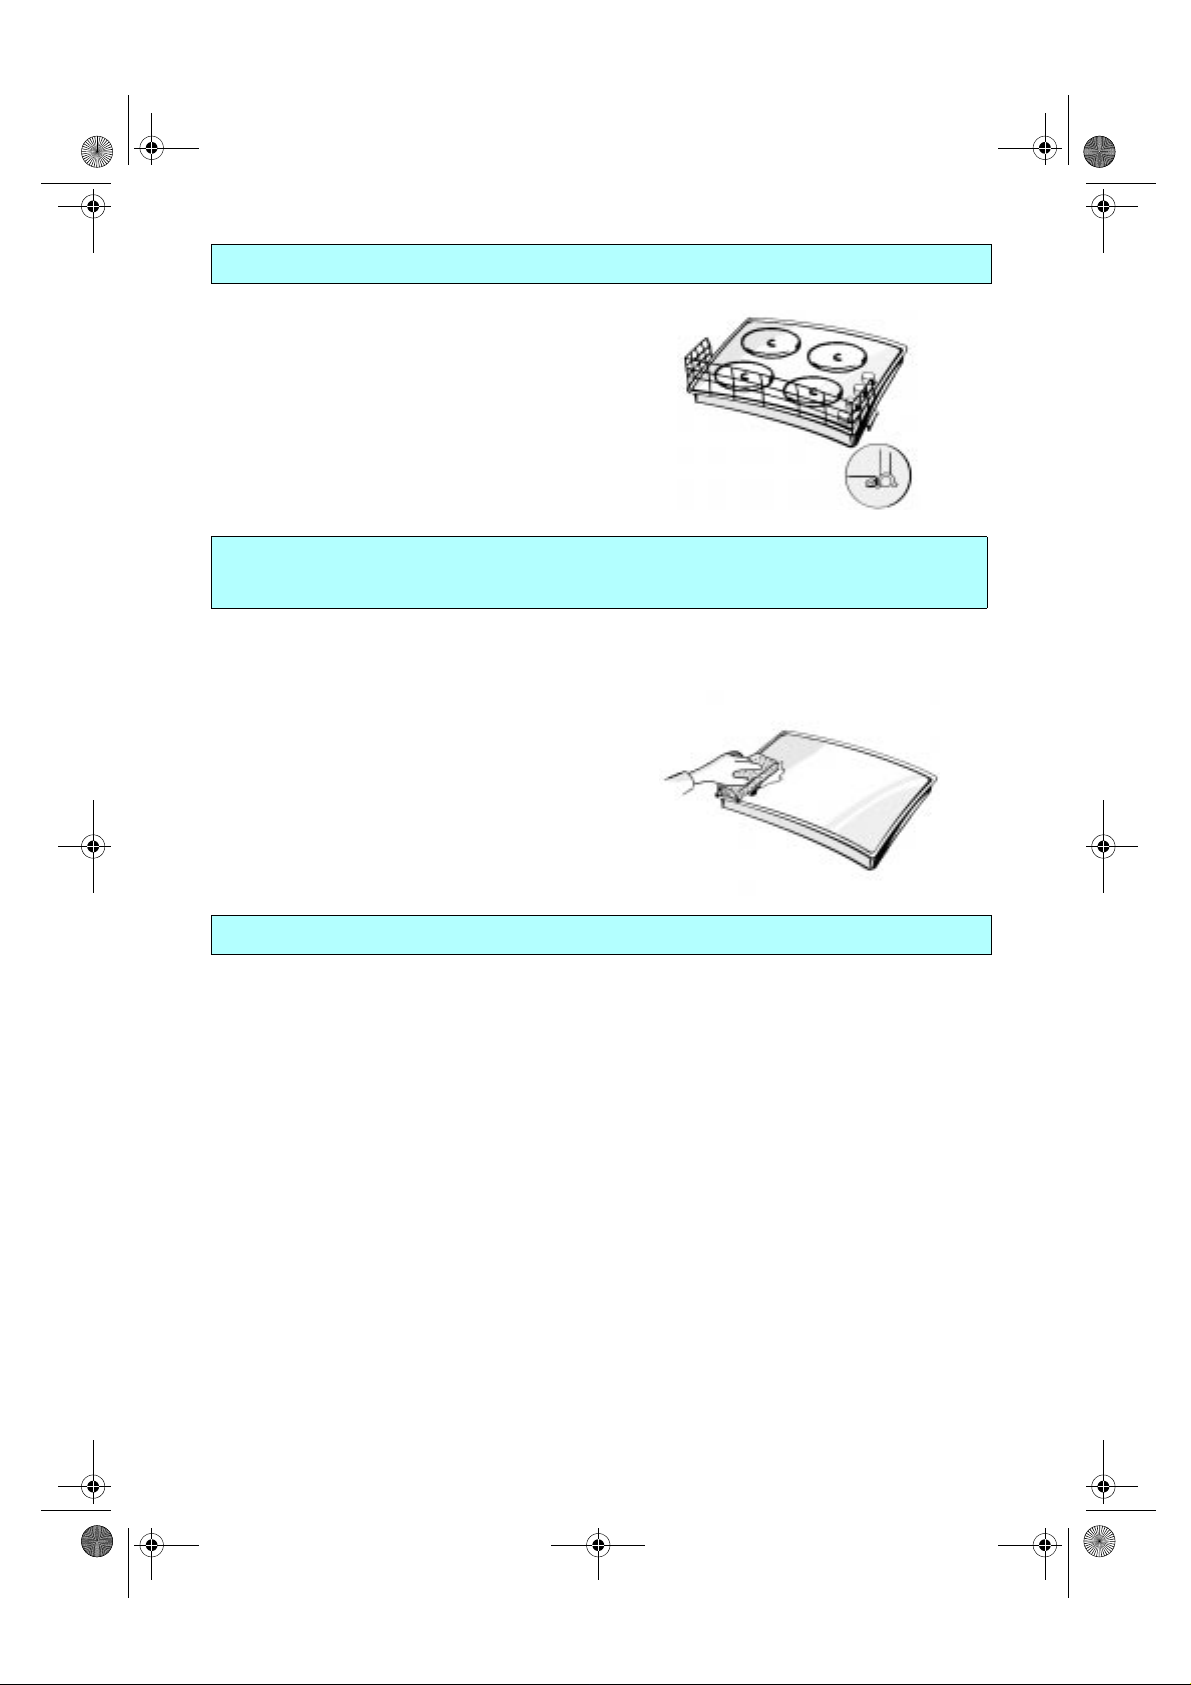
Child guard accessory AMH 122
This accessory can be obtained from the AfterSales Service under Part N° 4819 310 18436.
CARE AND MAINTENANCE OF THE GLASS-CERAMIC
Clean the cooktop, when it is cool, after each
use. This will prevent the build-up of dirt and
make cleaning easier.
• Use a clean cloth, absorbent kitchen wipes
and washing up liquid or a specific glassceramic hob cleaner.
• Remove baked-on dirt with the supplied
scraper tool and specific cleaning products.
• Food spills should be cleaned off before they
bake onto the glass-ceramic surface.
• Do not use abrasive products, bleach, ovencleaner spray or pan scourers.
• The cooktop should be treated periodically
with a proprietary brand of protective wax for
.
.
COOKTOP
glass-ceramic hobs.
TROUBLESHOOTING GUIDE
Cooktop not working
• Ensure that the cooktop is receiving electrical
power.
• Control knob set to “0”?
Set the main disconnect switch upline of the
appliance to “OFF” for a few minutes and
then back to “ON” and see if the problem
persists.
13
Page 6
1gb58913.fm Page 14 Friday, March 5, 2004 12:29 PM
AFTER SALES SERVICE
Before contacting After Sales Service
1. Try to solve the problem
(see “Troubleshooting Guide”).
2. Turn off the appliance and restart it to see if the
fault is repeated.
If after the above checks the fault still occurs, get
in touch with the nearest After Sales Service.
Please give:
• a short description of the fault.
• the exact type and model
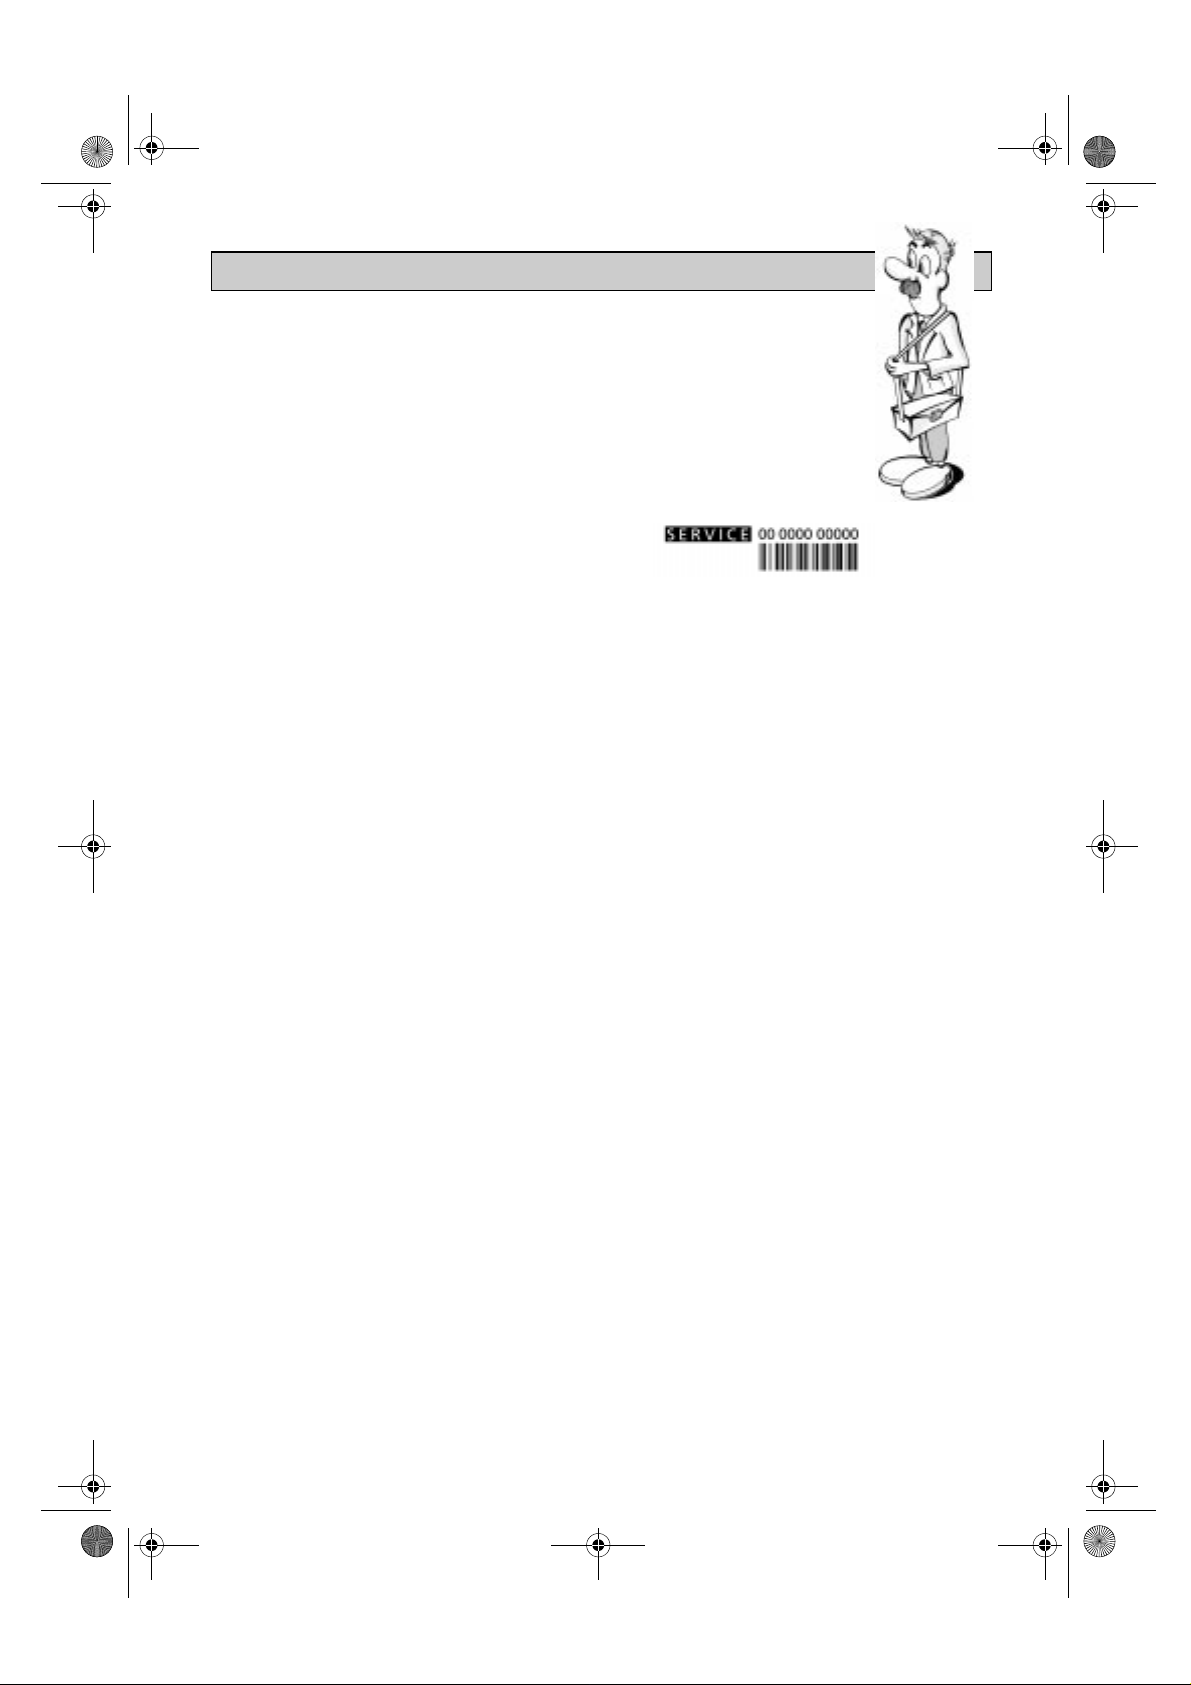
• the service number (number after the word Service
on the rating plate) is located on the underside of
the cooktop or on the Product Description Sheet.
The service number is also indicated on the
guarantee booklet.
• Your complete address and phone number.
14
 Loading...