How it Works
Log In / Sign Up
Buy Points
How it Works
FAQ
Contact Us
Questions and Suggestions
Users
Whirlpool
Loading...
C
CF27 EG
6
CF310A1
CF33 EG
3
CF340T
2
CF350
2
CF390A1
3
CF390B
CF420T
2
CF430
CF450A1
CF600 T
2
CF610
2
CF90
3
CF94
CFCR70111
2
CFF 933
8
CFF 933/01
7
CFH-112
10
CFH-1120
10
CFH-134
5
CFH-162
4
CFH 265T
CFH 325T
CFH470ST
CFH 470T
2
CFH-950
4
CFH-96
10
CFR 105 B
3
CFR 110 A
3
CFR 150 A
3
CFR320A-1
4
CFR400B-1
CFR75
CFS 050 S
10
CFS 051 S
3
CFS 054 S
21
CFS 100W
7
CFS 101 W
8
CFS 110W
4
CFS 111 W
4
CFS 140W
3
CFS 141 W
8
CFS 170
12
CFS 171
4
CFS 174
12
CFS 190SS
3
CFS 190W
3
CFS 191SS
CFS 191W
CFS 194SS
CFS 194W
CFS 300/1 S
7
CFS 300 S
3
CFS 310 S
CFS 340 S
CFS 400 AL
4
CFS 400 AL / 1
10
CFS 410 AL
2
CFS 440 AL
6
CFS 500 AL
11
CFS 500 AL / 1
9
CFS 600S
7
CFS 600 S / 1
13
CFS 609 W
11
CFS 610S
3
CFS 610 S / 1
2
CFS 616 S
10
CFS 616 S AL
11
CFS 640 S / 1
11
CFS 646 S AL
11
CFS 656 S AL
7
CFS 660 S
9
CFS 661 S
3
CFS 664 S
4
CFS 671 L S
5
CFS 671 R S
4
CFS 700 S
7
CFS 710 S GB
7
CFS 800 W
17
CFS 801/1 S
17
CFS 801 S
CFS 810 W
3
CFS 811/1 S
4
CFS 841/1 S
4
CFS 841 S
23
CFS NP1
6
CFS NP2
5
CFS NP4 S
11
CFS NP4 SR
11
CFS NP6 S
3
CFU1236ARW
CFU 125 E
5
CFU 125 UK
5
CFU 12 ECO
5
CFU 12 UK
4
CG2951XSW0
5
CG2951XSW1
5
CG2951XSW2
5
CG2951XSW3
5
CG2951XYG0
5
Loading...
Loading...
Nothing found
CFS 194W
INSTRUCTION FOR USE
68 pgs
3.67 Mb
0
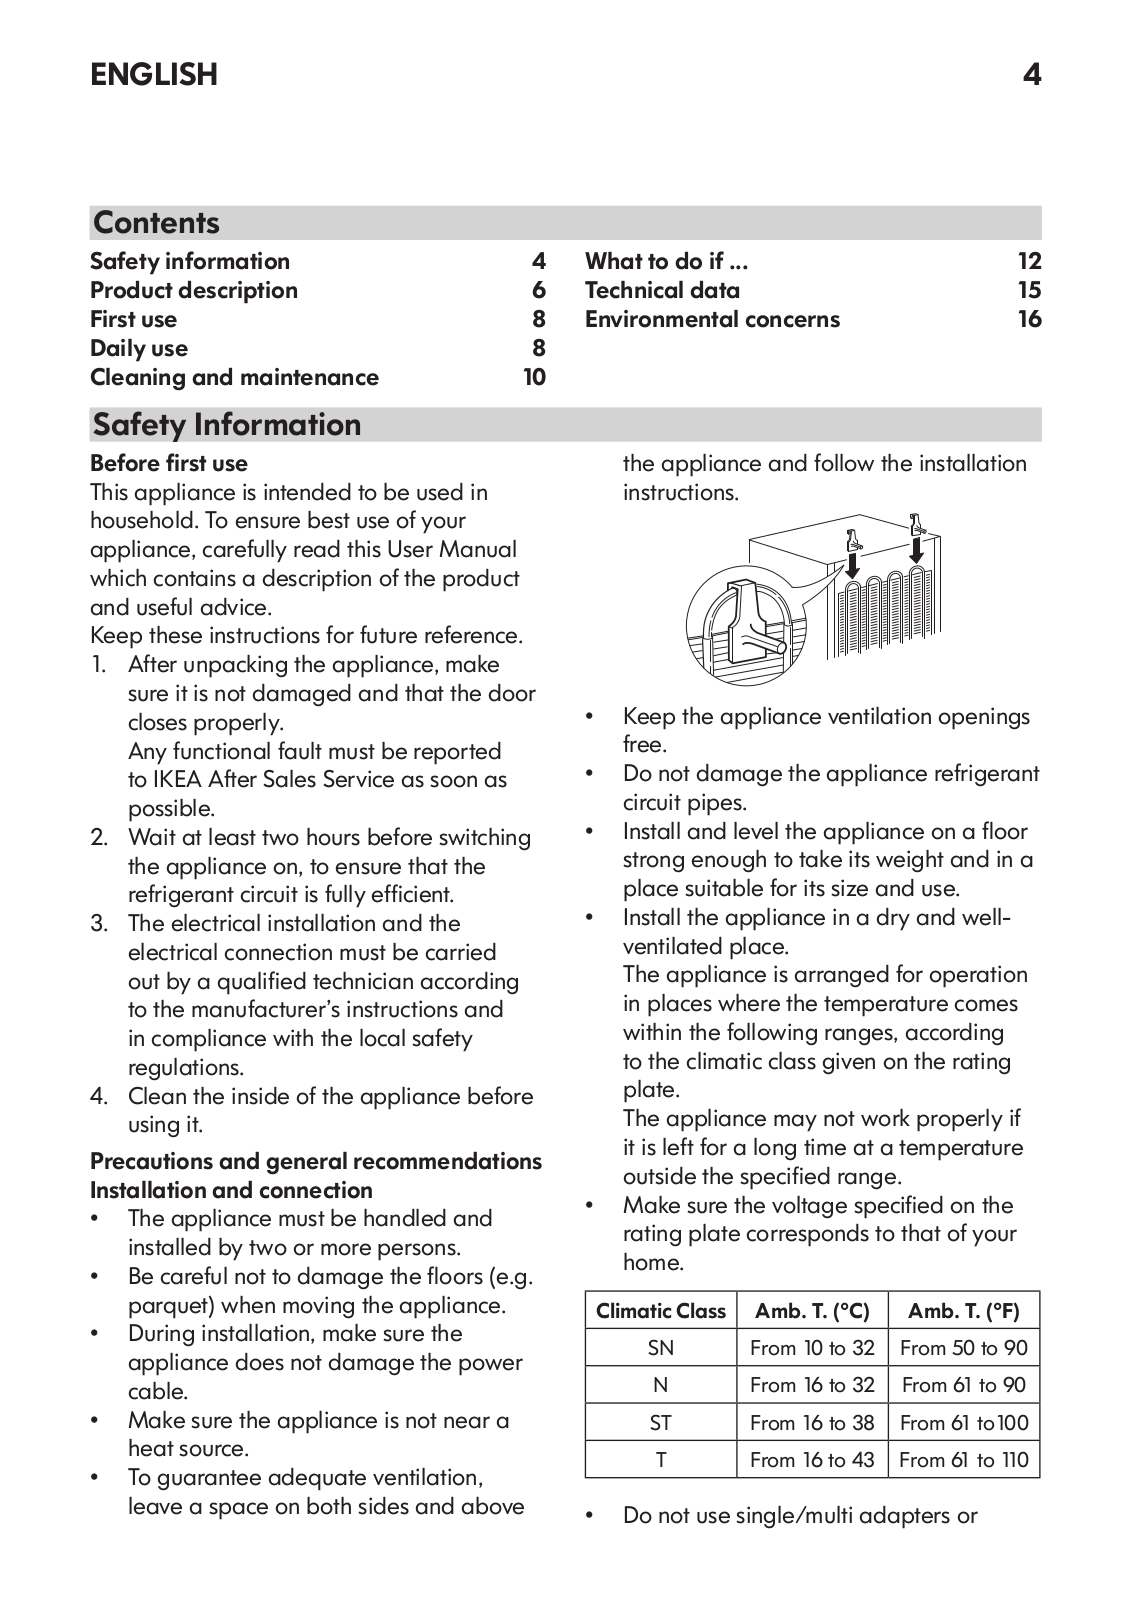
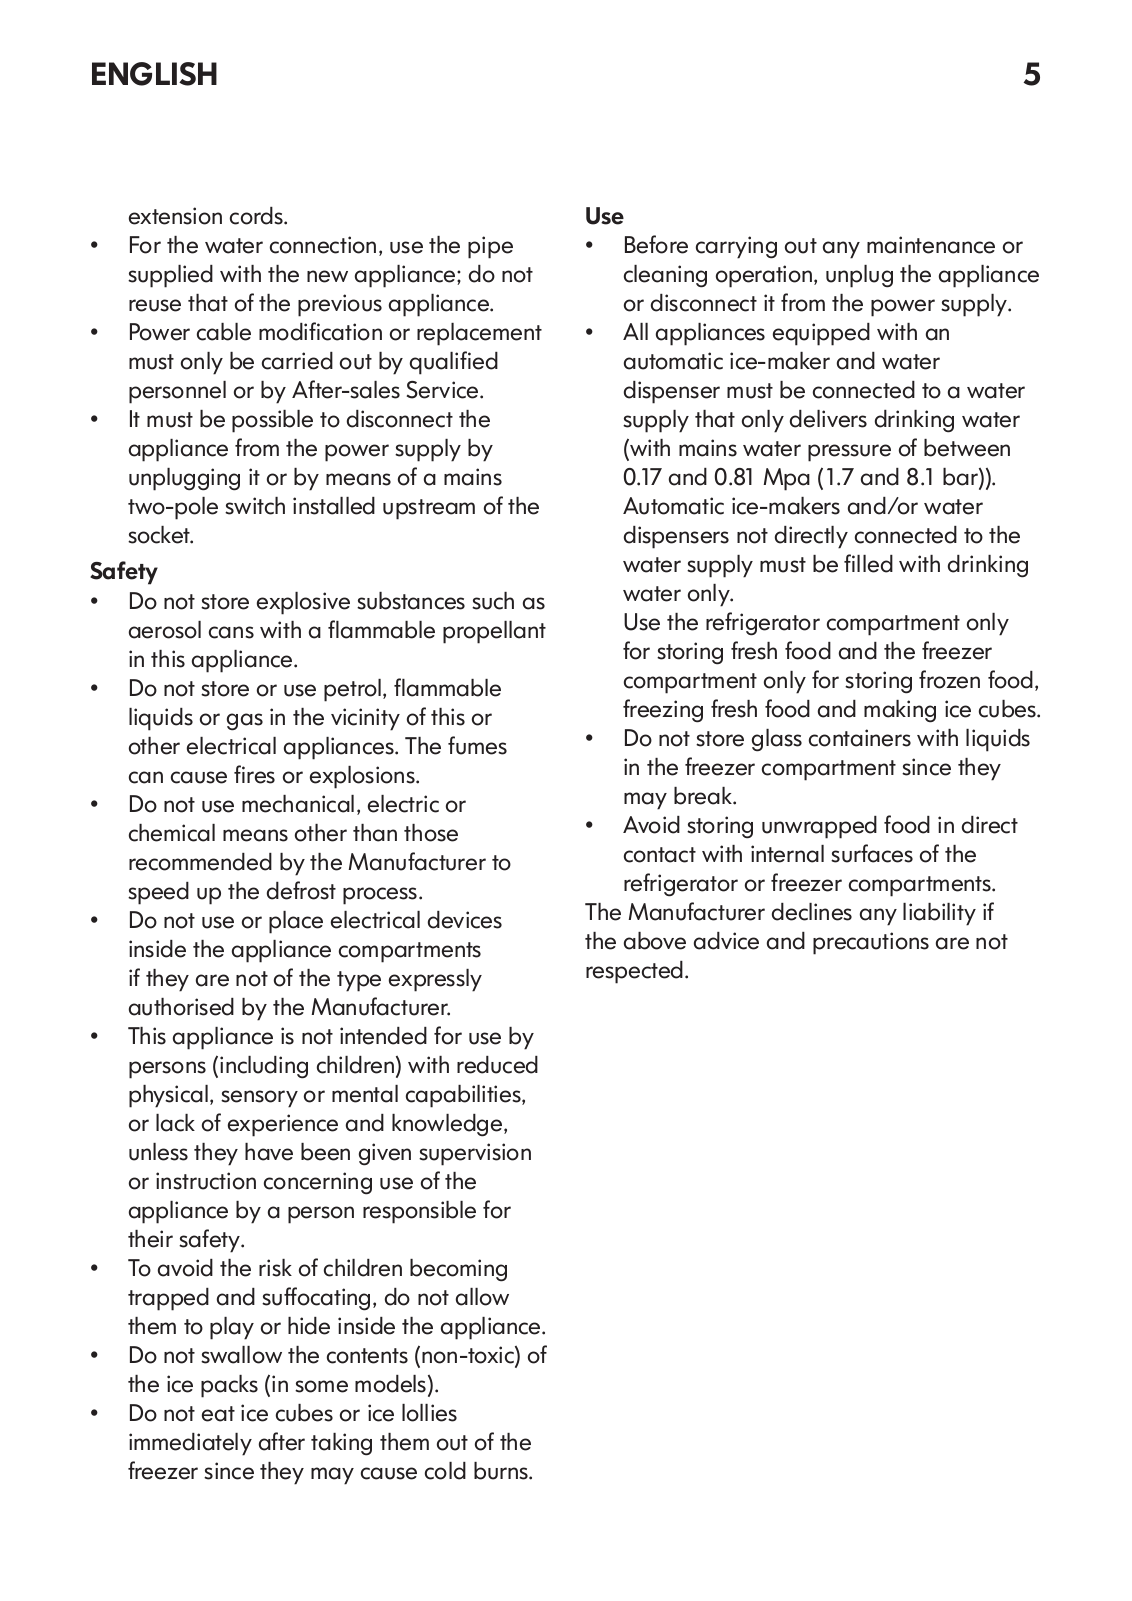
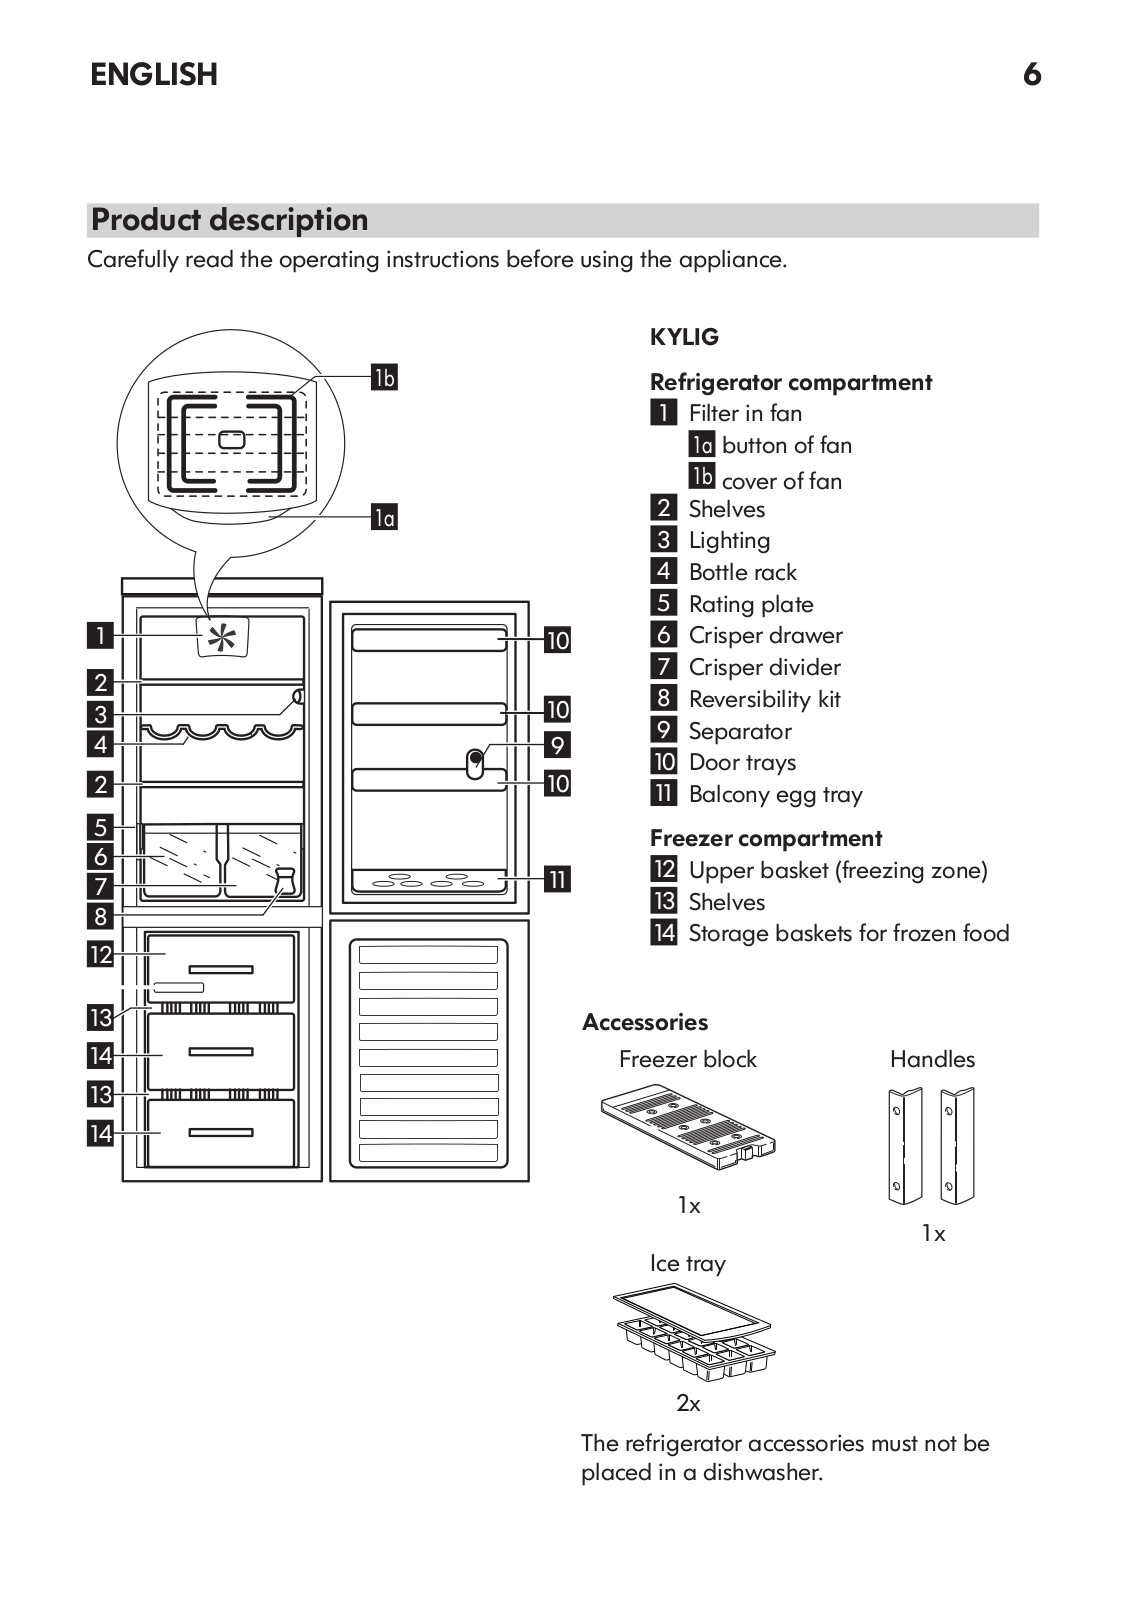
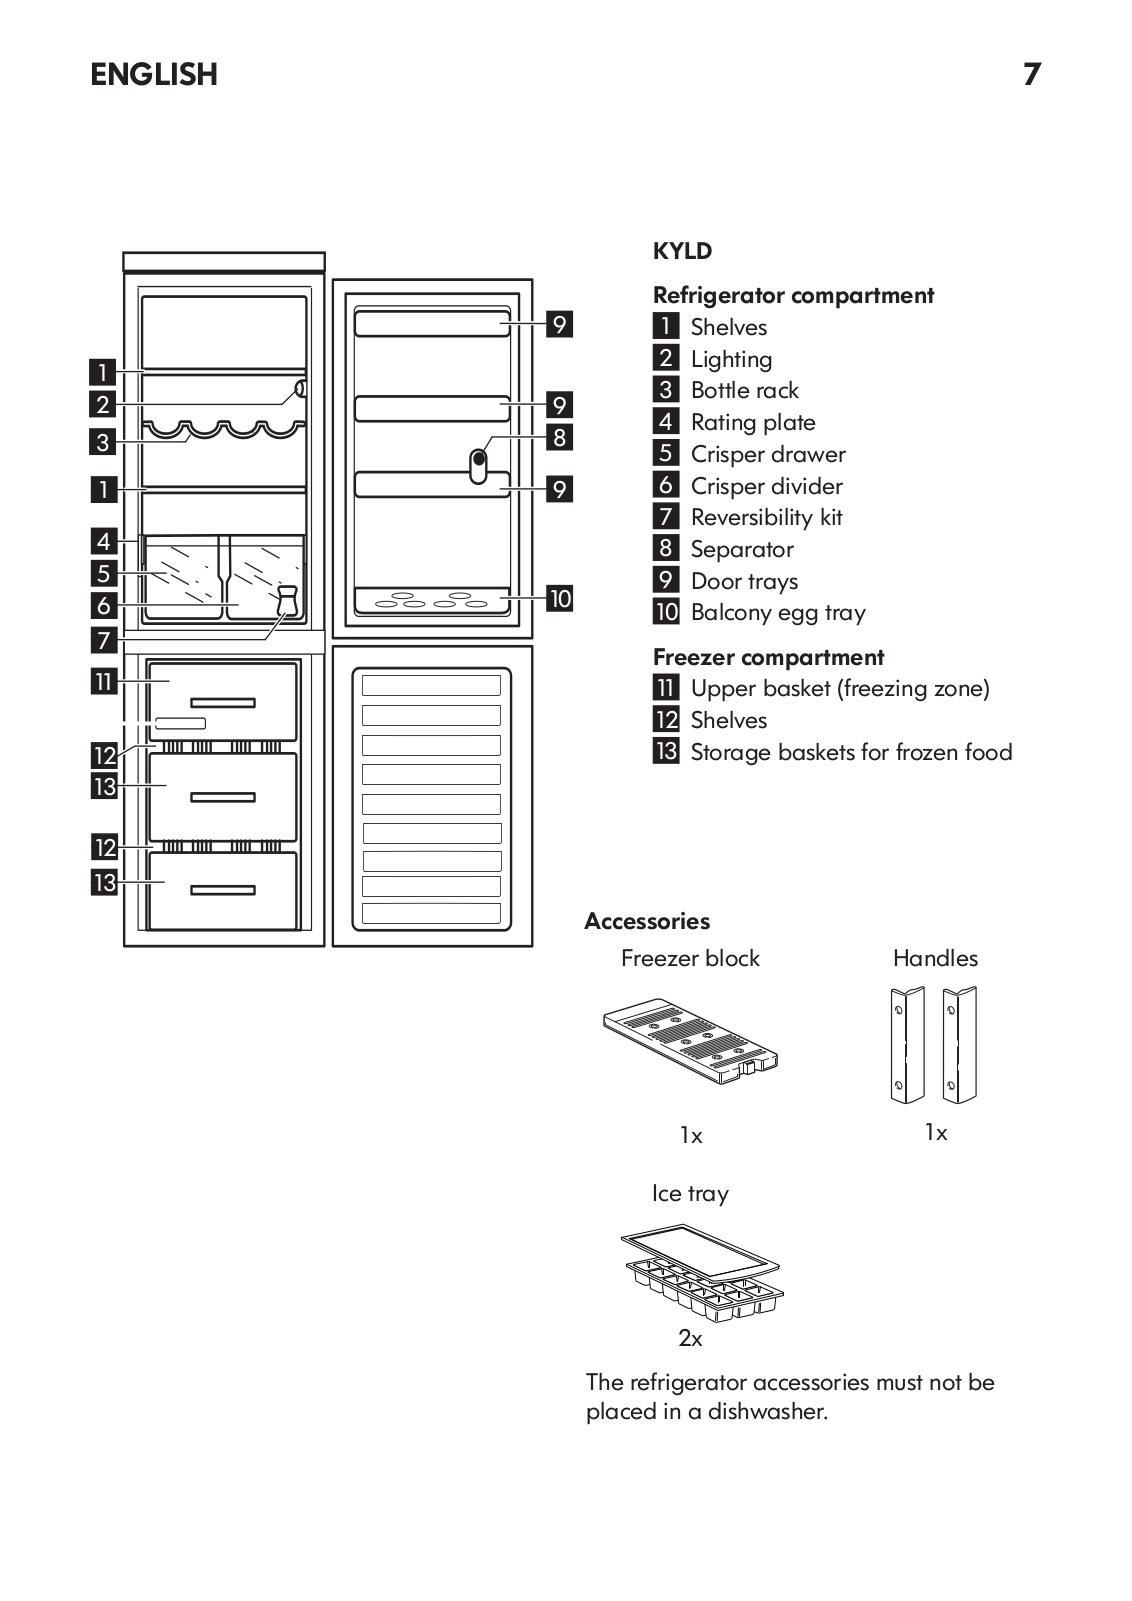
Table of contents
Loading...
Whirlpool CFS 194W, CFS 194SS INSTRUCTION FOR USE
...
Whirlpool INSTRUCTION FOR USE
Download
Specifications and Main Features
Frequently Asked Questions
User Manual
Download
Loading...
+
47
hidden pages
Unhide
You need points to download manuals.
1 point = 1 manual.
You can buy points or you can get point for every manual you upload.
Buy points
Upload your manuals