

Page 1
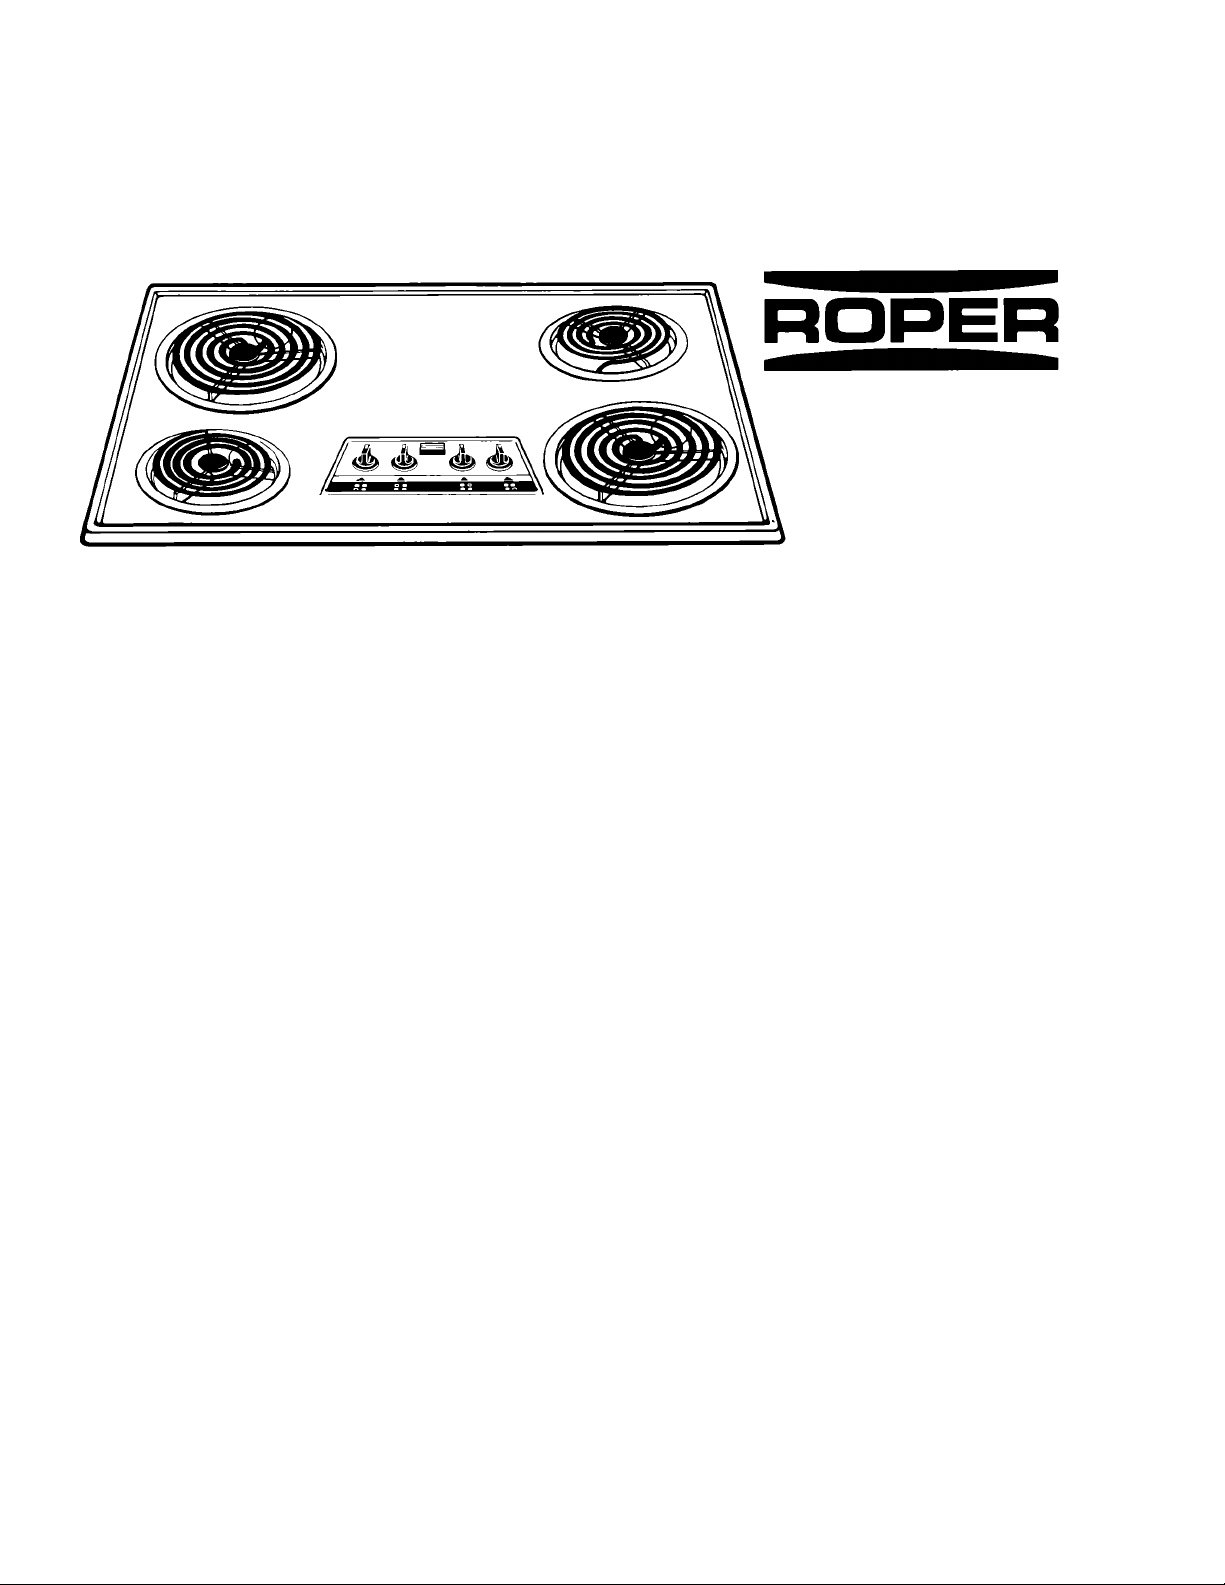
Electric Cooktop
Use and
Саге Guide
Appliances
CEX200V
CEX210V
CEX215V
CEX310V
CEX630V
CEX650V
Thank you for choosing a
Roper appliance.
This Use and Care Guide will help you
operate and maintain your new, qualitybuilt Roper cooktop. Keep this Use and
Care Guide in a safe place for future
reference.
Complete and mail the
Product Registration Card.
This card enters your warranty into our
warranty system that insures efficient
claim processing, can be used as a proof
of purchase for insurance claims and
helps Roper to contact you immediately
in the unlikely event of a product-safety
recall.
Please remember...
It is your responsibility to be sure that
your cooktop:
■ Has been properly installed where
it is protected from the elements,
and on a counter strong enough to
support its weight. (See the
Installation Instructions.)
■ Is not used by anyone unable to
operate it properly.
■ Is properly maintained.
■ Is used only for jobs expected of a
home cooktop.
NOTE: Because this Use and Care Guide
covers several models, not all
illustrations shown or features discussed
will apply to your specific model.
Contents
Page
__
Important Safety Instructions
Using Your Cooktop
Using the surface units
Using the griU and griddle
Caring For Your Cooktop
The control knobs
The control panel
Surface units and reflector bowls _
Solid element surface units
The griU and griddle _____________
Lift-up cooktop
Cleaning chart.
Before You Call For Service
If You Need Assistance, Service, or
Replacement Parts_______________
_________
________
_____
____________
_________________
____
________
_______
__
__
__
__
__
__
__
__
_
_
_
2
3
3
4
5
5
5
5
5
6
6
6
7
Page 2

Important Safety Instructions
^WARNING
1. Read all instructions before using
the cooktop.
2. Install or locate the cooktop only in
accordance with the provided
Installation Instructions. It is
recommended that the cooktop be
installed by a qualified installer.
The cooktop must be properly
connected and grounded to
electrical supply.
3. DO NOT use the cooktop for
warming or heating the room.
Persons could be burned or injured
or a fire could start.
4. DO NOT leave children alone in
area where cooktop is in use. They
should never be allowed to sit or
stand on any part of the cooktop.
They could be burned or injured.
5. DO NOT wear loose or hanging
garments when using the cooktop.
They could ignite if they touch a
hot surface unit and you could be
burned.
6. DO NOT repair or replace any part
of the cooktop unless specifically
recommended in this manual. All
other servicing should be referred
to a qualified technician.
7. DO NOT store flammable materials
on or near the cooktop. They could
explode or burn.
To reduce the risk of fire, electrical shock, injury to persons, or damage when using
the cooktop, follow basic precautions, including the following:
8. DO NOT use water on grease fires.
Never pick up a flaming pan.
Smother flaming pan by covering
with a well-fitted lid, cookie sheet
or flat tray. Flaming grease outside
of pan can be extinguished with
baking soda or, if available, a
multipurpose dry chemical or foamtype extinguisher.
9. Use only dry potholders. Moist or
damp potholders on hot surfaces
may result in burns from steam. DO
NOT use a towel or bulky cloth for a
potholder. They could catch on fire.
10. Select a pan with a flat bottom that
is about the same size as the
surface unit. If pan is smaller than
the surface unit, some of the
heating element will be exposed
and may result in the igniting of
clothing or potholders. Correct pan
size also improves cooking
efficiency.
11. DO NOT leave surface units on high
heat settings. Boil-overs and greasy
spill-overs could cause steam and
smoke, and could ignite and burn
you.
12. Make sure the reflector bowls are
in place during cooking. Cooking
without reflector bowls may
subject the wiring and components
underneath them to damage.
13. DO NOT line reflector bowls with
aluminum foil or other liners.
Improper installation of these liners
may result in a risk of electric shock
or fire.
14. Check to be sure glass cooking
utensils are safe for use on the
cooktop. Only certain types of
glass, glass ceramic, ceramic,
earthenware or other glazed
utensils are suitable for cooktops
without breaking due to the
sudden change in temperature.
15. Turn pan handles inward, but not
over other surface units. This will
help reduce the chance of burns,
igniting of flammable materials,
and spills due to bumping of the
pan.
16. DO NOT soak removable heating
elements in water. The element
will be damaged and shock or fire
could result.
17. DO NOT heat unopened
containers. They could explode.
The hot contents could cause
burns and container particles
could cause injury.
18. DO NOT store things children
might want above the cooktop.
Children could be burned or
injured whUe climbing on it.
19. DO NOT touch surface units or
areas near surface units. Areas
near surface units become hot
enough to cause burns. During
and after use, DO NOT touch, or
let clothing or other flammable
materials contact surface units or
areas near surface units until
they have had sufficient time to
cool.
■ FOR YOUR SAFETY ■
DO NOT STORE OR USE GASOLINE OR OTHER FLAMMABLE VAPORS AND LIQUIDS IN THE VICINITY OF
THIS OR ANY OTHER APPLIANCE. THE FUMES CAN CREATE A FIRE HAZARD OR EXPLOSION.
■ SAVE THESE INSTRUCTIONS ■
Page 2
Page 3
Using Your Cooktop
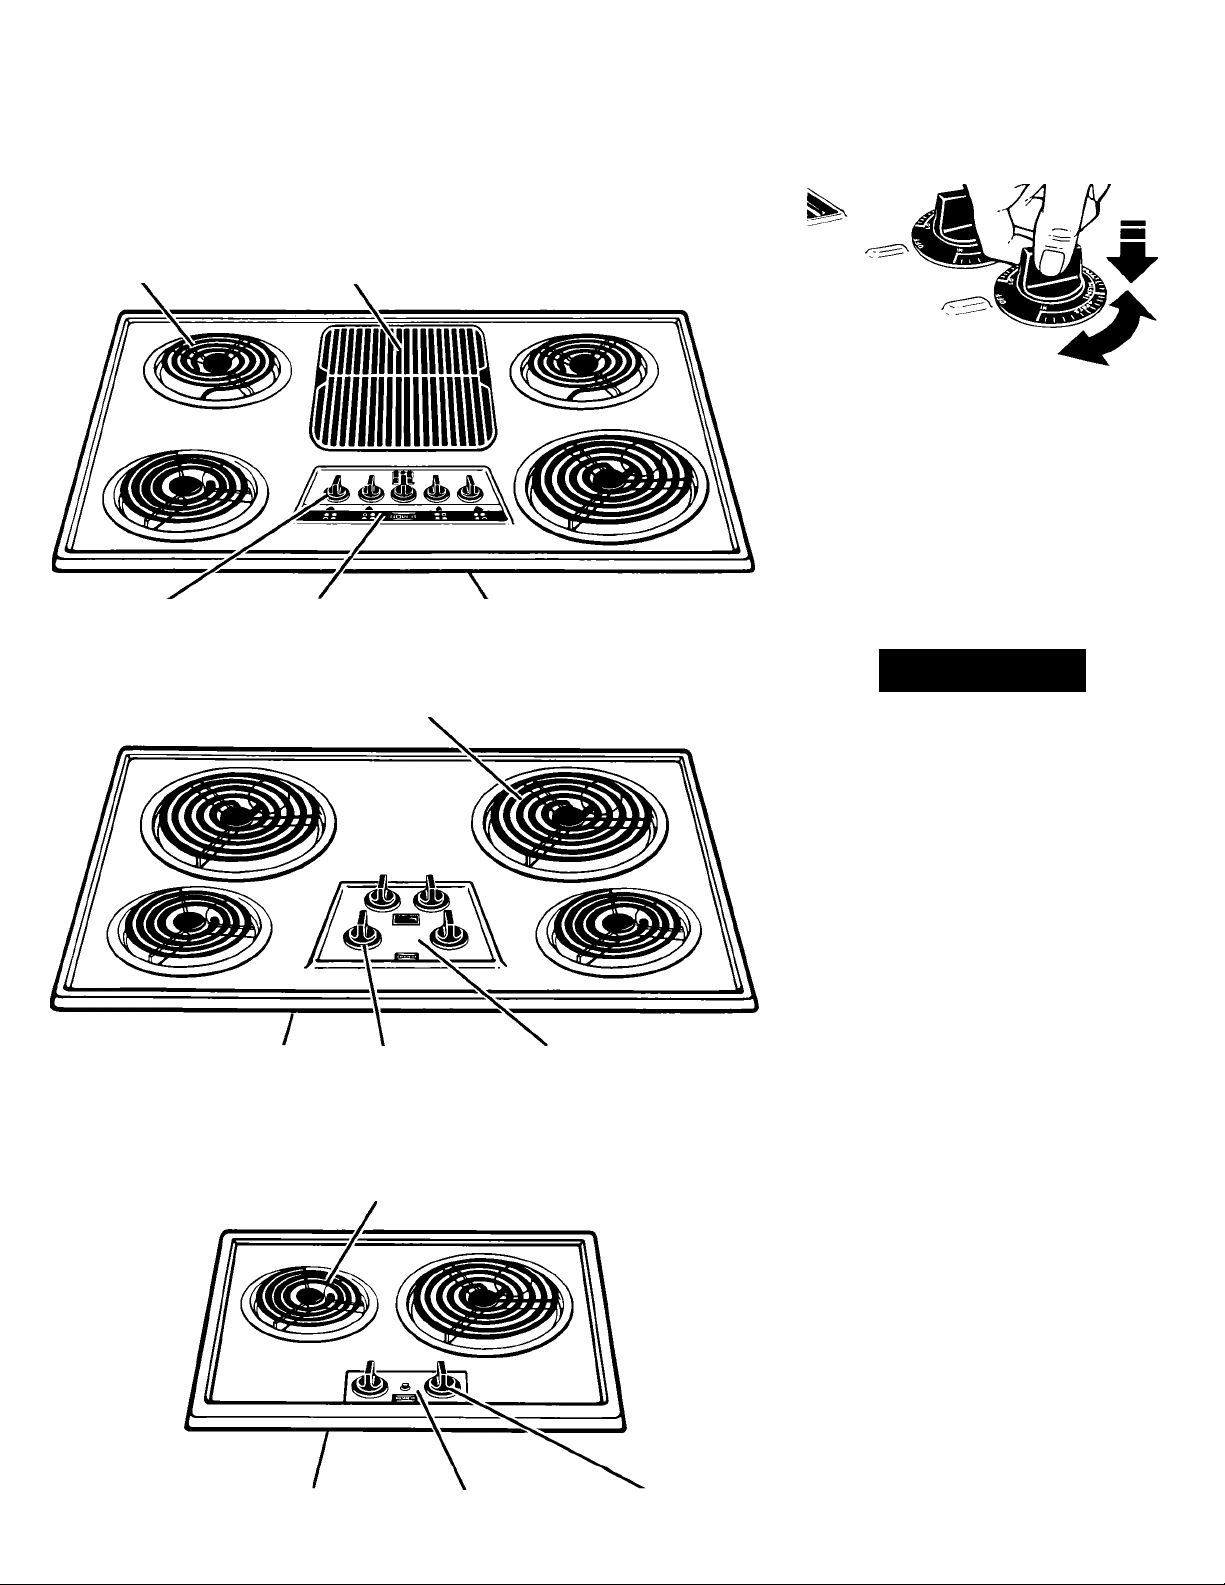
Models CEX650V (shown)
CEX630V (does not include grill or griddle)
Surface units
Control knobs Control panel Model and serial number plate (under cooktop)
Model CEX310V
Grill (griddle module also included)
Surface units
Using the surface units
Control knobs must be pushed in
before turning them to a setting. They
can be set anywhere between HI and
OFF.
Surface unit indicators
The solid dot in the surface unit
indicator shows which surface unit is
turned on by that knob.
Signal lights
One of the Surface Unit Signal Lights on
the control panel wiU glow when a
surface unit is on.
Awarning
Burn And Fire Hazard
Be sure all control knobs are turned
to OFF and all signal lights are off
when you are not cooking.
Someone could be burned or a fire
could start if a surface unit is
accidentally left on.
Model and serial number plate
(under cooktop)
Models CEX210V (shown), CEX200V &
CEX215V (with solid elements)
Surface units
Model and serial number plate
(under cooktop)
Control knobs Control panel
Control panel Control knobs
Until you get used to the settings, use
the following as a guide. For best
results, start cooking at the high
settings, then turn the control knob
down to continue cooking.
Use a high setting to start food cooking;
to bring liquids to a boil.
Use a medium-high setting to hold a
rapid boil; to fry chicken or pancakes.
Use a medium setting for gravy,
puddings and icing; to cook large
amounts of vegetables.
Use a medium-low setting to keep food
cooking after starting it on a higher
setting.
Use a low setting to keep food warm
until ready to serve. Set the heat higher
or lower within the low band to keep
food at the temperature you want.
Solid element surface units
(Model CEX215V)
Before placing a pan on solid element
surface units for the first time, heat on
high setting for five minutes. The
surface units will give off smoke as the
protective coating, applied at the factory,
finishes bonding to the surface.
Continued on next page
Page 3
Page 4

Solid element surface units are made of
heavy cast-iron to provide even cooking.
Each surface unit has a built-m
protective limiter as a safety feature. The
limiter senses uneven cooking
temperatures and automatically reduces
the heat level. The limiter will sense
uneven heat when a pan boils dry or
when a pan is removed and the surface
unit is left on. The heat level may also be
reduced automatically if the bottom of
the pan is not flat or if the pan is too
large or too small for the element. This
will result in longer cooking times.
Solid elements hold heat longer than
conventional surface units. For best
cooking results, use a high setting for
only a very short period of time. Then
use a lower setting to complete the
cooking. You may want to turn the solid
element surface unit OFF a few minutes
before you finish cooking.
Acaution
Solid elements stay hot for a long
time. Do not use the high setting
for long periods of time or leave
pans on hot elements when
cooking is done. Burned food and
damage to the cookware could
result.
Cookware
than the surface unit to prevent boil
overs and hot handles.
Use only flat-bottomed utensils. Flat
bottoms allow maximum contact
between the pans and surface units for
fast, even cooking. Pans with uneven
bottoms or with raised patterns on the
bottoms are not suitable. Do not use
trivets, woks with skirts, or canners
with concave or ridged bottoms.
To check your cookware for flatness,
place a straight-edge across the bottom
of each piece. Move the straight-edge. If
light shows anywhere between the pan
and the straight-edge, the pan is not
flat. Do not use it.
A WARNING
Burn Hazard
■ If the pan is too small for the
surface unit, you could be burned
by the heat from the exposed
section of the surface unit. Use
correctly sized cooking utensils
to prevent injury.
■ If a surface unit stays red for a
long time, the bottom of the pan
is not flat enough or is too small
for the surface unit. Prolonged
usage of incorrect utensils for
long periods of time can result in
damage to the surface unit,
cooktop, wiring and surrounding
areas. To prevent damage, use
correct utensils, start cooking on
high setting and turn control
down to continue cooking.
Using the grill and griddle
(Model CEX650V)
Before you use the grill or griddle
for the first time:
1. The cooking surfaces should be
washed with warm, soapy water,
Awarning
Bum And Fire Hazard
Be sure the grill/griddle control is
OFF and the grill or griddle is cool
and covered when not in use.
Failure to do so could result in
burns or fire.
rinsed and dried. Never use a metal
scouring pad or abrasive cleaner on
the grill or griddle; these will
damage the non-stick surface.
2. After cleaning, lightly wipe the
cooking surfaces with cooking oil to
prevent food from sticking. You
don't have to season (grease) the
griddle every time you use it. Do not
use shortening or butter to season
Grill chart
FOOD CONTROL SETTING
Beef steak
(1/2 - 3/4")
■ rare 6 5 min.
• medium
• well
Beef steak
(1 - 1 1/2")
■ rare
• medium 6
■ well 6
Hamburgers 6 10 min.
Pork chops
Hot dogs 6
Chicken pieces 6 45 - 60 min.
Page 4
6 6 min. 6 min.
6 7 min. 7 min.
6 5 - 6 min. 5 min.
6 15 min.
the griddle.
FIRST SIDE SECOND SIDE COMMENTS
12 - 13 min. 12 min.
9 - 10 min. 10 min.
4 min. 3 min. Turn as needed for even
3. Before you use the griddle for the
first time, preheat on HI, then turn
control to a lower setting to cook.
Turn off the elements when
cooking is finished. Leaving them
ON will damage the griddle.
4. Place food directly on cooking
surface. DO NOT use cookware on
the grill or griddle. Use only plastic
or nylon kitchen utensils on the grill
and griddle. Metal can damage the
non-stick cooking surface.
NOTE:Do not grill with the controls
on the high setting. Excessive smoke
and flare-up could result.
4 min.
10 min.
15 min.
Turn as needed for even
cooking.
Turn as needed for even
cooking.
cooking.
Turn frequently.
Page 5
Griddle chart
FOOD
Sausage patties
Bacon slices
Ham slice (3/4")
Hamburgers
Hot dogs
French toast
Grilled sandwiches 6
Pancakes
Fried eggs
Griddling and grilling times are approximate and may need to be adjusted to individual tastes.
CONTROL SETTING
5
HI
6
6
6
6
6
HI
FIRST SIDE
9 min.
6 min.
6 min.
8 min.
8 min.(turn often)
3 min.
3 1/2 min.
2 min.
3/4 - 1 min.
Caring For Your Cooktop
Awarning
Burn And Electrical Shock Hazard
Make sure all controls are OFF and
the cooktop is cool before cleaning.
Failure to do so can result in burns
or electrical shock.
The control knobs
1. Turn control knobs to the OFF
position.
2. Pull knobs straight off.
3. Wash in warm, soapy water.
4. Rinse well and dry completely. Do
not soak.
The control panel
1. Wipe with warm, soapy water or
spray glass cleaner, and soft cloth.
2. Rinse well.
3. Dry with soft cloth.
4. Replace control knobs by pushing
them firmly into place.
NOTE; Make sure all control knobs
point to the OFF position.
When cleaning, never use steel wool,
abrasives, or commercial oven
cleaners which may damage finish.
Surface units and reflector
bowls
Removing
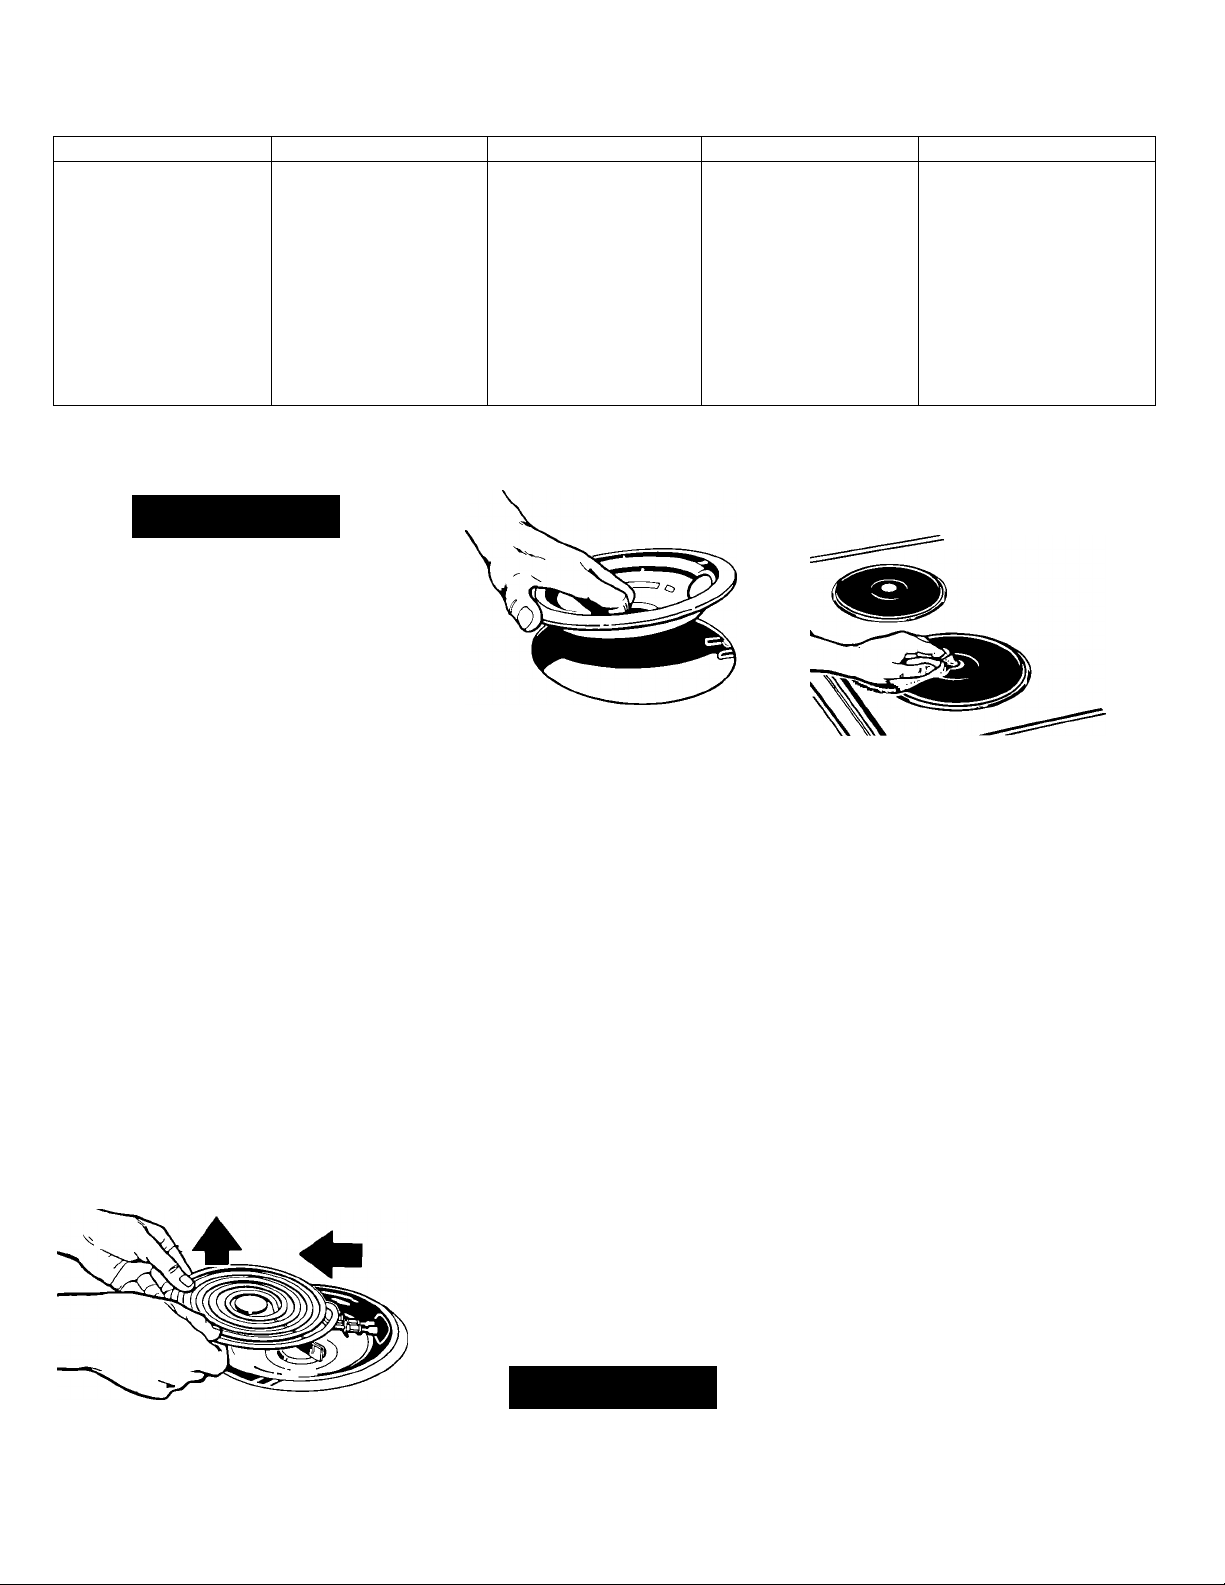
3. Lift out the reflector bowl. See
Cleaning Chart on page 6 for
cleaning instructions.
Replacing
1. Line up openings in the reflector
bowl with the surface unit
receptacle.
2. Hold the surface unit as level as
possible with the terminal just
started into the receptacle. Push the
surface unit terminal into the
receptacle.
3. When the terminal is pushed into
the receptacle as far as it will go,
the surface unit will fit into the
reflector bowl.
Reflector bowls reflect heat back to the
utensils on the surface units. They also
help catch spills. When they are kept
clean, they reflect heat better and look
new longer.
If a reflector bowl gets discolored, some
of the utensils may not be flat enough, or
some may be too large for the surface
unit. In either case, some of the heat
that’s meant to go into or around a
utensil goes down and heats the
reflector bowl. This extra heat can
discolor it.
Awarning
1. Lift the edge of the unit opposite
the receptacle, just enough to clear
the reflector bowl.
2. Pull the surface unit straight away
from the receptacle.
Fire And Electrical Shock Hazard
Do not line the reflector bowls with
foil. Fire or electrical shock could
result.
SECOND SIDE
5 min.
2 min.
6 min.
8 min.
2 min.
3 min.
2 min.
1/2 min.
COMMENTS
Grease griddle with oil, if
desired.
Grease griddle with oil, if
desired.
Solid element surface units
(Model CEX215V)
1. For best results, wipe off surface
units with a damp soft cloth and
soapy water after each use.
Burned-on food may be removed
with a soapy scouring pad. The red
spot in the center of the surface
unit wiU gradually wash off. This is
normal and will not affect the
operation of the surface unit.
2. IMPORTANT: After cleaning, apply
a thin coat of salt-free oil to the
COOL surface units, then heat 3 - 5
minutes. It may still smoke slightly
when heated. If surface units have
dark spots caused by grease and
food, the oil treatment will improve
their appearance but not eliminate
the spots.
NOTE: Optional Electrol® dressing
can be applied to the surface units
to improve their appearance.
3. The stainless steel trim rings will
yellow from the heat of the surface
units and pans. This is normal. The
yellowing can be removed by using
stainless steel cleaner or Cook Top
Polishing Creme on the trim rings.
To obtain order information for
Cook Top Polishing Creme (Part No.
814009) or Electrol® dressing (Part
No. 814030), write to:
Whirlpool Corporation
Attention: Customer Service
Dept.
1900 Whirlpool Drive
LaPorte,IN 46305
Page 5
Page 6

The grill and griddle (Model
CEX650V)
1. Lift grill/griddle cover and remove.
2. Remove the grill or griddle by
lifting slightly at two diagonallyopposite corners. Remove drip pan.
3. Wash grill or griddle in warm,
soapy water. Use a plastic scouring
pad for heavily-soiled areas. DO
NOT use metal scouring pads or
abrasive cleansers; they will
scratch the non-stick finish.
4. Empty and wash drip pan in warm,
soapy water. Use a scouring pad for
heavily-soiled areas.
5. Rinse and wipe dry.
6. Replace the drip pan, grill or
griddle and cover.
Cleaning chart
Lift-up cooktop (not included on
Models CEX200V, CEX210V &
1. Remove grill/griddle cover, grill or
griddle (Model CEX650V) and a
front surface unit.
2. Lift front of cooktop at surface unit
opening.
3. Carefully lower the cooktop onto
the support rod.
NOTE:CEX310V does not include
support rod. For this model, you
must hold cooktop up while
cleaning,
4. Wipe surface under cooktop with
warm, soapy water. Use a soapy
plastic scouring pad on heavily-
soiled areas.
Awarning
Personal Injury And Product
Damage Hazard
Be sure the rod is positioned all the
way to the front and is held
securely. The cooktop could
accidentally fall and injure you. Do
not drop the cooktop. Damage can
result to the porcelain and the
cooktop frame.
awarning
Make sure all controls are OFF and the cooktop is cool before cleaning. Failure to do so can
result in burns or electrical shock.
PART
Cooktop surface
Coil surface units and grill heating
element
Chrome reflector bowls
Solid element surface units
Burn And Electrical Shock Hazard
WHAT TO USE
Warm, soapy water and a soft cloth.
Plastic scouring pad for heavily-soiled
areas.
No cleaning required.
Warm, soapy water and a soft cloth;
plastic scouring pad.
Warm, soapy water and a soft cloth;
soapy plastic scouring pad or scouring
powder.
HOW TO CLEAN
Wipe off regularly when cooktop is
cool.
Do not allow food containing acids
(such as vinegar, tomato, lemon
juice or milk) to remain on surface.
Acids can remove the glossy finish.
Do not use abrasive or harsh
cleaners.
Splatters or spills will burn off.
Do not immerse in water.
Clean frequently.
Wash, rinse and dry well.
Do not use metal scouring pads or
harsh cleansers.
Use plastic scouring pad for cookedon food.
■ Wipe off after each use.
■ Before cleaning, make sure the
cooktop and the surface units are
cool.
■ After each cleaning, heat surface
units until dry.
■ To darken surface units or to remove
rust spots, use salt-free oil on a soft
cloth. After each cleaning, apply
thin coat of oil to surface units, then
heat for 3 - 5 minutes. Slight smoking
of oil will occur. Use Electrol ®
dressing (Part No. 814030). ' Follow
directions on the dressing.
NOTE: This will improve surface unit
appearance, but will not eliminate
dark spots.
*See page 5 for ordering information.
Page 6
Page 7

PART
Trim rings
Grill, griddle and cover
WHAT TO USE
Stainless steel cleaner or Cook Top
Polishing Creme (Part No. 814009)'
Warm, soapy water and a soft cloth;
plastic scouring pad.
HOW TO CLEAN
■ Before cleaning, make sure the
cooktop and the surface units are
cool.
■ Follow directions provided with
cleaner or polishing creme.
NOTE: Yellowing of trim rings is
normal from heat of the surface units
and pans.
*See page 5 for ordering information.
■ Clean after each use.
• Wash, rinse and dry well.
■ Do not use metal scouring pads or
harsh cleansers.
■ Use plastic scouring pad for cookedon food.
Control knobs
Control panel and trim
Warm, soapy water and soft cloth.
Warm, soapy water or spray glass
cleaner, and a soft cloth.
Before You Call For Service
If you are having an operating problem,
check the chart to see what the cause
might be before you call for assistance.
OPERATING PROBLEM
Nothing operates.
Surface units will not operate.
■ Cooktop is properly connected to a live
circuit with the proper voltage.
■ Fuse has blown or circuit breaker has
tripped.
■ Cooktop is connected to electrical
power.
■ Fuse has blown or circuit breaker has
tripped.
Control knob(s) will not turn. ■ You pushed in knob(s) before trying to
turn.
Food sticks to grill or griddle.
■ Grill/griddle surface is scratched.
■ Grill/griddle surface is seasoned. ■ Season grill/griddle surface, if
CHECK IF
■ Wash, rinse and dry well.
■ Do not soak.
■ Wash, rinse and dry well.
■ Follow directions provided with
cleaner.
WHAT TO DO
■ Contact qualified service technician
to reconnect cooktop to electrical
supply. (See Installation
Instructions.)
■ Replace fuse or reset circuit breaker.
■ Contact qualified service technician to
reconnect cooktop to electrical supply.
(See Installation Instructions.)
■ Replace fuse or reset circuit breaker.
■ Push in knob(s) before turning.
■ Use only correct cooking and
cleaning utensils that will not
damage grill/griddle surface.
needed. (See page 4 for additional
grill/griddle cooking tips.)
Cooking results aren't what you
expected.
■ Pans are the size called for in the
recipe.
■ You are following a tested recipe from
a reliable source.
• The cooking utensils have smooth, flat
bottoms and fit the surface units.
■ Use correct-size pans.
■ Modify recipe or find a new recipe.
■ Use cooking utensils with smooth,
flat bottoms.
Page 7
Page 8
If You Need Assistance, Service Or Replacement Parts.
Read the warranty. Contact your local
dealer to recommend a local service
company or to obtain replacement parts.
You will need the model number and
serial number when you call for
assistance or service. Both numbers are
located beneath the lift-up cooktop (see
illustrations on page 3).
This Roper appliance is warranted by
LIMITED WARRANTY
Appliances
1. Repair or replace during the first thirty (30) days from the date of purchase any finishes (porcelain, enamel or other)
and glass parts which we find to be defective.
2. Repair or replace during the first (1st) year from date of purchase any other part except for the finish, which we find
to be defective.
3. Repair or replace during the first five (5) years from date of purchase any magnetron (on those units so eguipped)
which we find to be defective. Labor on any magnetron under warranty is limited to the first (1st) year from date of
purchase.
4. During the second (2nd) through the fifth (5th) years from the date of original purchase on any product so equipped,
any part of the refrigerating system (compressor, evaporator, condenser, drier or connecting tubing) or any part of the
washer gear case assembly found defective in material or workmanship, will be supplied. Labor on the refrigerating
system and gear case assembly under this warranty is limited to the first (1st) year from the date of original purchase.
5. Replacement parts furnished under the terms of this warranty are warranted only for the unexpired portion of the
original warranty period and transportation charges relative to obtaining parts involved are the responsibility of the
original consumer purchaser.
6. This warranty applies only to products properly installed, adjusted and operated in accordance with instructions
found in the product literature. This warranty does not apply to any product which has been subjected to alteration,
misuse, improper installation or delivery damage. Nor does it apply to costs for any service requested for
demonstration or to confirm proper operation of appliance, or when used in other than, single-family household use.
7. Any repairs made under the terms of this warranty must be performed by a Roper brand appliance servicer
authorized by warrantor.
Whirlpool Corporation to be free from
defect in material and workmanship to
the original domestic purchaser. Any
parts which we find to be defective will
be repaired or replaced at our option
subject to the following limitations:
SHOULD YOU HAVE ANY OUESTIONS CONCERNING THIS WARRANTY, PLEASE CONTACT:
Customer Relations Dept.
ROPER Brand Appliances
2000 M 63 North
Benton Harbor, MI 49022
If you write or caU, please furnish complete model and serial number of appliance and date of purchase.
Under no circumstances shall Whirlpool Corporation be liable under this warranty for any loss of any
incidental or consequential damages and all IMPLIED WARRANTIES ARE LIMITED TO THE SAME TIME
PERIODS STATED HEREIN ON EXPRESS WARRANTIES FOR ROPER BRAND APPLIANCES.
Some states do not allow the exclusion or limitation of consequential damages or limitations of how long an
implied warranty may last, so the above limitations or exclusions may not apply to you. This warranty gives
you specific legal rights, and you may have other rights which may vary from state to state.
THIS IS A LIMITED WARRANTY WITHIN THE MEANING OF THAT TERM AS DEFINED IN THE
MAGNUSON-MOSS ACT OF 1975.
If you need service for your Roper brand appliance:
■ Contact your selling dealer for the authorized servicer in your area.
■ Phone l-(800) 44-ROPER [l-(800)447-6737] BETWEEN 8:00 - 4:30
Eastern Time - Monday thru Friday.
Part No. 36-300858-03-0/4315474
©1989 Whirlpool Corporation
Call Toll Free l-(800) 44-ROPER
l-(800) 447-6737
Between 8:00 a.m. - 4:30 p.m.
Monday thru Friday, Eastern Time
-OR-
Appliances
Printed in U.S.A
 Loading...