

Page 1
Contents
Safety warnings .................................................................................................................................. 13
Safeguarding the environment .......................................................................................................... 14
Precautions and general recommendations ..................................................................................... 14
Presentation of the refrigerator-freezer .......................................................................................... 15
Door reversibility .............................................................................................................................. 15
Installation ......................................................................................................................................... 16
Energy saving tips .............................................................................................................................. 17
Electrical Connection ........................................................................................................................ 17
Using the appliance ........................................................................................................................... 17
Switching on appliances with a separate temperature adjustment for each compartment: ........... 17
Refrigerator compartment ................................................................................................................ 17
Additional functions ........................................................................................................................... 18
Freezer compartment ....................................................................................................................... 18
Switching on appliances with one temperature adjustment only .................................................... 18
Advice for storing food ...................................................................................................................... 18
Compliance with food hygiene regulations ....................................................................................... 19
Freezing ............................................................................................................................................. 19
Storing, hygiene ................................................................................................................................. 20
The upper part of the freezer is divided as follows .......................................................................... 20
Defrosting .......................................................................................................................................... 20
Defrosting and cleaning ..................................................................................................................... 20
Routine maintenance ......................................................................................................................... 21
What to do if small problems occur? ................................................................................................ 22
After-Sales Service ............................................................................................................................ 22
Electrical Connection ........................................................................................................................ 23
Indicates safety information
Indicates ideas or tips for optimum
appliance use
Safety warnings
This appliance is intended to come
into contact with foodstuffs and is
exclusively for domestic use: any
other use is considered improper.
Installation of the appliance must be carried out
in accordance with the manufacturer’s
instructions. Incorrect installation can damage
the appliance. Do not use extension cables,
multiple sockets or adapters.
63733036_gb.p65 13/06/2002, 10:4013
Before carrying out any maintenance
operation, disconnect the appliance
from the power supply.
Keep this handbook with care and if the
refrigerator is sold the handbook must be
supplied with it.
The EC mark certifies that this appliance
complies with the following European
Regulations: 89/336 (electromagnetic
compatibility), 73/23 (low voltage), 96/57
(energetic efficiency) and successive
amendments.
13
Page 2
Safeguarding the environment
1. Packaging
The packaging material is entirely recyclable
and marked with the recycling symbol.
Follow local regulations for scrapping. Keep
the packaging materials (plastic bags,
polystyrene parts, etc.) out of reach of
children, as they are potentially dangerous.
2. Appliance
The appliance is made using recyclable
materials. Disposal must be carried out in
accordance with local environmental
regulations for waste disposal. Make the
appliance unusable by cutting off the power
cord. The appliance must be delivered to an
authorized collection centre for the recovery
of refrigerant gas.
Information:
This appliance does not contain CFCs (replaced
with R134a) or HFCs (replaced with R600a
Isobutane). For more information, refer to the
identification data plate affixed to the appliance.
Precautions and general recommendations
• Use the refrigerator compartment only
for storing fresh food and the freezer
compartment only for storing frozen food,
freezing fresh food and making ices cubes.
• Do not cover or obstruct the air vents of the
appliance.
• Do not store liquids in glass containers in
the freezer compartment - danger of
bursting.
• Do not eat ice cubes or ice lollies
immediately after taking them out of the
freezer compartment - risk of “cold” burns.
• Do not allow children to play or hide inside
the appliance - risk of becoming trapped and
suffocating.
• Before servicing or cleaning the
appliance, unplug it from the mains or
disconnect the electrical power supply.
• The power cable may only be replaced by an
authorized person.
• Do not store or use gasoline or other
flammable vapours/liquids in the vicinity of
this or any other appliance - risk of fire or
explosion.
Declaration of conformity
This appliance is intended to come into contact
with foodstuffs and conforms to D.L. 108 of
25.01.1992 (European Directive 89/109/EEC).
Appliances with Isobutane (R600a)
Isobutane is a natural gas with low
environmental impact. Caution is required,
however, since isobutane is flammable.
Therefore, it is essential to ensure that
refrigerant pipelines are not damaged.
14
63733036_gb.p65 13/06/2002, 10:4014
Page 3
Presentation of the refrigerator-freezer
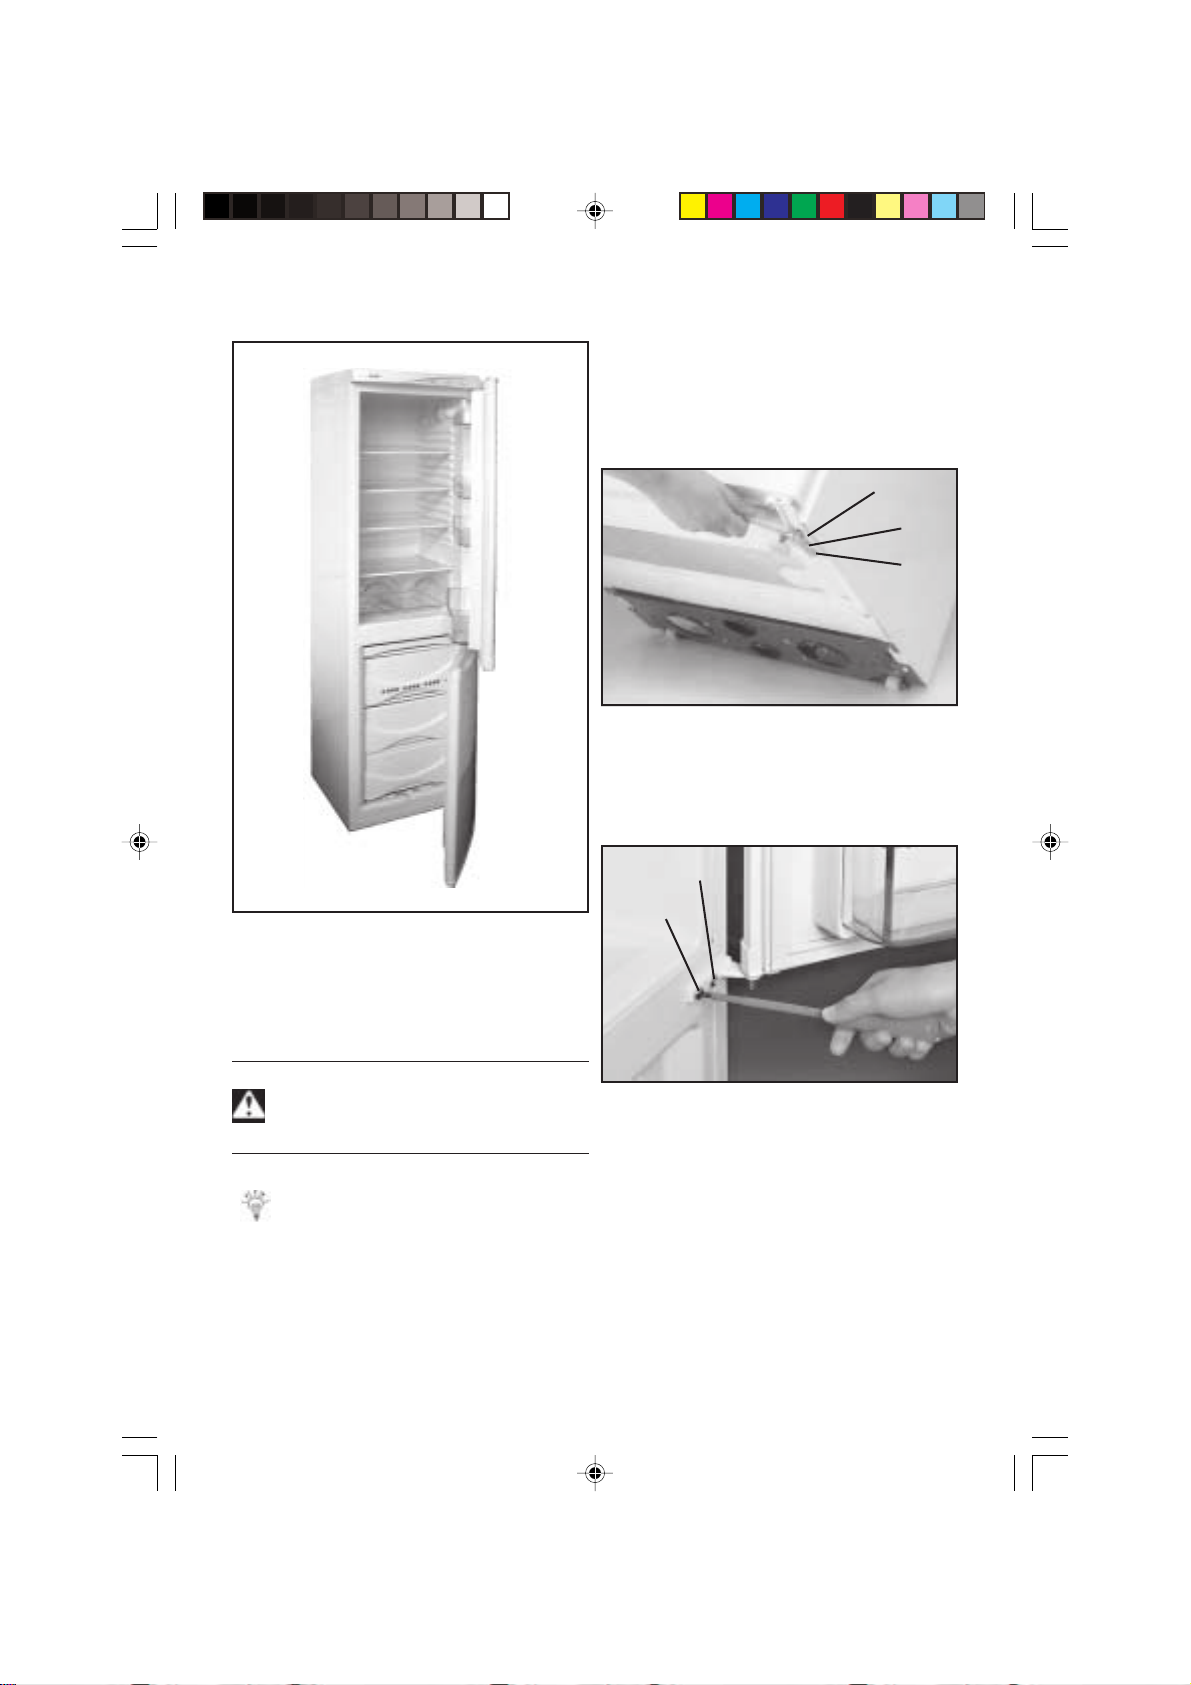
1. Turn the thermostat knob/s to “0”.
2. Tilt the appliance backwards to access
3. Leaving the door of the refrigerator
Fig. 1
screws 1, 2 and 3 of the lower hinge (fig. 2).
Unscrew using an 8 mm socket wrench.
Remove the hinge and then the freezer door.
Q
R
S
Fig. 2
open,unscrew screws 4 and 5 (fig. 3), using a
cross head screwdriver, remove the hinges,
and then the refrigerator door.
U
T
Door reversibility
The direction of door opening can be changed.
How to proceed:
Disconnect the appliance from the
power supply.
Empty the appliance and remove
grids and baskets.
Put a protection (cloth, carton) on the floor
and place the items on it, so that the doors are not
ruined when they are being removed
63733036_gb.p65 13/06/2002, 10:4015
Fig. 3
4. Remove the plastic protections that cover
the fixing holes on the left of the middle
hinge and fit the new plastic protections
supplied on the opposite side.
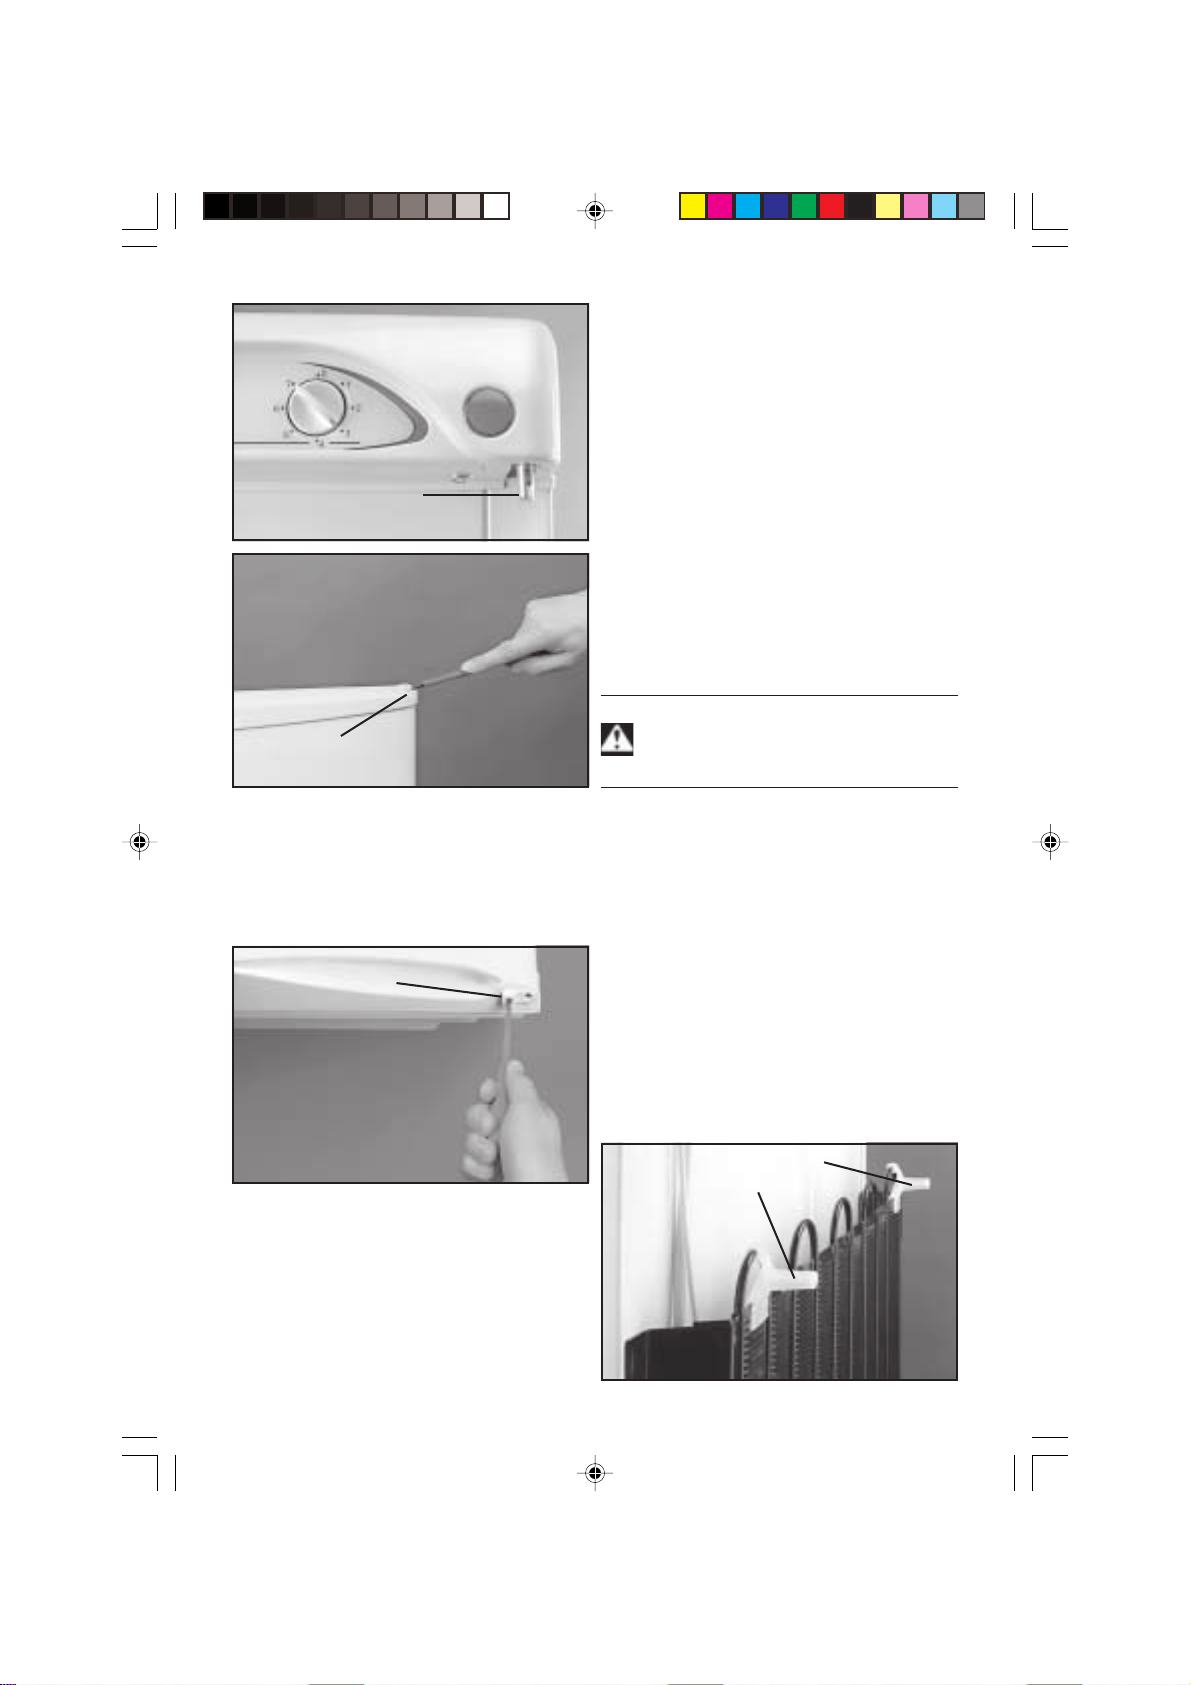
5. Unscrew upper pin 6 (fig. 4), using a 6 mm
pipe wrench and then screw it on the
opposite side.
6. Remove the upper pin on the refrigerator
door and the support-cover 7 (fig. 5), located
on the opposite side. Reverse the elements.
(Same procedure as for freezer door).
15
Page 4
W
V
Fig. 4
Fig. 5
10. Replace the appliance in vertical position
and, if necessary, adjust the doors
(intermediate and lower hinge adjustment)
in order to ensure perfect adherence of
seals and correct coupling alignment.
11. Make sure that all the screws have been
tightened correctly and check the door seal
by placing a sheet of paper between the
cover and the seal: the sheet must resist
when it is pulled or moved.
12. Switch on the appliance again.
Installation
After unpacking the appliance, check for damage. Any
damage must be immediately reported to the
supplier.
Keep the packaging materials (plastic
film, polystyrene parts, etc.) out of
reach of children and do not dispose
of in the environment.
7. Unscrew the lower pin of the refrigerator
door 8 (Fig.6), then fix it on the opposite
side, after removing the protection. Put the
protection in the original position of the pin
support. (Same procedure as for freezer
door).
X
Fig. 6
8. Position the refrigerator door fitting the
upper pin in its support, then fit the middle
hinge and screw it on.
9. Proceed as described above for the freezer
door and tighten the screws of the lower
hinge.
Choose a well-ventilated place where the
ambient temperature is between + 16°C and +
32°C. Observe this warning in order to store
your frozen food in good conditions and in
compliance with European regulations.
Install your appliance away from sources of heat,
radiators, oven, cookers, direct and intense
sunlight ... Check the installation location to be
sure you have clearance on all sides.
Mount the two spacers 1 and 2 (fig. 7) on the
condenser grill to prevent it from touching the
wall.
R
Q
Fig. 7
16
63733036_gb.p65 13/06/2002, 10:4016
Page 5
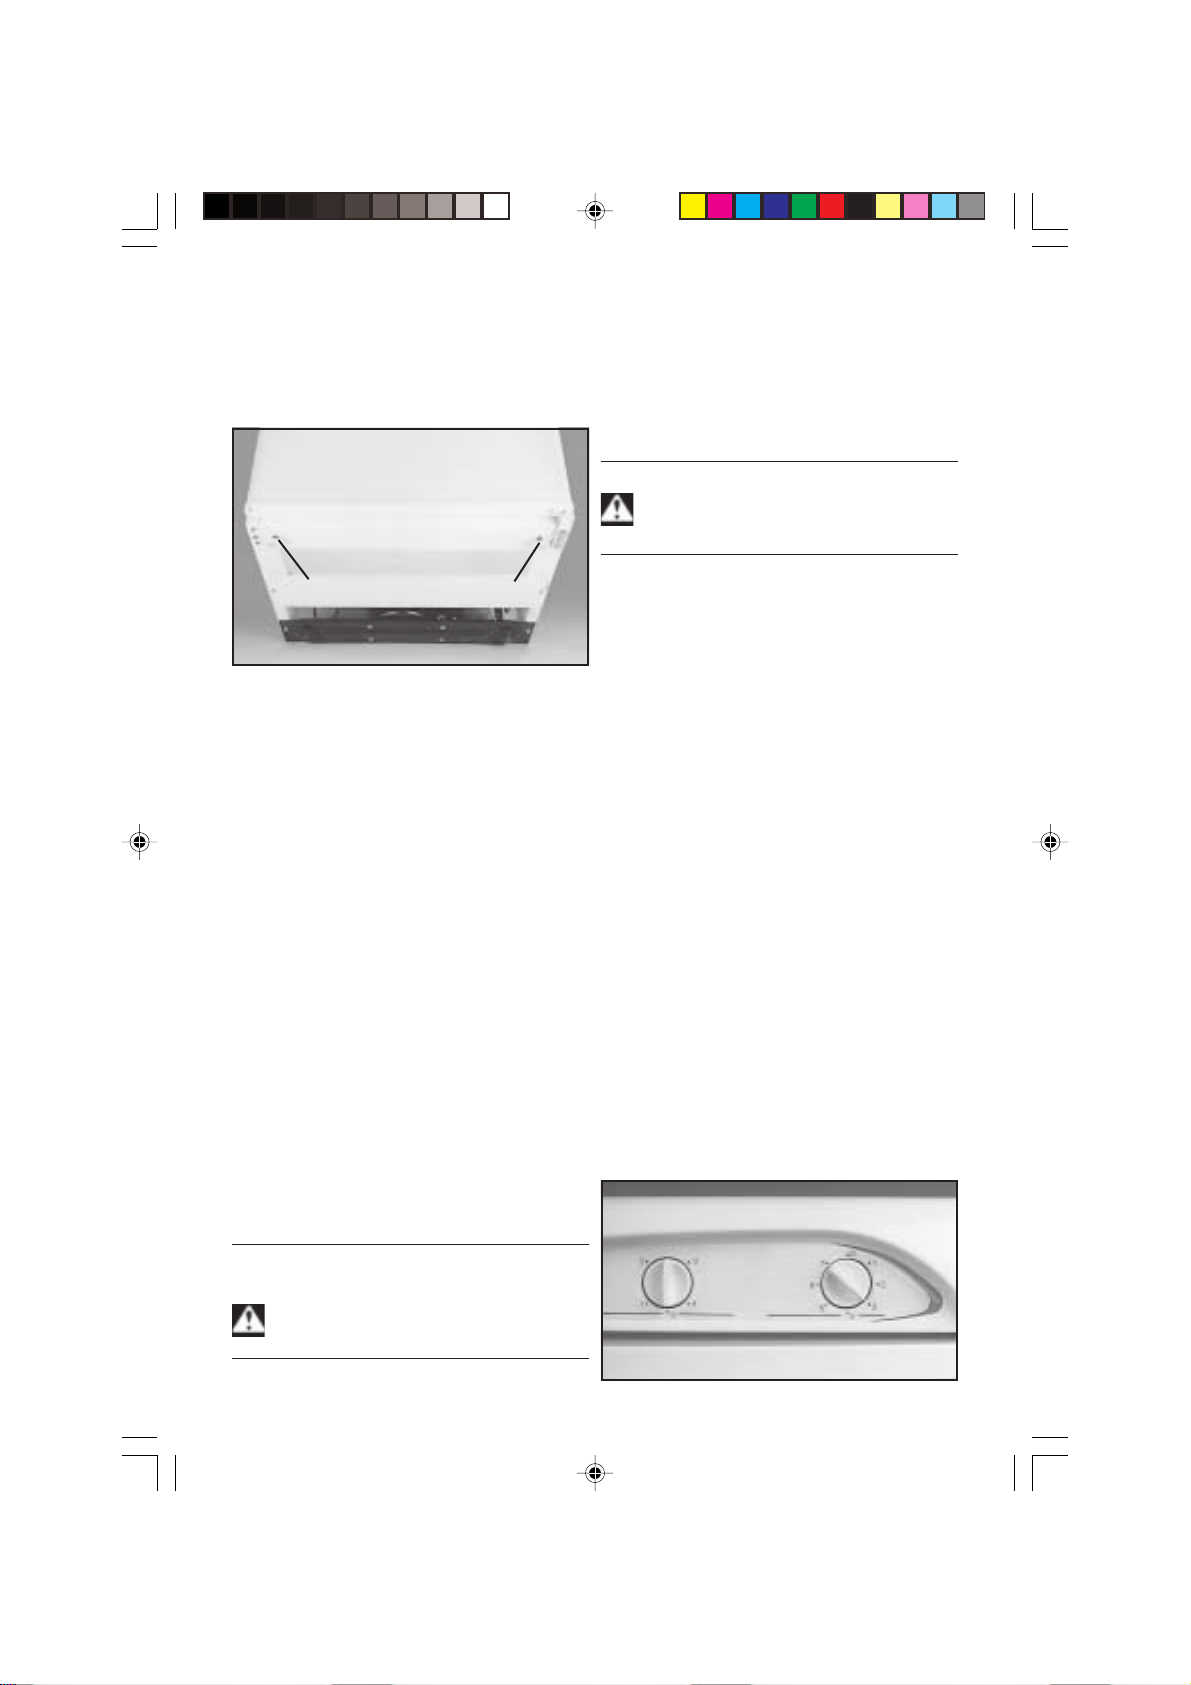
Adjust front feet 1 and 2 (fig. 8) so that the
appliance is slightly tilted backwards; in this way
the door will close properly.
To avoid undesired sounds, make sure that the
appliance is stable.
This appliance is designed to be connected to a
220-240V/50HZ electric system.
Before connecting, make sure that the
thermostat knob/s is/are turned to “0”.
Using the appliance
Leave the appliance in vertical position
for at least two hours after transport,
before switching it on, so that the
refrigerant liquid can stabilize.
QR
Fig. 8
Energy saving tips
• To install your appliance follow the
instructions in the chapter “Installation”.
• Remove dust from the condenser grill on
the rear of the appliance once a year in
order to allow air to circulate freely around
the cooling flaps.
• Wait for hot food to cool before placing in
the refrigerator.
• To defrost products, place them in the
refrigerator compartment; they will help
cool the food in the refrigerator.
• Leave the door open as little as possible
when you store or take out food.
• Do not select a temperature that is too low.
Adjust the thermostat depending on the
amount of food stored.
Electrical Connection
Switching on appliances with a
separate temperature adjustment
for each compartment:
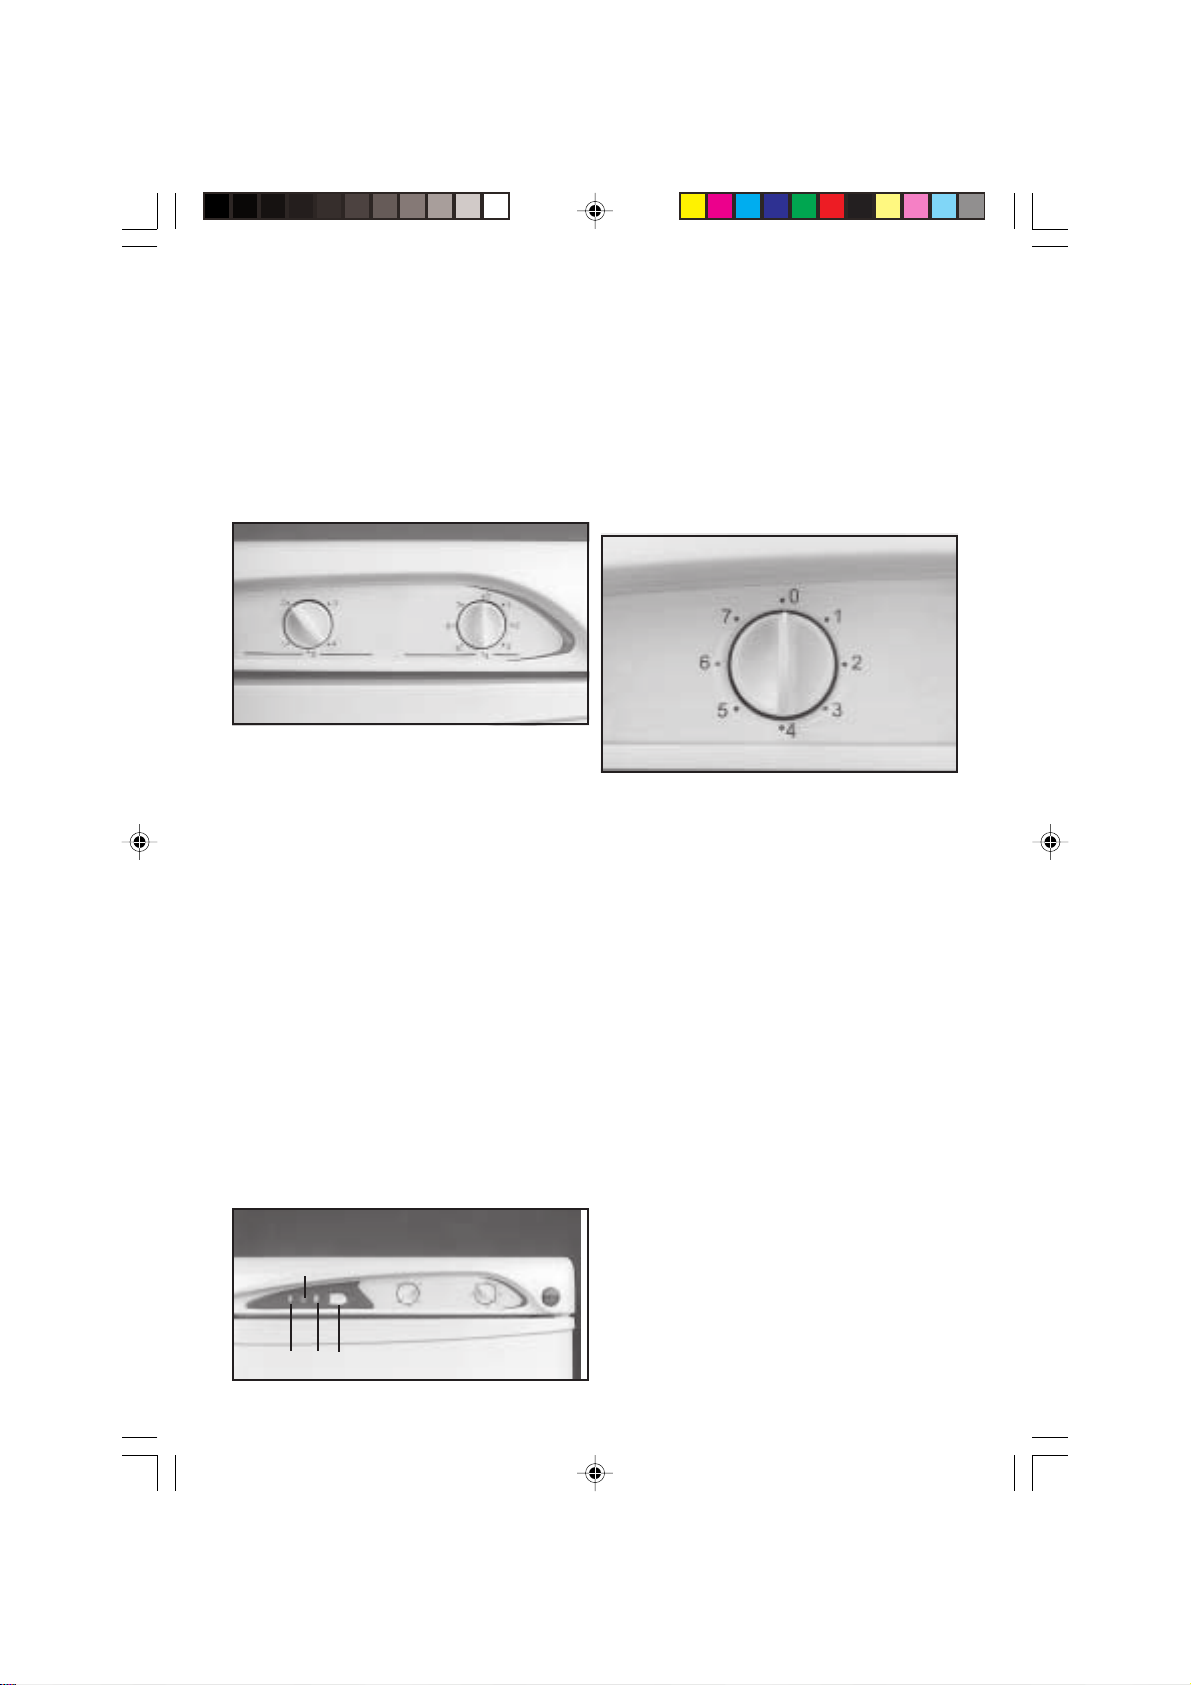
• A refrigerator thermostat located on the
right hand side of the control panel with 7
positions and 0 (STOP)
• A freezer thermostat located on the left
hand side of the control panel with 4
positions and 0 (STOP)
Refrigerator compartment
Turn the thermostat knob (fig. 9) to the med.
position. Leave the appliance to operate at this
setting for 24 hours.
Then adjust the setting according to your needs.
NOTE: the 0 position on the knob switches off
the refrigerator compartment.
A 10-16 A socket with earth connection is
required.
Regulations require that the
appliance is earthed. We cannot be
considered responsible for accidents
caused by the non-observance of this
provision.
63733036_gb.p65 13/06/2002, 10:4017
Fig. 9
17
Page 6
Freezer compartment
• Position the thermostat knob (fig.10) to 4.
Leave the appliance to operate at this setting
for 24 hours.
• Then adjust the setting according to your
needs.
NOTE: the 0 position on the knob switches off
the freezer compartment.
Fig. 10
Switching on appliances with one
temperature adjustment only
Turn the thermostat knob (fig. 12) to the med.
position. Leave the appliance to operate at this
setting for 24 hours.
Then adjust the setting according to your needs.
NOTE: the 0 position on the knob switches off
the refrigerator compartment.
Additional functions (fig. 11)
Q Green LED indicates that the appliance is
connected to the power supply
R Red LED (alarm): indicates that the
temperature inside the freezer is too high.
This LED temporarily turns on in the following
cases:
1. When the freezer compartment is switched
on for the first time
2. When a considerable amount of fresh food is
placed in the freezer
3. If the freezer door is left open for a long
time
S Yellow LED (fast freeze): lights up when the
fast freeze function is activated.
T Fast freeze button (for the use of this
function, refer to paragraph “freezing“)
R
Fig. 12
Advice for storing food
Proper use of your refrigerator, together with
strict observance of hygiene regulations,
significantly contribute to improved storage of
your food. We therefore invite you to read this
chapter carefully.
Checking the temperature:
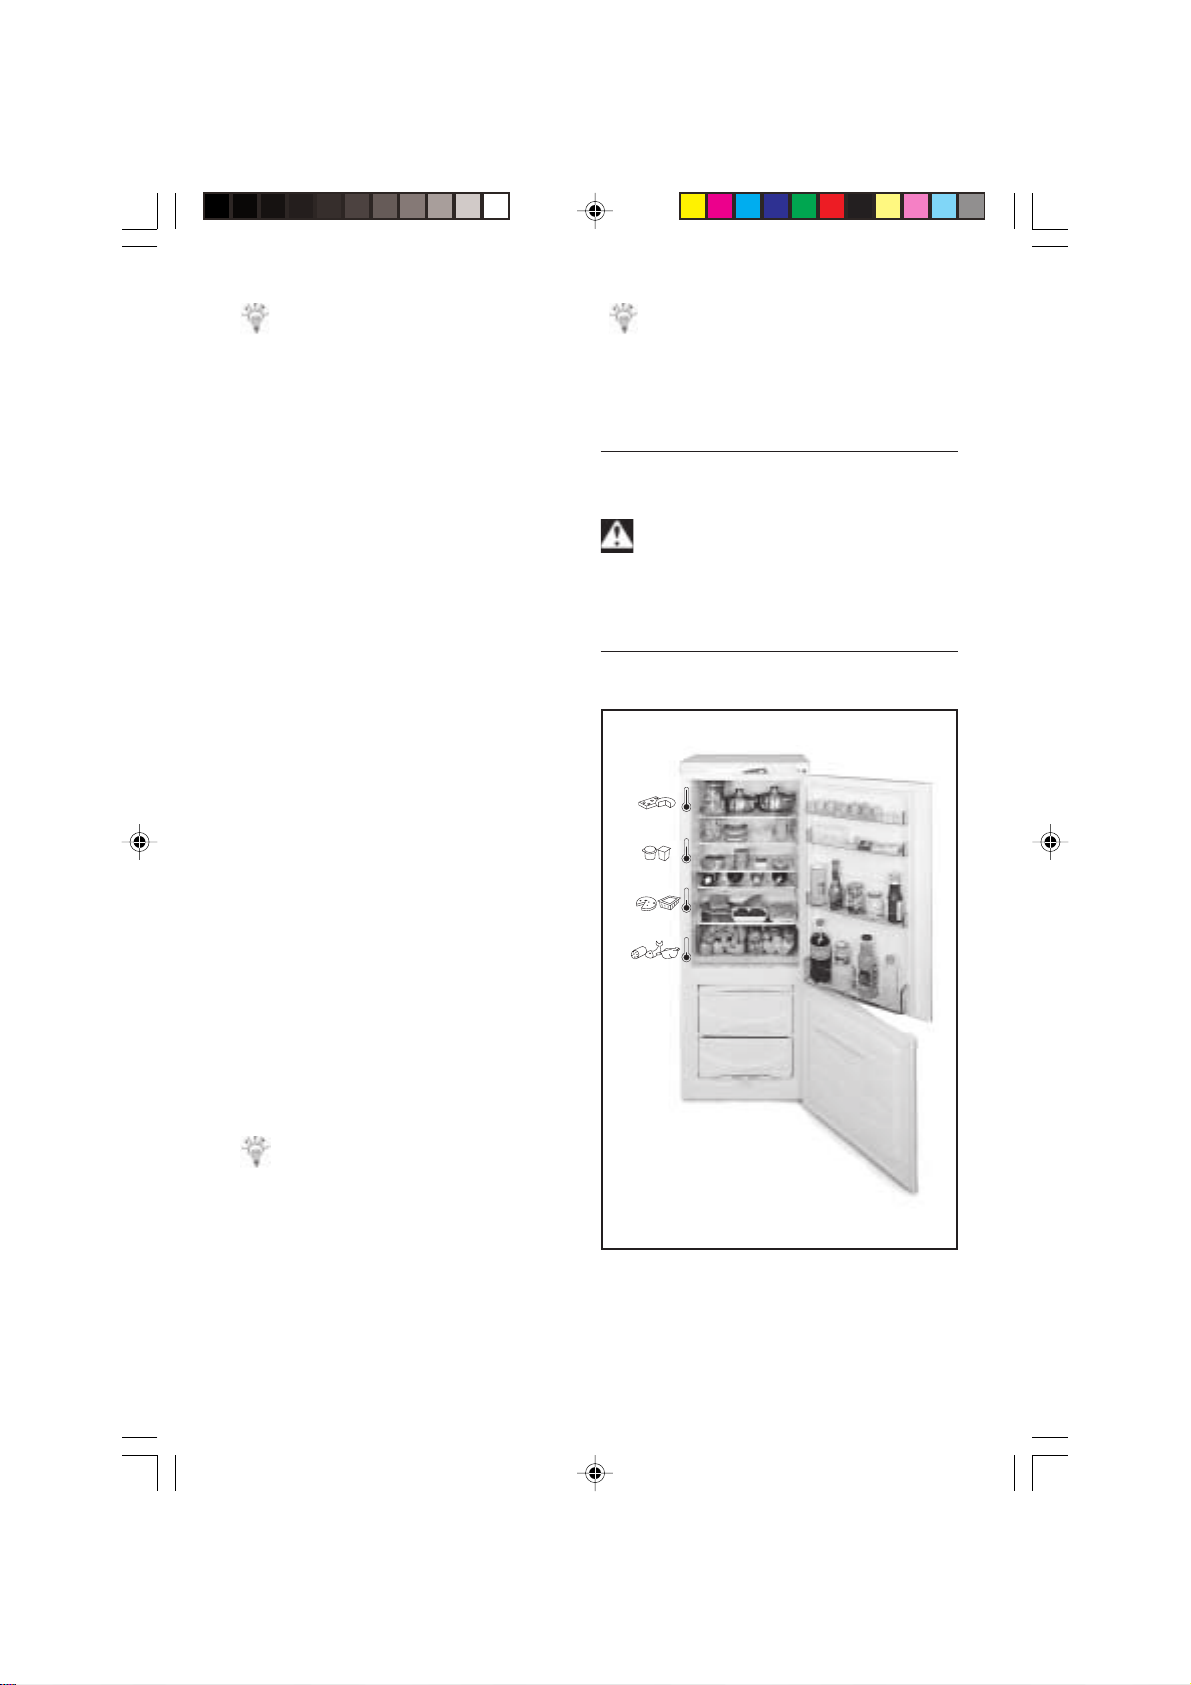
• Place the most delicate foods in the coldest
part of the appliance, as shown in figure 13.
• Wait for cooked food to cool completely
before placing in the refrigerator (e.g. soup).
• Limit the number of times you open the
door.
• Adjust the thermostat knob so as to obtain a
sufficiently low temperature. This
adjustment must be made progressively so
that foods do not freeze.
QST
18
63733036_gb.p65 13/06/2002, 10:4018
Fig. 11
Page 7
To measure the temperature in a specific
zone (e.g. the rack) you can use a thermometer
placed, from the beginning, in a container full of
water (glass). To obtain a temperature that
actually represents the temperature inside the
appliance faithfully, the temperature must be read
after a few hours of stabilization, e.g. in the
morning when the door is opened for the first time.
Compliance with food hygiene
regulations
• Remove all packaging before putting food in
the refrigerator (yoghurt cartons...)
• Wrap food with cling film or aluminium foil
to prevent items from being tainted with
other odours or flavours
• Arrange the food leaving sufficient space
around it for air to circulate.
• Clean the inside of the refrigerator
frequently using a product that does not
oxidize metal parts.
Freezing
If you want to freeze a large amount of
food, press the “fast freeze” button (yellow LED
lights up).
After 24 hours, press the fast freeze button again to
return to the storing mode (yellow LED goes out)
• Never re-freeze defrosted food
• Do not place fizzy drinks in the
freezer compartment
• Do not put full glass bottles in the
freezer compartment
• Do not eat products such as ice
immediately after taking them
out of the freezer since they may
cause serious cold burns
Freezing capacity
The freezing capacity is the maximum weight
that can be frozen in 24 h. It is indicated on the
appliance data plate inside the refrigerator
compartment, next to the crisper drawer.
Procedure:
Put the food prepared previously (see chapter
“storing, hygiene”), inside the freezer
compartment.
Identification of the coldest zone in your
appliance, which is the most suitable for storing
delicate foods such as meat, fish, cold meats,
airtight foods, raw vegetables in bags...
63733036_gb.p65 13/06/2002, 10:4019
Fig. 13
19
Page 8
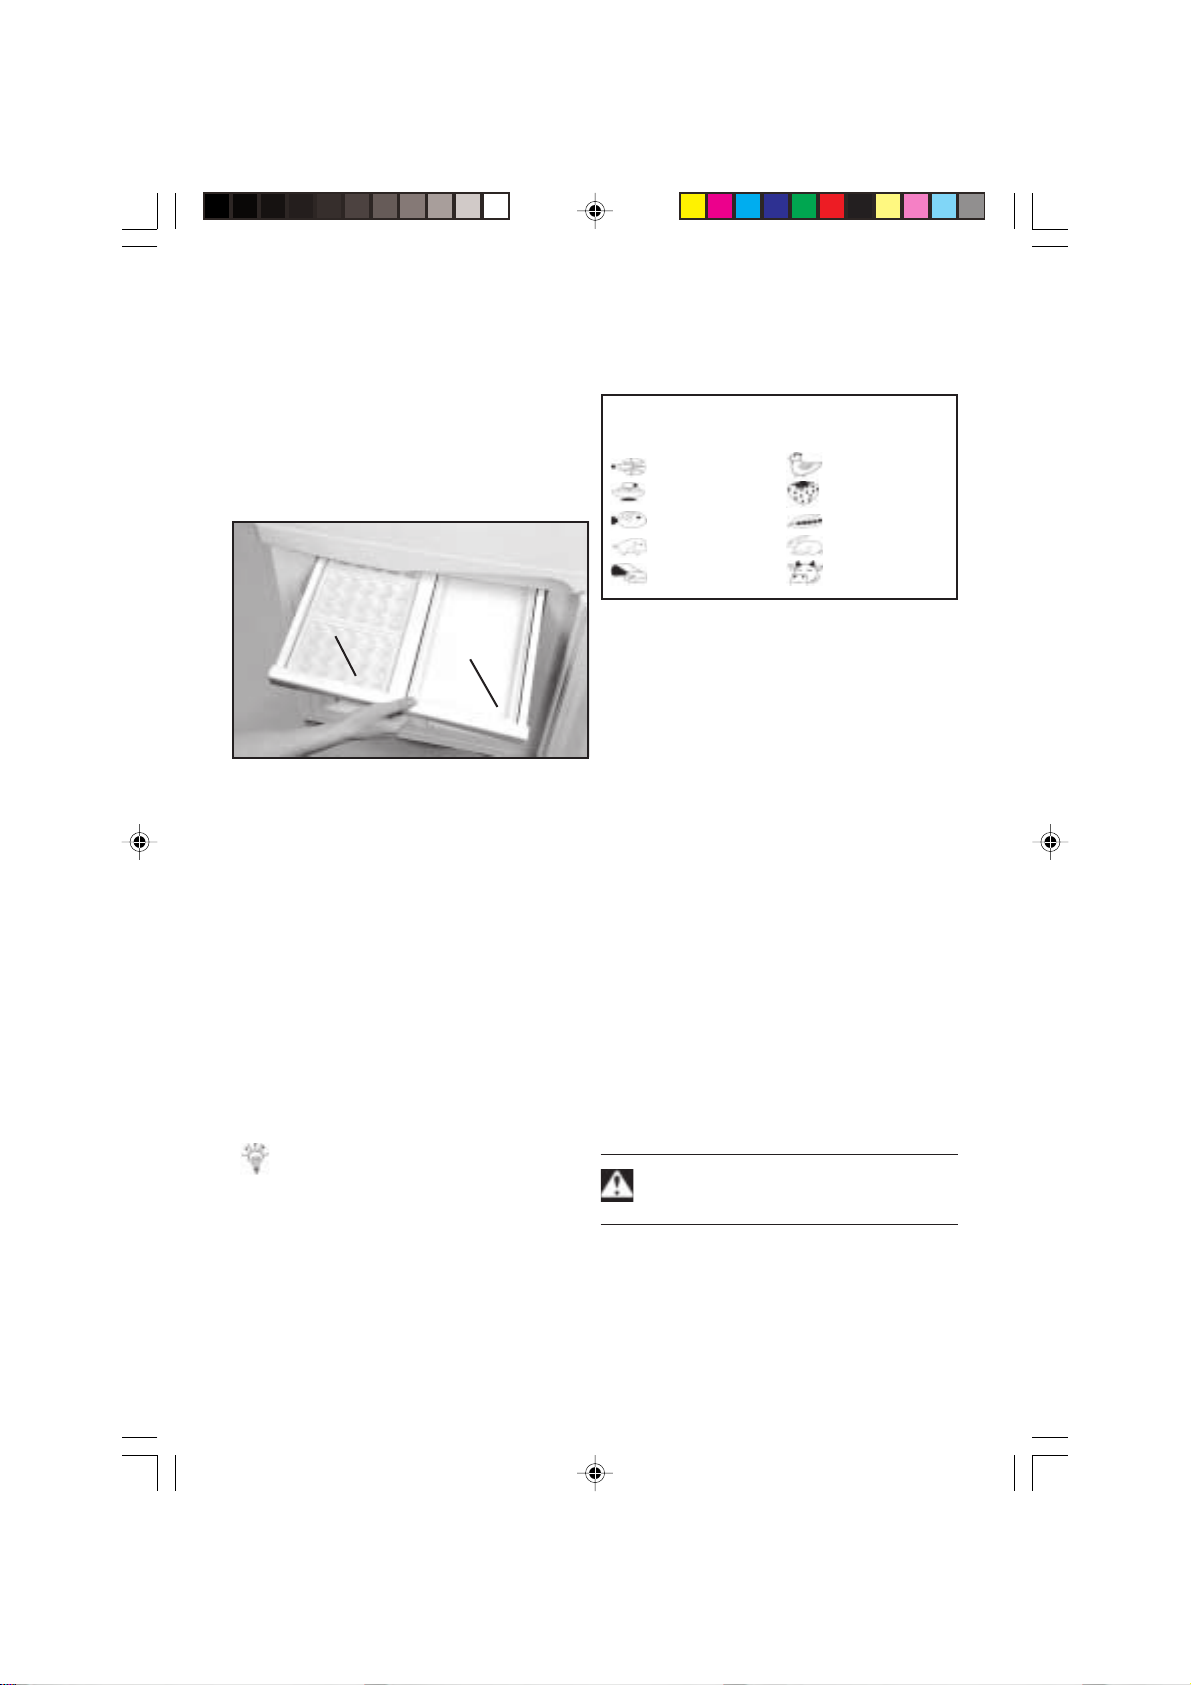
The upper part of the freezer is
divided as follows
(fig. 14):
Q A compartment for freezing thin foods
quickly. It is ideal for freezing berries. After
24 hours, wrap the food in a suitable
material (plastic bag).
R Compartment for making ice cubes
R
Q
Fig. 14
Storing, hygiene
Observe the following precautions:
• Choose only fresh, quality products.
• Do not place foods to be frozen in direct
contact with food that is already frozen
• Use a defrosted product within 24 hours
after defrosting.
• Limit the frequency of door opening to
prevent temperature increases inside the
freezer.
• Do not exceed the best before date
indicated on the frozen food packages.
• In the event of a power failure, do not open
the door of the freezer compartment.
In the event 24 hour notice is given for a
power failure, turn the thermostat knob to the
highest position to lower the temperature. Keep your
freezer compartment full; if necessary, place plastic
bottles in it, filled 3/4 with water. In this way you
will increase the performance of your freezer.
Defrosting
Only defrost the food you intend to use
immediately.
Guide to the storage
of frozen foods.
1 month
1 month
2 months
3 months
4 months
It is possible to defrost food in various ways:
• in the refrigerator
• at ambient temperature
• in a microwave or traditional oven at a
temperature between 40°C and 50 °C
• directly cooking it
Defrosting food in the refrigerator compartment
is the slowest way but the safest; besides, it
allows energy saving.
6 months
8 months
8 months
10 months
12 months
Defrosting and cleaning
Refrigerator compartment:
The refrigerator is provided with an automatic
defrosting function. Regularly check that the
drain hole (located at the bottom of the tray
above the crisper drawer) is clean.
Freezer compartment:
This compartment should be defrosted when
the thickness of ice on the walls reaches 3 mm.
Proceed as follows:
Before carrying out any maintenance
operation, disconnect the appliance
from the power supply.
20
63733036_gb.p65 13/06/2002, 10:4120
Page 9
• Turn the refrigerator thermostat knob to “0”
• Empty the freezer as described below:
• Wrap frozen products in cool bags or in
multiple sheets of paper.
• Place the food in the refrigerator to slow
down the temperature increase.
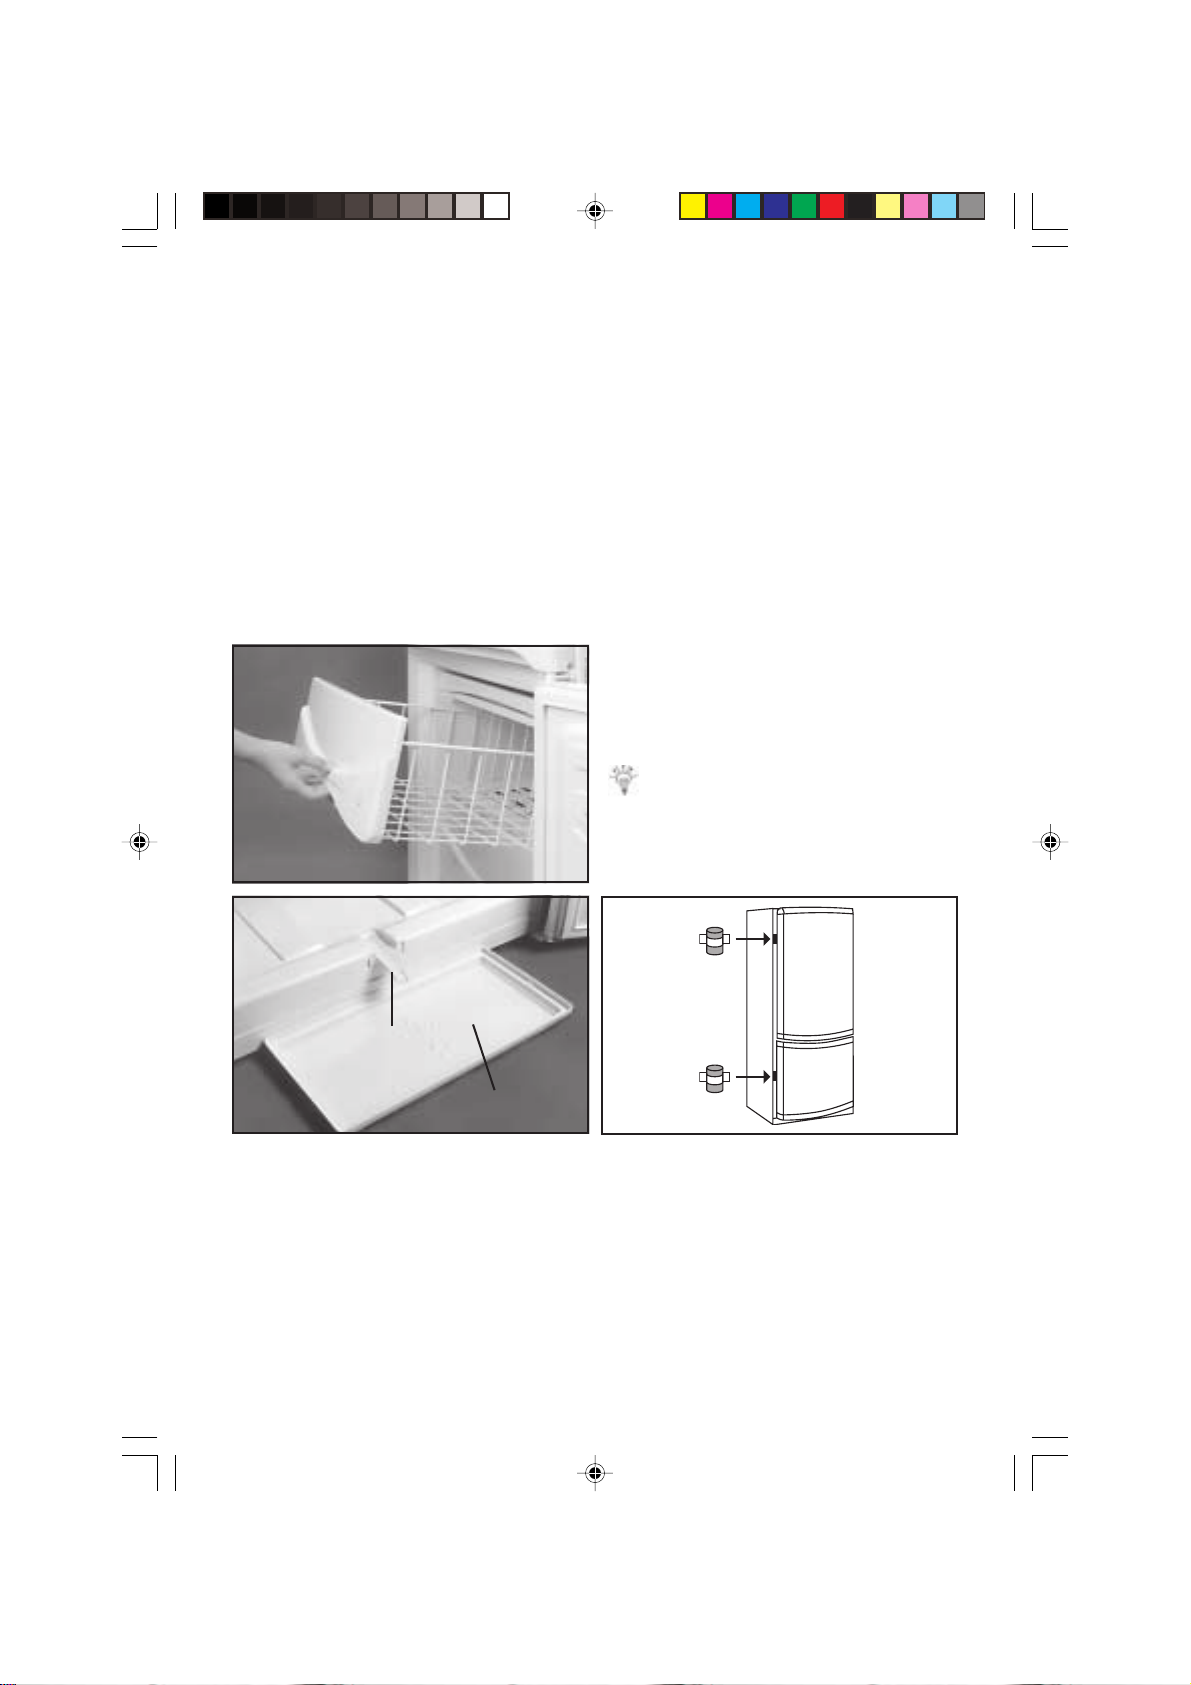
• Remove the baskets (fig. 15)
• Pull out the special conveyor 1 (fig. 16) until
it passes the edge of the appliance.
• Use the multifunction tray 2 (fig. 15) as drain
pan
Fig. 15
• To speed up the defrost process, you can
place a container with hot water (50°–60°C)
in the freezer compartment, paying
attention to put insulating material between
the container and the bottom of the freezer.
• Do not use metal objects to scrape off ice;
use the plastic scraper supplied with the
appliance.
• Clean the compartment with warm water
and some dish detergent.
• Rinse with a solution of water and vinegar
• Dry the walls
• Switch on the appliance again and then
replace the food.
Routine maintenance
Prolonged disuse:
Disconnect the appliance from the power supply
To aerate the compartments of your
appliance, wedge the doors open using, for
example, corks attached with adhesive tape
(fig.17)
Q
63733036_gb.p65 13/06/2002, 10:4121
R
Fig. 16
Fig. 17
21
Page 10
What to do if small problems occur?
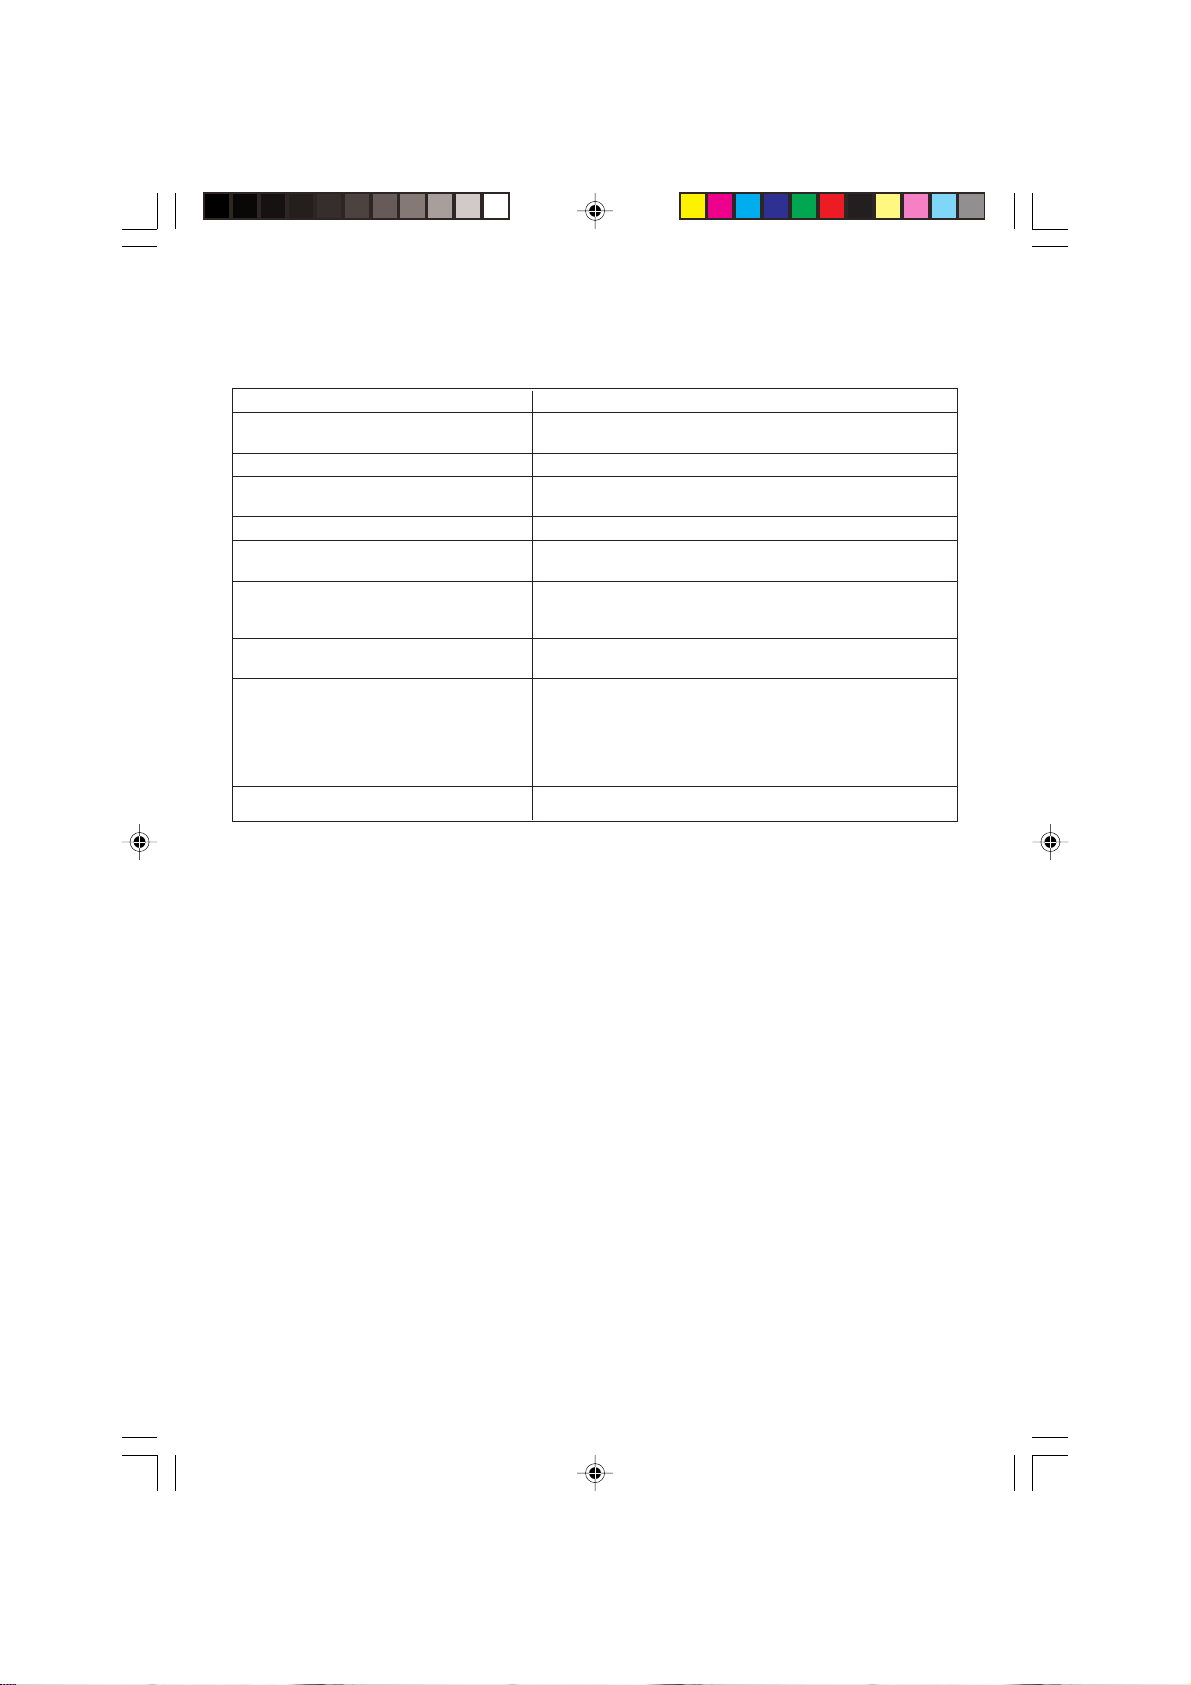
If faults occur whilst using your refrigerator-freezer, please check:
Trouble...
The appliance is not working at all
The lamp will not switch on
The appliance is excessively noisy
Water drips from under the refrigerator
There is too much frost build-up in the freezer
compartment
There is too much frost build-up in the refrigerator
compartment and the temperature is too low
The temperature inside the freezer is too low
The red LED is alight
The light is not working
- The electrical connections.
- The position of the thermostat/s: must not be set to 0.
- The electrical connections.
- That the floor is level
- That the levelling feet are adjusted properly
- The drain hole is obstructed; eliminate the blockage.
- It needs defrosting
- The door seal is not airtight, check feet are properly blocked.
- That the thermostat knob is not set to a position that is too high: if it is,
turn it progressively to a lower position so that the motor has its normal
stopping periods again.
- That the “fast freeze” button has not been pressed. The yellow LED
must be off.
- You have introduced a considerable amount of fresh food
- The freezer has just been turned on
- The freezer door has been left open for a long time. In these three cases,
the LED goes out after short time
- The thermostat setting is incorrect. Adjust it to a higher position. If the
problem persists, contact After-sales Service.
- This operation must be performed by After-sales Service.
Check...
The symbols used for the elements of this appliance are not contractual.
The manufacturer reserves the right to alter the exterior design of the appliances or
include technical innovations without modifying this document.
After-Sales Service
Before contacting After-Sales Service:
1. See if you can solve the problem yourself
with the help of the Troubleshooting guide.
2. Switch the appliance on again to see if the
problem has been solved. If it has not,
disconnect the appliance from the power
supply and wait for about an hour before
switching on again.
3. If the problem persists, contact After-sales
Service.
Specify:
• the nature of the problem,
• the model,
• the Service number (the number after the
word SERVICE on the data plate on the
inside of the appliance),
• your full address,
• your telephone number and area code.
Note: The direction of door opening can be
changed. If this operation is performed by
After-sales Service it is not covered by the
warranty.
22
63733036_gb.p65 13/06/2002, 10:4122
Page 11
Electrical Connection
1) For Great Britain only
Warning - this appliance must be earthed
Fuse replacement
If the mains lead of this appliance is fitted with a
BS 1363A 13amp fused plug, to change a fuse in
this type of plug use an A.S.T.A. approved fuse to
BS 1362 type and proceed as follows:
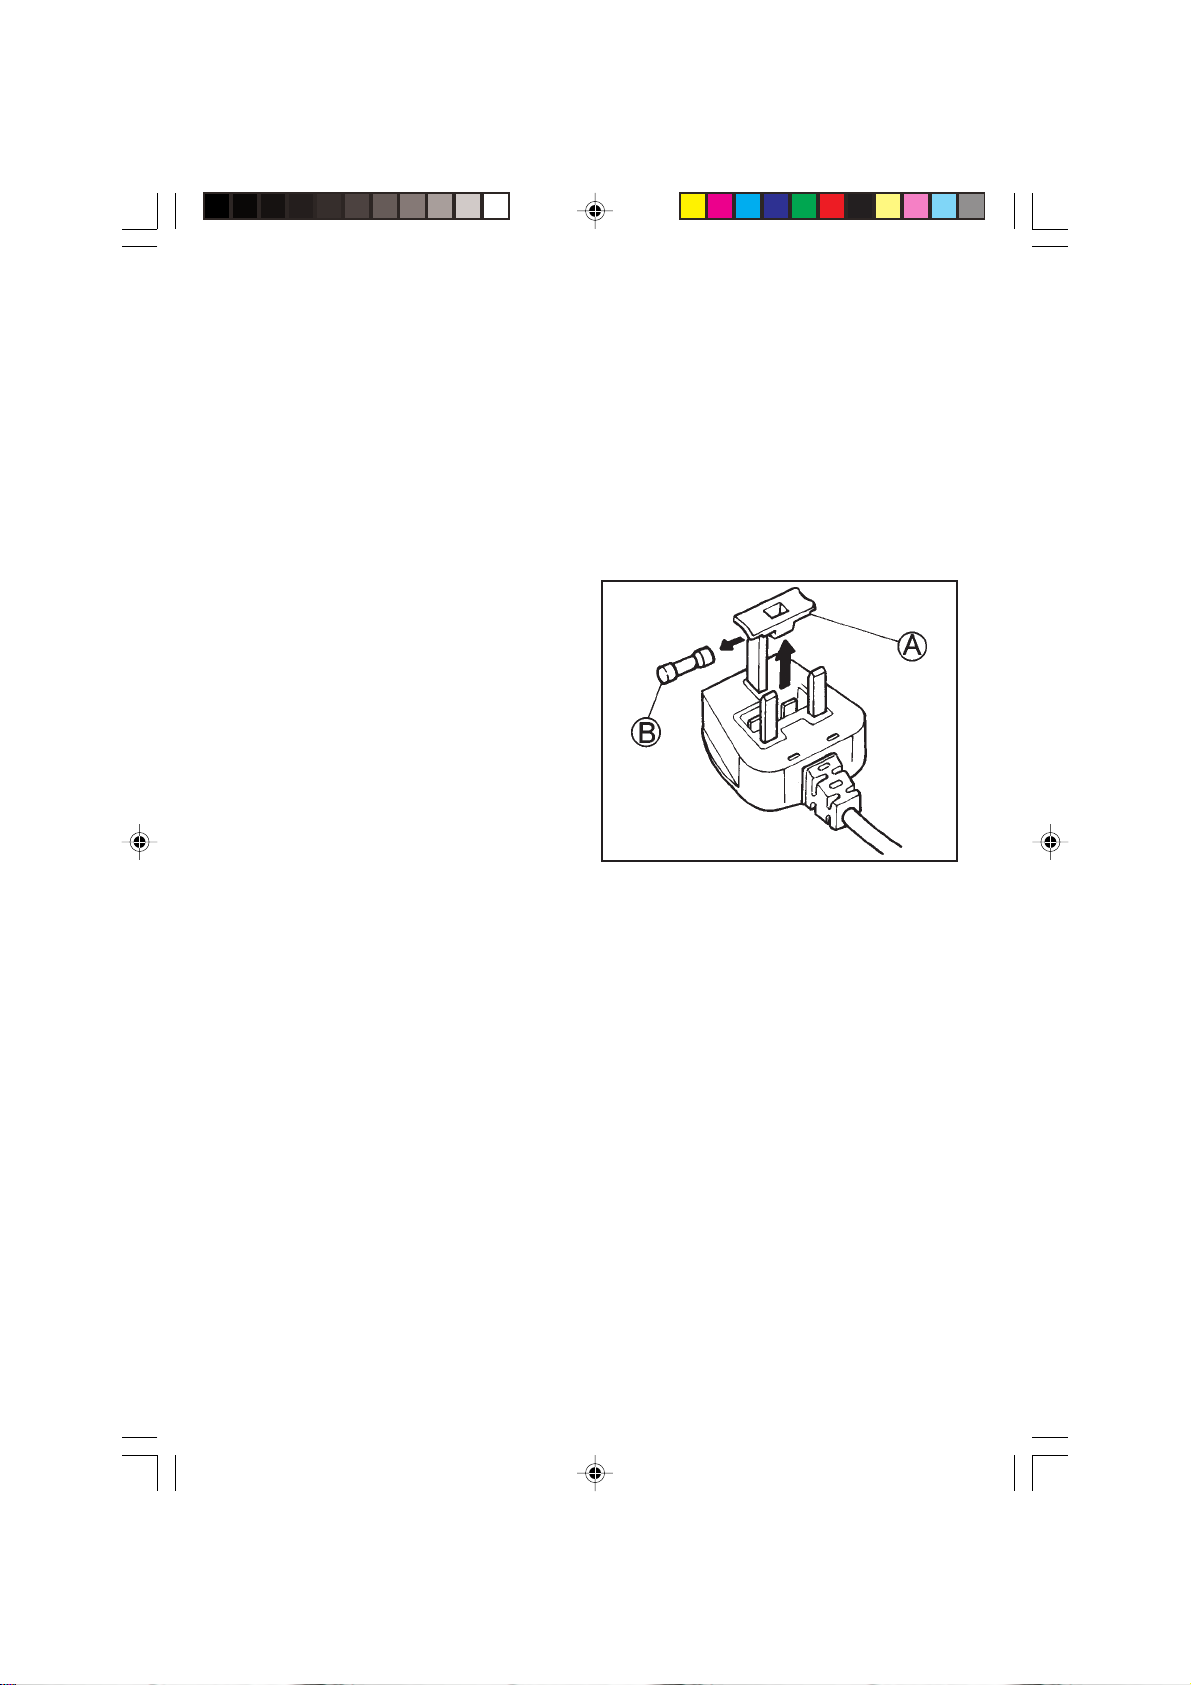
Remove the fuse cover (A) and fuse (B).
Fit replacement 13A fuse into fuse cover.
Refit both into plug.
Important:
The fuse cover must be refitted when changing a
fuse and if the fuse cover is lost the plug must
not be used until a correct replacement is fitted.
Correct replacement are identified by the
colour insert or the colour embossed in words
on the base of the plug.
Replacement fuse covers are available from your
local electrical store.
2) For the Republic of Ireland only
The information given in respect of Great Britain
will frequently apply, but a third type of plug and
socket is also used, the 2-pin, side earth type.
3) Socket outlet / plug
(valid for both countries)
If the fitted plug is not suitable for your socket
outlet, Please contact Whirlpool Service for
further instruction. Please do not attempt to
change plug yourself. This procedure needs to
be carried out by a qualified Whirlpool
technician in compliance with the manufactures
instructions and current standard safety
regulations.
63733036_gb.p65 13/06/2002, 10:4123
23
 Loading...