

Whirlpool CABRIO WTW6800WB1, CABRIO WTW6800WU1, CABRIO WTW6800WL1, CABRIO WTW6500WW1, CABRIO WTW6800WW1 Use & Care Manual
...
CABRIOTM
AUTOMATICWASHERWITH
®
6THSENSETMTECHNOLOGY
cabrlo
FABRIC CARE SYSTEM
For questions about features, operation/performance, parts, accessories, or
service, call: 1-800-253-1301
or visit our website at...
www.whirlpool.com
In Canada, call: 1-800-807-6777
or visit our website at...
www.whirlpool.ca
QUICK START GUIDE ............ PG. 6
Para una versibn en espahol, visite:
www.whirlpool.com
NOmero de pieza W10240441A
LAVEUSEAUTOMATIQUE
CABRIOTMAVEC
TECHNOLOGIE
6THSENSETM
Pour assistance, installation, ou service, composez le : 1-800-807-6777
ou visitez notre site internet &..
www.whirlpool.ca
LE0_/_C 8
Page
ASSISTANCE OR SERVICE ........................................................................ 2
WASHER SAFETY ....................................................................................... 3
BENEFITS AND FEATURES ....................................................................... 4
QUICK START GUIDE/WASHER USE ....................................................... 5
Using the Proper Detergent ...................................................................... 7
Starting Your Washer ................................................................................ 7
Cycles ....................................................................................................... 8
Additional Features ................................................................................... 9
Modifiers ................................................................................................... 9
Options .................................................................................................... 10
Changing Cycles, Modifiers, and Options .............................................. 11
LAUNDRY TIPS .......................................................................................... 11
WASHER CARE ......................................................................................... 12
Cleaning Your Washer ............................................................................ 12
Water Inlet Hoses .................................................................................... 12
Vacation, Storage, and Moving Care ..................................................... 12
TROUBLESHOOTING ............................................................................... 13
Washer and Components ....................................................................... 13
Washer Operation .................................................................................. 14
CLOTHING CARE ...................................................................................... 16
WARRANTY ............................................................................................... 19
GUIDE DE DI_MARRAGE RAPIDE.... PG. 24
Page
ASSISTANCE OU SERVICE ...................................................................... 20
SI_CURITI_ DE LA LAVEUSE .................................................................... 21
AVANTAGES ET CARACTI_RISTIQUES .................................................. 22
GUIDE DE DI_MARRAGE RAPIDE/UTILISATION DE LA LAVEUSE ..... 23
Utilisation du d_tergent appropri6 .......................................................... 25
Mise en marche de la laveuse ................................................................ 25
Programmes ........................................................................................... 26
Caract_ristiques suppl6mentaires .......................................................... 28
Modificateurs .......................................................................................... 28
Options ................................................................................................... 29
Changement des programmes, modificateurs et options ..................... 30
CONSEILS DE LESSIVAGE ...................................................................... 31
ENTRETIEN DE LA LAVEUSE .................................................................. 31
Nettoyage de la laveuse ......................................................................... 31
Tuyaux d'arriv6e d'eau ........................................................................... 32
Precautions & prendre avant les vacances,
un entreposage ou un d_m_nagement .................................................. 32
DEPANNAGE ............................................................................................. 33
La laveuse et ses composants ............................................................... 33
Fonctionnement de la laveuse .............................................................. 35
Soin des v_tements ................................................................................ 36
GARANTIE .................................................................................................. 39
W10240440A
SP PN W10240441A

ASSISTANCEORSERVICE
Before calling for assistance or service, please check
"Troubleshooting." It may save you the cost of a service call. If
you still need help, follow the instructions below.
When calling, please know the purchase date and the complete
model and serial number of your appliance. This information will
help us to better respond to your request.
If you need replacement parts
If you need to order replacement parts, we recommend that you
only use FSP® Factory Specified Parts. These parts will fit right
and work right because they are made with the same precision
used to build every new WHIRLPOOL ® appliance.
To locate FSP ®replacement parts in your area:
In the U.S.A., call the Customer eXperience Center at
1-800-253-1301, or your nearest designated service center.
In Canada, call 1-800-807-6777, or your nearest designated
service center.
Call the Whirlpool Customer eXperience Center toll free:
1-800-253-1301.
Our consultants provide assistance with:
• Features and specifications on our full line of appliances
• Installation information
• Use and maintenance procedures
• Accessory and repair parts sales
• Specialized customer assistance (Spanish speaking, hearing
impaired, limited vision, etc.)
• Referrals to local dealers, repair parts distributors, and service
companies
Whirlpool designated service technicians are trained to fulfill the
product warranty and provide after-warranty service anywhere in
the United States.
To locate the Whirlpool designated service company in your area,
you can also look in your telephone directory Yellow Pages.
For further assistance
If you need further assistance, you can write to Whirlpool
Corporation with any questions or concerns at:
Whirlpool Brand Home Appliances
Customer eXperience Center
553 Benson Road
Benton Harbor, MI 49022-2692
Please include a daytime phone number in your correspondence.
Call the Whirlpool Canada LP Customer Interaction Centre toll
free: 1-800-807-6777.
Our consultants provide assistance with:
• Use and maintenance procedures
• Accessory and repair parts sales
• Features and specifications on our full line of appliances
Referrals to local dealers, repair parts distributors, and service
companies. Whirlpool Canada LP designated service
technicians are trained to fulfill the product warranty and
provide after-warranty service anywhere in Canada.
For further assistance
If you need further assistance, you can write to Whirlpool
Canada LP with any questions or concerns at:
Customer Interaction Centre
Whirlpool Canada LP
1901 Minnesota Court
Mississauga, Ontario L5N 3A7
Please include a daytime phone number in your correspondence.
2
WASHER SAFETY
Your safety and the safety of others are very important.
We have provided many important safety messages in this manual and on your appliance. Always read and obey all safety
messages.
This is the safety alert symbol.
This symbol alerts you to potential hazards that can kill or hurt you and others.
All safety messages will follow the safety alert symbol and either the word "DANGER" or "WARNING."
These words mean:
You can be killed or seriously injured if you don't immediately[
follow instructions.
You can be killed or seriously injured if you don't follow
instructions.
All safety messages will tell you what the potential hazard is, tell you how to reduce the chance of injury, and tell you what can
happen if the instructions are not followed.
IMPORTANT SAFETY INSTRUCTIONS
WARNING: To reduce the risk of fire, electric shock, or injury to persons when using the washer, follow basic precautions,
including the following:
[] Read all instructions before using the washer.
[] Do not wash articles that have been previously cleaned
in, washed in, soaked in, or spotted with gasoline,
dry-cleaning solvents, other flammable, or explosive
substances as they give off vapors that could ignite or
explode.
[] Do not add gasoline, dry-cleaning solvents, or other
flammable, or explosive substances to the wash water.
These substances give off vapors that could ignite or
explode.
[] Under certain conditions, hydrogen gas may be
produced in a hot water system that has not been used
for 2 weeks or more. HYDROGEN GAS IS
EXPLOSIVE. If the hot water system has not been
used for such a period, before using the washing
machine, turn on all hot water faucets and let the water
flow from each for several minutes. This will release
any accumulated hydrogen gas. As the gas is
flammable, do not smoke or use an open flame during
this time.
State of California Proposition 65 Warnings:
WARNING: This product contains a chemical known to the State of California to cause cancer.
WARNING: This product contains a chemical known to the State of California to cause birth defects or other reproductive harm.
SAVE THESE INSTRUCTIONS
Do not allow children to play on or in the washer. Close
supervision of children is necessary when the washer is used
near children.
Before the washer is removed from service or discarded,
remove the door or lid.
[] Do not reach into the washer if the drum, tub or agitator is
moving.
[] Do not install or store the washer where it will be exposed to
the weather.
[] Do not tamper with controls.
[] Do not repair or replace any part of the washer or attempt any
servicing unless specifically recommended in this manual or in
published user-repair instructions that you understand and
have the skills to carry out.
[] See "Electrical Requirements" for grounding instructions.
BENEFITSANDFEATURES
Your washer has several benefits and features that are summarized here. Some items may not apply to your model.
Deep Clean Cleaning Action
The Deep Clean option uses Direct Inject Cleaning Action to help
ensure better soil and stain removal. Deep Clean reduces the
High-Efficiency Wash System
Your new top loading, high-efficiency washer saves you time by
allowing you to do fewer, larger loads. It also conserves resources
and helps lower your water and energy bills by using the following
innovations.
Auto Water Level
This washer senses the load size and composition through a
series of fills and wash motion. It then adjusts the water level for
the best cleaning and rinsing performance. It eliminates the
guesswork. The water level is just right for every wash load size.
NOTE: You may notice during a cycle that the wash load is not
completely submerged in water. This is normal for your washer.
Care Control Temperature Management
The Care Control Temperature Management system on this
washer electronically senses and maintains a uniform water
temperature by regulating incoming water temperatures. Using
Care Control will help dissolve detergent.
Hydro Plate Wash System
Your new washer works differently than most washers that you are
accustomed to. The most striking difference is that the washer
has an hydro plate wash system. It uses this new innovative hydro
plate at the bottom of the wash basket to move your load through
a mixture of water and detergent. The load is moved from the
outside toward the middle with items coming up in the center and
down on the outside edges.
Dispensers
The dispensers make your washer truly automatic. It is
unnecessary for you to return to the washer during the cycle to
add detergent, bleach, or fabric softener.
Laundry products are added to the load at the proper time in the
wash cycle.
Spin Speeds
This washer is preset to automatically select the spin speed based
on the cycle selected. Depending on your wash load, you can
change the preset speeds. The spin speed on this washer is
nearly twice as fast as that of a conventional washer. You may
notice different sounds during a spin cycle because of this higher
rate of speed.
need for pretreatment and is safe for all washable fabrics. Water
flushes through the dispenser to dissolve the detergent. The
detergent mixture is then sprayed onto the load while the washer
spins at low speed. This cleaning action will last up to 5 minutes
depending on the cycle selected. The washer then stops spinning,
fills with water to the appropriate level and continues washing with
the selected cycle.
High Efficiency (HE) Detergent
This washer is designed for High Efficiency (HE) detergent use
only. HEdetergents are made to produce the right amount of suds
and give the best performance in low water wash systems.
Innovative Features
Your new washer includes these features that help to reduce
noise, increase the ease of use and improve wash performance.
6th Sense TM Technology
6th Sense TM Technology features built-in intelligence that "knows
each wash load" for optimal cleaning, fabric care and efficiency.
From weighing the size of the load to determining how much
water is needed to clean it, the 6th Sense TM combination of
intuitive features takes the guesswork out of clothes care. Three
levels of off-balance protection and a suds detection sensor help
ensure worry- and error-free operation for further peace of mind.
Electronic Controls
Electronic controls with preset cycles are easy to use whether you
are a beginner or an "expert."
Quiet Operation
This washer is insulated with sound-dampening materials to
reduce washer operation sounds and noises. On some models,
an additional tub wrap is added for extra dampening of vibration
and sound.
4
Suspension System
To reduce washer "walk" and "out of balance" conditions, your
new washer combines:
• 4 Spring damper struts to isolate vibration
• Balance ring at the top and bottom of the wash basket to
minimize vibration
• Operating software designed to sense and correct off balance
loads
Clean Washer with AFFRESH TM Cycle
This washer features an easy-to-use Clean Washer cycle that
thoroughly cleans the inside of your washing machine using
higher water volumes in combination with AFFRESH _ washer
cleaner or liquid chlorine bleach.
Stainless Steel Basket
The stainless steel basket is corrosion resistant and enables
higher spin speeds for more water extraction, reducing drying
time.
QUICKSTARTGUIDE/WASHERUSE
Force Filter Wash/Rinse System
This washer filters 100% of the wash and rinse water. The water is
filtered then recirculated. The force filter traps sand and dirt,
flushing them down the drain, so they are not redeposited onto
the clean clothes.
Delay Wash
Delay Wash allows you to load your washer and pause the start of
the cycle for up to 10 hours.
End of Cycle Signal
The End of Cycle Signal produces an audible sound when the
wash cycle is finished. This signal is helpful when you are
removing items from the washer as soon as itstops.
Spray Rinse
This washer is designed to save water by rinsing the load with a
spray rinse instead of a deep water rinse on some cycles. When
using fabric softener, always select Fabric Softener from the
Dispensers option (on some models), select Fabric Softener
Dispenser (on some models), or select Extra Rinse.
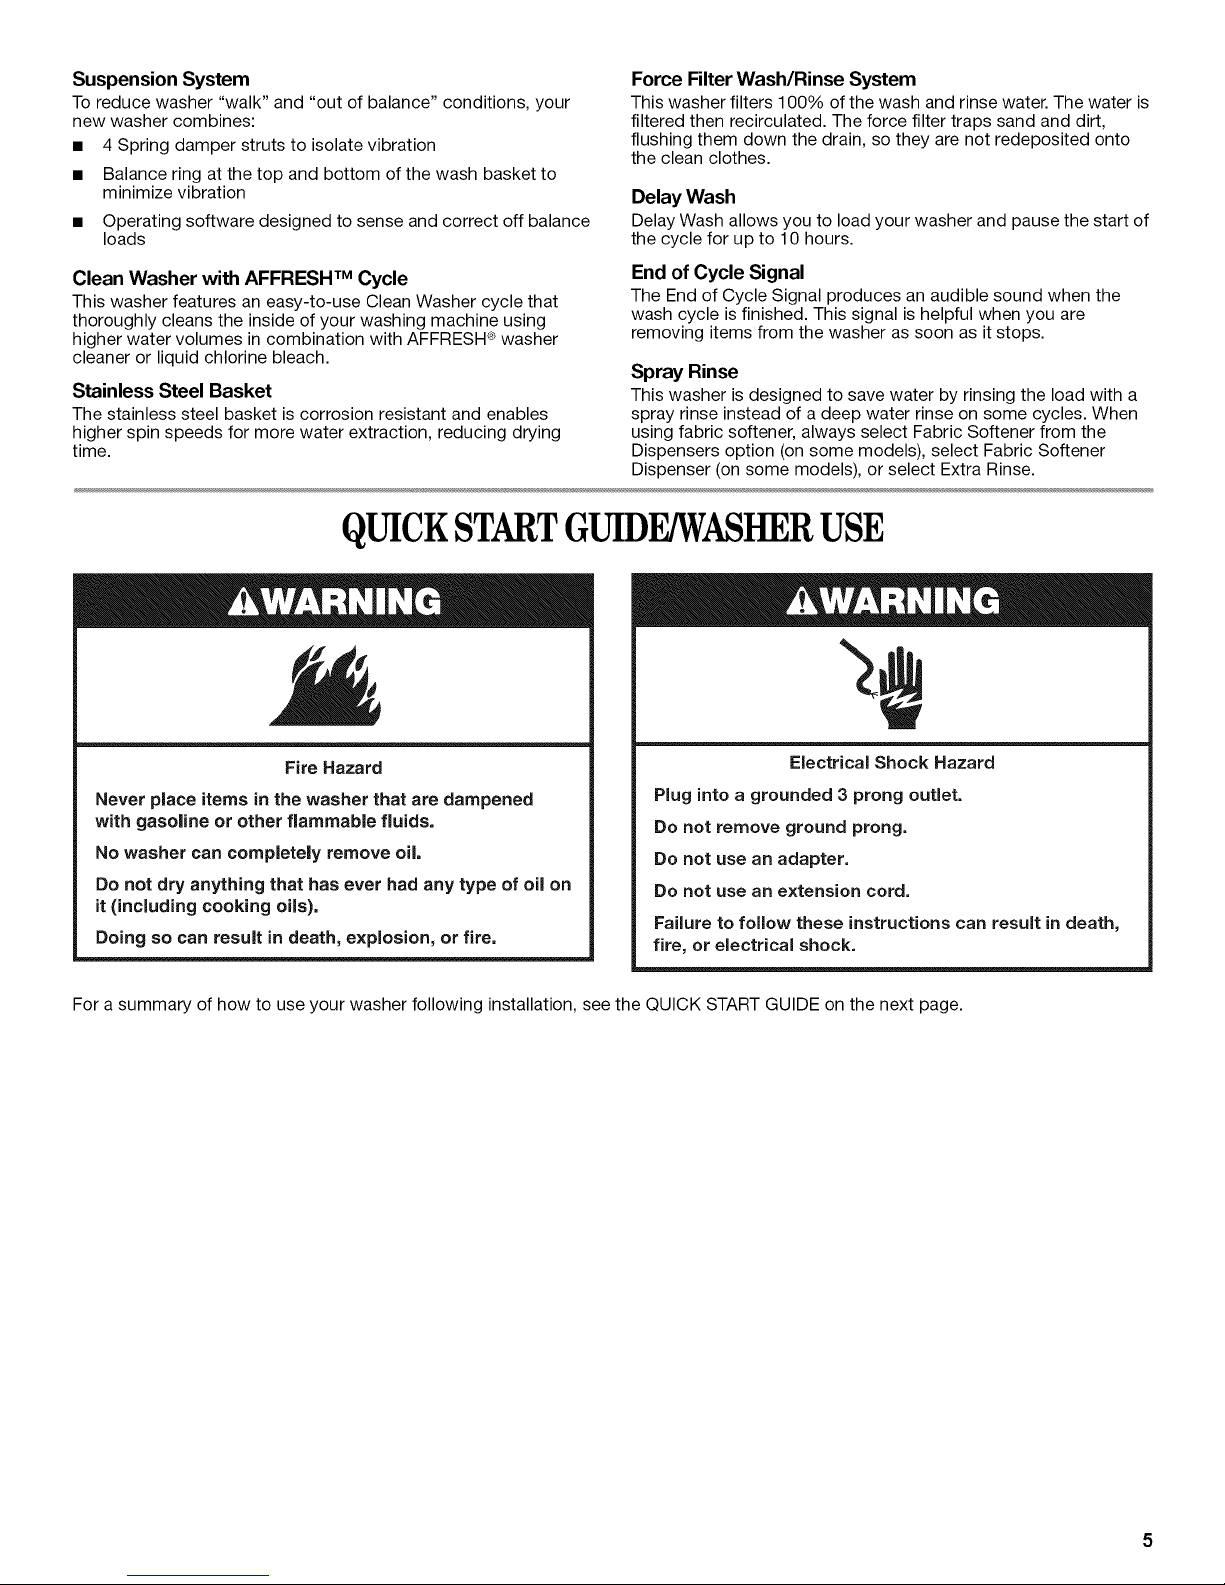
Fire Hazard
Never place items in the washer that are dampened
with gasoline or other flammable fluids.
No washer can completely remove oil.
Do not dry anything that has ever had any type of oil on
it (including cooking oils).
Doing so can result in death, explosion, or fire.
For a summary of how to use your washer following installation, see the QUICK START GUIDE on the next page.
Plug into a grounded 3 prong outlet.
Do not remove ground prong.
Do not use an adapter.
Do not use an extension cord.
Failure to follow these instructions can result in death,
fire, or electrical shock.
Electrical Shock Hazard

QUICKSTARTGUIDE
NOTE: The panel shown above may be different from that of your model.
WARNING: To reduce the risk of fire, electric shock, or injury to persons, read the IMPORTANT SAFETY INSTRUCTIONS
before operating this appliance. The following is a guide to using your washer.
Please refer to specific sections of this manual for more detailed information.
6
Use only High Efficiency detergents. The package for this type of
detergent will be marked "HE" or "High Efficiency." This wash
system, along with less water, will create too much sudsing with a
regular non-HE detergent. Using regular detergent will likely result
in washer errors, longer cycle times, and reduced rinsing
performance. It may also result in component failures and
noticeable mold or mildew. HE detergents are made to produce
the right amount of suds for the best performance. Follow the
manufacturer's instructions to determine the amount of detergent
to use. Remember, concentrated detergent such as 2x or higher
will use less detergent based on load size.
Use only HE High Efficiency detergent.
1=
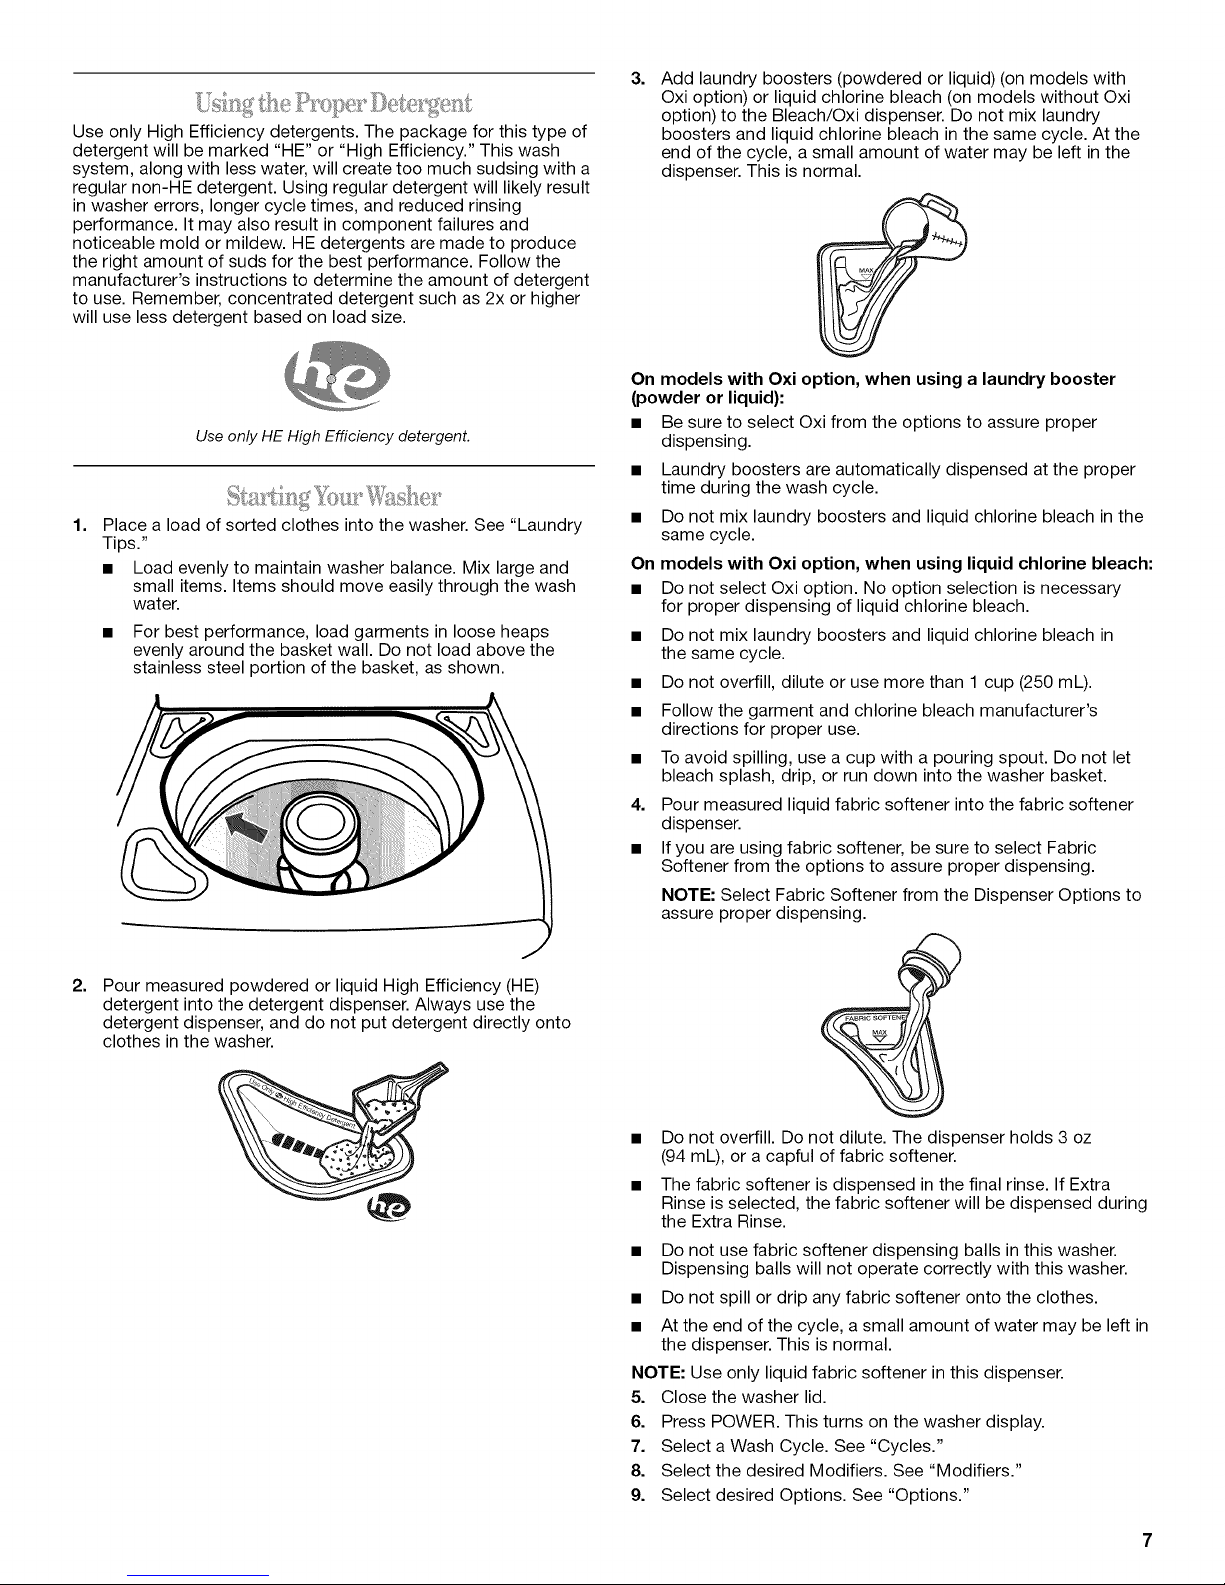
Place a load of sorted clothes into the washer. See "Laundry
Tips."
• Load evenly to maintain washer balance. Mix large and
small items. Items should move easily through the wash
water.
• For best performance, load garments in loose heaps
evenly around the basket wall. Do not load above the
stainless steel portion of the basket, as shown.
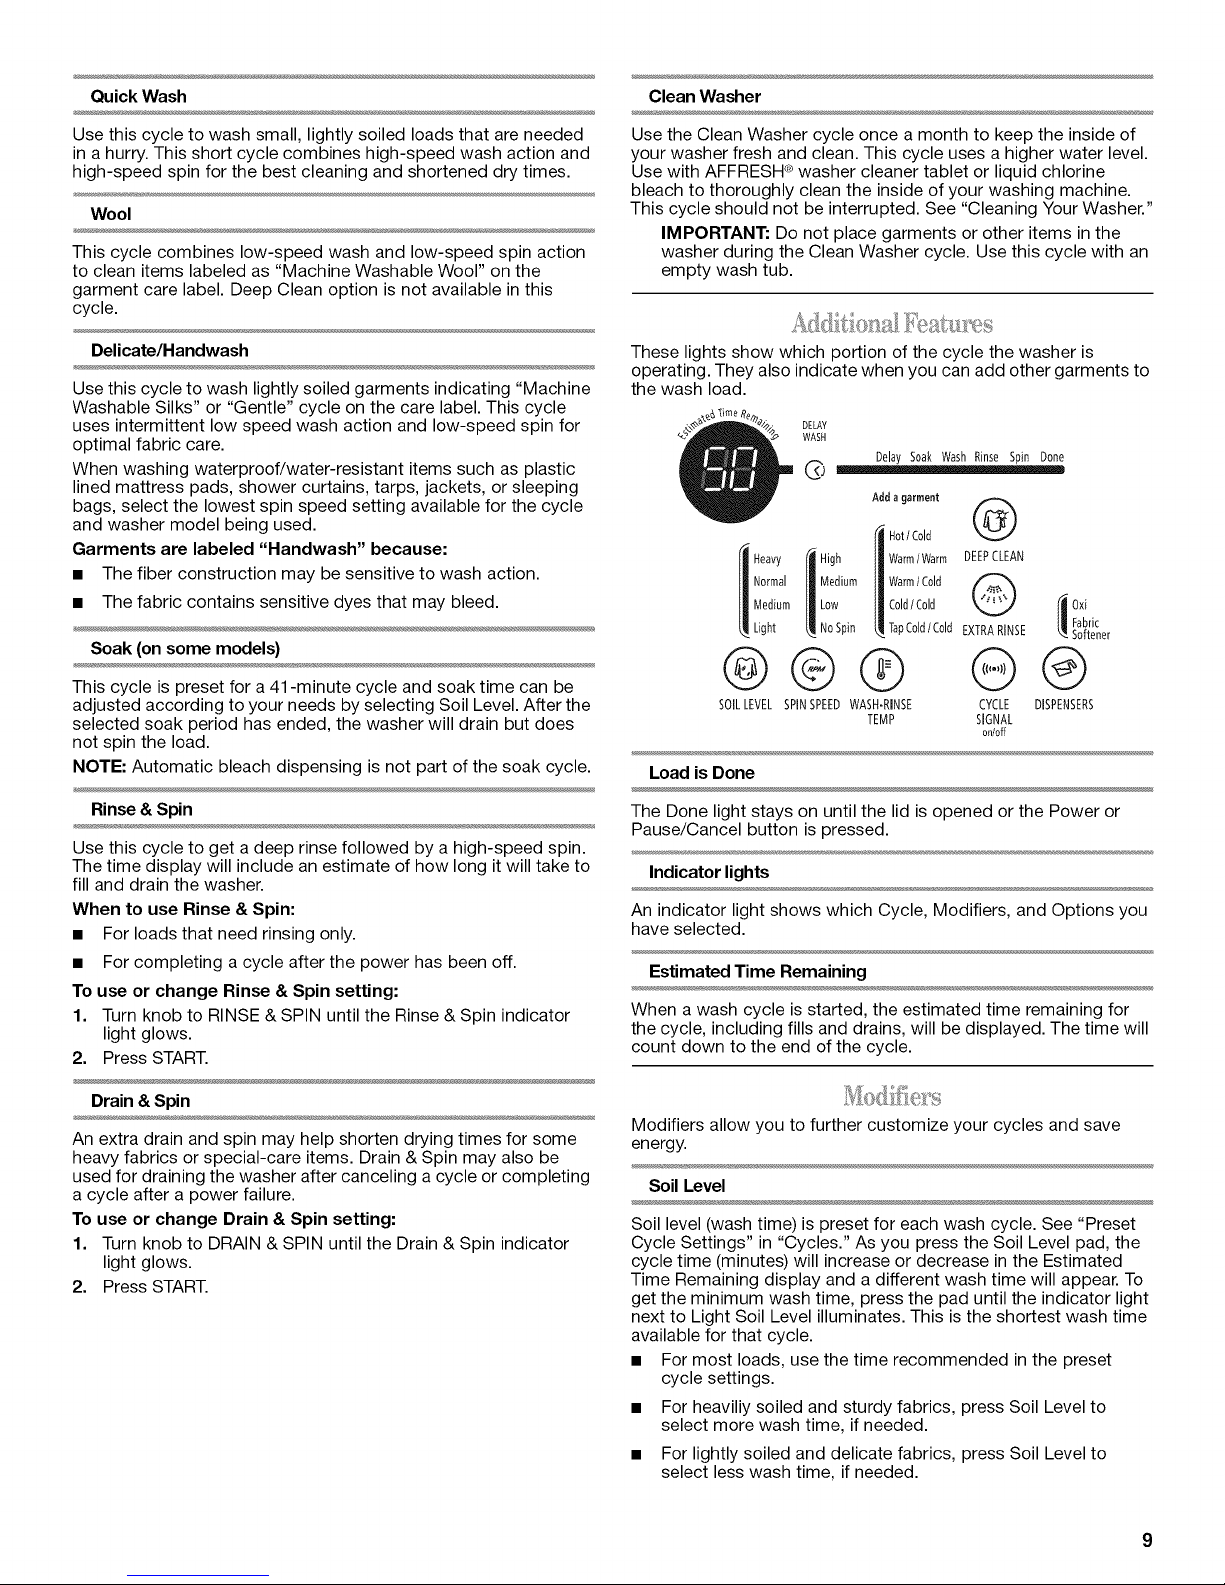
3=
Add laundry boosters (powdered or liquid) (on models with
Oxi option) or liquid chlorine bleach (on models without Oxi
option) to the Bleach/Oxi dispenser. Do not mix laundry
boosters and liquid chlorine bleach in the same cycle. At the
end of the cycle, a small amount of water may be left in the
dispenser. This is normal.
On models with Oxi option, when using a laundry booster
(powder or liquid):
• Be sure to select Oxi from the options to assure proper
dispensing.
• Laundry boosters are automatically dispensed at the proper
time during the wash cycle.
• Do not mix laundry boosters and liquid chlorine bleach in the
same cycle.
On models with Oxi option, when using liquid chlorine bleach:
• Do not select Oxi option. No option selection is necessary
for proper dispensing of liquid chlorine bleach.
• Do not mix laundry boosters and liquid chlorine bleach in
the same cycle.
• Do not overfill, dilute or use more than 1 cup (250 mL).
• Follow the garment and chlorine bleach manufacturer's
directions for proper use.
• To avoid spilling, use a cup with a pouring spout. Do not let
bleach splash, drip, or run down into the washer basket.
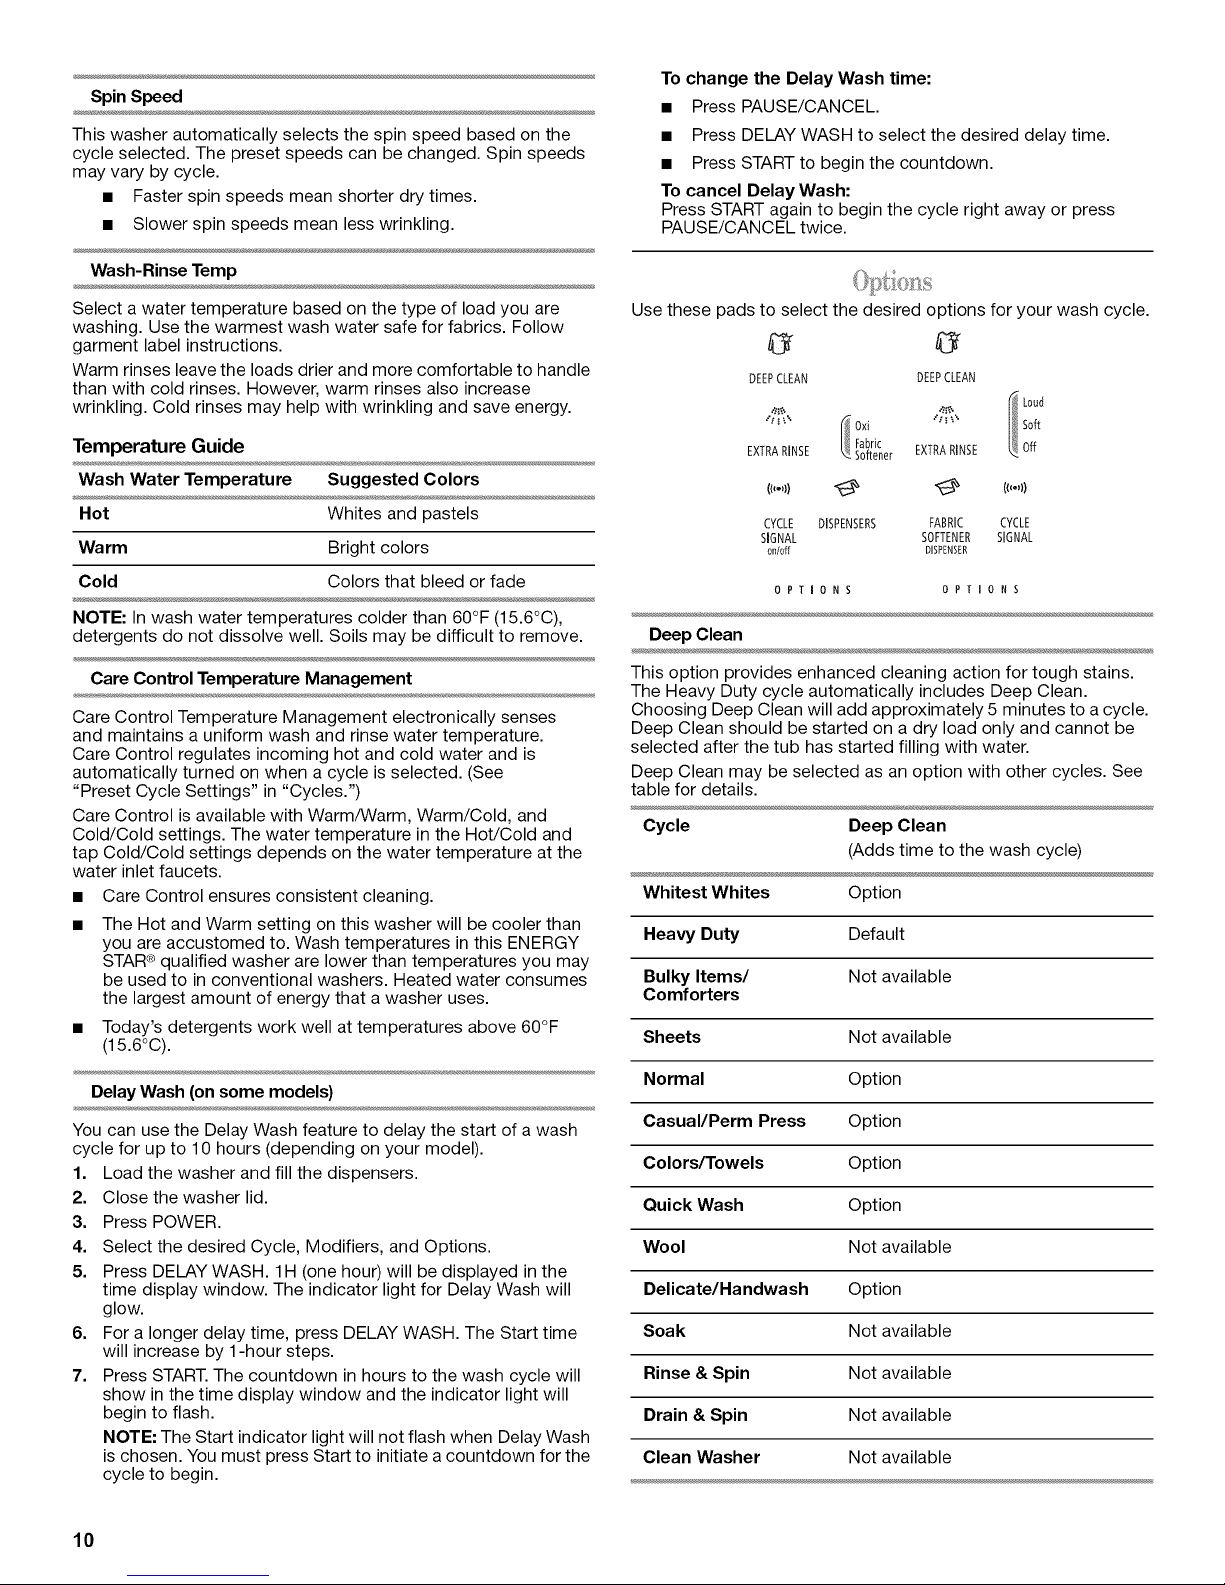
4. Pour measured liquid fabric softener into the fabric softener
dispenser.
• If you are using fabric softener, be sure to select Fabric
Softener from the options to assure proper dispensing.
NOTE: Select Fabric Softener from the Dispenser Options to
assure proper dispensing.
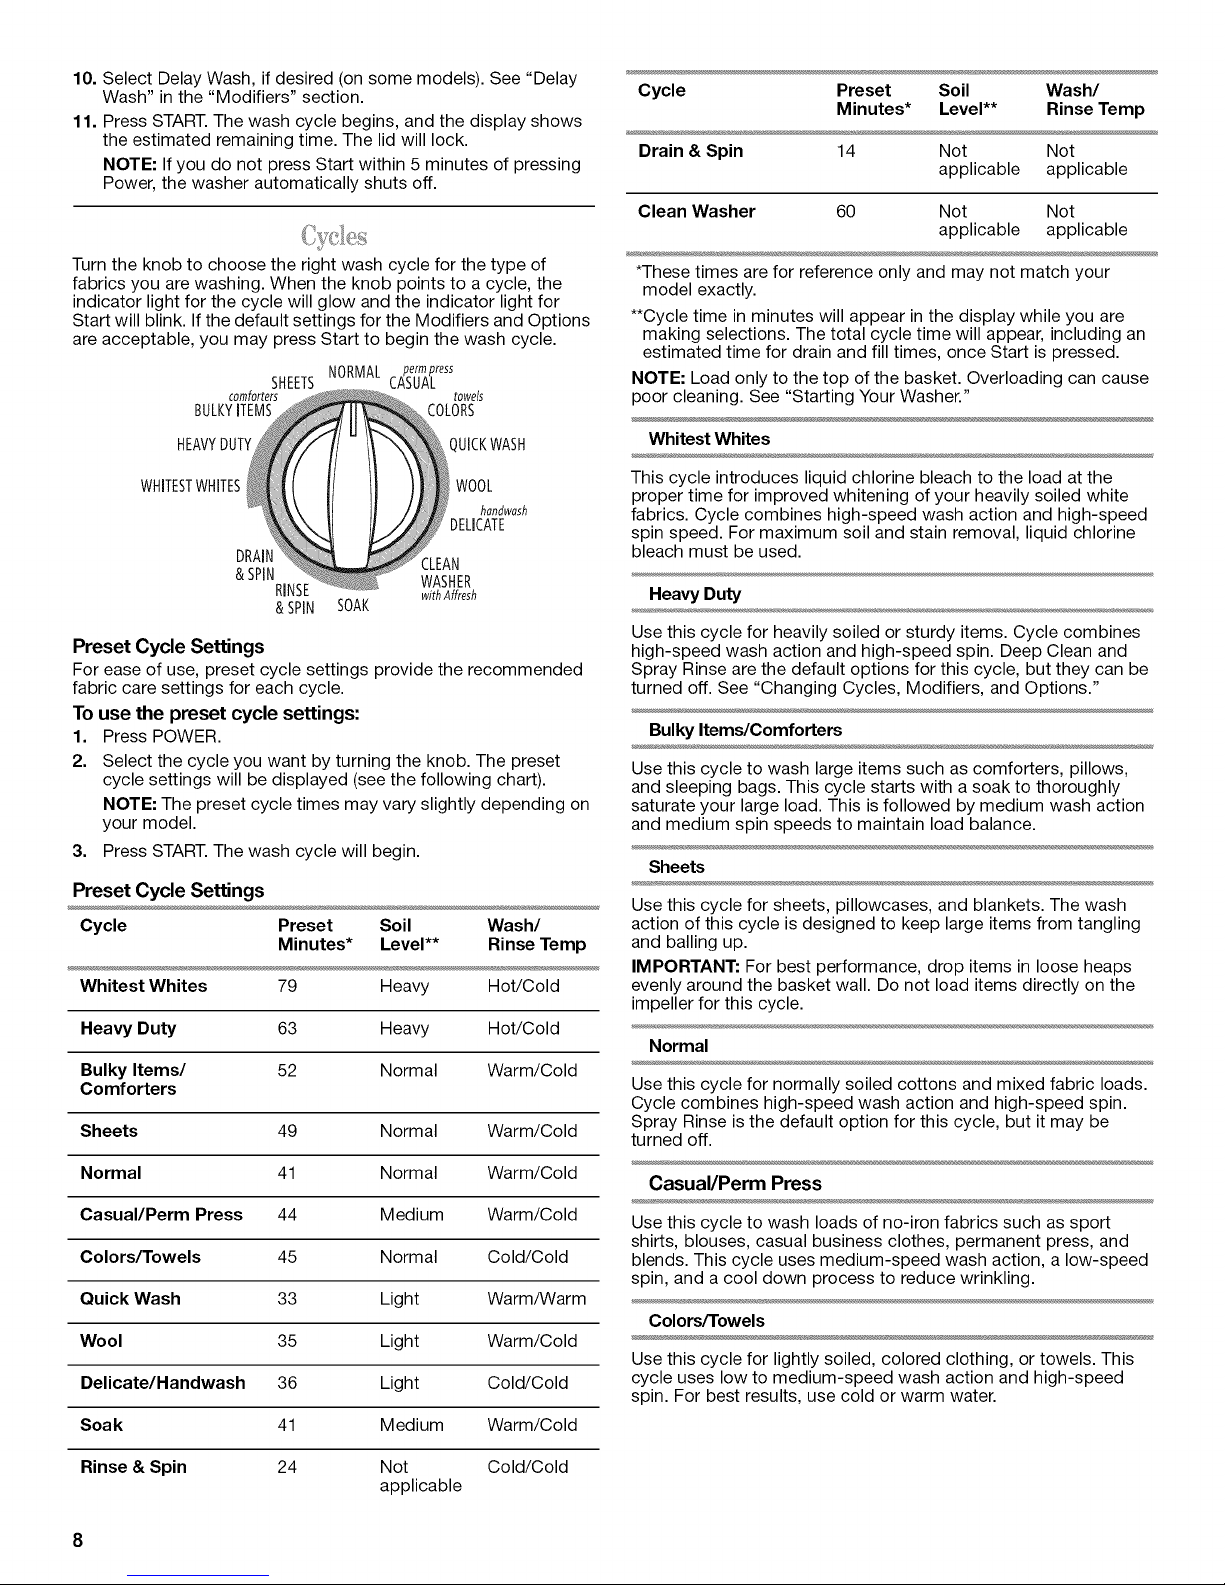
2=
Pour measured powdered or liquid High Efficiency (HE)
detergent into the detergent dispenser. Always use the
detergent dispenser, and do not put detergent directly onto
clothes in the washer.
• Do not overfill. Do not dilute. The dispenser holds 3 oz
(94 mL), or a capful of fabric softener.
• The fabric softener is dispensed in the final rinse. If Extra
Rinse is selected, the fabric softener will be dispensed during
the Extra Rinse.
• Do not use fabric softener dispensing balls in this washer.
Dispensing balls will not operate correctly with this washer.
• Do not spill or drip any fabric softener onto the clothes.
• At the end of the cycle, a small amount of water may be left in
the dispenser. This is normal.
NOTE: Use only liquid fabric softener in this dispenser.
5. Close the washer lid.
6. Press POWER. This turns on the washer display.
7. Select a Wash Cycle. See "Cycles."
8. Select the desired Modifiers. See "Modifiers."
9. Select desired Options. See "Options."
10.SelectDelayWash,ifdesired(onsomemodels).See"Delay
Wash"inthe"Modifiers"section.
11.PressSTART.Thewashcyclebegins,andthedisplayshows
theestimatedremainingtime.Thelidwilllock.
NOTE:IfyoudonotpressStartwithin5minutesofpressing
Power,thewasherautomaticallyshutsoff.
Turntheknobtochoosetherightwashcycleforthetypeof
fabricsyouarewashing.Whentheknobpointstoacycle,the
indicatorlightforthecyclewillglowandtheindicatorlightfor
Startwillblink.IfthedefaultsettingsfortheModifiersandOptions
areacceptable,youmaypressStarttobeginthewashcycle.
NORMAL permpress
SHEETS
comforters
BULKYITEMS
HEAVYDUTY
WHITESTWHITES
DRAIN
&SPIN
RINSE
&SPIN
Preset Cycle Settings
For ease of use, preset cycle settings provide the recommended
fabric care settings for each cycle.
To use the preset cycle settings:
1. Press POWER.
2.
Select the cycle you want by turning the knob. The preset
cycle settings will be displayed (see the following chart).
NOTE: The preset cycle times may vary slightly depending on
your model.
3. Press START. The wash cycle will begin.
Preset Cycle Settings
Cycle Preset Soil Wash/
Whitest Whites 79 Heavy Hot/Cold
Heavy Duty 63 Heavy Hot/Cold
Bulky Items/ 52 Normal Warm/Cold
Comforters
Sheets 49 Normal Warm/Cold
Normal 41 Normal Warm/Cold
Casual/Perm Press 44 Medium Warm/Cold
Colors/Towels 45 Normal Cold/Cold
Quick Wash 33 Light Warm/Warm
Wool 35 Light Warm/Cold
Delicate/Handwash 36 Light Cold/Cold
Soak 41 Medium Warm/Cold
Minutes* Level** Rinse Temp
SOAK
CASUAL
WASHER
withAffresh
towels
LORS
QUICKWASH
W00L
hondwash
DELICATE
N
Cycle Preset Soil Wash/
Minutes* Level** Rinse Temp
Drain & Spin 14 Not Not
applicable applicable
Clean Washer 60 Not Not
applicable applicable
*These times are for reference only and may not match your
model exactly.
**Cycle time in minutes will appear in the display while you are
making selections. The total cycle time will appear, including an
estimated time for drain and fill times, once Start is pressed.
NOTE: Load only to the top of the basket. Overloading can cause
poor cleaning. See "Starting Your Washer."
Whitest Whites
This cycle introduces liquid chlorine bleach to the load at the
proper time for improved whitening of your heavily soiled white
fabrics. Cycle combines high-speed wash action and high-speed
spin speed. For maximum soil and stain removal, liquid chlorine
bleach must be used.
Heavy Duty
Use this cycle for heavily soiled or sturdy items. Cycle combines
high-speed wash action and high-speed spin. Deep Clean and
Spray Rinse are the default options for this cycle, but they can be
turned off. See "Changing Cycles, Modifiers, and Options."
Bulky Items/Comforters
Use this cycle to wash large items such as comforters, pillows,
and sleeping bags. This cycle starts with a soak to thoroughly
saturate your large load. This is followed by medium wash action
and medium spin speeds to maintain load balance.
Sheets
Use this cycle for sheets, pillowcases, and blankets. The wash
action of this cycle is designed to keep large items from tangling
and bailing up.
IMPORTANT: For best performance, drop items in loose heaps
evenly around the basket wall. Do not load items directly on the
impeller for this cycle.
Normal
Use this cycle for normally soiled cottons and mixed fabric loads.
Cycle combines high-speed wash action and high-speed spin.
Spray Rinse is the default option for this cycle, but it may be
turned off.
Casual/Perm Press
Use this cycle to wash loads of no-iron fabrics such as sport
shirts, blouses, casual business clothes, permanent press, and
blends. This cycle uses medium-speed wash action, a low-speed
spin, and a cool down process to reduce wrinkling.
Colors/Towels
Use this cycle for lightly soiled, colored clothing, or towels. This
cycle uses low to medium-speed wash action and high-speed
spin. For best results, use cold or warm water.
Rinse & Spin 24 Not Cold/Cold
applicable
Quick Wash
Clean Washer
Use this cycle to wash small, lightly soiled loads that are needed
in a hurry. This short cycle combines high-speed wash action and
high-speed spin for the best cleaning and shortened dry times.
Wool
This cycle combines low-speed wash and low-speed spin action
to clean items labeled as "Machine Washable Wool" on the
garment care label. Deep Clean option is not available in this
cycle.
Delicate/Handwash
Use this cycle to wash lightly soiled garments indicating "Machine
Washable Silks" or "Gentle" cycle on the care label. This cycle
uses intermittent low speed wash action and low-speed spin for
optimal fabric care.
When washing waterproof/water-resistant items such as plastic
lined mattress pads, shower curtains, tarps, jackets, or sleeping
bags, select the lowest spin speed setting available for the cycle
and washer model being used.
Garments are labeled "Handwash" because:
• The fiber construction may be sensitive to wash action.
• The fabric contains sensitive dyes that may bleed.
Soak (on some models)
This cycle is preset for a 41 -minute cycle and soak time can be
adjusted according to your needs by selecting Soil Level. After the
selected soak period has ended, the washer will drain but does
not spin the load.
NOTE: Automatic bleach dispensing is not part of the soak cycle.
Use the Clean Washer cycle once a month to keep the inside of
your washer fresh and clean. This cycle uses a higher water level.
Use with AFFRESH_ washer cleaner tablet or liquid chlorine
bleach to thoroughly clean the inside of your washing machine.
This cycle should not be interrupted. See "Cleaning Your Washer."
IMPORTANT: Do not place garments or other items in the
washer during the Clean Washer cycle. Use this cycle with an
empty wash tub.
These lights show which portion of the cycle the washer is
operating. They also indicate when you can add other garments to
the wash load.
DELAY
WASH
@ .--................-.
Heavy _ High I| Warm/Warm DEEPCLEAN
Medium IILow II Cold/Cold Oxi
Light __ NoSpin _ TapCold/ ColdEXTRARINSE Softener
Delay Soak WashRinse Spin Done
Add a garme#t
Hot/ Cold
Hm
Fabric
@@© @@
SOILLEVEL SPINSPEEDWASH-RINSE CYCLE DISPENSERS
Load is Done
TEMP SIGNAL
0n/0ff
Rinse & Spin
Use this cycle to get a deep rinse followed by a high-speed spin.
The time display will include an estimate of how long it will take to
fill and drain the washer.
When to use Rinse & Spin:
• For loads that need rinsing only.
• For completing a cycle after the power has been off.
To use or change Rinse & Spin setting:
1. Turn knob to RINSE & SPIN until the Rinse & Spin indicator
light glows.
2. Press START.
Drain & Spin
An extra drain and spin may help shorten drying times for some
heavy fabrics or special-care items. Drain & Spin may also be
used for draining the washer after canceling a cycle or completing
a cycle after a power failure.
To use or change Drain & Spin setting:
1. Turn knob to DRAIN & SPIN until the Drain & Spin indicator
light glows.
2. Press START.
The Done light stays on until the lid is opened or the Power or
Pause/Cancel button is pressed.
Indicator lights
An indicator light shows which Cycle, Modifiers, and Options you
have selected.
Estimated Time Remaining
When a wash cycle is started, the estimated time remaining for
the cycle, including fills and drains, will be displayed. The time will
count down to the end of the cycle.
Modifiers allow you to further customize your cycles and save
energy.
Soil Level
Soil level (wash time) is preset for each wash cycle. See "Preset
Cycle Settings" in "Cycles." As you press the Soil Level pad, the
cycle time (minutes) will increase or decrease in the Estimated
Time Remaining display and a different wash time will appear. To
get the minimum wash time, press the pad until the indicator light
next to Light Soil Level illuminates. This is the shortest wash time
available for that cycle.
• For most loads, use the time recommended in the preset
cycle settings.
• For heaviliy soiled and sturdy fabrics, press Soil Level to
select more wash time, if needed.
• For lightly soiled and delicate fabrics, press Soil Level to
select less wash time, if needed.
Spin Speed
This washer automatically selects the spin speed based on the
cycle selected. The preset speeds can be changed. Spin speeds
may vary by cycle.
• Faster spin speeds mean shorter dry times.
• Slower spin speeds mean less wrinkling.
Wash-Rinse Temp
To change the Delay Wash time:
• Press PAUSE/CANCEL.
• Press DELAY WASH to select the desired delay time.
• Press START to begin the countdown.
To cancel Delay Wash:
Press START again to begin the cycle right away or press
PAUSE/CANCEL twice.
Select a water temperature based on the type of load you are
washing. Use the warmest wash water safe for fabrics. Follow
garment label instructions.
Warm rinses leave the loads drier and more comfortable to handle
than with cold rinses. However, warm rinses also increase
wrinkling. Cold rinses may help with wrinkling and save energy.
Temperature Guide
Wash Water Temperature
Hot
Warm
Cold
Suggested Colors
Whites and pastels
Bright colors
Colors that bleed or fade
NOTE: In wash water temperatures colder than 60°F (15.6°C),
detergents do not dissolve well. Soils may be difficult to remove.
Care Control Temperature Management
Care Control Temperature Management electronically senses
and maintains a uniform wash and rinse water temperature.
Care Control regulates incoming hot and cold water and is
automatically turned on when a cycle is selected. (See
"Preset Cycle Settings" in "Cycles.")
Care Control is available with Warm/Warm, Warm/Cold, and
Cold/Cold settings. The water temperature in the Hot/Cold and
tap Cold/Cold settings depends on the water temperature at the
water inlet faucets.
• Care Control ensures consistent cleaning.
The Hot and Warm setting on this washer will be cooler than
you are accustomed to. Wash temperatures in this ENERGY
STAR_ qualified washer are lower than temperatures you may
be used to in conventional washers. Heated water consumes
the largest amount of energy that a washer uses.
Today's detergents work well at temperatures above 60°F
(15.6°C).
Delay Wash (on some models)
You can use the Delay Wash feature to delay the start of a wash
cycle for up to 10 hours (depending on your model).
1,
Load the washer and fill the dispensers.
Close the washer lid.
2.
3.
Press POWER.
4.
Select the desired Cycle, Modifiers, and Options.
5.
Press DELAY WASH. 1H (one hour) will be displayed in the
time display window. The indicator light for Delay Wash will
glow.
6,
For a longer delay time, press DELAY WASH. The Start time
will increase by 1-hour steps.
7.
Press START.The countdown in hours to the wash cycle will
show in the time display window and the indicator light will
begin to flash.
NOTE: The Start indicator light will not flash when Delay Wash
is chosen. You must press Start to initiate a countdown for the
cycle to begin.
Use these pads to select the desired options for your wash cycle.
DEEPCLEAN DEEPCLEAN
L00d
Deep Clean
z_ _', _ Oxi z. _,_ S0ft
EXTRARINSE _ Sottener EXTRARINSE Off
CYCLE DISPENSERS FABRIC CYCLE
SIGNAL SOFTENER SIGNAL
onloff DISPENSER
OPTIONS OPTIONS
[_ Fabric
This option provides enhanced cleaning action for tough stains.
The Heavy Duty cycle automatically includes Deep Clean.
Choosing Deep Clean will add approximately 5 minutes to a cycle.
Deep Clean should be started on a dry load only and cannot be
selected after the tub has started filling with water.
Deep Clean may be selected as an option with other cycles. See
table for details.
Cycle Deep Clean
(Adds time to the wash cycle)
Whitest Whites Option
Heavy Duty Default
Bulky Items/ Not available
Comforters
Sheets Not available
Normal Option
Casual/Perm Press Option
Colors/Towels Option
Quick Wash Option
Wool Not available
Delicate/Handwash Option
Soak Not available
Rinse & Spin Not available
Drain & Spin Not available
Clean Washer Not available
10
Extra Rinse
An extra rinse can be used to aid in the removal of detergent or
bleach residue from garments. This option provides an additional
rinse with the same water temperature as the first rinse. This is the
default rinse setting for the Whitest Whites cycle.
Cycle Signal
The Cycle Signal produces an audible sound when the wash cycle
is finished. This signal is helpful when you are removing items
from the washer as soon as it stops. On some models, the Cycle
Signal option is on when the icon is lit. On other models, select
Loud, Soft, or Off.
Dispensers (Oxi/Fabric Softener)
Press the Dispensers option button until your desired choice (Oxi
or Fabric Softener) is highlighted.
• The Oxi option must be selected if laundry boosters (liquid
or powder) are added to the Liquid Bleach/Oxi dispenser.
This option flushes the bleach/oxi dispenser at the right
time in the cycle for optimum cleaning results. Do not use
laundry boosters and chlorine bleach in the same cycle.
The Fabric Softener option must be selected if liquid fabric
softener is added to the fabric softener dispenser. This
option flushes the dispenser at the right time in a deep
water rinse for optimal distribution. This option may also
be selected if a spray rinse is not desired.
Fabric Softener
The Fabric Softener option must be selected if liquid fabric
softener is added to the fabric softener dispenser. This option
flushes the dispenser at the correct time in a deep water rinse for
optimal distribution.
You can change Cycles, Modifiers, and Options anytime before
Start is pressed. Not all Modifiers and Options are available for all
cycles.
• A short tone sounds when a change is selected.
• Three short tones sound if an unavailable combination is
selected. The last selection will not be accepted.
Changing Cycles after pressing Start
1. Press PAUSE/CANCEL twice to cancel the cycle. The washer
will drain.
2. Press POWER.
3. Select the desired wash cycle.
4. Select the desired Modifiers and Options.
5. Press START.
The washer restarts at the beginning of the new cycle.
NOTE: If you do not press Start within 5 minutes of pausing the
washer, the washer automatically shuts off.
Changing Modifiers and Options after pressing Start
Options and Modifiers can be changed anytime after Start has
been selected and before the selected Option and Modifer cycle
begins.
NOTE: An error tone will sound if your selection is unavailable.
To manually drain the washer and spin the load
1. Press PAUSE/CANCEL twice to cancel the wash cycle and
drain the washer.
2. Press POWER.
3. Turn knob to select DRAIN & SPIN.
4. Press START.
When the spin is complete, the lid unlocks. Items can be removed
from the washer.
LAUNDRYTIPS
Preparing clothes for washing
Follow these recommendations to help you prolong the life of your
garments.
• Use only High Efficiency detergents. The package for this type
of detergent will be marked "HE" or "High Efficiency." This
wash system, along with less water, will create too much
sudsing with a regular non-HE detergent. Using regular
detergent will likely result in washer errors, longer cycle times,
and reduced rinsing performance. It may also result in
component failures and noticeable mold or mildew. HE
detergents are made to produce the right amount of suds for
the best performance. Follow the manufacturer's instructions
to determine the amount of detergent to use. Remember,
concentrated detergents such as 2x or higher will use less
detergent based on load size.
Use only HE High Efficiency detergent.
Close zippers, snaps, and hooks to avoid snagging other
items. Tie strings and sashes to avoid tangles.
Remove pins, buckles, and other hard objects to avoid
scratching the washer interior. Remove non-washable trim
and ornaments.
Empty pockets and turn them inside out; turn down cuffs.
Turn wool and synthetic knits inside out to avoid pilling.
• Brush away lint and dirt. Treat spots and stains, stained or wet
garments should be washed promptly for best results.
• Mend tears, loose hems, and seams.
Sorting
• Separate heavily soiled items from lightly soiled ones, even if
they would normally be washed together. Separate lint-givers
(towels, chenille) from lint-takers (corduroy, synthetics,
permanent press). When possible, turn lint-givers inside out.
• Separate dark colors from light colors, colorfast items from
noncolorfast items.
Sort by fabric and construction (sturdy cottons, knits, delicate
items).
When washing waterproof/water-resistant items, such as
plastic-lined mattress pads, shower curtains, tarpaulins,
jackets or sleeping bags, use one of the following cycles:
Delicate/Handwash, Colors/Towels, or Whitest Whites.
Cycle Options
• For additional performance and enhancements to desired
cycle, select options such as Deep Clean, Extra Rinse, Cycle
Signal, and Dispensers.
Unloading
• Remove clothes from washer after the cycle is completed.
Metal objects such as zippers, snaps, and buckles may rust if
left in the washer basket for a long time.
11
WASHERCARE
Washer Maintenance Procedure
This washer has aspecial cycle that uses higher water volumes, in
combination with AFFRESH <ewasher cleaner or liquid chlorine
bleach, to thoroughly clean the inside of the washer.
NOTES:
• Read these instructions completely before beginning the
cleaning process.
It is recommended that you allow the cleaning cycle to
complete without interruptions. If necessary, the cleaning
cycle may be interrupted by pressing the Power button once
or the Pause/Cancel button twice.
IMPORTANT: If the cleaning cycle is interrupted, run a Rinse &
Spin cycle to ensure that all remaining washer cleaner or bleach is
rinsed from the washer.
Begin procedure
1. Open the washer lid and remove all items from the washer.
2. Using the AFFRESH <ewasher cleaner (recommended):
Add one AFFRESH <ewasher cleaner tablet to the washer
drum.
If using chlorine bleach:
Add 1 cup (250 mL) liquid chlorine bleach to the bleach
dispenser.
NOTE: Do not add any detergent to this cleaning cycle. Use of
more than 1 cup (250 mL) of bleach will cause product
damage over time.
3. Close the lid.
4. Press POWER.
5. Turn cycle control knob to CLEAN WASHER cycle.
• The Estimated Time Remaining display will show
approximately 60 minutes.
6. Press START.
• The cycle will begin and water will dispense in the washer for
a moment and pause, then the lid will lock and the cycle will
continue.
Once the cleaning cycle has begun, allow the cycle to
complete. An estimated cycle time will appear on the display.
If the procedure does not sufficiently improve the machine
freshness, evaluate your installation and usage conditions for
other causes.
Always do the following to maintain washer freshness
• Use only High Efficiency (HE) detergent when washing a
clothes load.
Cleaning the exterior
Use a soft damp cloth or sponge to wipe up any spills.
Occasionally wipe the outside of your washer to keep it looking
new. Use mild soap and water. Do not use abrasive products.
Replace inlet hoses after 5 years of use to reduce the risk of hose
failure. Periodically inspect and replace inlet hoses if bulges,
kinks, cuts, wear, or leaks are found.
When replacing your inlet hoses, mark the date of replacement on
the label with a permanent marker.
Install and store your washer where it will not freeze. Because
some water may stay in the hoses, freezing can damage your
washer. If storing or moving your washer during freezing weather,
winterize it.
Non-use or vacation care:
Operate your washer only when you are at home. If you will be on
vacation or not using your washer for an extended period of time,
you should:
• Unplug washer or disconnect power.
• Turn off the water supply to the washer. This helps avoid
unintended flooding (due to a water pressure surge) while you
are away.
Towinterize washer:
1. Shut off both water faucets.
2. Disconnect and drain water inlet hoses.
3. Put 1 qt (1 L) of R.V.-type antifreeze in the basket.
4. Run washer on the Rinse & Spin setting for about 30 seconds
to mix the antifreeze and remaining water.
5. Unplug washer or disconnect power.
To use washer again:
1. Flush water pipes and hoses. Reconnect water inlet hoses.
Turn on both water faucets.
Electrical Shock Hazard
Plug into a grounded 3 prong outlet.
Do not remove ground prong.
Do not use an adapter.
Do not use an extension cord.
Failure to follow these instructions can result in death,
fire, or electrical shock.
2.
Plug in washer or reconnect power.
3.
Run the washer through the Bulky Items/Comforters cycle to
clean the washer and remove the antifreeze, if used. Use only
High Efficiency (HE) detergent. Use V2the manufacturer's
recommended amount for a medium-size load.
To
transport the washer:
1.
Shut off both water faucets.
2.
Disconnect and drain water inlet hoses.
3.
If the washer will be moved during freezing weather, put 1 qt
(1 L)of R.V.-type antifreeze in the basket. Run washer on the
Rinse & Spin setting for about 30 seconds to mix the
antifreeze and remaining water.
4,
Disconnect the drain from the drain system.
5.
Unplug the power cord.
6.
Place the inlet hoses into the basket.
7.
Drape the power cord and drain hose over edge into the
basket.
12
 Loading...