

Whirlpool AKZ 146 IX, AKZ 146 AV, AKZ 146 WH INSTRUCTION FOR USE
AKZ 146 PRODUCT DESCRIPTION SHEET
GB
IE
•Grid
•Pan set kit
Last
First
ACCESSORIES
OVEN FUNCTIONS TABLE
First-Last...
shelf positions
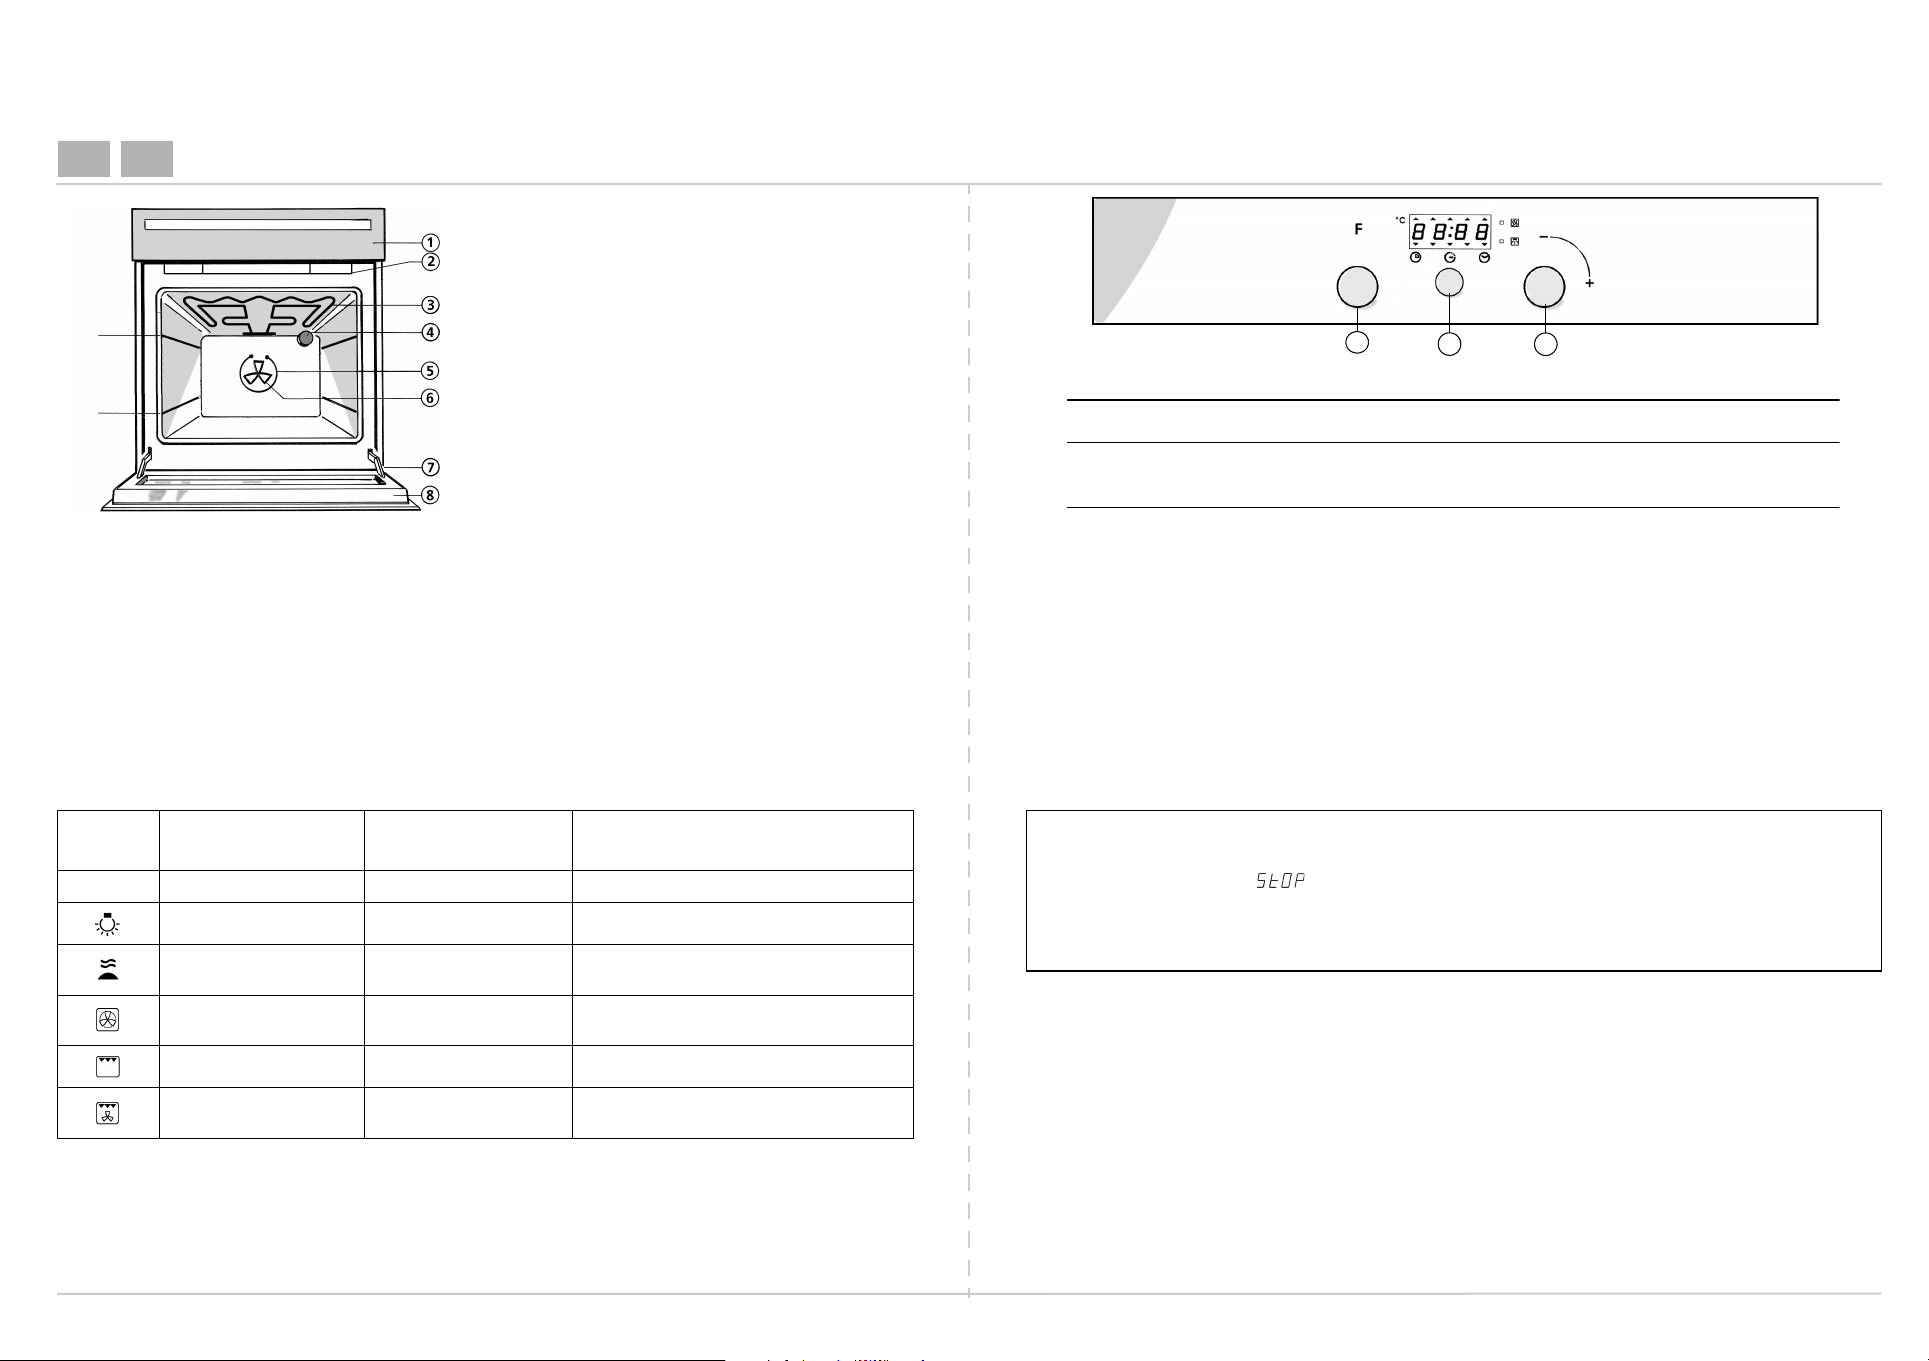
1. Control panel
2. Cooling fan* (not visible)
3. Top heating element
4. Oven light
5. Round heating element (not visible)
6. Fan
7. Oven door hinges
8. Oven door
The cooling fan switches on only when the oven has
*N.B.:
reached a certain temperature with the exception of the Grill
Functions where it starts immediately.
After the oven switches off, the cooling fan may, however,
continue to run for a certain time to ensure proper cooling.
Important:
and of relevant mounting components is available by the
After-Sales Service. The use of the kit reduces the temperature
of the outer oven surface and is strongly recommended if there
are kids in the house. Code N° 4819 310 39186.
An optional kit consisting of an oven door glass
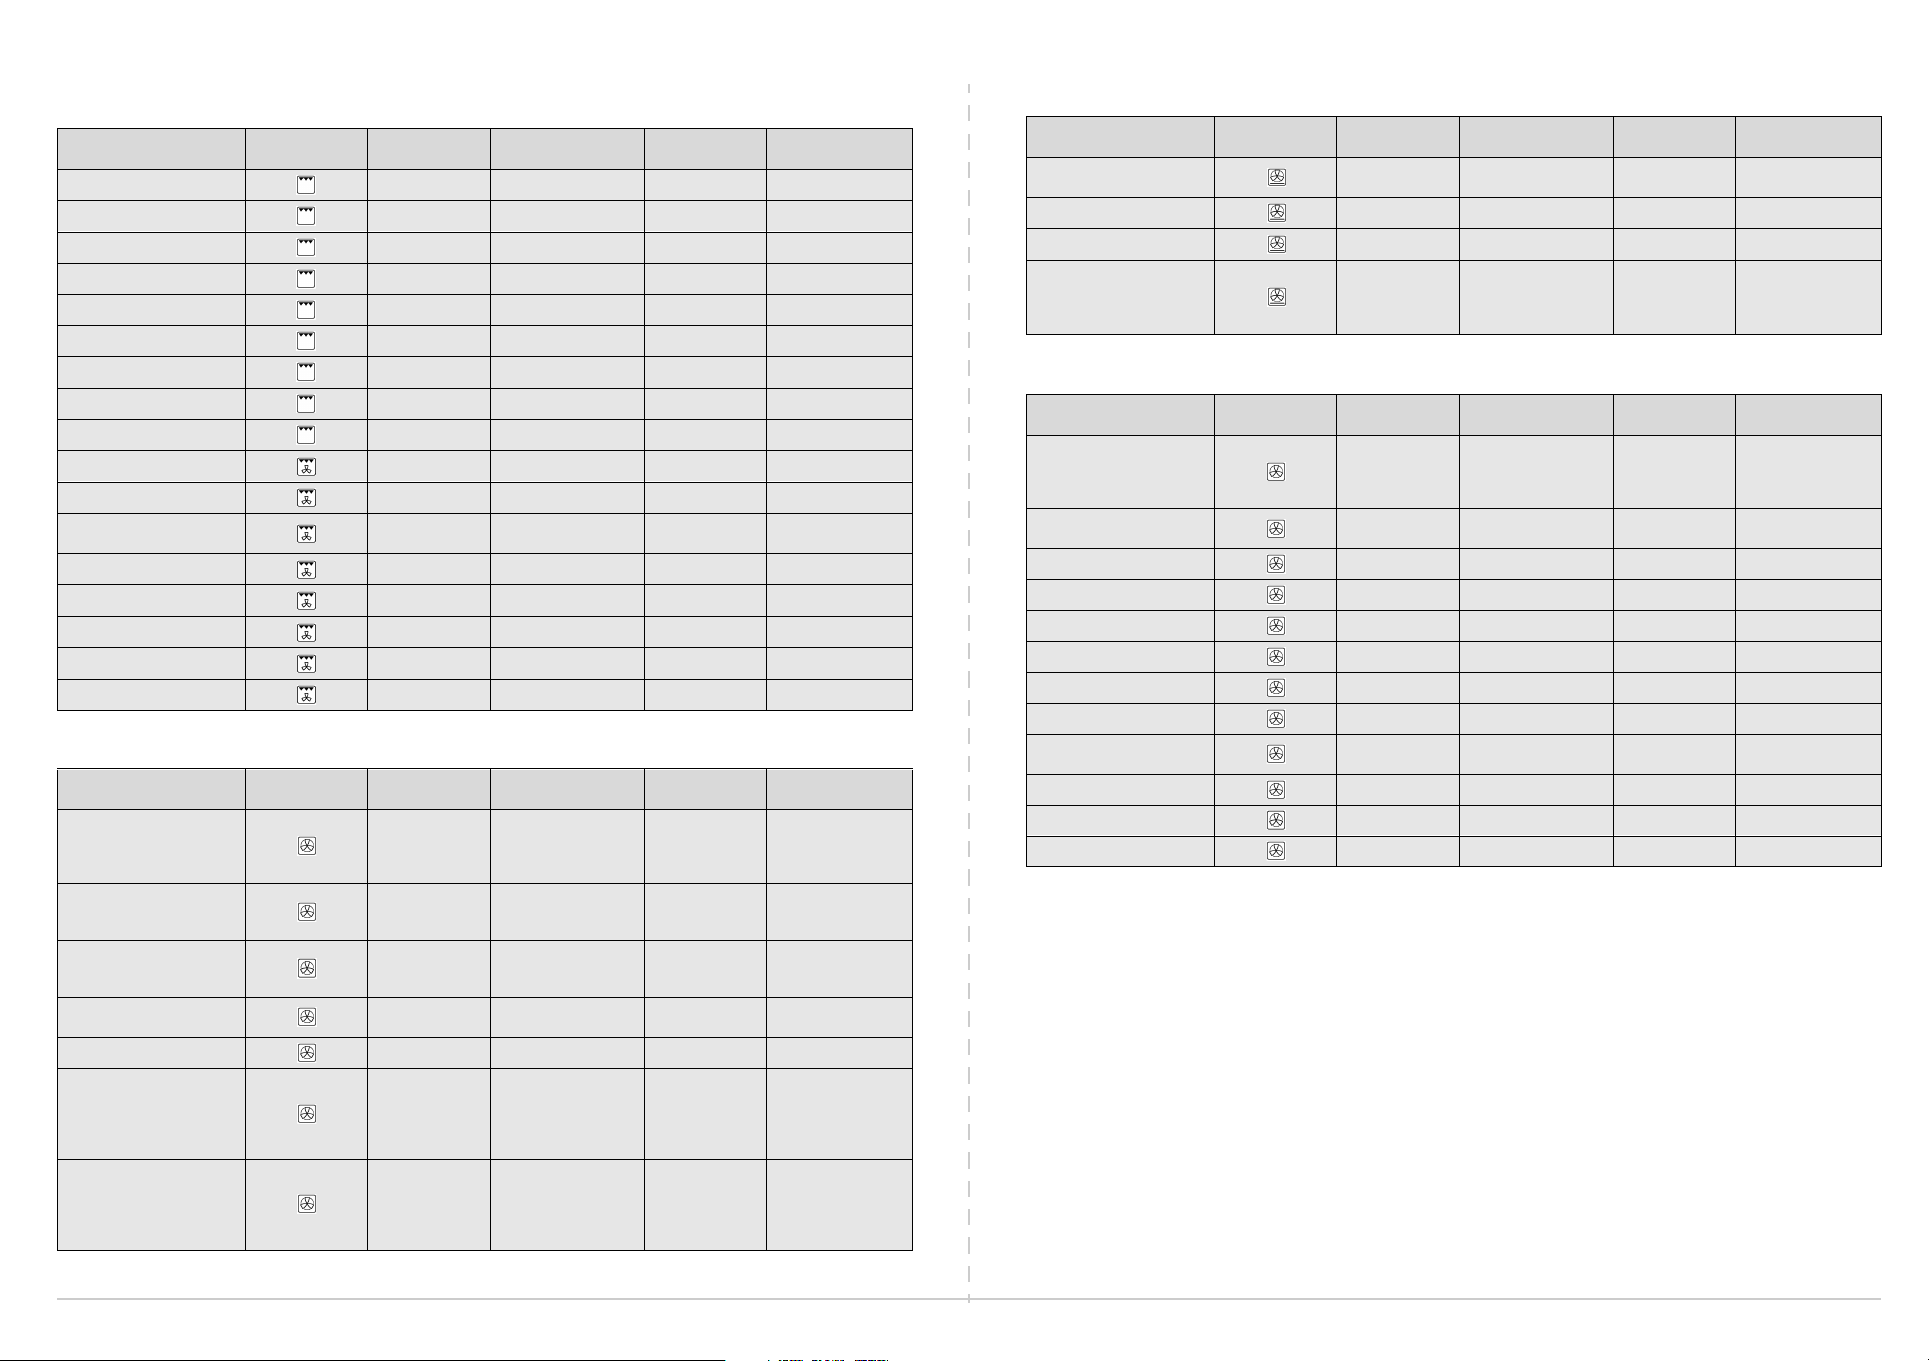
1
2
3
1. Selector knob: to choose the oven functions.
2. Button to select and confirm the different operations (operate by single presses only).
3. Knob to set: time of day, cooking time, the time at which cooking should terminate,
the temperatures and the power levels (Function P).
Function
symbol
0OVEN OFF
5019 310 53742
Function
OVEN LIGHT
MLTF
(Heat Maintenance)
FAN
GRILL
TURBOGRILL
(Grill + Fan)
Preset
temperature/level
--
- To switch on the oven light.
35C
160C
3 To grill small pieces of meat, toast, etc.
3 To grill large pieces of meat.
Function description
(see details in the user's manual)
To keep a constant temperature,
either 35°C or 60°C.
To cook on more than one shelf level,
at the same temperature.
STARTING THE OVEN
When the oven is connected to the power supply for the first time, or re-connected after a power
failure,
To start the oven:
•turn
•press
FOR A DESCRIPTION ON HOW TO USE THE OVEN, PLEASE REFER TO THE PROGRAMMER DESCRIPTION
SHEET.
the display shows “ ”.
knob 1
button 2
“0”
to
.
The display shows “--:--”.
.
COOKING TABLE FOR GRILL FUNCTION
FOOD Function
Sirloin steaks X 4 5 35 - 45
Cutlets X 4 5 30 - 40
Sausages X 4 5 30 - 40
Pork chops X 4 5 25 - 35
Fish X 4 5 30 - 40
Chicken legs X 4 5 35 - 40
Kebabs X 4 5 30 - 35
Spare ribs X 4 5 20 - 35
Chicken halves X 3 5 45 - 50
Chicken halves - 3 5 45 - 55
Whole chicken - 3 5 60 - 70
Roast
(pork, beef)
Duck - 2 5 80 - 90
Leg of lamb - 3 5 90 - 120
Roast beef - 3 5 90 - 120
Baked potatoes - 3 5 40 - 50
Swordfish cutlets - 3 5 35 - 45
Preheating
(5 minutes)
- 3 5 75 - 90
Level
(from the bottom)
Browning
level
FOOD COOKING TABLES
FOOD Function
MEAT
Lamb,
Kid,
Mutton
Roast
(Veal, Pork, Beef)
(kg. 1)
Chicken,
Rabbit,
Duck
Turkey (kg. 6) + level. 3
browning
Goose (2 Kg) X 2 190 100 - 120
FISH
(WHOLE)
(1-2 kg)
Gilt-head, Bass, Tuna,
Salmon, Trout
FISH
(CUTLETS)
(1 kg.)
Sword Fish, Tuna,
Salmon, Cod
NOTE:
When cooking meat using fan-assisted and static functions, it is also advisable to use the Browning
Preheating
(10 minutes)
X 2 190 70 - 90
- 2 190 60 - 80
- 2 190 60 - 70
X 1 190 150 - 180
- 2 - 3 190 65 - 75
- 3 190 50 - 55
function (level 1 to 3).
Level
(from the bottom)
Temperature
(°C)
Cooking time
(minutes)
Cooking time
(minutes)
FOOD Function
VEGETABLES
Stuffed peppers
Stuffed tomatoes - 2 180 50 - 60
Baked potatoes - 2 190 45 - 50
Raw vegetables
au gratin
(e.g. Fennel, Cabbage,
Asparagus, Celery)
FOOD Function
SWEETS,
PASTRIES,
ETC.
Raising cakes (sponges)
Filled pies
(with cheese)
Tarts - 3 180 45 - 50
Apple strudel X 3 200 45 - 50
Biscuits - 1 - 3 160 30 - 40
Cream puffs X 1 - 3 180 40 - 50
Savoury Pies X 3 180 55 - 60
Lasagne - 2 190 45 - 55
Filled fruit pies
e.g. Pineapple, Peach
Meringues - 1 - 3 80 150 - 180
Vol-au-vents X 1 - 3 190 25 - 30
Soufflés - 2 180 55 - 65
Preheating
(10 minutes)
- 2 180 55 - 60
- 3 180 40 - 50
Preheating
(10 minutes)
- 3 150 35 - 45
- 2 160 70 - 80
- 2 180 45 - 50
Level
(from the bottom)
Level
(from the bottom)
Temperature
(°C)
Temperature
(°C)
Cooking time
(minutes)
Cooking time
(minutes)
 Loading...