

Whirlpool AKR 998 IX INSTRUCTION FOR USE
31833169GB.fm Page 1 Wednesday, May 11, 2005 12:01 PM
INSTALLATION SHEET
GB
Minimum height above burners: 60 cm (electric burners), 75 cm (gas, gas oil or coal
burners). If gas cooking device installation instructions specify a greater distance, this must
be taken into consideration. To install, follow steps (1Ö2Ö3Ö.....). Do not switch the power
on until installation is entirely completed.
b
b
c
a
a
a
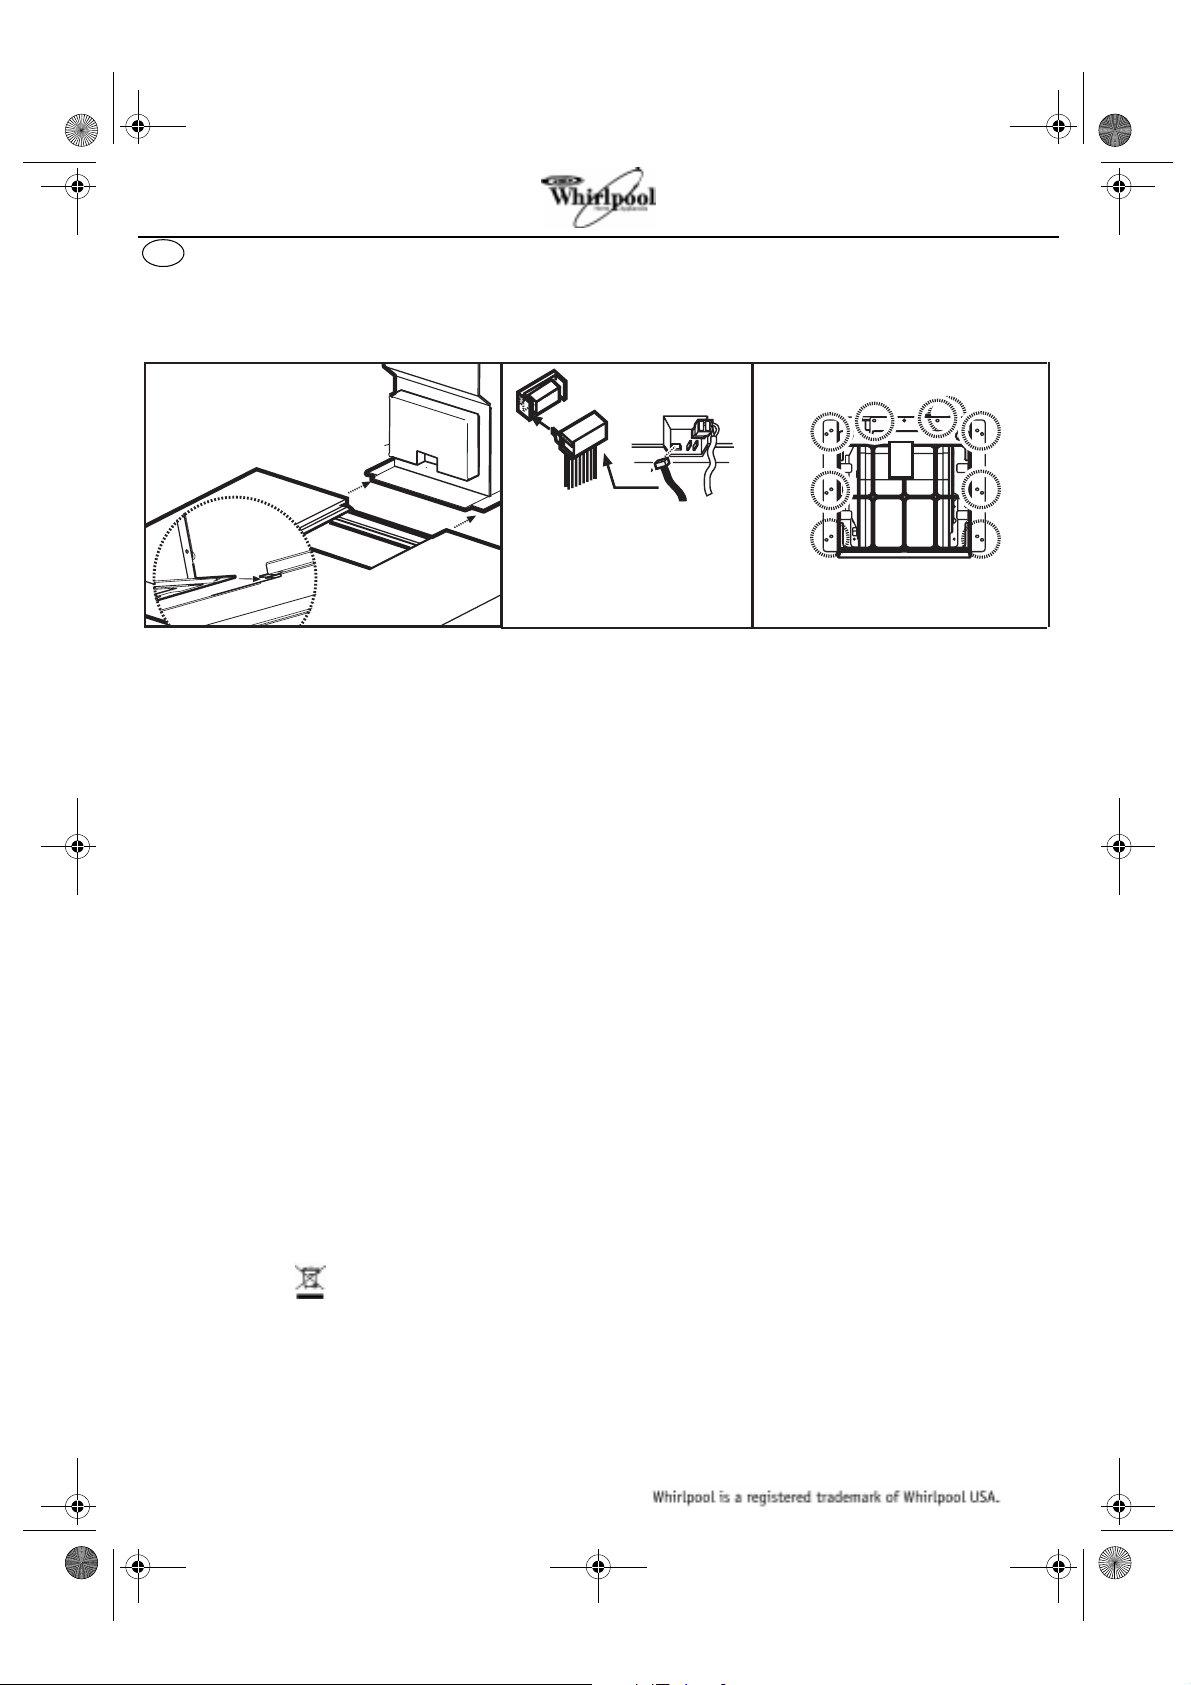
Preassembly of steam deflector on the motor unit: (a) fit the steam deflector on the rails of the
motor unit (if fitted, remove the two travel stop screws from the steam deflector), (b) carry out
the control panel and lamp connections, (c) fix with 8 screws.
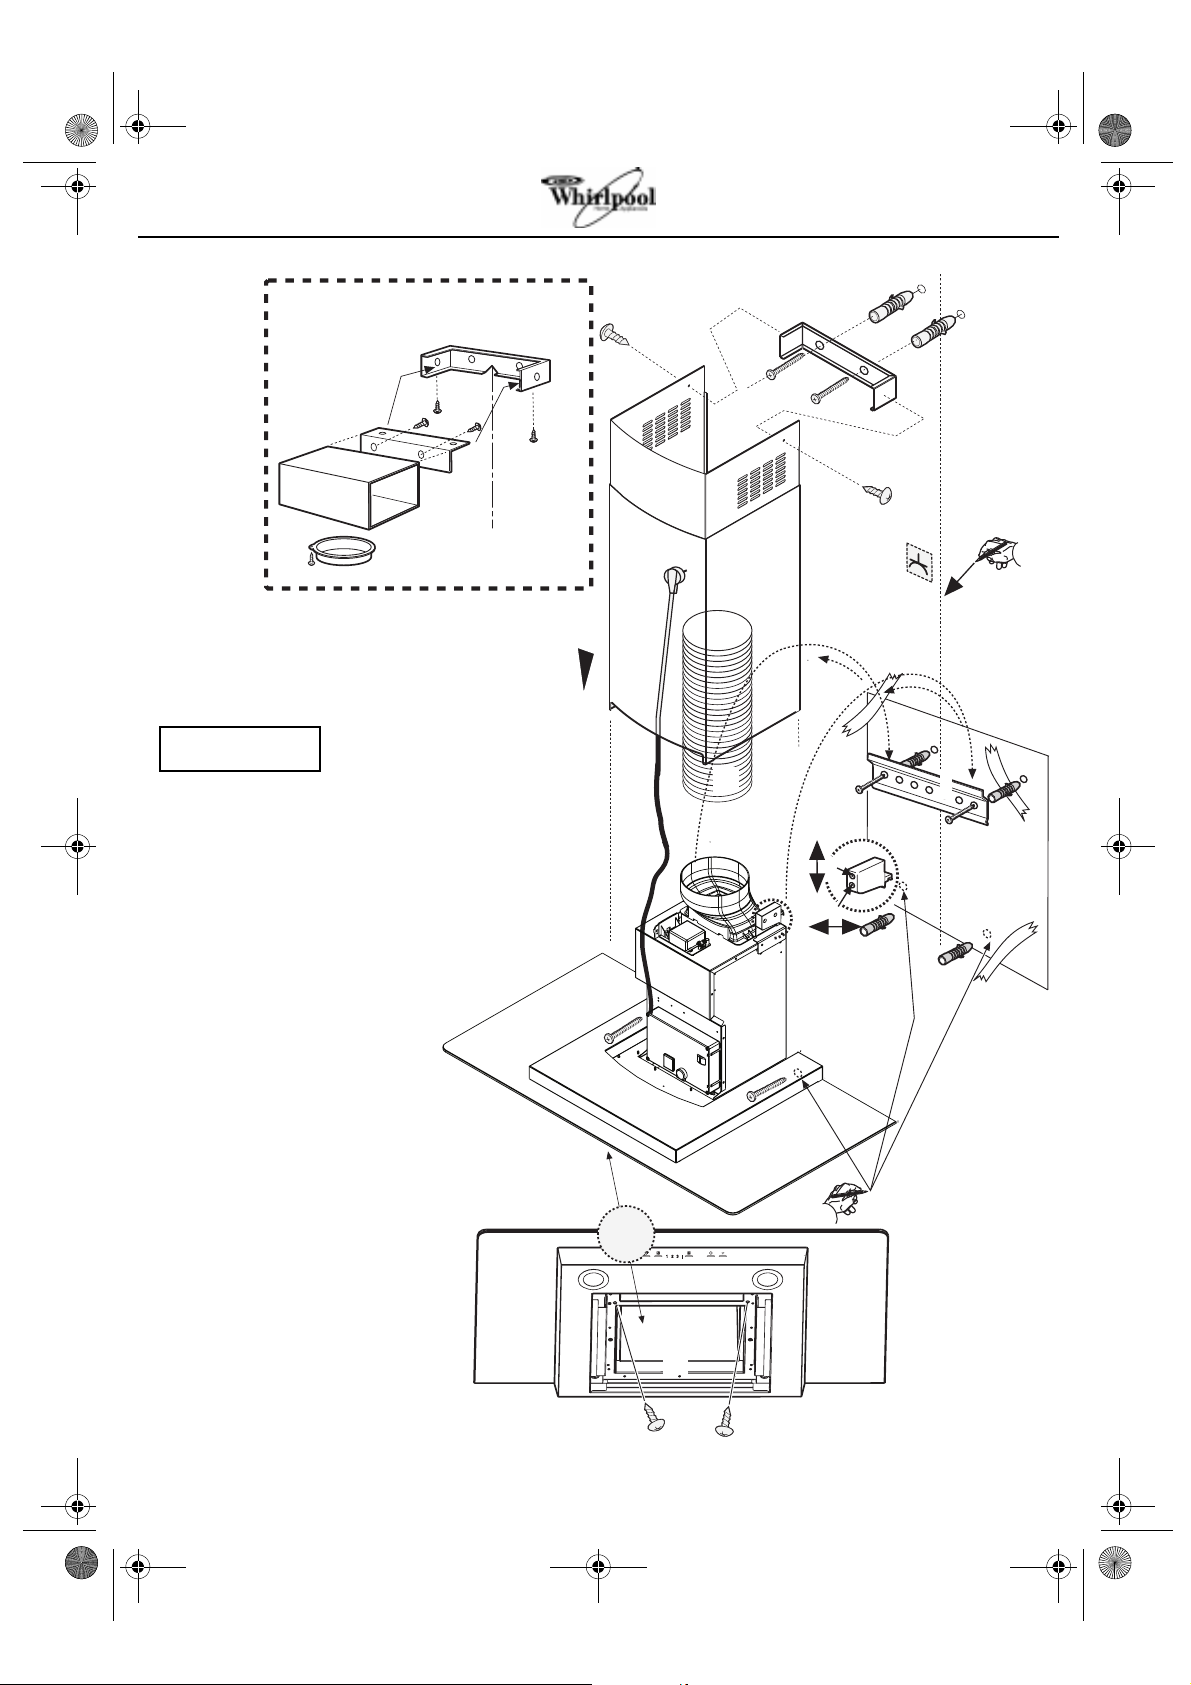
- Mark a line on the wall, up to the ceiling, corresponding to the centre-line (1).
- Place the drilling template on the wall (2). The vertical centre-line on the drilling template
corresponds to the centre-line drawn on the wall, and the bottom edge of the drilling template
corresponds to the bottom edge of the hood.
- Place the mounting bracket on the drilling template so that it matches the outlined rectangle. Mark
and drill the two outside holes, remove the drilling template, insert two wall plugs in the holes and fix
the hood mounting bracket (3) with two 5 x 45 mm screws
- Hang the hood on bracket (4), adjust distance (5) and the horizontal alignment (6) of the hood.
- From inside the hood, mark 2 holes for final fixing of the hood (7).
- Remove the hood from the bracket (8), drill and insert 2 wall plugs (9).
- Place the flue mounting bracket G on the wall and fix with two plugs and two screws (10).
- Hook the hood on the mounting bracket (11).
- Fix the hood to the wall (12) with two 5x45 mm screws (ABSOLUTELY NECESSARY).
- Connect an exhaust pipe (14) to the connection ring B; the pipe must be turned towards the outside
(extraction version) or towards the deflector (filtering version). Fix the deflector (F) to the flue
support bracket G.
- Carry out the electrical connection (15).
- Apply the flues and fix them to the flue support G with 2 screws (16).
- Slide the bottom section of the flue (17) in the special seat above the hood to completely cover the
extraction unit, then fix it with 2 screws (18).
This appliance is marked in conformity with European Directive 2002/96/EC, Waste Electrical and
Electronic Equipment (WEEE).
Make sure this product is disposed of correctly; in this way the user helps prevent potential negative
consequences for the environment and health.
The symbol on the product or on the documentation provided indicates that this product is not
be treated as domestic waste but must be taken to a suitable collection point for recycling electric and
electronic equipment.
Dispose of it in accordance with local waste disposal regulations.
For further information on the treatment, recovery and recycling of this product, contact the
appropriate local office, domestic waste collection service or the shop where the product was
purchased.
5019 318 33169
31833169GB.fm Page 2 Wednesday, May 11, 2005 12:01 PM
13F
F
Deflector F: to be installed only on Filtering Version
17
16
15
G
8
10
10
16
1
4-11
8
14. not supplied
15. prepare the electrical connection
12
14
B
6
5
12
7
3
2
9
9
!
5019 318 33169
18
 Loading...