

Page 1
AKP 555
FR
Highest
level
First
level
P R O D U C T D E S C R I P T I O N S H E E T
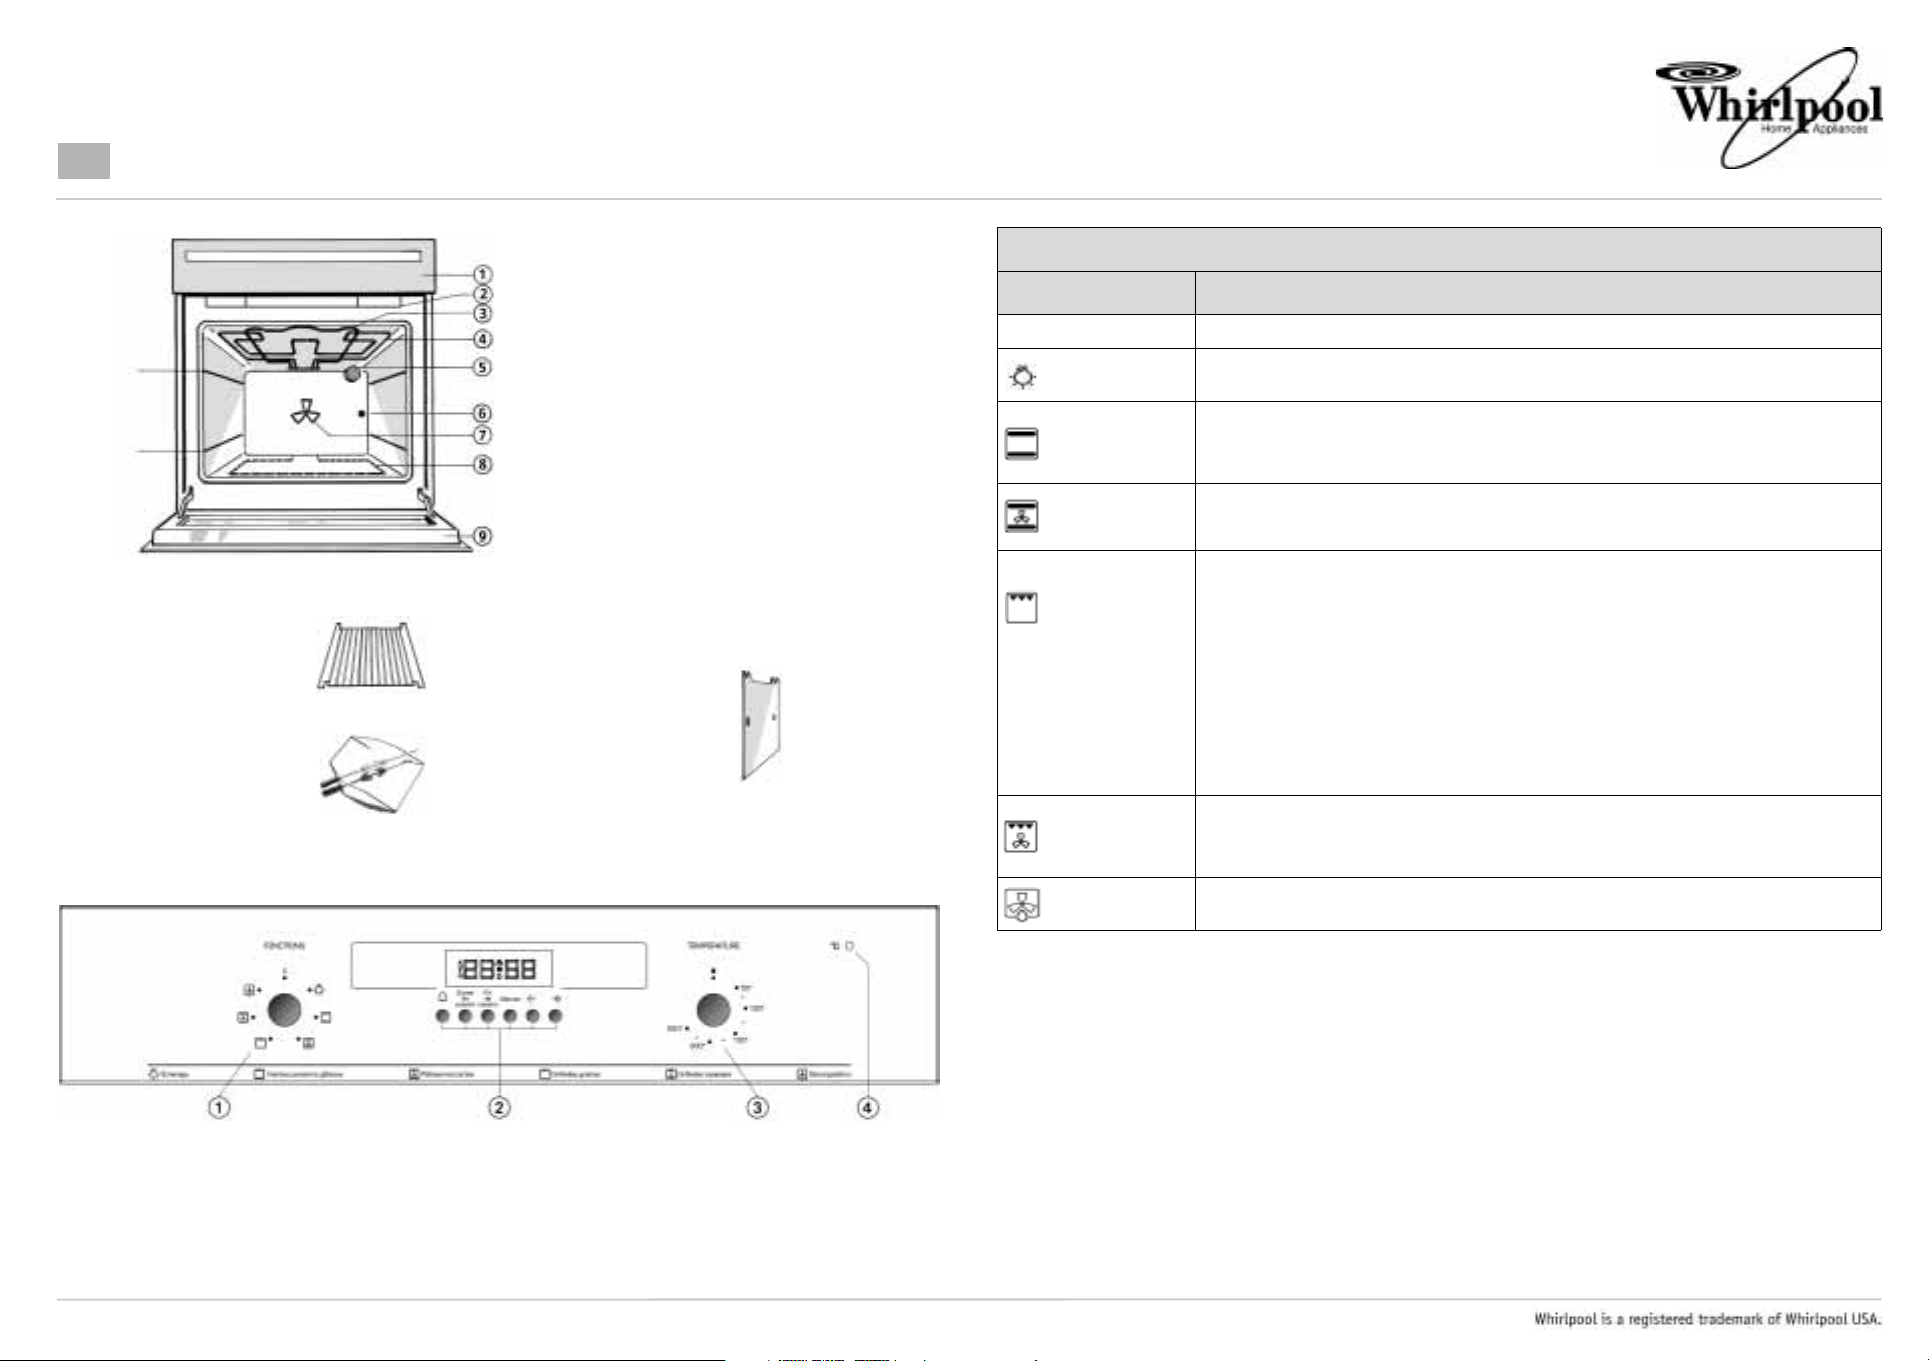
1.
Control panel
2.
Cooling fan (not visible)
3.
Top heating element
4.
Grill element
5.
Rear oven lamp
6.
Turnspit slot
7.
Fan
8.
Bottom heating element (not visible)
9.
Oven door
Oven functions table
Function Description of function
-Oven OFF
LAMP
STATIC
0
• To switch on the oven light.
• To cook meat, fish and poultry in the oven.
• Preheat the oven to the required cooking temperature and place the food inside as soon as the red
thermostat light turns off.
• It is advisable to use the second or third level.
Wire Shelf:
Tu r n s p i t :
ACCESSORIES
Side catalytic panels:
CONTROL PANEL
PASTRY/FAN
GRILL
GRILL + TURNSPIT
TURBOGRILL
DEFROST
• To cook on max. two levels.
• If necessary, switch the position of the dishes in the oven for optimum cooking performance.
• It is not necessary to preheat the oven (except for pizzas and focaccias).
• Use the grill function to cook sirloin steaks, kebabs, sausages, vegetables au gratin and for making
toast.
• Preheat the oven for 3/5 min.
• During cooking the door must remain closed.
• When cooking meat, to avoid spatters of fat and smoke, pour a little water into the drip tray.
• It is advisable to turn the food during cooking.
• This function is ideal for roasting meat and poultry.
• Insert the spit support on the second level, then skewer the meat and block it with the two forks
supplied.
• Insert the spit in the slot provided on the rear wall at the right hand side and lean it on the support.
• When cooking meat, to avoid spatters of fat and smoke, pour a little water into the drip tray.
• Remove the plastic knob before closing the door. Remember to refit the knob before removing
cooked food from the oven.
• This function is ideal for cooking large pieces of meat (roast beef, roast joints).
• During cooking the door must remain closed.
• When cooking meat, to avoid spatters of fat and smoke, pour a little water into the drip tray.
• Turn the meat during grilling.
• Ideal for thawing frozen food at room temperature.
• The food should be placed in the oven in its wrapping to prevent it from drying out.
1. Function selector knob
2. 6-button programmer
5019 310 56501
3. Thermostat knob
4. Thermostat indicator light (red)
Page 2
COOKING TABLES
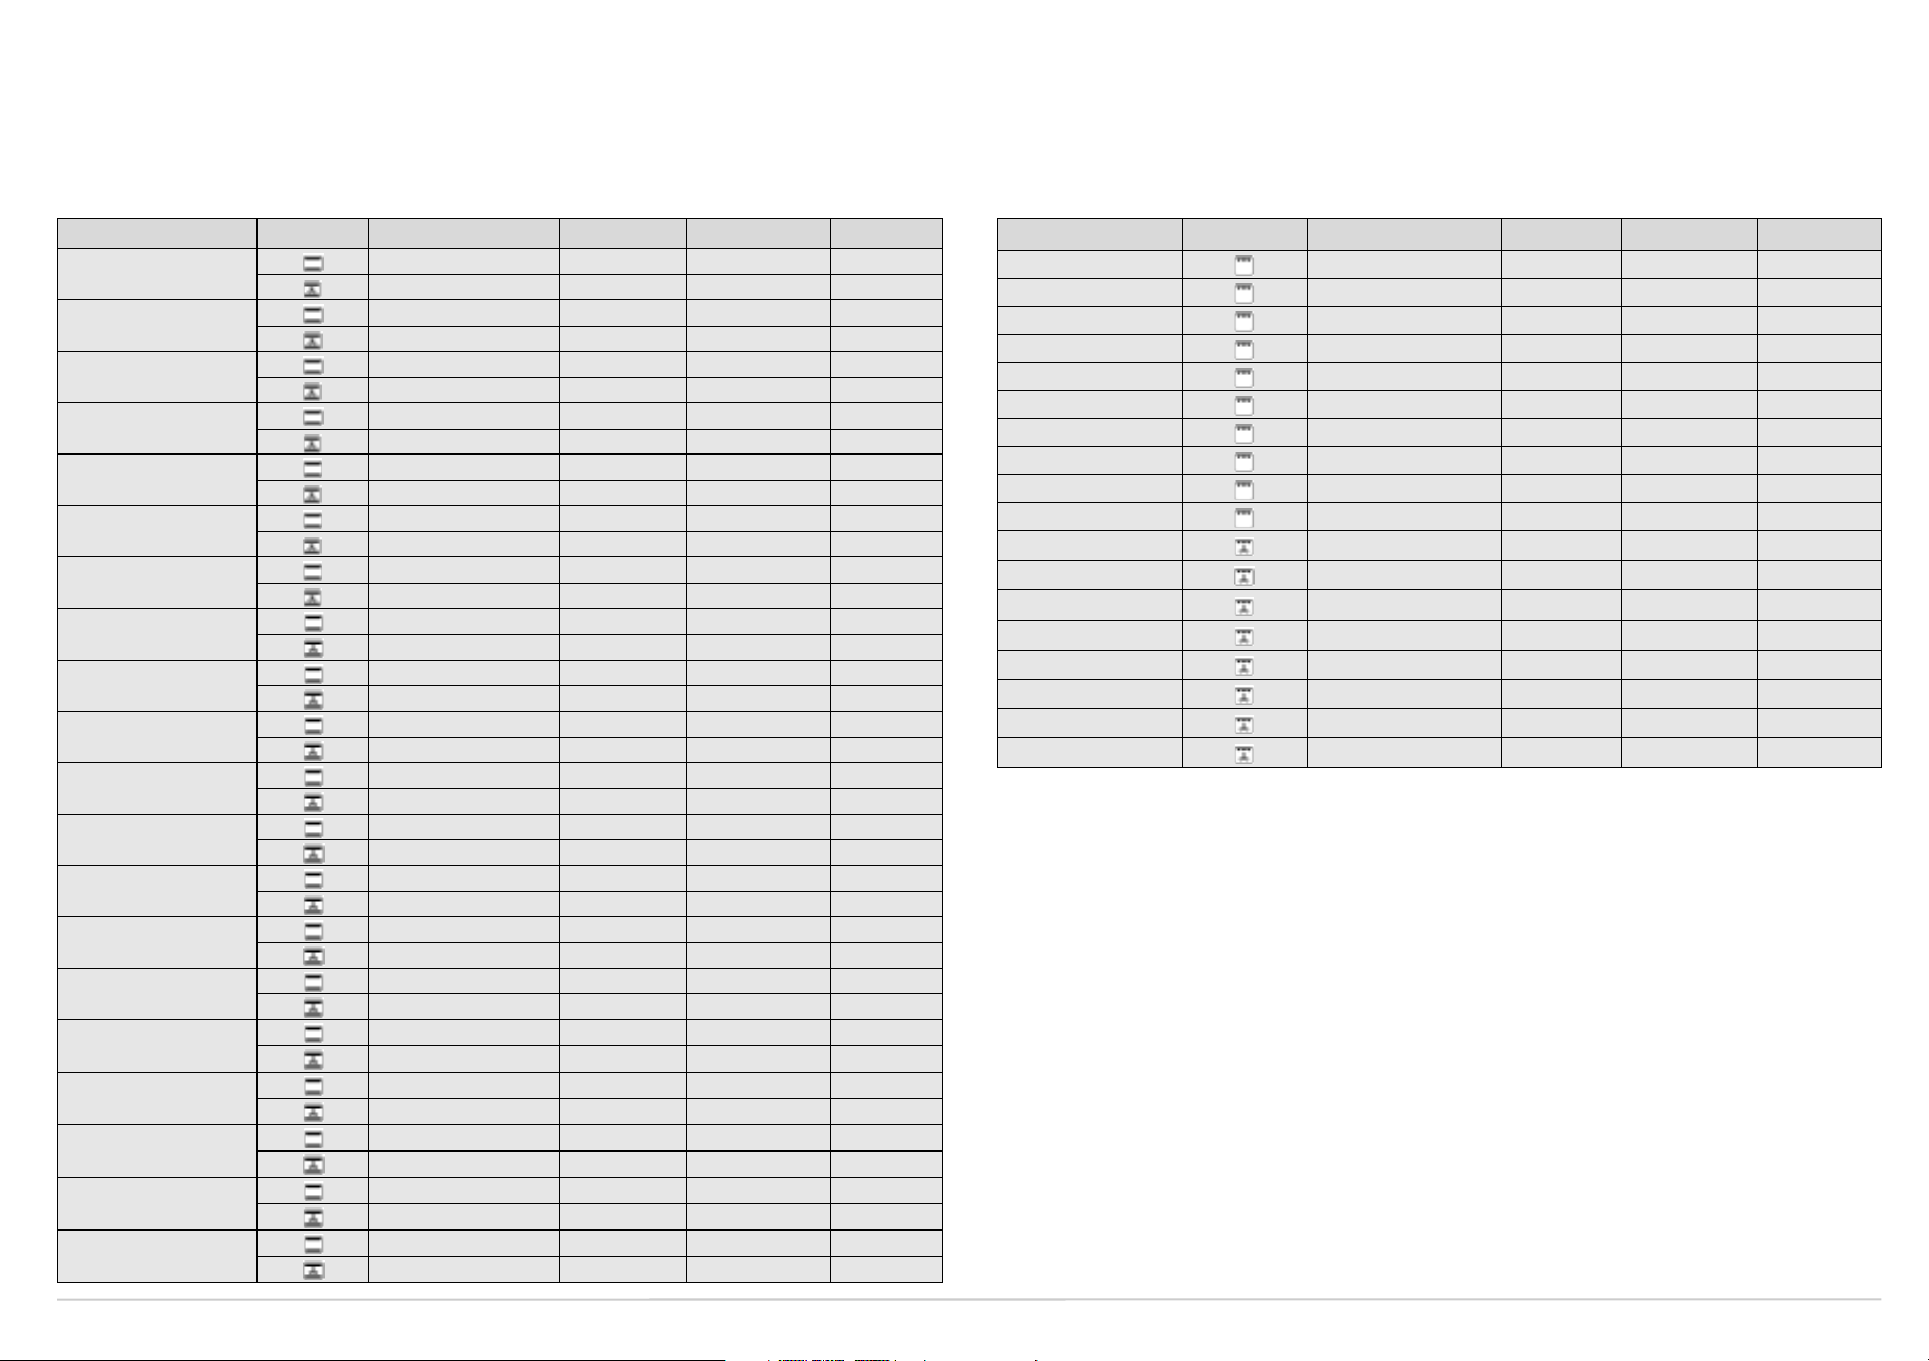
FOOD Function Preheating
MEAT
Lamb, Kid, Mutton
Veal, Beef, Por k
Chicken,
Rabbit,
Duck
Tu r k e y
(3-5 kg)
Goose
(2 kg)
(1 kg)
FISH
Gilt-head, Bass, Tuna, Salmon, Cod
FISH
(<1 kg - cutlets)
Sword fish, Tuna
VEGETABLES
Peppers, tomatoes, roast potatoes
SWEETS, PASTRIES, ETC.
Raising cakes
Filled pies
(with cheese)
Tar t s
Apple strudel, crèpes
Biscuits, sponge rings, shortbread
Choux buns, sweet sponge rolls
Savoury pies, filled fruit pies, e.g.
Pineapple, Peach
Lasagna, potatoes au gratin, cannelloni,
pasta timbales
Bread
Pizza
Vol- au- vent s
Soufflés
Level
(from the bottom)
X 2 200 90 - 110
X 2 200 100 - 110
X 2 200 90 - 110
X 2 200 90 - 110
X 2 200 70 - 80
X 2 200 70 - 80
X 2 210 160 - 180
X 2 200 170 - 180
X 2 210 100 - 130
X 2 200 100 - 130
X 2 200 60 - 80
X 2 190 60 - 80
X 2 190 50 - 60
X 2 190 50 - 60
X 2
X 2
X 2
X 2
X 2
X 2
X 2
X 2
X 2
X 2
X 2
X 2
X 2
X 2
X 2
X 2
X 2
X 2
X 2
X 2
X 2
X 2
X 2
X 2
X 2
X 2
Temperature
(°C)
190
190
180 40 - 50
180 40 - 50
190 60 - 90
180 60 - 90
190 40 - 50
180 40 - 50
200 50 - 60
190 50 - 60
180 20 - 30
180 30 - 40
180 35 - 45
180 35 - 45
200 50 - 60
190 45 - 55
200 40 - 50
190 40 - 50
210 30 - 40
210 30 - 40
225 15 - 20
210 20 - 30
210 20 - 30
200 30 - 40
200 40 - 50
190 50 - 60
Cooking time
(min)
50 - 60
50 - 60
COOKING TABLE FOR GRILL FUNCTION
FOOD Function Preheating
To a s t X 3-4 200-225 10 - 15
Sirloin steak X 3-4 200-225 30 - 40
Cutlets X 3-4 200-225 30 - 40
Sausages X 3 200-225 30 - 40
Pork chops X 3 200-225 30 - 40
Fish (cutlets) X 3 200-225 30 - 40
Chicken legs X 3 200-225 40 - 50
Kebabs X 3 200-225 40 - 50
Spare ribs X 3 200-225 40 - 50
Chicken halves X 3 200-225 40 - 50
Chicken halves - 3 200-225 40 - 50
Whole chicken - 2-3 200-225 60 - 70
Roast
(pork, beef)
Duck - 1-2 200-225 60 - 80
Leg of lamb - 1-2 200-225 80 - 100
Roast beef - 2 200-225 60 - 70
Baked potatoes - 2-3 200-225 40 - 50
Fish, e.g.: Gilt-head, Trout - 3 190-200 40 - 50
Cooking times and temperatures are approximate only.
Note:
- 2-3 200-225 60 - 80
Level
(from the bottom)
Te m p e ra t ur e
(°C)
Cooking time
(min)
Page 3
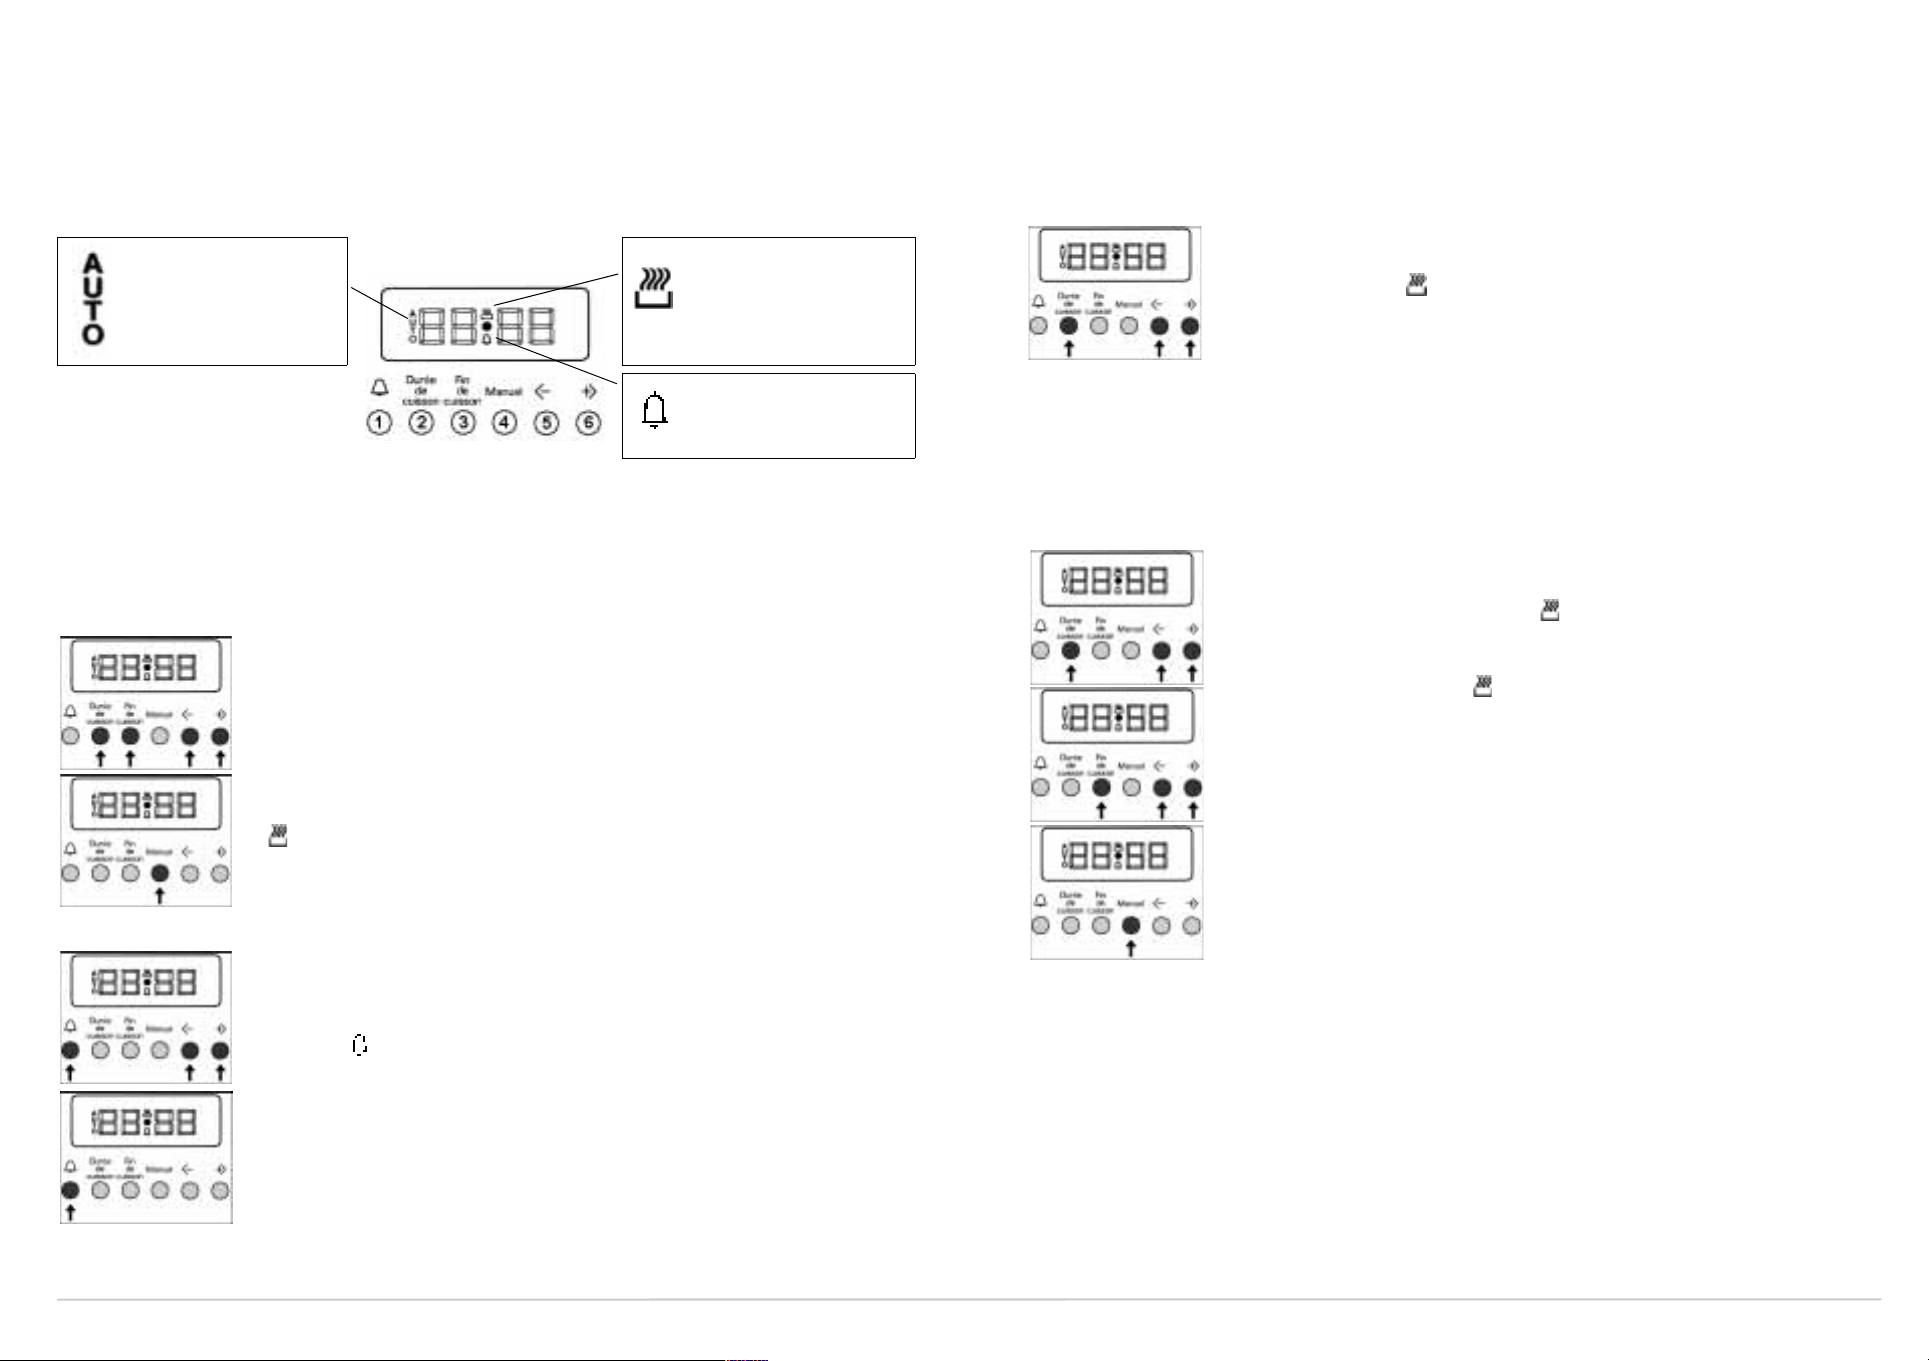
Display & button description
AUTO lights up and
stays lit to indicate
Automatic Mode, blinks
to confirm end of
cooking time.
1. Minute Minder with acoustic signal selection button
2. Cooking duration selection button
3. End of cooking time selection button
4. Manual operation selection button
5. Data settings or change button
6. Data settings or change button
Setting the clock and selecting the Manual Mode
Upon installation or after a power failure digits
Keep buttons 2 and 3 pressed simultaneously while setting the clock through the
usage of buttons 5 and 6.
Press button 4 Manual operation selection button to proceed with the Manual
operating mode.
will light up.
Manual operation when
lit indicates Manual Mode
is operating
Minute Minder when lit
indicates Minute
Minder is operating
-0:00
and
AUTO
both blink.
Programming the Cooking Time
Press button 2 digits
Press button 5 or 6 to set the desired cooking time.
12:00
and
AUTO
• Set the oven by turning the Oven thermostat knob to the desired
temperature, the oven will immediately come into operation.
The acoustic signal will start to indicate elapsing of cooking time and that the
oven has switched off.
• Set the oven by turning the Selector knob to
silence the acoustic signal.
•Press button 2 to check or to change the remaining cooking time.
•Press button 3 to display the remaining cooking time when desired.
-0:00
are displayed.
+ light up a few seconds after buttons release.
Programming Duration and End of Cooking Time
Press button 2 digits
Press button 5 or 6 to set the desired cooking time.
Actual time of the day and
release.
•Press button 3 and consequently press button 5 or 6 to set the desired
cooking time. The symbol will turn off and reappear when oven goes into
automatic operation at the start of the previously programmed duration.
• Set the oven by turning the Oven thermostat knob to the desired
temperature and choose the desidered function by turning Selector knob.
The acoustic signal will start to indicate elapsing of cooking time and that the
oven has switched off.
• Set the oven by turning the Selector knob to
silence the acoustic signal.
-0:00
are displayed.
AUTO
+ light up a few seconds after buttons
, then press button 4 to
“0”
, then press button 4 to
“0”
Setting the Minute Minder with acoustic signal
Operates independently from oven functions.
Press button 1 digits
Press button 5 or 6 to display the desired cooking time.
12:00
and light up a few seconds after buttons release.
The acoustic signal will start upon elapsing of cooking time.
Press button 1 to silence the acoustic signal.
-0:00
are displayed.
Changing the time of day:
Push the manual key and the point in the middle of the display will start flashing, the time can be altered
with the
+
and
-
keys.
Changing of the volume of the alarm:
Once the machine is set to manual mode and the time of day has been set using the
point in the middle of the display will stop flashing, now pressing the
volume.
Press and hold the
cycle from High . Medium . Low.
-
to hear the alarm level, each additional press will reduce the volume. This will
-
key you will change the
+
and
-
keys the
Page 4

 Loading...