

Page 1

USER MANUAL
Light programmable oven with
boiler
Page 2

Table of contents
For further information on the functions and user interface of the
Preface and warranty 3
Safety instructions 4
Operation panel
5
Settings
-
- Time 6
- Core temperature 6
- Programmes (new – edit – cancel) 6-7
Temperature 6
6-7
Description of functions
- Preheating 8
- Combi steaming 1 & 2 8
- Reheating 8
- Manuel pulsing 8
- Steaming in a light programmable oven with boiler 8-9
- Exhaust 9
- Current time and date and setting of timer 9
- Fan speed 9
- CombiWash (fully automatic cleaning system) 9
- Semi-automatic cleaning 9
- Hot air 8
8-10
Programmes/recipes
Indicative core temperatures 11
Low-temperature and long-time roasting 12
- Low-temperature roasting 12
- Shrinkage 12
- Legislation on food products 12
- Long-time roasting 12
10
User menu
13-14
Cleaning
- Behind filter housing 16
- Jets 16
- Outside 17
- Exhaust valve 17
-
- Error codes 18
- Inside 15
Filter under front panel 17
15-17
Recommended programmes/recipes 19-28
Dear customer,
oven, see Service & Installation Manual.
2
Page 3

Dear Customer
Congratulations on the purchase of your new WHIRLPOOL oven.
You are now the owner of one of the leading ovens on the market.
All WHIRLPOOL products are subjected to intensive product development, which ensures that
the products always offer the latest technology and the most up-to-date and energy-saving
methods of preparation. Moreover, the WHIRLPOOL products are entirely up-to-date with the
latest developments/technology in terms of
• ERGONOMICS AND SAFETY
• SIMPLE AND LOGICAL OPERATION
• ELEGANT AND FUNCTIONAL DESIGN
• RELIABILITY AND SERVICE
To ensure that our customers get an optimum and reliable product, all WHIRLPOOL units are
passed through an extensive test programme in which all functions are subjected to a
continuous and extreme load.
Before you start using the oven and its many automatic functions, we recommend that you
study the manual thoroughly so as to ensure optimum cooking results. By going through the
manual, you will obtain a better understanding of the advanced technology and feel safer while
using the oven in your daily work.
Furthermore, we call your attention to the wide variety of optional extras:
• Handshower
• Core temperature probe
• Additional cassette rack, trolley for rack, wall bracket
• Extraction hood and extraction hood with condenser
• Visit www.whirlpool.com for further information on our wide range of additional
equipment
Terms of warranty
Provided that it has been registered on the WHIRLPOOL website, your new WHIRLPOOL oven is
covered by a 48-month factory warranty. The warranty covers the oven cabinet and spare
parts. Furthermore, there is a 10-year warranty on the exterior door glass. The period of
warranty takes effect from the date of production. For further information on the warranty
terms, please visit www.houno.com/warranty.
The warranty does not include....
We especially draw your attention to the fact that the factory warranty does not cover glass
parts such as interior door glass, lamp glass and halogen lamps, nor does it cover sealings.
Furthermore, the factory warranty does not apply in the case of
• defects that are due to the fact that installation has not been carried out in accordance
with the WHIRLPOOL Installation & Service Manual at present in force (electricity, gas,
water/drain, exhaust),
• damage resulting from accidents, including damage caused by water, transport,
misapplication or negligence,
• defects and interruptions of operation that are the result of the oven not being
handled/operated as specified in the user's manual.
WHIRLPOOL cannot be made liable for indirect loss, including loss of profits.
If you utilise all the technological facilities of this oven, you are guaranteed perfect results with
only a minimum of resources.
3
Page 4

Enjoy your new WHIRLPOOL oven.
Yours sincerely,
WHIRLPOOL
Safety Instructions
Ready for use….
When the oven is correctly installed, read this manual carefully before the oven comes into
service.
This manual should be kept handy to persons using the oven.
Always place trays filled with hot liquid in the bottom runners of the oven chamber to avoid
spilling the hot liquid on yourself when you take the tray out of the oven chamber.
Some areas on the outside of the oven may get as hot as 60°C or more, therefore, you should
only touch the front of the oven.
Do not open the oven during the automatic cleaning process.
Do not store flammable materials around or under the unit.
When using the roll-in or trolley system, be aware of hot racks sliding out of the oven. Use the
parking brakes on the wheels to prevent trolleys from rolling away on uneven floors.
4
Page 5
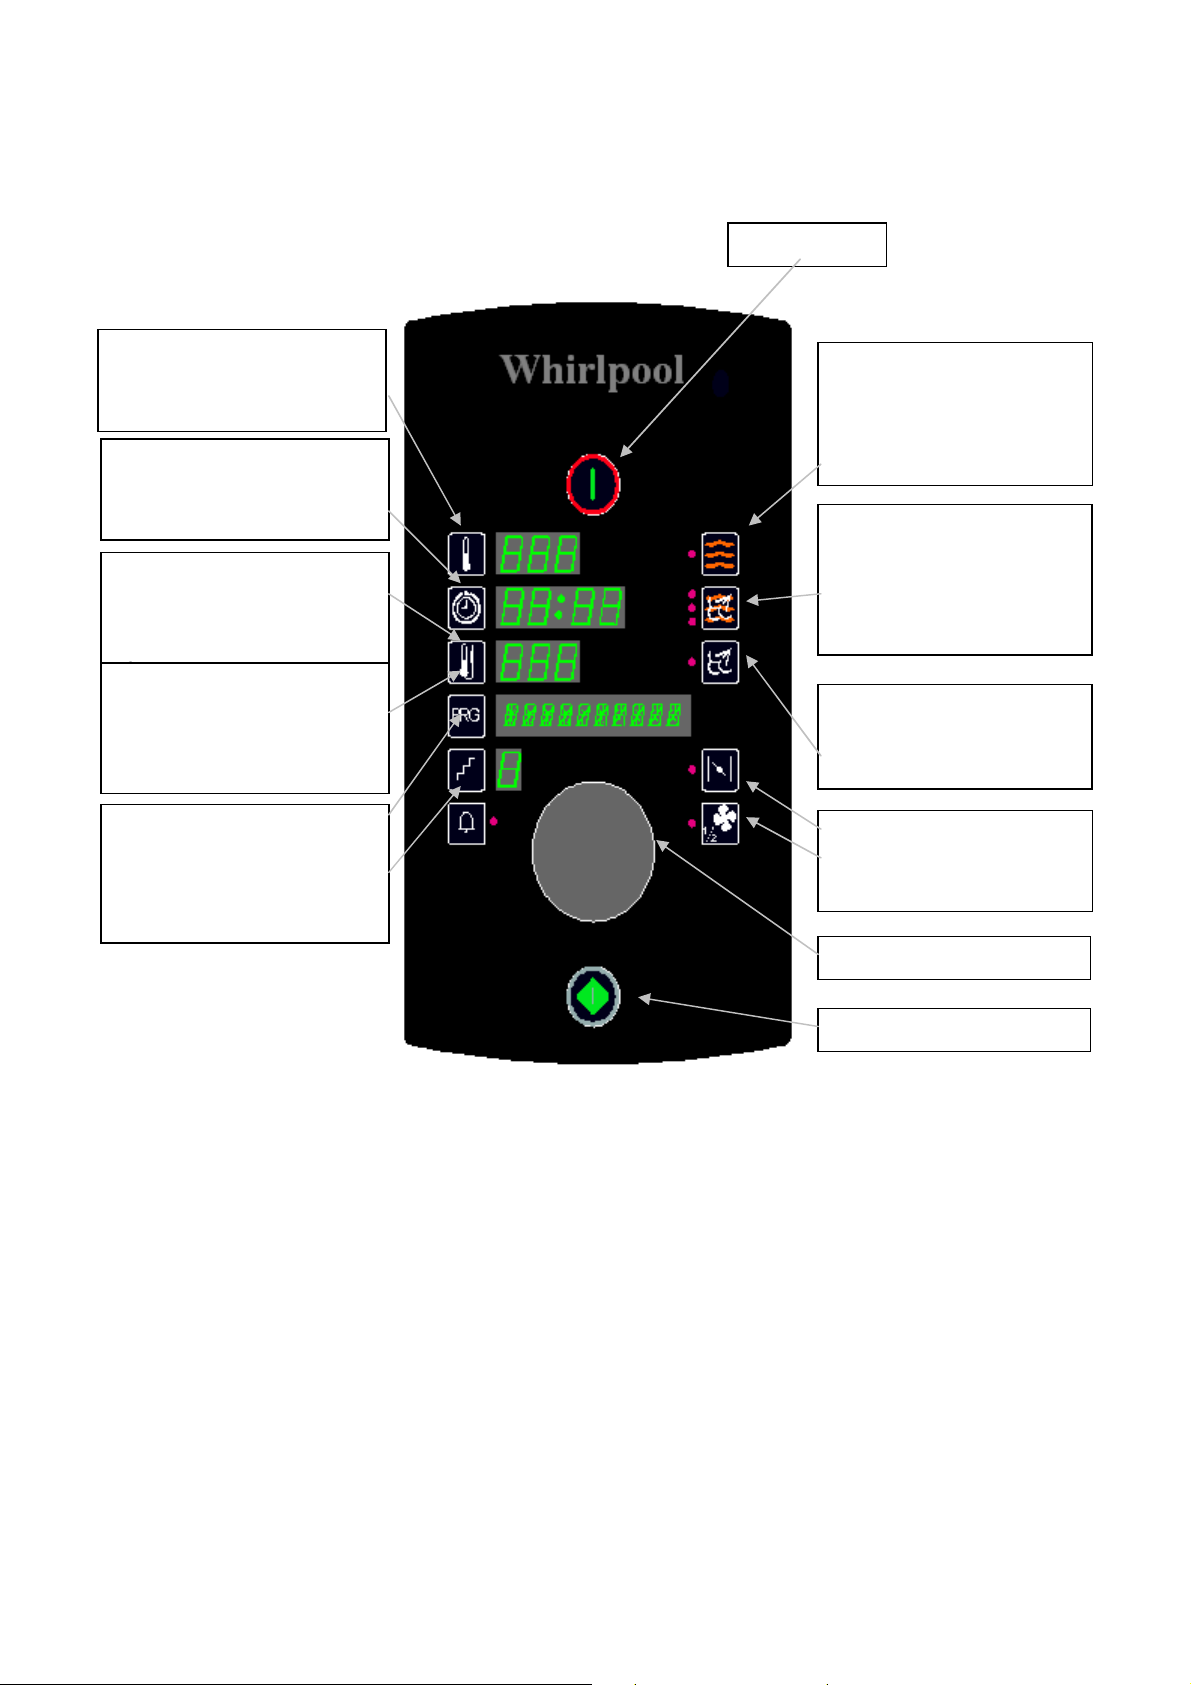
COMBI STEAMING 2
of 30
-
99°C.
ON/OF
F
Main switch
Operation panel
Turn switch
TEMPERATURE SETTING. Press
once and set temperature with
TURN SWITCH. Enter by
pressing symbol again.
TIME SETTING. Press once and
set time with TURN SWITCH. 4
hours is maximum. Confirm by
pressing TIME.
SETTING CORE TEMP. PROBE
(optional extra). Press once
and set with TURN SWITCH.
Deactivate by turning switch
past the permitted temp. range
PROGRAMMES. Press once and
choose program with TURN
SWITCH. Editing and deleting
are described on following
pages.
STEP shows current step when
PROGRAMME mode is active.
Control lamp next to ALARM
lights up when alarm after a
step has been chosen (when
PRG is active).
HOT AIR 30-250°C. All modes
and all optional extras are
described on following pages.
Preheating up to 300°C is a
standard feature on models C
and K.
REGENERATING / COMBI
STEAMING
Change between the modes
by pressing
REGENERATING
COMBI STEAMING 1
STEAMING 30-120°C (2).
Used for manual humidity
pulsing in HOT AIR during
preparation.
EXHAUST is open when
control lamp is on.
Low FAN SPEED is active
when control lamp is on.
(1) If the oven does not incorporate CombiWash, the manually operated cleaning system can
be activated by pressing the PRG key and turning the turn switch until CLEANING appears
in the display.
5
Page 6

Settings
Setting of temperature
Press TEMPERATURE key once and set temperature with turn switch.
Confirm by pressing TEMPERATURE key again.
Setting of time
Press TIME key.
Time flashes.
Choose desired time (hours and minutes) with turn switch.
If switch is turned all the way down to 0,”-:--” (continuous operation) appears in the display.
Max. time setting is 4 hours.
Confirm by pressing TIME key again.
Setting of core temperature (optional extra)
Press CORE TEMPERATURE key.
If the display is off, the core temperature appears as 75°C.
Set core temperature between 30 and 99°C with turn switch.
Core temperature is deactivated by turning switch past 30.
When core temperature is chosen, time changes to ”-:--” .
Confirm by pressing CORE TEMPERATURE key again.
The core temperature probe has several measuring points on its tip.
The computer calculates an average temperature thus ensuring that the core temperature is
100% correct.
If the probe is inserted incorrectly, the advanced technology notifies you at once.
The probe is inserted vertically in the thickest part of the product.
When preparing products of very different sizes, you get a uniform quality by inserting the
sensor in the smallest product and then moving it to a larger product when the core
temperature alarm sounds.
Programmes
10 programmes that can hold 3 process steps each. It is possible to write 10 characters and
entering alarm after steps 1 and 2.
Press PRG and turn the switch. The first five programmes are preset at the factory (P0 – P4).
Start the programme by pressing the ON/OFF key.
To leave PROGRAMME, turn the switch beyond ”P O”.
To delete an entire programme, press core temperature key and alarm key simultaneously for
2 seconds.
When the keys or the turn switch is idle for 20 seconds, the oven returns to manual operation.
Entering and changing text
To enter or change text, press PRG for 3 seconds.
The first digit or the relevant letter/”_” flashes alternately. Change the flashing character with
the turn switch. You can choose between all the letters of the alphabet and the digits 0 – 9.
The space sign is next to the letter A.
Move on to the next digit by pressing PRG briefly.
Store text by pressing PRG until “SAVED” appears in the display.
To leave text editing without storing, press ALARM. The original text reappears.
To delete the entire text
When a key or the turn switch is idle for 20 seconds, the oven returns to select programme.
, press PRG and ALARM simultaneously for 2 seconds.
6
Page 7

Entering and changing data in steps
By pressing STEP when PROGRAMME is active, the step display is turned on and shows ”1”.
The data of the first step can now be entered.
To move on to the next step (1-3) and read and change settings, press STEP again.
Choose and change temperature, time, core temperature, exhaust and fan as in manual
operation.
Stop between steps: To turn the alarm between steps on and off, press ALARM. If the control
lamp is on, the programme ends with the current step and a beep is heard. The oven does not
proceed to the next step until the oven door is opened and closed or you press ALARM.
To store a change made in the step mode, press PRG for 2 seconds.
Leave STEP by choosing another programme with the turn switch.
Be careful not to use the turn switch when a value flashes. If you turn the switch while you are
working in STEPS, the computer switches to the next programme and all changes are lost.
Delete current step by pressing STEP and ALARM simultaneously for 2 seconds.
When the programme has started, you can still change time, temperature, core temperature
and the settings of fan and exhaust. These changes will then only be active in the current run.
Note that the display shows the total time remaining after start and that it will show the time
remaining in the current step when you press TIME.
7
Page 8

Description of Functions
Hot air
30-250°C
The hot air operating mode can be used for roasting, grilling, baking and gratinating. We
recommend that you keep the exhaust open when roasting products at very high
temperatures. It is possible to roast breaded products such as breaded fish and breaded pork
chops. For maximum effect, use enameled cast iron trays / silicone-coated baking sheets and
one of the special browning fats available in the shops.
Preheating
251-300°C
By setting the temperature higher than 250°C, you change to the preheating mode and
PREHEAT is shown instead of HOT AIR. With this function, you preheat the empty oven. The
time can be set to max. 15 minutes, and continuous operation (-:--) is not possible. The
preheating mode has been changed so that the countdown does not start until the desired
temperature has been reached. This is to ensure that the oven is always in the same condition
when the oven is loaded, no matter the starting temperature.
IT IS RECOMMENDED TO ALWAYS PREHEAT THE OVEN BEFORE USE.
Combi steaming 1 & 2
30-250°C
COMBI STEAMING 1 is recommended for the roasting of all kinds of meat cuts. The pores of
the meat close quickly, which prevents the juice from leaving the meat.
When using long-time roasting at 80 – 130°C, COMBI STEAMING 1 helps reduce shrinkage.
COMBI STEAMING 2 is recommended for roasts that should be well-done, and if you want to
use the juice in the container for gravy. At temperatures higher than 170°C, the crust of the
meat becomes nice and brown. A great deal of humidity is added to the oven chamber and the
amount of liquid in the tray is increased during production.
Reheating/regeneration
30–180°C
Regenerating is a very gentle process and therefore very suitable for reheating. Use a core
temperature probe to reach the perfect end temperature. For the reheating of sous-vide
products, etc., follow the recommendations of the producer as to reheating. The products
should not be covered up as this impedes optimum and quick reheating.
Manual humidity pulsing
When you press the key for STEAMING in the HOT AIR mode, you add humidity to the oven
chamber. Humidity is added for as long as the key is held down.
Steaming with boiler
When the steam generator is cold (< 65°C), the steaming starts with a flushing of the
generator. It takes approx. 8 minutes before the oven produces steam (the change of water
only takes place when the temperature in the steam generator is below 65°C).
The steam generator is then hot and steam is generated immediately.
General recommendations for steaming
STEAMING at 100°C is recommended for all kinds of hard vegetables, rice and pasta.
LOW-TEMPERATURE STEAMING at 70-80°C is recommended for the steaming of fish.
FORCED STEAMING at 120°C is an aggressive and very rapid process, which should be used
with care.
IT IS RECOMMENDED TO LET THE OVEN PRESTEAM FOR 8 MINUTES BEFORE LOADING IT.
8
Page 9

Exhaust
The exhaust is usually closed in all operating modes. It is always closed in the steaming mode.
When the control lamp is on, the exhaust is open.
If you wish to reduce the amount of humidity in the oven chamber – when you brown, for
instance – the exhaust should be open.
Fan speed
Set the FAN speed by pressing the fan key and turn the switch.
A fan speed between 20 and 50% is recommended for the baking of puff pastry, Danish
pastry, cakes and small products as well as in the Delta-T and Cook-and-Hold modes. You may
add 1 – 2 minutes’ preparation time for each ½ hour when low fan speed is used.
Fan speeds below 50% cannot be used at temperatures above 200°C.
A fan speed between 50 and 100% are recommended if you want a particularly juicy end
product and accept a longer cooking time.
Hours, date and setting of timer
Shows the exact time and date when the oven is off. For setting of clock and timer, see USER
MENU below.
Fully automatic cleaning system, CombiWash (optional extra)
The cleaning system should be used every day. You choose between levels 1, 2, 3 and 4 and
possibly additional detergent, depending on how soiled the oven chamber is. The last thing you
do before turning off the light in the evening is activating CombiWash. When CombiWash is
finished, the computer automatically switches to an energy-saving standby function.
Follow these steps to start CombiWash:
• Cool down the oven chamber to 80°C.
• Check the level of detergent and rinse aid.
• Press PRG and turn switch until CombiWash appears in the display.
• Press STEP to select cleaning level: 0 is 2 minutes’ flushing with water – 1 is light cleaning
and 4 is very thorough cleaning. Press ALARM for additional detergent.
• Close oven door and press ON.
Steps 1 and 2 are used after steaming/roasting at low temperatures.
Steps 3 and 4 are used after roasting of meat / cooking at temperatures higher than 180°C.
We recommend that the oven is cleaned on a daily basis or after each production.
Semi-automatic cleaning
This cleaning function can also be used on ovens with CombiWash. Simply deactivate
CombiWash in the user menu.
• Cool down oven chamber to 60°C.
• Press PRG and cleaning appears in the display. Press ON.
• Press ON
9
Page 10

• When the alarm sounds (after 10 minutes) and add soap appears in the display, open oven
door and spray detergent into oven chamber. Close oven door and the programme
continues.
• When the programme is over, rinse oven appears in the display (after another 10 minutes).
Rinse oven chamber.
If the oven is very soiled, activate combi steaming 2 at 80°C for 30 minutes before starting
cleaning programme.
Programme/recipe
0
Fillet of beef, 4 kg,
trimmed, medium
1
Braised pork, 3-4 kg,
well-done
2
Neck of pork with
lard, 3-4 kg, welldone
3
Low-temperature
steaming for 5 hours,
medium (max. 5 kg)
4
Duck roast, 3000 g
Mode
1) Hot air /
preheating
Alarm
2) Combi steam 1
3) Combi steam 1
1) Combi steam 2
2) Combi steam 1
1) Steaming
2) Combi steam 1
3) Hot air
1) Combi steam 1
2) Combi steam 1
3) Hot air
1) Hot air / preheating
Alarm
2) Combi steam 2
3) Combi steam 1
Temp./time/misc.
200/5
180/20
60/20
165/60
80/45
100/40
165/40
190/20/exhaust
open
80/105
60/180/low fan
speed
200/15/exhaust
open
200/5
145/40
170/30
Last step is ”holding
time” which ensures that
the meat is medium
done. May be omitted.
Last step is ”holding
time” which ensures
perfectly roasted meat.
May be omitted.
Can be used for all kinds
of lean cuts of veil and
beef.
Remarks
10
Page 11

Indicative core temperatures for beef, veal, pork and lamb
Cuts of saddle, tenderloin and ham 60-65°C
Roast of saddle, ham 65°C
Cuts of meat containing a great deal of connective tissue, such as
neck, brisket and shoulder 80°C
Paté 75°C
Terrine 60°C
Foie gras terrine 45°C
A rare roast is achieved at a core temperature of 60-62°C
A medium-rare roast is achieved at a core temperature of 65-67°C
A roast well-done is achieved at a core temperature of 70°C
(Meat with a great deal of connective tissue 80°C)
The more connective tissue the meat contains, the more important is the holding time after
the core temperature has been reached.
During traditional roasting at temperatures higher than 150°C, the core temperature may rise
by an additional 5°C during the first part of the holding time.
Tender meat such as sirloin steak and trimmed fillet reaches maximum tenderness at 65°C.
The meat becomes tougher between 75 and 80°C but becomes increasingly tender again as
the temperature rises above that.
Meat containing a great deal of connective tissue, such as shoulder, brisket and neck, needs to
be heated for a long time before it is sufficiently tender – for instance, a holding time of 30 –
90 minutes at a core temperature of 65-75°C (then it is ”low-temperature tenderising” – see
”Low-temperature roasting”).
For meat prepared for a buffet or for display on a sales counter, the indicative core
temperature is above 75°C. The meat should be removed after 3 hours or when the core
temperature falls to below 65°C. See recommendations from the Ministry of Health.
Indicative core temperatures for fish
Fish without bones 55°C
Fish with bones 60°C
Fish pâté 65°C
The steaming of fish will succeed at a temperature of 65 – 80°C. The fish does not coagulate
and shrinkage is reduced to a minimum.
11
Page 12

Low-temperature and long-time roasting
Indicative bactericidal holding times
Long-time roasting
Roasting at a temperature between 110 and 150°C. Slow heating produces meat that is
uniformly cooked.
Low-temperature roasting
Can be described as roasting below 100°C, the core temperature of the roast and the oven
temperature being almost the same. The advantage of this method of preparation is that the
roast is uniformly cooked. Furthermore, the slow preparation/heating process may result in the
meat becoming more tender. Can be used for all types of meat and is particularly suitable for
the preparation of meat with a great deal of connective tissue. With holding time at a core
temperature of 65°C, it is possible to achieve additional tenderising of particularly ”tough” cuts
of meat (at temperatures above 60°C, the meat starts to dehydrate).
Shrinkage during low-temperature roasting
Depending on the meat, the following indicative temperatures can be used for cuts of meat
that should be medium-rare or well-done:
5 hours approx. 25-30% shrinkage
10 hours approx. 35-40% shrinkage
20 hours approx. 45% shrinkage
Keeping qualities and indicative legal requirements from the Ministry of Health
The keeping qualities of heated meat vary a great deal according to the way the meat is
packed while stored – from a few days for small cuts of meat to several weeks for sous-vide
products.
The Danish legal requirements governing food hygiene state:
When heated, the food product should have an overall temperature of at least 75°C, with the
following exceptions:
• Whole cuts of meat
• Meat which the consumer does not want well-done, served in portions
• Hens’ eggs served one at a time
• Other kinds of food which, because of their nature, cannot be heated to at least 75°C.
Heating up food should not, however, cause any hygienic problems.
Food that has been heated should either be eaten within 3 hours, kept hot at a temperature of
65°C, or cooled down to max. 5°C in the course of no more than 3 hours.
12
Page 13

User menu
To enter the user menu, press ALARM for 5 seconds while you are in the manual mode.
The display briefly shows ”USER MENU”. The core temperature display shows ”b” and the
number of the value to be set (see below).
You leave the user menu by turning the turn switch beyond ”0”.
1 Store pre-
setting
2 Timer Press STEP to change the various settings of the timer.
3 Volume low Press STEP and adjust the volume of the alarm during operation from 0
4 Volume high Press STEP and adjust the volume of the alarm at the end of a
5 Sound
frequency
6 Interior light Press STEP: 0 = continuously on / 5 = off after 5 min. / 1 = continuously
7 Current
temperature
8 Extraction Applicable only if oven has condensing extraction hood. 0 = extraction
9 Time graphics Shown in text display during operation. Change by pressing STEP.
10 Minutes Minutes are shown in temperature display. Change by pressing
11 Hour Hour is shown in temperature display. See 10.
12 Day Day of the month, 1-31. Day of the week, 1 – 7, in time display. See 10.
13 Month Month. See 10.
14 Year The year 2007 is indicated by ”7”. See 10.
15 CombiWash For ovens with the automatic cleaning system, CombiWash:
Time and temperature can be changed in HOT AIR, COMBI STEAMING
and STEAMING and saved by pressing ALARM. The alarm control lamp
flashes when data are ready to be saved.
The desired changes should be made before entering the USER MENU.
1) DATE. The date flashes in the temperature display. To set the date,
turn switch. 0 means daily start.
2) HOUR. Set the hour.
3) MINUTE. Set the minute.
4) MODE. Choose a mode by pressing one of the four mode keys.
5) TEMPERATURE. Set the oven temperature.
6) TIME (duration of program) 0:00 - 4:00.
Press ALARM to activate timer (ON appears in the temperature display
and control lamp is on). Deactivate by pressing ALARM. The oven can
now be turned off with the main switch or it can be left on standby. The
oven starts automatically but only in the manual mode.
to 9.
program/mode from 1 to 9.
Press STEP and adjust from 1 to 9.
on but off when door open / 6 = off after 5 min. but off while door open.
0 = desired temperature / 1 = current temperature. Adjust by pressing
STEP.
hood running independently of oven / 1 = extraction hood stops 10
minutes after oven has stopped.
0 = Display shows mode chosen
1 = Display alternately shows mode chosen and time remaining.
temperature key and turning switch. Store by pressing temperature key
again.
In Europe, you can choose to have the computer switch to summer time
automatically. 0 = No change, 1 = Change from/to summer time.
If problems occur with respect to some of the CombiWash error
messages, the program can be deactivated. 0 is shown in step display.
Then activate the semiautomatic cleaning program by pressing START
(no wash arm required) and follow the instructions in the display.
13
Page 14

16 Regenera-
ting/reheating
17 Injection
interval 1
18 Injection
interval 2
19 Save all Press ALARM to make a backup of all settings in all modes and
20 Retrieve all Press ALARM to retrieve all settings saved in all modes and programmes.
21 Retrieve ori-
ginal menu
22 Screen saver Interval of seconds before screen saver becomes active. 0 = 0 sec. / 1 =
23 Language Change by pressing STEP (1 – 4).
24 SW update Updating of software. Special memory key required. Contact your local
Setting of humidity pulsing. Press temperature key and turn switch to
change setting. The value indicates the number of seconds between each
injection into the oven chamber. If the value is increased, less humidity
is added to the oven chamber, if the value is reduced, more humidity is
added (factory setting is every 8 seconds).
Combi steaming 1: See 16 (factory setting is every 12 seconds)
Combi steaming 2: See 16 (factory setting is every 5 seconds)
programmes.
Press ALARM and retrieve all programmes preset by the manufacturer. In
step display, choose which program (0 – 4) to retrieve and press ALARM.
10 sec. / 2 = 30 sec. / 3 = 60 sec./ 4 = 180 sec. / 5 = 600 sec. Change
by pressing STEP.
distributor.
14
Page 15

Cleaning
Daily cleaning of the oven is recommended for hygienic reasons and to avoid interruptions of
operation.
The design of the WHIRLPOOL ovens allows quick and easy cleaning. The oven chamber is
made of all-welded stainless steel, which makes it splash proof. You will therefore find the
easy-to-use handshower (optional extra), which is located under the front panel, very suitable
for interior cleaning.
The door sealing is easy to remove, which ensures quick and efficient cleaning under and
around it.
Furthermore, the flat front panel makes exterior cleaning simple and efficient.
To give the oven an extra shine, we recommend WHIRLPOOL steel oil which is available from
your oven supplier (0.5 litre: part No. 045650 – 5 litres: part No. 045654).
Oven chamber
Use CombiWash, level 1-4 (note that CombiWash should be ordered as optional extra together
with the oven as it cannot be retrofitted) or the semi-automatic cleaning program (see
Description of functions), or do as follows:
A. Always clean in a cold oven or cool the oven chamber down to below 80°C.
B. Let the oven run in COMBI STEAMING 2 at 80°C for 15 minutes.
C. Apply WHIRLPOOL oven detergent to the sides of the oven chamber, racks, etc. (according
to requirement) using a soft brush or a spray pistol. Protect your face and hands as the
detergent may cause irritation should it come into contact with your skin.
D. Let the detergent work for 10 minutes.
E. Let the oven run in COMBI STEAMING 2 at 80°C for 15 minutes.
F. Rinse the oven chamber with water (using a soft brush or the handshower (optional
extra)).
G. If the oven is not connected to a soft-water plant, we recommend that you use
WHIRLPOOL rinse aid and wipe the oven chamber with a dry cloth.
Cleaning behind filter housing
For thorough cleaning of the oven chamber, move the filter housing so that it becomes
possible to clean round the fan and heating elements.
Loosen the 2 screws (A) and (B) on the filter housing, turn the filter housing and clean behind
it. The filter housing can be dismounted entirely by lifting it upwards till it is clear of the pin at
the bottom and then tipping it.
15
Page 16
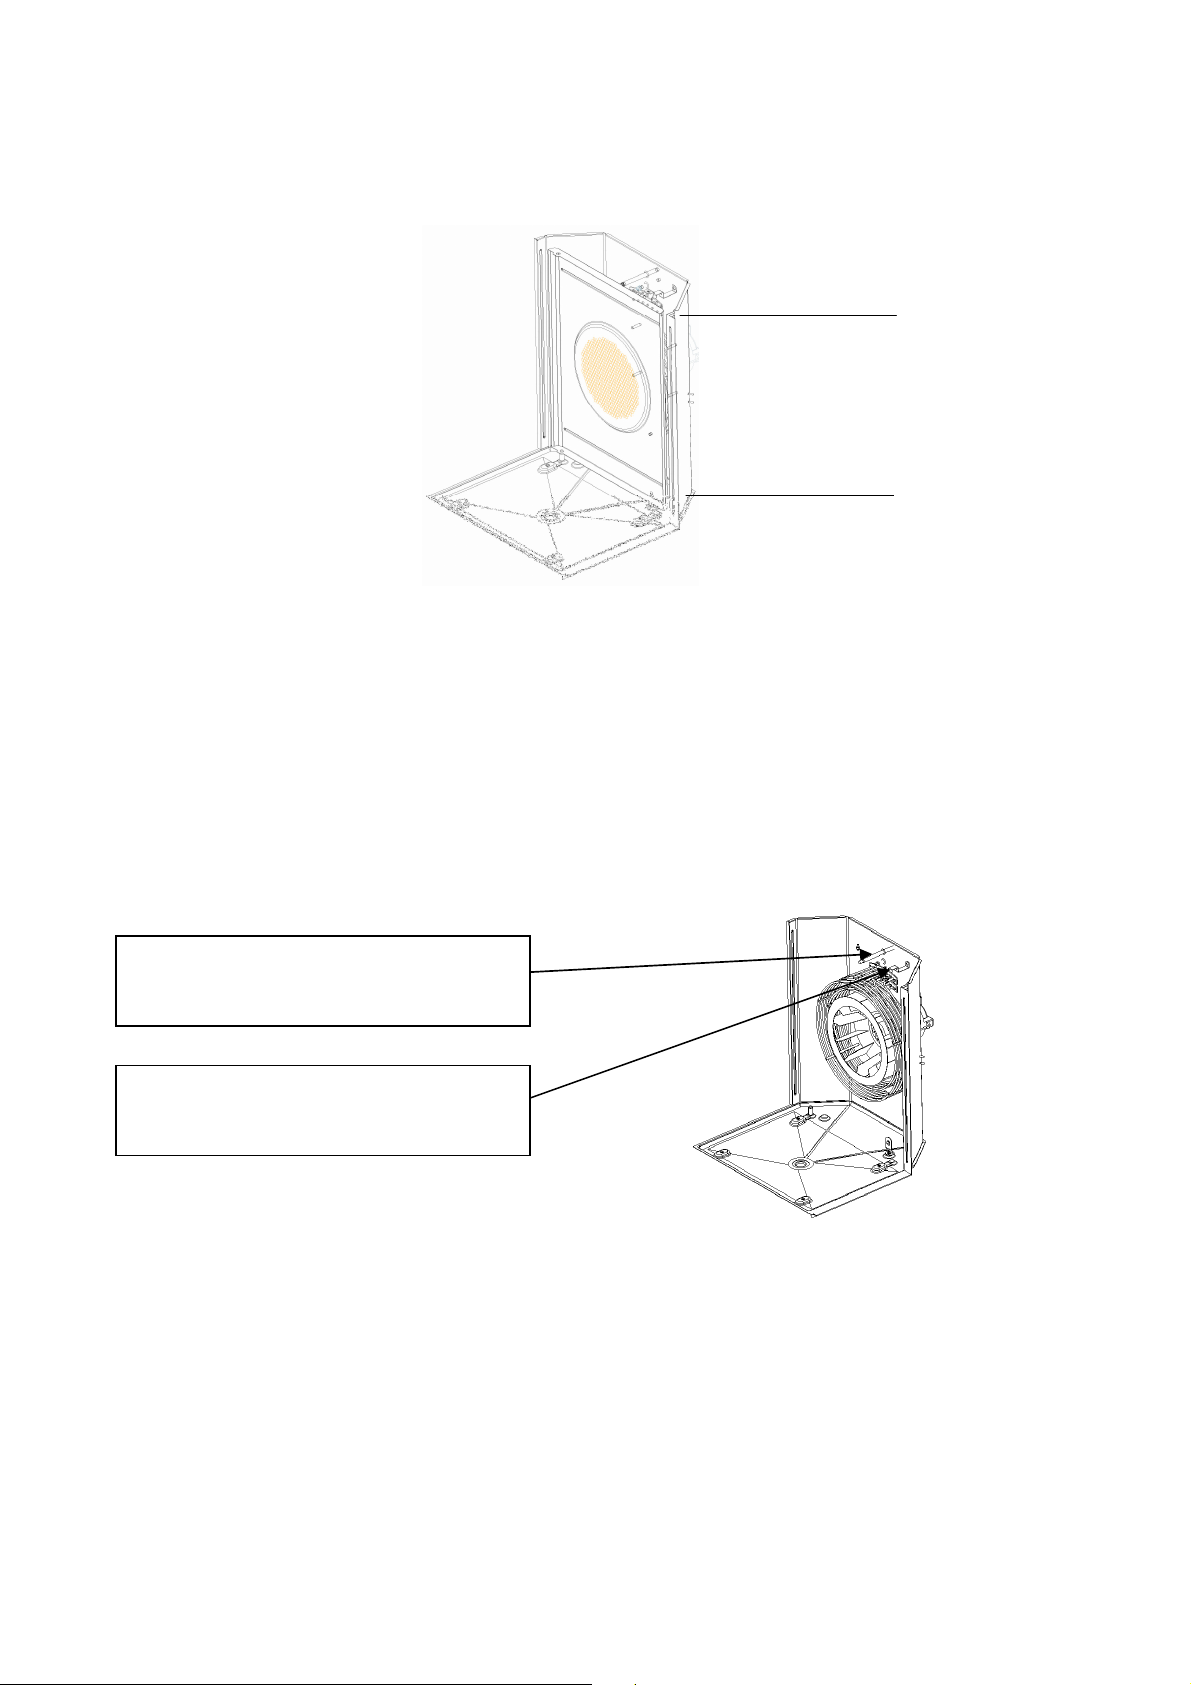
(A)
(B)
Cleaning of jet heads
The jet head should be dismounted and cleaned regularly according to how often the combi
steaming and ClimaOptima modes are used. The easiest way to clean the jet head is to let it
soak in scale remover according to requirement. All ovens are supplied with an additional jet
head.
If the oven is equipped with the automatic cleaning system, CombiWash, there will be two jet
heads. The other jet head will be located to the right of or above the first one. This jet head
should also be checked/cleaned regularly.
Please note the position of the jet heads:
The jet head for steam / ClimaOptima
should be located with the notch
facing downwards (the long tube).
The jet head for CombiWash should
be located with the notch facing
upwards (the short tube).
Exterior cleaning
Wash the oven cabinet on the outside with soapy water and dry with a soft and damp cloth.
After drying, apply WHIRLPOOL STEEL OIL (follow directions on the packaging). The steel oil is
available from your oven supplier (0.5 litre: part No. 045650 – 5 litres: part No. 045654) and
is only for external use.
Note! The exterior of the oven must never be flushed with a water hose or high-pressure
cleaner as this may damage the electronic components.
16
Page 17

Filter
Under the front panel is a filter that should be cleaned on a weekly basis – either manually or
automatically.
Remember to fit the filter again after cleaning to prevent dirt, soil, etc. from entering the oven.
17
Page 18

Error Codes
Error code 3:
Error code 4:
Error code 5:
Error code 6:
Error code 7:
Error code 8:
Error code 9:
Error code 10:
Error code 11:
Error code 12: SSR too hot (Solid-state relay too hot.)
Error code 13:
Error code 14: Fan running too slow
Error code 15: CPU board too hot (> 60°C)
Error code 16: IO board too hot (> 60°C)
Error code 18: Error in set-up data
Error code 19: Wrong language
Error code 20:
Error code 22: Restart not possible (Oven has been without power too long.)
Error code 23: Oven too hot at CombiWash start-up
Error code 24:
Error code 25:
Error code 28: Configuration error in main alarms (3, 4, 5, 12) (warning)
Error code 29: Wrong door sensor signal (warning)
Error code 34: Water pressure too low (Check that water is turned on.)
Error code 40: Temperature in IO board critical (Warning after program run.)
Error code 43: Wrong software version (Visual Cooking I oven)
Error code 44: Failure during initialisation of exhaust at oven start-up
Error code 45: 24 V missing or failure of main contactor output
Generator too hot (Generator thermoswitch has tripped. Reconnect by
pressing button under oven.)
Oven too hot (Oven chamber thermoswitch has tripped. Reconnect by
pressing button under oven.)
Fan too hot (Thermoswitch in motor has tripped. Wait for 10 minutes
and try again.
Drain too hot (Drain temperature has been above 75°C for more than 5
min. Check that jet in drain is working.)
Oven sensor defective (Temperature sensor in oven chamber not
working properly.)
Core temp. probe not connected (A program using core temp. probe
has been selected but probe has not been connected.)
Generator sensor defective (Temperature sensor in generator not
working.)
Drain sensor defective (Sensor in drain not working. Oven can still be
used.)
Water shortage (Steam generator was not filled within two minutes.
Check that the water has been turned on.)
Generator too hot (Temperature in steam generator higher than
130°C. If fault recurs, descale generator)
Internal defect (Failure in communication between computer and IO
board.)
Draining failure (Drain blocked or failure of drain pump. Water level in
generator still high after 10 seconds of draining.)
Core temperature probe defective (1, 2 or 3 of the elements in the
core temperature probe defective.)
18
Page 19
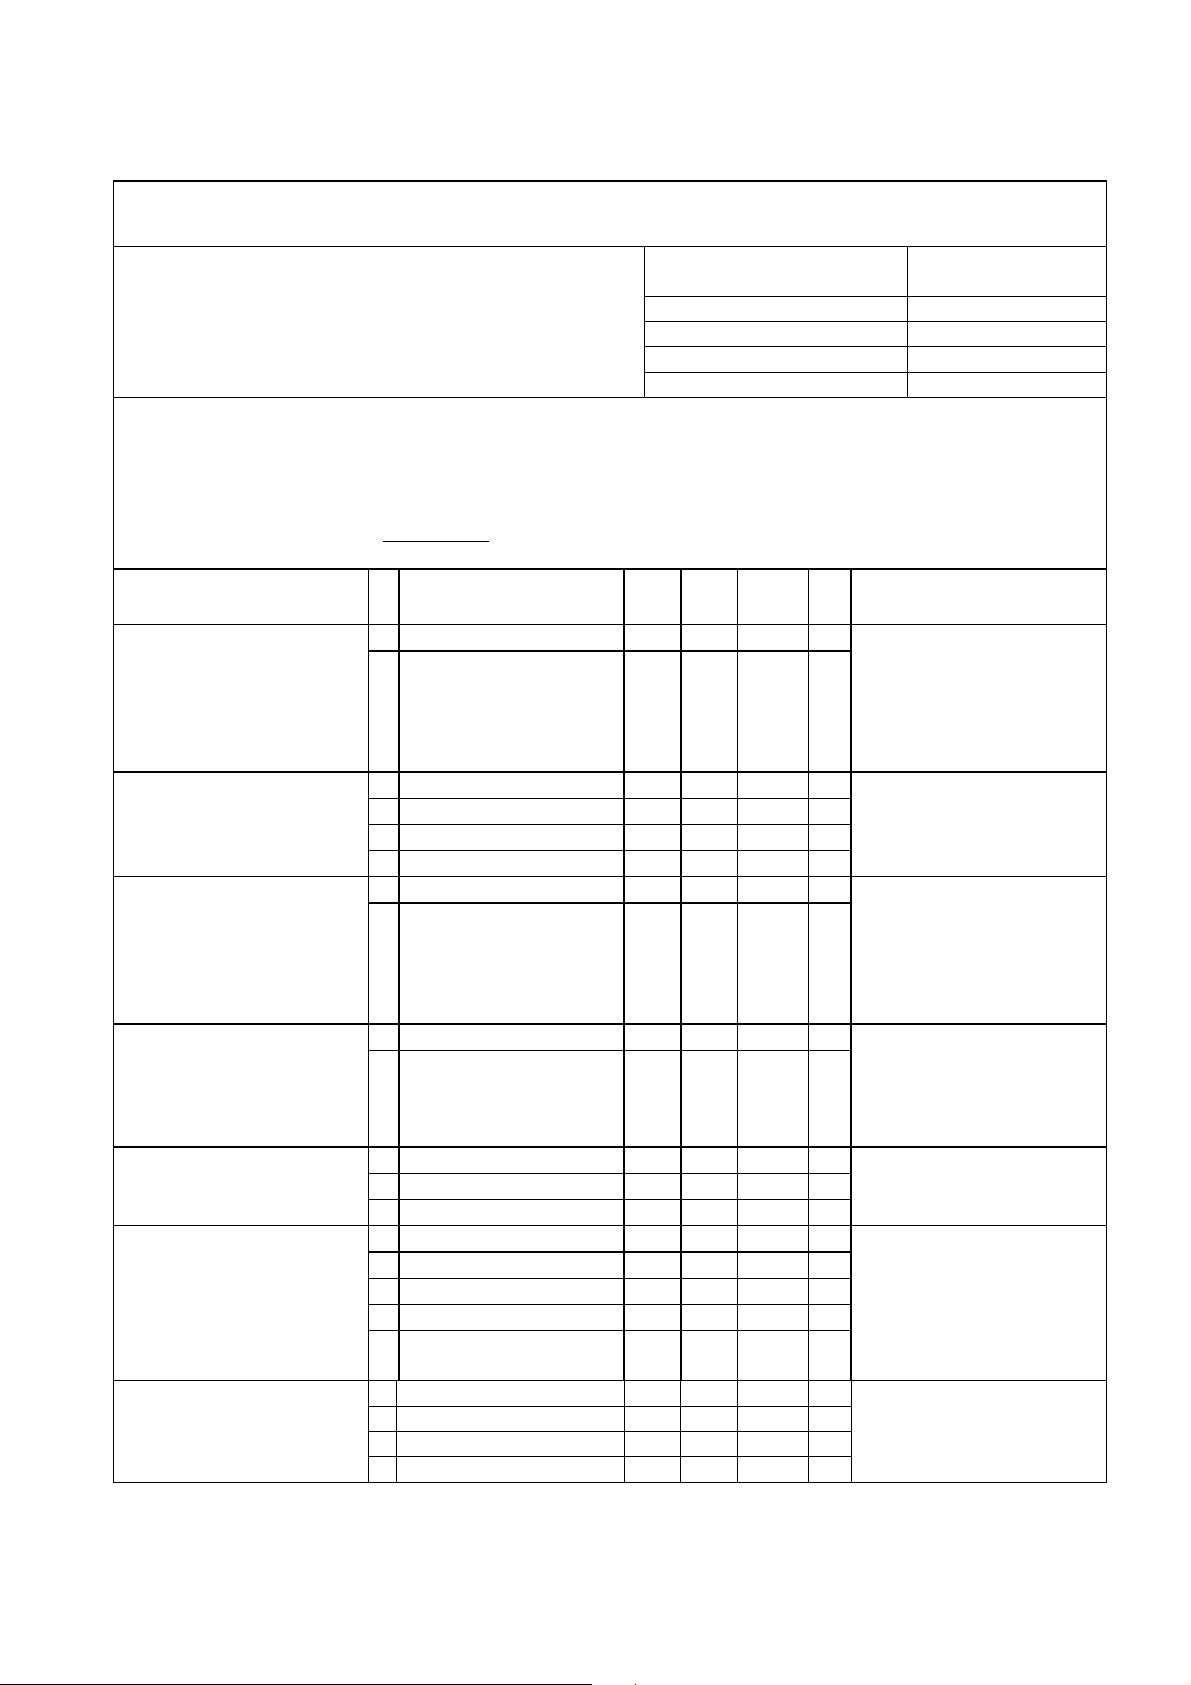
6 kg,
3%
6 kg,
*60%
6
*50%
time roasting, 10
Meat with lard and fat,
Recommended Programmes
The following recipes are for ovens equipped
with the modes ClimaOptima and Steaming.
To the right is a conversion table which
enables you to use the recipes in all
WHIRLPOOL ovens.
Note: Most programmes have a PREHEATING OR PRESTEAMING mode followed by STOP. This
means that the products should not be loaded into the oven until this step is completed. Find
program – press start – wait for alarm signal – open door – load oven – insert
multipoint core temperature probe, if any – close door. The program continues
automatically.
*(This value refers to the estimated amount of humidity that the products give off during the
below programmes)
Veal & Beef
Fillet with flank, 4medium
whole, 1½-3 kg,
medium
1 Preheating - Alarm 250 1 Tournedos, medium
2 Hot air / exhaust
open
1 Preheating - Alarm 160 2
2 ClimaOptima 60 135 20
3 ClimaOptima 20 150
4 Hot air 185
1 Preheating - Alarm 210 2 Tenderloin, roasted
3 ClimaOptima 30 185
Mode
ClimaOptima 0% Hot air with
exhaust open
ClimaOptima 30 – 60% Combi 1
ClimaOptima 70 – 90% Combi 2
ClimaOptima 100% Combi 3
Steaming Combi 3
% °C Min.
250
CT
57
57
62
60
Apply special browning
fat to meat and tray.
Use baking sheets,
grilling sheets,
enameled iron sheets
*20%
*50%
Salting 5-10 g per kg,
6-24 hrs before
roasting reduces shrinkage by an additional 2-
Remarks
medium
Braising, 3well-done
Joint of beef or veal, 3kg, with lard, well-done
Longhours,
well-done
1 Preheating - Alarm 250 1 Roasted cuts of meat,
2 Hot air / exhaust
open
1 Preheating - Alarm 160 2
2 ClimaOptima 70 135
3 ClimaOptima 40 165
1 Preheating - Alarm 140 2
2 ClimaOptima 80 110 20
3 ClimaOptima 40 135
4 ClimaOptima 20 165
5 Hot air / exhaust
open
1 ClimaOptima 100 110 30
2 ClimaOptima 30 80 180
3 ClimaOptima 30 70 370
4 ClimaOptima 0 220 20
250
195 15
59
65
75
50
70
*30%
Salting 5-10 g per kg,
6-24 hrs before roastig
reduces shrink-age by
an additional 2-3%
*30%
*50%
19
Page 20
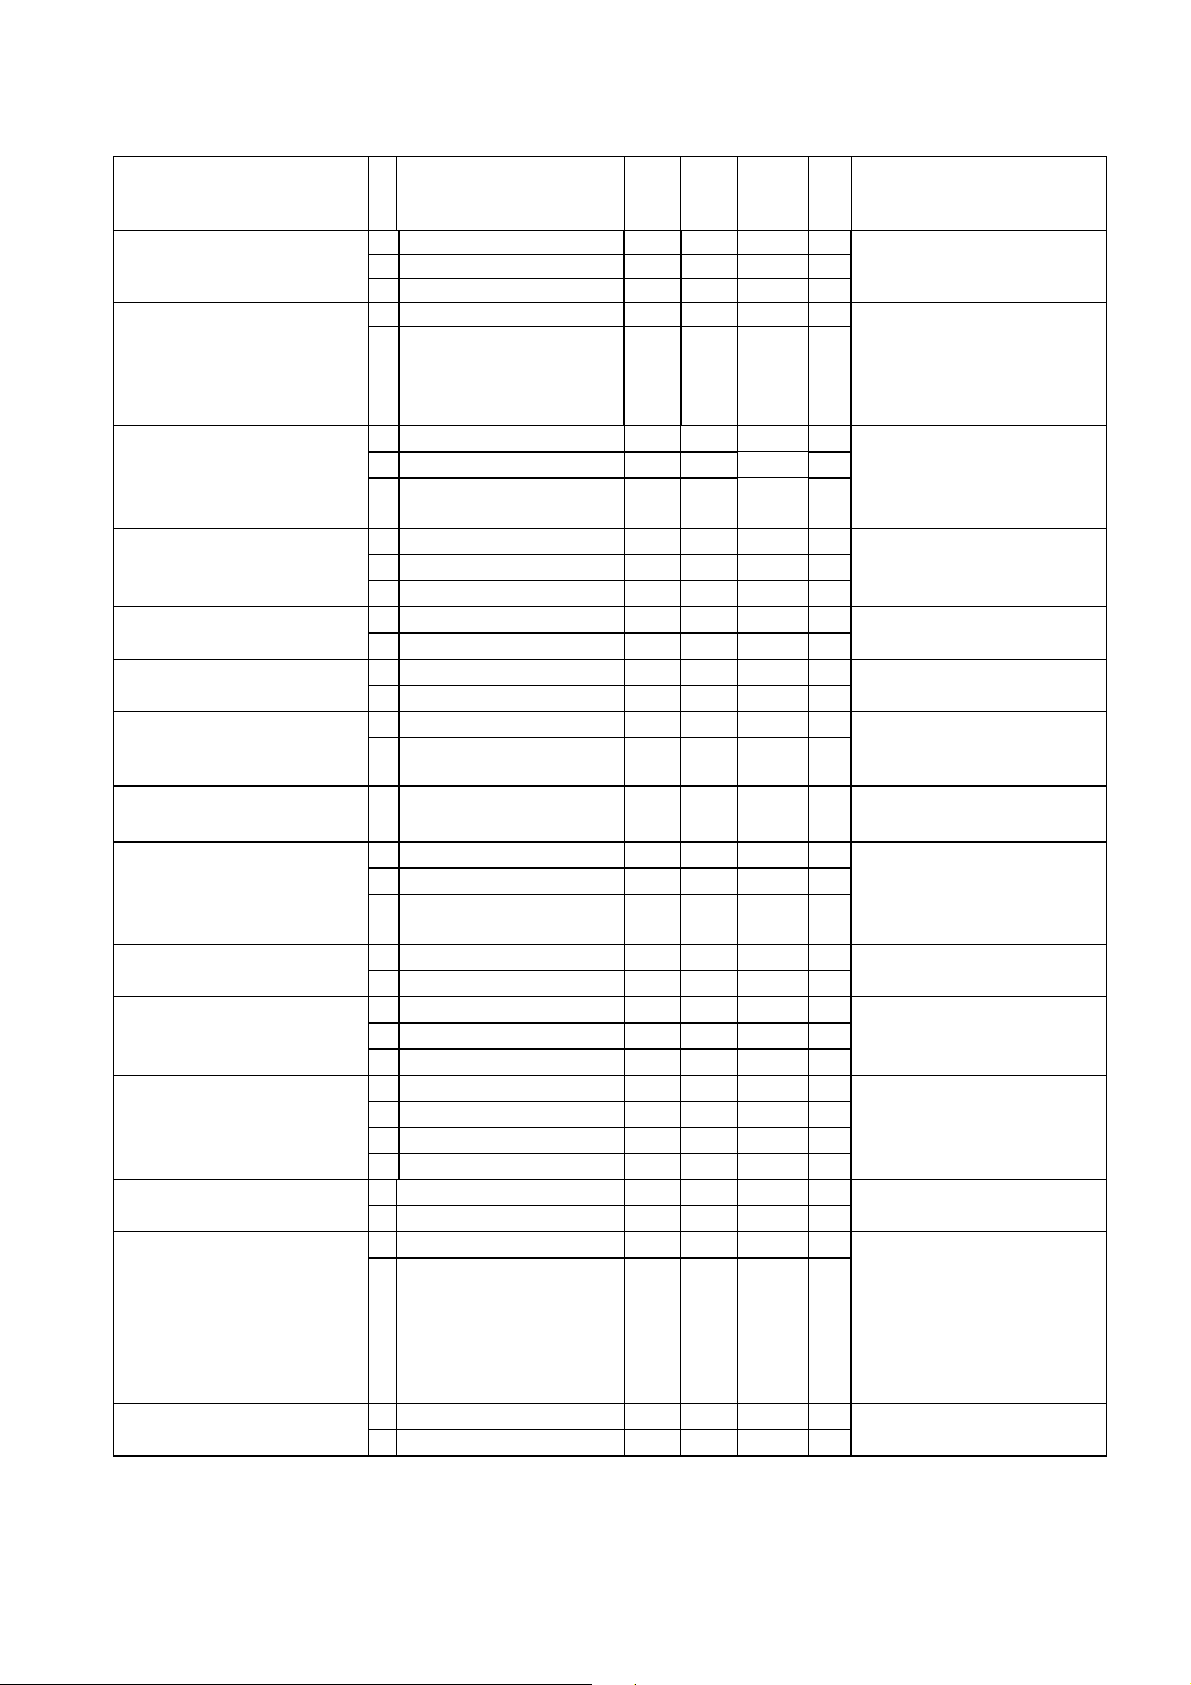
Long-time roasting, 10
1 Preheating
-
Alarm
180 2
2 ClimaOptima
60
165 60
3 ClimaOptima
20
100 70
1 Preheating
-
Alarm
160 2
24 hrs before roasting
Add special browning fat
hours, trimmed meat,
medium
Braised knuckle of veal
ClimaOptima 40 100 30 *50%
1
*60%
Roastbeef, 2-5 kg,
medium
Sirloin in puff pastry
Steamed brisket of veal
and beef, 1–4 kg, welldone
Lasagne
Minced meat dishes
Pâté in tins of 1000 g
each
Pork
Neck of pork and rib
roast with lard, 2-5 kg,
well-done
2-5 kg
Neck of pork without
lard, 2-4 kg, well-done
Ham with knuckle, 8-10
kg, well-done
2-3 kg, well-done
140-200 g
preparation
2 ClimaOptima 30 135
57
1 Preheating - Alarm 180 2
2 Hot air 150
3 Hot air / exhaust
180
50
60
open
1 Steaming 100 8
2 Steaming 100
80
3 Steaming 80 45
1 ClimaOptima 30 145
85
2 ClimaOptima 0 185 10
1 ClimaOptima 40 165
80
2 ClimaOptima 0 185 10
1 ClimaOptima 30 80 75
2 ClimaOptima 0 100 10
Mode
% °C Min.
CT
1 ClimaOptima 100 100 30
2 ClimaOptima 60 165
3 Hot air / exhaust
195 20
78
open
1 Preheating - Alarm 175 2 Roasted saddle of pork,
2 ClimaOptima 30 165
75
1 Preheating - Alarm 195 2
2 ClimaOptima 30 165
78
3 ClimaOptima 20 70 45
1 Steaming 100 8
2 Steaming 100 120
3 ClimaOptima 60 135
75
4 ClimaOptima 20 185 20
1 Preheating - Alarm 185 2 Ham roast without lard,
2 ClimaOptima 60 165
85
1 Preheating - Alarm 250 1 Roasting of pork chops,
2 Hot air 225
16
1 Presteaming - Alarm 100 8 Spareribs, basic
2 Steaming 100 45
Salting 5-10 g per kg,
6reduces shrink-age by
an additional 2-3%.
*40%
Remarks
to meat and tray. Use
silicone-coated baking
sheets, enameled cast
iron trays or specially
designed grilling trays.
*30%
Season/marinate
*50%
*60%
*60%
*60%
*60%
*50%
*40%
*50%
*50%
*30%
20
Page 21
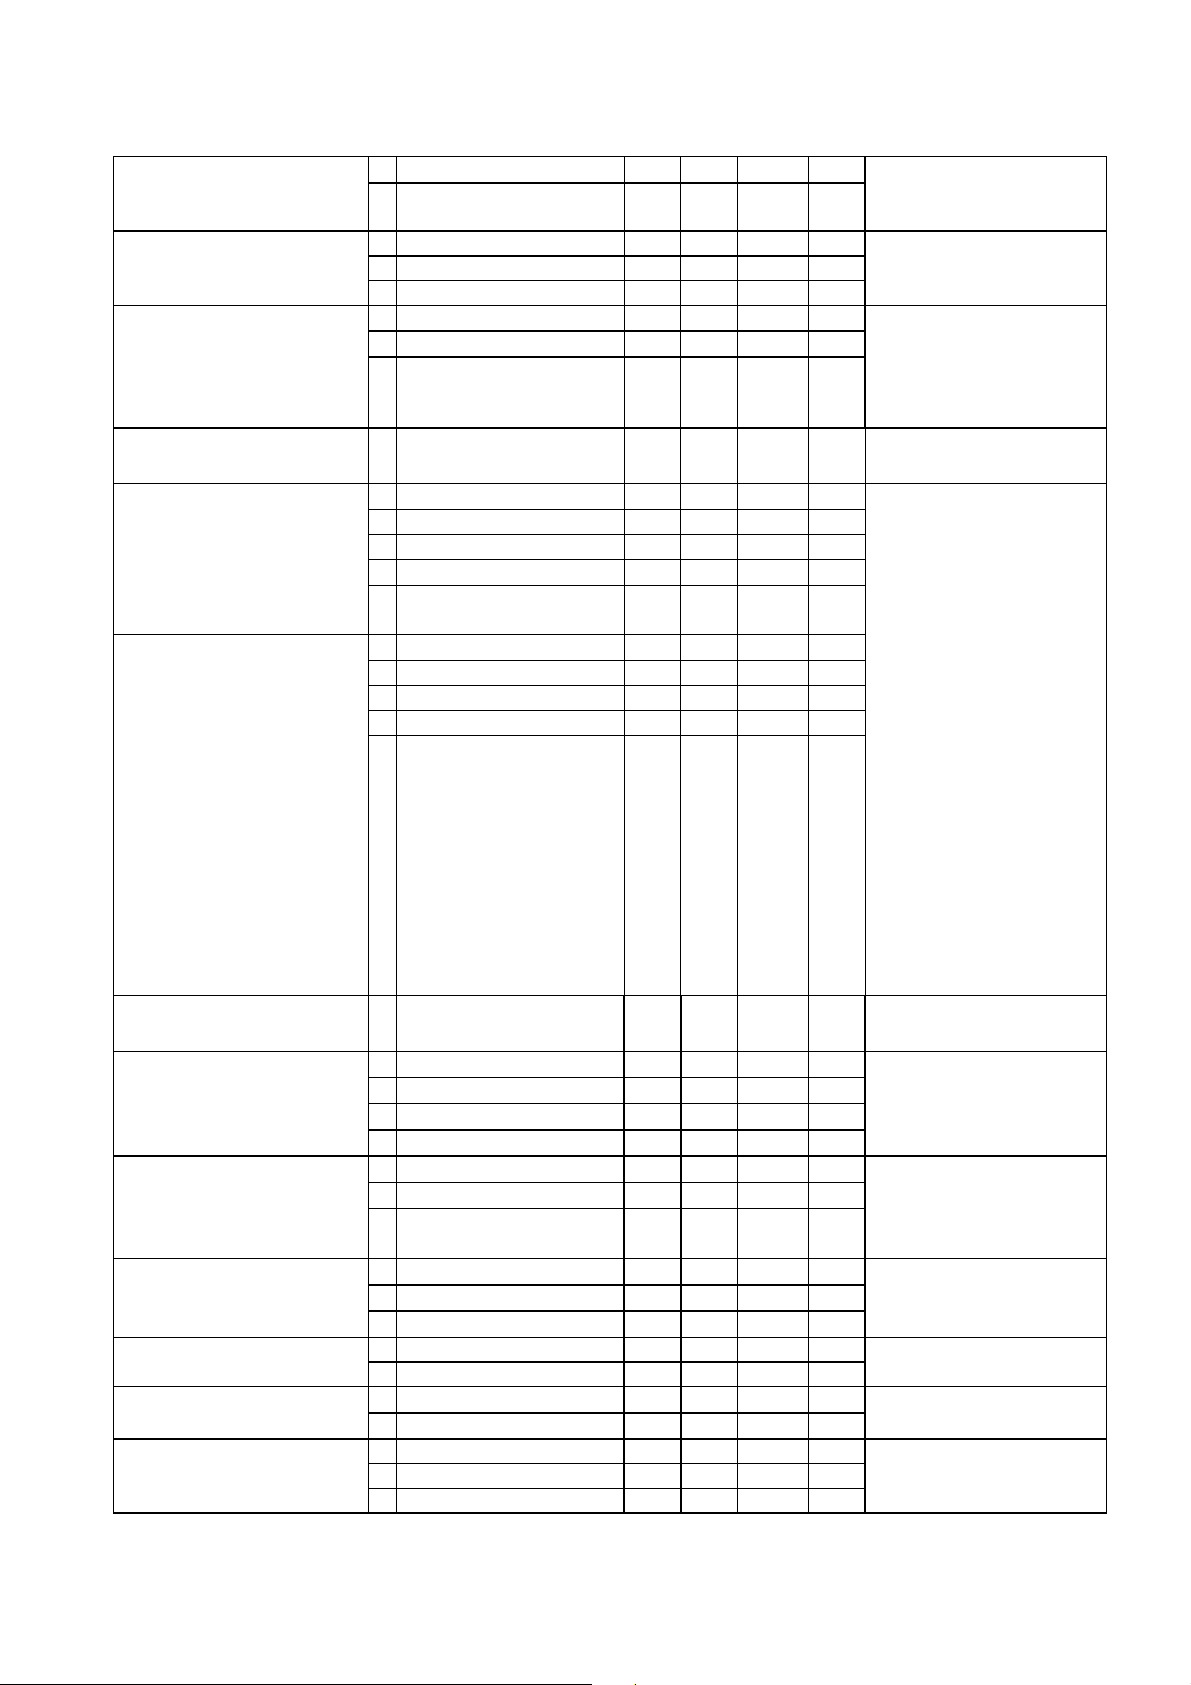
(presteamed,
1 Preheating
-
Alarm
160 2
2 ClimaOptima
60
135 65
3 ClimaOptima
70
165 80
Recommended time of
1 Cooling
-
Alarm
55
2 Hot air / low fan
65 45
1 Preheating
-
Alarm
185 2
*50%
2 ClimaOptima
50
145 80
3 ClimaOptima
25
170 30
marinated)
Braising, 2-3 kg, welldone
Preheating - Alarm 200 2 Spareribs, finishing
1
2 ClimaOptima 65 170 30
*30%
*60%
Suckling pig roasted
whole, 20-23 kg, welldone
Delta-T roasting
Delta-T, medium
Delta-T, well-done
Poultry
Chicken, 1000 g
Chicken, 1400 g
Chicken, 1700 g
Foie gras terrine
1 ClimaOptima 60 100 240
2 ClimaOptima 20 70 210
3 Hot air / exhaust
250 30
open
Use WHIRLPOOL rack
for suckling pig which
is available for model
sizes 1.16 and 1.20.
*40%
Mode
1 Preheating - Alarm 210 2
2 ClimaOptima 20 185 10
3 Cooling 40
4 ClimaOptima
Delta-T
5 Hot air / low fan
speed / Cook & Hold
1 Preheating - Alarm 210 2
% °C Min.
CT
30 62
60
Remarks
For whole roasts.
Perfect program for
production during the
night. The meat is
kept hot indefinitely
at the last stage
(Co&Ho).
2 ClimaOptima 20 185 10
3 Cooling 40
4 ClimaOptima
5 Hot air / low-fan
Delta-T
30 80
60
speed / Cook & Hold
preparation before
last stage is 60/90
minutes (medium/
well done).
Optimum tenderness
of the meat is
achieved. Shrinkage
is reduced by approx.
10-15 % as compared
to traditional roasting
methods. The meat
can be taken directly
Mode
% °C Min.
CT
1 Preheating - Alarm 210 2
2 ClimaOptima 60 180 10
from the oven.
Remarks
*60%
3 ClimaOptima 40 190 15
4 ClimaOptima 0 205 7
1 Preheating - Alarm 190 2 *60%
2 ClimaOptima 60 165 30
3 Hot air / exhaust
0 190 10
open
1 Preheating - Alarm 190 2 *60%
2 ClimaOptima 60 165 30
3 ClimaOptima 0 190 10
Chicken pie, 1000 g, in
tin
Duck roast, 3000 g
21
1 Preheating - Alarm 180 2 *60%
2 ClimaOptima 60 160
75
Page 22

1 Preheating
-
Alarm
250 2
Apply special browning
1 Preheating
-
Alarm
250 2
(7x7 mm)
*20%
1 Presteaming
-
Alarm
100 8
N container
Fish
1 Presteaming - Alarm 70 8 Steamed fish, 60-130 g
2 Steaming 70 60
1 Preheating - Alarm 100 2 Fish terrine
2 ClimaOptima 60 120
Roasted plaice, breaded
2 ClimaOptima 0 225 16
1 Presteaming - Alarm 70 8 Steamed salmon, whole
fillet, 1-3 kg
Vegetables
120 g
Baked potatoes 1 ClimaOptima 60 165
Cream potatoes
Superfarm Service+
(9x9 mm)
French fries, Farmfrites
Superfarm Service+
2 Steaming 70 60
1 Preheating - Alarm 250 2 Grilled fish, 80 g
2 Hot air / exhaust
open
1 Presteaming - Alarm 100 8 Steamed potatoes, 702 Steaming 100 40 98
1 Preheating - Alarm 180 2 *60%
2 ClimaOptima 50 150 65
1 Preheating - Alarm 250 2 French fries, Farmfrites
2 ClimaOptima 20 230 7
2 ClimaOptima 20 230 5
Mode
Mode
% °C Min.
225 7
% °C Min.
CT
65
fat to fish/tray. Use
silicone-coated baking
sheets, enameled cast
iron trays or specially
designed grilling trays.
Use flat trays and
baking paper. Place
fish on skin side. After
steaming, remove
skin and carefully
remove dark fat from
the back of the fish
with a spoon.
CT
Max. 8-9 kg,
perforated container
98 *60%
Use special GN wire
basket. Tip: Shake the
basket 1 time during
the preparation
process.
Remarks
*70%
*20%
Remarks
Steamed rice
(parboiled)
22
2 Steaming 100 25
1 Presteaming - Alarm 100 8 Danish rice porridge
2 Steaming 100 105
Use deep G
and flat GN container
as cover.
Add sugar, salt and
perhaps other spices
and stir before adding
milk. Use flat GN
container as cover. 2
kg rice per 90 mm GN.
Page 23
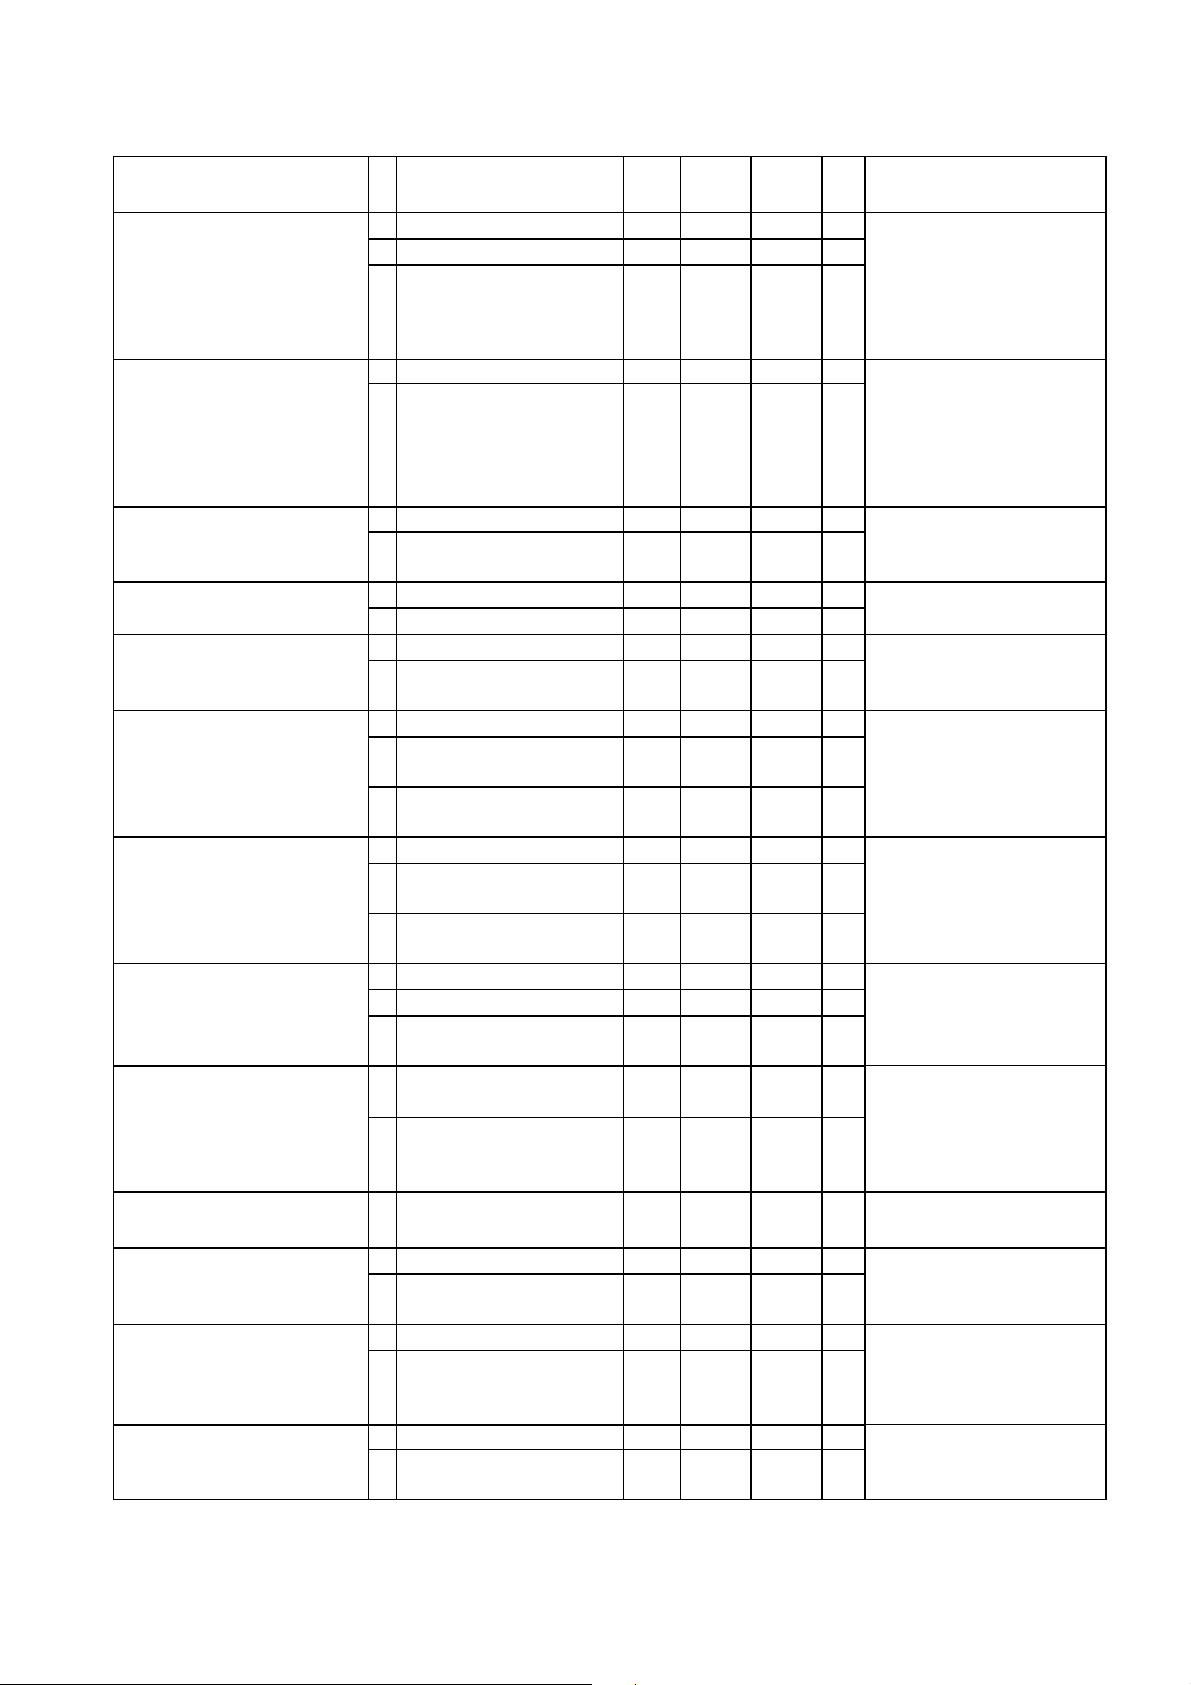
Bread & Pastry
1 Preheating
-
Alarm
180 2
1 Preheating
-
Alarm
220 2
1 Preheating
-
Alarm
220 2
Danish pastry, 85-100
g, bake-off
Danish pastry, mini, 4075 g, bake-off
Prebaked bread, 500700 g, bake-off
Baquettes, 250 g, bakeoff
Prebaked rye bread,
1100 g, bake-off
Semi-automatic bread
program
Bread, 60 g
Bread, 4-600 g
Puff pastry
Mode
1 Preheating - Alarm 210 2
2 Hot air 175 13
3 Hot air / exhaust
open
2 Hot air / exhaust
open
2 Hot air / exhaust
open
1 Preheating - Alarm 230 2
2 Hot air 180 9
1 Preheating - Alarm 190 2
2 Hot air / exhaust
open
1 Proving 32 45
2 Hot air / low fan
speed
3 Hot air / exhaust
open
1 Preheating - Alarm 240 2
2 Hot air / low fan
speed
3 Hot air / exhaust
open
1 Preheating - Alarm 230 2
2 Hot air 180 24
3 Hot air / exhaust
open
1 Preheating - Alarm 190 2
% °C Min.
180 5
170 18
180 11
160 25
185 24
185 10
180 10
180 5
200 4
CT
The distance between
the sheets should be
130 mm equalling the
distance between
every other runner.
The distance between
the sheets should be
130 mm equalling the
distance between
every other runner.
Remarks
*40%
*40%
*30%
*20%
*40%
*40%
*30%
*50%
2 Hot air / exhaust
open and low fan
speed
Desserts
1 Cooling - Alarm 75 Crème brulée, in
portions of 1½ dl
Genoise
23
2 Hot air / low fan
speed
1 Preheating - Alarm 100 2 Meringue
2 Hot air / exhaust
open and low fan
speed
2 Hot air / low fan
speed / exhaust open
Mode
160 20
% °C Min.
75 80
95 80
CT
Remarks
*30%
Page 24
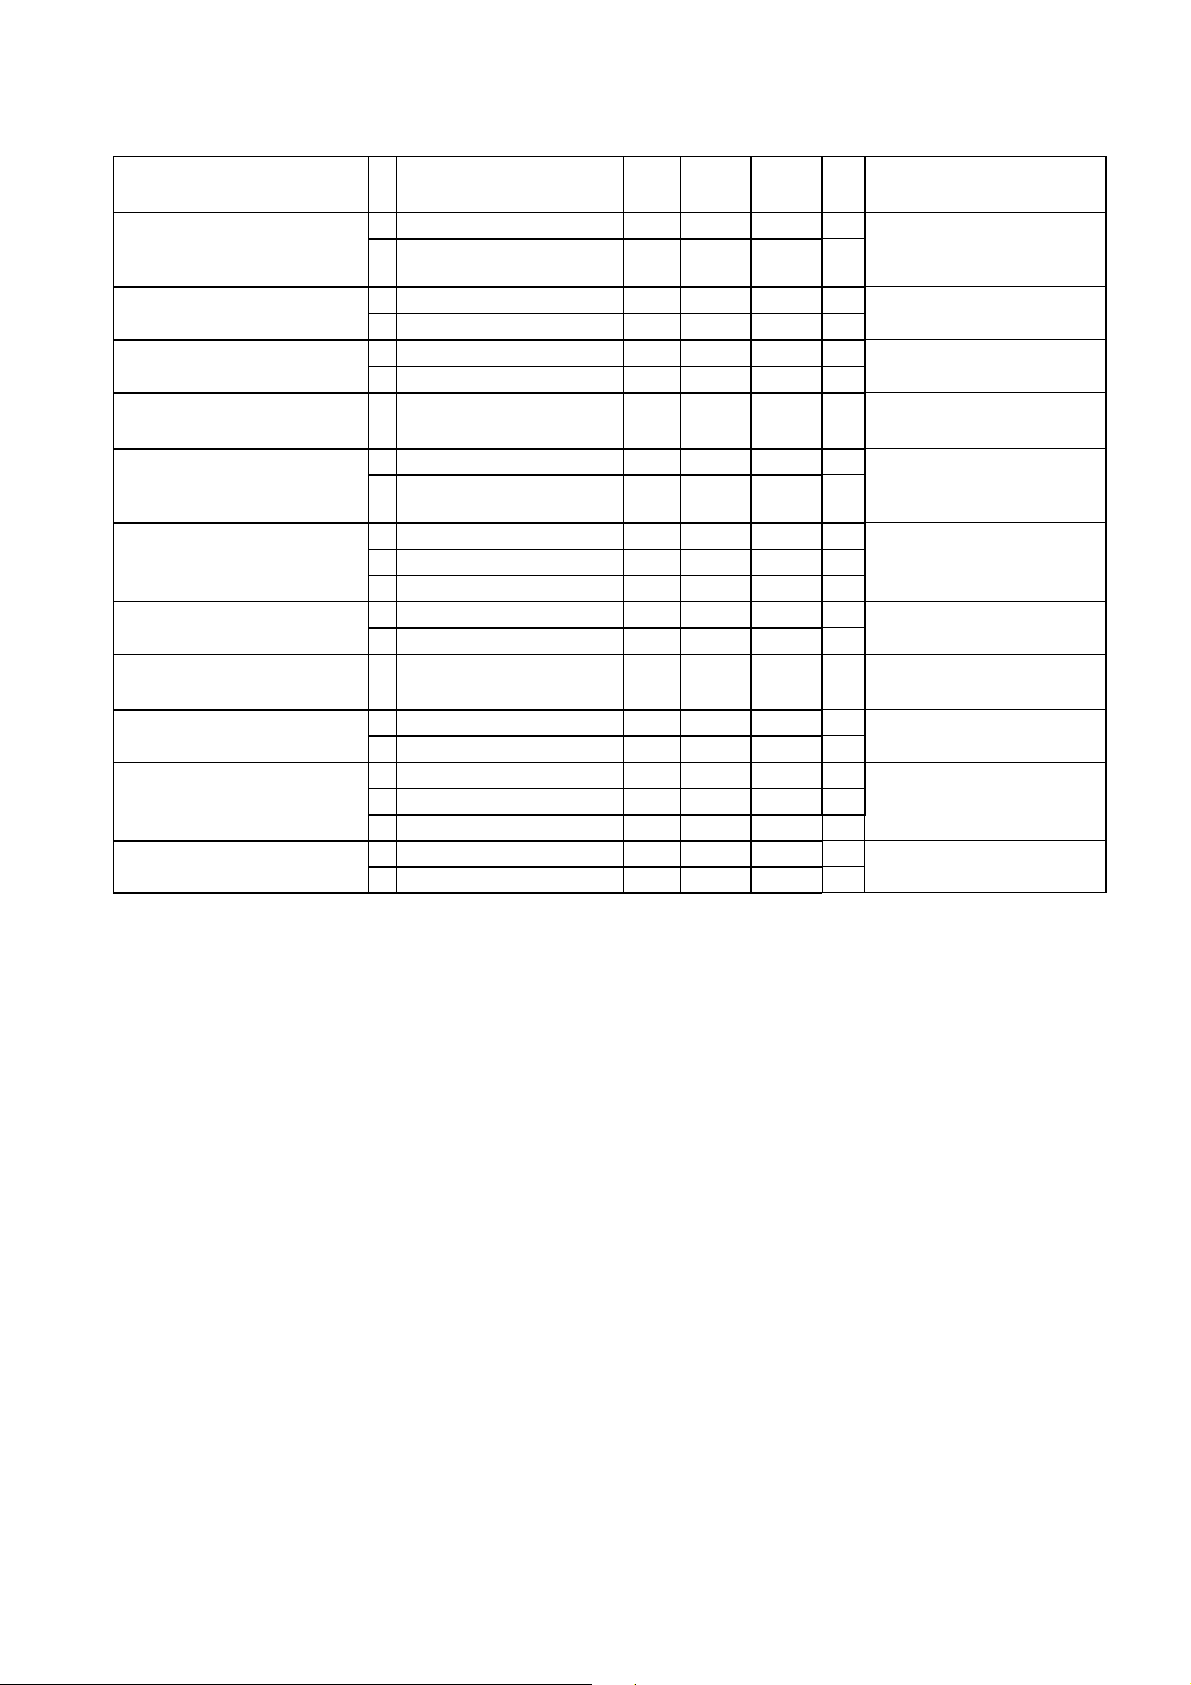
Shellfish
steamed
Game
trimmed, 1-2 kg,
medium
Saddle of venison,
larded, 3-5 kg, medium
Lamb
medium
Stuffed venison of lamb
(boneless), medium
medium
Mode
1 Steaming - Alarm 100 8 Lobster, approx. 1.2 kg,
2 Steaming 100 15
1 Steaming - Alarm 100 8 Mussels, steamed
2 Steaming 100 15
1 Steaming - Alarm 100 8 Prawns, steamed
2 Steaming 100 10
Mode
1 Preheating - Alarm 190 2 Fillet of venison,
2 ClimaOptima 20 180 59
1 Preheating - Alarm 190 2
2 ClimaOptima 40 160 10
3 ClimaOptima 60 165 57
1 Preheating - Alarm 190 2 Haunch of venison
2 ClimaOptima 60 165 57
Mode
1 Preheating - Alarm 190 2 Leg of lamb, boneless,
2 ClimaOptima 60 165 57
1 Preheating - Alarm 180 2
2 ClimaOptima 60 150 55
3 ClimaOptima 0 185 60
1 Preheating - Alarm 180 2 Fillet of lamb, trimmed,
2 ClimaOptima 20 180 59
% °C Min.
% °C Min.
% °C Min.
CT
CT
CT
Cooking time: Approx.
1 min. / 100 g + 3
min.
Remarks
Remarks
Remarks
*30%
*50%
*50%
*50%
*50%
*30%
24
Page 25

Baking
Temperature
20 min.,
Recommended values
Product
Operating mode
Rolls* Hot air
Loaves* Hot air
Buns* Hot air
Baguettes,
prebaked
French loaves/
baguettes
Danish pastry**
Hot air, possibly
exhaust open
Hot air, possibly
exhaust open
Hot air, possibly
exhaust open
Marble cake Hot air
Madeira cake Hot air
Vanilla biscuits Hot air
Processing
time in minutes
15-20
25-35
15-20
10-12 / 2-4
15-20 / 2-5
10-50 / 5-7
50-70
50-80
7-10
°C
170-180
160-180
160-170
170-180
170-180
170-180
160-170
150-160
160-170
Remarks and tips
Manual humidity for the
first 10 sec., 40-50 g/ea.
Manual humidity for the
first 10 sec., 650 g/ea.
Manual humidity for the
first 15 sec., 40 g/ea.
No humidity pulsing
Manual humidity for the
first 10-20 sec.
Different sizes
In a baking tin
In a baking tin
Puff pastry Hot air
Chou (cream
puff)
Hot air
Almond cake Hot air
Meringue
Hot air, possibly
exhaust open
20-25 160-180 ½ fan speed
20-30 160-180 ½ fan speed
8-12 170
120-140 80 ½ fan speed
*) Dough products that are not preproved/prebaked by the manufacturer
should prove/rise for approx. 15 - 40 min. depending on the product. Frozen
products should be defrosted to +5°C before proving.
**) Danish pastry products based on bread dough should prove for 15-
whereas certain bake-off products can be baked directly from the freezer.
Frozen dough products should defrost longer.
25
Page 26
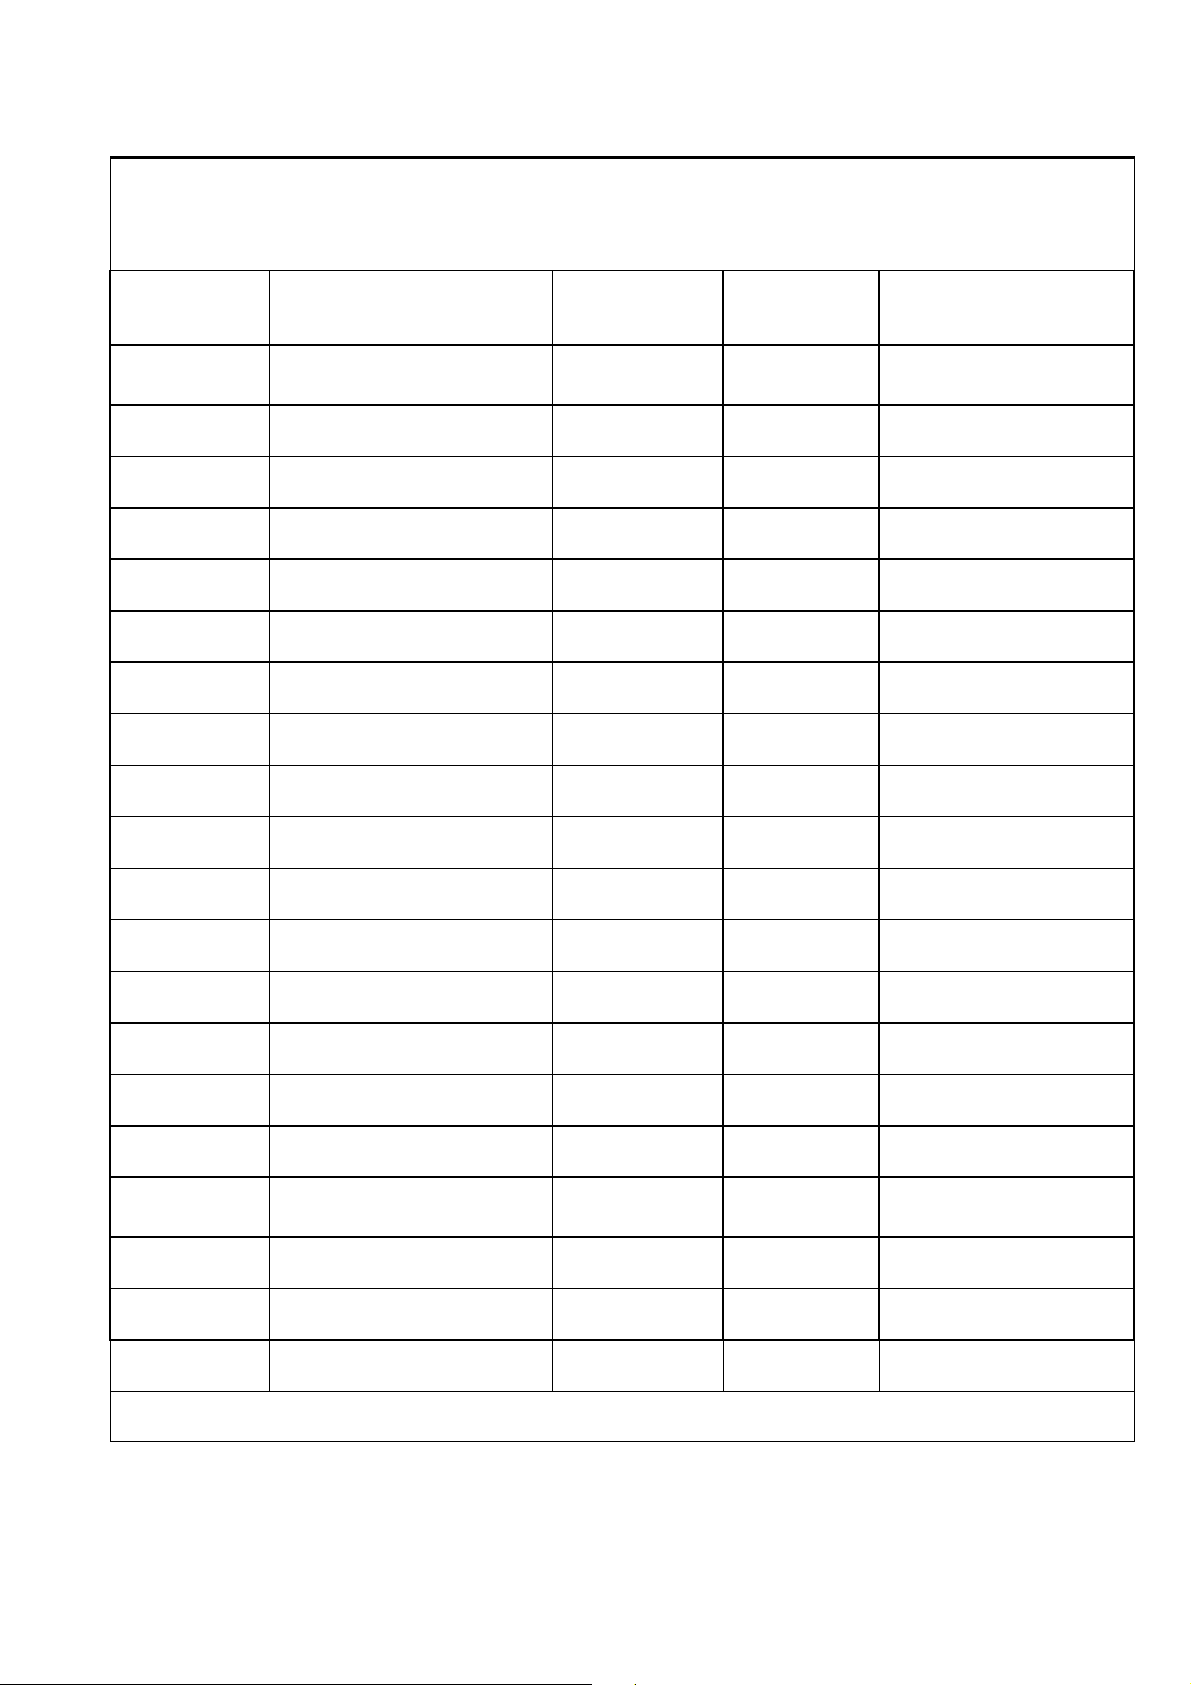
Temperature
Vegetables
Recommended values
Product
Operating mode
Processing
time in
°C
Remarks and tips
minutes
Potatoes
Potatoes Hot air + exhaust open 15 100 Pre-boiled
Fried potatoes
Baked potatoes
Carrots
Small carrots
Cauliflower
Broccoli
Broccoli
Broccoli
Beans
Brussels sprouts
Spinach
Celery
Leeks
Rice
Pasta
Eggs
Eggs
Steaming/100% ClimaOptima/
Combi 3
Steaming/100% ClimaOptima/
Combi 3
Steaming/100% ClimaOptima/
Combi 3
Steaming/100% ClimaOptima/
Combi 3
Steaming/100% ClimaOptima/
Combi 3
Steaming/100% ClimaOptima/
Combi 3
Steaming/100% ClimaOptima/
Combi 3
Steaming/100% ClimaOptima/
Combi 3
Steaming/100% ClimaOptima/
Combi 3
Steaming/100% ClimaOptima/
Combi 3
Steaming/100% ClimaOptima/
Combi 3
Steaming/100% ClimaOptima/
Combi 3
Steaming/100% ClimaOptima/
Combi 3
Steaming/100% ClimaOptima/
Combi 3
Steaming/100% ClimaOptima/
Combi 3
Steaming/100% ClimaOptima/
Combi 3
Steaming/100% ClimaOptima/
Combi 3
Steaming/100% ClimaOptima/
Combi 3
30-40
15
60
25
18
20
15
18
2-3
10
20
8
20
15
30
25
8
12
100
230
185
100
100
100
100
100
100
100
100
100
100
100
100
100
100
100
Fresh. Different sorts of
potatoes require different
steaming times.
Pre-boiled and sliced - add oil
Fresh, whole, medium-sized
Deep-frozen, add spices while
frozen
Stalks, fresh
Fresh
Deep-frozen
Blanching
Deep-frozen
Frozen
Fresh
Deep-frozen, add spices while
frozen
Fresh
Parboiled. 1 part of rice to 1½
part of cold water
Pour pasta into cold water. 1
part of paste to 1½ part of
water*
Soft-boiled, perhaps stacked
in egg trays
Hard-boiled, perhaps stacked
in egg trays
* The steaming time is reduced if preheated water is used.
26
Page 27

Temperature
aluminium tins placed
Products
Beef
tenderloin
Roastbeef
Joint of beef
Roast veal
Roast pork
Pork chops
Schnitzel
Meat balls
Minced-meat
dishes
Liver pâté
Cured saddle
of pork
Smoked ham
Ham in puff
pastry
Pickled neck
Meat Courses
Recommended values
Operating mode
Hot air + Combi 1
or
ClimaOptima 20-40%
Hot air + Combi
or
ClimaOptima 40%
Steaming + Combi 2 + Hot air
or
ClimaOptima 100% +
ClimaOptima 50%
Steaming + Combi 2 + Hot air
Or
ClimaOptima 100% +
ClimaOptima 50%
Steaming + Combi 2 + Hot air
or
ClimaOptima 100% +
ClimaOptima 30%
Hot air + exhaust open
Hot air + exhaust open
Combi 1 / ClimaOptima 50%
Steaming + Combi 1 + Combi 1
or
ClimaOptima 60% in all steps
Hot air + exhaust open
Combi 1 or ClimaOptima 60%
Combi 1 or ClimaOptima 60%
Hot air or ClimaOptima 20%
Steaming / Combi 3 /
ClimaOptima 100%
Processing
time in minutes
5 / 15 200 / 140
20 / 25
15-20 / 70-90 /
20-25
10-15 / 60-70 /
15-20
10 / 60 / 25
15
15
15
10 / 45 / 20
45 170
50-60
80
15 / 90
60
°C
Remarks and tips
Fresh, whole fillet of
beef. Add spices
before cooking
180 / 140
Add spices before
cooking
100 / 140-150
160-190
100 / 180 /
190
Well-hung
Add spices and lard
before cooking
Neck with lard. Add
spices before cooking
225
Fresh
225
Fresh
165
100 / 160 /
175
Pre-fried in pan, 75 g
Approx. 2 kg in
aluminium tin
250 g and 500 g
in water bath
180
175
160 / 180
Apply mustard +
clayed sugar
Exhaust open or
closed
100 Fresh, without bones
Liver
Gratin
Frankfurter
Omelette
27
Hot air or ClimaOptima 20%
Combi 1-2
or
ClimaOptima 60%
Steaming / Combi 3 / 100% /
ClimaOptima
Hot air + exhaust open
6 / 6
45
18 80
30
235 Fresh, sliced - add oil
185
Apply fat to container
Page 28

Temperature
ClimaOptima 60% + ClimaOptima
ClimaOptima 60% + ClimaOptima
ClimaOptima 60% + ClimaOptima
ClimaOptima 60% + ClimaOptima
ClimaOptima 60% + ClimaOptima
ClimaOptima 60% + ClimaOptima
Poultry, Fish and Game
Recommended values
Product
Chicken
Chicken
Chicken legs
Duck
Goose
Turkey
Flatfish
Operation mode
Combi 1 + Hot air w. exhaust
Combi 1 + Hot air w. exhaust
Combi 1 + Hot air w. exhaust
Combi 1 + Hot air w. exhaust
Combi 1 + Hot air w. exhaust
Combi 1 + Hot air w. exhaust
open or
0%
open or
0%
open or
0%
open or
0%
open or
0%
open or
0%
Hot air
Processing
time in
°C
Remarks and tips
minutes
20-25 / 10-15 160 / 185
Fresh, defrosted,
1000 g
35-45 / 10-15 180 / 220 Frozen, 800 g
15 / 5 160 / 185 Fresh, defrosted
50-60 / 50-60 170-180
90-120 / 15-20
80-100 / 10-20
160-185 Fresh or defrosted
160-185
Fresh or defrosted,
3000 g
4000 g, perhaps
covered with lard
12-18 175-185 Fresh, cover with oil
Greenland
Halibut
Trout
Turbot
Cod
Mussels
Saddle of
venison
Haunch of
venison
Leg of lamb
Meat loaf
Vacuumpacked
meat/poultry
Steaming / Combi 3 /
ClimaOptima 100%
Steaming / Combi 3 /
ClimaOptima 100%
Steaming / Combi 3 /
ClimaOptima 100%
Steaming / Combi 3 /
ClimaOptima 100%
Steaming / Combi 3 /
ClimaOptima 100%
Combi 1 or
ClimaOptima 50%
Steaming + Hot air + Combi 1 or
ClimaOptima 100% +
ClimaOptima 50%
Steaming + Combi 1 + Hot air or
ClimaOptima 100% +
ClimaOptima 50%
Combi 1
or
ClimaOptima 60%
Steaming / Combi 3 /
ClimaOptima 100%
10-20 70-75 Fresh
10-15
8-12
70-75
70-75
Fresh
Fresh
12-18 70-75 Fresh
15-20 75-80 Fresh
Fresh, possibly cov-
25-23 180-200
ered with lard or oil
Fresh, possibly
15 / 20 / 30-40
170-180
covered with lard or
oil
20 / 25 / 30-40
170-180 /
140-160 / 160
Without bones, add
spices
15-20 220 Fresh, add spices
10-15 70-85 Without bones
28
 Loading...