How it Works
Log In / Sign Up
Buy Points
How it Works
FAQ
Contact Us
Questions and Suggestions
Users
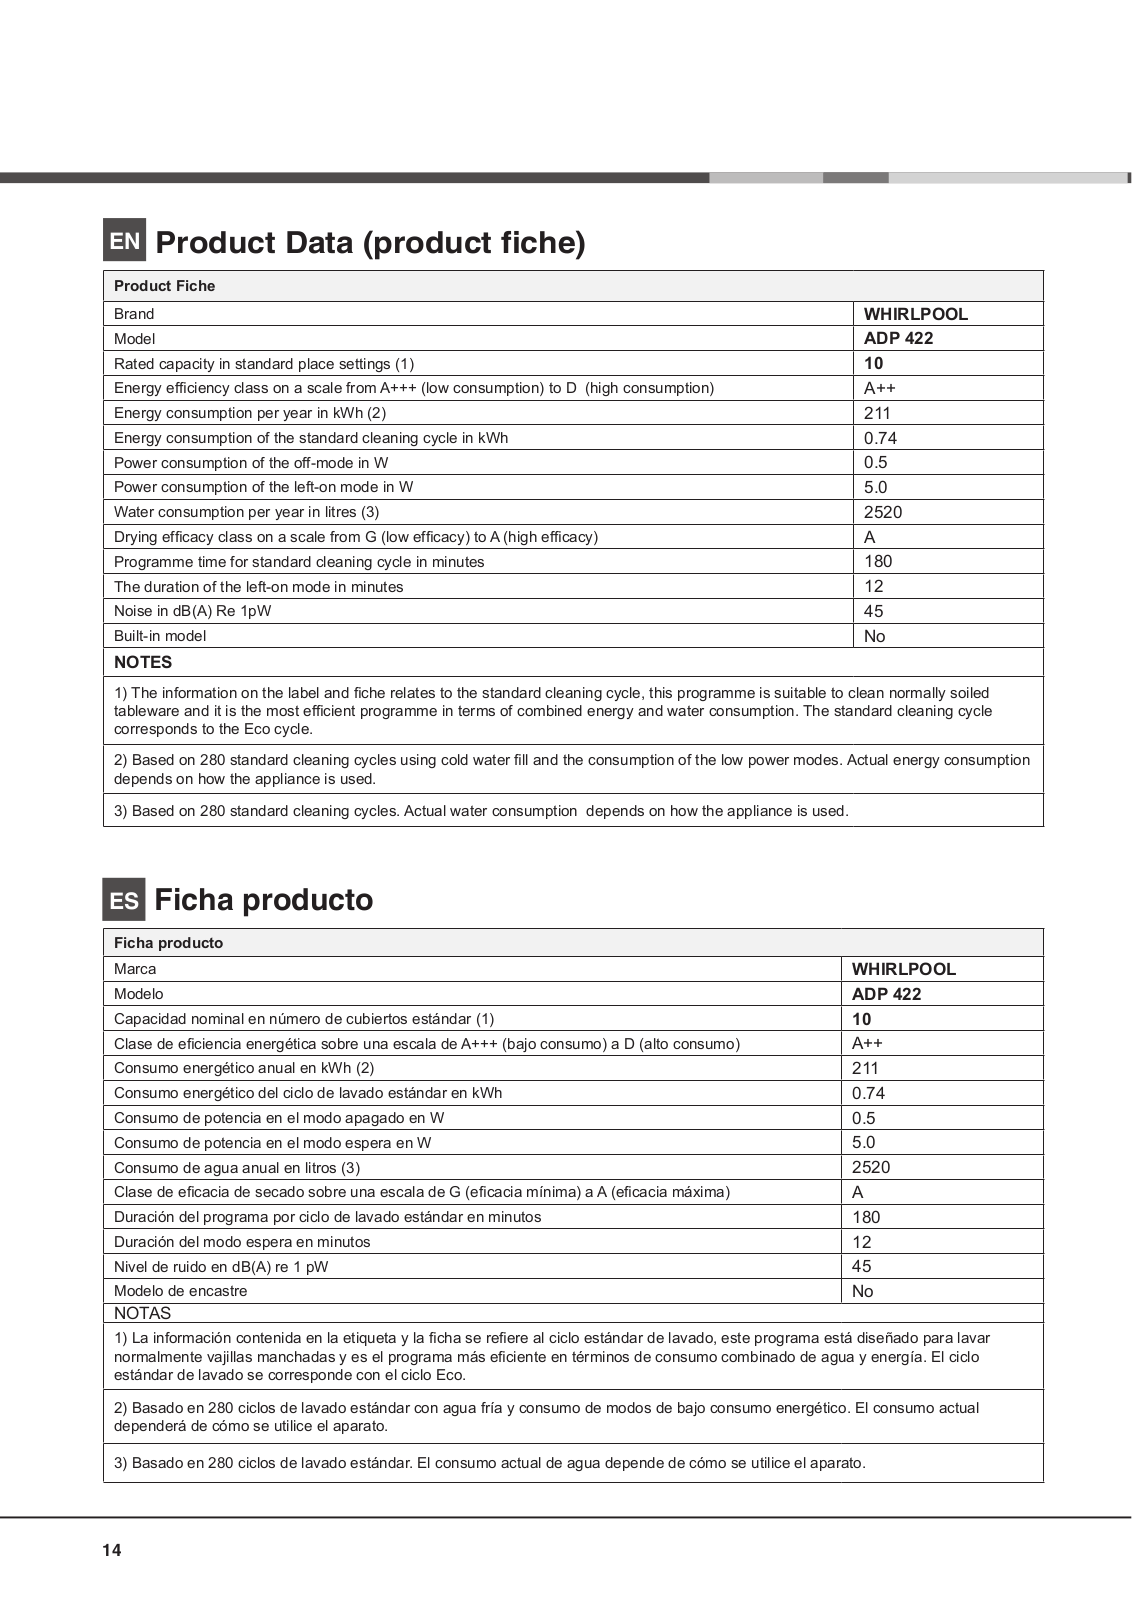
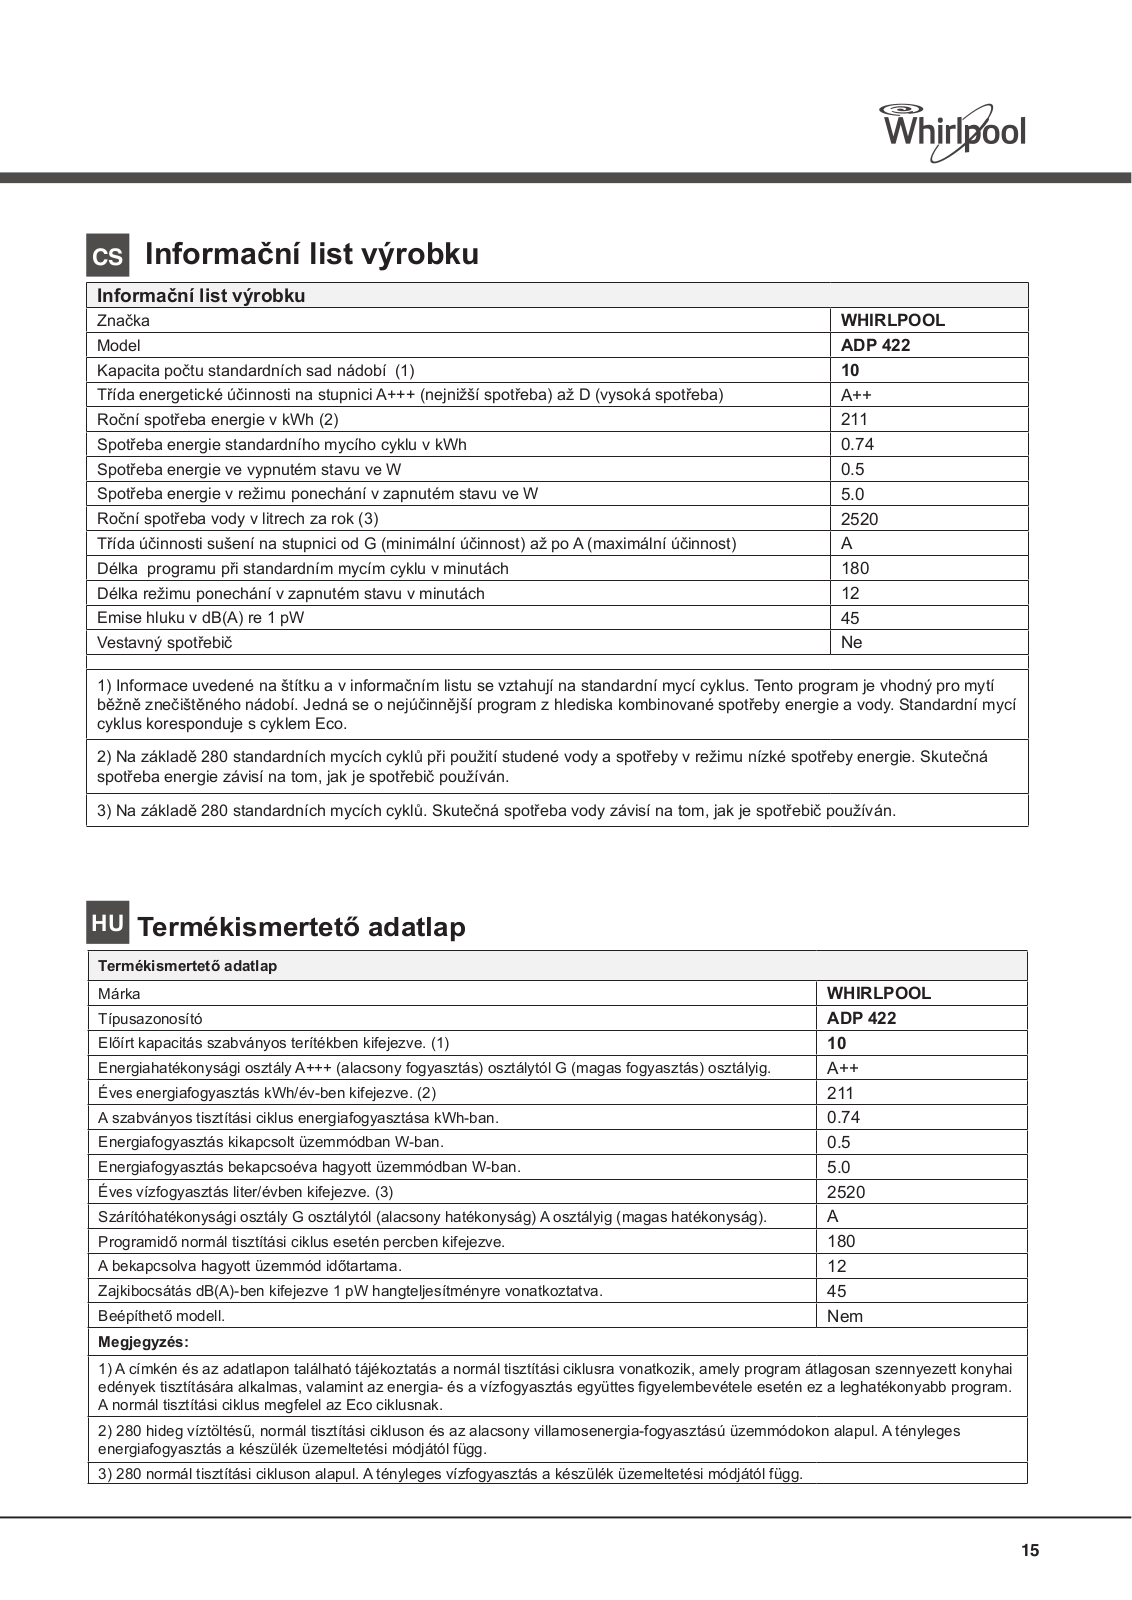
WHIRLPOOL
Loading...
A
ADP 2966/1 WHM
6
ADP 2966 NBM
2
ADP 2966 PLM
2
ADP 2966 WHM
12
ADP 2967 GRM
3
ADP 2967 PLM
5
ADP 2967 WHM
6
ADP 2968 WHM
5
ADP 300WH
ADP 301 IX
2
ADP 301 WH
6
ADP 301 WH UK
ADP 321
ADP 321 IX
2
ADP 321 WH
2
ADP 323 WH
8
ADP 3300
ADP 3300 WH
7
ADP 330/S WH
4
ADP 3315 SL
ADP 3315 WH
ADP 331/S WH
2
ADP 332/S WH
3
ADP 334 WH
8
ADP 335 WH
5
ADP 341/S WH
4
ADP 3500
ADP 351/S WH
4
ADP 3550
4
ADP 361 WH
ADP 3T
6
ADP 400
ADP 4000 WH
ADP 400 IX
4
ADP 400 WH
4
ADP 402
ADP 402 IX
ADP 402 WH
3
ADP 4107
ADP 4107 WH
8
ADP 4108/1 WH
3
ADP 4108 WH
6
ADP 4109/1 WH
12
ADP 4109 WH
10
ADP 410 IX
5
ADP 410 WH
5
ADP 4119 WH
2
ADP 415 IX
4
ADP 415 WH
4
ADP 4200 WH
10
ADP 422 IX
3
ADP 422 WH
2
ADP 4300
2
ADP 4300/1 WH
4
ADP 4300 WH
11
ADP 4305 WH
7
ADP 4307
4
ADP 4350
3
ADP 4400
ADP 4400/1 WH
4
ADP 4400 PRODUCT INFORMATION
ADP 4400 WH
6
ADP 4403 WH
ADP 4404/5 WH
2
ADP 4405 WH
5
ADP 4407
ADP 4407/1
2
ADP 4408 WH
7
ADP 4410
2
ADP 4410 WH
9
ADP 4411
4
ADP 4411 IX
3
ADP 4411 WH
2
ADP 4415
2
ADP 4415 WH
8
ADP 4420 WH
3
ADP 4425
ADP 4425 WH
3
ADP 4426
ADP 4426WH
ADP 4427 WH
ADP 4440 WH
ADP 4450
3
ADP 4451
3
ADP 450
ADP 4500/5 AL
4
ADP 4500/5 WH
4
ADP 4500/7
ADP 4500 WH
4
ADP 4501-5
ADP 4501/5 WH
ADP 4501 WH
ADP 4502/5/S
ADP 4502 AL
ADP 4504 WH
ADP 4507
2
ADP 4508
ADP 4509
2
ADP 450 IX
3
ADP 450 WH
6
Loading...
Loading...
Nothing found
ADP 422 IX
User Manual
84 pgs
18.49 Mb
0
User Manual [nl]
68 pgs
15.51 Mb
0
User Manual
32 pgs
6.79 Mb
0
Table of contents
Loading...
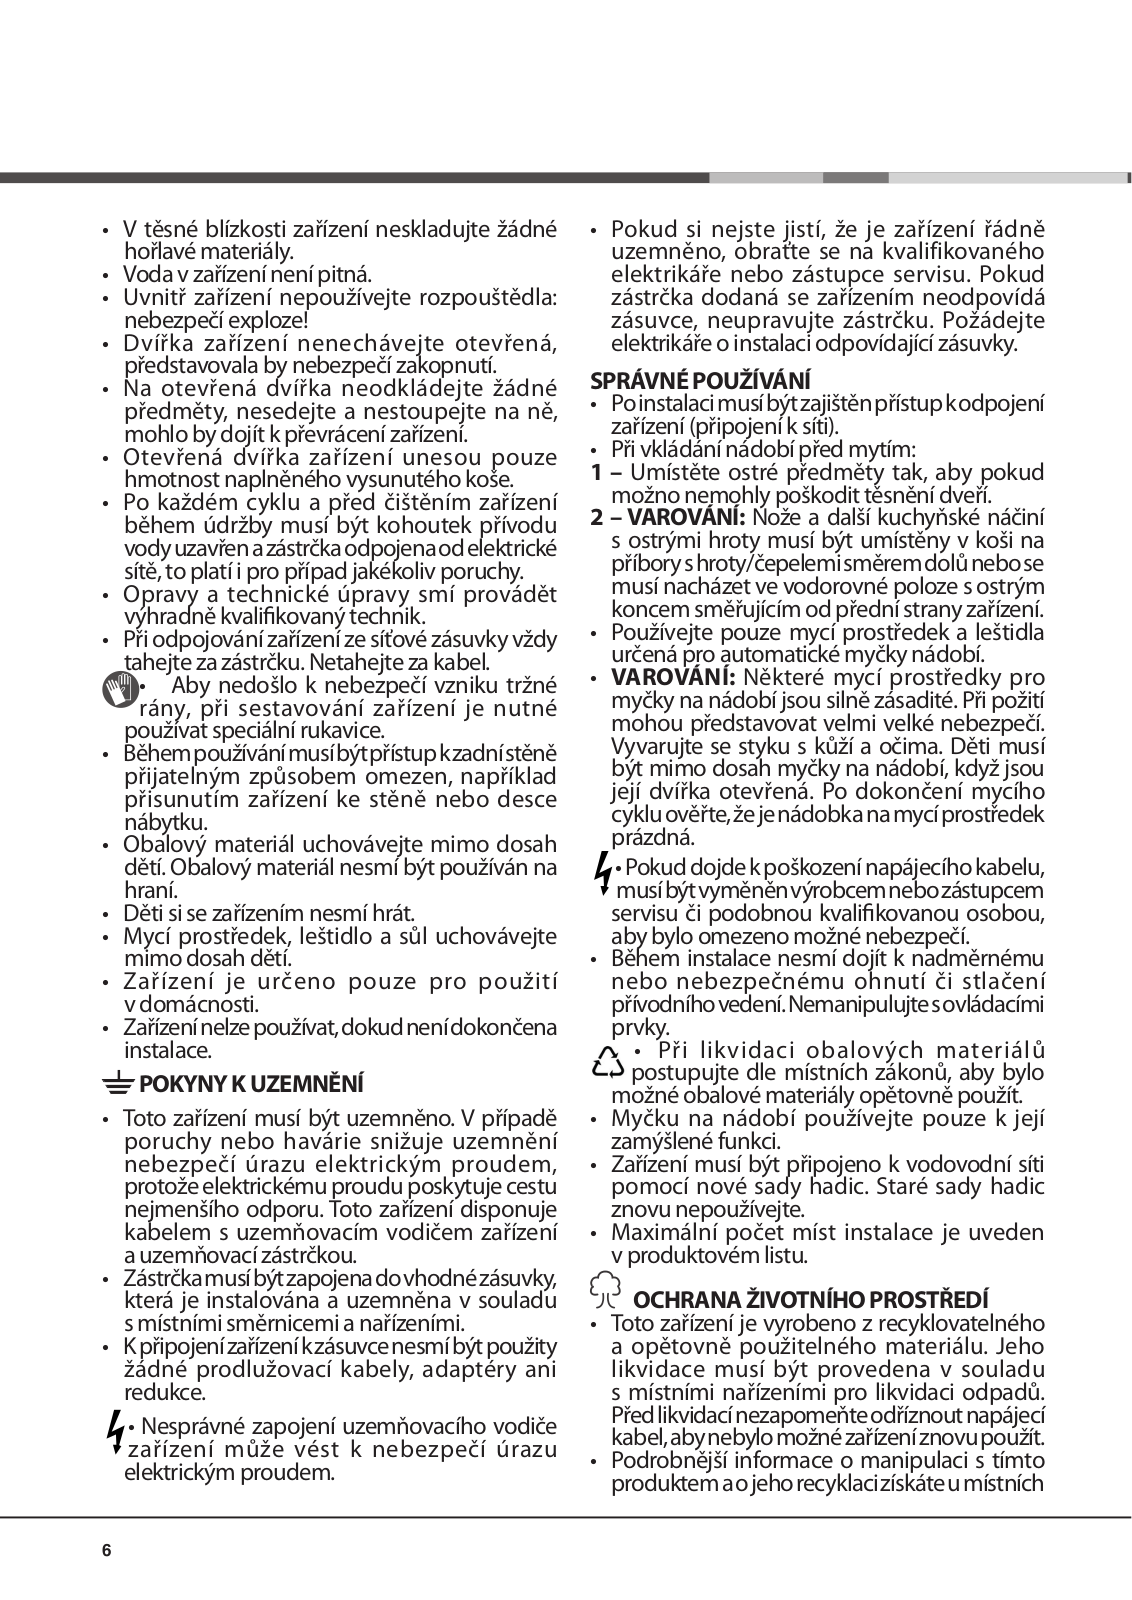
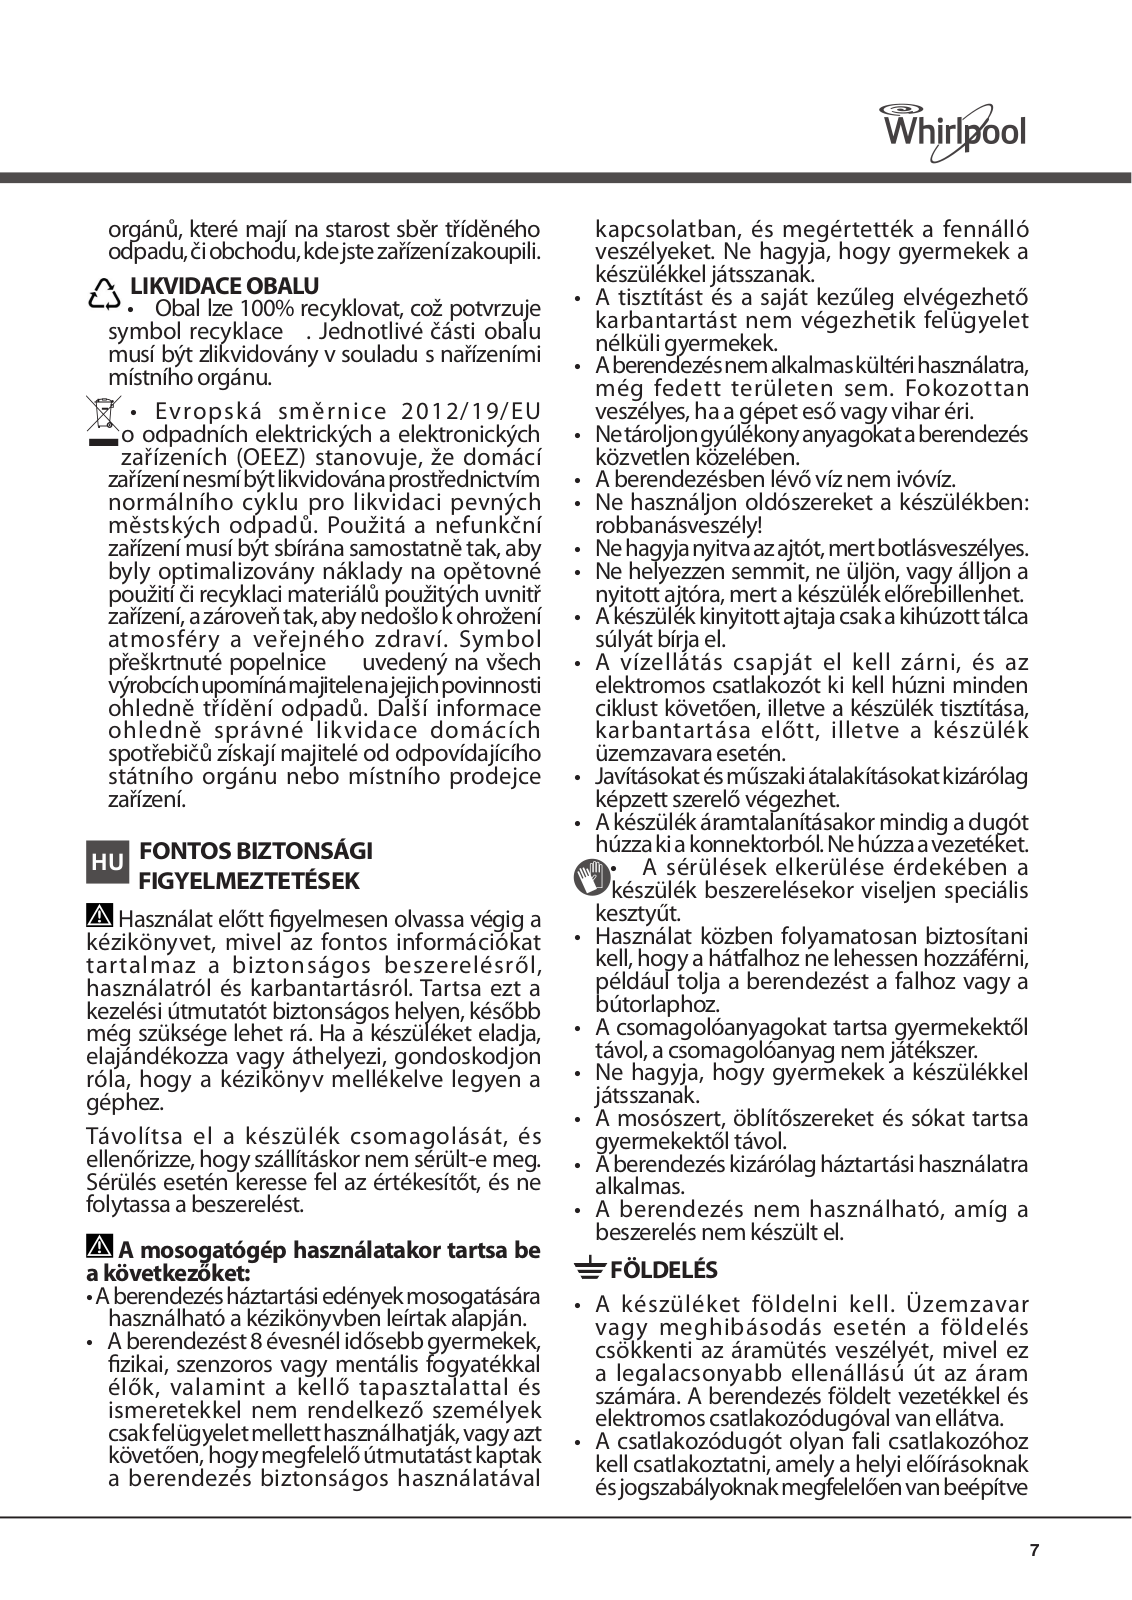
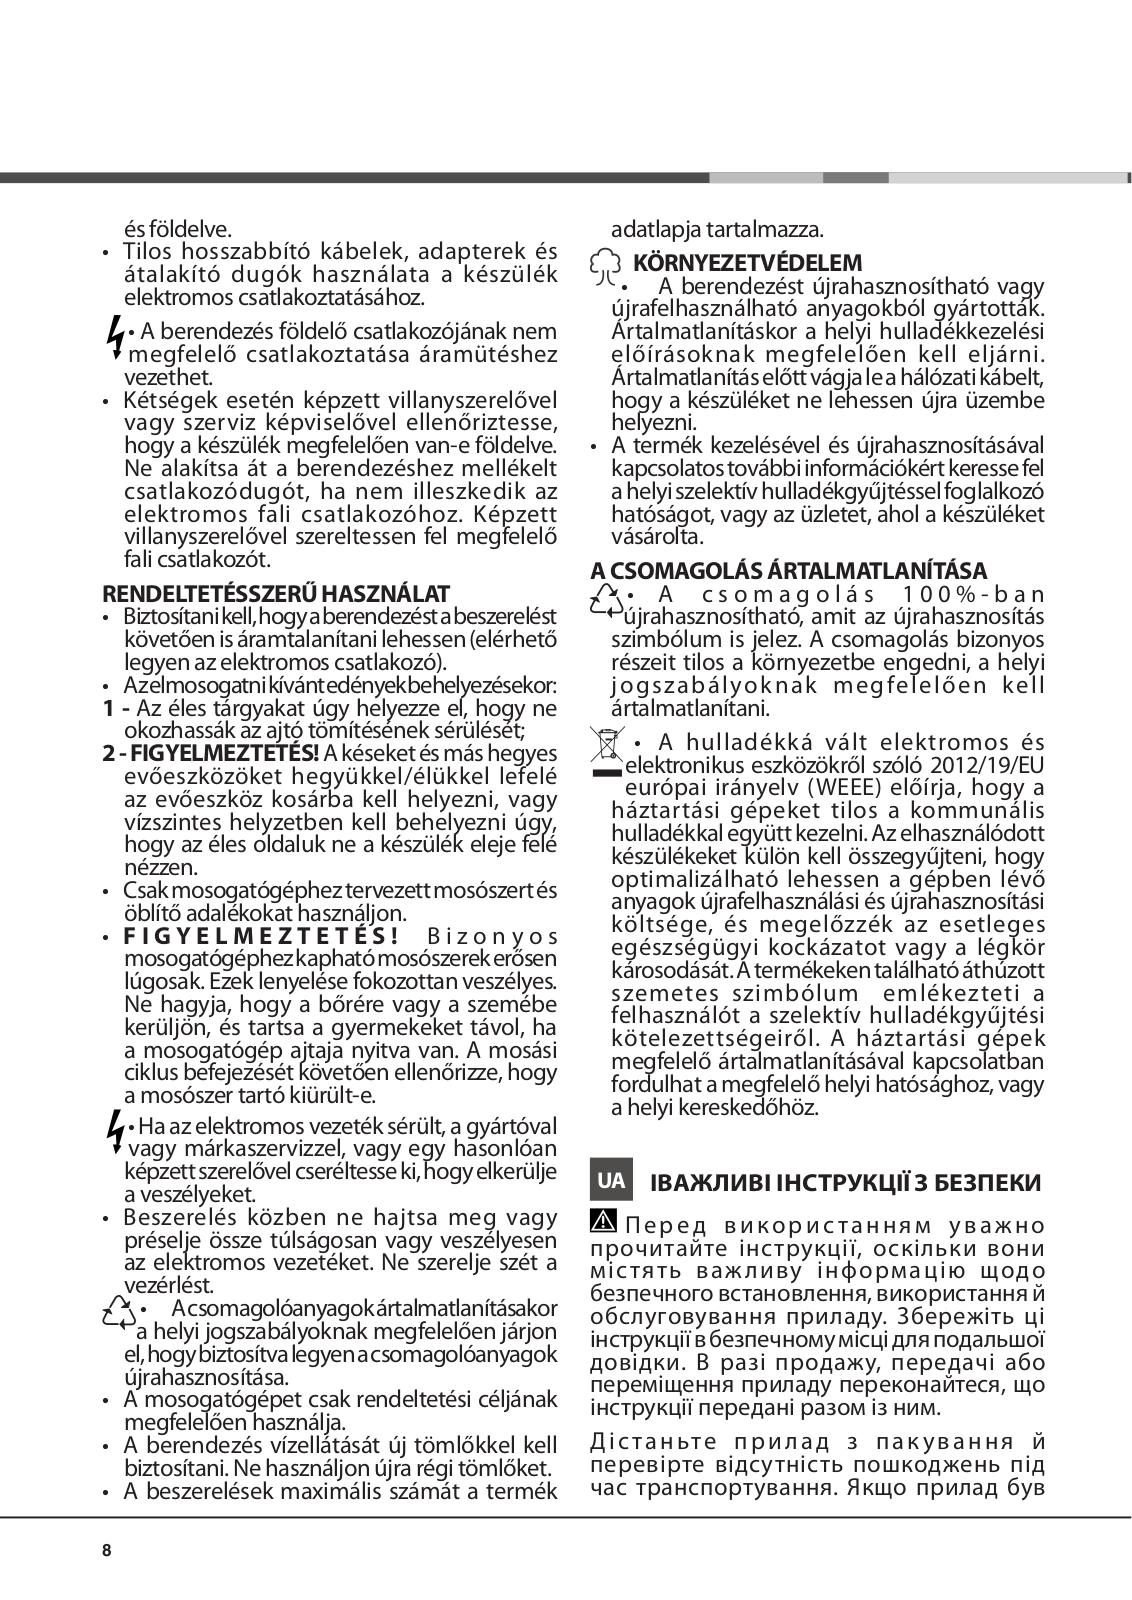
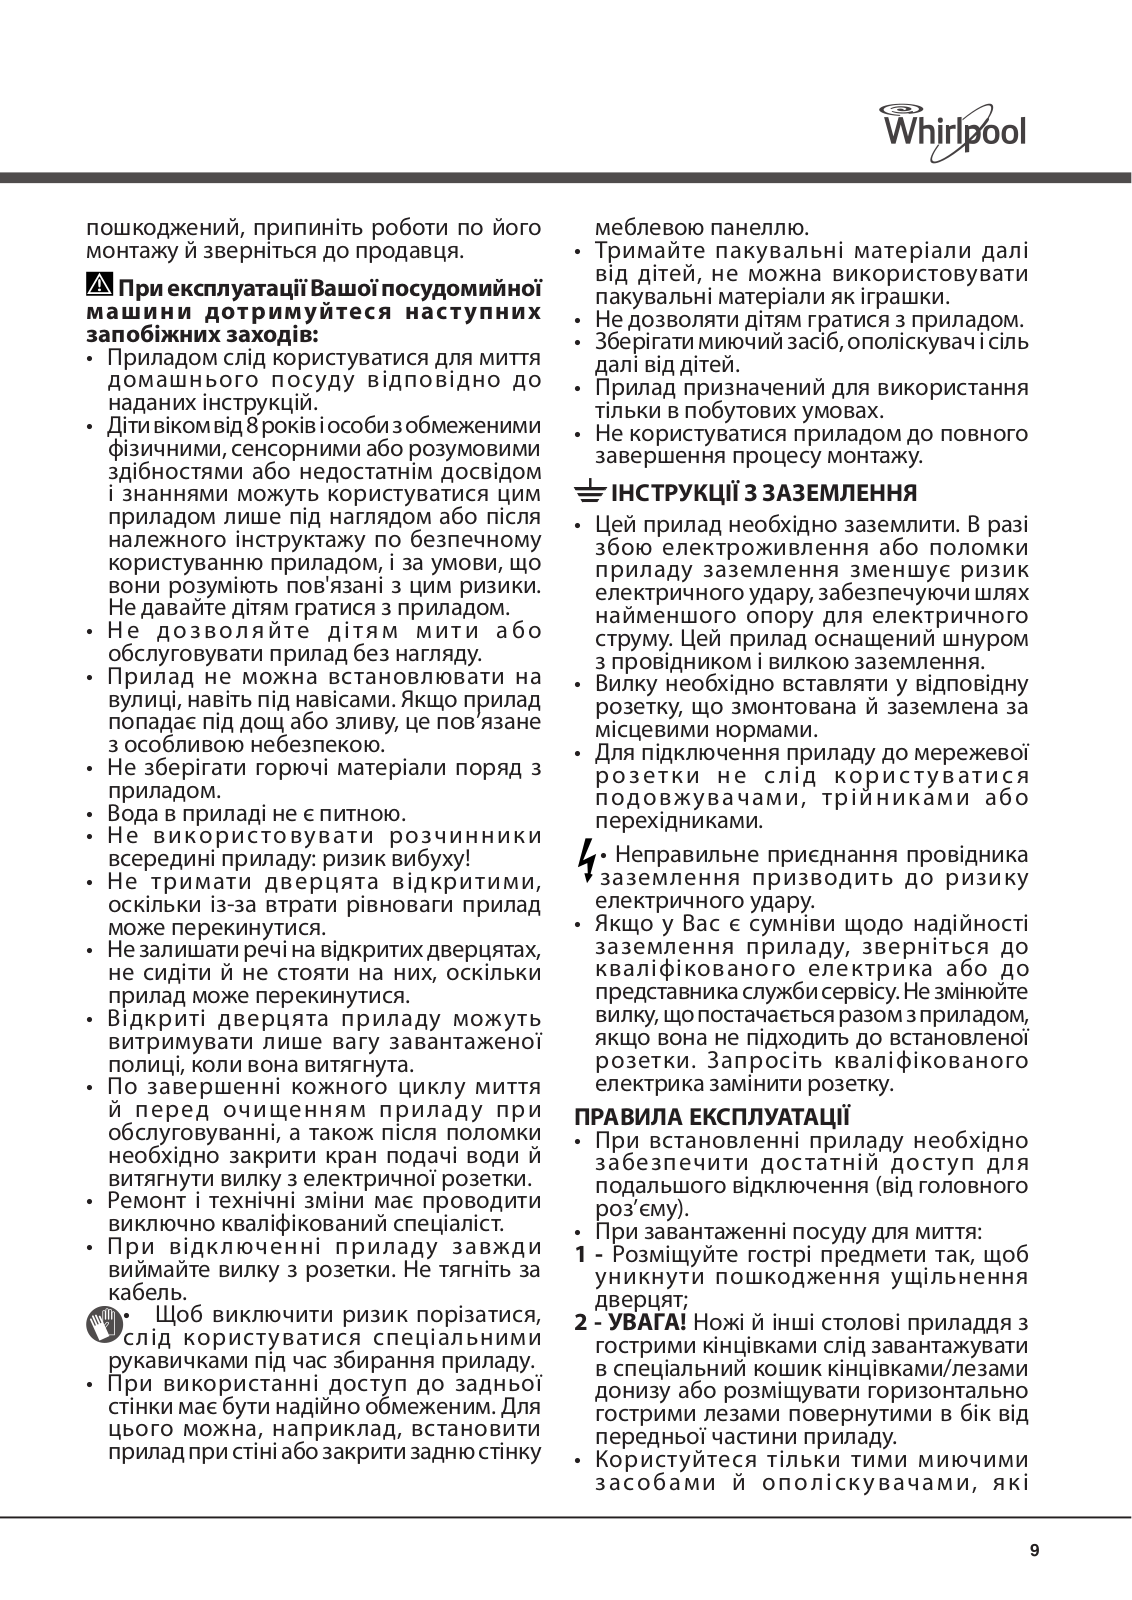
WHIRLPOOL ADP 422 IX User Manual
...
WHIRLPOOL User Manual
Download
Specifications and Main Features
Frequently Asked Questions
User Manual
Download
Loading...
+
58
hidden pages
Unhide
You need points to download manuals.
1 point = 1 manual.
You can buy points or you can get point for every manual you upload.
Buy points
Upload your manuals
 Loading...