

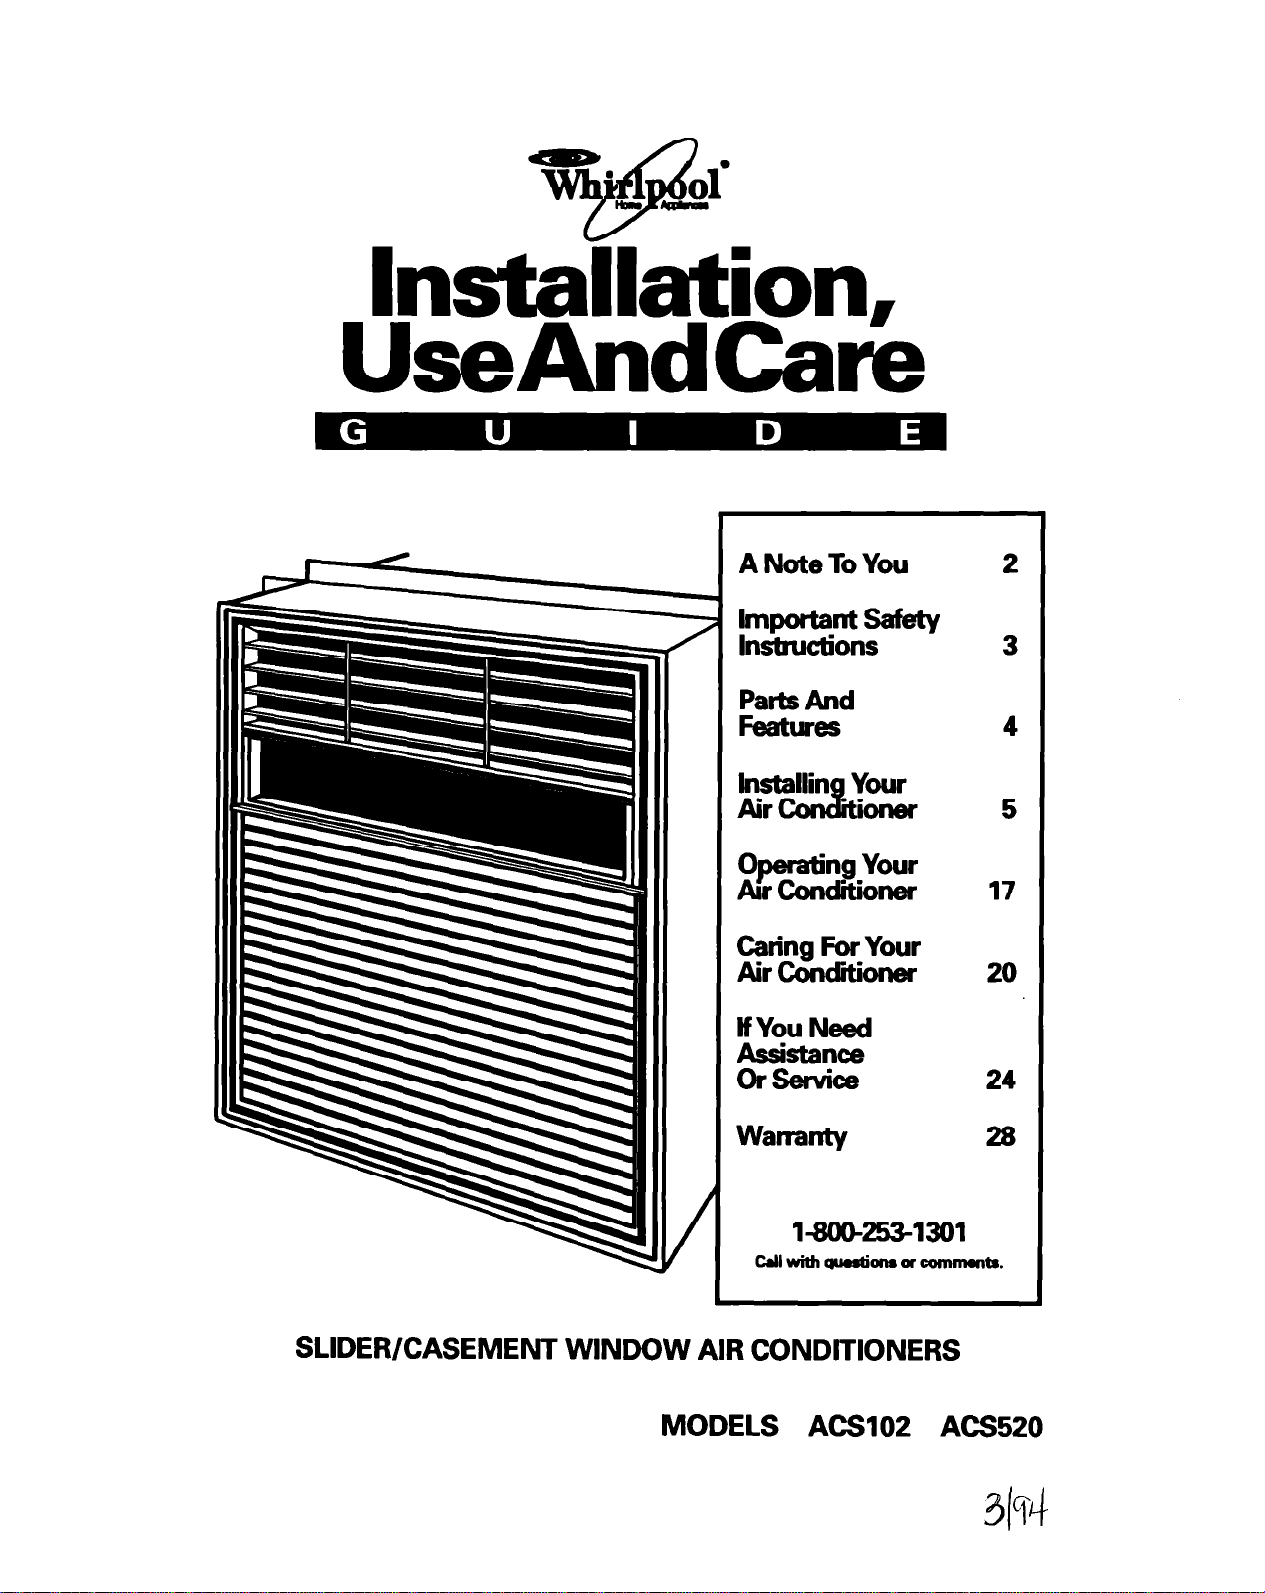
Whirlpool ACSIOZ, ACS520 User Manual
lnstakrtion,
UseAndCare
ANoteToYw
IFZZ?
Parts And
Features
lnstallin Your
Mordtioner 5
Operating Your
Au conditioner 17
c&i&F&~
If You Need
$$$=F~
Warranty
2
3
4
20
24
28
laxw53-1301
cdlwllhqlbeslion8acommonts.
SLIDER/CASEMENT WINDOW AIR CONDlTlONERS
MODELS ACSIOZ ACS520
A Note To You
Thank you for buying a WhirlpooP appliance.
You have purchased a quality,
into its manufacturing. To ensure that you will enjoy many years of trouble-free operation, we have
developed this Use and Care Guide. lt is full of valuable information on how to operate and maintain
your appliance properly and safely. Please read it carefully. Also, please complete and mail the Ownership Registration Card provided with your appliance. This will help us notify you about any new information on your appliance.
Your safety is important to us.
This guide contains safety symbols and statements. Please pay special attention to these symbols and
follow any instructions given. Here is a brief explanation of the use of each symbol.
worldclass
home appliance. Years of engineering experience have gone
This symbol will help alert you to such
dangers as personal injury, burns, fire and
1 electricalshock.
This symbol will help you avoid actions
1 1 ~~~~~~~~~ product damage 1
(scratches, dents, etc.) and damage to your
Our Consumer Assistance Center number, l-80@253-1301,
is toll-free, 24 hours a day.
lf you ever have a question concerning your appliance’s operation, or if you need service, first see “If
You Need Assistance Or Service” on page 24. If you need further help, feel free to call our Consumer
Assistance Center. When calling, you will need to know your appliance’s complete model number and
serial number. You can find this information on the model and serial number plate (see diagram on
page 4). For your convenience, we have included a handy place below for you to record these numbers,
the purchase date from the sales slip and your dealer’s name and telephone number. Keep this book
and the sales slip together in a safe place for future reference.
Model Number
Serial Number
Purchase Date
Dealer Name
Demler Phone
Important safety instructions
l Read all instructions before using your air
conditioner.
l Complete the installation requirements as
described in the Installation Instructions.
l Do not allow children to operate or play with
the air conditioner.
l Do not operate the air conditioner with the
front panel removed.
- SAVE THESE INSTRUCTIONS -
Help us help you
Please:
l Install the air conditioner in a window that will
hold the weight and secure it in accordance
with the Installation Instructions.
l Connect the air conditioner only to the proper
kind of outlet with the correct electrical supply
and grounding. (See the Installation Instruc-
tions.)
l Be sure the air conditioner is the correct size for
the area you want to cool.
l Use the air condiiioner only for its intended
purpose.
l Be sure the air conditioner is not used by
anyone unable to operate it propetfy.
l Maintain the air conditioner properly.
Also, remove the Energy Label and Buy Guide.
Use a damp cloth to take off any glue residue. Do
not use sharp instruments, flammable fluids or
abrasive cleaners. These can damage the
material.
l Never clean air conditioner parts with
flammable fluids. The fumes can create a fire
hazard or explosion.
l FOR YOUR SAFETY l
DO NOT STORE OR USE GASOLINE OR
OTHER FLAMMABLE VAPORS OR LIQUIDS
IN THE VICINITY OF THIS OR ANY OTHER
APPLIANCE. THE FUMES CAN CREATE A
FIRE HAZARD OR EXPLOSION.
3
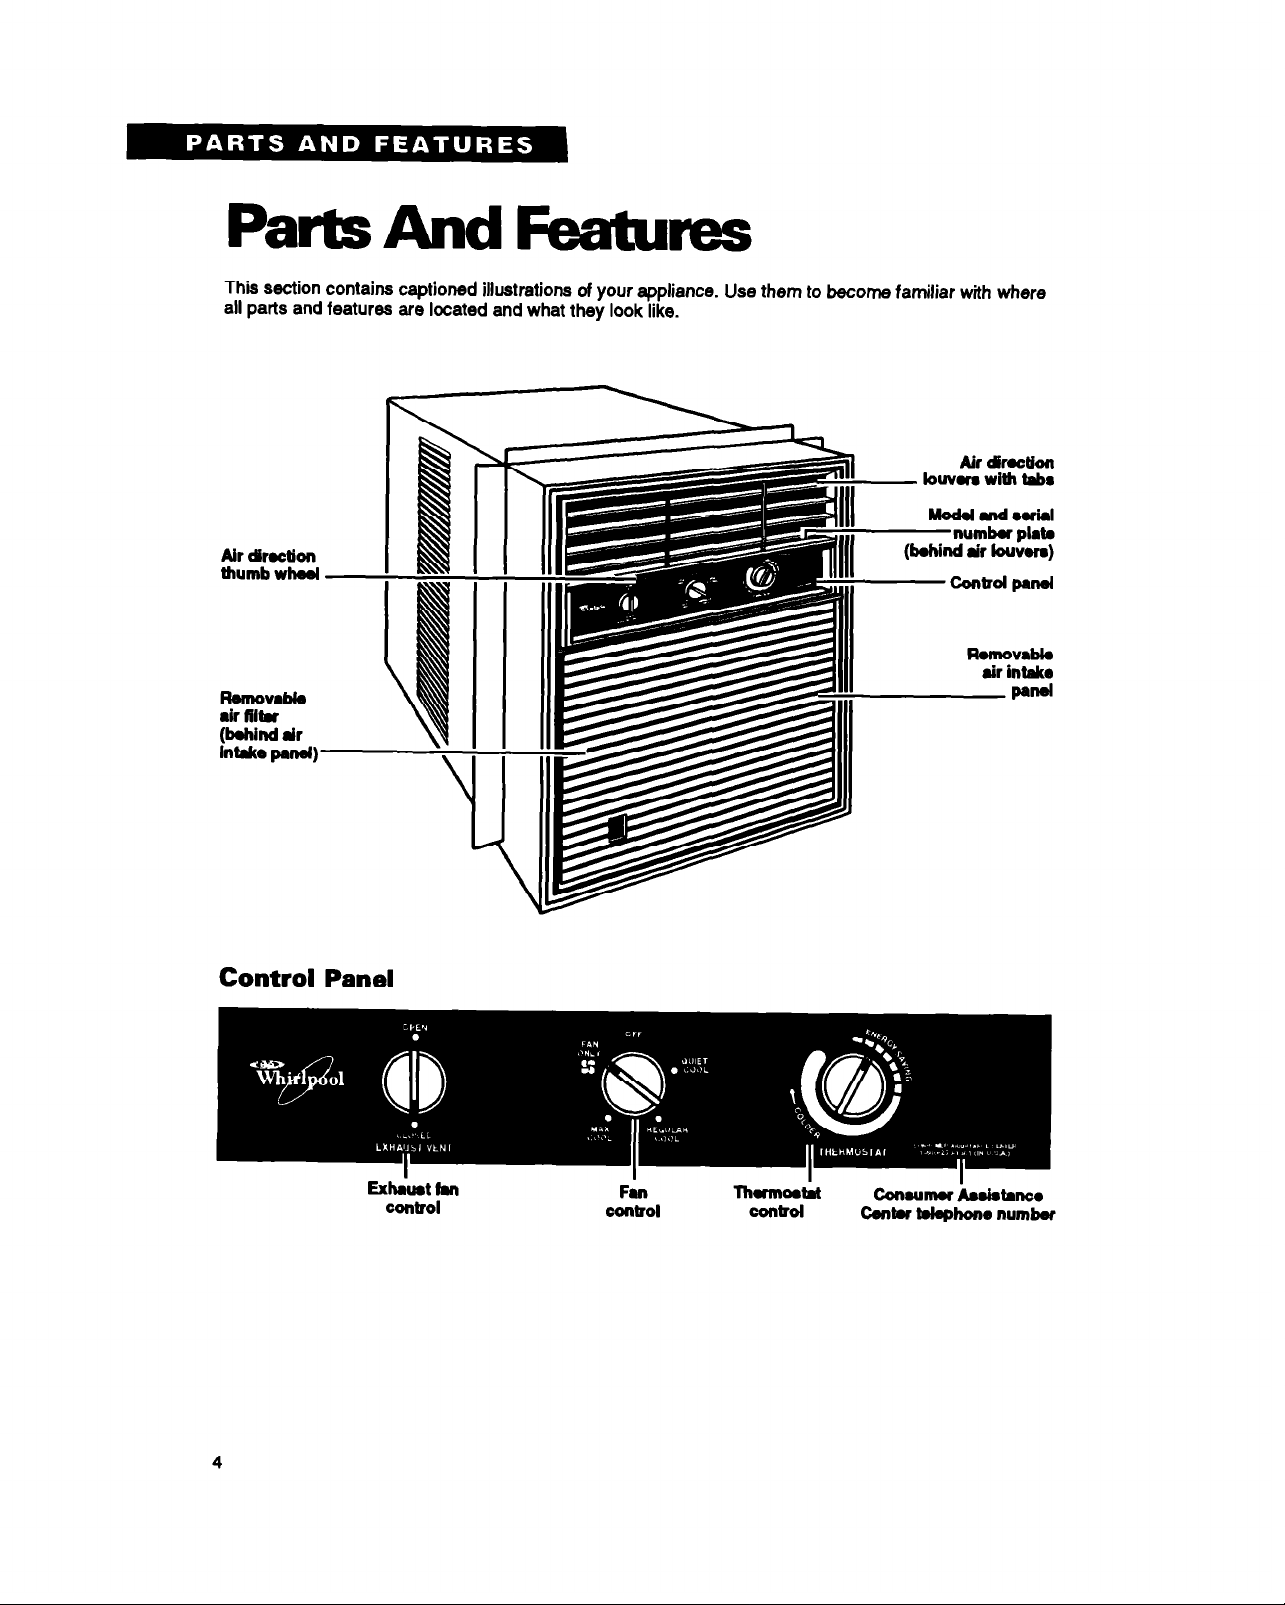
PartsAnd Features
This section contains captioned illustrations of your appliance. Use them to become familiar with where
all parts and features are located and what they look like.
Air direction
thumb wheel
ROIlbOVdO
air lilb
(behind air
Intake panel)
FL
COIIBOI
COlltTOl
tisumu Asoistmco
Centu lobphone number
I

Installing Your Air Condiiioner
In This Section
PWP
Mwttng m nquirsmnb . . . . . . . . . . . . . . . . ..-.. 5 installing in a sliding window . . . . . . . . . . . . . . . . . . . . . . . . . 5
PropsrIng fur instdauu4l . . . . . . . . . . . . . . . . . . . . . . . . . . . . . . . . . . .
Proper installation of your air conditioner is important for proper operation and best cooling results. This
section will tell you how to meet necessary electrical requirements and how to install your air conditioner
properly into a sliding or casement style window. Please read these installation instructions, as well as
the operating and care instructions, before installing your unit.
ln.lallbIg in a
5
crmont window . . . . . . . . . . . . . . . . . . 13
Meeting electrical requirements
OBSERVE ALL LOCAL CODES AND
ORDINANCES.
Elactrlul Shock and
Person81 Injury Hazard
l Electrical ground is required on this
appliance.
l DO NOT modify the power supply cord
plug. lf it does not fit the outlet, have a
proper outlet installed by a qualified
electrician.
l DO NOT have a fuse in the neutral or
grounding circuit. A fuse in the neutral or
grounding circuit could result in an
electriial shock
l DO NOT use an extension cord with this
appliance.
l Check with a qualified electrician if you
are in doubt as to whether the appliance
is properly grounded.
Failure to follow these instructions could
resutt in electrical shock, serious injury
or death.
DO NOT, UNDER ANY CIRCUMSTANCES,
REMOVE THE POWER SUPPLY CORD
GROUNDING PRONG.
NOTE: lf codes permit and a separate grounding
wire is used, it is recommended that a qualified
electrician determine that the grounding path is
adequate and not interrupted by plastic, non-
metallic gaskets or other insulating materials.
Receptacle wiring
Receptacle wiring should be a minimum of
14gauge. Use copper wire only. It is the responsibility of the consumer to provide proper and
adequate receptacle wiring, installed by a
qualified electrician. Observe the National
Electrical Code and all local governing codes and
ordinances.
Electrical requirements
A 115 volt (103.5 minimum, 126.5 maximum),
60 Hertz, AC only, 15 ampere fused electrical
supply is required. A time delay fuse or time
delay circuit breaker is also required. A separate
circuit, sewing only this appliance, must be
provided.
PW
5
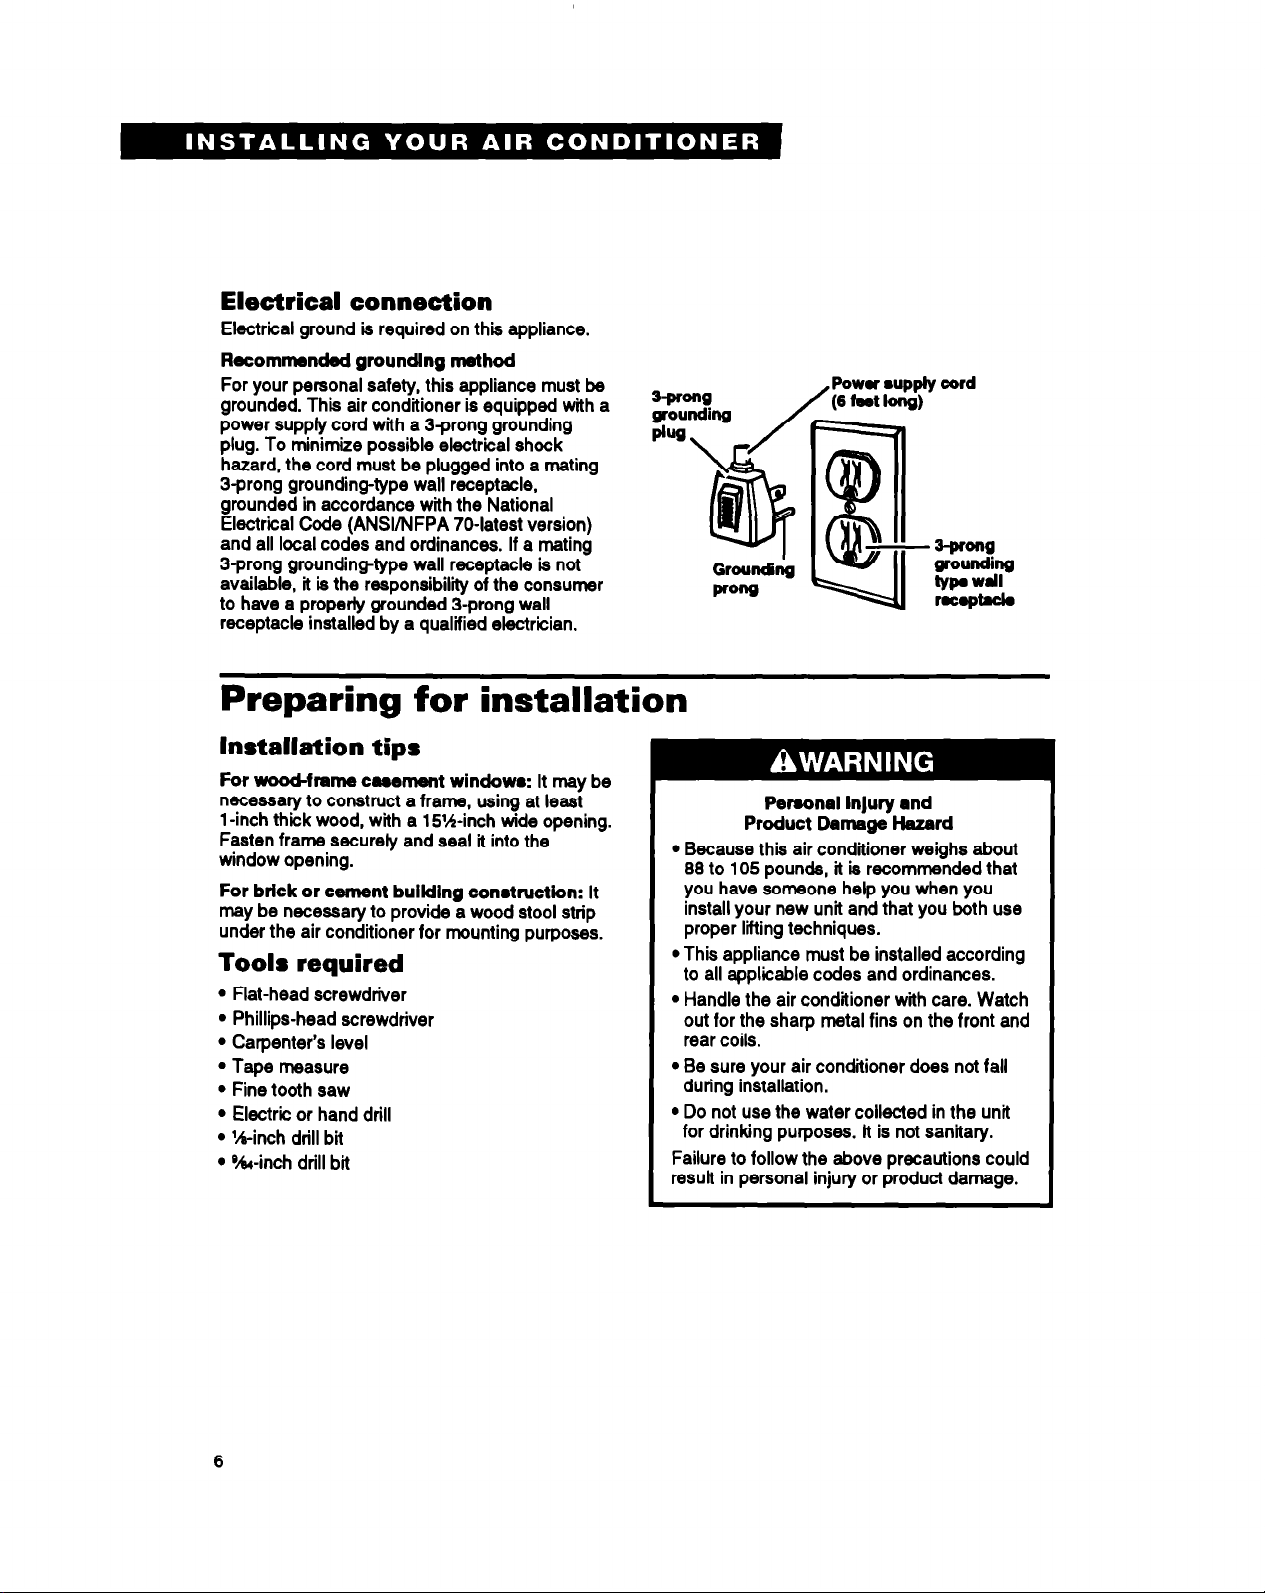
Electrical connection
Electrical ground is required on this appliance.
Recommended groundlng method
For your personal safety, this appliance must bs
grounded. This air conditioner is equipped with a
power supply cord with a 3prong grounding
plug. To minimize possible electrical shock
hazard, the cord must be plugged into a mating
3prong grounding-type wall receptacle,
grounded in accordance with the National
Electrical Code (ANSI/NFPA 70-latest version)
and all local codes and ordinances. If a mating
3-prong groundingtype wall receptacle is not
available, it is the responsibilii of the consumer
to have a properly grounded 3-prong wall
receptacle installed by a qualified electrician.
Preparing for installation
Installation tips
For wood-frame cnement windowe: It may be
necessary to construct a frame, using at least
1 -inch thick wood, with a 15%inch wide opening.
Fasten frame securely and seal it into the
window opening.
For brick or cement bulkflng conetruction: It
may be necessary to provide a wood stool strip
under the air conditioner for mounting purposes.
Tools required
l Flat-head screwdriver
l Phillips-head screwdriver
l Carpenter’s level
l Tape measure
l Fine tooth saw
l Electric or hand drill
l %-inch drill bit
l %-inch drill bit
Poww
Pereonel Injury and
Product Damage Hazard
l Because this air conditioner weighs about
88 to 105 pounds, it is recommended that
you have someone help you when you
install your new unit and that you both use
proper lifting techniques.
l This appliance must be installed according
to all applicable codes and ordinances.
l Handle the air conditioner with care. Watch
out for the sharp metal fins on the front and
rear coils.
l Be sure your air conditioner does not fall
during installation.
l Do not use the water collected in the unit
for drinking purposes. lt is not sanitary.
Failure to follow the above precautions could
resull in personal injury or product damage.
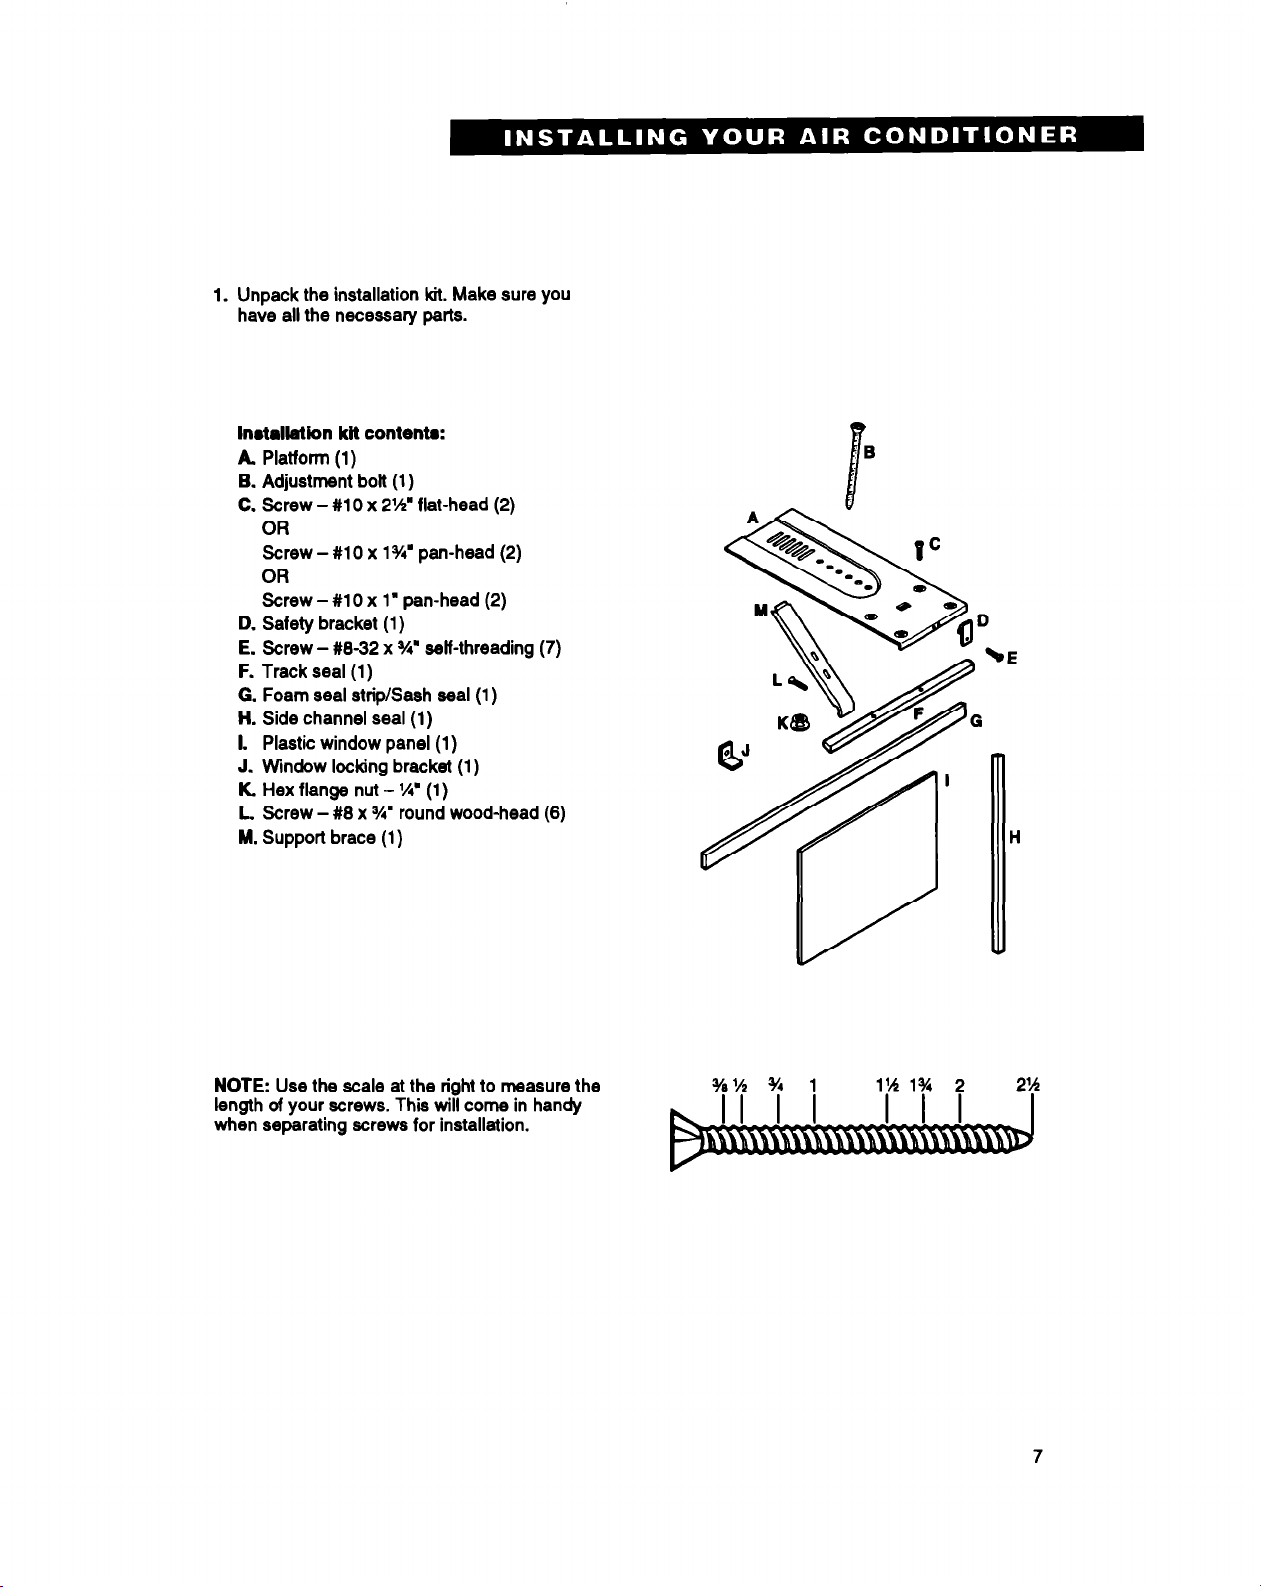
1. Unpack the installation kft. Make sure you
have all the necessary parts.
In~tdatkm kit contenta:
A Platform (1)
B. Adjustment bolt (1)
C. Screw - #10 x 2%’ flat-head (2)
OR
Screw - #lO x 1%’ pan-head (2)
OR
Screw - #lO x 1’ pan-head (2)
D. Safety bracket (1)
E. Screw - #8-32 x o/4’ self-threading (7)
F. Track seal (1)
G. Foam seal strip/Sash seal (1)
H. Side channel seal (1)
I. Plastic window panel (1)
J. Window locking bracket (1)
K. Hex flange nut - l/4’ (1)
L. Screw - #8 x W’ round wood-head (8)
M. Support brace (1)
NOTE: Use the scale at the right to measure the
length of your screws. This will come in handy
when separating screws for installation.
7
2. Choore a proper size window.
l 15% inches minimum width
l 18% inches maximum width
(for casement windows)
l 21%e inches minimum height
(with window panel retainer)
l 20% inches minimum height
(window panel retainer removed)
l 40 inches maximum height
NOTE: The height measurement must be of
an unobstructed opening above the mounting
platform. In some cases, due to a variety of
stop and track arrangements, the above
dimensions may vary slightly. lf necessary, the
installation can be made by altering the
window jambs. (See “Alternate window jamb
applications” on page 12.)
3. Choose the prof~r window location.
Choose a window that will allow the cooled air
to flow freely and directly into the room(s) you
want to cool. Remember, it is difficult to move
air around comers. Also, choose a window
that is within 8 feet of an electrical outlet. (See
“Meeting electrical requirements” on pages 5-6
for receptacle and wiring needs.) Do not we
en extension cord.
15%
4 minimum
I
I
inch08
Width
20’KI illcha
minimum
height
46 inchw
maximum
haight
4
16%
in&w
maximum
D
Width
(cwemannt
windows)
1
Installing in a sliding window
1. Attach support brece to platform as shown.
Use the adjustment bolt and hex flange nut to
complete the assembly. Choose the slot and
adjustment bott hole locations that will create a
45’ angle between the platform and the
support brace. Try the assembly in the window
to determine if the platform will rest properly
and allow the proper slope (?&inch lower on
outside). Without the proper slope, water could
drip into your home and cause water damage.
NOTE: lf you are planning to use a sidingprotection board (see Step 5) on the outside of
your house, hold the board in place when
testing the assembly in the window.
8
 Loading...