

Page 1
CONTENTSGB
BEFORE USING THE COOKING HOB Page 9
SUGGESTIONS FOR ENVIRONMENT PROTECTION Page 9
PRECAUTIONS AND GENERAL ADVICE Page 9
ENERGY SAVING TIPS Page 10
CARE AND MAINTENANCE Page 10
AFTER-SALES SERVICE Page 11
INSTALLATION Page 11
8
Page 2
BEFORE USING THE COOKING HOB
x To get full satisfaction of your
cooking hob, please read these
instructions carefully and keep them
for future consultation.
SUGGESTIONS FOR ENVIRONMENT PROTECTION
1. Packaging
The packaging material is entirely recyclable,
andismarkedwiththerecyclingsymbol
which identifies it as a type of material that
must be sent to local waste-disposal centres.
2. Product
The cooking hob is made out of recyclable
material. When scrapping it, comply with
local waste-disposal regulations. Before
disposing of it, cut its power cable off in
order to render it inoperative.
PRECAUTIONS AND GENERAL ADVICE
Ù
x Keep the packaging material (plastic bags,
polystyrene parts, etc.) out of the reach of
children, as they are potentially dangerous.
x Check whether the cooking hob has been
damaged during transport.
x Ensure that the installation and
electrical connections are performed by
a qualified technician, following the
manufacturer’s instructions and in
compliance with current local safety
regulations.
,
x Before any cleaning or maintenance
operation, disconnect the cooking hob
from mains power supply.
x In case of prolonged use, additional
ventilation may be needed (opening a
window or increasing the extraction
force of the hood).
x Keep children away from the cooking
hob when it is in use.
x After use, ensure that the knobs are in
position zero.
Declaration of conformity
x This cooking hob is suitable for contact with
foodstuffs, and complies with EEC Directive
89/109.
x This cooking hob (Class Y) has been
designed to be used only for cooking. Any
other use (such as heating a room) is
improper and dangerous.
x This cooking hob has been designed,
constructed and marketed in compliance
with:
- safety requirements of EEC Directive “Low
voltage” 73/23;
- protection requirements of EEC Directive
“EMC” 89/336;
- requirements of EEC Directive 93/68.
9
Page 3
ENERGY SAVING TIPS
x
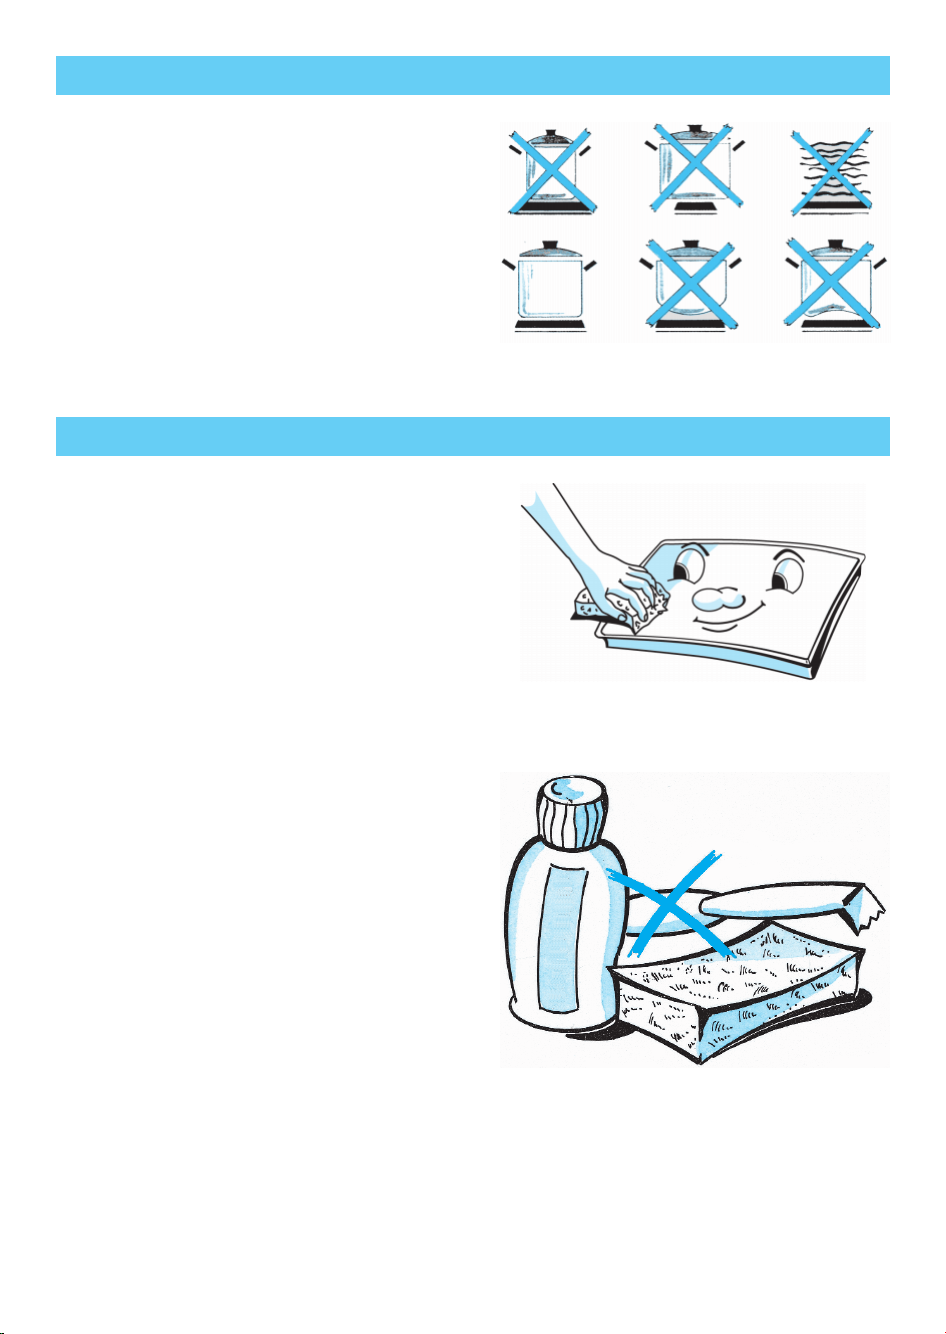
The cooking hob is equipped with hotplates
having different diameters. Use pots and pans
whose bottom diameter is equal to that of the
hotplates, or slightly larger.
x
Only use flat-bottomed pots and pans.
x
Do not operate a hotplate without placing
a container on it.
x
If possible, keep the container covered when
cooking.
x
Cook vegetables, potatoes, etc. with a small
amount of water in order to cut down cooking
time.
x
A pressure cooker allows you to save even
more energy and time.
CARE AND MAINTENANCE
Cleaning the hob
x
Before cleaning the cooking hob,
disconnect it from mains power supply
and wait until it has cooled down.
x
Wipe it with a cloth moistened with hot water
andsoapordilutedliquiddetergent.
x
Do not use abrasive or corrosive products,
chlorine products or steel wool.
x
Do not leave acid or alkaline substances, such as
vinegar, salt or lemon juice, etc., on the cooking
hob.
Stainless steel surface
x
Clean it with a specific commercial product.
Note: if the cooking hob is used continuously,
the high temperatures may alter the colour
of the hotplates.
Cleaning the electric hotplates
The electric hotplates must be cleaned when
they are lukewarm.
Wipe them with a cloth moistened with water and
salt, and polish with a cloth moistened with oil.
10
Page 4
AFTER-SALES SERVICE
Before you call the After-sales Service:
1. Re-start the cooking hob, to check whether
correct operation has been restored.
2. If the malfunction persists, call the After-sales
Service.
Give the following information:
x
type of malfunction;
x
model of cooking hob;
x
service number (i.e., the number that follows
the word SERVICE on the rating plate under
the cooking hob and on the guarantee paper);
x
your complete address;
x
your telephone number and area code.
INSTALLATION
Technical information for installer
This cooking hob can be embedded in a
worktop 20 to 50 mm thick.
If another appliance is not fitted under the
cooking hob, insert a separator panel, at a
distance of at least 90 mm from the cooking
hob bottom.
x
If a vertical piece of furniture is installed,
there must be a gap of at least 00 mm
between it and the edge of the cooking
hob.
l
x
Before installing the cooking hob, remove the
plastic film that protects it, if present.
The outer surfaces of the furniture or appliances
adjoining the cooking hob must be heat resistant
(heat protection “Y”, according to standards EN
60335-2-6).
x
Installation must comply with current local safety
regulations.
Installation of cooking hob
x
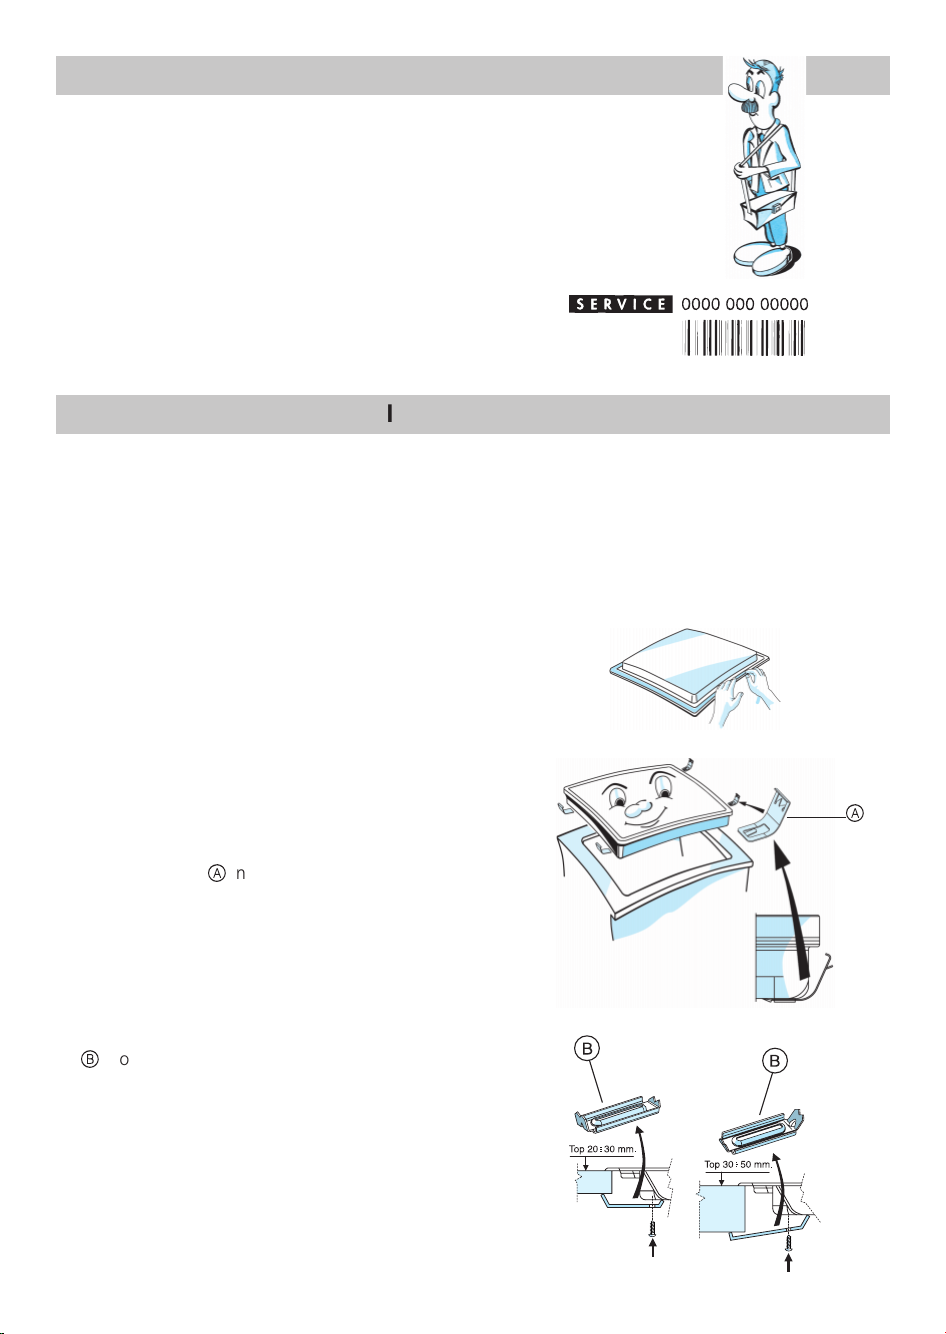
Apply the supplied gasket to the cooking
hob (unless it has already been fitted), after
having cleaned its surface as shown in the
figure.
A
- If the worktop is made out of wood, use
the springs supplied.
1. Fit the 4 springs
the box.
2. Make an opening in the worktop, respecting the
dimensions indicated in the enclosed product
description sheet.
3. Install the cooking hob in the worktop.
B
- If the worktop is made out of marble or
other materials (plastics, ceramics or stone), the
cooking hob must be fixed by means of brackets
, to be ordered from the After-Sales Service
b
(code 489 30 8528).
1. Align the brackets with the bores and fix them
with the screws.
2. Make an opening in the worktop, respecting the
dimensions indicated in the product description
sheet.
3. Install the cooking hob in the worktop.
into the relevant seat under
a
a
11
Page 5
INSTALLATION
Electrical connection
x
The electrical connections must comply
with local regulations.
x The data relevant to the voltage and power
absorption are indicated on the rating plate.
x
The earthing of this appliance is
compulsory by law.
The manufacturer cannot be held
responsible for injury to persons or animals
or damage to property arising from failure
to comply with these requirements.
ELECTRICAL COOKING HOBS
WITH SIDE CONTROLS
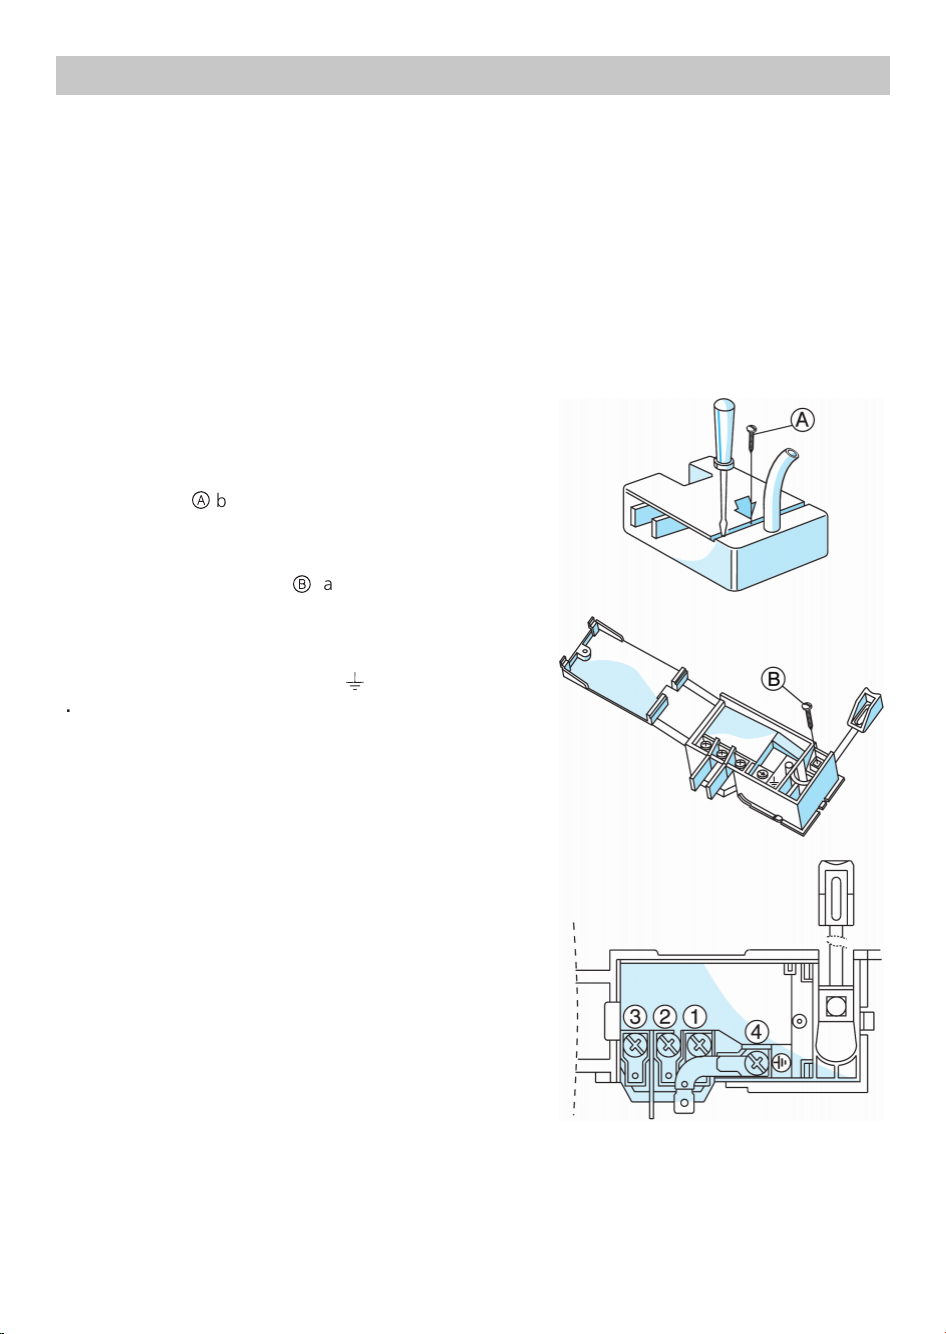
Connection to terminal board
Open the cover of the terminal board and
1.
loosen screw
in the figure.
2.
Unsheath the cable for about 70 mm.
3.
Peel off the internal cables for about 10 mm,
loosen cable clamp screw
cable in the cable clamp.
x The terminal board has 4 terminals:
1-2 interconnected (line)
3 (neutral)
4 (earth): marked with symbol
4.
Connect the cable to the terminal board,
following the indications of the connection
diagram punched on the bottom of the
cooking hob. Fasten the cable clamp and
close the cover.
by means of a tool, as shown
a
, and insert the
b
.
4
x
When the cooking hob is installed, provide
a single-pole circuit breaker with a contact
breakingdistanceofatleast3mm.
x
After installation, the electric parts must
not be accessible.
x The cooking hob must be earthed and fitted
with fuses adequate to the hotplate rating.
x For electrical connection, use an H05RR-F
cable (see table in product description sheet).
12
 Loading...