How it Works
Log In / Sign Up
Buy Points
How it Works
FAQ
Contact Us
Questions and Suggestions
Users
Whirlpool
Loading...
#
5KSBCJ
5
5KSM150PSEAC
3
5KSM150PSECB
5KSM150PSEER
3
5KSM150PSEES
5KSM150PSEGA
5KSM150PSEMS
5
5KSM150PSEMY
2
5KSM150PSEOB
3
5KSM150PSEPK
5KSM150PSEWH
3
5KSM150PSEYP
5KTT780EAC
5KTT780EER
5KTT780EOB
5KTT780EPM
5KTT780EWH
2
5KTT890EER
2
5KTT890EPM
5KWB100EAC
3
5KWB100EOB
4
5KWB100EPM
4
5SSA
4
5VES3FHGRS00
5VET0WPKLQ05
5VEV201NAQ
5VGF25SNEA00
5VGI6FARAF
5VGS3SHGKQ00
5VGS3SHGKQ01
5VGS3SHGKQ02
5VGS3SHGKQ03
5VGS7SHGKQ00
5VGS7SHGKQ01
5VGS7SHGKT00
5VGS7SHGKT01
5VGS9SHGKQ00
5VGS9SHGKQ01
5VGS9SHGKT00
5VGS9SHGKT01
5VM1BXGFYA
5VM1BXGFYW
5VM9BXGFYA
5VM9BXGFYW
5VMFI267AA
5VWT31SFYW
5VWT51SFYF
5VWT51SFYW
5VWT59SFYF
5VWT59SFYW
5VWT71REYF
5VWT71REYF00
5WRS22FDBF
5WRS22FDBF00
5WRS22KNBF00
5WRS25FDBF
5WRS25FDBF00
5WRS25KNBF00
5WRS25KNBF02
5WRS25KNBW00
5WRS25KNBW02
5WT519SFEG
5WT519SFEG00
5WT519SFEW
5WT519SFEW00
60-Hz
600
620 EV/WS
7
622/G-IT
5
6 ADG 952
6 ADP 905
6 ADP 962
2
6 AKR 901 IX -2
3
618102
2
623.2.02
6
623 212
6
623.4.02
623 659
4
624 202
5
624 212
3
625.1.00
2
625 102
2
625.1.10
2
625.1.12
2
600.150.70 CFS 609 W
9
600 162 15
4
600 162 20
2
600 270 54
2
600 275 96
600.497.77
12
600 645 79
600 655 93
600 793 16
600 812 82
600 947 79
2
601 237 48
7
60123908
5
61005273
61005626
61005627
Loading...
Loading...
Nothing found
5VWT71REYF
Owner's Manual
68 pgs
2.69 Mb
0
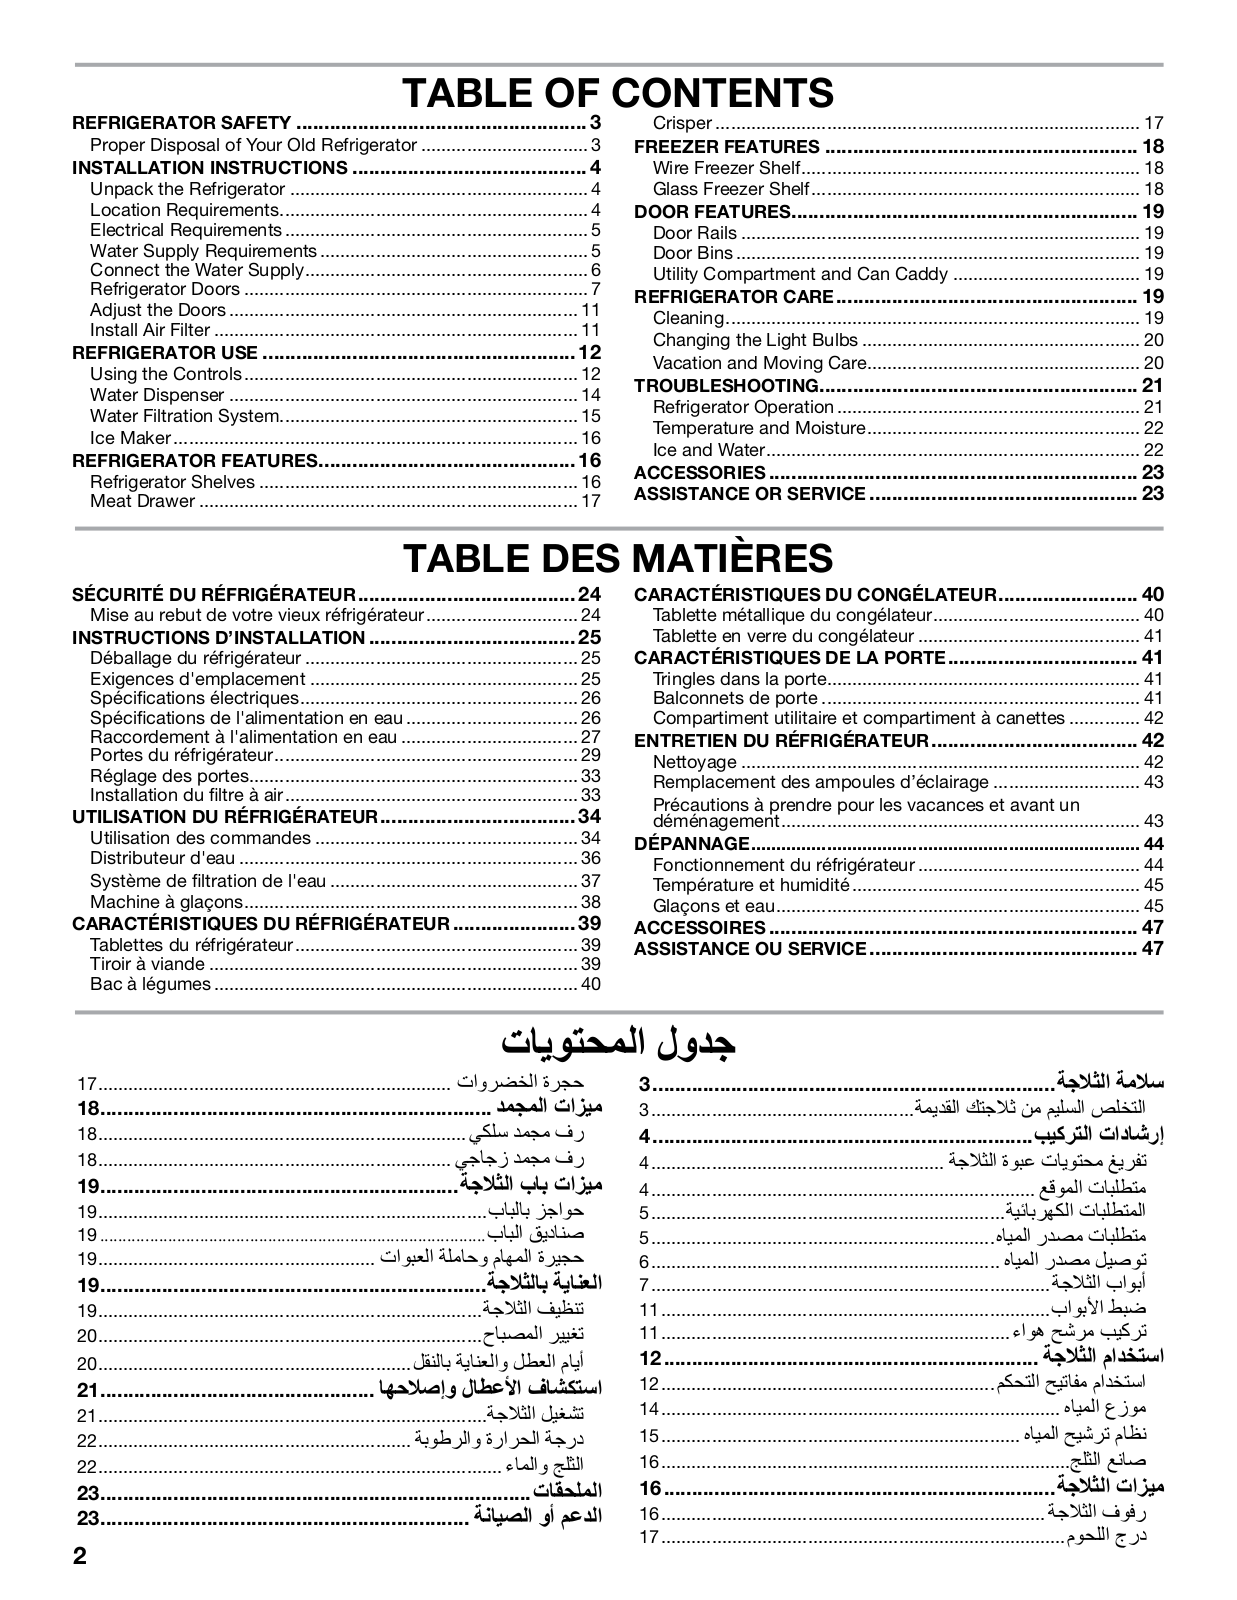
Table of contents
Loading...
Whirlpool 5VWT71REYF Owner's Manual
...
Whirlpool Owner's Manual
Download
Specifications and Main Features
Frequently Asked Questions
User Manual
Download
Loading...
+
47
hidden pages
Unhide
You need points to download manuals.
1 point = 1 manual.
You can buy points or you can get point for every manual you upload.
Buy points
Upload your manuals
 Loading...