

Whirlpool 1SF034PEW Use & Care Manual

GAS
RANGE
Continuous-Cleaning
Model lSF034PEW

Contents
Page
BEFORE YOU USE YOUR RANGE.
2
IMPORTANT SAFETY
INSTRUCTIONS. . . . . . . . . . .
3
PARTS AND FEATURES. . . . .
6
USING YOUR RANGE. . . . . . . . . .
7
Using the Surface Burners . .
7
Setting the Clock . . . . . . . . .
B
Using the Minute Timer. . .
9
Using the Oven Temp
Control . . . . . . . . . . . . . . . . . . .
9
Baking.. . . . . . , , . . . . . . . . . . .
9
Broiling . . . . . . . , . . . . . . . . . .
10
Using the Automatic
MEALTIMER’” Clock.. . . . . . .
11
The Oven Vent. . . . . . . . . . . . . . .
13
Page
CARING FOR YOUR RANGE . . . .
14
Control Panels . . . . .
14
Surface Burner Grates and
Reflector Pans. . . . . . . . . .
15
Lift-Up Cooktop . . . . . . . . . . .
15
Surface Burners . . . . . . . . . . .
16
The Oven Door . . . . . . . . .
16
The Continuous-Cleaning
Oven . . . . . . . . . . . . . . . . . . . . .
17
Cleaning Chart . . . . . . . . . . . . .
19
Changing the Oven Light . . . .
20
IF YOU NEED SERVICE OR
ASSISTANCE . . . . . . . . . . . . . . . . . .
2 1
WHIRLPOOL RANGE
WARRANTY . . . . . . . . . . . . . . . . . . .
24
01989 Whirlpool Corporation
Before you use your range
You are responsible for:
l Reading and following all safety precautions in this Use and Care Guide.
l Installing and leveling the range on a floor strong enough to hold its weight,
and where it is protected from the elements. (See the Installation
Instructions.)
l Making sure the range is not used by anyone unable to operate it properly
l Properly maintaining the range.
l Using the range only for jobs expected of a home range.
2

IMPORTANT
SAFETY INSTRUCTIONS
Gas ranges have been thoroughly tested for safe and efficient operation.
However, as with any appliance, there are specific installation and safety
precautions which must be followed to ensure safe and satisfactory
aeration.
To reduce the risk of fire, electrlcal shock,
Injury to persons, or damage when using the
range, follow barlc
precaullonr, Including
. FOR YOUR SAFETY.
DO NOT STORE OR USE GASOLINE OR OTHER FLAMMABLE
VAPORS AND LIQUIDS IN THE VICINITY OF THIS OR ANY
OTHER APPLIANCE. THE FUMES CAN CREATE A FIRE
HAZARD OR EXPLOSION.
. FOR YOUR SAFETY.
IF YOU SMELL GAS:
1. OPEN WINDOWS.
2. DON’T TOUCH ELECTRICAL SWITCHES.
3. EXTINGUISH ANY OPEN FLAMES.
4. IMMEDIATELY CALL YOUR GAS SUPPLIER.
IMPROPER INSTALLATION, ADJUSTMENT, ALTERATION,
SERVICE OR MAINTENANCE CAN CAUSE INJURY OR
PROPERTY DAMAGE. REFER TO THIS MANUAL. FOR ASSISTANCE OR ADDITIONAL INFORMATION CONSULT A
QUALIFIED INSTALLER, SERVICE AGENCY, MANUFACTURER
(DEALER) OR THE GAS SUPPLIER.
- IMPORTANT -
To the Installer: Please leave this instruction book with the unit.
To the Consumer: Please read and keep this book for future reference.
l Read all instructions before using
the range.
installed by a qualified installer.
The range must be properly con-
* Install or locate the range only in
accordance with the provided
Installation Instructions. It is recommended that the range be
netted to the proper gas supply
and checked for leaks. The range
must also be properly connected
to electrical supply and
grounded.
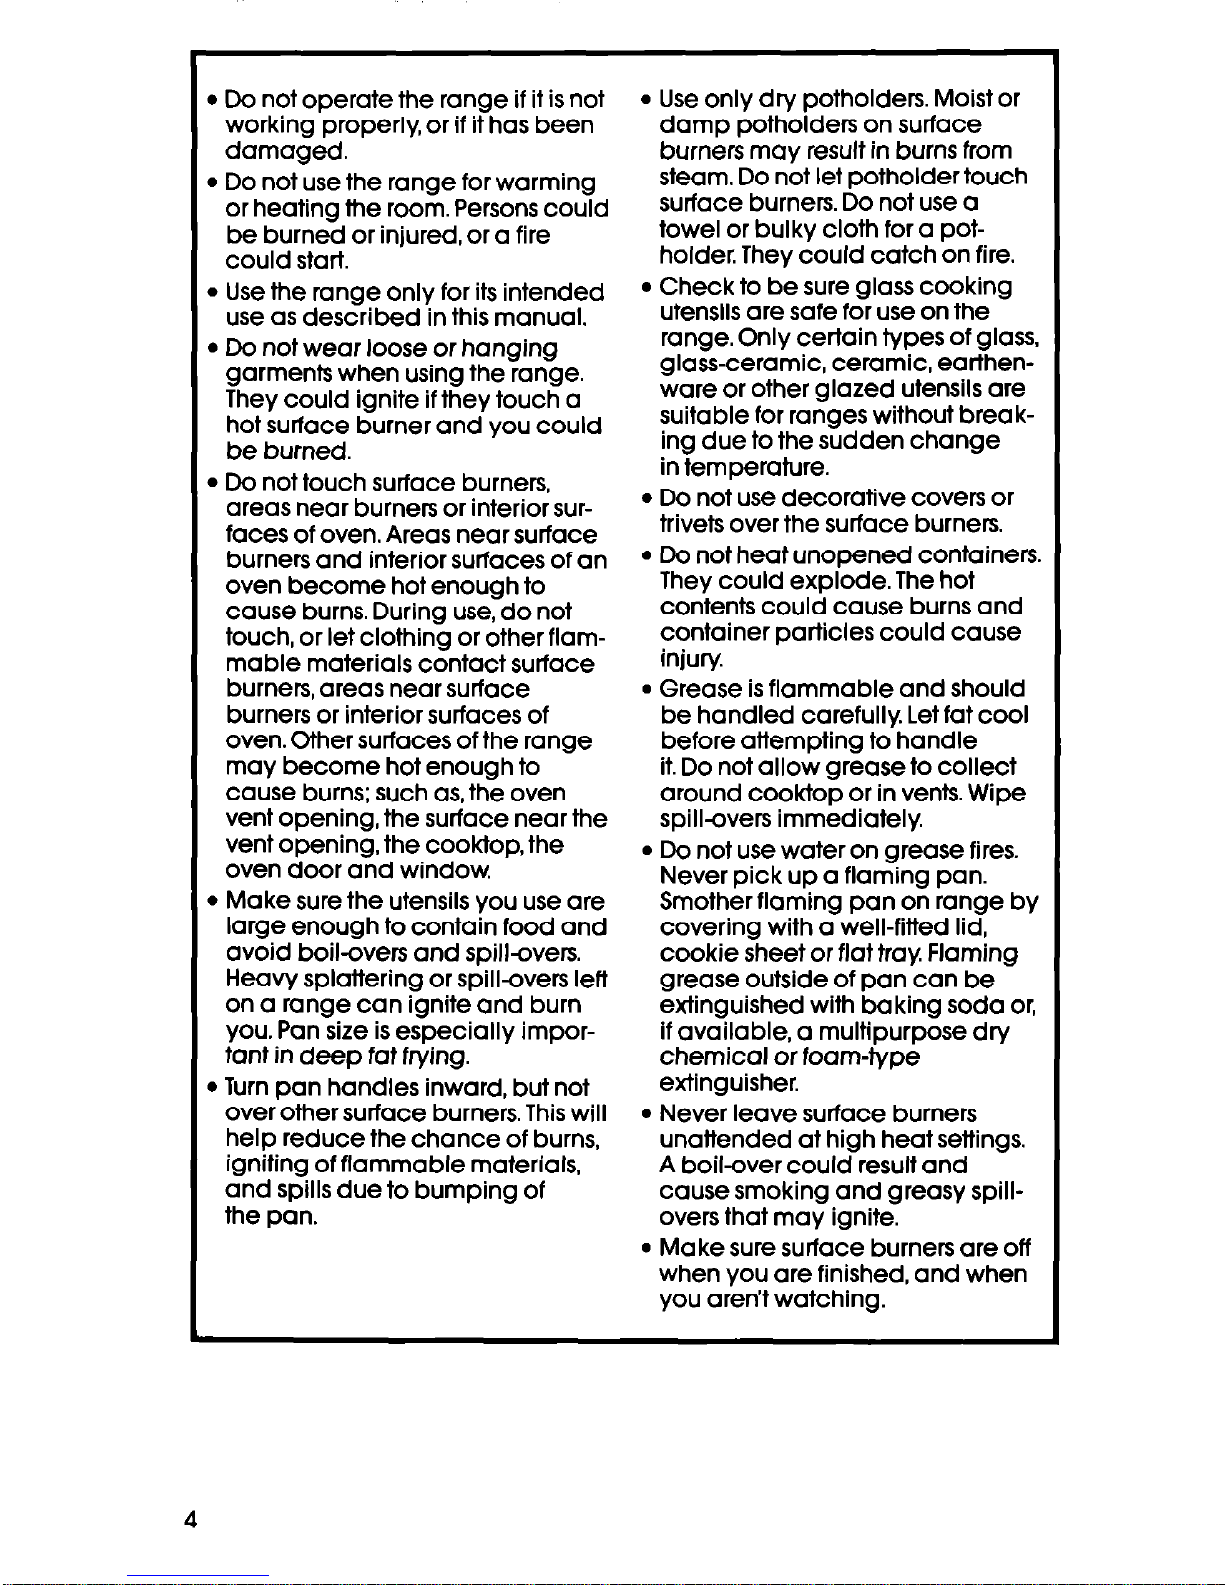
l Do not operate the range if it is not
working properly, or if it has been
damaged.
l Do not use the range for warming
or heating the room. Persons could
be burned or injured, or a fire
could start.
l Use the range only for its intended
use as described in this manual.
l Do not wear loose or hanging
garments when using the range.
They could ignite if they touch a
hot surface burner and you could
be burned.
l Do not touch surface burners,
areas near burners or interior surfaces of oven. Areas near surface
burners and interior surfaces of an
oven become hot enough to
cause burns. During use, do not
touch, or let clothing or other flammable materials contact surface
burners, areas near surface
burners or interior surfaces of
oven. Other surfaces of the range
may become hot enough to
cause burns; such as, the oven
vent opening, the surface near the
vent opening, the cooktop, the
oven door and window.
l Make sure the utensils you use are
large enough to contain food and
avoid boil-avers and spillovers.
Heavy splattering or spillovers left
on a range can ignite and burn
you. Pan size is especially important in deep fat frying.
l Turn pan handles inward, but not
over other surface burners. This will
help reduce the chance of burns,
igniting of flammable materials,
and spills due to bumping of
the pan.
l Use only dry potholders. Moist or
damp potholders on surface
burners may result in burns from
steam. Do not let potholder touch
surface burners. Do not use a
towel or bulky cloth for a potholder. They could catch on fire.
l Check to be sure glass cooking
utensils are safe for use on the
range. Only certain types of glass,
glass-ceramic, ceramic, earthenware or other glazed utensils are
suitable for ranges without break-
ing due to the sudden change
in temperature.
l Do not use decorative covers or
trivets over the surface burners.
l Do not heat unopened containers.
They could explode. The hot
contents could cause burns and
container particles could cause
injury
l Grease is flammable and should
be handled carefully. Let fat cool
before attempting to handle
it. Do not allow grease to collect
around cooktop or in vents. Wipe
spillovers immediately.
l Do not use water on grease fires.
Never pick up a flaming pan.
Smother flaming pan on range by
covering with a well-fitted lid,
cookie sheet or flat tray. Flaming
grease outside of pan can be
extinguished with baking soda or,
if available, a multipurpose dry
chemical or foam-type
extinguisher.
l Never leave surface burners
unattended at high heat settings.
A boil-over could result and
cause smoking and greasy spillovers that may ignite.
l Make sure surface burners are off
when you are finished, and when
you aren’t watching.
4

l Use care when opening oven
0 Clean your range regularly See
door. Let hot air or steam escape
care and cleaning instructions in
before removing or replacing
this manual.
food.
l Be sure all range parts are cool
l Always position oven racks in
before cleaning.
desired location while oven is
l Do not clean door heat seal. It is
cool.
essential for a good seal. Care
l Do not store flammable materials
should be taken not to rub,
on or near the range. They could
damage, or move the seal. Clean
explode or burn.
only parts recommended in this
l Do not store things children might
Use and Care Guide.
want above the range. Children
l Do not use oven cleaners. No
could be burned or injured while
commercial oven cleaner or oven
climbing on it.
liner protective coating of any
l Do not leave children alone or
kind should be used in or around
unattended in area where the
any part of the oven.
range is in use. They should never
0 Do not repair or replace any part
be allowed to sit or stand on any
of the range unless specifically
part of the range. They could be
recommended in this manual. All
burned or injured.
other servicing should be referred
l Never use a match or other flame
to a qualified technician.
to look for a gas leak. Explosion
l Disconnect the electrical supply
and injury could result.
before servicing the range.
l Know where your main gas shut off
valve is located.
l Keep range vents unobstructed.
- SAVE THESE INSTRUCTIONS -
Thank you for buylng a Whlrlpool appliance. Please complete and
mall the Owner Reglstratlon Card provlded wlth this product. Then
complete the form below. Have this information ready if you need serv-
ice or call with a question.
l Copy model and serial numbers
from plate (under the cooktop)
Model Number
and purchase date from sales
slip.
Serial Number
l Keep this book and the sales slip
together in a handy place.
Purchase Date
Service Company Phone Number
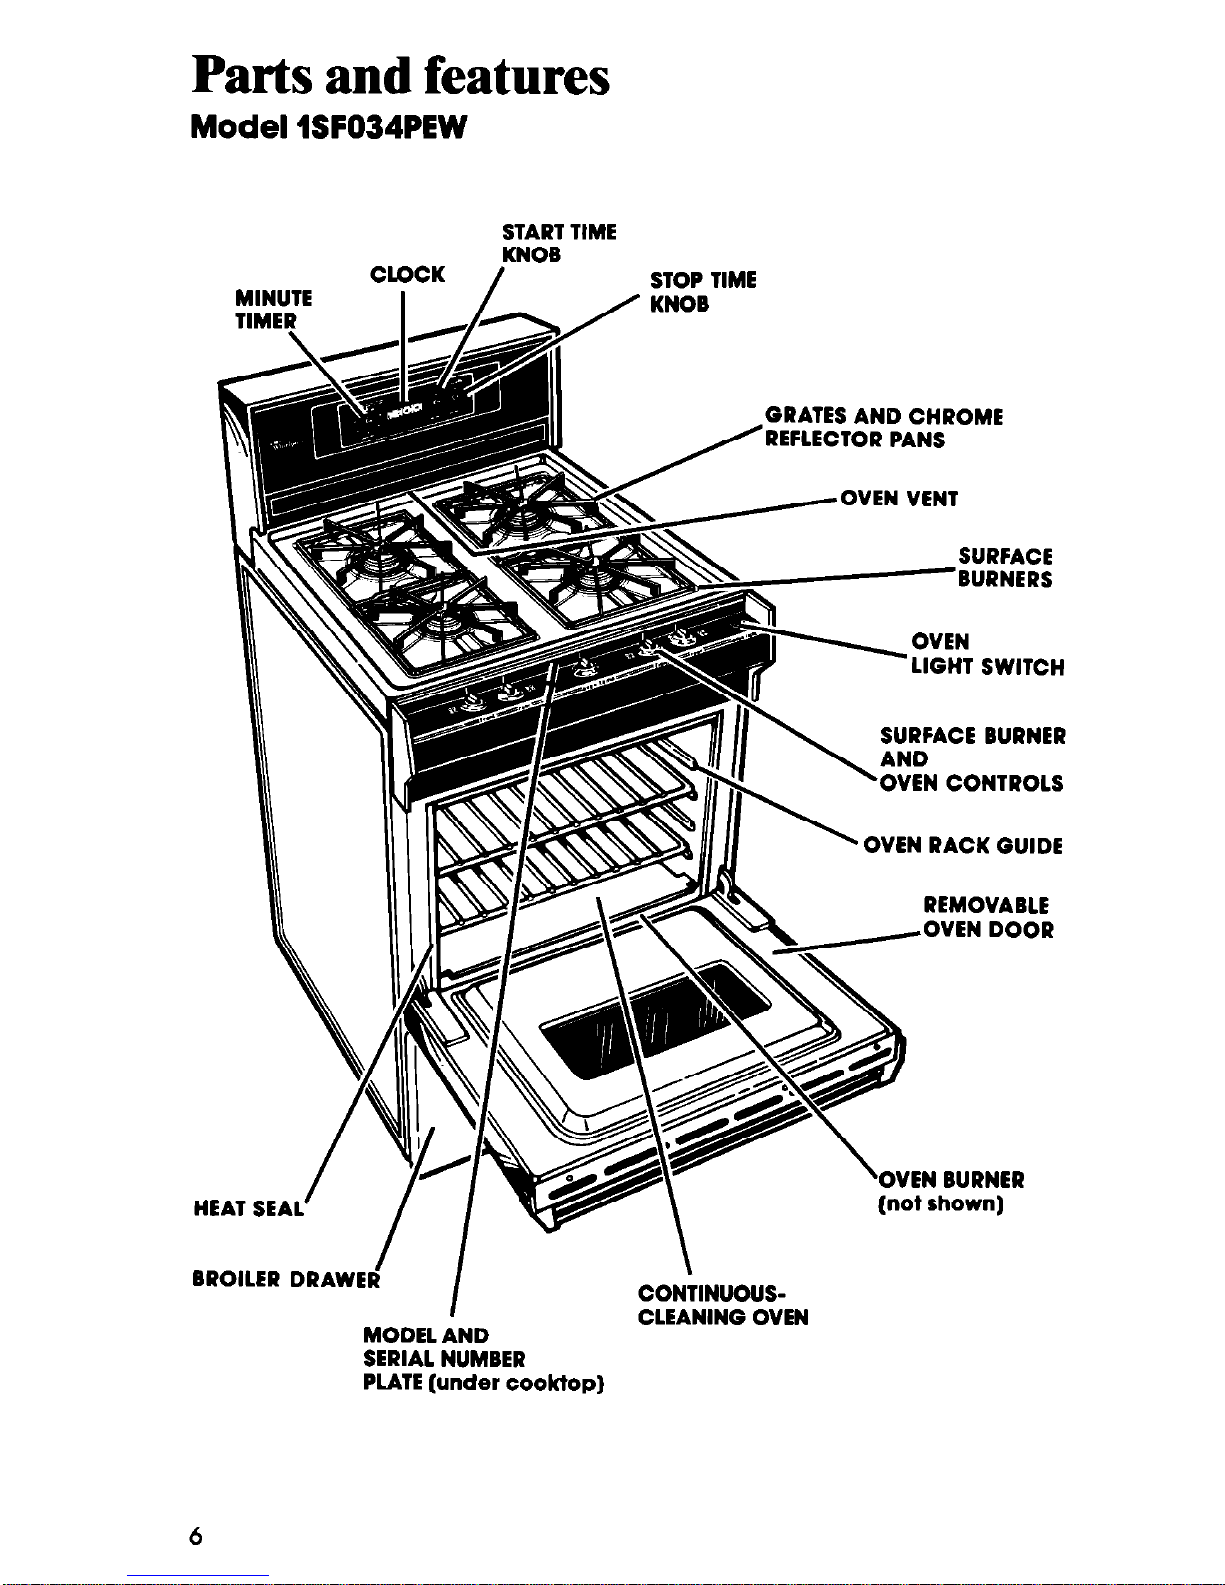
Parts and features
Model lSF034PEW
START TIME
KNOB
CLOCK /
MINUTE
TIMER\
STOP TIME
GRATES AND CHROME
REFLECTOR PANS
III
\
Y .OVEN
’ OVEN RACK GUIDE
SURFACE
BURNERS
LIGHT SWITCH
SURFACE BURNER
ONTROLS
REMOVABLE
iN DOOR
HEAT SEAI
BROILER DRAWEd
MODEL AND
SERIAL NUMBER
PLATE (under cooktop)
6
‘OVEN BURNER
_.. _
(nor sno lwn]
I
CON\TINUOUSCLEANING OVEN
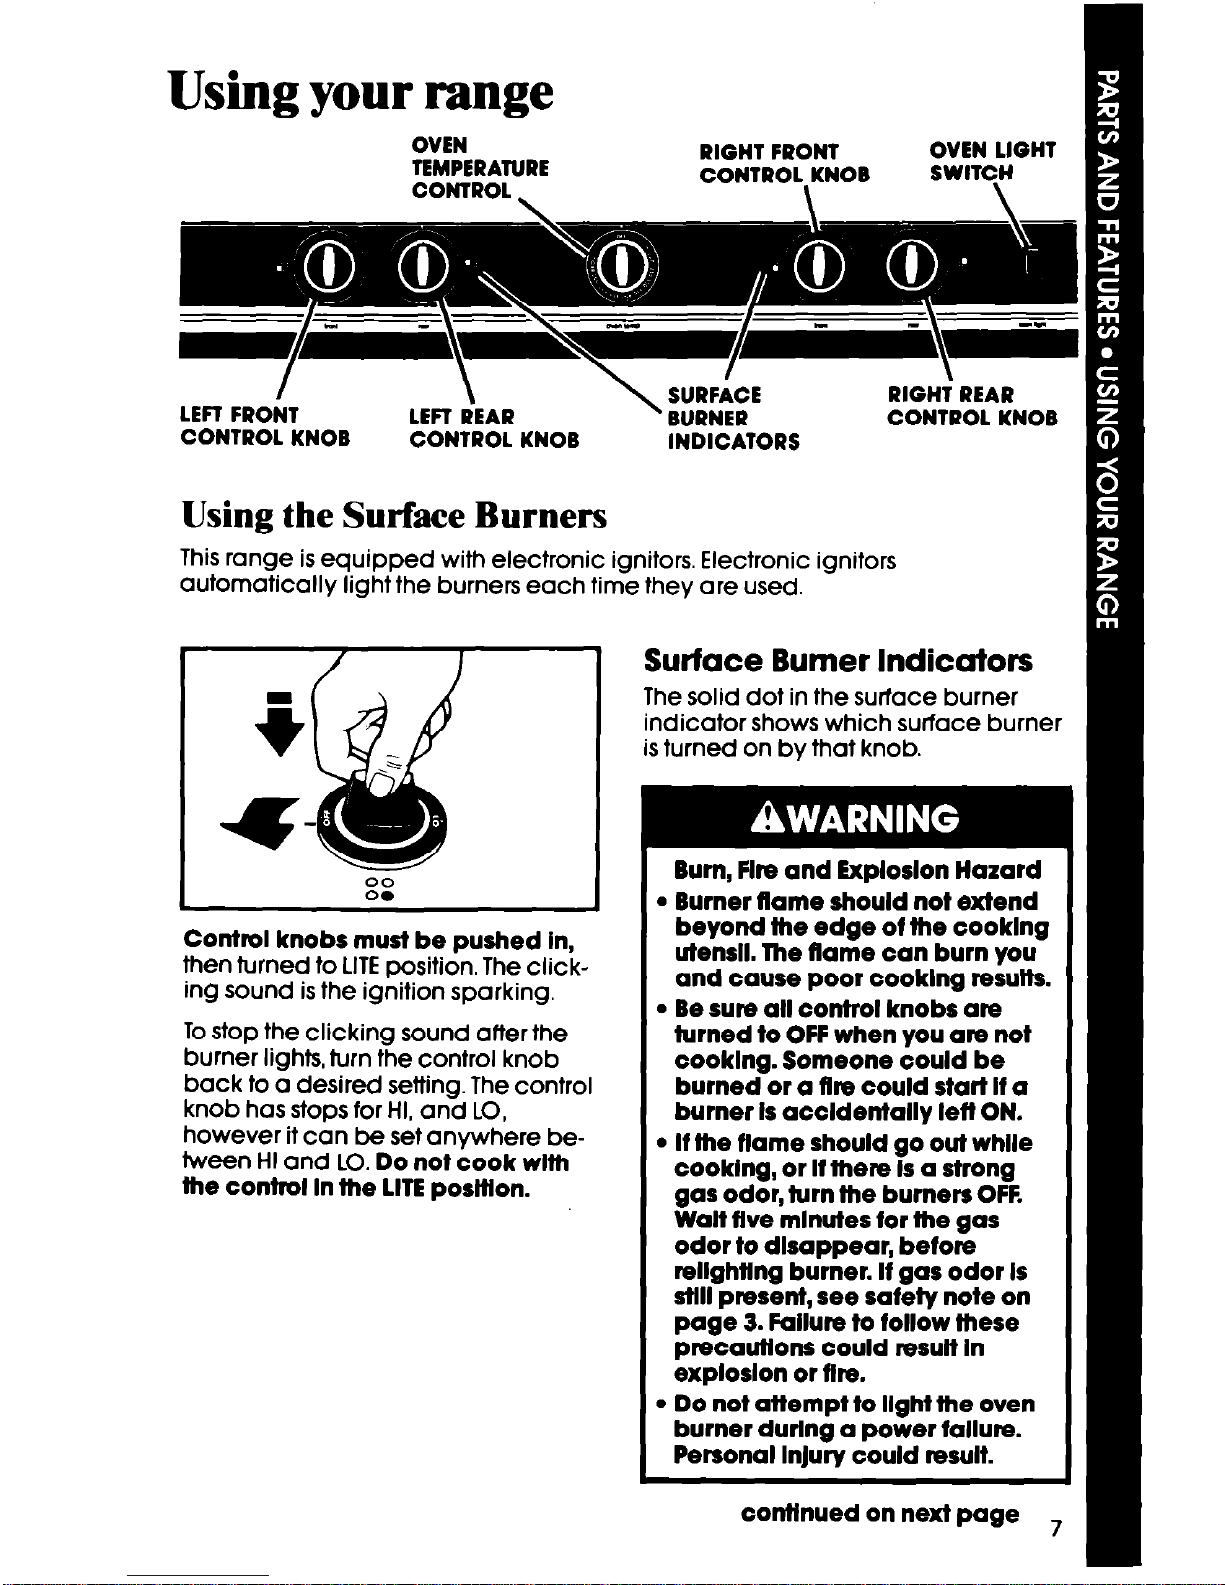
Using your range
CONTROL KNOB
OVEN
TEMPERATURE
CONTROL
CONTROL KNOB
\
RIGHT FRONT
CONTROL KNOB
\
INDICATORS
Using the Surface Burners
This range is equipped with electronic ignitors. Electronic ignitors
automatically light the burners each time they are used.
Surface Burner Indicators
The solid dot in the surface burner
indicator shows which surface burner
is turned on by that knob.
OVEN LIGHT 1
SWITCH
\
RIGHT REAR
CONTROL KNOB
Control knobs must be pushed in,
then turned to LITE position. The clicking sound is the ignition sparking.
To stop the clicking sound after the
burner lights, turn the control knob
back to a desired setting. The control
knob has stops for HI, and LO,
however it can be set anywhere between HI and LO. Do not cook wlfh
the control In the LITE posltlon.
Bum, Fire and Exploslon Hazard
l Burner flame should not extend
beyond the edge of the cooklng
utensll. The flame can burn you
and cause poor cooklng resutts.
l Be sure all control knobs are
turned to OFF when you are not
cooklng. Someone could be
burned or a fire could start If a
burner Is acoldentally lefl ON.
* If the flame should go out while
cooking, or If there Is a strong
gas odor, turn the burners OFF.
Walt flve mlnutes for the gas
odor to disappear, before
rellghtlng burner. If gas odor Is
still present, see safety note on
page 3. Failure to follow these
precautions could result In
exploslon or fire.
m Do not attempt to light the oven
burner durlng a power failure.
Personal InJury could result.
1
continued on next page
~

In Case of a Prolonged Power Failure
Surface burners with electronic ignitors can be manually lighted. Hold a lit
match near the burner
lights, turn the control to the desired setting.
Until you get used to the sefflngs, use the following as a gulde.
and turn the control to the LITE position. After the burner
Use ME
the burner. After
the burner lights,
turn control
back to a desired setting to
stop the clicking
of the ignition.
Do
wlth the control
In the LITE poslNon.
to light
not cook
Use HI
foods cooking
or to bring liquids to a boil.
to start
Use
a medlum
setting
cooking or to fry
chicken or pancakes: for gravy,
puddings and
icing or to cook
large amounts
of vegetables.
to start
Setting the Clock
Push In and turn the Minute Timer Knob to set the Clock.
Use LO
keep foods
warm until
ready to serve
to
1.
Push In Mlnute Timer Knob and
turn In either dlrectlon until clock
shows the right time of day.
2. Let the Mlnute llmer Knob pop
out. Turn in either direction until
Minute Timer hand points to OFF.
The clock setitng will change if
you push In the knob when
turnlng.
 Loading...