

Wheego Whip (2010) Owner's Manual
Owner’s Manual
NOTICE TO FIRST RESPONDERS
The Master Disconnect Button is behind the passenger seat.
Simply push the red button and all power from the battery
pack will be disconnected.


WHEEGO Owner’s Manual
Table of Contents
1
2
3
4
5
6
7
8
9
Introduction
Vehicle Identication and Specications
Things to Know Before You Operate Your Car
Understanding the Standard Features of Your Car
Understanding the Optional Features of Your Car
Operation and Maintenance
Warranty and Customer Service
Index
Appendix
Important Information
Customer Service 678-904-4795
Dealer’s Number _______________________
04
06
07
08
20
20
29
32
32
03

1 INTRODUCTION
CONTENTS
1. About this Owner’s Manual
2. Introduction to the Safe Ownership of a WHEEGO
3. Cautions, Warnings and Notes
NOTE: This manual is subject to change. For the latest version please visit wheego.net
and click on Vehicles/Owner’s Manual.
You can be badly injured while working on an electric vehicle. Take your vehicle to your
dealer or call WHEEGO Customer Service at 678-904-4795 Ext. 3 for help.
WARNING
Any modications or alterations to this vehicle could seriously affect its road worthiness
and safety and may lead to an accident resulting in serious injury or death.
ABOUT THIS MANUAL
Thank you for purchasing your Electric Vehicle from WHEEGO. Your vehicle is designed to
operate exclusively on battery power. It is an emission-free vehicle. The ideal application
for a low speed battery-powered electric vehicle occurs when the daily driving pattern is
predictable and the distance is relatively short. WHEEGO’s objectives include customer
safety, product satisfaction and pride of ownership. This Owner’s Manual is designed to
acquaint you with the proper and safe operation of your WHEEGO. Please take the time
to read and understand the manual before operating your vehicle.
Maintenance schedules and general care instructions are included in the Operation and
Maintenance section. This manual is applicable to the following WHEEGO line of vehicles:
Whip 2010 model year.
If questions arise after reading the manual, contact WHEEGO Customer Service at 678904-4795 Ext. 3. Please have your Vehicle Identication Number (VIN) and date of
purchase information available.
NOTE: All information and specications in this Owner’s Manual are current at the time of
printing. However, due to WHEEGO’s policy of continuous improvement, we reserve the
right to make changes to the manual, at any time, without written notice or obligation.
INTRODUCTION TO SAFE OWNERSHIP OF WHEEGO LOW SPEED VEHICLES
WHEEGO battery-electric vehicles are different from vehicles you might be accustomed to
owning. Special precautions should be followed when owning and operating a WHEEGO.
Please pay particular attention to the cautions and warnings in this manual, as well as those
placed on the vehicle in various locations.
Electric cars provide a great amount of torque when the accelerator is pressed. This may
cause the car to spin its tires, particularly on wet or slippery pavement. WHEEGO batteryelectric vehicles are designed to meet US Federal Government safety requirements for a
special class of vehicle known as “Low Speed Vehicles.” By this very name, and implicit in
these safety requirements, these vehicles are intended only for use at low speed, up to 25
mph, and on public roads (as governed by individual state laws) where the speed limits are
correspondingly low and do not exceed 35 mph.
04

Specic to WHEEGO models, the following safe habits should always be followed:
• WHEEGO battery-electric vehicles are motor vehicles. For this reason, safety belts
should always be worn by all occupants while the vehicle is in operation.
• The WHEEGO Whip LSV is NOT designed to meet any collision or roll-over
requirements. Therefore, you should always drive your WHEEGO in a safe manner
while being alert to potentially dangerous situations around you. As with all motor
vehicles, never drink alcohol and attempt to drive a WHEEGO. Operate a WHEEGO
only on public or private roads where the speed limits are appropriate for low speed
vehicles (individual state laws vary, so please check with your DMV) and the trafc is
light. You should never operate a WHEEGO in such a way that you obstruct faster
moving trafc. You should be carefuul when crossing a road with a higher speed unit.
State laws vary on road speeds that LSV’s may cross.
• WHEEGO battery-electric vehicles should be recharged from a standard 120VAC 15
amp electrical outlet. Charging from a circuit of lesser capacity and/or using a cord
from an outlet to the WHEEGO that is not sufcient in wire gauge could create a re
hazard. Please consult this manual for the proper extension cord gauge and length.
• The battery pack is what you charge and provides the “energy” to the WHEEGO
electric drive system. The voltage in a WHEEGO battery pack is sufcient to cause
death by electrocution. For this reason, WHEEGO owners should NEVER attempt to
do any maintenance or repair work on their WHEEGO’s electric drive system,
including the battery pack, unless they have had special training.
Please read, understand and abide by the above safety precautions for years of safe
operation and enjoyment of your WHEEGO.
CAUTIONS, WARNINGS AND NOTES
Throughout this Owner’s Manual you will nd the words “WARNING” and “CAUTION.”
These serve as reminders that special attention is required. “WARNING” indicates a direct
hazard, which could result in an accident causing bodily injury. “CAUTION” identies
something that could result in damage to your vehicle. You will also nd information
preceded by the word “NOTE.” Notes are for your information and to make procedures
easier to understand.
05

2 VEHICLE IDENTIFICATION & SPECIFICATIONS
CONTENTS
1. Vehicle Information
2. General Specications
VEHICLE INFORMATION
For all model vehicles, the vehicle identication number (VIN) can be found on the VIN
plate, located on the driver’s side of the dashboard. The VIN indicates the model year,
model type and the serial number of the vehicle. It can also be found on the information
label inside the driver’s door jamb.
NOTE: Record the Vehicle Identication Number in the space provided below for easy
reference:
Vehicle Identication Number (VIN):
__|__|__|__|__|__|__|__|__|__|__|__|__|__|__|__|__|
Key # ___________ (Stamped on Key)
Date purchased: _____ /_____ /_____
GENERAL SPECIFICATIONS WHEEGO WHIP
Motor: AC41 Brushless
Drive System: Single speed front wheel drive transaxle
Tires: 195/50/R15
Battery Pack: 96V AGM Sealed Maintenance-Free Lead-Acid
Onboard Charger: 96V Output Delta-Q Fully Automatic 120v/12A input
Vehicle Width: 63.19 inches
Vehicle Length: 118.90 inches
Vehicle Height: 62.99 inches
Wheelbase: 79.74 inches
Turning Circle*: 362.2 inches
Curb Weight**: 2,475 lbs.
GVWR**: 2,999 lbs.
Payload Capacity: 524 lbs. (options + passengers + cargo)
*The turning circle is the diameter of a circle required to make a U-turn maneuver.
**These weight limits are approximate. The GVWR must not be exceeded. GVWR
is the actual weight of the vehicle including the weight of the entire payload of options,
passengers, and cargo.
06

3 THINGS TO KNOW BEFORE YOU OPERATE YOUR CAR
CONTENTS
1. Driving and Alcohol
2. Safety Information
DRIVING AND ALCOHOL
Your ability to drive your WHEEGO can be seriously impaired with blood alcohol levels
far below the level allowed by law. If you are drinking alcohol, don’t drive. Ride with a
designated non-drinking driver, call a cab, or use public transportation.
Driving after drinking alcohol can lead to an accident. Your perceptions are less sharp,
your reexes are slower, and your judgment is impaired when you have been drinking.
Never drink alcohol and drive.
WARNING
Drinking alcohol can seriously impair your ability to operate this vehicle.
SAFETY INFORMATION
• Read the Owner’s Manual before operating this vehicle.
• Charge the vehicle in a well-ventilated area only.
• Keep children away from the vehicle during charging.
• Batteries can emit explosive hydrogen gases when charging if they are overcharged.
Keep sparks and ames away from the battery area of the vehicle. Tools, wires, and
metal objects can cause sparks and a short to occur if they come into contact with
the battery connections or posts. Follow all instructions carefully when dealing with
batteries.
• The batteries in the WHEEGO are 8 Volt Lead-Acid AGM Batteries. They are
connected in a pack conguration to produce HIGH VOLTAGE DC (Direct Current)
ELECTRIC POWER (96 Volts). These batteries are sealed, maintenance-free, and
are selected specically to optimize the operation and performance of your vehicle.
Never use (or substitute for) any battery other than the original factory approved batteries
that come in your WHEEGO.
Your vehicle is battery powered. If handled improperly, batteries can be dangerous. Follow
the precautions provided in the Operation and Maintenance section of this manual during
charging operations to avoid personal injury or damage to electrical components in the
vehicle.
WARNING
• Electrolytes can leak from damaged or defective batteries. Avoid contact with skin,
eyes, or clothing.
• Batteries contain acid, which can cause severe burns. If battery uid comes in contact
with your skin, ush the affected areas with water for at least 15 minutes and then
seek medical assistance.
• If battery acid is ingested, seek immediate medical assistance.
• Contact with eyes: Flush with water and get medical assistance as soon as possible.
While you are being driven to get medical assistance, continue to rinse your eyes by
using a sponge or soft cloth saturated with water.
07
Battery posts, terminals, and related accessories contain lead and lead compounds.
If you do somehow end up handling the batteries in your vehicle, immediately wash your
hands afterward.
WARNING
Improper handling of high voltage wiring, batteries, or control systems could result in
serious or fatal injury by electric shock. Only qualied technicians should repair or access
high voltage wiring, battery packs, and associated systems.
4 UNDERSTANDING THE STANDARD FEATURES OF YOUR CAR
CONTENTS
Instrument Panel
1.
Console
2.
Foot Pedals
3.
Master Disconnect Button
4.
Safety Belts and Child Restraints
5.
Convenience Items
6.
INSTRUMENT PANEL
Turn Signals/Lights
a.
Horn
b.
Hazard Warning Flashers
c.
Windshield Wipers and Washer
d.
BDI Gauge
e.
Speedometer
f.
Eco-Meter
g.
Key Switch
h.
Fog Lights
i.
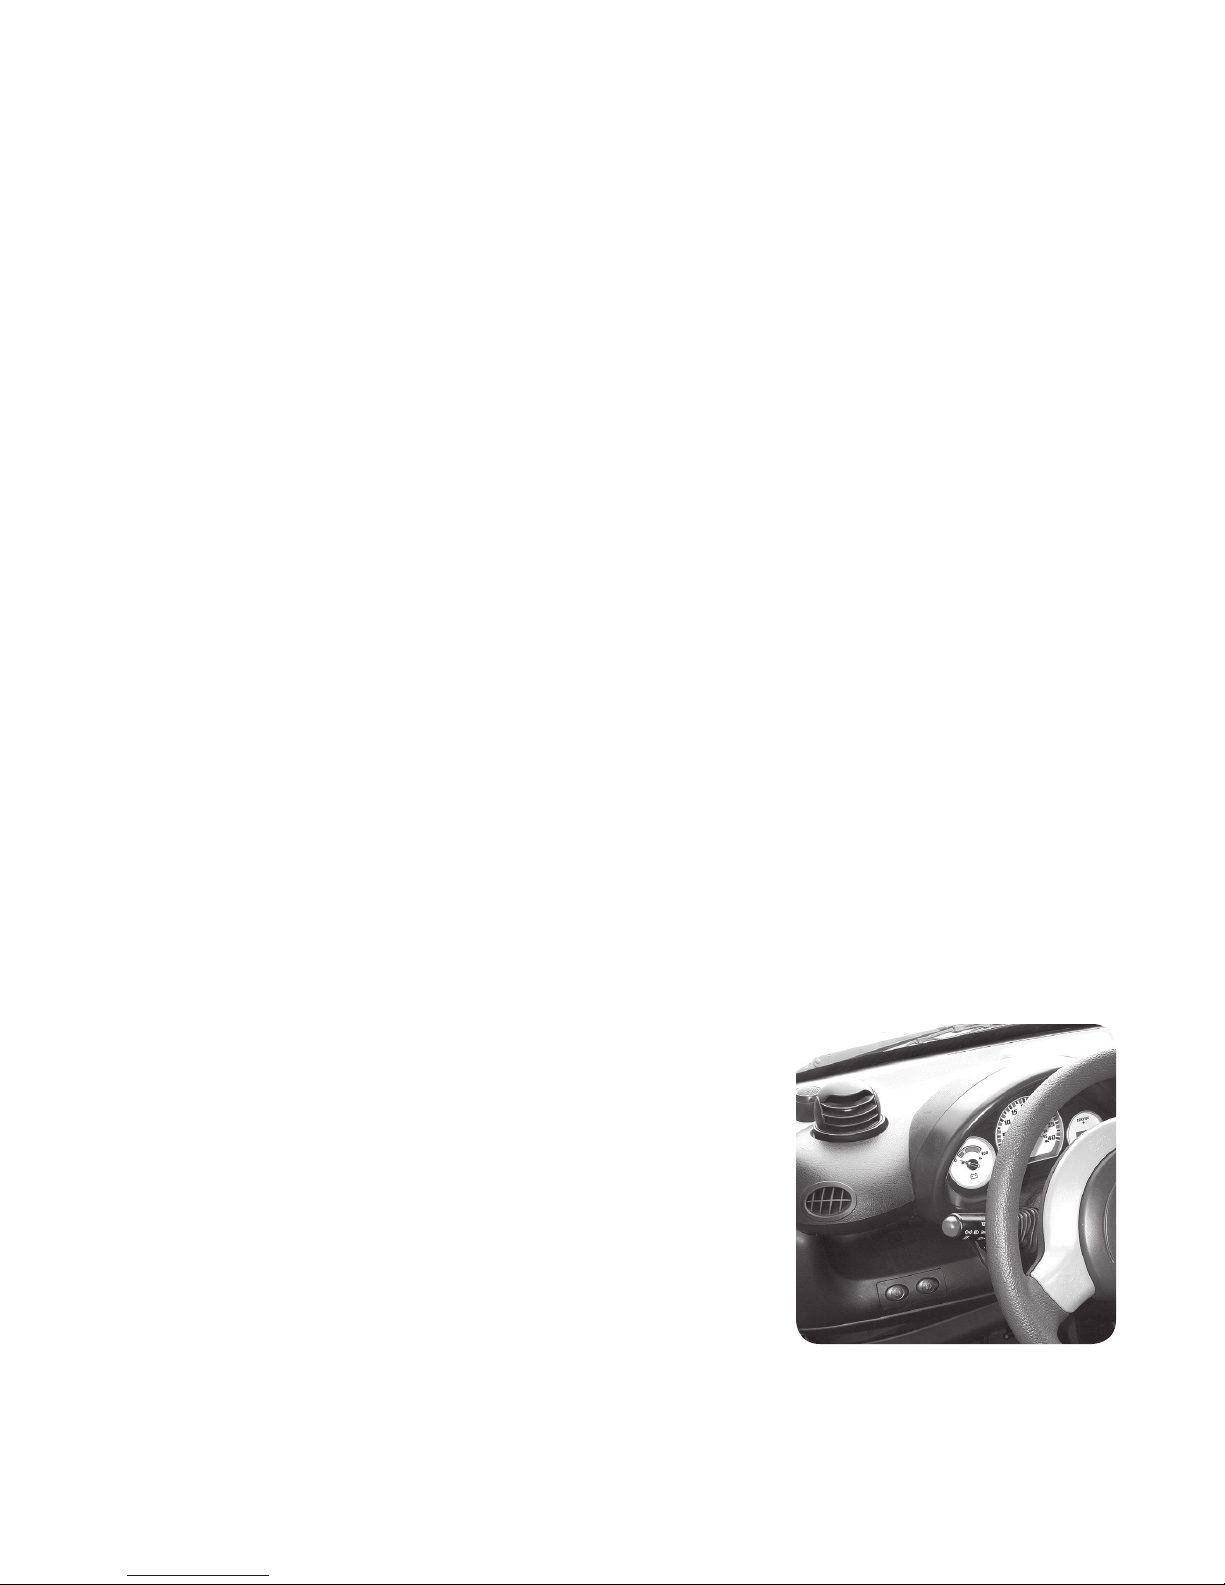
TURN SIGNALS & LIGHTS
The turn signal lever is multi-functional and controls the
turn signals and lights.
For a left turn move the lever down until it clicks.
For a right turn move the lever up until it clicks.
To turn on the taillights rotate the lever knob up one click.
To turn on the headlights rotate the lever knob up one more
click. You should turn off the lights before exiting the vehicle.
If you accidentally leave the lights on, a buzzer will sound to
remind you to turn them off.
HORN
Press one of the buttons on the steering wheel to activate the horn.
08
HAZARD WARNING FLASHERS
Your vehicle’s hazard warning asher is an emergency warning
system. When you activate it, front and rear directional signals
will ash intermittently. Use it when your vehicle is disabled on
or near the road. It warns other drivers to steer clear of you and
your vehicle. This is an emergency warning system not to be used
when the vehicle is in motion. To activate the warning ashers,
press the red button on the top of the steering wheel. To turn the
warning ashers off, press the red button again.
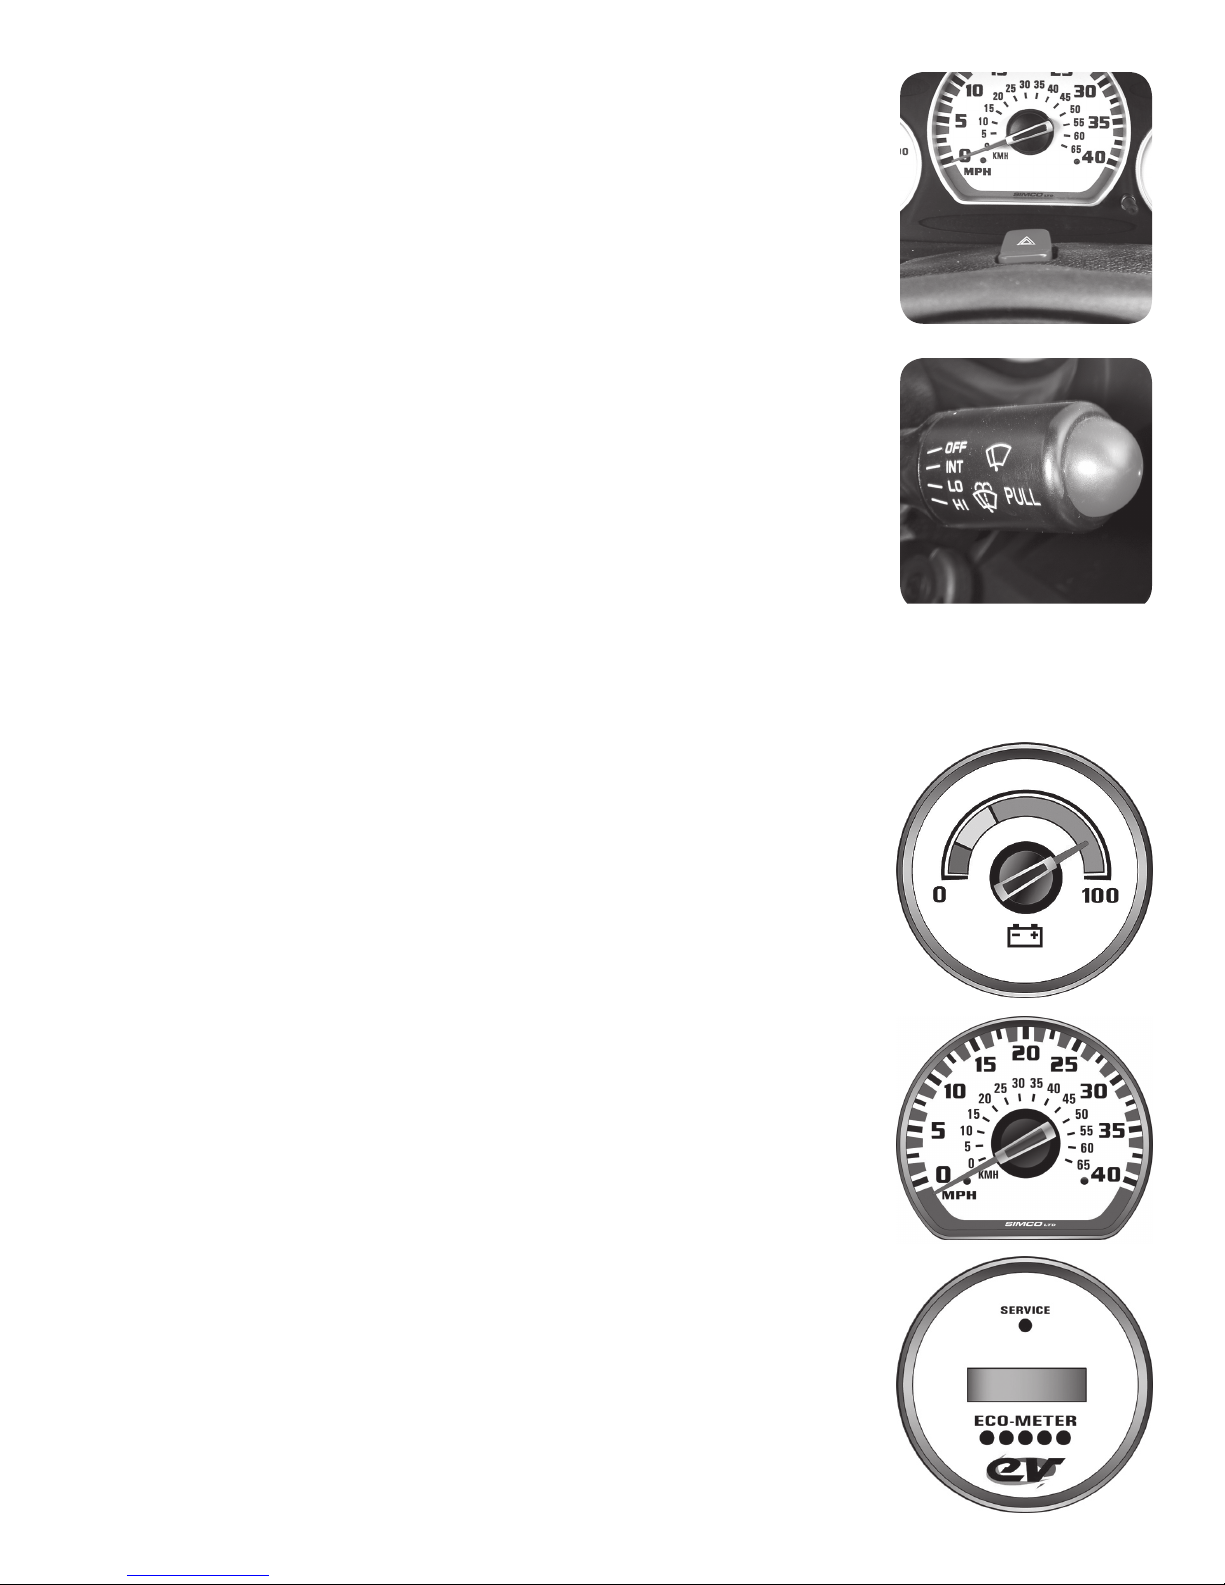
WINDSHIELD WIPERS AND WASHER
The wiper lever controls the windshield wipers and washer. Move
the wiper signal lever down to turn on the windshield wipers
(1-click intermittent, 2-clicks low speed, 3-clicks high speed).
Move the wiper lever back up to turn off. Pull the wiper lever
momentarily toward the driver to spray the windshield with uid
from the washer reservoir.
CAUTION
A damaged or worn wiper blade may reduce vision and impair you
from seeing well enough to drive safely. A worn wiper blade could
damage windshield glass. If your wiper blades become damaged
or worn, please replace them immediately.
BDI GAUGE
The BDI (Battery Discharge Indicator) is similar to a fuel gauge on a
liquid (gas-diesel-ethanol) fueled vehicle. It gives the current state
of charge of the battery pack while the key is in the ON position.
The 100% charged position is all the way to the right and the fully
discharged position is to the left. When the indicator reaches the
yellow zone, the battery pack has about 40% remaining charge.
When it reaches the red zone the battery pack has about 30%
remaining charge and the Power Conservation Mode feature will
begin to help economize battery usage for the remainder of the
discharge cycle.
SPEEDOMETER
The Speedometer shows the current driven speed of the vehicle
in both miles per hour and kilometers per hour. Low Speed
Vehicles leave the factory set for a maximum speed of 25 mph
(3200 RPM).
ECO-METER
The Eco-Meter read out initially shows the status of the shifter
(forward, neutral, or reverse). Press the black button to access
the Odometer, Trip Meter, and Miles on Current Charge Meter. All
readouts are in miles. The odometer indicates the total distance
the vehicle has been driven. The Trip Meter is useful for keeping
track of specic distances traveled.
While viewing the Trip Meter, press the button for 3-4 seconds
to reset the Trip Meter. The Miles on Current Charge Meter will
automatically reset each time the vehicle completes a charging
cycle. The Eco-Meter Meter also gives you feedback as to how
09
your driving habits (and the terrain) are affecting the draw on the batteries, which affects
your driving range. There are 5 lights on the meter, and they are in sequence: red, yellow,
green, green, green. When the indicator light is red, there is the most drain on the battery
pack. Alternately, 3 greens lit at the same time means that you are driving in a fashion
that is very economical on the battery pack.
CAUTION
Electrical wiring, circuit boards, and components are located under and behind the upper
and lower dash. Liquids can damage electrical components and the circuit board. Handle
liquids with care. Do not spray water directly into the dash.
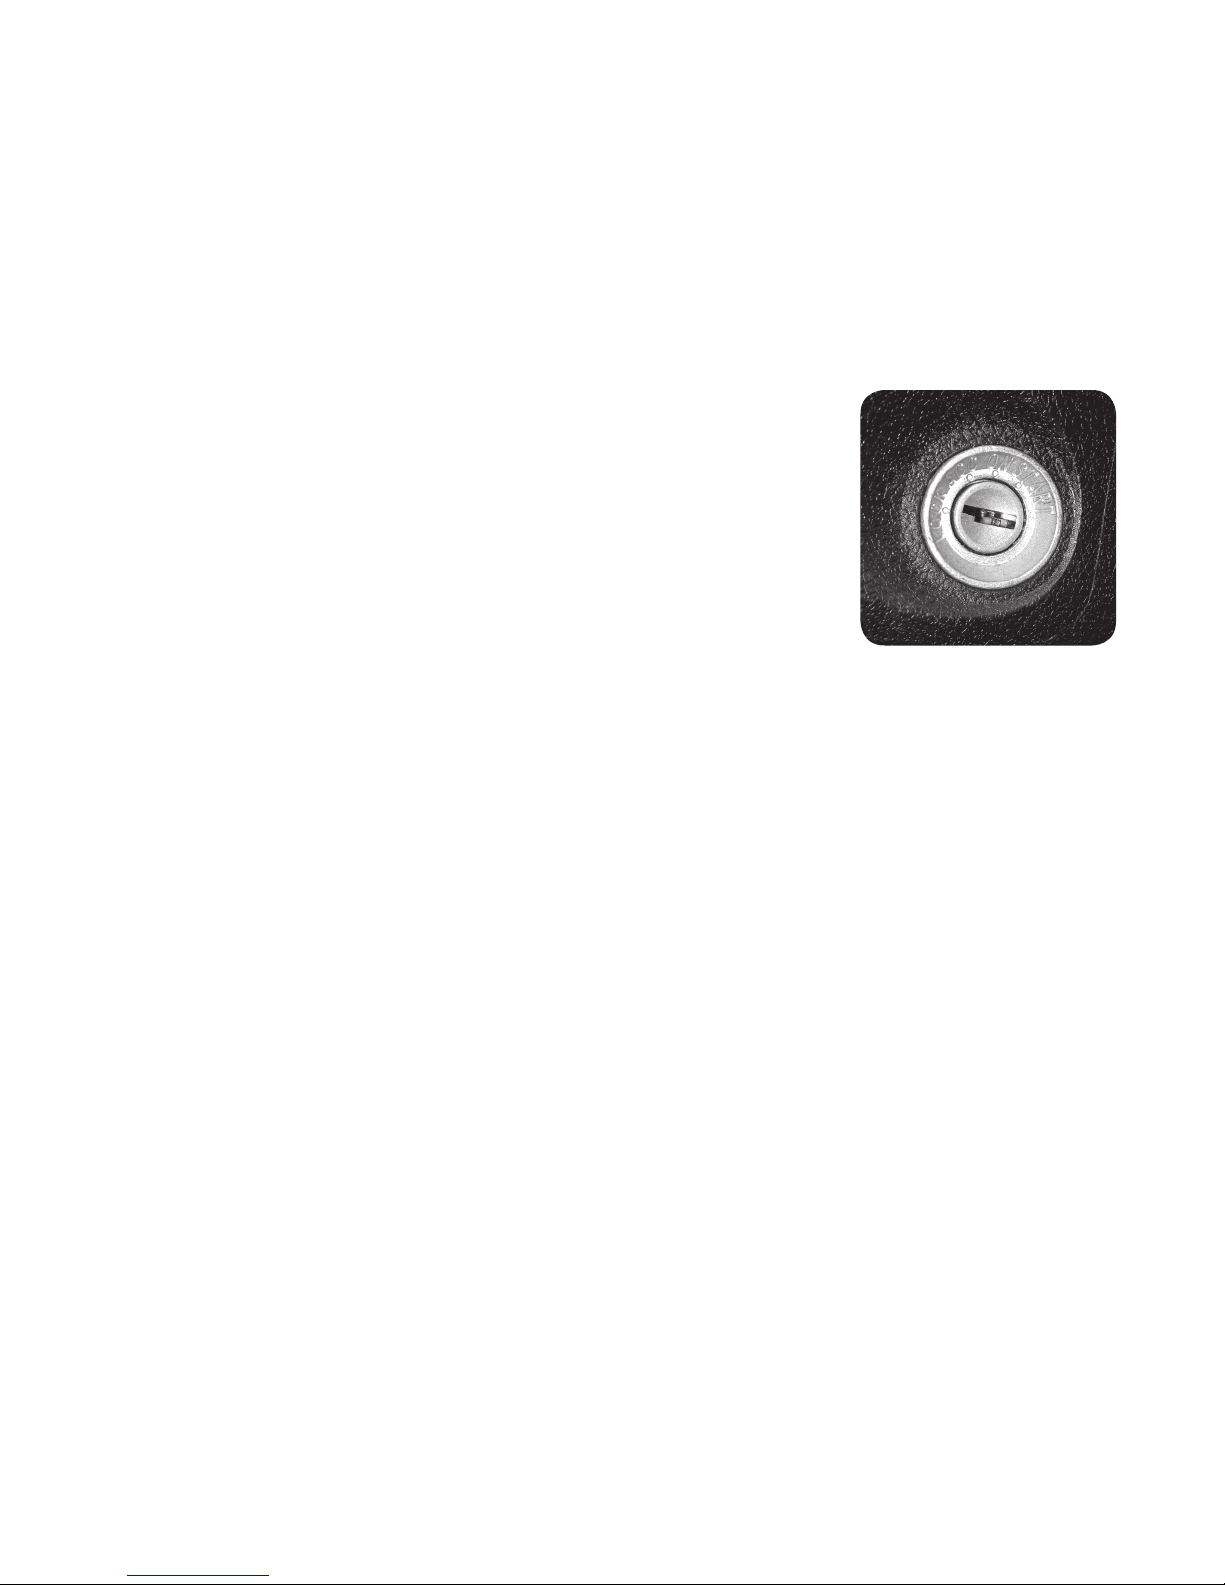
KEY SWITCH
When the key is turned clockwise to the rst “ACC” position the
accessory circuits will be on (radio, lights, etc.). When the key
is turned to the second “ON” position the Battery Discharge
Indicator and Eco-Meter will activate and the car can then be
driven. There is no audible sound when the car is on. If the key is
in the “ON” position and a buzzer sounds, then one of the doors is
probably not completely closed. Close the doors and the buzzer
should stop.
CAUTION
Do not leave the key in the “ON” position when not in use. Doing so will discharge the
batteries.
CAUTION
Never turn the key to the “OFF” position while the vehicle is in motion. This could
lead to loss of speed and loss of control of the vehicle. This can cause a
serious accident.
FOG LIGHTS
Below the steering column to the left are 2 switches. The one on the right is the switch
for the Front Fog Lights. When the taillights or headlights are turned on, pressing this
switch will activate the fog lights. The left switch is non-functional.
CONSOLE
a. Ventilation Controls
b. Radio
c. Rear Defroster/Courtesy Light/12v Accessory Jack
d. Forward/Reverse Shifter
e. Parking Brake
f. Cupholders
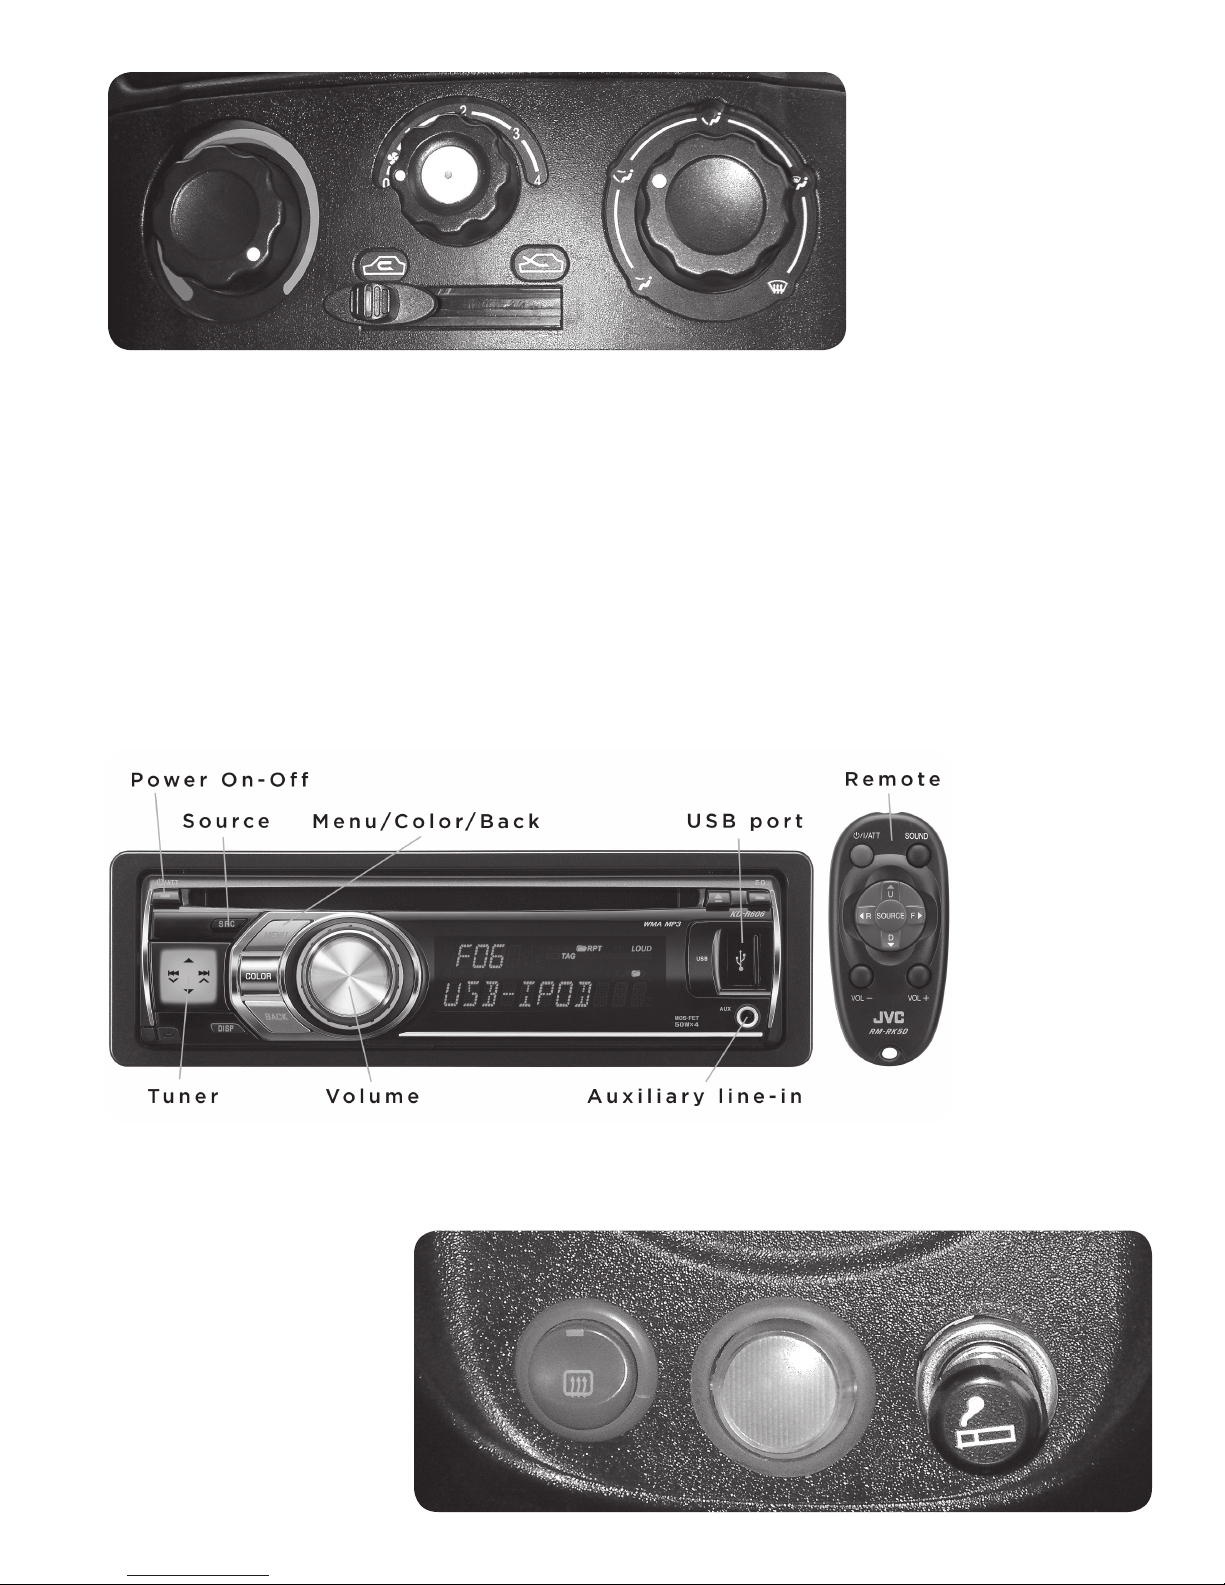
VENTILATION CONTROLS
There are 3 knobs to control the ventilation system. The left knob controls the temperature.
Turn it counterclockwise to increase the temperature and clockwise to decrease the
temperature. The center knob controls the volume of air. Turn it clockwise to increase
airow and counterclockwise to decrease airow. If the vehicle is equipped with Air
Conditioning, after selecting the volume of air you desire by clicking the center knob,
you may press the center knob to turn on the AC compressor.
10
The temperature knob
on the left must be
turned all the way to
cold while running the
Air Conditioner. Pressing
the center knob a second
time will turn the AC off.
The right knob controls
the airow. By selecting
different positions you
can choose where to have
the air enter the passenger compartment. Below the center knob is a control that slides from left
to right. Moving it to the left position will recirculate the air in the vehicle and moving it to the
right position will allow outside air to enter the vehicle through the ventilation system.
RADIO - JVC AM/FM/CD/USB/MP3 RECEIVER
The ON-OFF button is in the upper left corner of the display. The round knob controls the volume.
Pressing the square button on its left or right sides will change the station tuner. Pressing it on
the top or bottom will scroll through the preset stations. Pressing the SRC button will change
the source (AM/FM/AUX/etc.). The USB input jack will communicate with iPhones, iPods, and
thumb drives. Please refer to the JVC Owner’s Manual for detailed instructions on the use of the
radio.
REAR DEFROSTER/
COURTESY LIGHT/12V
ACCESSORY JACK
Below the radio are
3 console- mounted
accessory buttons. From
left to right they are: rear
defroster, courtesy light,
and 12V accessory jack.
Press the rear defroster
button to turn on the rear
11
window defroster. The indicator light will come on. Press it a second time to turn it off. If the lower
half of the courtesy light button is pushed in, then a courtesy light will come on whenever one of
the front doors is open. To turn this off, push the upper half of this button. The 12 volt accessory
jack can be used to provide power for 12 volt accessories that have a cord with a “lighter plug”
style connector. The maximum power available is 15 amps of 12 volt power.
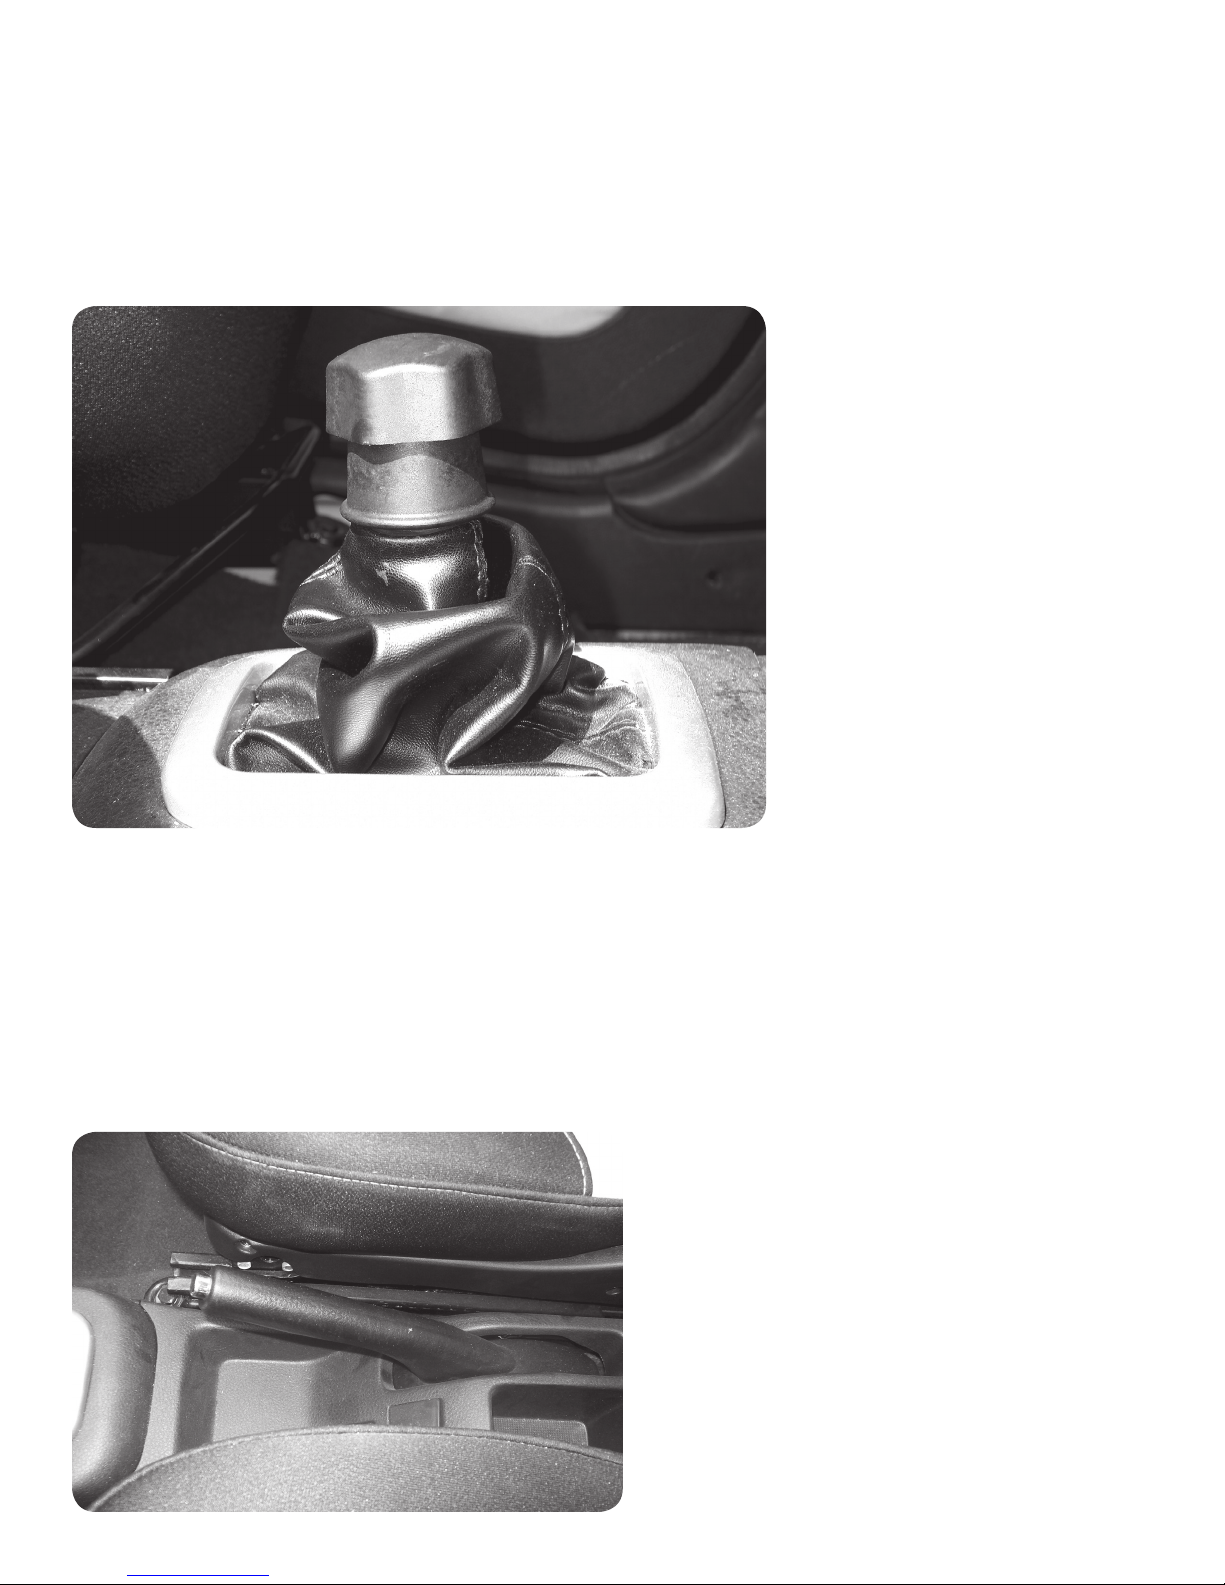
FORWARD/REVERSE SHIFTER
Forward
With the key turned ON and
the brake depressed, pull up
on the lock ring underneath
the shifter knob and move the
shifter from the neutral to the
forward position. Release the
brake and push down on the
accelerator pedal to move the
vehicle forward with a speed
range of 0-25 MPH. Drive only
on APPROVED TRAFFIC”
routes based on Low Speed
Vehicle (LSV) regulations for
your area.
Reverse
With the key turned ON and
the brake depressed, pull up
on the lock ring underneath
the shifter knob and move
the shifter from the neutral to the reverse position. Release the brake and push down on the
accelerator to move the vehicle in reverse. The top speed in the reverse direction is limited for
safety.
CAUTION
Always bring the vehicle to a complete stop before changing the position of the
forward/reverse shifter. Note that there is no Parking Gear- only Forward, Reverse, and Neutral.
PARKING BRAKE
On the oor between the seats is the hand
actuated parking brake. This brake must
be engaged when parking the vehicle
or prior to exiting the vehicle. Grasp
the brake and pull up to engage. Press
the silver button on the end and lower
the brake handle to release the parking
brake. If the key is OFF or removed
from the key switch and the brake is not
engaged a buzzer will sound.
12
NOTE: The parking brake is adjustable
and should be checked periodically by
a trained service technician as shown in
the vehicle maintenance schedule.

WARNING
• Always turn the vehicle OFF and engage the parking brake prior to exiting the vehicle
or it will roll and may cause damage or injury.
• Leaving children unattended in a vehicle is dangerous. Children should be warned not
to touch the parking brake or the shifter lever. Don’t leave the keys in the ignition. A
child could operate controls or move the vehicle.
• Be sure the parking brake is fully disengaged before driving. Failure to do so can lead
to brake problems due to excessive heating of the rear brakes.
CUPHOLDERS
The oor mounted console has several storage compartments and cupholders.
FOOT PEDALS
a. Brake pedal
b. Accelerator pedal
c. Hood release
BRAKE PEDAL
The brake pedal is located on the driver’s oor to the left of the accelerator pedal. To
slow or stop the vehicle, rmly press the foot brake pedal.
WARNING
Riding the brakes can lead to brake failure and possibly an accident. Driving with your
foot resting or riding on the brake pedal can result in abnormally high brake temperatures,
excessive lining wear, possible brake damage, and reduced driving range. Excessive brake
wear could lead to not having full braking capacity in an emergency.
ACCELERATOR PEDAL
The accelerator pedal is located on the driver’s oor next to the center console and is
used to control your speed. Pressing down on the pedal will increase vehicle speed.
WARNING
Always accelerate slowly to prevent possible injury to yourself or others.
HOOD RELEASE
The hood release is located to the left of the brake
pedal in front of the driver’s door. Pull it toward
you to open the hood.
13
 Loading...