

Page 1
1. Using this manual
Thank you for choosing this mobile device.
This device will provide you with high-quality mobile communication and
entertainment based on exceptional technology and high standards.
This manual has been specially designed to guide you through the functions and
features of your device.
1.1 Read me first
●Before using your device,read the entire manual and all safety instructions to ensure
safe and proper use.
●The descriptions in this manual are based on the default settings of your device.
●The images and screenshots used in this manual may differ from the actual product.
●The contents of this manual may differ from the pr oduct, or from software provided
by service providers or carriers, and are subject to change without prior notice.
●Available features and a dditional services may vary by device, software, or service
provider.
●Formatting and delivery of this manual is based on Android T
andmay vary depending on the user’s operating system Version.
●Applications on this device may perform differently from functions available in the
computer version of the operating system.
M
operating systems
1
2. Assembling
2.1 General information
7.0 Nougat,
The phone is a dual SIM phone that encloses features, such as Android
Wi-Fi.etc. This phone is provided with two SIM slots for two different SIM cards.
The SIM card inserted in the slot1 is called SIM1, and the other one in the slot2 is
known as SIM2. You can select to operate SIMs as per your needs.
2
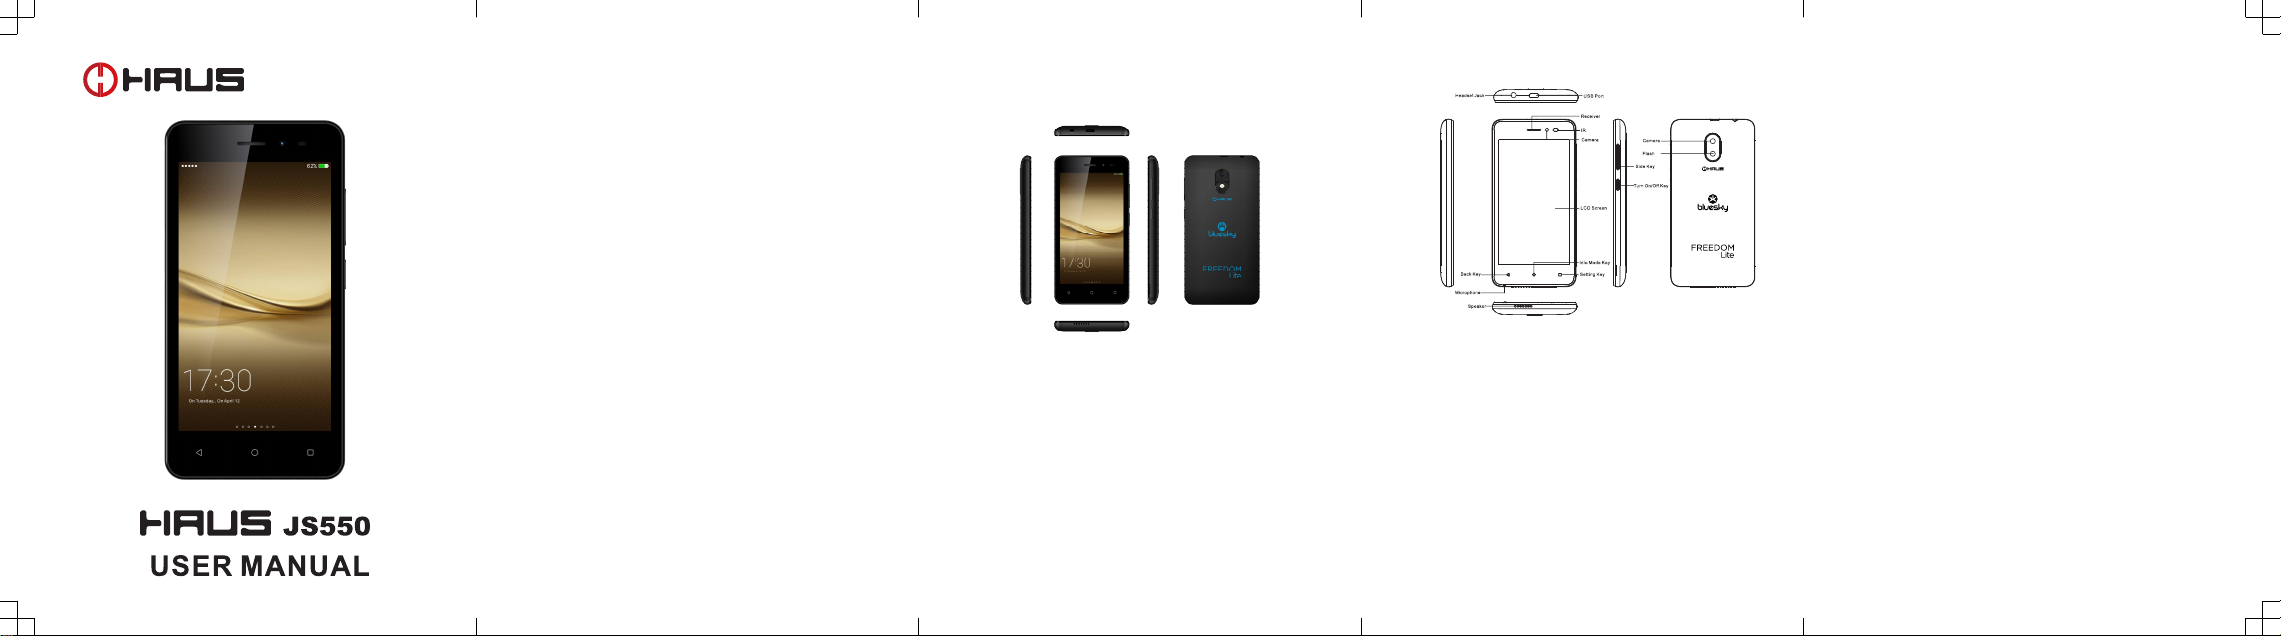
2.2 Phone Overview
2.3 Insert the SIM card
Insert the SIM card when you need a cellular service. Do not insert a memory card into
the SIM card slot.
2.4 Charge the battery
Before using the device for the first time or when the battery has been unused for an
extended period, you must fully charge the battery.
●Use only our approved chargers and cables. Unapproved chargers or cables may
cause batteries to explode or damage your device.
2.5 Insert a memory card
Your device accepts micro SD. Memory cards with maximum capacities of 32 GB,
When you insert a memory card into your device, the memory card’s file directory will
appear in the SD card folder.3
3. Getting started
3.1 Turn on or off your device
Press and hold the Turn on/off key.
3.2 Use the touch screen
Your device’s touch screen lets you easily select items or perform functions. Learn
basic actions for using the touch screen.
3.3 Lock or unlock the touch screen and the keys
Your device will go in standby mode when you do not use it for a specified p eriod. To
turn on the screen, press the Turn on/off key.
●to set standby time, select Settings →Display →Sleep.
3.4 Get to know the Home screen
From the Home screen, you can view your device’s status and access applications.
The H ome scr een has multiple pa nels. Scroll left or right to view the panels on the
Home screen.
Move an item on the Home screen
Tap and hold an item, and then drag it to a new location.
3.5 Access applications
Launch applications and take full advantage of features on your device. You can
reorganize the application list to match your preferences, or download applications
from the Internet to enhance your device’s functionality.
3.6 Launch multiple applications
Your device allows you to multitask by runni ng multiple applications at the same time.
To launch multiple applications, select another a pplication to launch from the Home
screen.
4
Page 2
4. Communication
4.1 Calling
Make a call
1 In the application list, select Phone →Keypad, and then enter an area code and a
phone number.
2 Select to make a voice call.
3 Select to end the call.
Answer a call
1 During an incoming call, Select drag your finger to outside of the large circle
then select
To mute the ringtone, press the side key.
2 Select
4.2 Messages
Learn to create and send text (SMS) or multimedia (MMS) messages, and view or
manage messages that you have sent or received.
Send a text message
1 In the application list, select Messaging →
2 Add recipients:
●Enter phone numbers manually and separate them with a semicolon or a comma.
●Select phone numbers from your contact lists.
3 Select the text field and enter your message text.
4 To send the message, select
to end the call.
5
5. Entertainment
5.1 Camera
Learn how to take and view photos and videos. You can take photos and record videos.
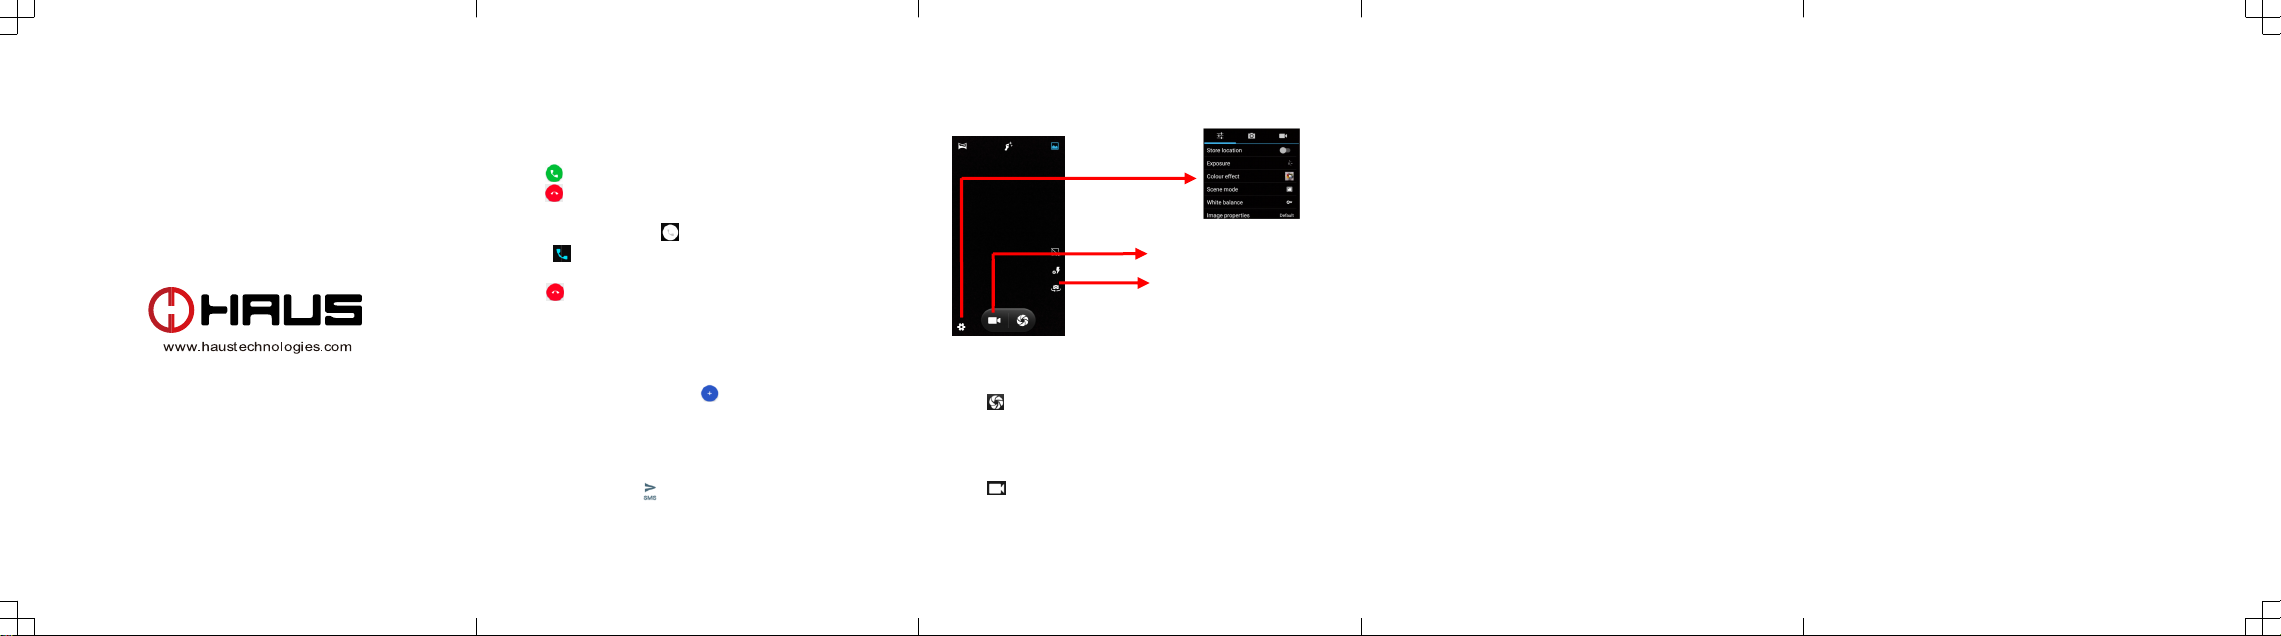
Take a photo
1 In the application list, select Camera.
2 Aim the camera lens at the subject and make
3 Select to take a photo.
The photo is saved automatically.
Record a video
1 In the application list, select Camera.
2 Aim the lens at the subject and make any necessary adjustments.
3 Select to start recording.
5.2 Music player
Learn to listen to your favorite music while on the go.
Add music files to your device
Start by transferring files to your device or memory card:
Tap this icon to open
setting menu
Tap this icon to switch to
video record
Tap this icon to switch to
front camera
6
● Download from the internet.
● Download from a computer with Windows Media Player.
● Receive via Bluetooth.
● Copy to your memory card.
Play music
1 In the application list, select Play Music.
2 Select a music category → a music file.
6. Tools
6.1 Calculator
Learn to perform calculations with your device.
Perform a calculation
1 In the application list, select Calculator.
2 Use the keys on the screen to perform basic calculations.
6.2 Clock
Set an alarm
1 In the application list, select Clock →Alarm.
2 Select Add alarm.
3 Set the details of the alarm.
4 When you are finished, select OK.
Stop an alarm
When the alarm sounds,
●To stop the alarm, select Dismiss
●To silence the alarm for the snooze period, select Snooze.
6.3 Calendar
You can open C alendar to view and manage the events you ha ve created. Touch Menu
icon do the following operations: New event, Refresh, Search, Calendars to display and
Settings.
7
7. Settings
Access the setting options
1 In the application list, select Settings.
2 Select a setting category, and then select an option.
8. E-waste disposable mechanism
'E-waste' means waste electrical and electr onic equipment (WEEE). In other words
E-waste is a popular, informal name for electronic products nearing the end of their
"useful life".
Do’s and Don’ts for disposal e-waste
Do’s:
a. Ensure that an Authorized Person repairs your products
b. Call Our Local Authorized Collection Centers to Dispose products.
c. Always drop your used electronic products, batteries or any accessories thereof
after the end of their life at nearest Authorized Collection Point or Collection
Center.
d. Separate the packaging material according to responsible waste disposal options
and sorting for recycling.
e. Always remove the battery from the product, when you do not intend to use the
product anymore it in future.
Don’ts:
a. Do not Dismantle your product on your own.
b. Do not give your e-waste to Scrap Dealer/ Rag Pickers.
c. Do not dispose-off the e-waste in landfills.
d. Never dump E-waste in garbage bins.
e. Do not dispose of your product at municipal waste bins or rooms.
f. Do not throw used batteries into household waste.
g. Consequences of improper handling and disposal of E-Waste.
Android is a trademark of Google LLC.
8
Page 3

FCC RF Exposure Information and Statement
This device meets the government's requirements for exposure to radio waves. The guidelines are
based on standards that were developed by independent scientific organizations through periodic
and thorough evaluation of scientific studies. The standards include a substantial safety margin
designed to assure the safety of all persons regardless of age or health. The SAR limit of USA
(FCC) is 1.6 W/kg averaged. Device types: 4G Smart Phone (FCC ID: 2AOII-JS550) has also
been tested against this SAR limit. SAR information on this and other pad can be viewed on‐line
at http://www.fcc.gov/oet/ea/fccid/. Please use the device FCC ID number for search. This device
was tested simulation typical 10 mm to body. To maintain compliance with FCC RF exposure
requirements, use accessories should maintain a separation distance between the user's bodies
mentioned above. The use of belt clips, holsters and similar accessories should not contain
metallic components in its assembly. The use of accessories that do not satisfy these requirements
may not comply with FCC RF exposure requirements, and should be avoided.
FCC Warning
This device complies with Part 15 of the FCC Rules. Operation is subject to the following two
conditions:
(1) This device may not cause harmful interference, and (2) this device must accept any
interference received, including interference that may cause undesired operation.
NOTE 1: This equipment has been tested and found to comply with the limits for a Class B digital
device, pursuant to part 15 of the FCC Rules. These limits are designed to provide reasonable
protection against harmful interference in a residential installation. This equipment generates, uses
and can radiate radio frequency energy and, if not installed and used in accordance with the
instructions, may cause harmful interference to radio communications. However, there is no
guarantee that interference will not occur in a particular installation. If this equipment does cause
harmful interference to radio or television reception, which can be determined by turning the
equipment off and on, the user is encouraged to try to correct the interference by one or more of
the following measures:
- Reorient or relocate the receiving antenna.
- Increase the separation between the equipment and receiver.
-Connect the equipment into an outlet on a circuit different from that to which the receiver is
connected.
-Consult the dealer or an experienced radio/TV technician for help.
NOTE 2: Any changes or modifications to this unit not expressly approved by the party
responsible for compliance could void the user's authority to operate the equipment.
 Loading...