

Page 1
ASSEMBLY INSTRUCTIONS
STEP 1: Stationary Option
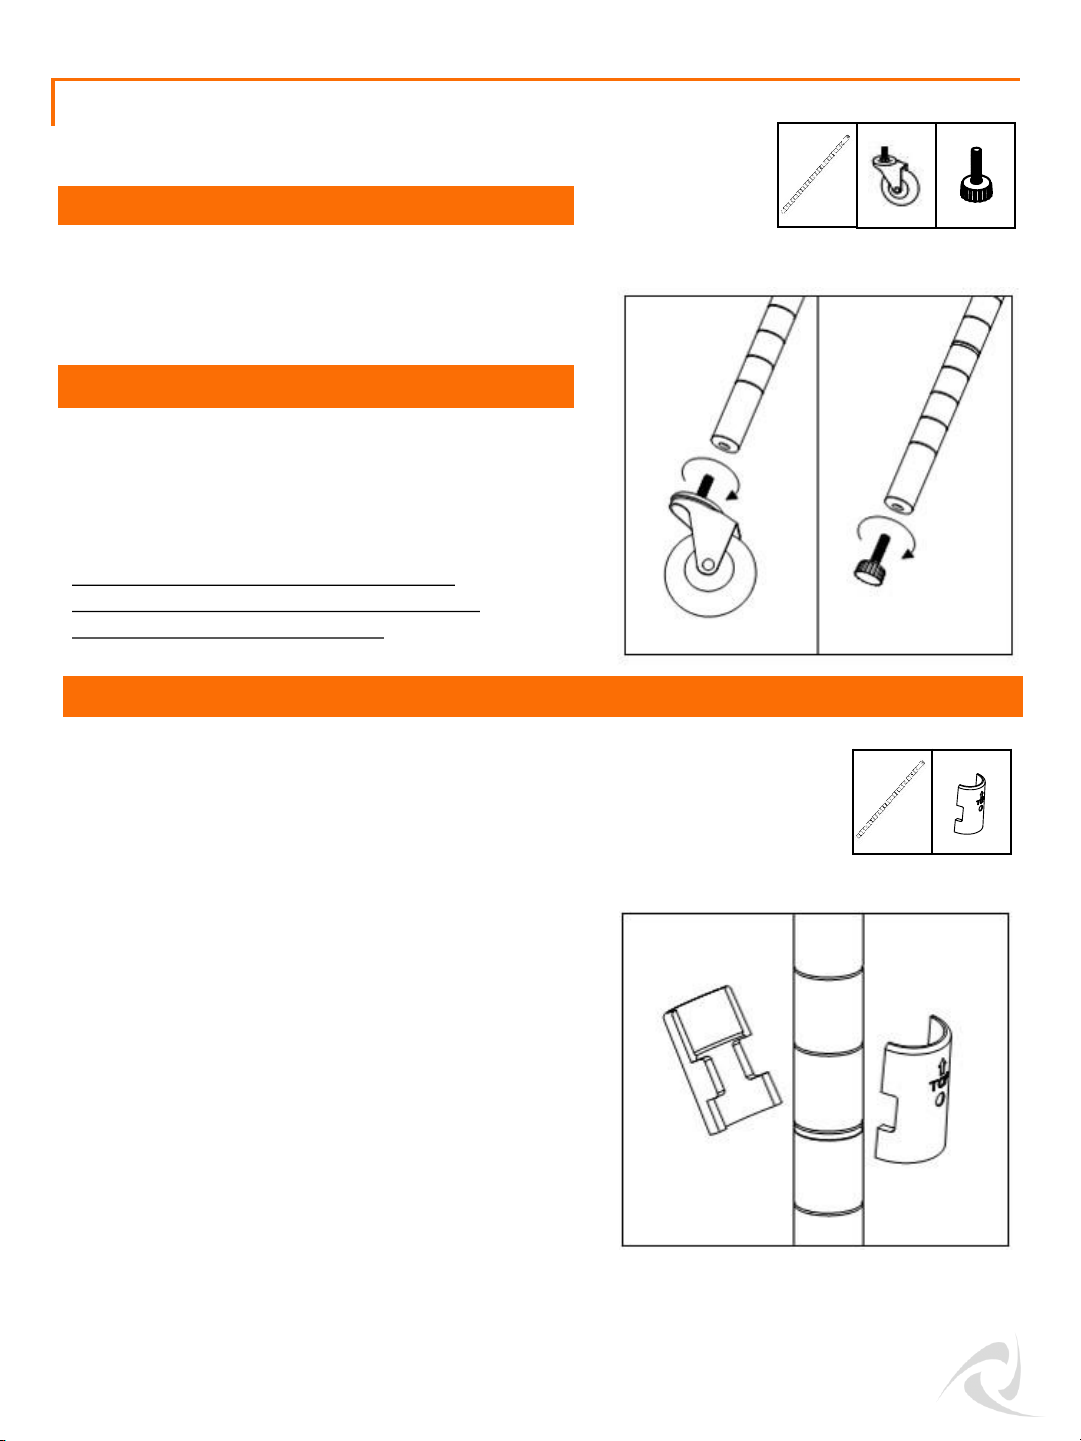
Screw each FEET LEVELER (F) into the bottom of
each BOTTOM POLE (A). Turn clockwise to screw
in place.
STEP 1: Mobile Option
Screw each CASTER (E) into the bottom of each
BOTTOM POLE (A). Turn clockwise to screw in
place. Make sure the Locking Casters are on the
same side.
Use the provided caster wrench to tighten
completely. Failure to do as instructed could
result in the caster stem breaking.
STEP 2: SLIP SLEEVES
For easiest assembly, do not attach the TOP (B) and
BOTTOM (A) POLES until instructed. Once connected,
these will be the posts for the rack.
A (4)
E (4) F (4)
Note that each POLE (A+B) has slight horizontal line
indentations at 1” intervals. Each SLIP SLEEVE (D) has
raised horizontal lines inside designed to lock them in
place on the POLE (A+B).
On the BOTTOM POLE (A), place 1 pair of SLIP SLEEVES (D)
at the desired level. Please make sure the arrow faces up
and that the word “TOP” is right side up. Do this for each
BOTTOM POLE (A) and make sure that the heights are
identical for BOTTOM POLE (A).
Slide the pair of SLIP SLEEVES (D) until you hear a click to
confirm the pair is locked onto the BOTTOM POLE (A). DO
NOT place more than one pair on each POLE (A) at a time.
* For safety and stability, the lowest SHELF (C) should be lower than the 3rdnotch from the bottom.
** Note: There will be a very small gap in-between the SLIP SLEEVES (D)—this is normal.
A (4) D (8)
2
Page 2
ASSEMBLY INSTRUCTIONS
STEP 3: INSTALLING BOTTOM SHELF
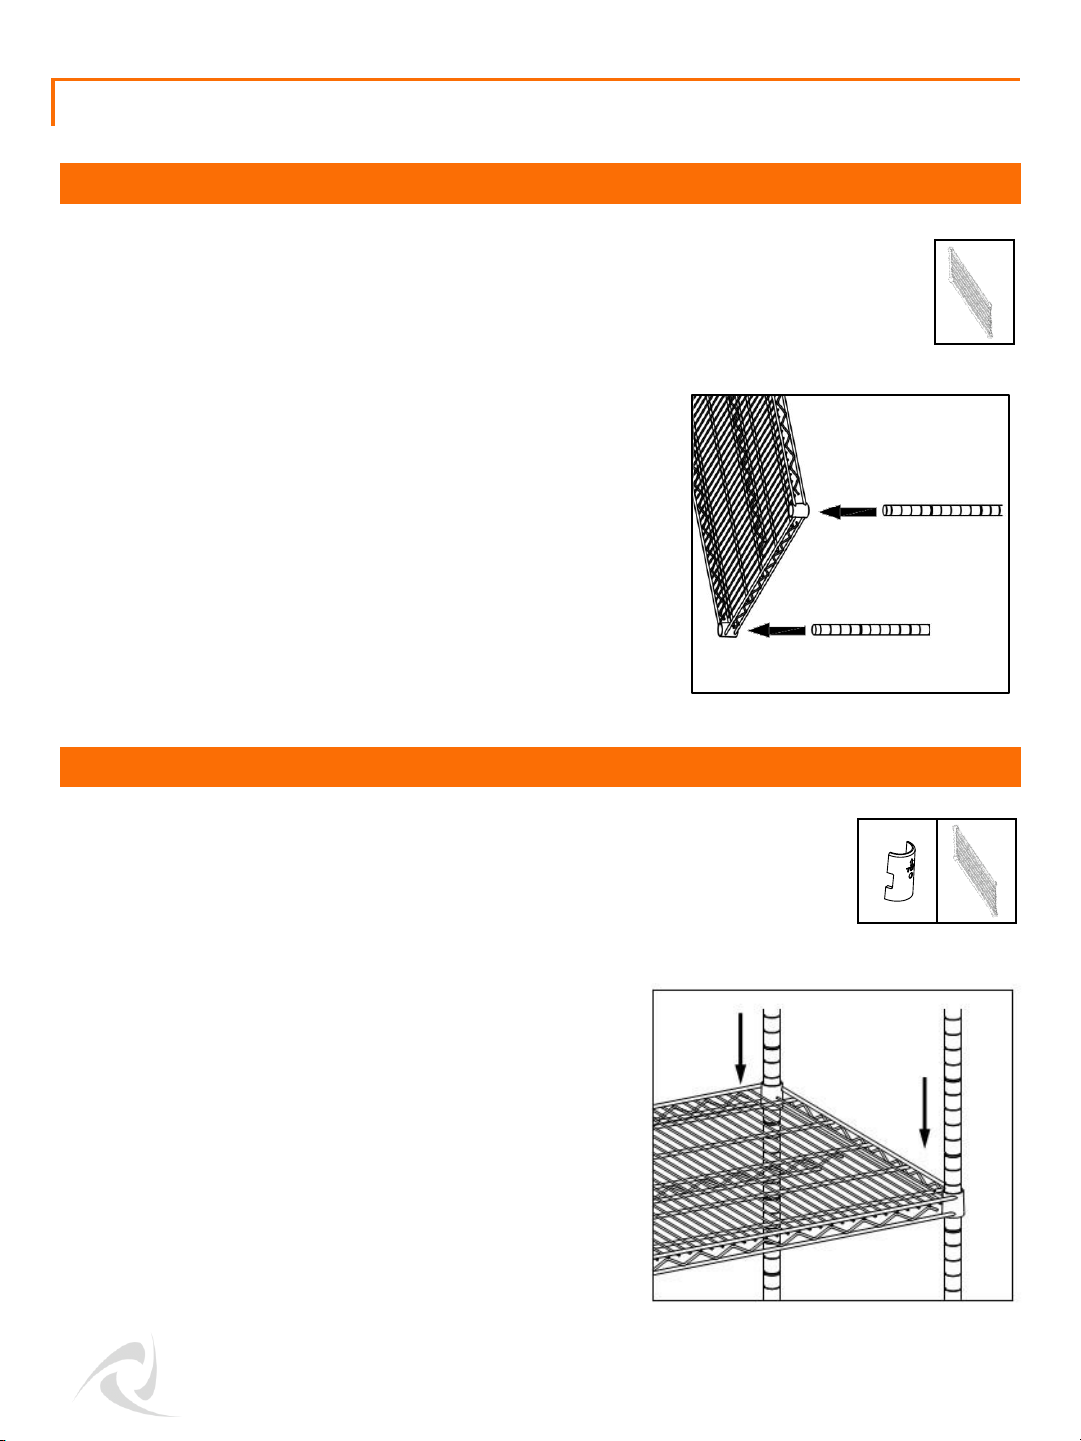
Place SHELF (C) on its side and slide the (4) BOTTOM POLES (A)
through the holes in the SHELF (C). Make sure that the SHELF
(C) corner cylinders are positioned over the SLIP SLEEVES (D).
Stand the unit upright.
*Note: The level side of the SHELF (C) is the TOP side (the logo
on the corner cylinders should be right-side up.)
**Use a rubber mallet, if needed, to secure the SHELF (C).
***For convenience, place BOTTOM POLES (A) with Locking
Casters on the long side of the shelf if the rack will be pushed
against a wall OR if the rack is frequently rolled around like a
cart place BOTTOM POLES (A) with Locking Casters on the side
being pushed or pulled.
STEP 4: INSTALLING SHELVES
On POLE (A), place 1 pair of SLIP SLEEVES (E) at the desired
distance between SHELVES (C). Please make sure the arrow
faces up and that the word “TOP” is right side up. Do this for
each POLE (A), and make sure that the heights are identical
for each POLE (A).
C (1)
D (8) C (1)
Lower SHELF (C) over the BOTTOM POLES (A) so that the
corner cylinders of the SHELF (C) are positioned over the SLIP
SLEEVES (D).
Repeat Step 4 to install other SHELVES (C) as desired.
**Use a rubber mallet, if needed, to secure the SHELVES (C).
3
Page 3
ASSEMBLY INSTRUCTIONS
STEP 5: INSTALLING TOP POLES
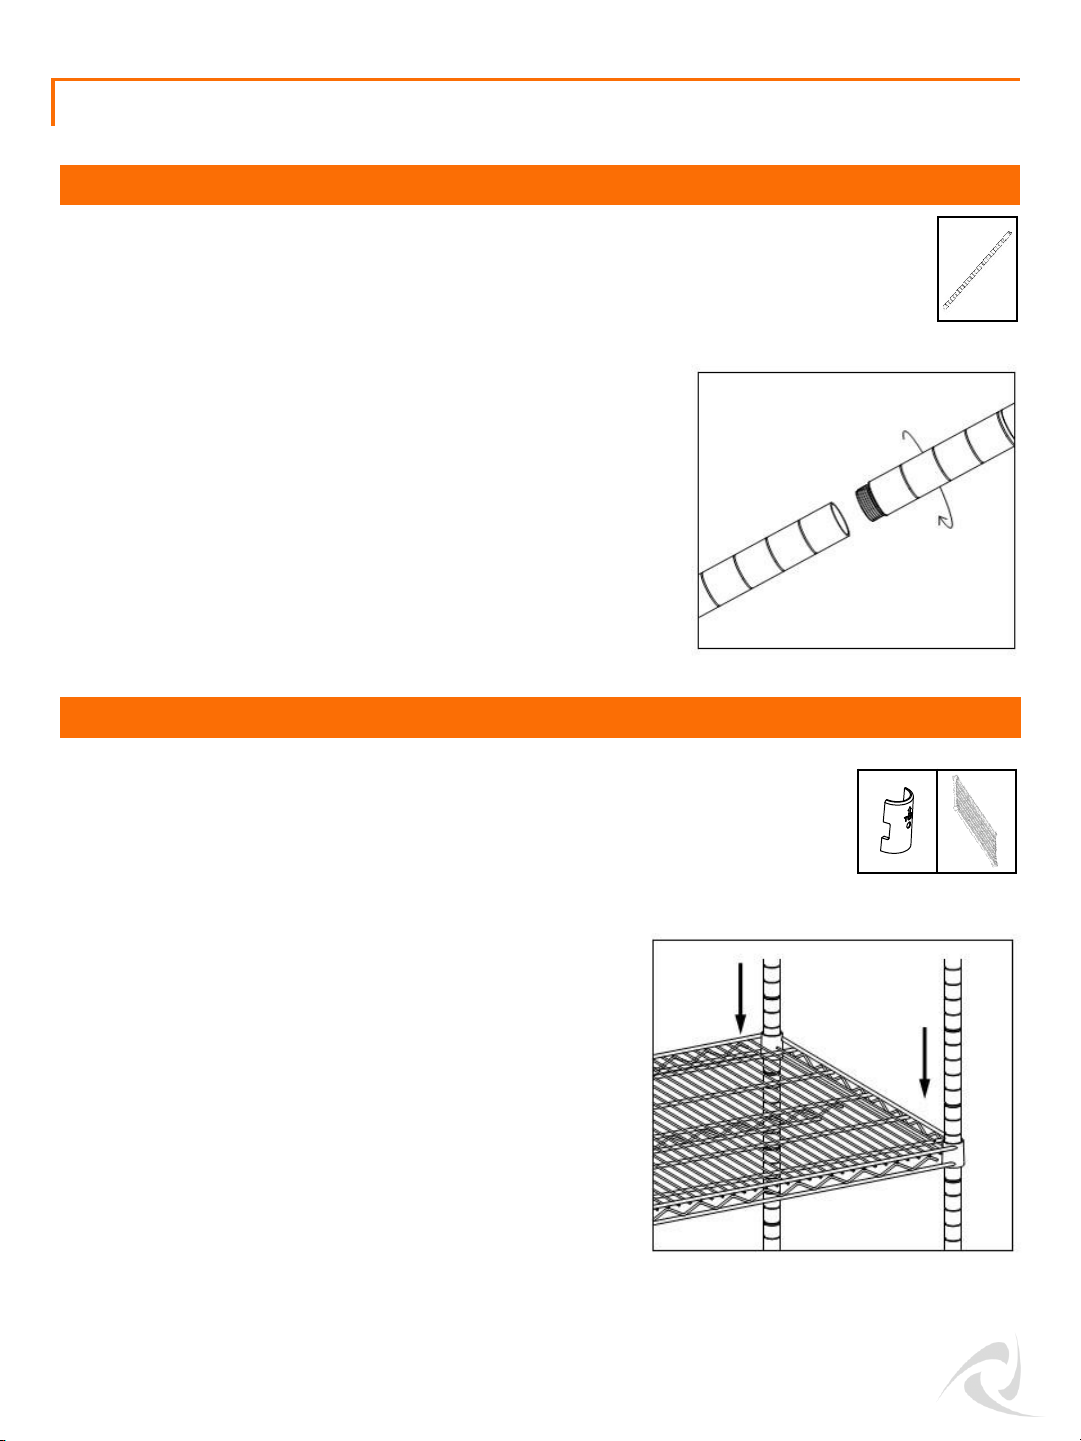
Screw the TOP POLE (B) into the BOTTOM
POLE (A). The tops of these poles are
indicated by the BLACK END CAP.
B (4)
STEP 6: INSTALLING SHELVES
On POLE (A+B), place 1 pair of SLIP SLEEVES (D) at the desired
distance between SHELVES (C). Please make sure the arrow
faces up and that the word “TOP” is right side up. Do this for
each POLE (A+B), and make sure that the heights are
identical for each POLE (A+B).
Lower SHELF (C) over the TOP POLES (B) so that the corner
cylinders of the SHELF (C) are positioned over the SLIP
SLEEVES (D).
Repeat Step 6 to install other SHELVES (C) as desired.
**Use a rubber mallet, if needed, to secure the SHELVES (C).
D (24) C (3)
4
 Loading...