

Page 1
Operator’s Manual
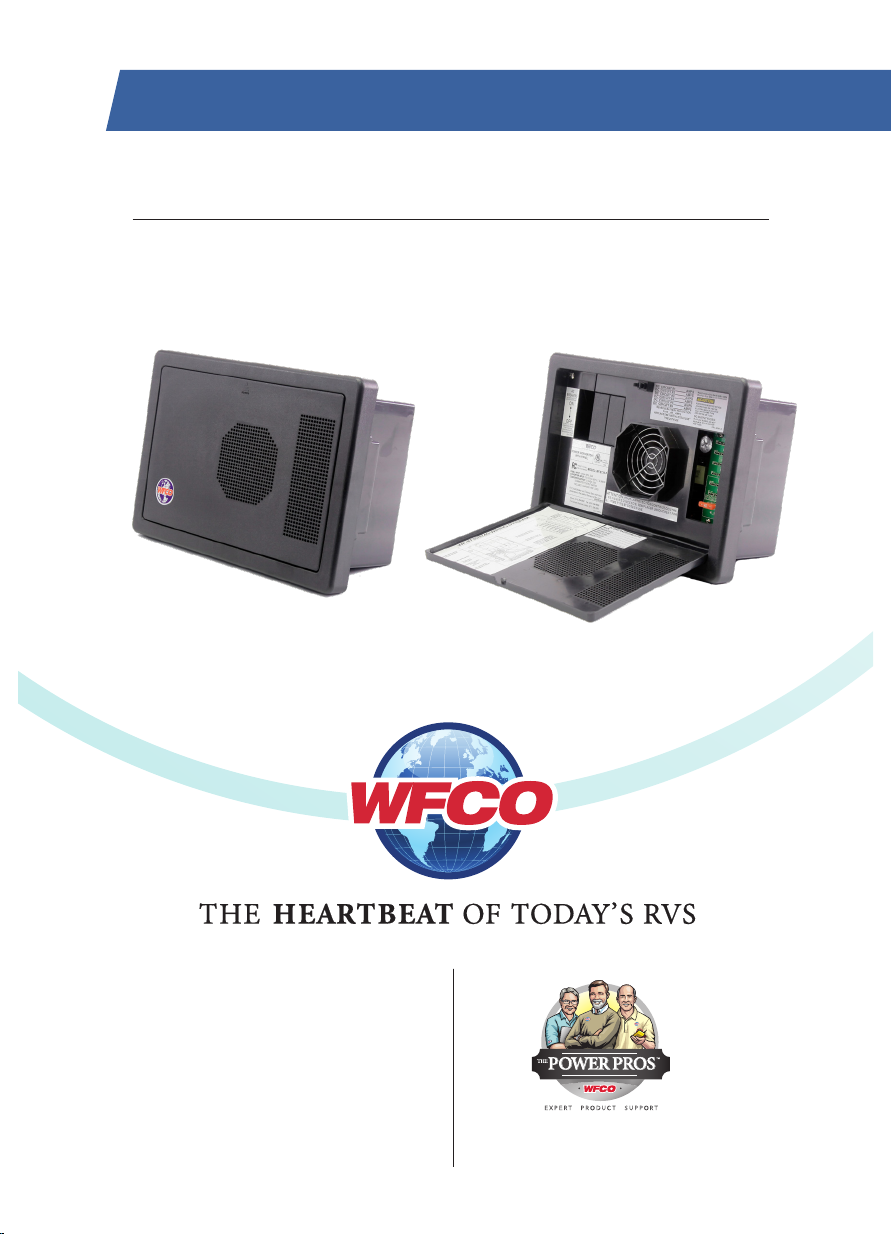
WF-8700 Series
WF-8712P | WF-8725P | WF-8735P | WF-8740P
( The Power Center model number is located on the front panel label near the AC breakers)
Distributed in the U.S.A. and Canada by
ARTERRA DISTRIBUTION
(877) 294-8997
Warranty: [email protected]
Fax (574) 294-8698
www.wfcoelectronics.com
Power PROs Technical Support
(877) 294-8997
Page 2

TABLE OF CONTENTS
SAFETY INFORMATION ........................................................................................................... 3
GENERAL INFORMATION
Reverse Battery Protection ........................................................................................................... 3
Blown Fuse Indicators ................................................................................................................... 4
Automatic Cooling Fan ................................................................................................................ 4
Over-Temperature Protection ...................................................................................................... 4
Electronic Current Limiting ......................................................................................................... 4
Short Circuit Protection ............................................................................................................... 5
CIRCUIT PROTECTION
DC Fuses ......................................................................................................................................... 5
AC Circuit Breaker ........................................................................................................................ 5
UL-Listed Main Circuit Breaker List .......................................................................................... 5
UL-Listed Branch Circuit Breaker List ....................................................................................... 5
OPERATIONAL FEATURES
ree Stage Smart Charging ........................................................................................................ 7
TROUBLESHOOTING INSTRUCTIONS
Converter Output Voltage ............................................................................................................. 8
Reverse Polarity Fuses ................................................................................................................... 8
Troubleshooting Flow Chart ......................................................................................................... 9
GENERAL COMPLIANCE INFORMATION
Agency Listings ............................................................................................................................... 9
INSTALLATION INSTRUCTIONS
Mounting the Enclosure ............................................................................................................... 10
Wiring the AC Breakers ............................................................................................................... 10
Wiring the DC Fuse Board .......................................................................................................... 11
SPECIFICATIONS .......................................................................................................................... 12
WARRANTY INFORMATION .................................................................................................... 13
2
Page 3
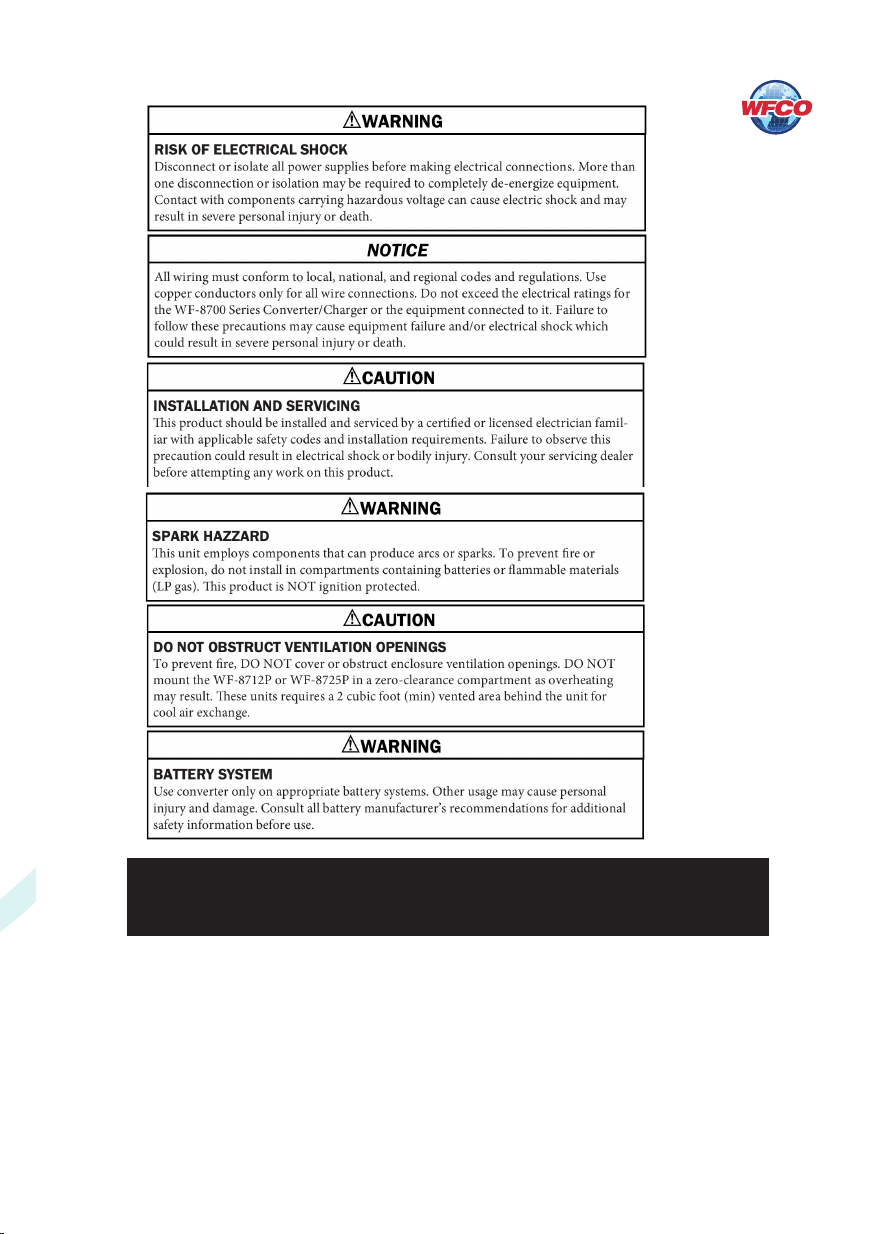
GENERAL INFORMATION
WF-8700 Series Power Center Safety Features
Reverse Battery Protection
e WF-8700 Series Power Centers will charge the 12-volt House battery if installed. A battery
DOES NOT have to be installed for WF-8700 Series Power Center converter operation. When
a battery is installed, a reverse polarity fuse protects the converter circuitry. e fuse is located
along the bottom of the row of fuses. Refer to Figure 1 below. is feature prevents permanent
damage to the converter from a battery connected into the circuit backwards. In addition to
protecting the converter section, the reverse polarity fuse is the main connection between the
converter and the DC fuse board.
3
Page 4

e fuse values and quantity vary depending on which WF-8700 Series Power Center you
have. Refer to the table and drawing below.
• WF-8712 – 15A (1)
• WF-8725 – 30A (1)
• WF-8735 – 40A (1)
• WF-8740 – 30A (2)
Blown Fuse Indicators on DC Fuse Board
e DC Fuse Board has individual blown fuse indicators as standard equipment. e
WF-8712P & WF-8725P have 4 DC circuits (3 Branch and 1 Battery). e WF-8735P and
WF-8740P have 6 DC circuits (5 Branch and 1 Battery). Each of the circuits contain a Red
LED to indicate a blown fuse. If one of the circuits draws more current than the rating of
the fuse, the fuse will blow. When this occurs, the Red LED for that circuit will illuminate.
NOTE: e fuse board employs surface mount LEDs which are barely visible to the naked
eye. Replace the blown fuse with a known good fuse of the same rating. NOTE: If the
replacement fuse blows again, check that circuit for a short or overload condition.
Figure 1
Automatic Cooling Fan
e cooling fan in the WF-8700 Series Power Center is incremental and is controlled by
the current drawn out of the converter to the applied load. NOTE: e WF-8712P does not
have a fan. e on-board microprocessor increases fan speed as the total load increases and
decreases fan speed as the load decreases. Unlike traditional temperature-controlled fans, the
load-controlled fan provides better component cooling by avoiding temperature spikes which
can lead to premature component failure.
Over-Temperature Protection
If the internal temperature of the converter exceeds a critical point, it will shut down. is
protects the unit from excessive heat that may damage sensitive components. e unit will
restart once the temperature inside has dropped.
Electronic Current Limiting
In the event that the output current exceeds the maximum rating for the WF-8700 Series
4
Power Center converter, the output current will remain constant, but the output voltage
will begin to drop. If this occurs, the unit will recover once loads are reduced.
Page 5
Short-Circuit Protection
Should a short-circuit occur in the RV, the WF-8700 Series Power Center converter will
drop the voltage output to zero volts. If the short-circuit condition is removed and no
other fault conditions are detected, the converter will resume normal operation. However,
short-circuit conditions are dangerous, and an RV will require inspection by a qualied
service technician.
CIRCUIT PROTECTION
WF-8700 Series Power Center Fuses and Breakers
DC Fuses (12 Volts)
e DC fuse boards have spaces the Branch, Battery and Reverse Polarity fuses as
described above. Should any of fuses blow, the Branch Circuit fuses and the Reverse
Battery Protection fuses should be replaced with ATC or ATO automotive type fuses such
as:
• Littelfuse type 257
• Bussmann type ATC
AC Circuit Breakers (120/240 Volts)
e AC Breaker side of the WF-8700 Series Power Center is located on the le side of the
enclosure. e WF-8700 Series Power Center accepts standard residential breakers. e
WF-8712P and WF-8725P have spaces for a 30 Amp Main and up to 3 Branch breakers
when using duplex breakers. e WF-8735P and WF-8740P have spaces for a 30 Amp
Main and up to 5 Branch breakers when using duplex breakers. A list of factory tested and
approved breakers follows. e breakers may be purchased at most big-box department
stores and home centers.
UL-Listed Main Circuit Breakers, Rated for 120V, Maximum 30A
e following breakers have been factory tested and approved for use as 30 Amp Main
breakers in the WF-8700 Series Power Center:
Manufacturer Model/Cat. No./Type
Cutler Hammer Type BR and C
omas Betts Type TB or TBBD
ITE/Siemens Type QP or QT
Square D Type HOM or HOMT
Murray Type MP-T or MH-T
General Electric Type THQL
UL-Listed Branch Circuit Breakers, Rated for 120V, Maximum 20A
e following breakers have been factory tested and approved for use as Branch breakers
in the WF-8700 Series Power Center:
5
Page 6

Manufacturer Model/Cat. No./Type
Cutler Hammer Type BR and C, Type BRD, BD and A
omas Betts Type TB or TBBD
ITE/Siemens Type QP or QT
Square D Type HOM or HOMT
Murray Type MP-T or MH-T
General Electric Type THQL
When replacing any of the installed circuit breakers, the replacement should be of the same
manufacturer, type designation, and equal interrupting rating, not to exceed 30A. e
“Short-Circuit-Current” rating for the breaker should be 10,000 Amps.
Breaker Filler Plates: Model #FP-01 or FP-01B (Black)
6
Figure 2
Page 7

OPERATIONAL FEATURES
Converter Operation Modes
ree-Stage Smart Charging
In order to maximize battery life, it is best to charge batteries slowly, keep them topped o
with a trickle-charge when the RV is not being used. e 3-Stage “smart” charger
continuously measures the battery voltage output and regulates the amount of charge
using three modes of operation; Absorption, Bulk and Float modes.
All WFCO power converters are automatic three-stage switching power supplies. e
converter senses which mode it needs to be in by checking the RV system voltage.
e converter normally provides a constant target output voltage of 13.6 VDC (nominal)
to power all the branch circuits. However, it is current limited, and if the output (load)
current reaches its maximum, the output voltage will drop as necessary to hold the
converter’s maximum output current level (the Amperage rating) without exceeding it.
If the output current reaches its maximum (normally caused by a discharged battery),
this will cause the converter to go into Bulk Mode, which means the target output voltage
will change to 14.4 VDC and a timer will start. Although the converter is outputting 14.4
VDC, you will not be able to read that on a voltmeter due to the voltage-current
relationship. From the paragraph above, as load current increases, output voltage
decreases. e actual output voltage will not rise until the load current is reduced, which
happens naturally as the battery charges or if 12 VDC appliances are turned o.
Bulk Mode will be maintained until the current draw drops to approximately ve Amps,
or until the timer reaches four hours (whichever happens rst). en the target output
voltage is changed back to 13.6 VDC for Absorption Mode. Lights that are powered from
the output may change brightness slightly at that tim
Figure 3
Note: For a detailed explanation of the charging modes, please refer to our publication
“eory of Operation”, document #AD-TD-0001-0.
TROUBLESHOOTING INSTRUCTIONS
7
Page 8

Troubleshooting the WF-8700 Series Power Center
Refer to the Troubleshooting Guide for the WF-8700 Series Power Center (Figure 4) below.
Check Converter Output Voltage
Before checking the WF-8700 Series Power Center output voltage, disconnect the battery
cables at the battery. Make sure the converter is plugged into an AC source (105-130 VAC).
Check the converter output voltage at the battery with a voltmeter. Place the meter probes
on the discon-nected battery cables; place the Positive (red) meter probe on the + Positive
red battery wire and place the Negative (black) meter probe on the - Negative black wire on
the battery cable. Be sure you have good connections at the cables. If the voltage reads 13.6
VDC (+/- 0.2) with no load, the converter is functioning properly.
If the converter output voltage at the battery reads 0.0 VDC, or if the battery is not
charging, check for an open inline fuse in the battery wire circuit. One may have been
installed by the RV manufacturer. Also check for loose wiring connections.
NOTE: e battery circuit (Red wire) should have the following fuse installed:
WF-8712P – Circuit #4 – 15 A
WF-8725P – Circuit #4 – 30 A
WF-8735P – Circuit #6 – 30 A
WF-8740P – Circuit #6 – 30 A
Reverse Polarity Fuses
If there is no DC output coming from the WF-8700 Series Power Center converter section,
rst check the reverse polarity fuse(s) on the fuse board. en, visually inspect the fuses for
any breaks in the fuse element. If no breaks are found, use a continuity tester to check for
continuity. If the reverse polarity fuses are blown, it means the RV battery was accidentally
connected in reverse, either at the battery or at the converter. Investigate the connections
and reconnect the cables properly. Replace the fuse with the same type and Amperage
rating as the original.
IMPORTANT: ese fuses protect the converter from damage in the event that the RV
battery is accidentally connected in reverse. A reversed battery connection, even if for only
a second, will cause these fuses to blow.
If the above checks have been made but the converter output still reads 0.0 VDC, the
converter is not functioning properly. Contact the Arterra Distribution Power PROs at
1 (877) 294-8997. Before placing the call, please have available the WF-8700 Series Power
Center model number from the front panel label and the 14-digit serial number from the
bar code tag located on the fan panel. e fan panel is accessible aer the door assembly has
been removed.
8
Page 9

Figure 4
Should it be determined that the converter section of the WF-8700 Series Power Center
is defective, and the unit is under warranty, the entire unit will need to be returned. e
converter section is not user serviceable.
When preparing the unit for return, remove the AC breakers. Label and disconnect each
wire as they are removed from the breakers and Ground and Neutral bars. e DC wires
protruding from the back of the WF-8700 Series Power Center have been connected to the
DC circuits in your RV by the RV manufacturer. In a similar fashion, label and disconnect
these wires. Follow the packaging instructions in your warranty claim packet.
GENERAL COMPLIANCE INFORMATION
Agency Listings
UL
e WF-8700 Series Power Centers are UL-Listed, and cUL-Listed (Canadian).
FCC Compliance Class B
NOTE: is equipment has been tested and found to comply with the limits for a Class B
digital device, pursuant to Part 15 of the FCC Rules. ese limits are designed to provide
reasonable protection against harmful interference when the equipment is operated in a
commercial envi-ronment. is equipment generates, uses, and can radiate radio
frequency energy, and if not installed and used in accordance with the instruction manual,
may cause harmful interference to radio communications. Operation of this equipment
in a residential area is likely to cause harmful interference in which case the user will be
required to correct the interference at his own expense.
9
Page 10

INSTALLATION INSTRUCTIONS
Installing the WF-8700 Series Power Center
Mounting the Enclosure
e WF-8700 Series enclosure should be mounted in an accessible area such as a wall or in the
side of a cabinet. e front of the enclosure should not be obstructed to allow free air ow for
the cooling fan. NOTE: e WF-8712P does not have a fan. e enclosures will slide into rough
openings as follows:
• WF-8712P and WF-8725P – 10 7/16” W x 6 1/8” H x 3 ¾” D
• WF-8725P and WF-8735P – 10 3/8” W x 6 7/8” H x 4 5/16” D
Aer wiring is completed, the enclosure fastens to the wall or cabinet using 4 wood screws (not
supplied).
Wiring the AC Breakers
Make sure no AC power is coming into the RV from either the Shore Power cord or an onboard generator. Determine the proper size breakers for the loads the WF-8700 Series Power
Center will be powering. You can use either single or duplex breakers, or a combination of both.
We recommend that all the breakers used be of the same brand. A total of 4 breakers can be
mounted in the WF-8712P and WF-8725P when using duplex breakers: 1 Main breaker and up
to 3 Branch breakers. A total of 6 breakers can be mounted in the WF-8735P and 8740P when
using duplex breakers: 1 Main and up to 5 Branch breakers. Refer to the tables on pages 5 and 6
for a selection of approved breakers. e Main breaker should be 30 Amp and is to be installed
in the le-most position. See the wiring diagrams below. A hold down clip is provided to keep
the breaker securely in place.
e 30 Amp power cord is routed through the large knockout in the back of the wiring
compartment and secured with a Romex clamp. e Black (Hot) wire is connected to the 30
Amp Main breaker as shown. e White (Neutral) wire is connected to the Neutral Terminal bar
at the bottom of the wiring compartment. e Green (Ground) wire is connected to the Ground
Terminal bar also located at the bottom of the compartment.
Route the Romex leads for the Branch circuits through the Strain Reliefs in the back of the
wiring compartment. In a similar fashion, connect the Black wire to the Branch breaker and the
White and Green wires to the appropriate Terminal bar.
e Black power wire for converter power on the WF-8735P and WF-8740P has a pigtail
connection. e metal pin is inserted in the Branch breaker designated for converter power.
e end with the wire nut can be used to power another circuit if necessary. If not used, leave
the wire nut installed and push the wire to the side. Make sure all terminals are torqued to the
10
specications listed on the back of the door assembly.
Page 11

Wiring the DC Fuse Board
Make sure the house battery is disconnected before beginning the DC wiring. Determine
what DC loads are to be connected to the fuse board and what position they will occupy. All
4 circuits on the WF-8712 and WF-8725 Power Centers have up to 20 Amp ATO or ATC
fuses installed. On the WF-8735 and WF-8740 Power Centers, circuits F5 and F6 can be
used for slide-outs or other higher current loads and can have a maximum 30 Amp ATO or
ATC fuse installed. e remaining 4 circuits are general purpose and can have up to 20 Amp
ATO or ATC fuses installed. Make sure the fuses are seated properly.
Figure 5
11
Page 12

All models have wire lead connections. Strip approximately 1/4” of insulation from the wires
and attach to the appropriate connected load using a wire nut or other approved method. Make
sure the connectors are tightly secured.
Connect the heavy wire (Red) coming from the battery to the Red 10AWG wire coming from
the back of the enclosure.
As a last step, install a separate bus bar in a location behind the converter. Connect the 10AWG
White wire coming from the back of the enclosure to this bus bar. Connect the battery negative
wire to this bus bar along with all the negative DC load wires. Also, run a wire from the bus bar
to chassis ground.
12
Figure 6
Page 13

CONSUMER LIMITED WARRANTY
for WFCO Electronic Products
WFCO extends, to the original owner, a Two Year Limited Product Warranty. is
warranty is in eect from the date of original purchase for a period of two (2) years. is
limited warranty is extended specically for and is limited to Recreational Vehicle
application and is
Provinces of Canada.
in material and workmanship under normal use and service based on its intended use and
function. is warranty is limited to the repair or replacement, at WFCO’s discretion, of any
defective parts or defective assembly. Any implied warranties of merchantability or tness
for intended use are limited in duration unless applicable State Law provides otherwise. You
may have other rights as specied by each individual state.
only valid within the continental United States, Alaska, Hawaii and the
WFCO warrants, to the owner, that its products are free from defects
EXCLUSIONS and LIMITATIONS
e OEM warranty specically does not apply to the following:
• Any WFCO product that has been repaired or altered by an unauthorized person;
• Any damage caused by misuse, faulty installation, testing, negligence, accident or any
WFCO product installed in a commercial vehicle;
• Any WFCO product, whose serial number has been defaced, altered or removed;
• Any WFCO product, whose installation has not been in accordance to the WFCO
written instructions;
• Any consequential damages arising from the loss of use of the product including but not
limited to: inconvenience, loss of service, loss of revenue, loss or damage to personal
property, cost of all services performed in removing or replacing the WFCO product.
Specications are subject to change without notice or obligation.
• Any WFCO Electronics products sold through unauthorized Internet sources
(Example: eBay) will be excluded from all warranty coverage oered by Arterra
Distribution / WFCO.
CONSUMER WARRANTY CLAIM PROCEDURE
Upon determination and validation by an authorized OEM dealer that a WFCO product has a
defect, a Return Goods Authorization (RGA) number will be required before the product can
be returned. e RGA number can be requested by completing the Warranty Information Fax
Sheet and appropriate Troubleshooting Form found at www.wfcoelectronics.com. Once these
forms have been completed, email the forms along with Proof of Purchase to
[email protected] or fax the three documents to the Warranty Department at
(574) 294-8698. Aer receipt of the forms, an RGA number will be issued. is number shall
appear on all correspondence with warranty service. Upon validation of the warranty, WFCO
shall replace the product with a like product. e RGA number shall be placed on the outside
of the carton used to return the product for ease of identication. Do not mark directly on
the product. e product must be packaged properly to avoid further product damage which
could cause a non-warrantable condition.
WARRANTY ASSISTANCE
e consumer may contact the selling Dealer or OEM for warranty assistance.
e consumer may also contact Arterra Distribution, exclusive distributor to WFCO
Products at: (574) 294-8997 or Fax (574) 294-8698.
13
Page 14

Figure 7
14
Page 15

Figure 8
15
Page 16

WFCOELECTRONICS.COM
 Loading...