

Wet Sounds WW-BT-VC User Manual
Operation Instructions:
The WW-BT-VC is easy to operate. One knob performs dierent
functions depending on how long you turn and hold it:
Instruction Duration
Tap
Press briey
Turn Approx: 1 second
Turn and hold Approx: 3 seconds
Bluetooth® device is connected to phones using a procedure called
pairing. By following a few simple steps, a phone can easily be
paired with the WW-BT-VC.
1. Press the knob and hold until you see red and blue LED
lights blinking . At this time, it gets into pair status.
2. Set your Bluetooth phone to search for the Bluetooth®
device (WW-BT-VC).
Follow your phones instruction guide for Bluetooth® pairing. First
make sure that Bluetooth is activated on your mobile phone. Then
set your phone to discover the Bluetooth device. This usually
involves going to settings, connect or Bluetooth menu on your
phone and selecting the option to discover or add a Bluetooth
device. Your phone will nd the Bluetooth® receiver under the
name WW-BT-VC. After selecting WW-BT-VC your phone will
conrm when pairing is complete.
Play music
(Some phones may require you to start a media player
rst)
• Tap the knob once.
Pause music
• Tap the knob to pause, and tap again to resume playing.
Skip one track forward
• Turn the knob clockwise.
Skip one track back
• Skip one track back
Adjust volume UP
• Turn and hold the knob clockwise.
Adjust volume DOWN
• Turn and hold the knob counter-clockwise.
Installation Instructions:
• Hook the red wire to 12volt +
• Hook the black wire to 12 volt -
• Insert a 3.5 mm audio cable into the back of the device and connect
to your source or amplier.
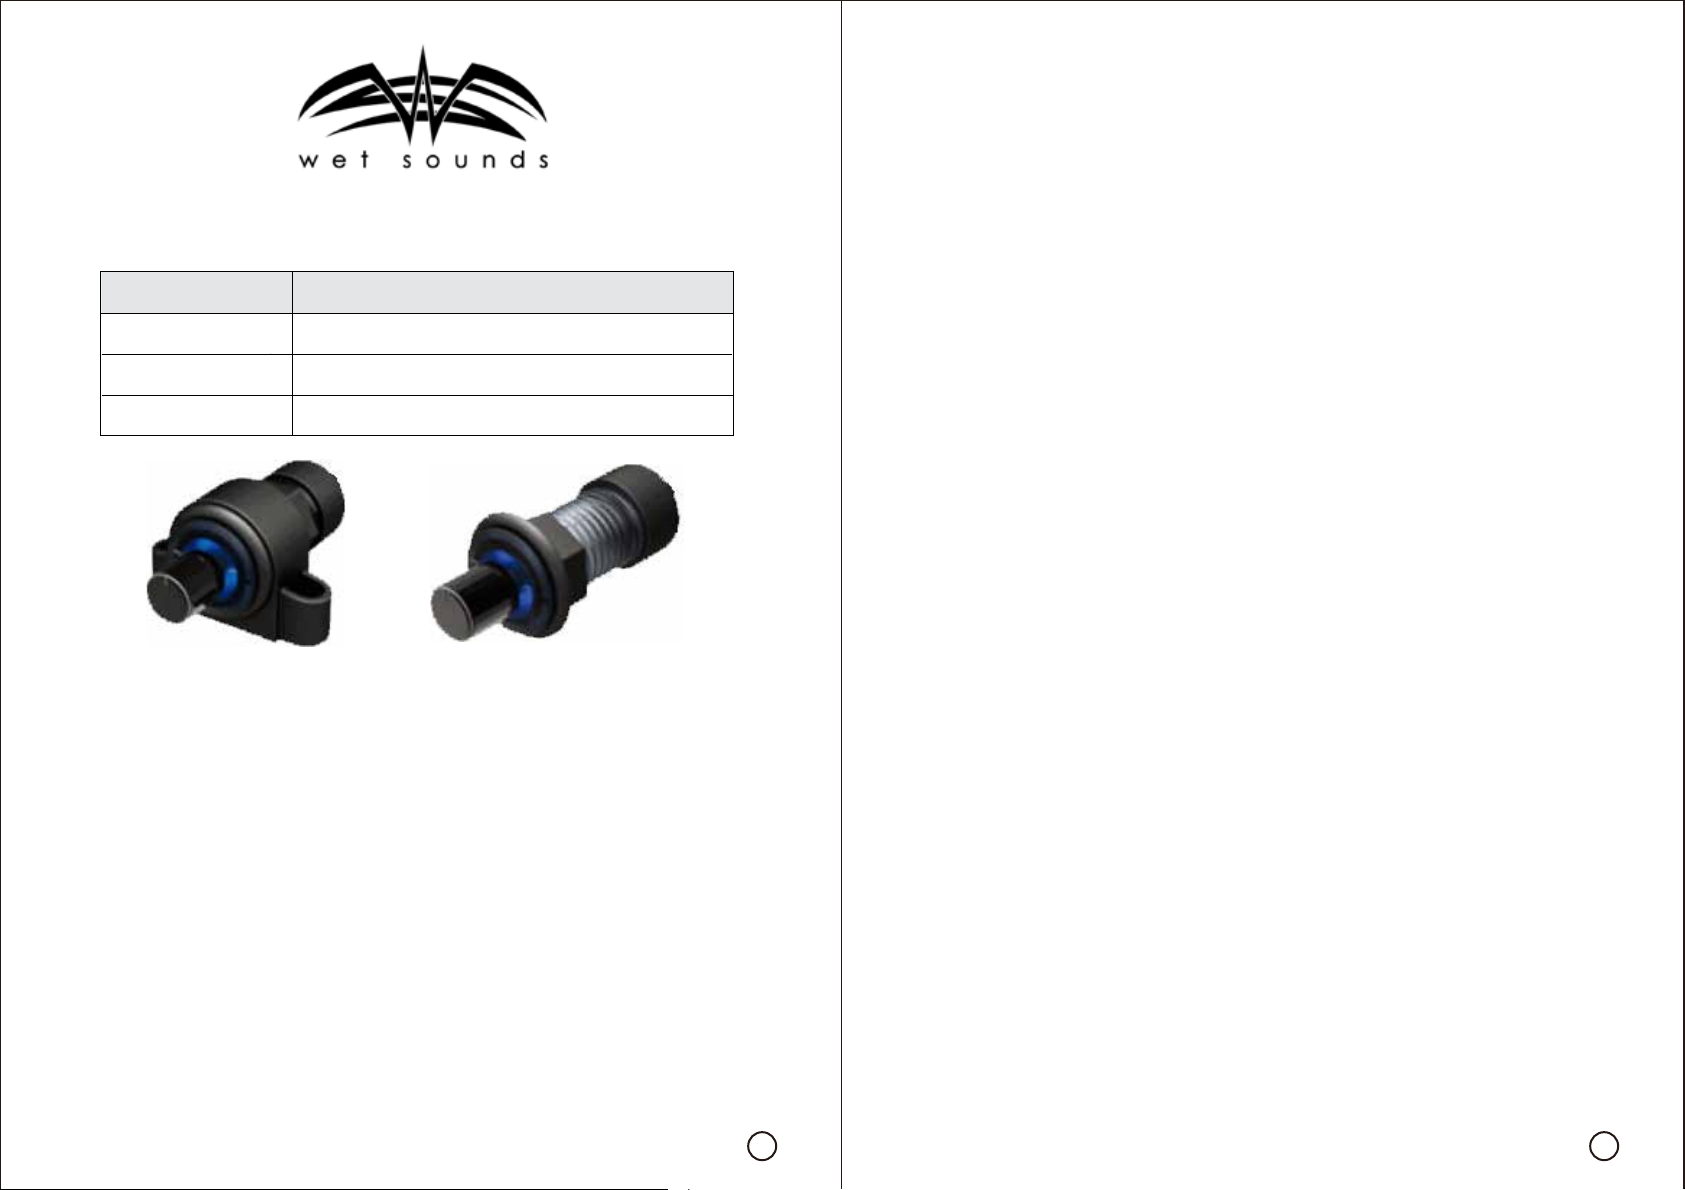
Surface Mount Instructions:
Use the 2 Phillips screws to mount
Flush Mount Instructions:
Drill a 7/8" hole. Unscrew the locking nut on the back of the device
and pull apart. Slide the unit thru the hole and attach the nut on the
back side.
Note: You can adjust the orientation of the knob in either of
the two mounting positions by loosening the nut on the back
side and rotating the knob to a dierent position. Example,
the mark can either be at 12, 3, 6 & 9 o'clock position.
1 2
 Loading...