

Wet Sounds SYN-DX 2 User Manual
SYN-DX SERIES
FULL RANGE CLASS-D AMPLIFIERS
SYN-DX 2, SYN-DX 4 , SYN-DX 6 ,
OWNER'S MANUAL
HIGH PERFORMANCE MARINE AUDIO
wetsounds.com
1
CONGRATULATIONS!
Thank you for purchasing the Wet Sounds SYN-DX series amplier. Wet Sounds
represents the ultimate in High Performance Marine Audio. Wet Sounds SYN-DX
Series Marine Ampliers are designed to be a complete solution for every type of
extreme marine application. SYN-DX ampliers use superior performance circuitry
by utilizing Class D Power Supplies. These ampliers have extreme power output
packed inside a small chassis, thermal overload protection, exible crossovers,
extended inputs. SYN-DX ampliers are a well balanced match for all of the Wet
Sounds™ products.
WARNING
We build all Wet Sounds products to play at high volumes for extended periods of
time. Your ears however are not designed for high volume listening. This product
can easily generate high volumes that can permanently damage your hearing.
We urge you to limit your exposure to very high volume sound. You may also nd
your state has laws governing the volume of an audio system. Please be aware
of all local and state laws in your area. A Properly tuned and operated audio
system will deliver years of enjoyment when used properly.
WARNING
Please check the installation location before you begin. Do not cut any of the boats
structure. Pay close attention to what items are behind the panels and carpet.
Often the manufacturer will hide wires, mechanical or other electronic devices in
the exact locations you wish to install in.
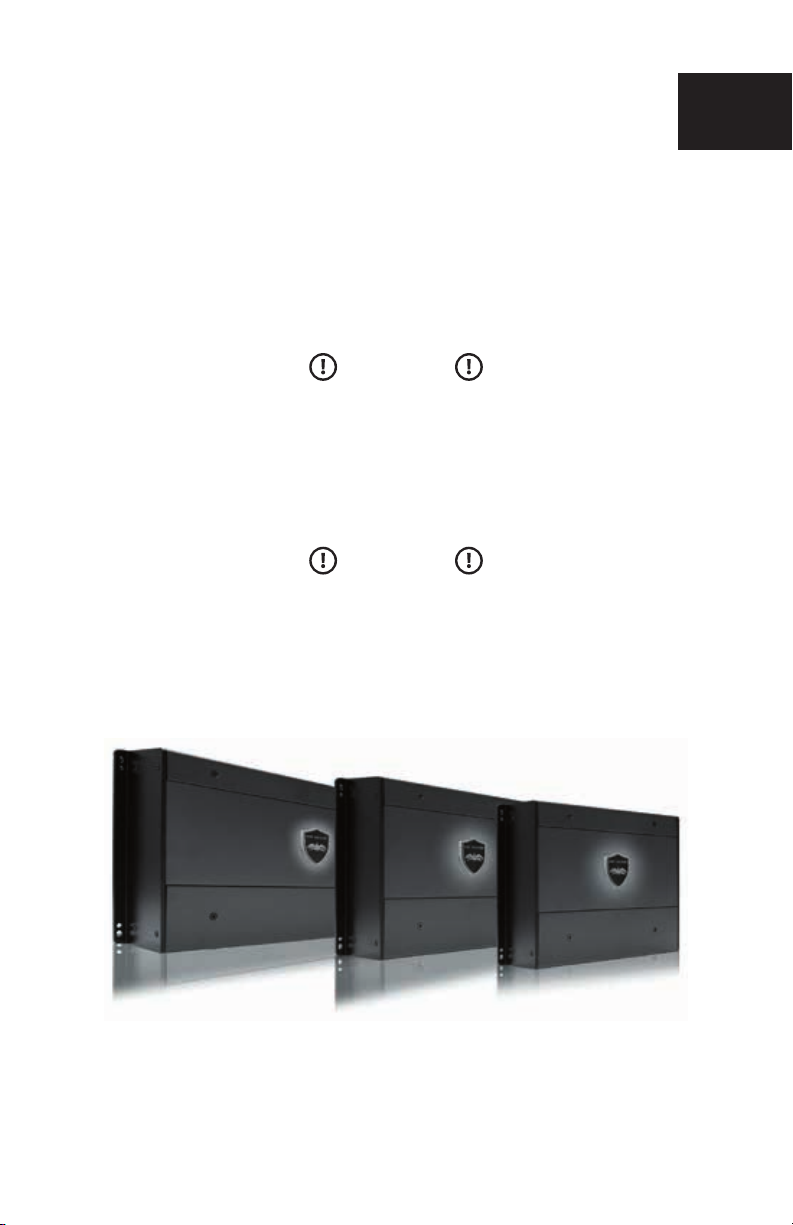
WET SOUNDS SYN-DX SERIES AMPLIFIERS
Wet Sounds SYN-DX Series Owner’s Manual

2
INSTALLATION INSTRUCTIONS
Wet Sounds Marine Ampliers are designed for easy installation in your boat. To
ensure proper installation of your new purchase please follow all the suggestions
listed below. If you do not have experience with marine electrical and
mechanical systems contact a professional installer. Paying a qualied
installer is almost always cheaper than paying a dealership to repair your
boat.
LOCATING THE AMPLIFIER
The amplier must be securely mounted to a solid surface. Please select a
dry location to mount your amplier. All Wet Sounds products are designed to
operate in humid environments however direct contact with water can damage
the electronics. Do not mount the amplier to any area that may have excessive
vibration (like a subwoofer enclosure). Position the amplier in an area that
receives sufcient airow for proper heat dissipation.
SUPPLYING ENOUGH POWER
Your amplier does NOT make power; it converts power, or current, from your
boats electrical system and converts it into high power musical energy. If the amp
can’t get all the power it needs it will not produce its full output. Your Wet Sounds
amplier will produce full output longer than other amplies on the market today.
Should your voltage or current drop too low the amplier will drop below the rated
output. Make sure your boats charging system is in good working order. Any high
performance audio amplier will increase the demand on your alternator and
battery. If you are unsure have you charging system checked system testing by a
professional technician.
Wet Sounds SYN-DX Series Owner’s Manual
3
RUNNING THE WIRING CABLES
**Always keep the signal cable and the power cables separated to prevent the
possibility of inducing noise into the system**
Carefully run the power and the signal cables through the boat. Always keep all
the wire tight and tied down to prevent the power wire from shorting and reduce
the risk of re. A 4 AWG or larger wire should be used for power and ground
connections. We recommend a fuse to be installed on the power wire within 18
inches of the battery for safety.
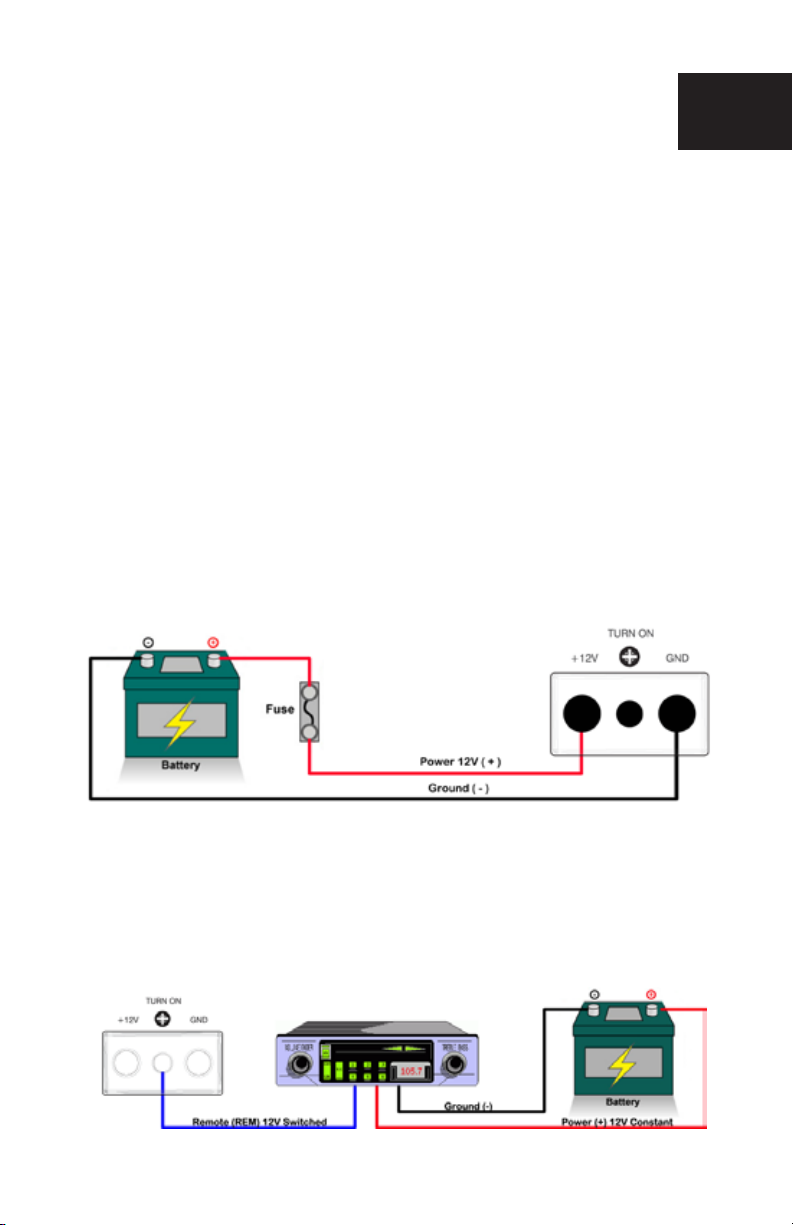
AMPLIFIER CONNECTIONS
**Make sure that the +12 volt cable is NOT connected to the battery while making
any of the connections until all the connections and the fuse are installed**
Power Connections
The SYN-DX Series is designed for 4 AWG Power wire (+12 V) and Ground wire
(GND). You will need to prepare the wire by remove 5/8” on the protective shielding
on the power and ground wire. Then take a Phillips head screwdriver and back out
the screws on the terminal block. Insert the +12 volt wire into the +12V side of the
terminal block and then tighten the screw back into the terminal block. You will do
the same for the Ground wire. See below
REMOTE CONNECTION
This amplier is designed to accept a 12 AWG – 16 AWG wire input on the terminal
block for speaker outputs 1 and 2. (Diagram A). The Remote Turn-on is how the
amplier knows when to turn on and off. This is typically connected to the remote
output wire on an aftermarket radio. When connecting this amplier to a factory
radio, you will need to nd a +12 volt accessory wire that switches on and off with
the key.
Wet Sounds SYN-DX Series Owner’s Manual
4
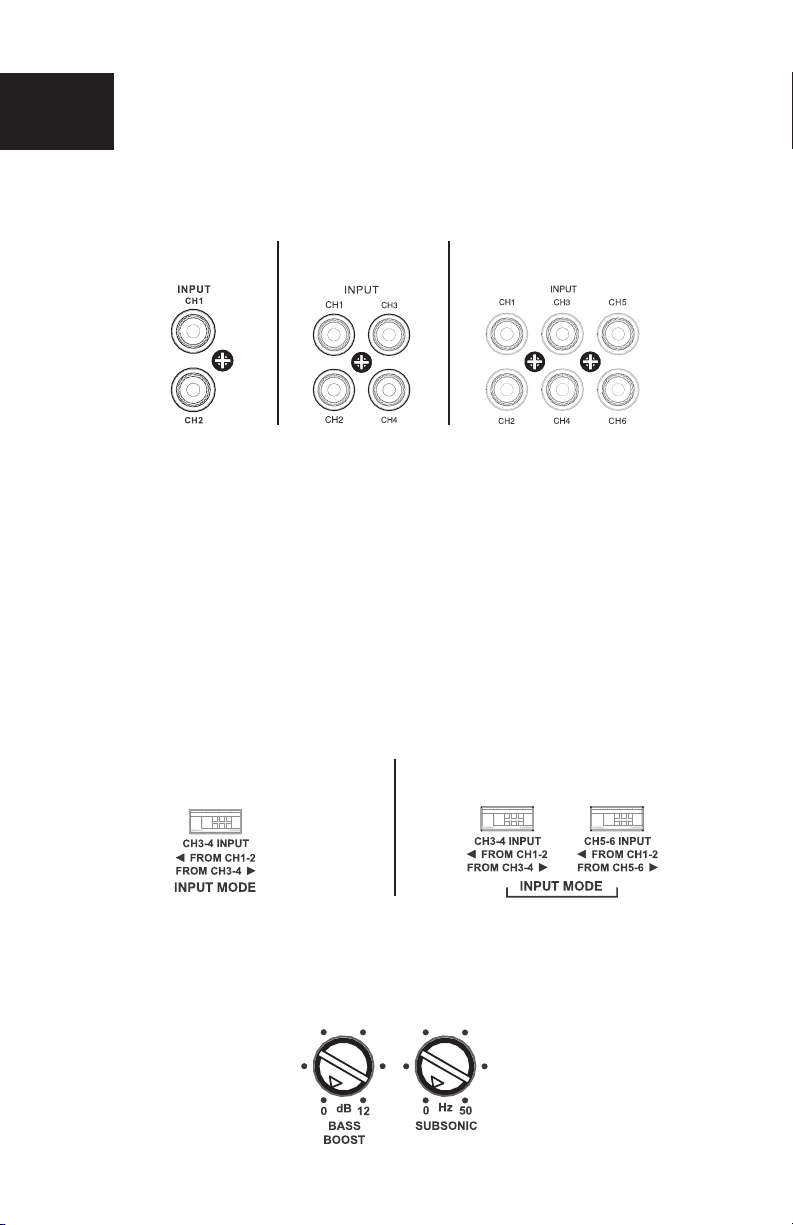
AMPLIFIER SIGNAL INPUTS
Connect the RCA outputs from the source unit into the inputs of the amplier. The
SYN-DX Series has 1 pair of inputs for each pair of channels.
SYN-DX 2 SYN-DX 4
SYN-DX 6
On the SYN-DX 4, there is 1 input selection switch. The switch is used to
designate 2 or 4 channel input. You can select FROM CH 1-2 when only using 1
set of RCA inputs to allow all 4 channels to have output from 1 set of RCAs (CH
1,2,3, & 4). You can select FROM CH 3-4 to use both sets of inputs.
On the SYN-DX 6, there are 2 different input selection switches. The rst is to
designate 2 or 4 channel input. You can select FROM CH 1-2 when only using 1
set of RCA inputs to allow all 4 channels to have output from 1 set of RCAs (CH
1,2,3, & 4). The next is to turn on or off the inputs for channels 5 & 6.(See below)
Ch 5 & 6 can be carried over from inputs 1 & 2 when you select FROM CH 1-2, or
a separate set of RCA cables can be used when you select FROM CH 5-6.
**NOTE if you only use the amplier in 2 channel input mode you will not
have fading capabilities between front and rear outputs.**
SYN-DX 4
SYN-DX 6
SYN-DX 2 ADVANCED SUBWOOFER CONTROLS
The SYN-DX 2-Channel Amplier is equipped with additional features / controls
when using a subwoofer on this amplier. There is BASS BOOST and SUBSONIC
FILTER. For any assistance in setting this up, please contact Wet Sounds Technical
Support at 877-938-7757.
Wet Sounds SYN-DX Series Owner’s Manual

5
SPEAKER TERMINAL INPUTS
The SYN-DX Series utilizes removable speaker terminal blocks for easier
installations and stronger power connections. The terminal blocks are designed to
accept 12 AWG- 16 AWG speaker wire. When preparing the wire you will need to
strip 5/8” of the cables protective shielding. Then take a small Phillips or at head
screwdriver and back out the screw on the terminal block. Insert the speaker wire
into the terminal block and then tighten the screw back into the terminal block. (DO
NOT OVERTIGHTEN) (See below)
POWER INDICATOR
The amplier is equipped with a dual illumination LED on the top of the amplier
that the Wet Sounds logo badge is mounted on. This amplier is equipped with an
advanced diagnostic system controlled by a microprocessor. In the event that the
unit goes into protection for any reason it will ash a diagnostic code. The different
sequences indicate the “Code” for faster trouble shooting. When the amplier rst
turns on the LED will ash blue. Once the amplier is ready for use the LED light
will change to solid blue. If the amplier is in protection mode (over voltage, under
voltage, DC offset, thermal heating or speaker short) the LED light will ash a red
diagnostic sequence. See troubleshooting section for further detail.
Wet Sounds SYN-DX Series Owner’s Manual
 Loading...