

Page 1
620 Applegate St. • PO Box 518 • Philomath, OR • 541-929-5650 • fax 541-929-5277 • www.wetlabs.com
BPA50 Battery Core Replacement (P/N FAA-000934)
Parts List
• Battery core • Two 6-32 x 3/8 in. socket head cap screws
• Two size 238 O-rings, pre-lubricated • One 7/64 in. hex wrench for 6-32 screws
Changing Battery Core
1. Disconnect any cables plugged into the BPA50.
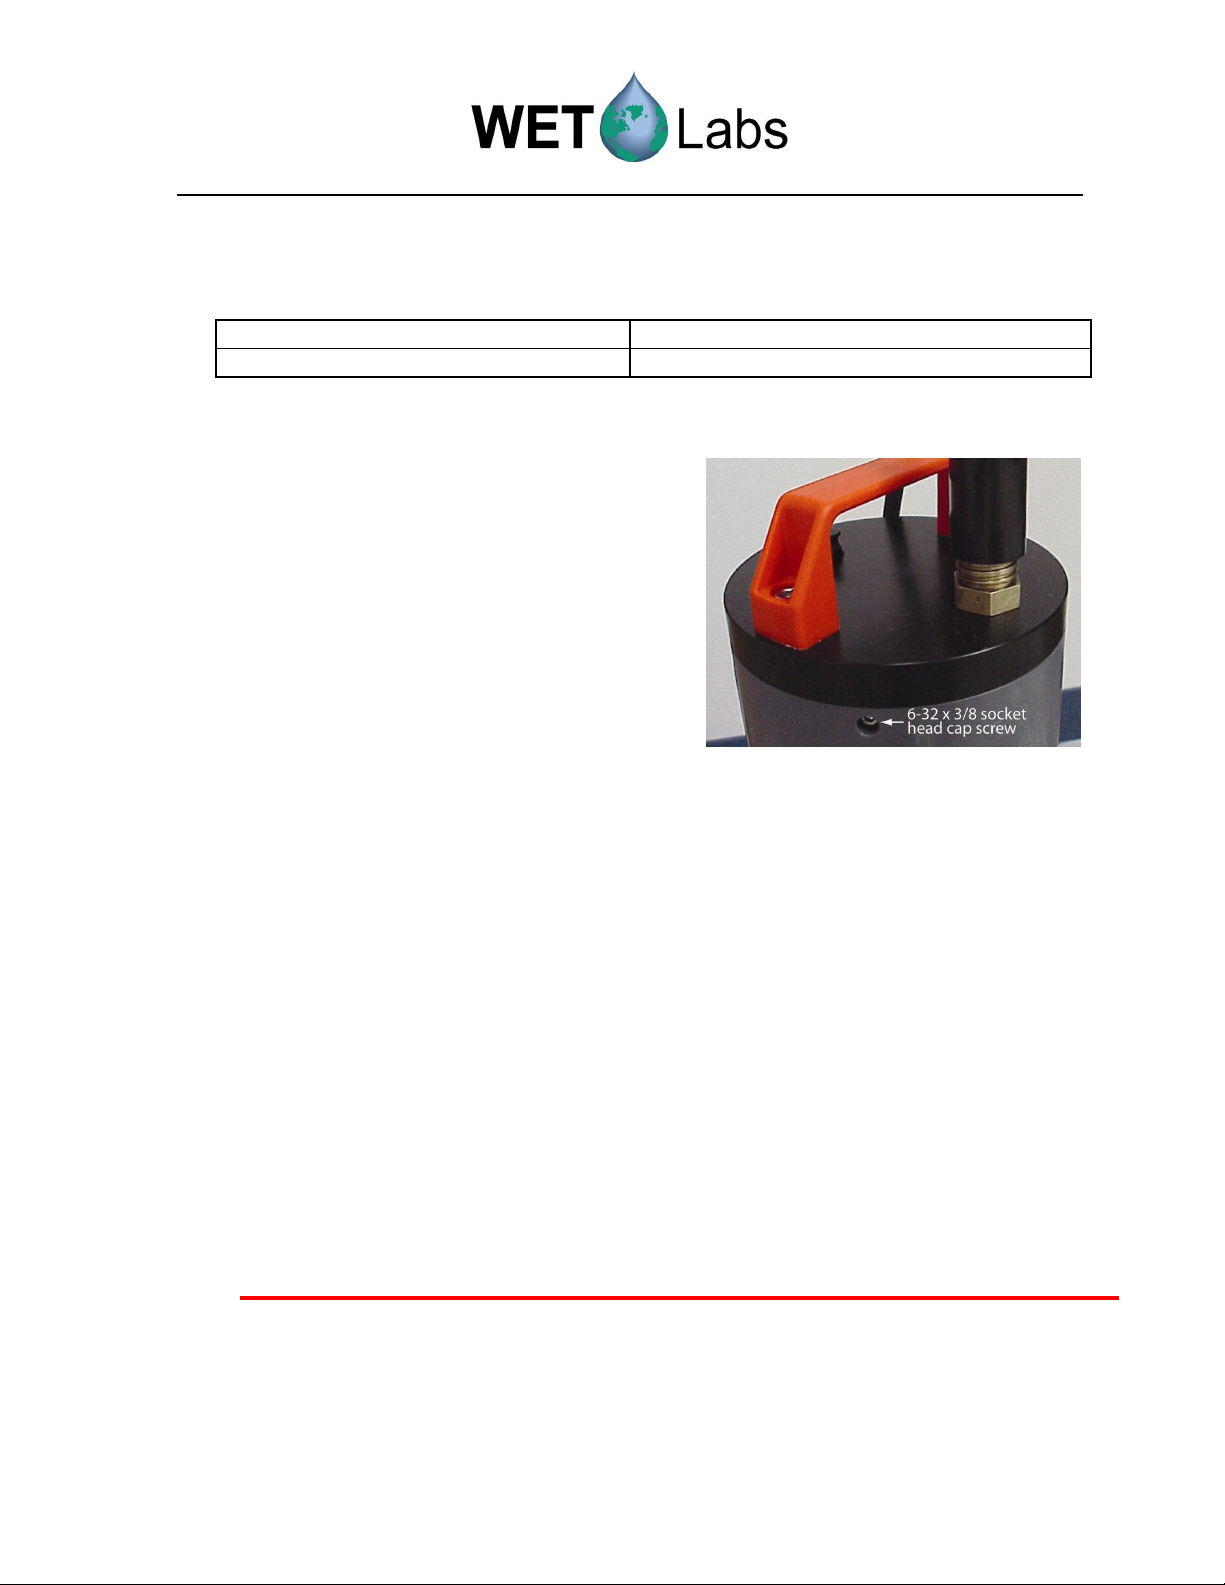
2. Remove the end flange:
• remove the two 6-32 screws on the pressure
housing that secure the end flange.
• grip the pressure housing and use the handle
on the end flange to carefully pull it free.
3. Remove the foam padding ring on top of the battery core.
4. Disconnect the bulkhead connector wiring from the battery core. Note that you may have to
pull the connector out of the end of the core.
5. Remove battery core package from pressure housing and unwrap the padding from the core;
save the padding. Recycle battery core according to local regulations.
6. Wrap the new battery core with the saved padding to prevent the batteries from moving in the
pressure housing.
7. Insert into the pressure housing. The fit should be snug.
Removing and Installing O-rings
WARNINGS
The plastic of the pressure housing is soft and scratches easily. Even dirty rags can
••
scratch surfaces and cause leaks. Use only clean materials to clean the O-ring grooves
and sealing surfaces.
Never use harsh chemicals to clean the end flange or the battery pressure housing.
••
Soapy water or isopropyl alcohol are the only approved cleaning solutions.
Never use O-rings with any visible nicks or cracks. A molding line is normal and
••
acceptable.
The end flange has two O-rings: if the first one fails, the second one acts as a backup. If you
have any doubt about the quality of your battery pack’s seal, please return it to WET Labs for
any necessary repair and a pressure test.
a. Hold the large diameter of the end flange firmly with one hand.
BPA50 Replacement (BPA50rpl) Revision A 20 December 2007 1
Page 2
620 Applegate St. • PO Box 518 • Philomath, OR • 541-929-5650 • fax 541-929-5277 • www.wetlabs.com
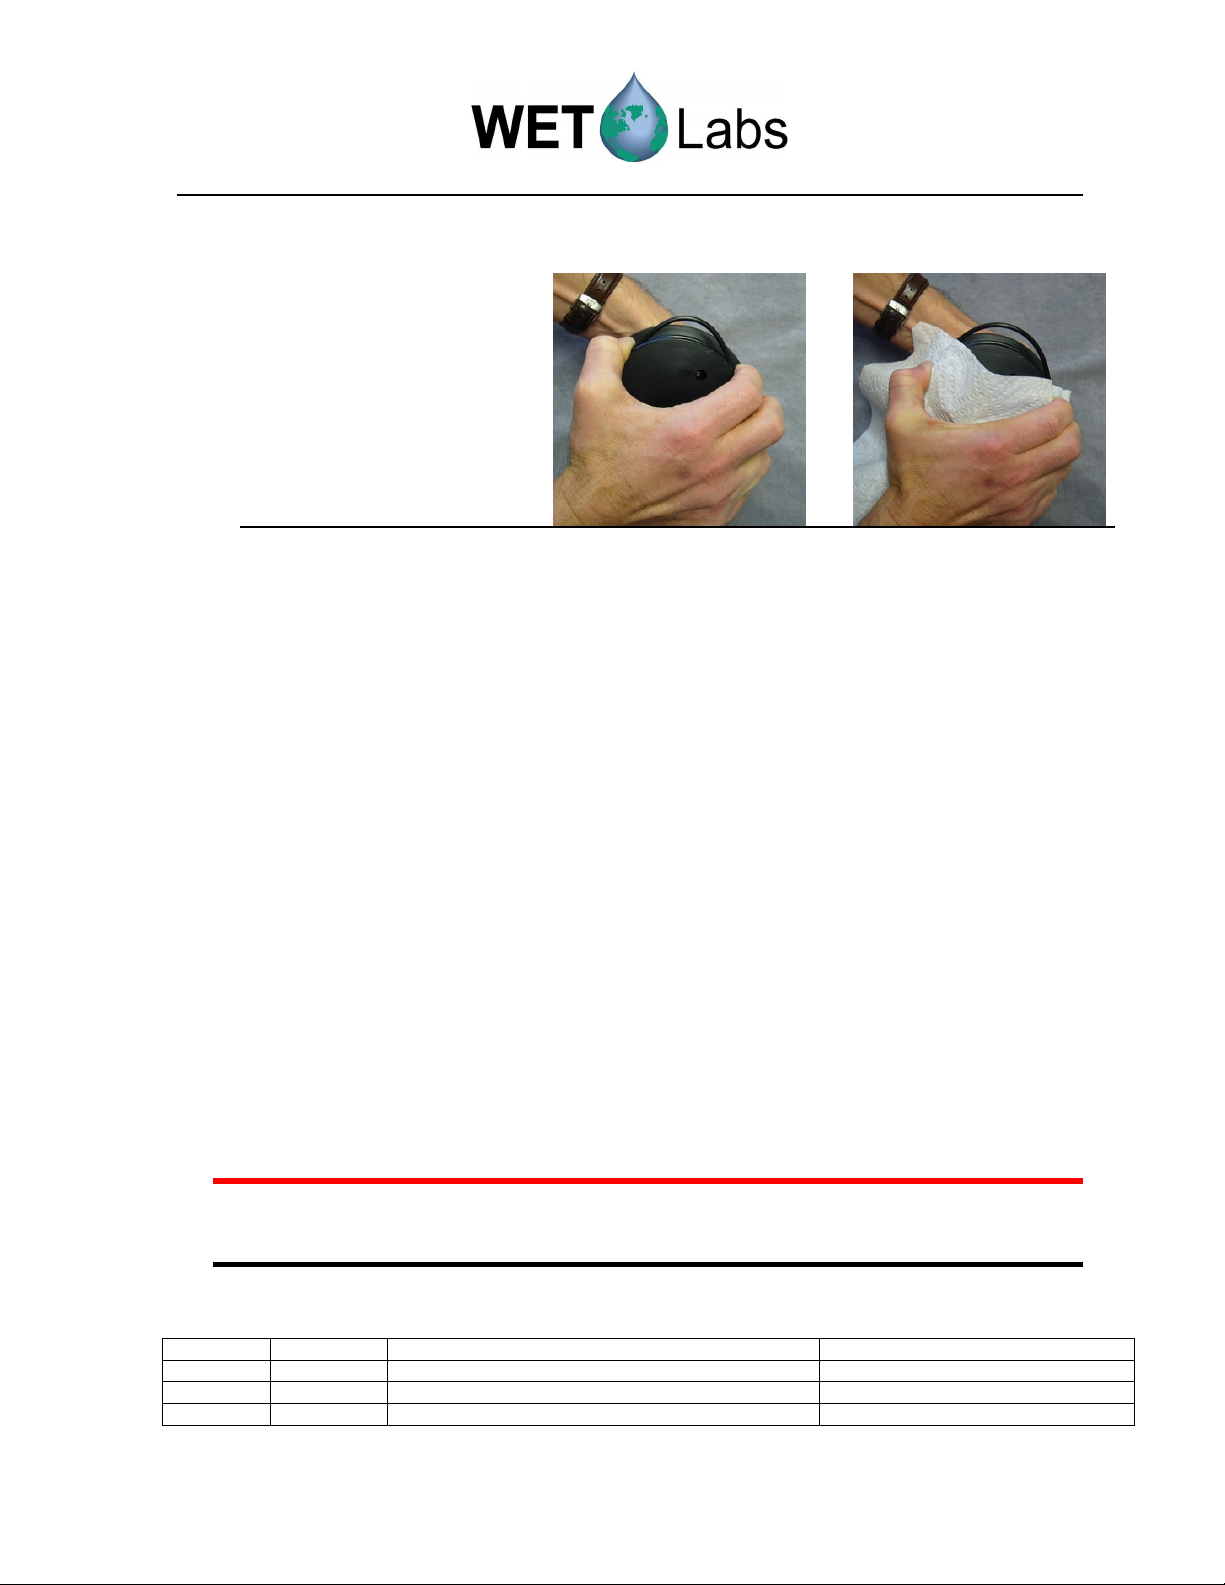
b. Place the palm of your other hand over the smaller diameter of the flange and grip the O-
ring with your thumb and index finger, approximately 180 degrees apart.
c. Push up firmly with your
thumb and index finger
while gripping the Oring. It will stretch and
form a loop. If your
fingers slip or you can’t
grip the O-ring firmly
enough, use a paper
towel for extra traction.
d. Use a third hand or a little finesse to grasp the loop and peel the O-ring out of the groove.
e. Repeat with the second O-ring.
f. Use a lint-free cloth to wipe the O-ring grooves perfectly clean. It may help to moisten
the wipe with water or isopropyl alcohol.
g. Inspect the grooves under good light. They should be pristine. The slightest scratch, hair,
fuzz, lint, etc. can cause an O-ring seal to fail.
h. Remove one O-ring from the sealed bag in the replacement kit and carefully stretch it
over the small diameter of the flange, allowing it to snap into the nearest O-ring groove.
i. Repeat with the second O-ring, fitting it to the other groove.
j. Wipe the inner sealing surface inside the gray battery pressure housing.
k. Inspect the inner sealing surface for imperfections. As with the O-ring grooves, minor
blemishes or contamination can cause leaks.
l. Check the O-rings one last time to ensure they’re still perfectly clean.
8. Re-connect the wiring, coiling the extra length into the center of the battery core.
9. Replace the foam padding ring on the top of the core.
10. Check that the voltage on the bulkhead connector is approximately 15V.
11. Carefully press the end flange into the battery tube. It is a snug fit. You may notice that
increased force is required as each O-ring is compressed by the sealing surface.
12. Twist the end flange by the handle to align the 6-32 screw holes in the end flange and the
pressure housing.
WARNING!
The 6-32 screws are threaded directly into the plastic housing. To prevent stripping the threads,
DO NOT over-tighten the screws.
13. Replace the two 6-32 x 3/8 in. screws that secure the end flange to the pressure housing.
Revision History
Revision Date Revision Description Originator
A 12/20/07 New document (DCR 554) A. Derr, M. Everett, H. Van Zee
BPA50 Replacement (BPA50rpl) Revision A 20 December 2007 2
 Loading...