

Westinghouse WVE613S, WVE615W, WVE615WC User Manual
USER MANUAL
ELECTRIC BUILT-IN OVENS
WVE613, WVES613L/R, WVE615, WVEP615,
WVE616, WVE617, WVEP618, WVE626,
WVE636, WVE645, WVE655, WVE665

WARNING
WARNING
TIPS & INFORMATION
ENVIRONMENTAL TIPS
CONTENTSCONGRATULATIONS
Dear customer,
Congratulations and thank you for choosing our oven.
We are sure you will find it a pleasure to use. Before you
use the oven, we recommend that you read through
the relevant sections of this manual, which provides a
description of your appliance and its functions.
To avoid the risks that are always present when you use
an appliance, it is important that the appliance is installed
correctly and that you read the safety instructions
carefully to avoid misuse and hazards.
We recommend that you keep this instruction booklet for
future reference and pass it on to any future owners.
After unpacking the appliance, please check it is not
damaged. If in doubt, do not use the appliance but
contact your local customer care centre.
This appliance complies with requirements of Australian
Standard AS/NZS 60335.2.6.
Conditions of use
This appliance is intended to be used in household
and similar applications such as:
• Staff kitchen areas in shops, offices and other
working environments
• Farm houses
• By clients in hotels, motels and other residential
type environments
• Bed and breakfast type environments
Important safety instructions ........................................................3
Product description ...........................................................................5
WVE613
WVES613
WVE615
WVE616
WVE617
WVEP618
WVE645S
WVEP615 ................................................................................................ 6
WVE626
WVE636
WVE655
WVE665
Before first use ....................................................................................7
Installing your oven accessories ................................................. 8
Using your oven .................................................................................. 11
Cooking guide .................................................................................. 22
Grilling guide ..................................................................................... 23
Steam cooking guide .....................................................................24
Dealing with cooking problems ................................................26
Getting to know the oven ............................................................ 27
Care and cleaning ...........................................................................28
Using your cooktop.........................................................................39
Troubleshooting ............................................................................... 40
Installing your appliance ...............................................................42
Warranty ...............................................................................................47
Please ensure you read the instruction manual fully
before you call for service, or a full service fee could
be applicable.
Record model and serial number here:
Model number:........................................................................................
Serial number: .........................................................................................
PNC: .............................................................................................................
Please read the user manual carefully and store in a handy
place for later reference.
The symbols you will see in this booklet have
these meanings:
WARNING
This symbol indicates information concerning your
personal safety.
CAUTION
This symbol indicates information on how to avoid
damaging the appliance.
IMPORTANT
This symbol indicates tips and information about use
of the appliance.
ENVIRONMENT
This symbol indicates tips and information about
economical and ecological use of the appliance.
2 CONTENTS

TIPS & INFORMATION
ENVIRONMENTAL TIPS
WARNING
IMPORTANT SAFETY INSTRUCTIONS
Please read the user manual carefully and store in a handy
place for later reference.
IMPORTANT
Important – check for any damages or marks.
• If you find the oven is damaged or marked, you
must report it within 7 days if you wish to claim for
damage/marks under the manufacturer’s warranty.
This does not affect your statutory rights.
• Discolouration of the enamel has no effect on the
performance of the appliance.
ENVIRONMENT
Information on disposal for users
• Most of the packing materials are recyclable. Please
dispose of those materials through your local
recycling depot or by placing them in appropriate
collection containers.
• If you wish to discard this product, please contact
your local authorities and ask for the correct method
of disposal.
WARNING
These warnings have been provided in the interest of
safety. You MUST read them carefully before installing or
using the appliance.
• An authorised person must install this appliance and
carry out servicing. (Certificate of Compliance to be
retained)
• Before using the appliance, ensure that all packing
materials are removed from the appliance.
• Always be careful when you move the appliance
because it is heavy. Always wear safety gloves.
• Do not pull the appliance by the door handle.
• This appliance must be earthed.
• In order to avoid any potential hazard, the enclosed
installation instructions must be followed.
• Ensure that all specified vents, openings and air
spaces are not blocked.
• Do not modify this appliance.
• This appliance must not be used as a space heater.
• Where the appliance is built into a cabinet, the
cabinet material must be capable of withstanding
70°C. If adjacent to vinyl wrapped surfaces, use
installation kit from vinyl wrap supplier.
• Ensure the appliance is switched off before cleaning
or replacing parts. This can be done by switching off
the appliance via the powerpoint or isolating switch
(if available), or the switchboard.
• Do not use steam cleaners, as this may cause
moisture build up.
• Switch the appliance off before removing the oven
light glass for globe replacement.
• Do not open the oven door during steam cooking.
Steam can be released. There is a risk of skin burns.
There is a risk that steam causes moisture damage to
cabinets.
• Allow the oven to cool down for 30 minutes before
you drain the water tank in a steam oven. Scalding
water may be released.
• Always keep the appliance clean. Ensure fats and oils
do not accumulate around elements, burners or fans.
• Care must be taken when wiping exposed stainless
steel edges.…they can be sharp!
• Do not spray flammable materials in or under the
appliance, e.g. aerosols.
• Do not leave the grill on unattended.
• Always turn the grill off immediately after use as fat
left behind may catch fire.
• Do not cover the grill insert with foil, as fat left there
may catch fire.
• Always keep the oven dish, grill dish and bake trays
clean as any fat residue may catch fire.
• To avoid an accident, ensure that the oven shelves
and fittings are always inserted into the appliance in
accordance with the instructions.
• The door glass on this appliance is made from a
tough, durable material that withstands heating and
cooling without breaking. As a precaution however,
do not put cold water on hot glass.
• Door glass that is damaged should be immediately
replaced.
• This appliance is not intended for use by persons
(including children) with reduced physical, sensory
or mental capabilities, or lack of experience and
knowledge, unless they have been given supervision
or instruction concerning use of the appliance by a
person responsible for their safety.
• Children should be supervised to ensure that they do
not play with the appliance.
• Accessible parts will become hot when in use. To
avoid burns and scalds, children should be kept away.
• During use, this appliance becomes hot. Care should
be taken to avoid touching hot surfaces, e.g. oven
door, heating elements or internal surfaces of the
oven.
• Always use gloves when handling hot items inside the
oven.
• To maintain safe operation, it is recommended
that the product be inspected every 5 years by an
authorised service person.
• New appliances can have an odour during the first
operation. It is recommended to ‘run in’ the oven
before you cook. Run the oven(s) at 180°C for 30
minutes and ensure the room is well ventilated.
Cooktop only
• If the ceramic glass on cooktop is accidently cracked,
switch off the appliance to avoid the possibility of
electric shock.
3CONTENTS

IMPORTANT SAFETY INSTRUCTIONS
WARNING
CAUTION
Read the following carefully to avoid damage to
the appliance.
• The grill door must be left fully open whilst grilling in
a separate grill wall oven and a separate grill
underbench oven.
• The grill tray must be fully inserted whilst grilling.
• Do not place thick portions of food under the grill.
Foods may curl, catch and ignite.
• Do not use the door as a shelf.
• Do not push down on the open oven door.
• Do not use harsh abrasive cleaners or metal scrapers
to clean the oven door glass since they can scratch
the surface which may result in shattering of the
glass.
• Do not use harsh abrasive cleaners, powder cleaners,
steel wool or wax polishes on enamel.
• Do not use sharp metal implements or utensils on any
surface, as these may leave permanent scratches or
marks.
• Do not use stainless steel cleaners, abrasive cleaners
or harsh solvents to clean your stainless steel
appliance.
• Do not line the bottom of the oven or grill with foil or
cookware, it will damage the enamel.
• Do not use the base of the oven for cooking – it will
damage the enamel.
• Do not put water directly into the hot appliance.
• Always clean the appliance immediately after any
food spills.
Cooktop only
• Do not allow pots to boil dry as damage to both pan
and cooktop may result.
• Do not operate the cooktop for an extended period
of time without a utensil on the hot plate.
• Do not allow large cookware to overhand onto the
adjacent benchtop. This will cause scorching to the
benchtop surface.
• Do not place heat resistant mats, wire mats or
aluminium foil under pots or pans.
• Do not cook food directly on the ceramic glass
surface.
• Do not use round bottom woks, wok stands or similar
utensils that could lead to overheating of hotplates
and possible damage to the cooking surface..
NOTE: You must read these warnings carefully before
installing or using the appliance. If you need assistance,
contact your Customer Care Centre. The manufacturer will
not accept liability, should these instructions or any other
safety instructions incorporated in this book be ignored.
4 IMPORTANT SAFETY INSTRUCTIONS
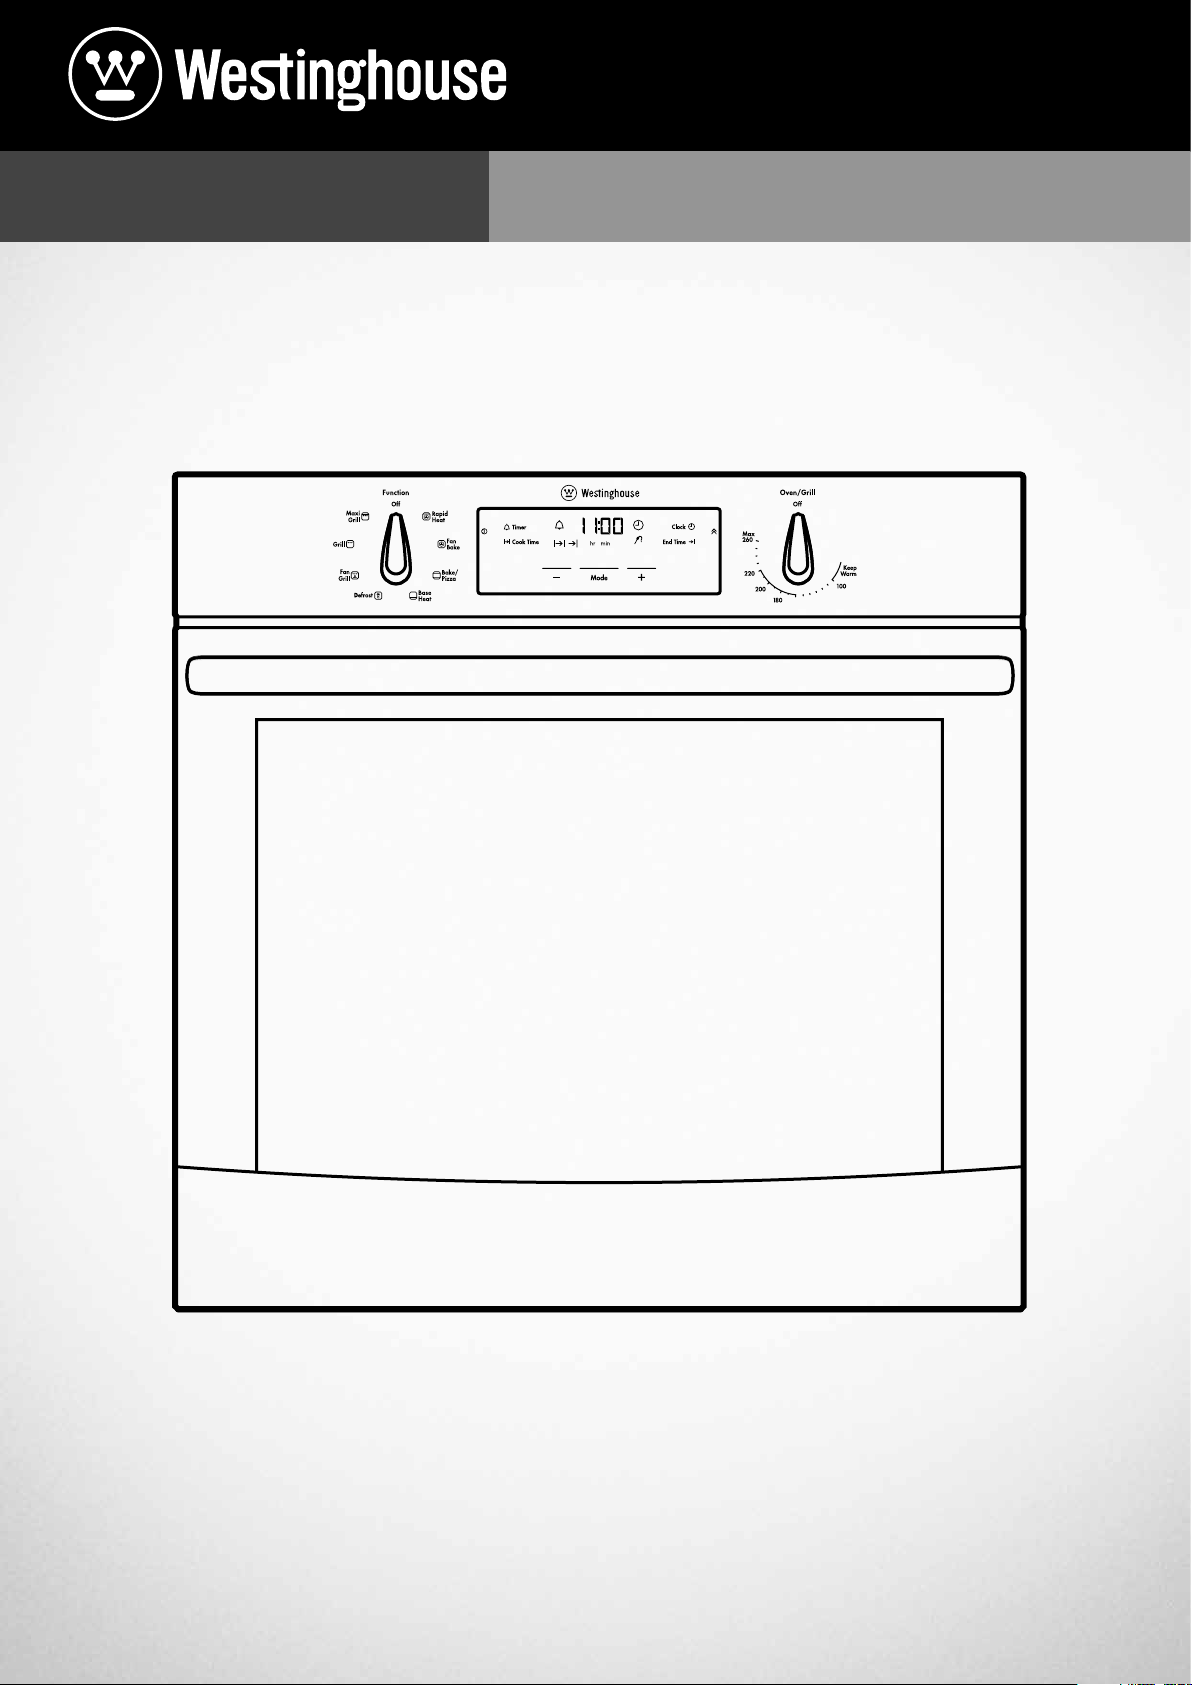
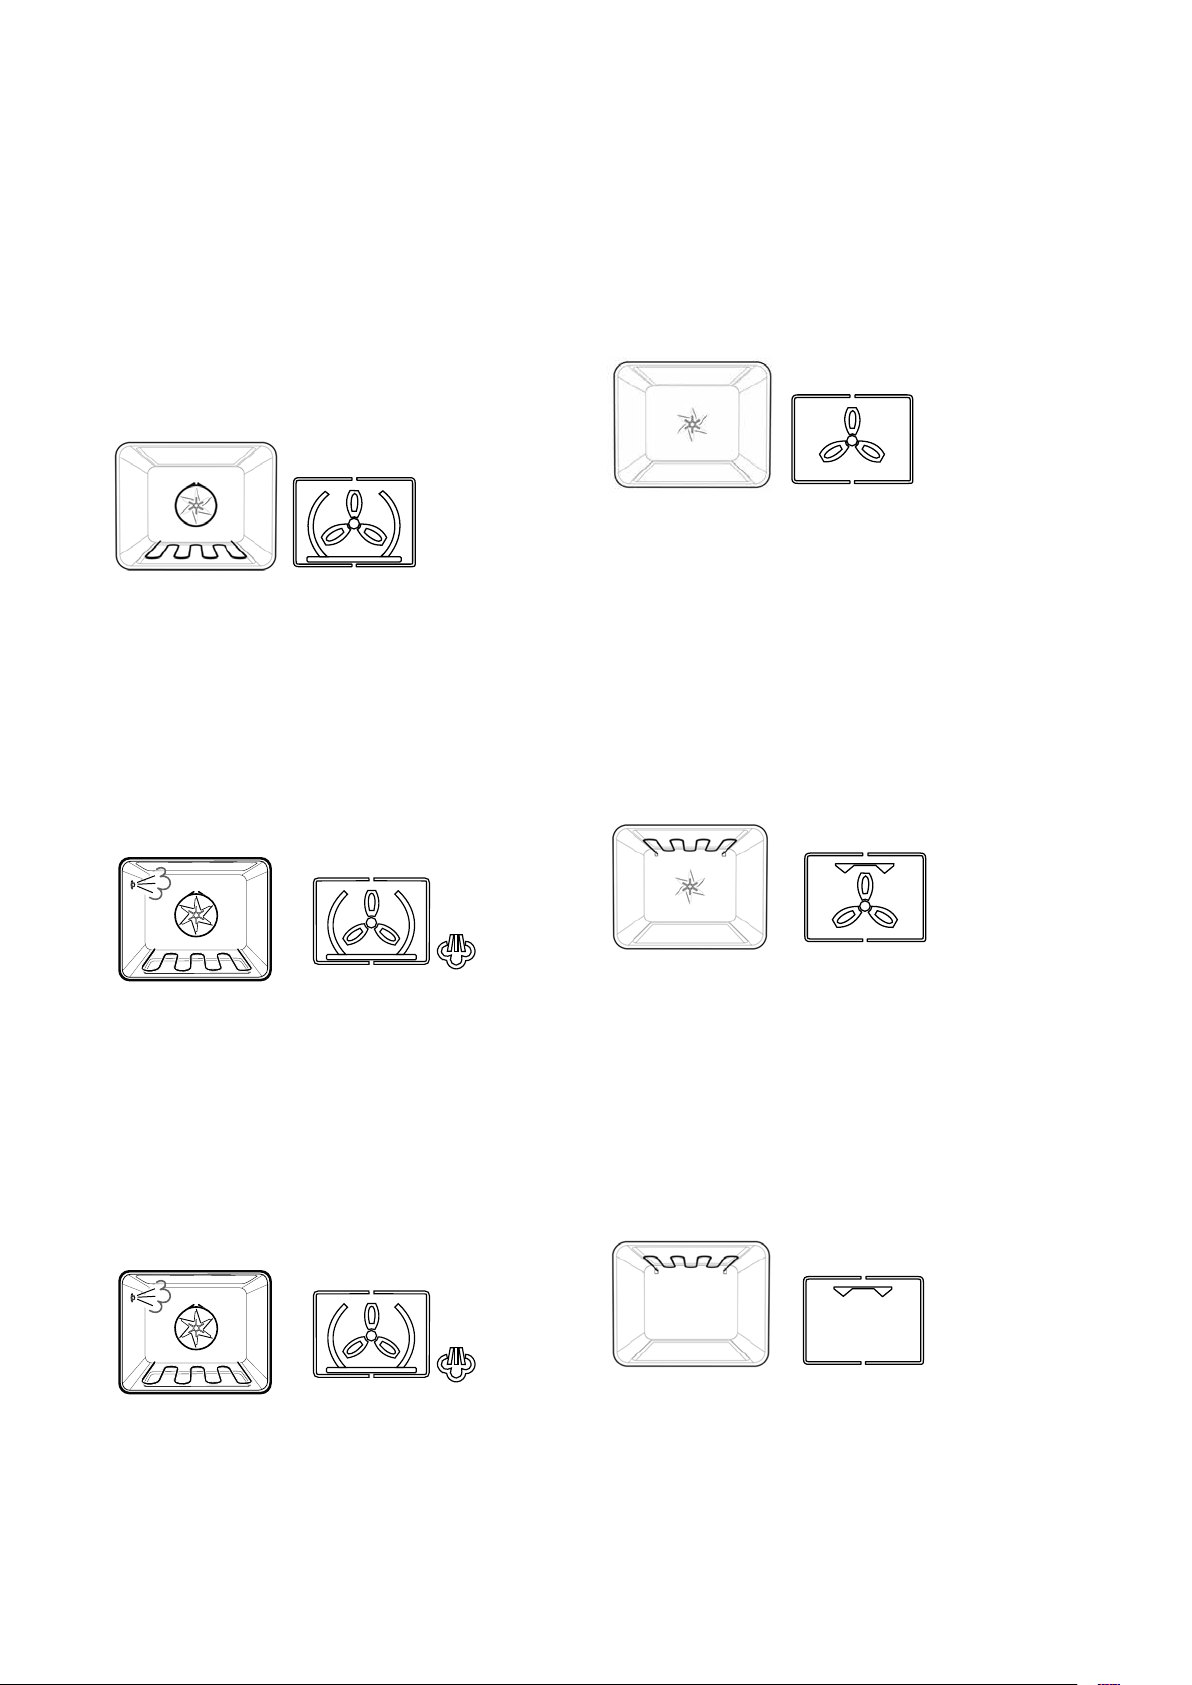
PRODUCT DESCRIPTION
WVE613 & WVES613
WVE615
WVE616
oven/grill indicator light
function
selector
function selector
oven/grill
temperature selector
function
indicator light
oven indicator lightfunction indicator light
electronic clock
oven
indicator light
‘auto-off’ timer
oven/grill
temperature selector
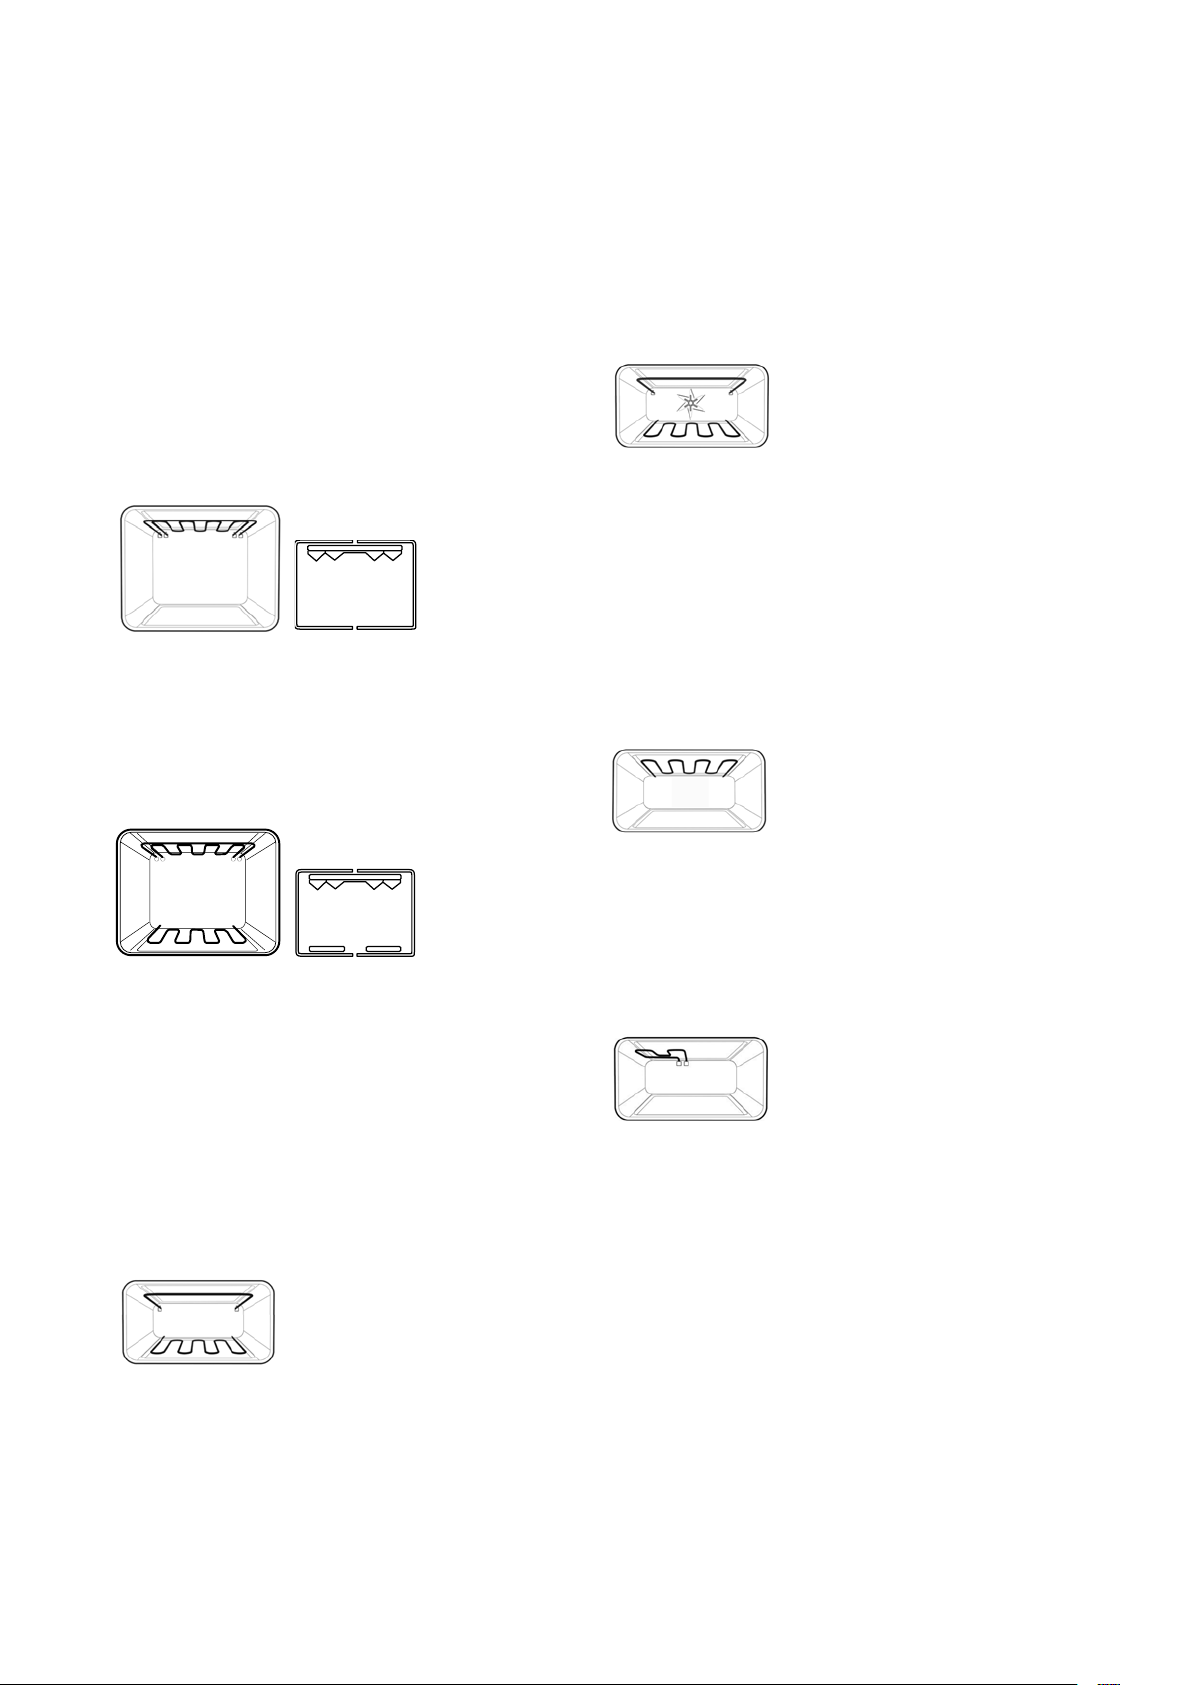
WVE617
WVEP618
WVE645S
inner element
indicator light
function selector
inner & outer
element
indicator light
programmable controller
element
indicator light
electronic clock
programmable controller
oven/grill
indicator light
oven/grill
temperature selector
water drawer
left rear
right frontleft front right rear
function
selector
oven/grill
temperature
selector
‘auto-off’ timer
5PRODUCT DESCRIPTION
PRODUCT DESCRIPTION
WVEP615
WVE626
WVE636
upper
function
selector
function
selector
function selector
upper oven
indicator light
upper oven/grill
temperature
selector
upper oven
indicator light
upper oven/grill
temperature
selector
electronic
clock
electronic clockupper
temperature selector
lower oven
indicator light
lower
function
selector
lower oven
indicator light
lower
function
selector
lower oven/grill
temperature
selector
lower oven/grill
temperature
selector
WVE655
WVE665
function
selector
function
selector
oven
temperature
selector
oven
temperature
selector
oven
indicator light
oven
indicator light
electronic clock
grill
indicator light
electronic
clock
grill
indicator light
grill temperature
selector
full and half grill
temperature selector
6 PRODUCT DESCRIPTION
WARNING
BEFORE FIRST USE
Preparing your appliance for the first time
• Please remove all internal boxes and bags from the
oven before operation.
• Please wipe out the oven interior prior to operation
with warm soapy water and polish dry with a soft
clean cloth. Do not close the oven door until the oven
is completely dry.
• If your appliance is fitted with a mechanical “Auto
Off” timer, make sure it is set to “Off” marker for
manual operation.
CAUTION
• Do not line the oven with foil as it will damage the
enamel.
• New appliances can have an odour during first use. It
is recommended to ‘run in’ the oven before cooking
for the first time. Operate the oven(s), empty, at a
temperature of 180°C for approximately 30 minutes.
For appliances with a separate grill, run the grill on
maximum for 15 minutes WITH GRILL DOOR OPEN.
Please ensure that the room is well ventilated during
this process.
WVEP615 controller
• After the appliance has been electrically connected,
“12” and the “Set Clock” symbol “
• To set the time of day “Hours” press the
buttons.
• Press the “Clock” button and the time of day
“Minutes” will flash and can be set in the same
manner.
• After 5 seconds from the last change, the clock
display will stop flashing, confirming the time is set.
NOTE: The clock has a 24-hour display.
“ will flash.
or
Programmable controller (WVE617 & WVEP618)
• After the appliance has been electrically connected,
the “Set clock” symbol
display.
• To set the time of day, press
• After 5 seconds from the last change the “Timer
arrow” symbol
has been set.
NOTE: The clock has a 24-hour display.
will disappear, confirming the time
will flash on the clock
or symbols.
Setting the time of day
If you have purchased a model fitted with an electronic
clock or programmable controller, you must set the time
of day before you can operate your appliance.
Electronic clock
• After the appliance has been electrically connected,
“12.00” will be displayed and the “Clock” indicator
symbol
• To set the time of day, press the
• After 5 seconds from the last change, the “Clock”
indicator symbol
time has been set.
NOTE: The clock has a 24-hour display.
will flash.
or symbols.
will disappear, confirming the
7BEFORE FIRST USE
TIPS & INFORMATION
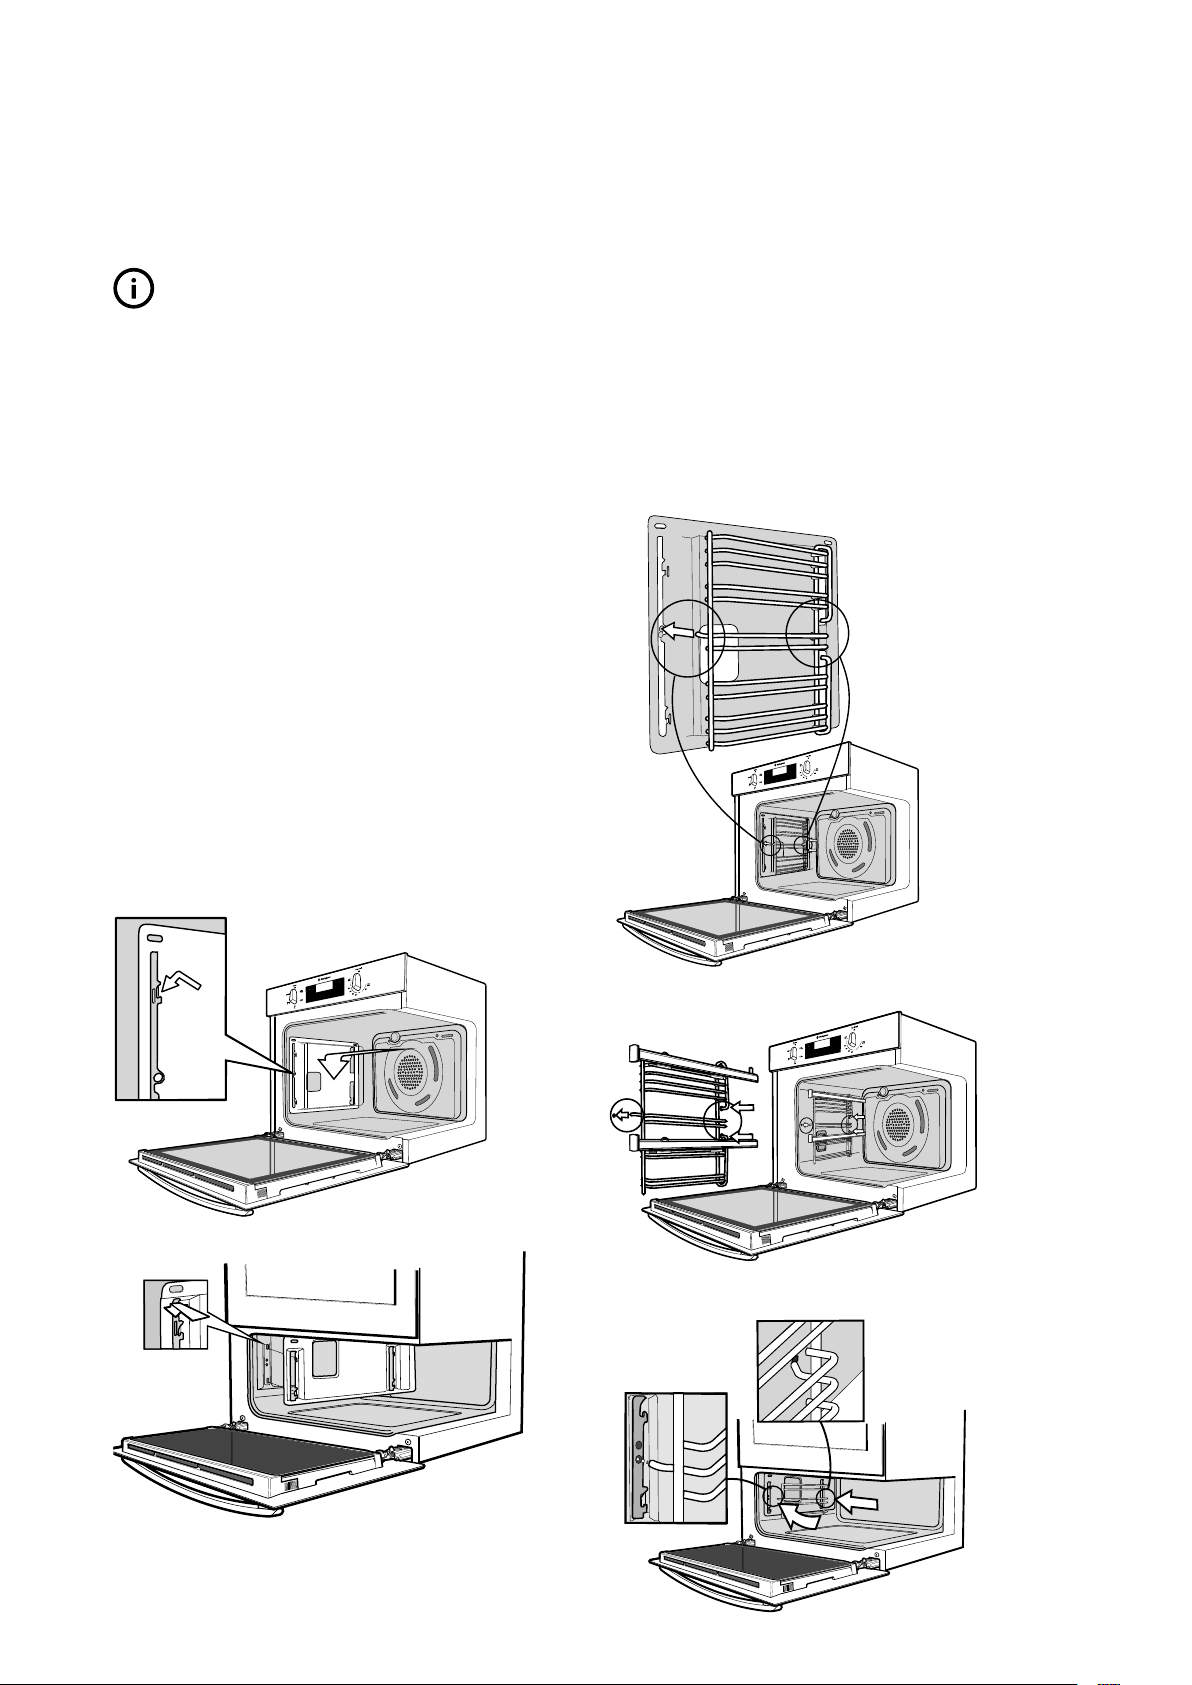
INSTALLING YOUR OVEN ACCESSORIES
Catalytic liners (on selected models)
IMPORTANT
Models which contain catalytic liners have 2 catalytic
side liners (to be fitted by you) and a catalytic fan cover
(already fitted).
NOTE: If your model does not have catalytic liners, they
are available for purchase from the Customer Care Centre.
Catalytic liners are coated with a specially formulated
enamel coating. This porous coating enables a “self
cleaning” process. Catalytic liners must be installed first
but you can omit them, if you wish, with no effect to
cooking performance. Their sole purpose is to make oven
cleaning easier.
• The catalytic liners attach to each side of your oven.
There is a left hand and right hand version which is
marked on the panel.
• Position the first liner as per the diagram. The black,
shiny side of the liner should be facing the oven
wall, the hooks pointing down and the word ‘LH’
positioned to the top rear portion of the oven. The
right hand side will be a mirror image of this.
• Line the hooks up with the slots provided in the oven
wall, push them in and then allow the liner to slide
down to its final position.
• The access hole for the side racks should be visible
when the liner is correctly positioned.
Side racks
The side racks that come with your oven can be attached
to either side of your oven.
• Insert the twin pegged side into the rear access holes
provided, ensuring that the pegs are fully inserted.
• Then locate the front peg into the front access hole
and push in firmly.
• (WVE626 and WVE665 only) when locating the left
side rack into the small oven or grill, ensure the pegs
are inserted into the upper two access holes.
OPERATION
8 INSTALLING OVEN ACCESSORIES
rear
front
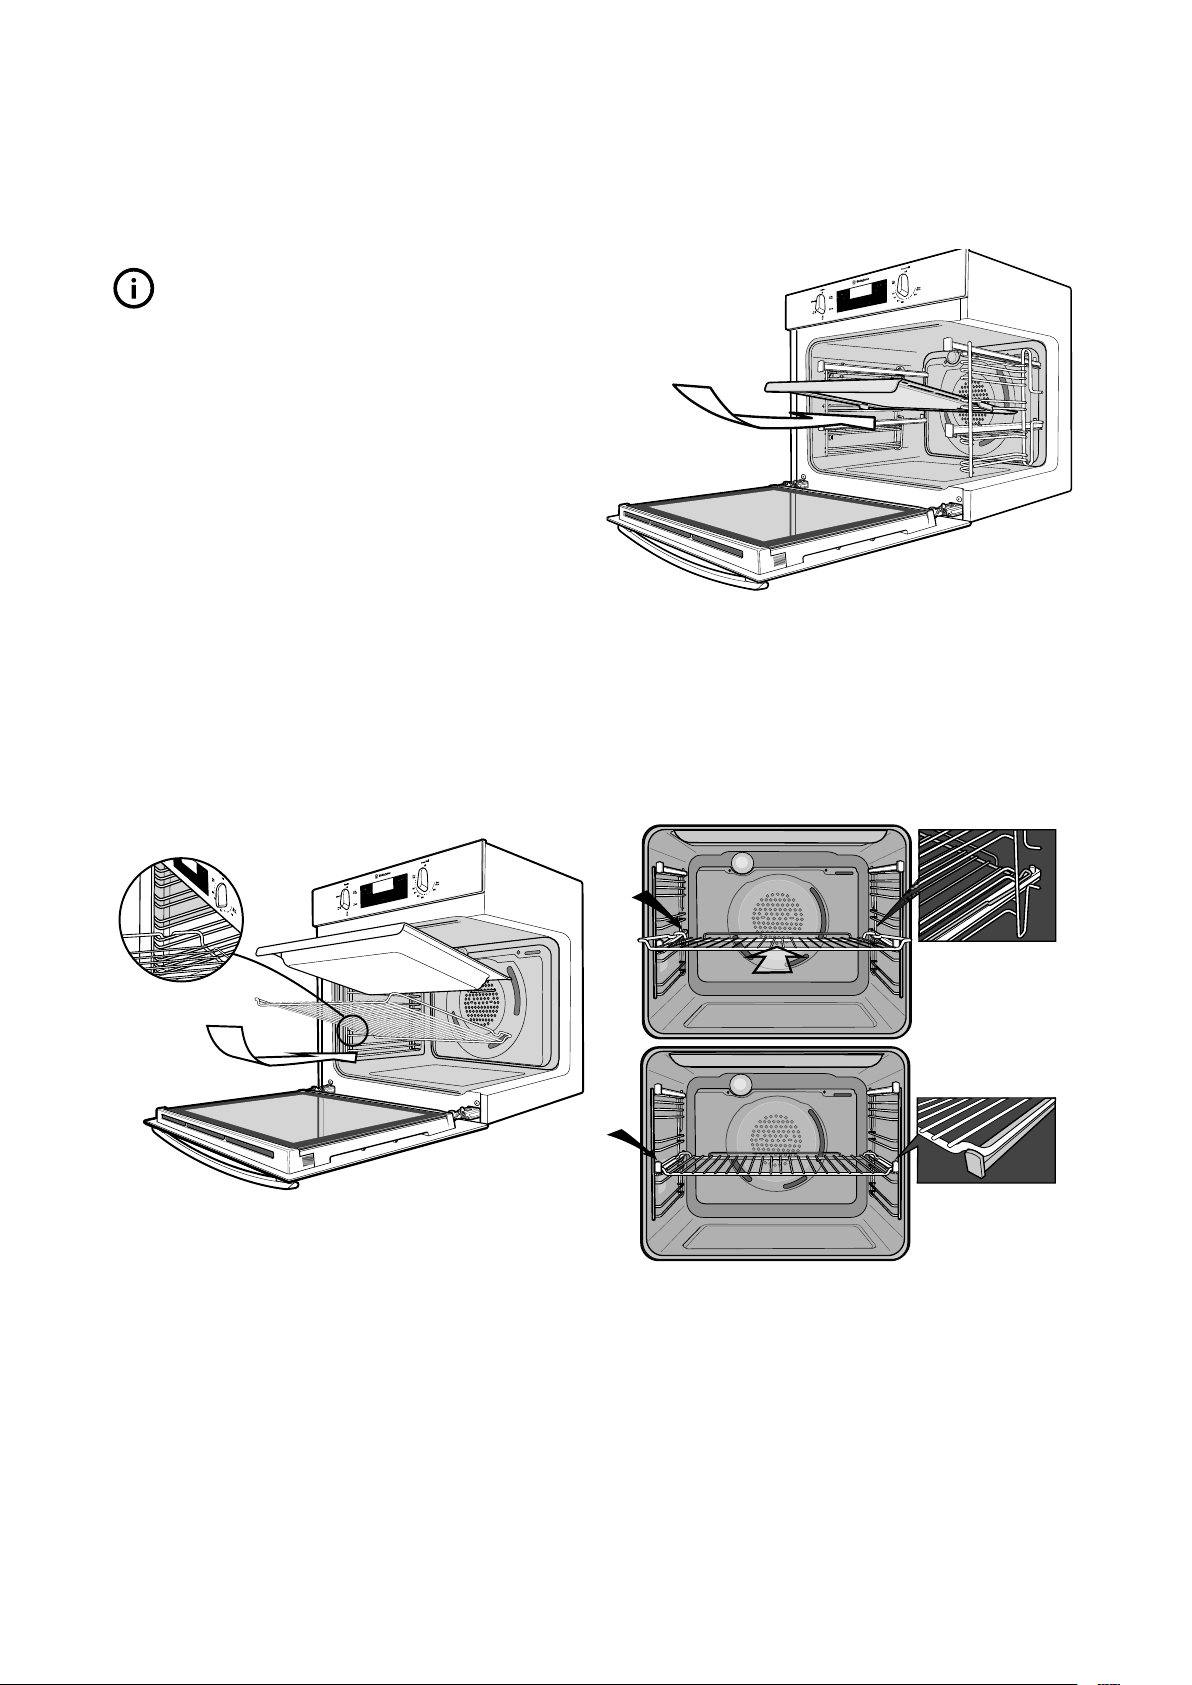
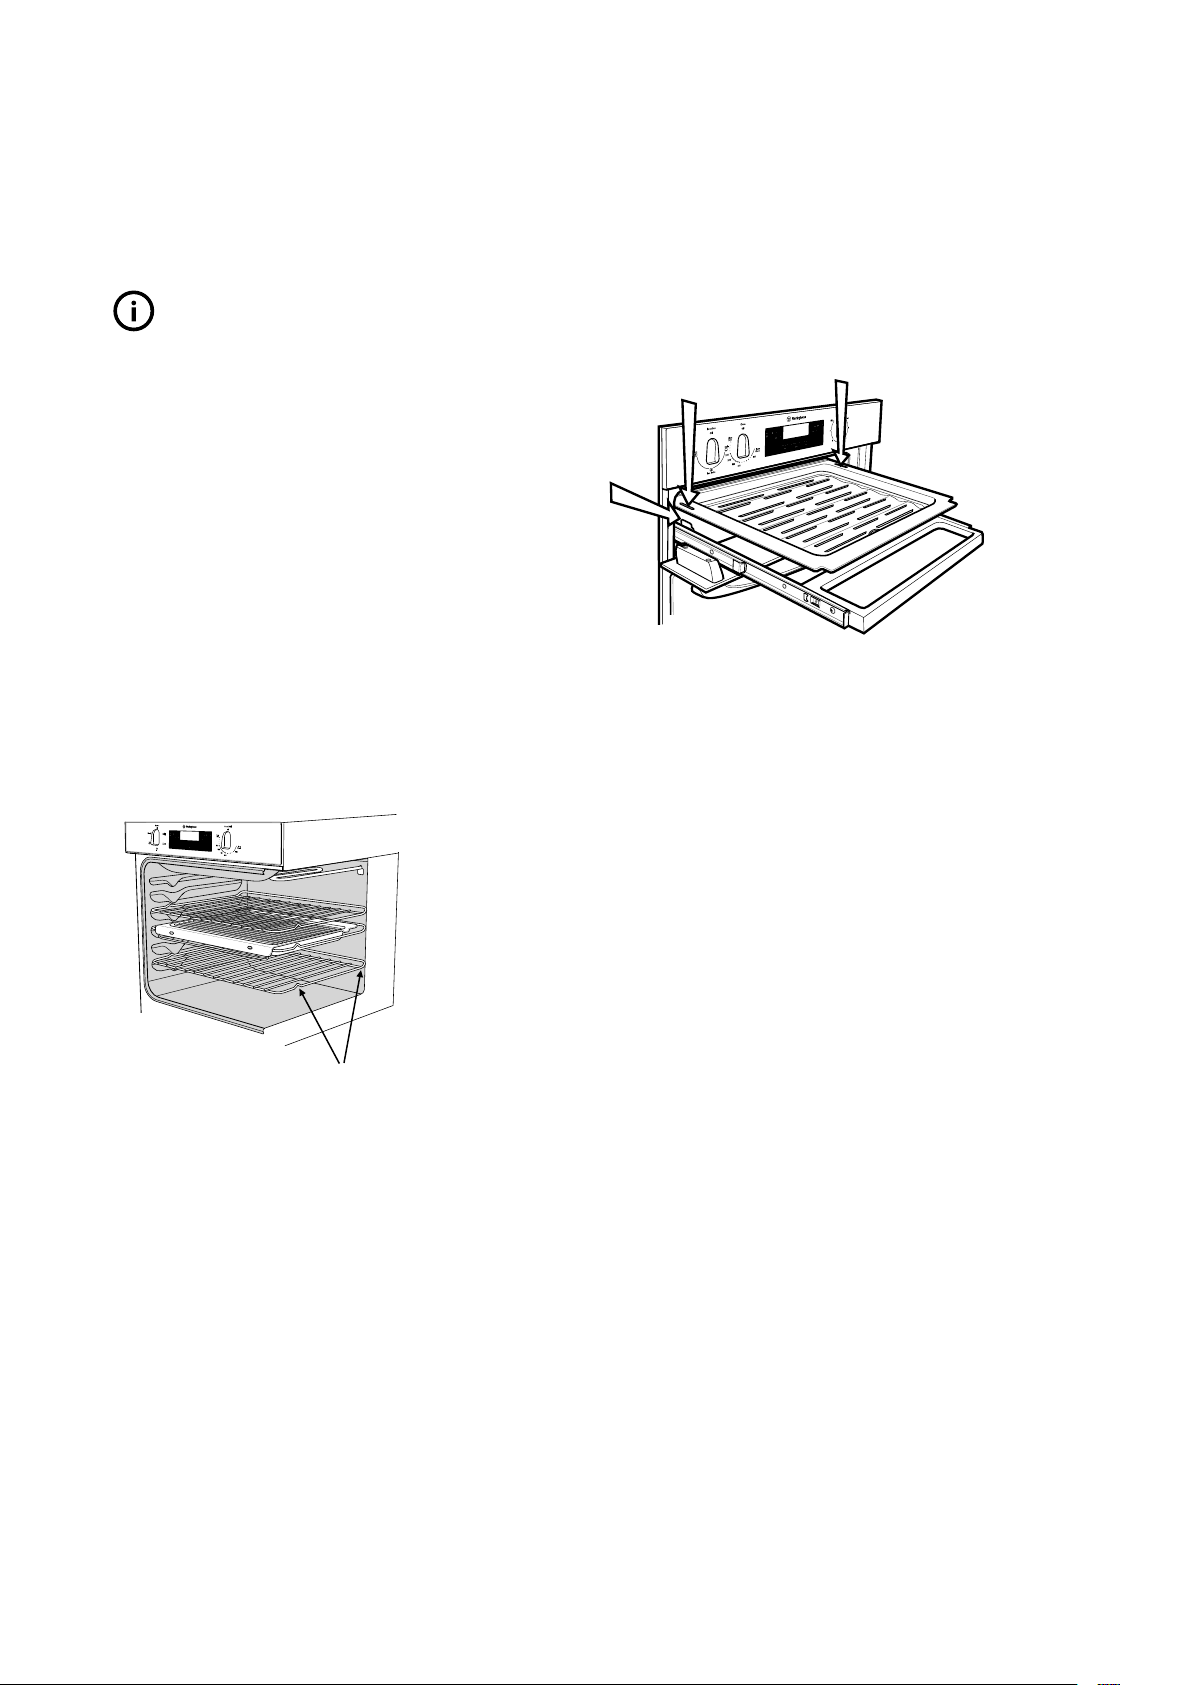
Shelves and trays
TIPS & INFORMATION
IMPORTANT
The shelves are designed so that they have maximum
travel but cannot be accidentally pulled right out. The
trays are designed the same way and fit straight into the
side racks.
To fit a shelf or tray to side racks:
• Locate the rear edge of the shelf/tray in between
2 guide rails of the side rack - see diagram. Ensure
the same rail positions on both sides of the oven are
being engaged.
• With the front edge raised, begin to slide the shelf
into the oven.
• Once the detents have passed the front edge of the
side rack, the shelf can be pushed completely in.
• The grill/baking tray for separate grill wall oven
models slides into the wire runners in a similar
manner.
• When fully inserted the shelf/tray should not interfere
with the closed oven door.
• Remove extra trays and dishes before roasting
or baking.
To fit a shelf or tray to telescopic slides (where fitted):
• With the slides fully pushed in, push the shelf or tray
along the top of the slide until it hits the back post.
• Drop the front of the shelf or tray onto the slide
ensuring it sits behind the front post of the slide.
• When fully inserted the shelf/tray should not interfere
with the closed oven door.
9INSTALLING OVEN ACCESSORIES
TIPS & INFORMATION
INSTALLING YOUR OVEN ACCESSORIES
Shelves and trays (WVEP615 only)
IMPORTANT
Your oven comes with formed “easy clean” runners. The
shelves are designed to travel freely on runners without
being pulled out accidentally. Make sure you have the
shelf in the correct orientation before you slide it in,
otherwise it could become jammed.
• Locate the rear edge of the shelf in the recess
between 2 formed runners.
NOTE: The Top ‘Ledge’ is not a shelf position.
• With the front edge raised, begin to slide the shelf
into the oven. Lower the front edge as you push the
shelf completely in.
• The grill/baking tray for underbench oven models sits
into a wire carrier that fits into the oven exactly like
the shelves.
• When fully inserted, the shelf/tray should not interfere
with the closed oven door.
NOTE: Shelves and accessories must be removed when
using pyrolytic cleaning function.
Shelves and trays (WVE655 only)
• To insert the grill tray in a separate grill underbench
product, open the grill door and fully extend the grill
drawer. Position the grill tray so that the slots on the
outer edges fit over the tabs on the slides.
note the orientation of the
side and rear features
10 INSTALLING OVEN ACCESSORIES
USING YOUR OVEN
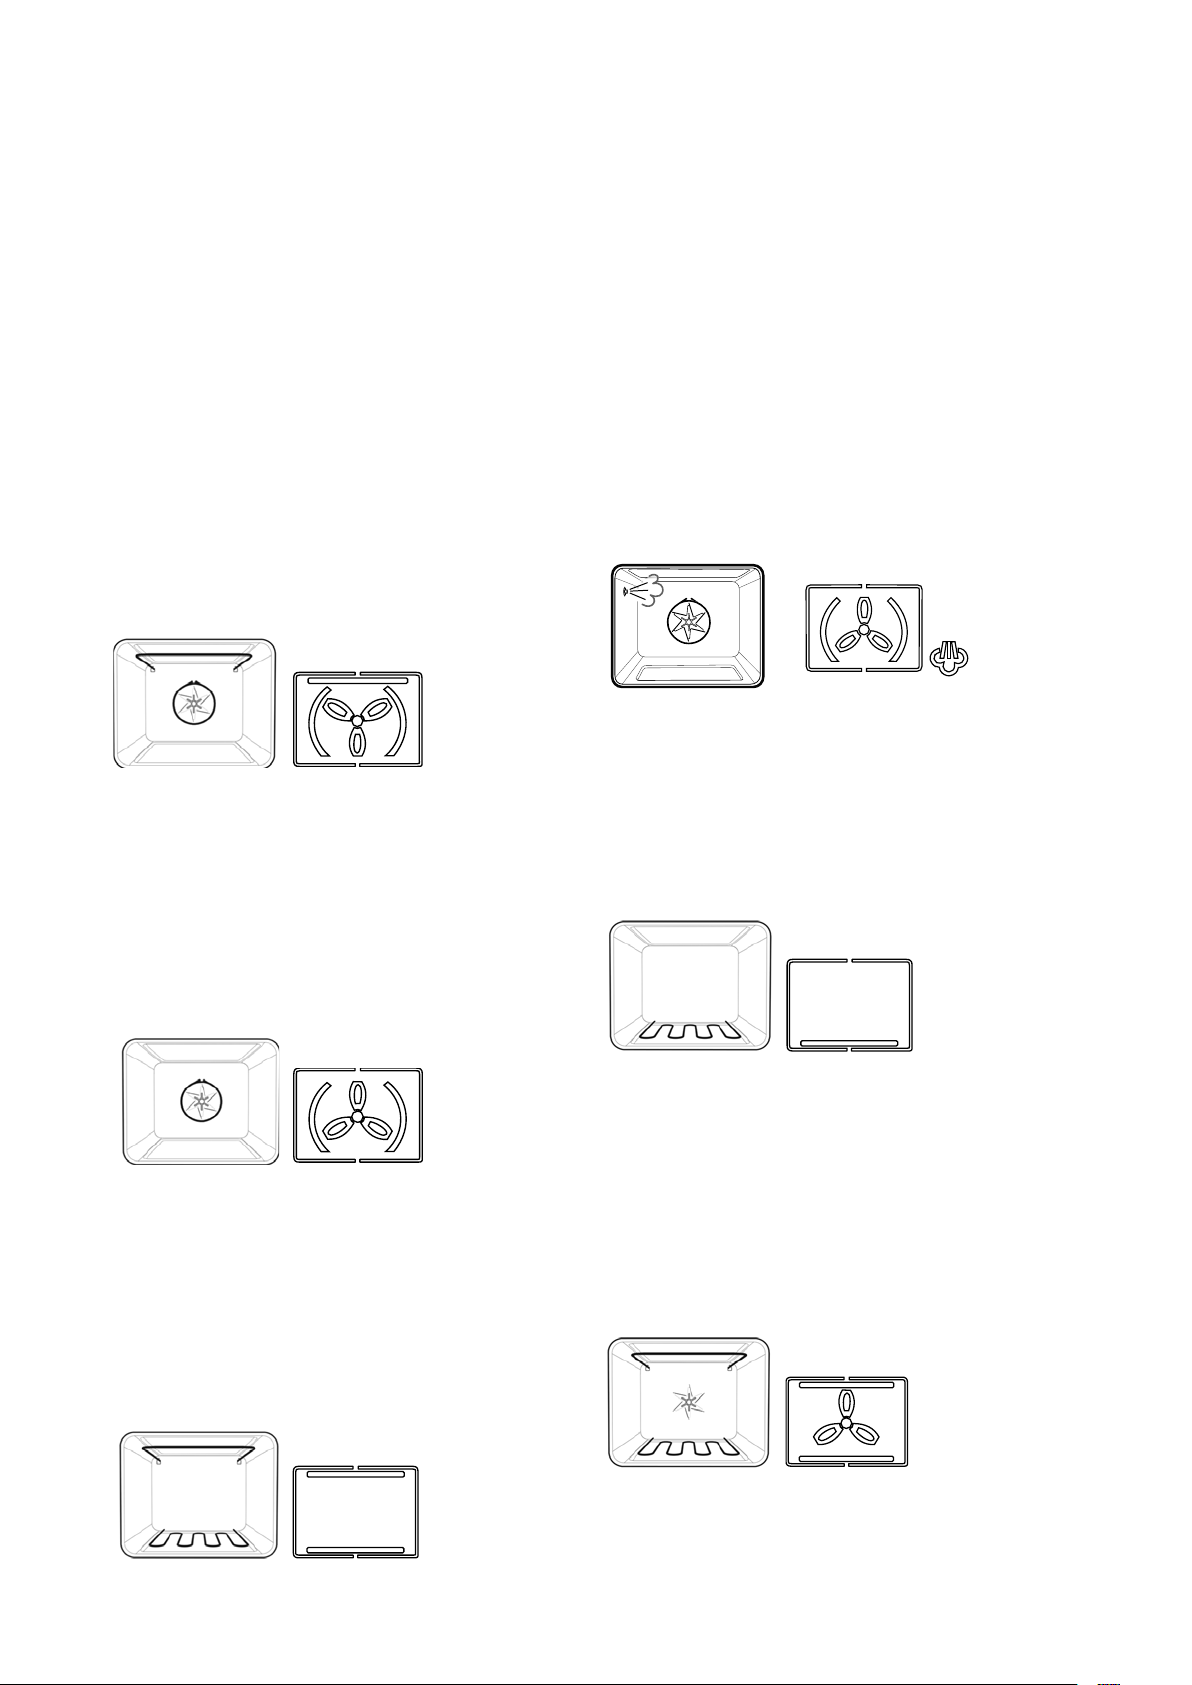
Understanding your oven functions
Your oven will have a selection of the following functions.
Refer to “Description of your appliance” to confirm what
functions are available to you.
Large oven
Rapid Heat/Fast Heat Up (FHU)
Heat comes from the element surrounding the fan as well
as the smaller element above the food. This allows you
to preheat your oven 30% quicker than with standard
“Bake”. “Rapid heat” is ideal for cooking frozen precooked foods such as savoury pastries, pizzas, mini meals
(TV dinners), meat pies and fruit pies. Simply place the
food in the oven straight from the freezer and heat – ideal
for busy people.
Fan Bake
Heat comes from the element surrounding the fan. This
fan circulates the hot air around the oven cavity so that
you can put your food in different places in the oven and
still cook them at the same time. You can use the “Fan
bake” function for multi-shelf cooking, reheating cooked
foods, pastries and complete oven meals. It will cook at a
lower temperature and be faster than baking. Please note
that some variation in browning is normal.
Steam Assisted Cooking (WVE617 model only)
Perfect for all kinds of meat, poultry and fish dishes. The
hot air ensures the outside of the food is sealed whilst
the steam keeps the inside tender. Steam comes from the
outlet pipe and heat comes from the element surrounding
the fan. This fan circulates the hot air and steam around
the oven cavity so that you can position the food
anywhere in the oven. The browning of meat or fish will
be perfect, with the best cooking result at the core. Shape
will be preserved and evenly firm. Vegetables will retain a
high level of nutrients.
NOTE: Steam will only start if the water tank has
been filled and the oven temperature is above 130°C.
Base Heat
Heat comes from the element below the food. The
element is controlled by the thermostat and will turn on
and off to maintain the set temperature. The “Base heat”
function can be used to add extra browning to the bases
of pizzas, pies and pastries. Cook in the lower half of the
oven when you are using only one shelf. For best results,
use silver or shiny trays.
Bake/Pizza
Heat comes from two elements, one above and one
below the food. The bottom element is a clean heat
element and is below the floor of the oven. Both elements
are controlled by the thermostat and will turn on and off
to maintain the set temperature. You can use the “Bake”
function for a single tray of biscuits, scones, muffins,
cakes, slices, casseroles, baked puddings, roasts and
delicate egg dishes.
Fan Assist
Heat comes from two elements, one above and one
below the food. The fan circulates the hot air around
the oven cavity so that you can put the food in different
places in the oven and still cook them at the same time.
You should only use a maximum of 2 shelves with “Fan
assist”. Do not use the bottom shelf. If two shelves are
used, the food on the shelf in the higher position will cook
first and should then be removed to allow the food on the
lower shelf to finish cooking.
11USING YOUR OVEN
USING YOUR OVEN
Pizza
“Pizza” is a combination of “Base heat” and “Fan bake”
and offers you the combined benefits of both functions.
Heat comes from the element surrounding the fan as
well as the clean heat element below the oven floor. The
“Pizza” function is ideal for foods that require cooking and
browning on the base. It is great for foods such as pizzas,
quiches, meat pies and fruit pies. Simply place the food in
the middle of the oven and set the desired temperature.
Pizza + Steam (WVE617 model only)
This function creates a great pizza in terms of crispy
crust and uniform browning on top. “Pizza + Steam” is
a combination of “Base heat”, “Fan bake” and “Steam”
and offers you the combined benefits of each of these
functions. Heat comes from the element surrounding the
fan as well as the clean heat element below the oven floor.
NOTE: Steam will only start if the water tank has been
filled and the oven temperature is above 130°C.
Defrost
The “Defrost” function uses low temperature air which is
circulated by the fan. You can defrost (thaw) your food
before you cook it. Also you may use “Defrost” to raise
yeast dough or to dry fruit, vegetables or herbs.
Fan Grill (grill in oven models only)
“Fan grill” offers you the benefits of both “Bake” and
traditional “Grill” functions. The grill element turns on
and off to maintain the set temperature while the fan
circulates the heated air. The oven door remains closed
for fan grill. You can use “Fan grill” for large cuts of meat
in the oven which gives you a result that is similar to
“rotisserie” cooked meat. Put your food on a shelf in the
second lowest shelf position. Put the grill dish on the
lowest shelf position to catch any spills. When using “Fan
grill” it is not necessary to turn the food over during the
cooking cycle. Set temperature to 180°C.
Steam Reheat (WVE617 model only)
A great function for reheating dishes like rice, pasta and
pizza that can suffer from dryness in normal ovens or
sogginess in microwave ovens. Steam comes from the
outlet pipe and heat switches from between the element
surrounding the fan and the clean heat element below the
oven floor. This function has a set temperature of 130°C.
NOTE: Steam will only start if the water tank has been
filled and the oven temperature is above 130°C.
130°C
Grill (grill in oven models only)
“Grill” directs radiant heat from the powerful upper
element onto the food. You can use the “Grill” function for
tender cuts of meat, steak, chops, sausages, fish, cheese
toasties and other quick cooking foods. Grill with the
oven door closed. Preheat your grill for 3 minutes to get
the best results. This will help seal in the natural juices of
steak, chops etc. for a better flavour. You can slide your
grill dish into either of the 2 spaces within the upper pairs
of support rails.
12 USING YOUR OVEN
Maxi Grill (grill in oven models only)
Fan Assist (duo small oven only)
“Maxi grill” directs radiant heat from 2 powerful upper
elements onto the food. You can use the “Maxi grill”
function for tender cuts of meat, steak, chops, sausages,
fish, cheese toasties and other quick cooking foods.
Grill with the oven door closed. “Maxi grill” allows you
to take full advantage of the large grill dish area and
will cook faster than normal “Grill”. For best results it is
recommended to preheat your grill for 3 minutes. This
will help seal in the natural juices of steak, chops etc. for a
better flavour.
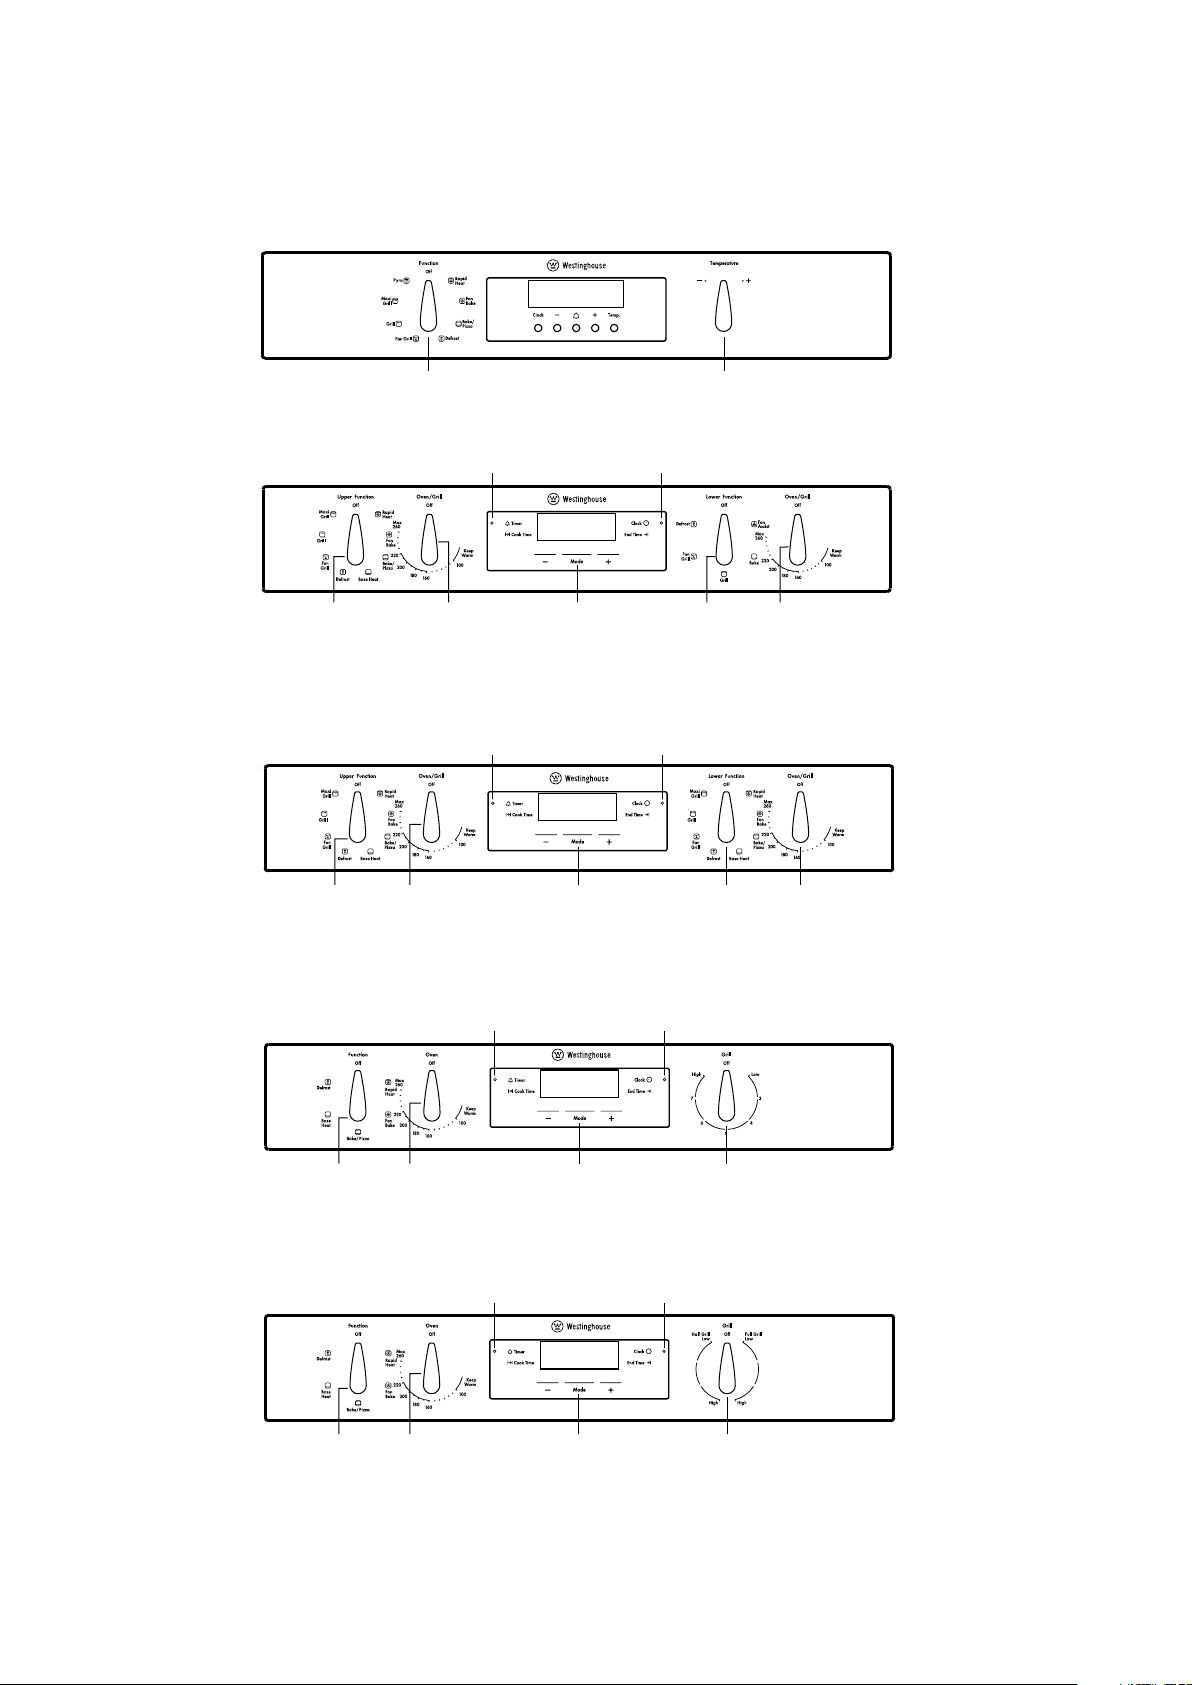
Pyro Clean (WVEP615 & WVEP618 models only)
The “Pyrolytic cleaning” function is used for cleaning
the main oven. It cleans by burning off the spatters and
temperature. This process produces ash which can be
wiped out of the oven cavity.
Heat comes from two elements, one above and one
below the food. The fan circulates the hot air around the
oven cavity to deliver very even cooking.
Grill (small oven only)
The “Grill” directs radiant heat from the powerful upper
element onto the food. You can use the “Grill” function for
tender cuts of meat, steak, chops, sausages, fish, cheese
toasties and other quick cooking foods. Preheat your grill
for 3 minutes to get the best results. This will help seal in
the natural juices of steak, chops etc. for a better flavour.
The grill dish should be positioned between the upper
pair of support rails.
NOTE: Grill with the grill door open.
Small oven/grill
1. Bake (duo small oven only)
Heat comes from two elements, one above and one
below the food. The bottom element is a clean heat
element and is below the floor of the oven. Both elements
are controlled by the thermostat and will turn on and off
to maintain the set temperature. You can use the “Bake”
function for a single tray of biscuits, scones, muffins,
cakes, slices, casseroles, baked puddings, roasts and
delicate egg dishes.
Split Grill (small oven only)
The “Split grill” works in the same way as a full width grill
but with the added advantage of being able to optimise
the energy usage for smaller servings.
NOTE: Grill with the grill door open.
13USING YOUR OVEN

WARNING
USING YOUR OVEN (CONTINUED)
TIPS & INFORMATION
IMPORTANT
Cooling/Venting fan
This appliance is fitted with a cooling fan. This prevents
your kitchen cabinet from overheating and reduces the
condensation inside the oven. It will operate whenever
you are using the oven and blow warm air across the top
of the oven door.
NOTE: For selected models only, if the oven is still hot
from cooking, the cooling fan will keep running to cool the
oven down and will switch off by itself once cool.
Condensation and steam
This appliance is supplied with an exclusive system which
produces a natural circulation of air and the constant
recycling of steam. This steam makes it possible to
cook in a steamy environment ensuring that dishes are
soft inside and crusty on the outside. This process also
reduces cooking time and energy consumption. During
cooking, steam may be produced and released when the
door is opened. This is absolutely normal. When food is
heated, it produces steam in the same way a boiling kettle
does. When steam comes into contact with the oven door
glass, it will condense and produce water droplets. To
reduce condensation, ensure that the oven is pre-heated
before placing food in the oven cavity. It is recommended
that condensation is wiped away after each use of
the oven.
The effects of dishes on cooking results
Dishes and tins vary in their thickness, conductivity, colour
etc. which affects the way they transfer heat to the food.
• Aluminium, earthenware, oven glassware and bright
shiny utensils reduce cooking and base browning.
• Enamelled cast iron, anodized aluminium, aluminium
with non-stick interior and coloured exterior and dark,
heavy utensils increase cooking and base browning.
• To increase base browning simply lower the shelf
position. To increase top browning, raise the
shelf position.
• Always place dishes centrally on the shelf to ensure
even browning.
• Single level cooking gives best results in conventional
modes. If cooking on more than one level use a fan
cooking function.
Operating your oven temperature selector (selected
models only)
A thermostat controls the temperature in your appliance.
The temperature can be selected within the specified
range. To set the temperature, turn the temperature
selector in a clockwise direction to the desired setting. An
indicator light above the temperature selector will come
on. When the set temperature is reached, the element
switches off and the indicator light goes off. When the
oven temperature falls below the set temperature, the
element switches on and the oven indicator light comes
on again.
CAUTION
Once the food is cooked, turn the temperature selector
back in an anti-clockwise direction. Do not force it right
round in a clockwise direction as this will result in damage
to the thermostat.
NOTE: For multifunction ovens the desired cooking
function must be selected before the oven will operate.
Once the desired function has been selected, use the
temperature selector to set the required temperature.
Pre-heating your appliance
For best results when baking you must pre-heat the
oven for 30 minutes. Pre-heat the grill for 3 minutes to
obtain best results. Pre-heating your appliance allows it
to reach the required temperature quickly and efficiently.
When baking bread or cakes, load the oven as quickly as
possible after pre-heating and leave the oven door open
for the shortest time. This will minimise loss of heat from
the oven and ensure the best results.
Pre-heating with “Rapid Heat” (selected models only)
For electric multifunction appliances preheat your oven
by selecting the “rapid heat” function. This function allows
your oven to reach the preset temperature quicker than
any other cooking function.
• Turn the function selector to “Rapid Heat”.
• Set the desired pre-heat temperature, by rotating
your oven temperature selector. When the indicator
light goes out the oven has reached the desired
preset temperature. Select the oven function you
require for cooking or baking and place your food
into the oven.
Pre-heating with “Fast Heat Up - FHU” (WVE617 and
WVE618 models only)
“Fast Heat Up” can be selected in the initial heat up phase
of any cooking function. During “Fast Heat Up”, the heat
comes from the element surrounding the fan as well as
the smaller element above the food. This allows you to
preheat your oven 30% quicker than on standard “Bake”.
Pre-heating with other functions
• It is recommended you preheat your appliance when
cooking or baking.
• Set the desired pre-heat temperature, by rotating
your oven temperature selector. When the indicator
light goes out the oven has reached the desired
preset temperature, place your food into the oven.
Pre-heating “grill”
• Preheat the grill for at least 3 minutes to obtain best
results. This will help to seal the natural juices of
steak, chops and other meats for a better flavour.
14 USING YOUR OVEN
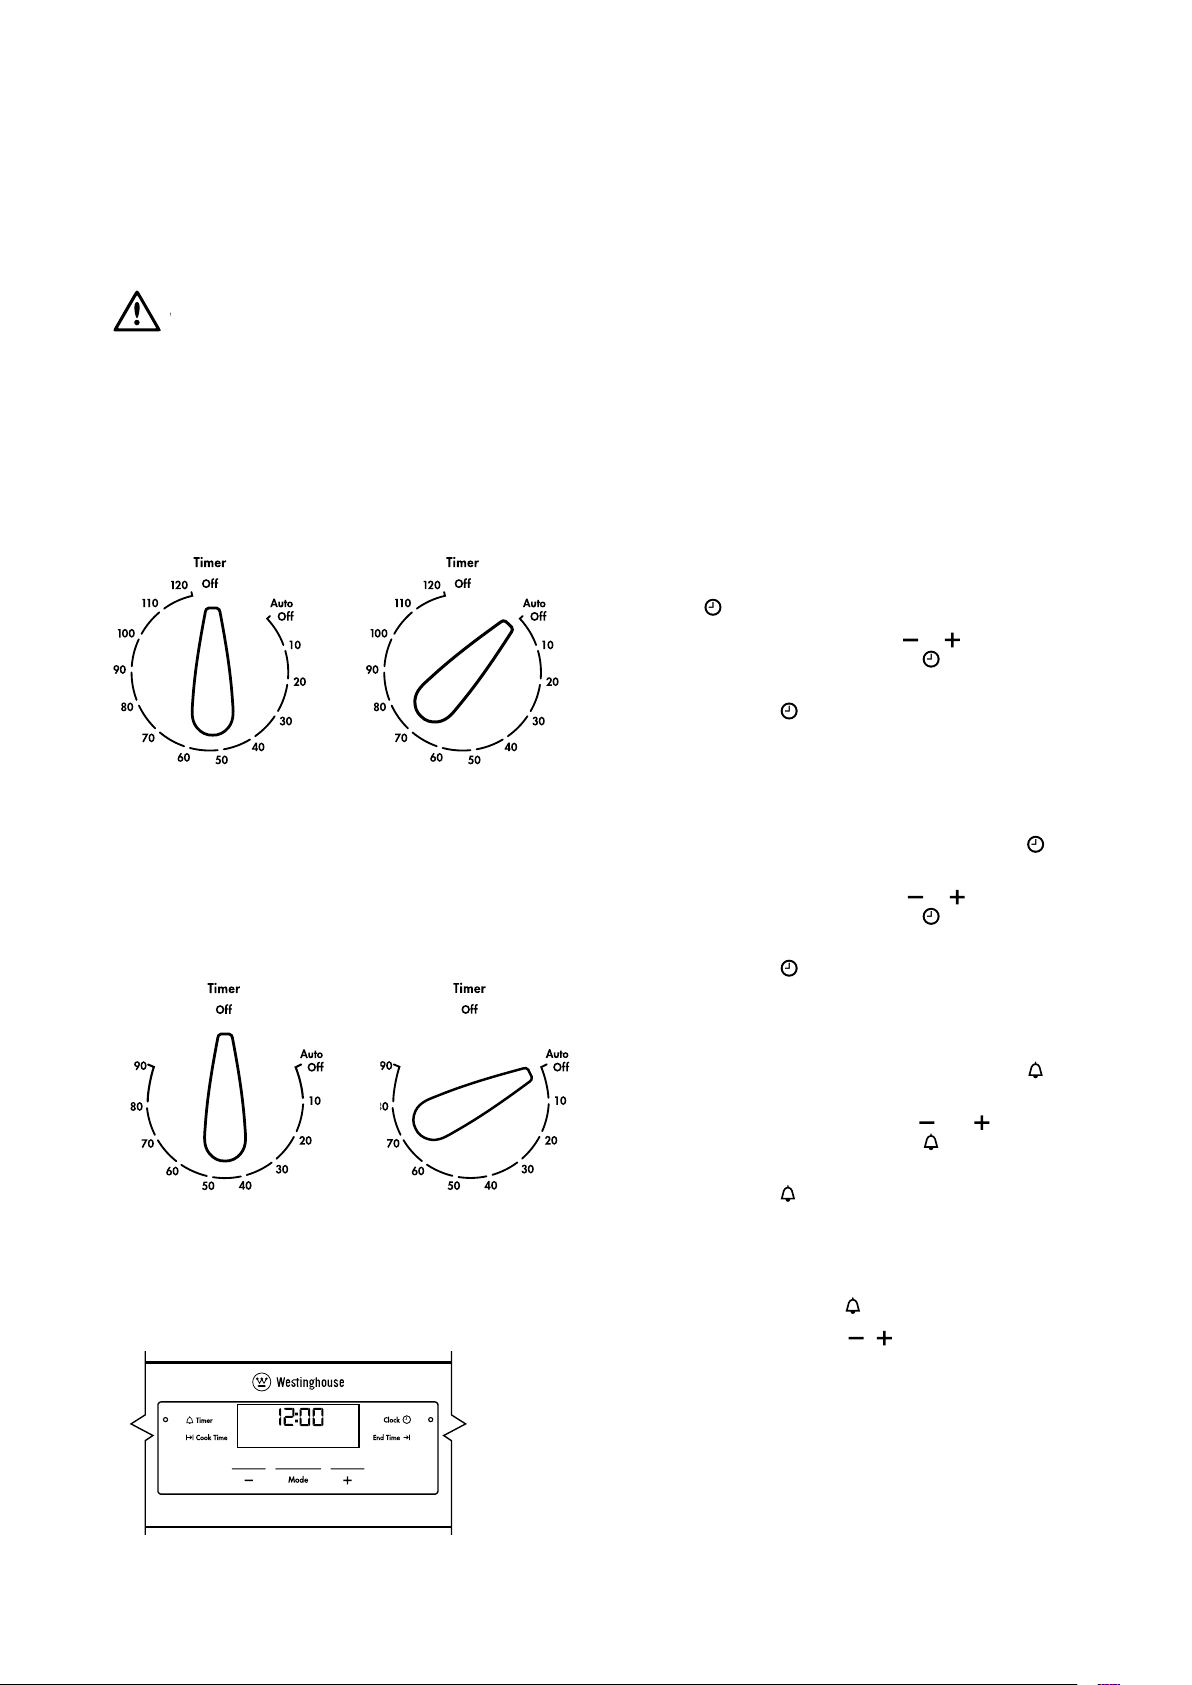
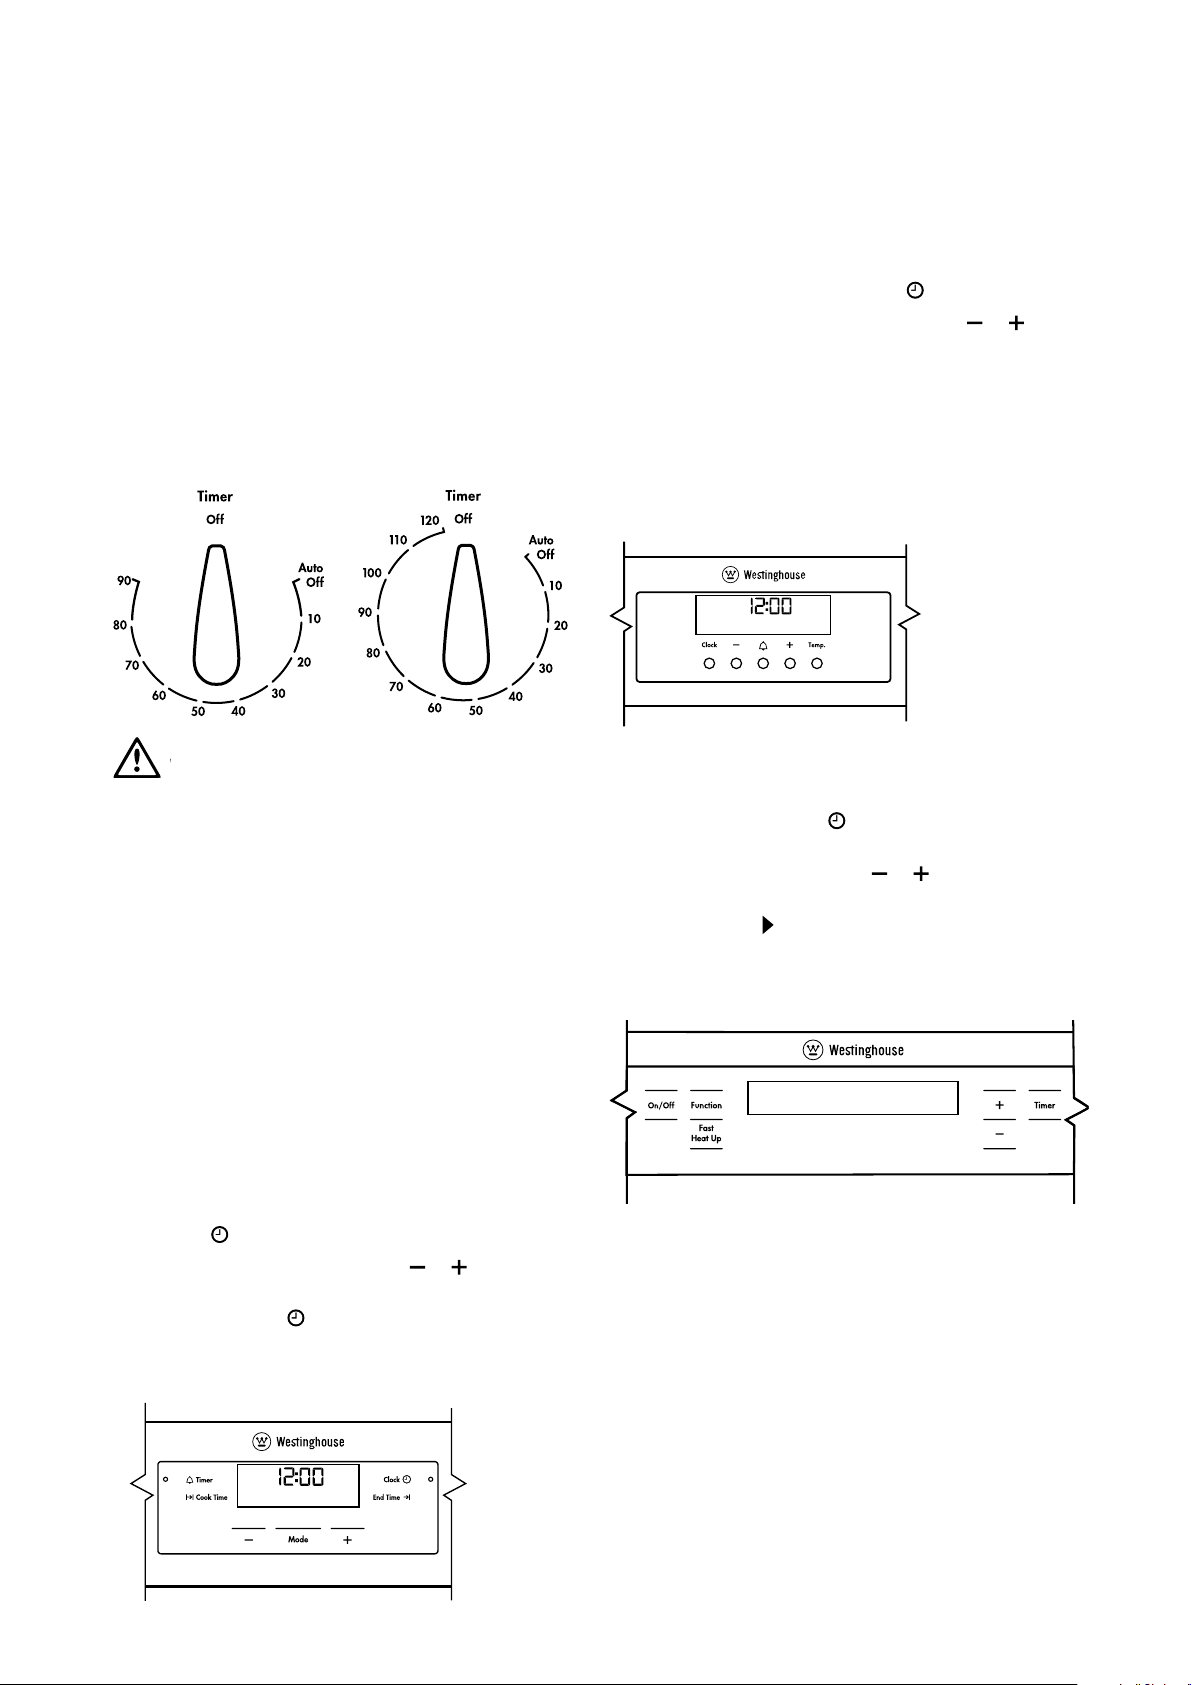
Cooking with your timer (selected models only)
WARNING
CAUTION
Set the timer clockwise. Do not force anticlockwise or
damage to the timer will result.
120 minute “Auto off” timer
The 120 minute timer features an automatic oven cut off
This means that a cooking period of up to 120 minutes
can be set. When the timer has counted back to “Auto
off”, a bell will sound and the oven will automatically
switch off.
Once automatic baking is complete, return to manual
operation by setting the timer to the “OFF” mark.
General features
The oven is equipped with an electronic clock that can
be used to turn the oven on and off automatically. The
‘Cook time’ function automatically turns the oven off after
a set amount of time. The ‘End time’ function is used to
set the time of day you want the cooking cycle to finish. A
“Delayed start” is possible by combining the “Cook time”
and “End time” features to switch the oven on and off at a
specific time during the day.
NOTE: Your touch control clock only operates with your
main oven.
Setting the time of day (after electrical connection)
1. After the appliance has been electrically connected,
“12.00” will be displayed and the “Clock” indicator
symbol
2. To set the time of day, press the
while the “Clock” indicator symbol
3. After 5 seconds from the last change, the “Clock”
indicator symbol
time has been set.
NOTE: The clock has a 24-hour display.
will flash.
or symbols
is flashing.
will disappear, confirming the
Changing the time of day
90 minute “Auto Off” timer
The 90 minute timer features an automatic oven “cut off”.
This means that a cooking period of up to 90 minutes can
be set. When the timer has counted back to “Auto Off”, a
ding will sound and the oven will automatically switch off.
Once automatic baking is complete, return to manual
operation by setting the timer to the “OFF” mark.
NOTE: It is not recommended to use this timer for short
durations (e.g. boiling eggs).
Operating the electronic clock (selected models only)
1. Press “Mode” until the “Clock” indicator symbol
begins flashing.
2. To set the time of day, press the
while the “Clock” indicator symbol
3. After 5 seconds from the last change, the “Clock”
indicator symbol
time has been set.
will disappear, confirming the
or symbols
is flashing.
Setting the minute minder
1. Press “Mode“ until the “Timer” indicator symbol
begins flashing.
2. Set the countdown time by using
while the “Timer” indicator symbol
3. After 5 seconds from the last change, the “Timer”
indicator symbol
timer has been set. The countdown time remaining
will appear on the display.
4. Once the set time has elapsed, a beeper will sound
for 1 minute. The time indication “0.00” and a flashing
“Timer” indicator symbol
5. To stop the beeper, press
NOTE: This feature has no effect on the oven operation.
With the minder operating, the time of day cannot be
displayed.
will stop flashing, confirming the
will appear on the display.
, symbols or “mode”.
and symbols
is flashing.
15USING YOUR OVEN
 Loading...