

Page 1
INSTALLATION GUIDE
WARNING:
THIS PRODUCT MUCT BE INSTALLED IN ACCORDANCE WITH THE APPLICABLE INSTALLATION CODE
BY A PRESON FAMILIAR WITH THE CONSTRUCTION AND OPERATION OF THE PRODUCT AND THE HAZARDS
INVOLVED.
RISK OF SHOCK:
DISCONNECT POWER BEFORE INSTALLATION.
Risk of re/electric shock - The electrical rating of this product is 120-277V. Installer must determine whether
they have 120-277V at the xture before installation.
Risk of re/electric shock - T8 LED tube installation requires knowledge of uorescent lighting luminaires and
electrical systems. If not qualied, DO NOT attempt installation. Contact a qualied electrician.
Risk of re/electric shock - Install this kit only in the luminaires that have the construction features and
dimensions shown in the drawing and/or photographs.
Risk of re/electric shock - Do not use this kit in luminaires that emply shunted bi-pin lamp holders (found in
xtures that use instant start ballasts).
Do not make or alter any open holes in an enclosure of wiring or electrical components during installation.
This device complies with Part 15 of the FCC rules and has been tested and found to comply with the limits for
a Class B digital device. These limits are designed to provide reasonable protection against harmful
interference in a residential installation. This equipment generates, uses and can radiate radio frequence to
radio communications. Any changes or modications not expressly approved by the manufacturer could void
the uner’s authority to operate the equipment.
Removing uorescent lamp system
NOTE: Westinghouse TL LED tube is suitable for be installed in T8 or T12 standard luminaries.
1. Disconnect power from xture.
2. Remove uorescent bulb.
3. Remove wiring compartment cover.
4. Cut all wires which are connected to ballast and remove it.
L
AC Input
N
Ballast BallastAC Input
Fluorescent lamp
L
N
STOP!
DO NOT install this product in a xture that uses shunted lamp holders
(found in all xtures with instant start ballasts). Installing this product
with shunted lamp holders will cause a short circuit condition in the lamp
holder and create a re or shock hazard. Before continuing, determine if
the lamp holders currently installed in the xture are shunted or
non-shunted. If the current lamp holders are shunted, cut the wires away
from the lamp holders and install non-shunted lamp holders, making
new connections with the lead wires at terminals indicated here:
Fluorescent lamp
Fluorescent lamp
Non-shunted lampholder
NOTE: If using existing non-shunted lamp holders, installer should not disconnect lead wires from
lamp holders and make new connections at terminals. Instead, cut lead wires away from lamp holders
and make new connections to lead wires using approved connectors.
Page 2
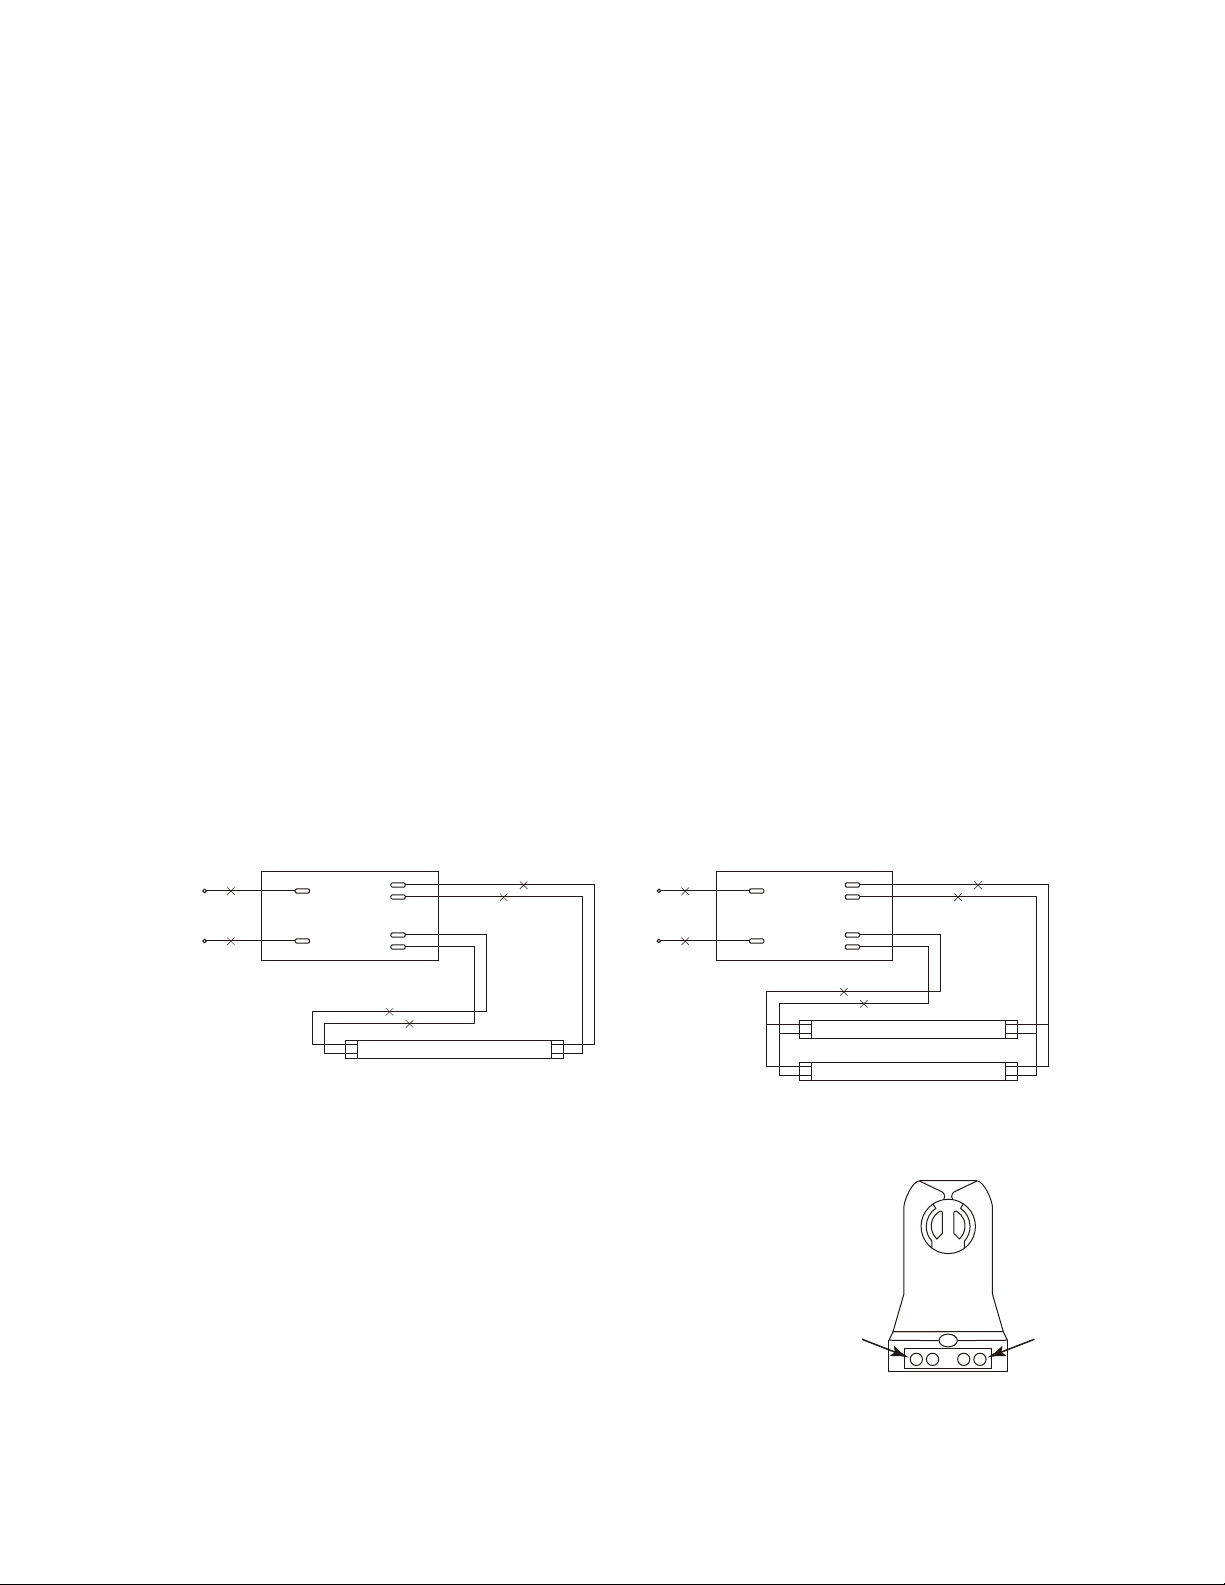
Retrotting xtures with ONE LAMP
NOTE:
Only one end of this LED tube receives power. The “powered” end is indicated with a sticker on the tube
itself. Before begining installation, determine which end of the xture will be the “powered” end and which
end will be the “dead” end.
1. Make sure AC power to xture is OFF
2. Make sure ground wire from AC supply is securely connected to ground screw inside xture.
3. Connect black (live) and white (neutral) lead wires from lamp holders on “powered” end to incoming AC
supply black (LIVE) and white (NEUTRAL) wires with approved wire connectors. If only one lamp is being
installed, proceed to step 4 below.
No Live Connection
Live
Neutral
Non-shunted Lampholder
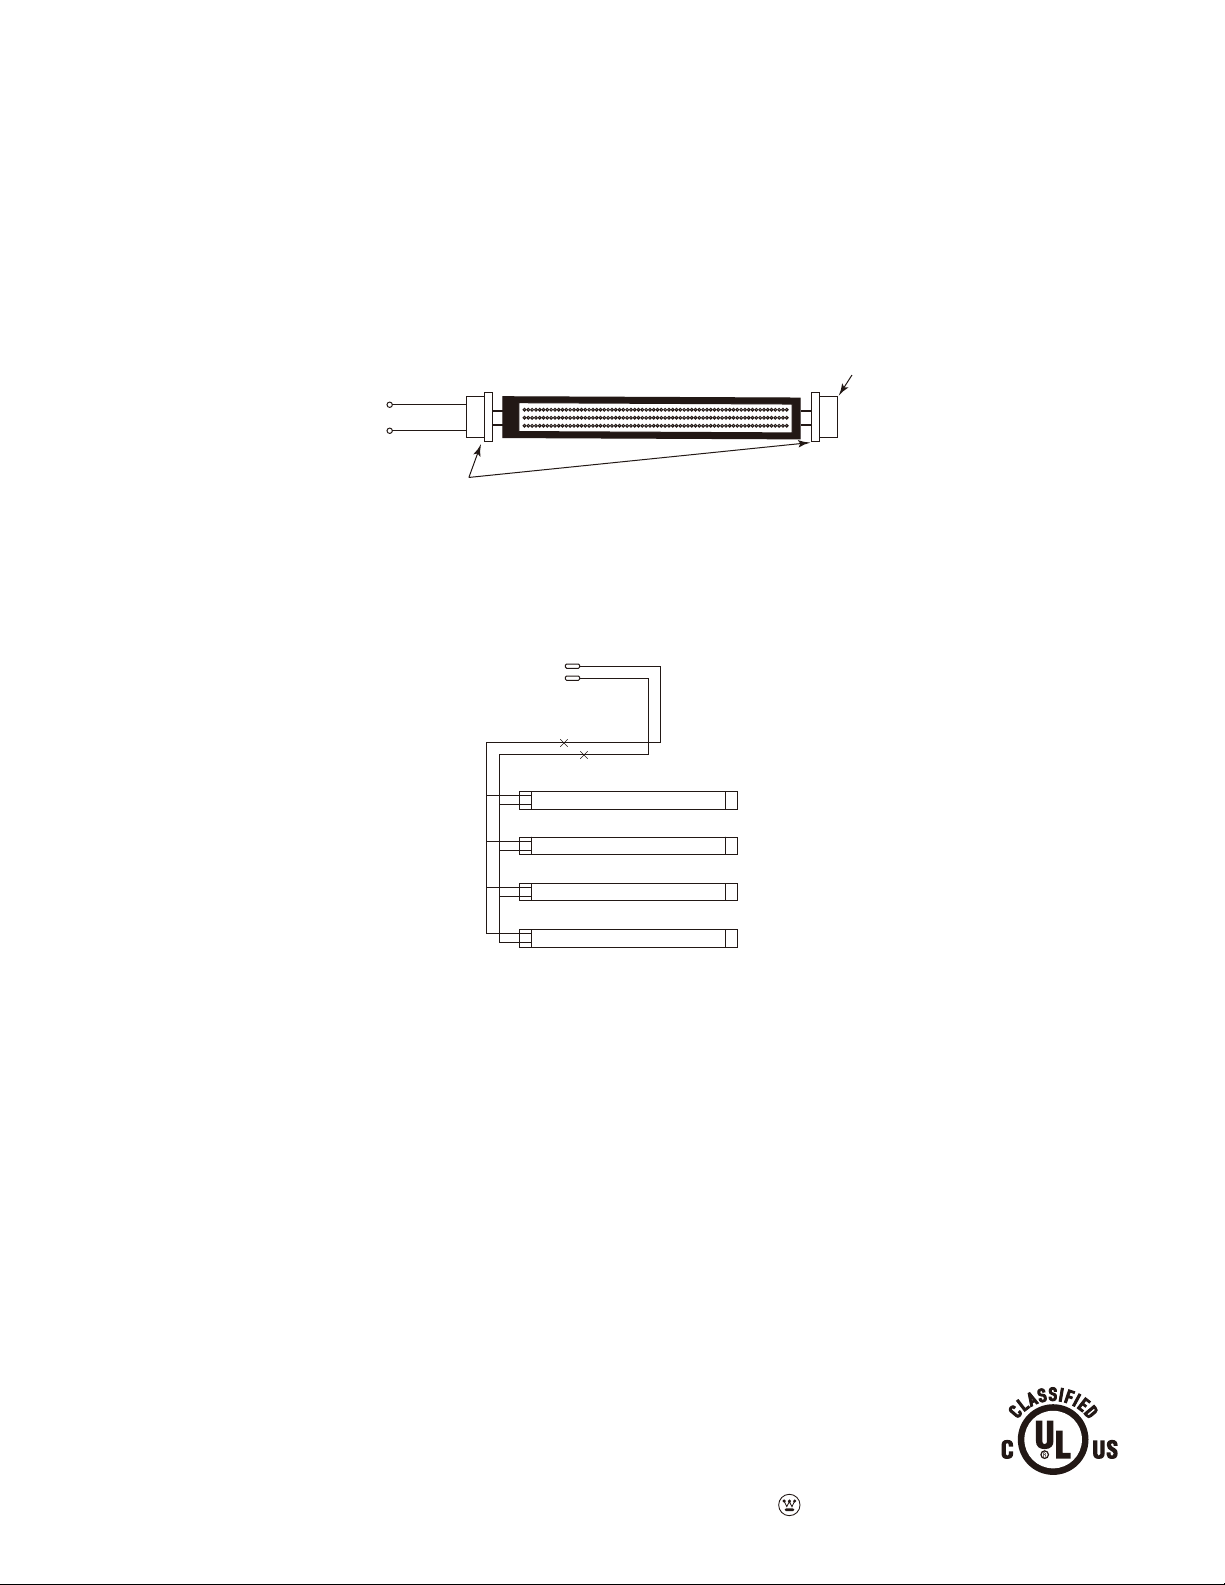
Retrotting xtures with MULTIPLE LAMPS
After completing steps 1 - 3 above, connect terminals on the “powered” lamp holder for rst lamp to
matching terminals on “powered” lamp holder for second lamp with black (live) and white (neutral) wires,
being sure to maintain polarity. Repeat this “daisy chain” connection for each additional lamp.
AC Input
LED Tube
LED Tube
LED Tube
LED Tube
When all connections are complete, place appropriate connectors/wire nuts on the end of any unused wires.
4.
5. Replace wiring compartment cover.
6. Place sticker that is included with this product on wiring compartment cover or other conspicuous place
on or inside of xture. Sticker reads: “This xture has been modied. The ballast has been removed. DO
NOT install uorescent lamps in this xture”.
7. Place sticker that is included with this product somewhere near the “powered end” socket(s). Sticker
reads: “The socker(s) on this end of the luminaire are supplying line volatage. Be sure to install the
powered end of the LED tube(s) into the sockers on this end of the luminaire.”
8. Install LED tube(s), matching the end of the lamp that has the “L/N” sticker to the lamp holder that is
connected to the Live and Neutral wires.
9. Re-connect power to xture.
The luminaire wiring has now been modied and will no longer operate uorescent lamps.
Do not use with dimmers.
Suitable for dry locations only.
This device is not intended for use with emergency exits.
Westinghouse Lighting, Philadelphia, PA 19154-1029, U.S.A. www.westinghouselighting.com , WESTINGHOUSE, and INNOVATION YOU CAN BE SURE OF are
trademarks of Westinghouse Electric Corporation. Used under license by Westinghouse Lighting All rights reserved. Made in China
 Loading...