

Westin HDX DROP STEP WHEEL-TO-WHEEL NERF STEP BARS INSTALLATION INSTRUCTIONS
INSTALLATION INSTRUCTIONS
HDX DROP STEP WHEEL-TO-WHEEL NERF STEP BARS
ITEM QUANTITY DESCRIPTION TOOLS NEEDED
1 2 RUNNING BOARD ASSEMBLY (1 DRIVER, 1 PASSENGER) 16MM SOCKET
2 2 FRONT MOUNTING BRACKET (1 DRIVER, 1 PASSENGER) 16MM WRENCH
3 2 CENTER MOUNTING BRACKET 13MM SOCKET
4 2 REAR MOUNTING BRACKET 13MM WRENCH
5 6 MOUNTING BRACKET BASE 10MM SOCKET
6 2 TOP ISOLATOR BRACKET (1 DRIVER, 1 PASSENGER) 10MM WRENCH
7 2 TOP ISOLATOR BRACE (1 DRIVER, 1 PASSENGER) 15MM SOCKET
8 2 BOTTOM ISOLATOR BRACKET (1 DRIVER, 1 PASSENGER) 19MM SOCKET
APPLICATION:
Ram 1500 Crew Cab 2019 (5.5 ft. Bed) (Excl. 2019 Ram 1500
Classic); Ram 1500 Crew Cab & Quad Cab 2019 (6.4 ft. Bed)
(Excl. 2019 Ram 1500 Classic)
PART NUMBER:
56-534705, 56-5347052, 56-534725, 56-5347252, 56-534735, 565347352
CONTENT
9 4 ISOLATOR KIT 1/2” EXTENSION
10 16 M8 HEX HEAD BOLT (YELLOW ZINC) RATCHET
11 38 M8 SPLIT LOCK WASHER (YELLOW ZINC) TORQUE WRENCH
12 38 M8 FLAT WASHER (YELLOW ZINC) IMPACT GUN
13 24 M8 HEX NUT (YELLOW ZINC) BREAKER BAR
14 2 M10 HEX HEAD BOLT (YELLOW ZINC)
15 2 M10 SPLIT LOCK WASHER (YELLOW ZINC)
16 4 M10 FLAT WASHER (YELLOW ZINC)
17 2 M10 HEX NUT (YELLOW ZINC)
18 4 M12 HEX HEAD BOLT (YELLOW ZINC)
19 4 M12 SPLIT LOCK WASHER (YELLOW ZINC)
20 6 M8 ROUND HEAD SQUARE NECK BOLT (BLACK ZINC)
21 18 M8 PLASTIC RETAINER SQUARES
ANTI-SEIZE LUBRICANT MUST BE USED ON ALL STAINLESS STEEL FASTENERS TO PREVENT THREAD DAMAGE AND GALLING
P.N.: 75-5653470-RevA
Westin Automotive Products, Inc.
320 W. Covina Blvd
San Dimas, Ca. 91773
ECO #: W18-0099
1
Thank you for choosing Westin products
for additional installation assistance please call
Customer Service (800) 793-7846
www.westinautomotive.com
DATE: 11/7/18
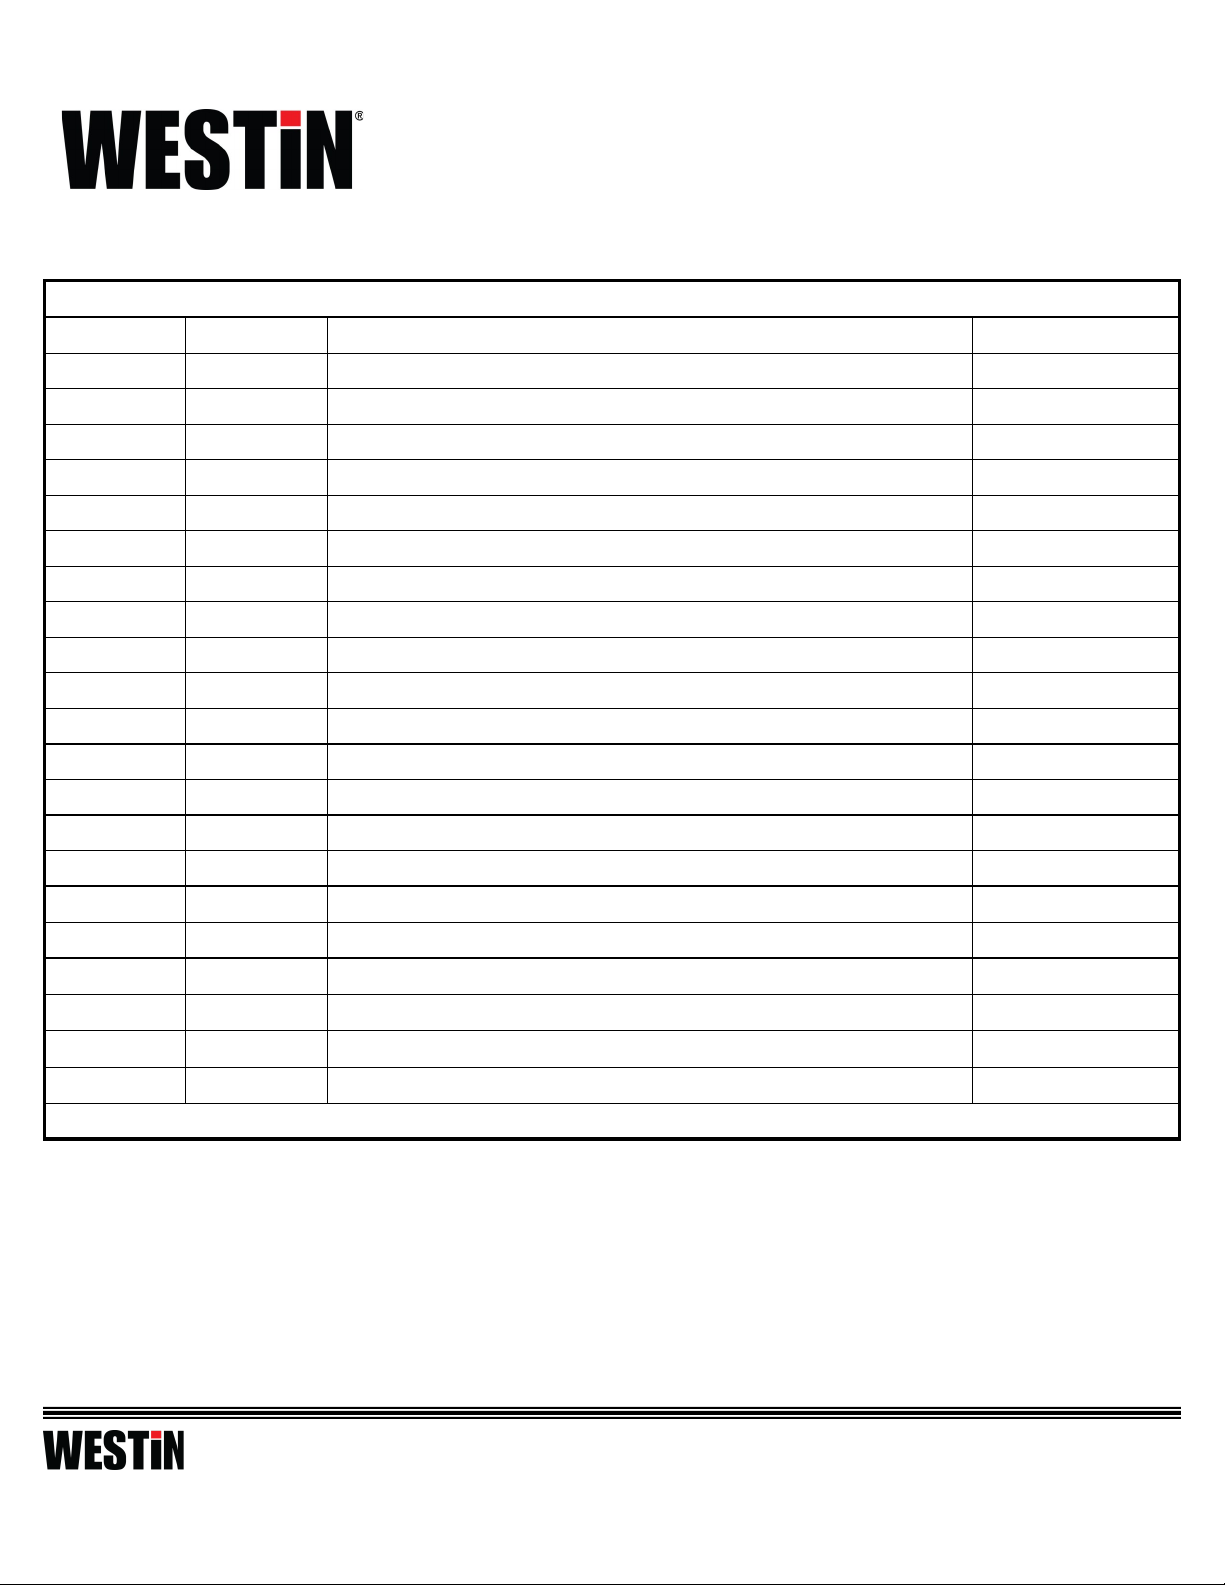
Passenger
ITEM 1
ITEM 2
ITEM 3 ITEM 4 ITEM 5
Driver
ITEM 6 ITEM 7
ITEM 8
ITEM 9
PROCEDURE
1. Remove contents from box, verify if all parts listed are present and free from damage.
Carefully read and understand all instructions before attempting installation.
Failure to identify damage before installation could lead to a rejection of any claim.
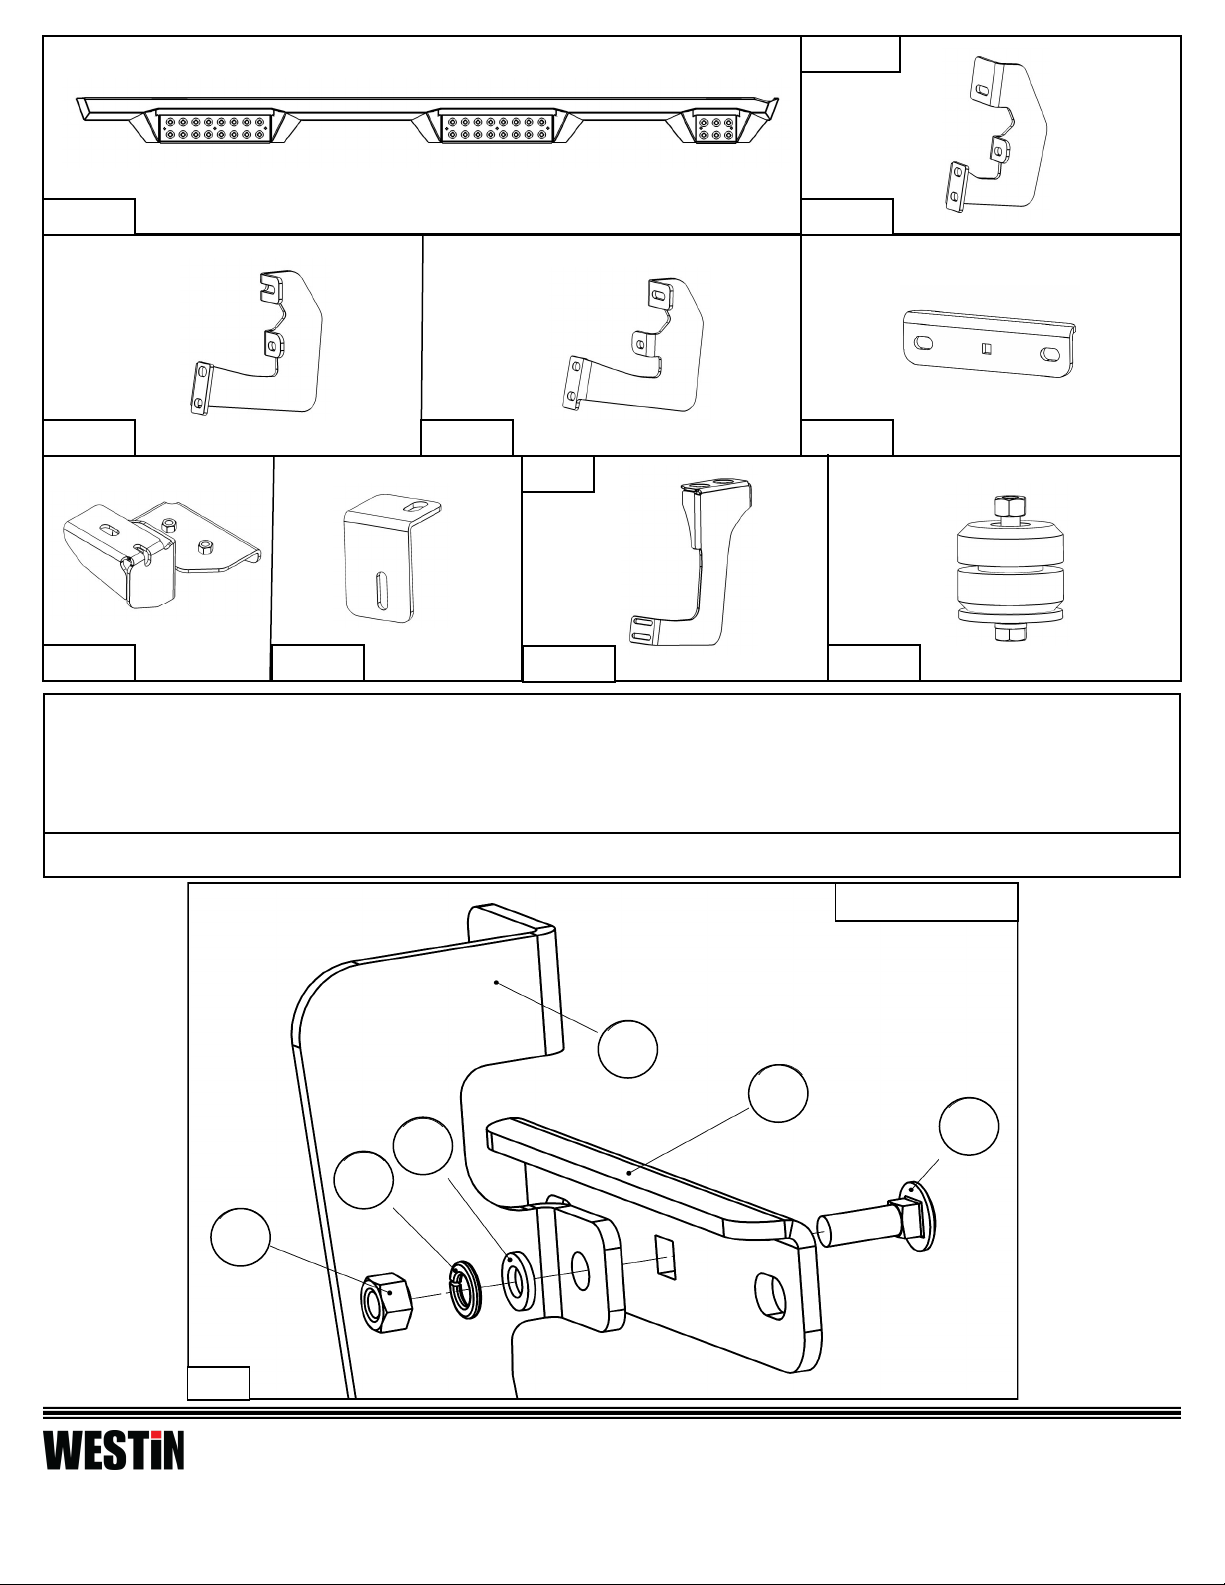
2. Preassemble the Mounting Brackets with Mounting Bracket Bases. Do not tighten hardware at this time. See Figure 1.
Similar Bracket
4
5
20
12
11
13
Fig. 1
Thank you for choosing Westin products
for additional installation assistance please call
Customer Service (800) 793-7846
www.westinautomotive.com
DATE: 11/7/18
P.N.: 75-5653470-RevA
Westin Automotive Products, Inc.
320 W. Covina Blvd
San Dimas, Ca. 91773
ECO #: W18-0099
2
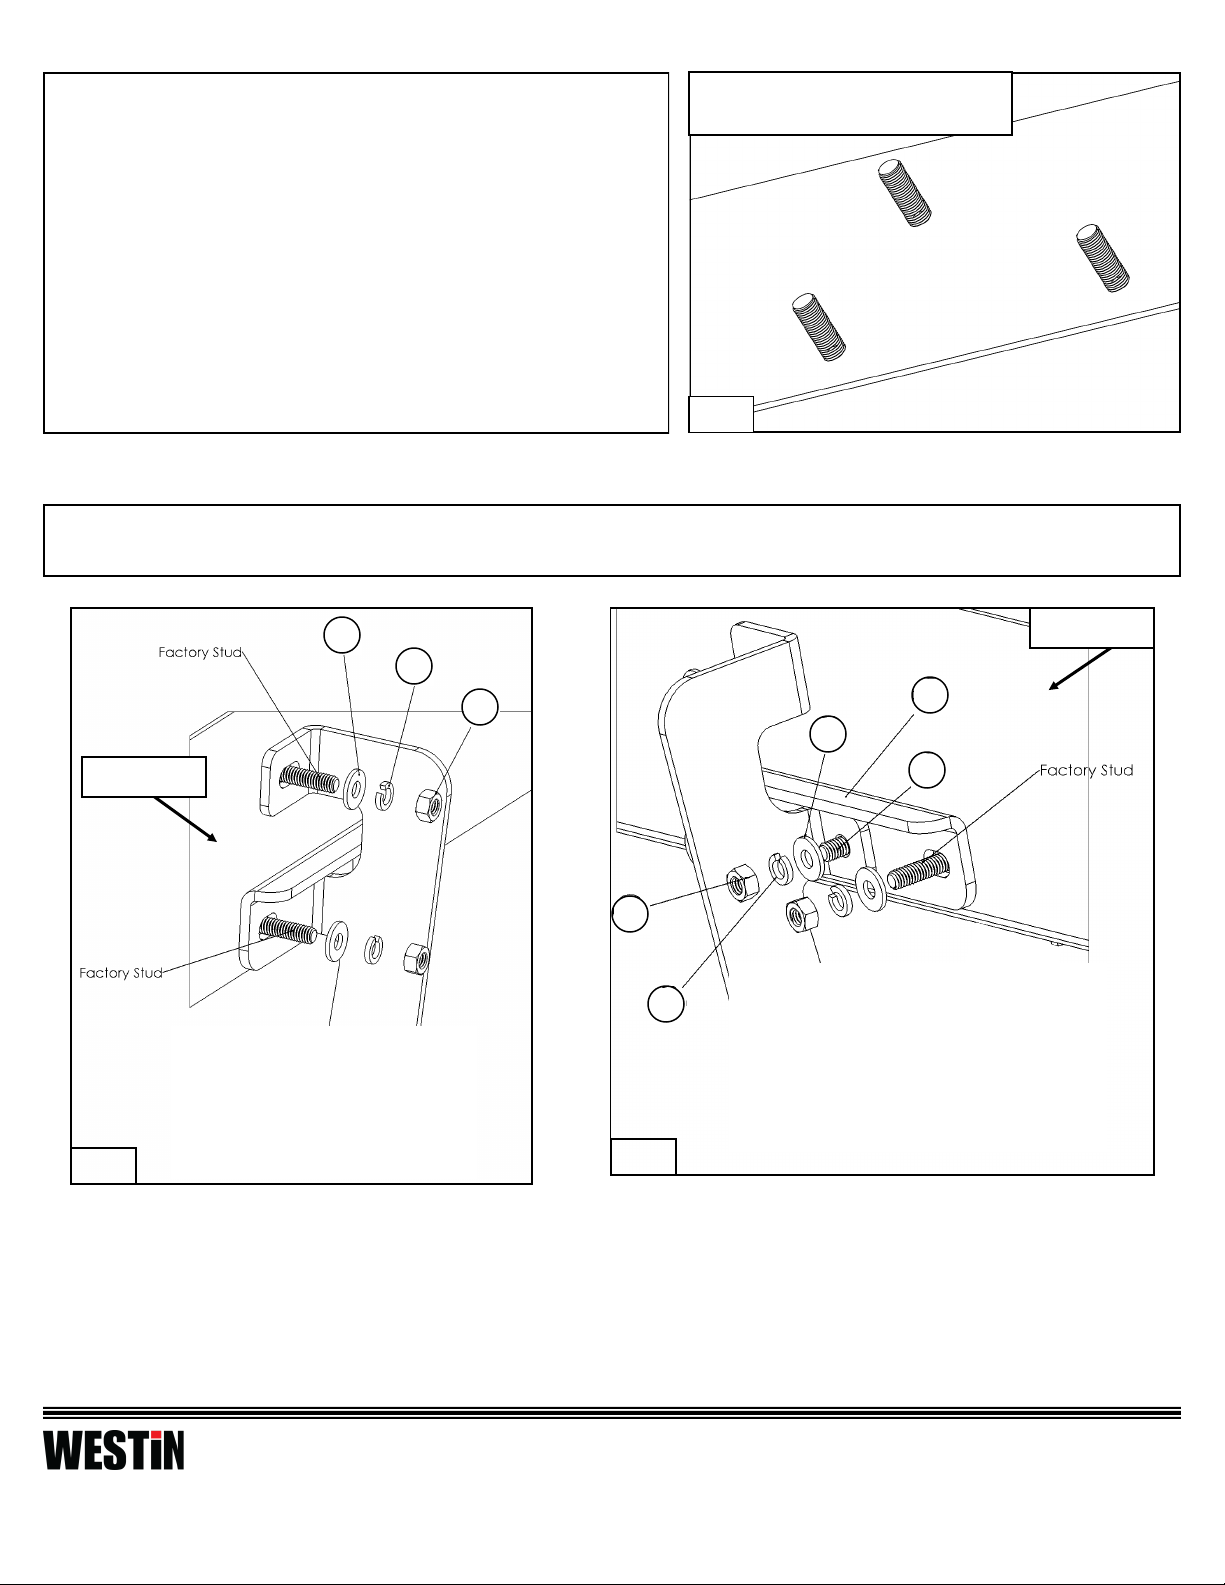
Rear Mounting Location Shown
Other Mounting Locations are Similar
3. Starting on the passenger side of the vehicle, locate the 3
mounting locations on the rocker panel.
Note A: The rear mounting location is shown in Figure 2.
Other mounting locations are similar.
Note B: The lower two studs on the rocker panel have a thick
coat of paint on them. When installing the M8 hex nuts,
apply extra pressure to start. If necessary, back M8 hex
nuts off the studs to clear build up.
See Figure 2.
Fig. 2
4. At the rear mounting location, loosely install Rear Mounting Bracket (4) with preassembled Mounting Bracket Base (5)
using the supplied M8 hardware. See Figures 3 & 4.
Rocker Panel
Fig. 3
12
Rocker Panel
11
13
5
12
20
13
11
Fig. 4
P.N.: 75-5653470-RevA
Westin Automotive Products, Inc.
320 W. Covina Blvd
San Dimas, Ca. 91773
ECO #: W18-0099
3
Thank you for choosing Westin products
for additional installation assistance please call
Customer Service (800) 793-7846
www.westinautomotive.com
DATE: 11/7/18
 Loading...