

Page 1

zebra wood headboard
! Tools supplied:
! Do not throw away packaging materials until assembly is complete.
! Assemble this item on a soft surface, such as cardboard or carpet, to protect fi nish.
! Proper assembly of this item requires 2 people.
assembly instructions
Hardware
AB
bolt: 6mm x 35 mm long 8x
CD
fl at washer 6x13mm 16x
EF
long bolt: 6mm x 70mm 4x
G
lock washer 16x
cap nut 8x
short bolt: 6mm x 90mm 4x
nut 4x
7627540/7627532/7627524/7627516 10.30.08
Page 1 of 7
Page 2
zebra wood headboard
assembly instructions
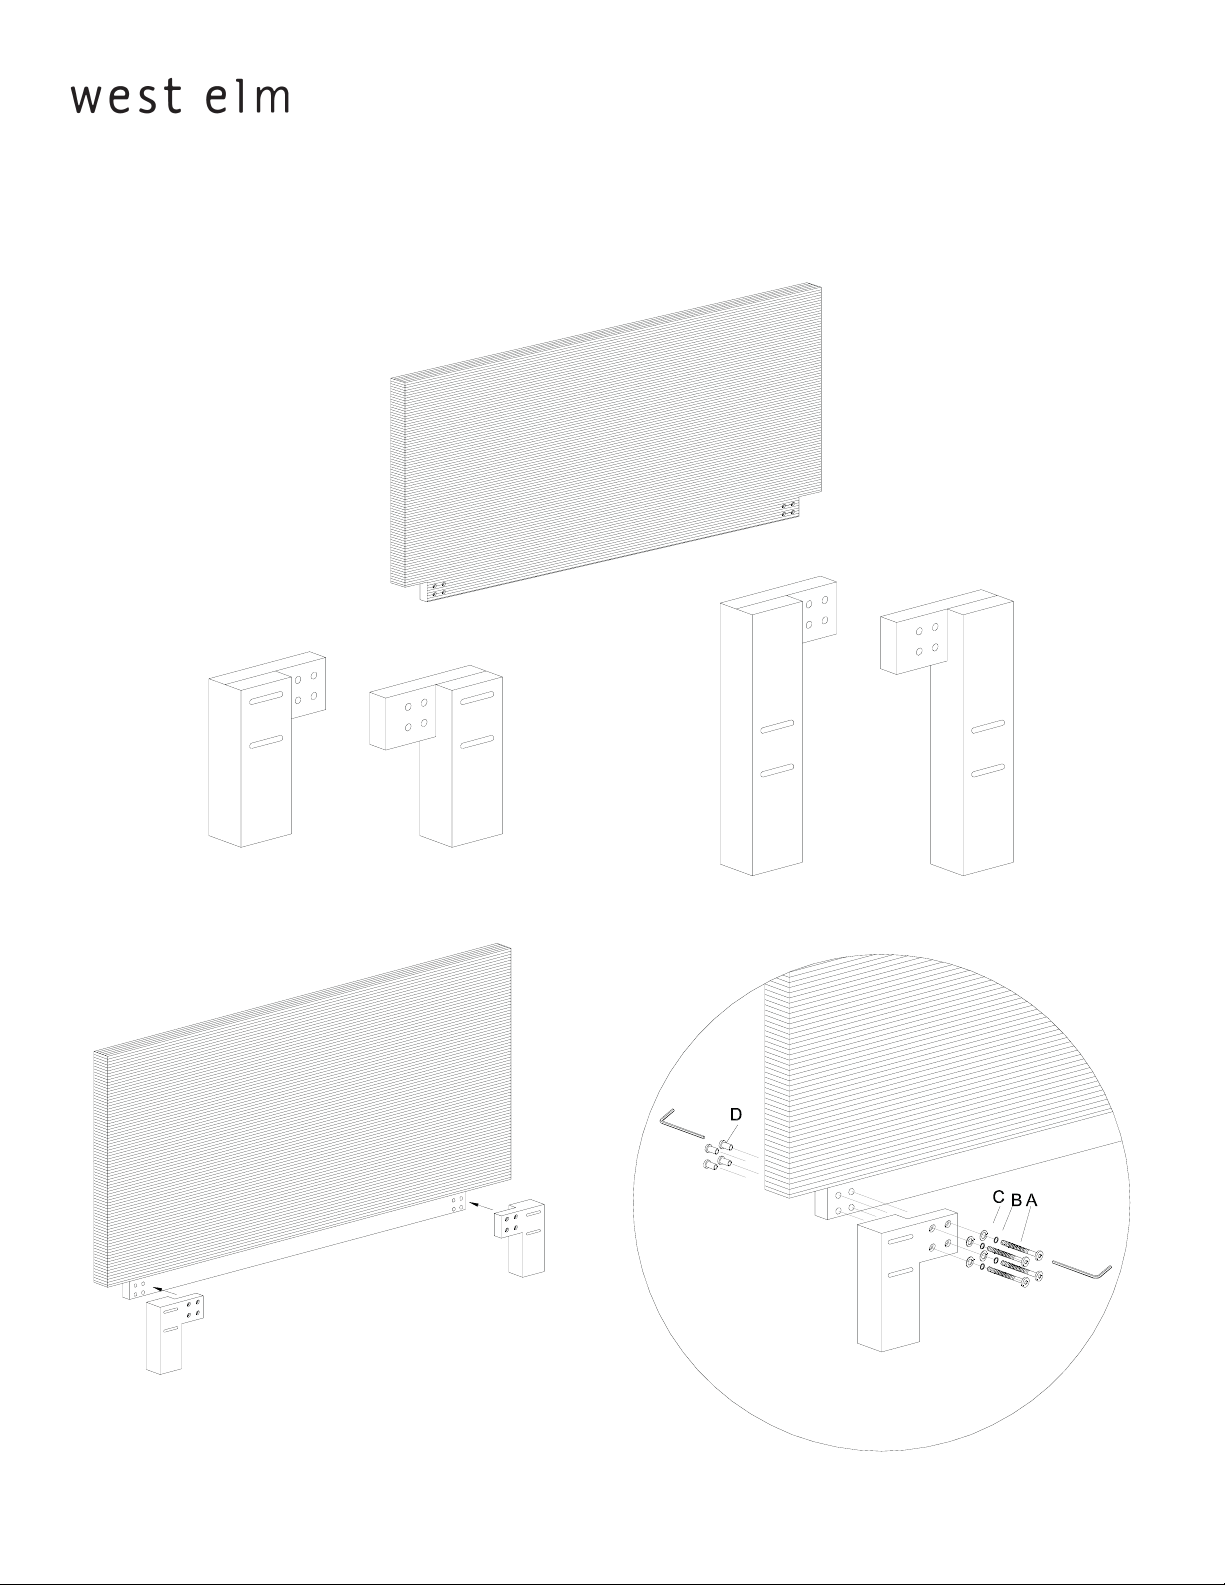
1.Choose the legs that match your bedframe. Fasten legs to the headboard using bolt (A), lock washer (B),
metal washer (C), and cap nuts (D). Tighten with supplied allen key.
7627540/7627532/7627524/7627516 10.30.08
Page 2 of 7
Page 3
zebra wood headboard
assembly instructions
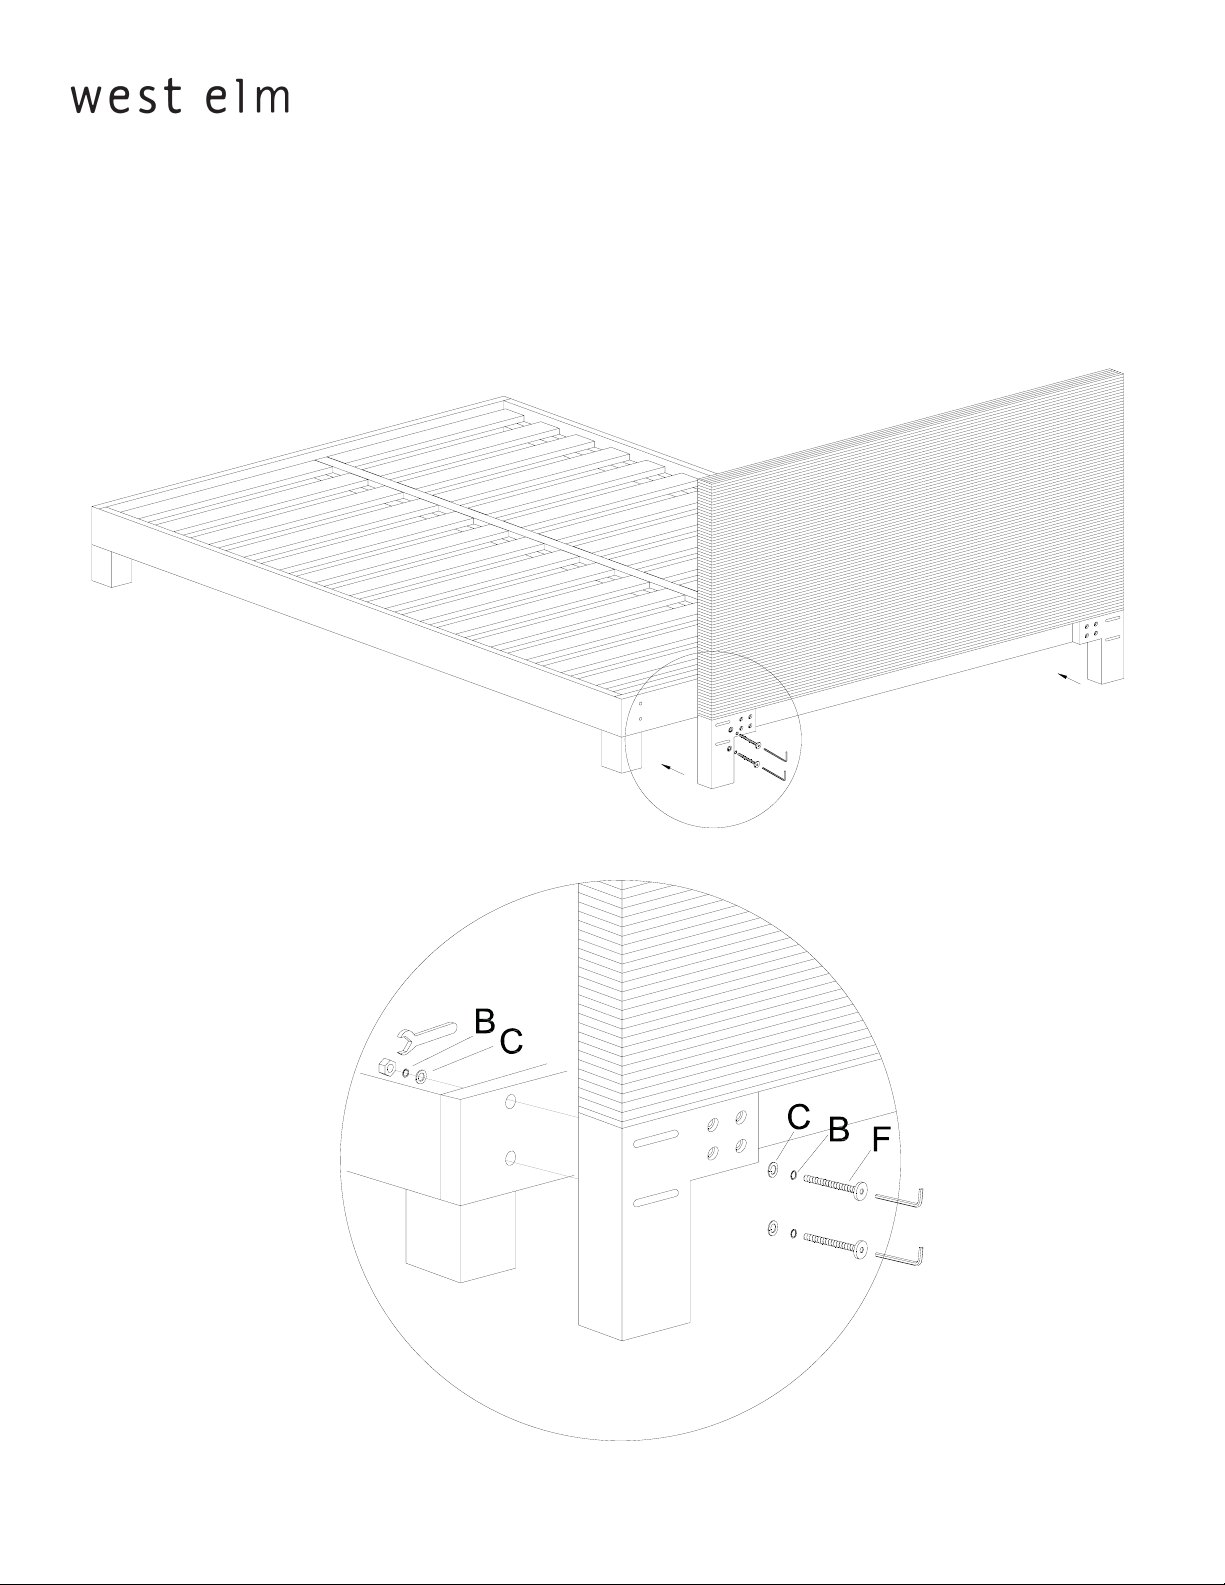
Attaching the headboard to the west elm wood bed frame.
1. Fasten legs to the headboard using bolt (F), lock washer (B), metal washer (C), and nuts (G). Tighten
with supplied allen key.
7627540/7627532/7627524/7627516 10.30.08
Page 3 of 7
Page 4

zebra wood headboard
assembly instructions
Attaching the headboard to the tall wood bed frame.
1. Fasten legs to the headboard using bolt (F), lock washer (B), metal washer (C), and nuts (G). Tighten
with supplied allen key.
7627540/7627532/7627524/7627516 10.30.08
Page 4 of 7
Page 5

zebra wood headboard
assembly instructions
Attaching the headboard to the narrow leg bed frame.
1. Fasten legs to the headboard using bolt (F), lock washer (B), metal washer (C), and nuts (G). Tighten
with supplied allen key.
7627540/7627532/7627524/7627516 10.30.08
Page 5 of 7
Page 6

zebra wood headboard
assembly instructions
Attaching headboard to metal bed frame for boxspring and mattress.
1. Align hardware bolt (E), lock washer (B), at washer (C) and nut (G) as shown and tighten with supplied
tools.
7627540/7627532/7627524/7627516 10.30.08
Page 6 of 7
Page 7

zebra wood headboard
assembly instructions
Attaching the headboard to the chunky wood bed frame.
1. Fasten legs to the headboard using bolt (F), lock washer (B), metal washer (C), and nuts (G). Tighten
with supplied allen key.
CARE INSTRUCTIONS
Hardware may loosen over time. Periodically check that all connections are tight.
Wipe with a soft, dry cloth. To protect nish, avoid the use of chemicals and household cleaners.
7627540/7627532/7627524/7627516 10.30.08
Page 7 of 7
 Loading...