

Page 1

: upholstered bedframe
assembly instructions
A
small bolt 1/4”DIA x 5/8”
(for full, queen, king, cal king size 8x)
(for twin size 4x)
C
small metal washer (for full, queen, king, cal king size 8x)
E
(for full, queen, king, cal king size 8x)
(for twin size 4x)
(for twin size 4x)
F
(for full, queen, king, cal king only)
H
B
large bolt 5/16”DIA x 1”
D
large metal washer
(for full, queen, king, cal king only)
4x
I
(for full, queen, king, cal king size 12x)
(for twin size 8x)
8x
G
lock washer large nut small nut 12x
small wrench large wrench 1x
8995672/6952048/6952022/6951941/8996217/8995623/7322753/8995276/8995201/8995037/8986127/
8986036/8986069/8986085/8985962 - 10/05
(for full, queen, king, cal king size 2x)
(for twin size 1x)
page 1 of 8
Page 2
: upholstered bedframe
assembly instructions
! Do not throw away packaging materials until
assembly is complete.
! Assemble this item on a soft surface, such as
cardboard or carpet, to protect the finish.
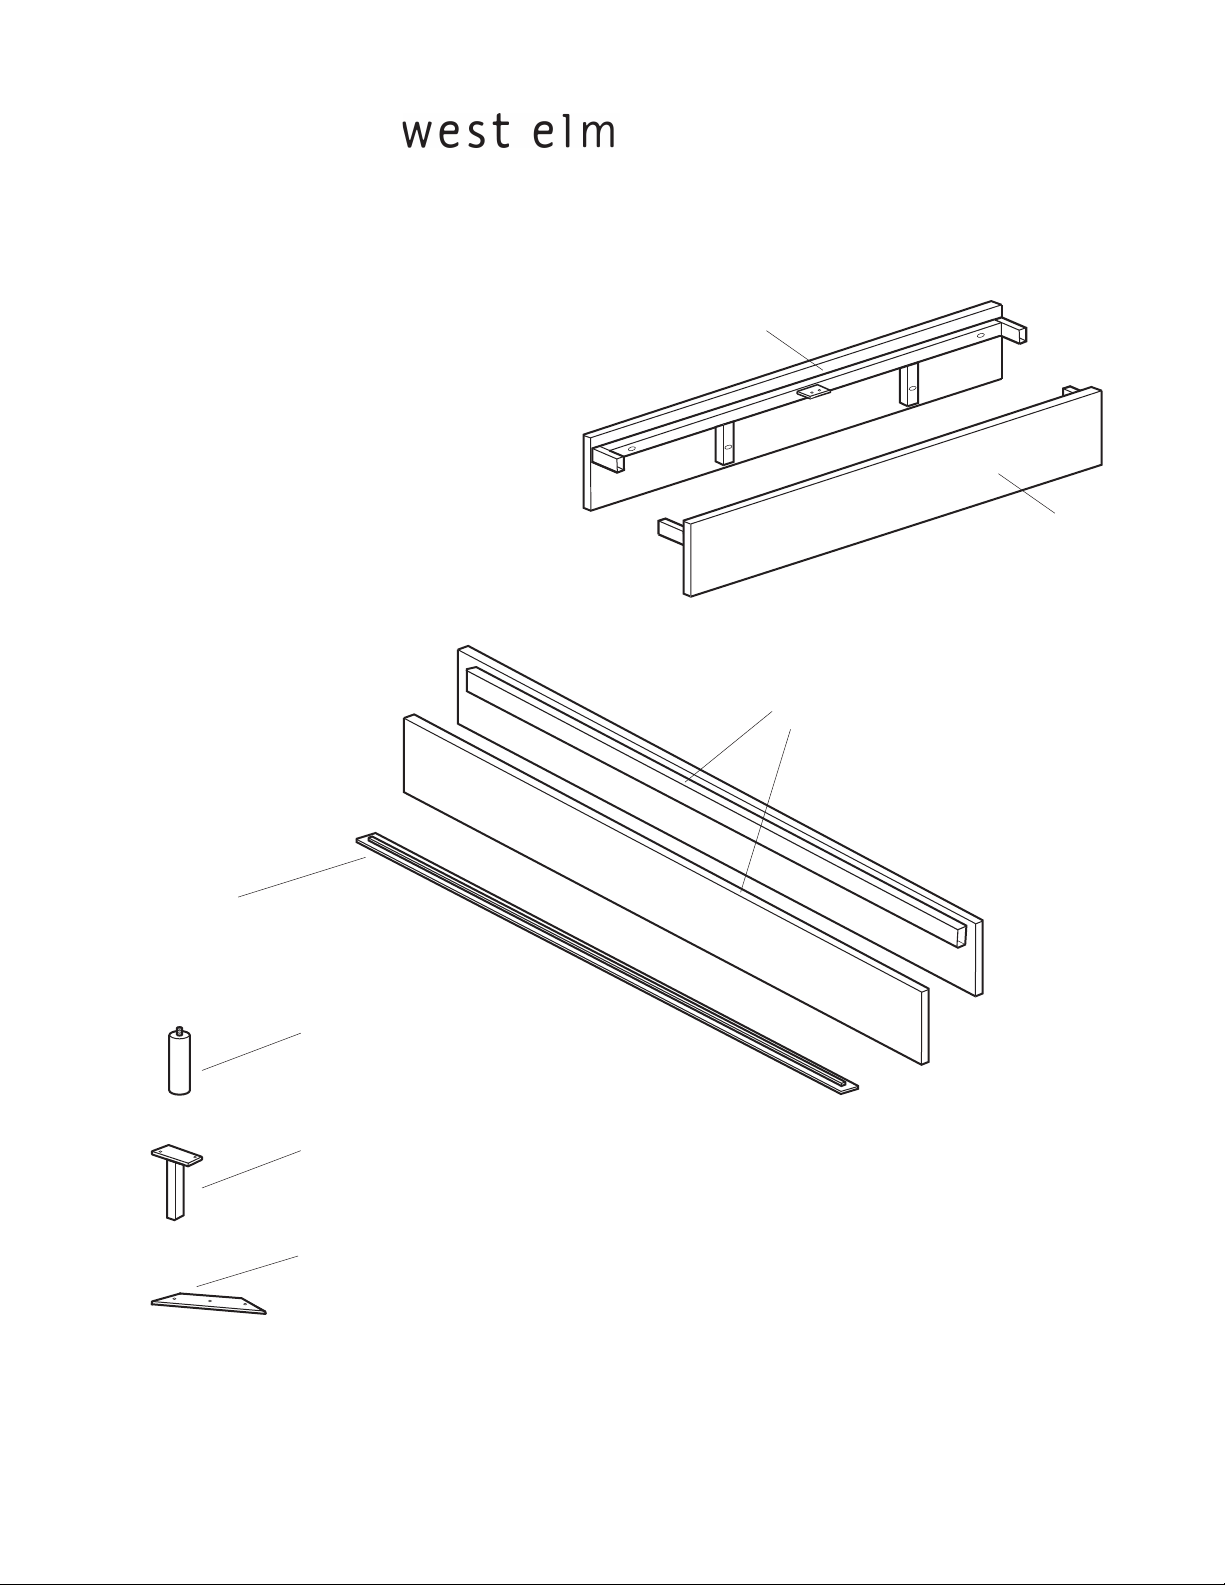
headboard
footboard
side panel (2x)
midbeam
(cal king, king, queen, and full sizes only)
corner leg (x4)
center leg (x2)
(cal king, king, queen, and full sizes only)
corner brace (x4)
8995672/6952048/6952022/6951941/8996217/8995623/7322753/8995276/8995201/8995037/8986127/
8986036/8986069/8986085/8985962 - 10/05
page 2 of 8
Page 3
: upholstered bedframe
assembly instructions
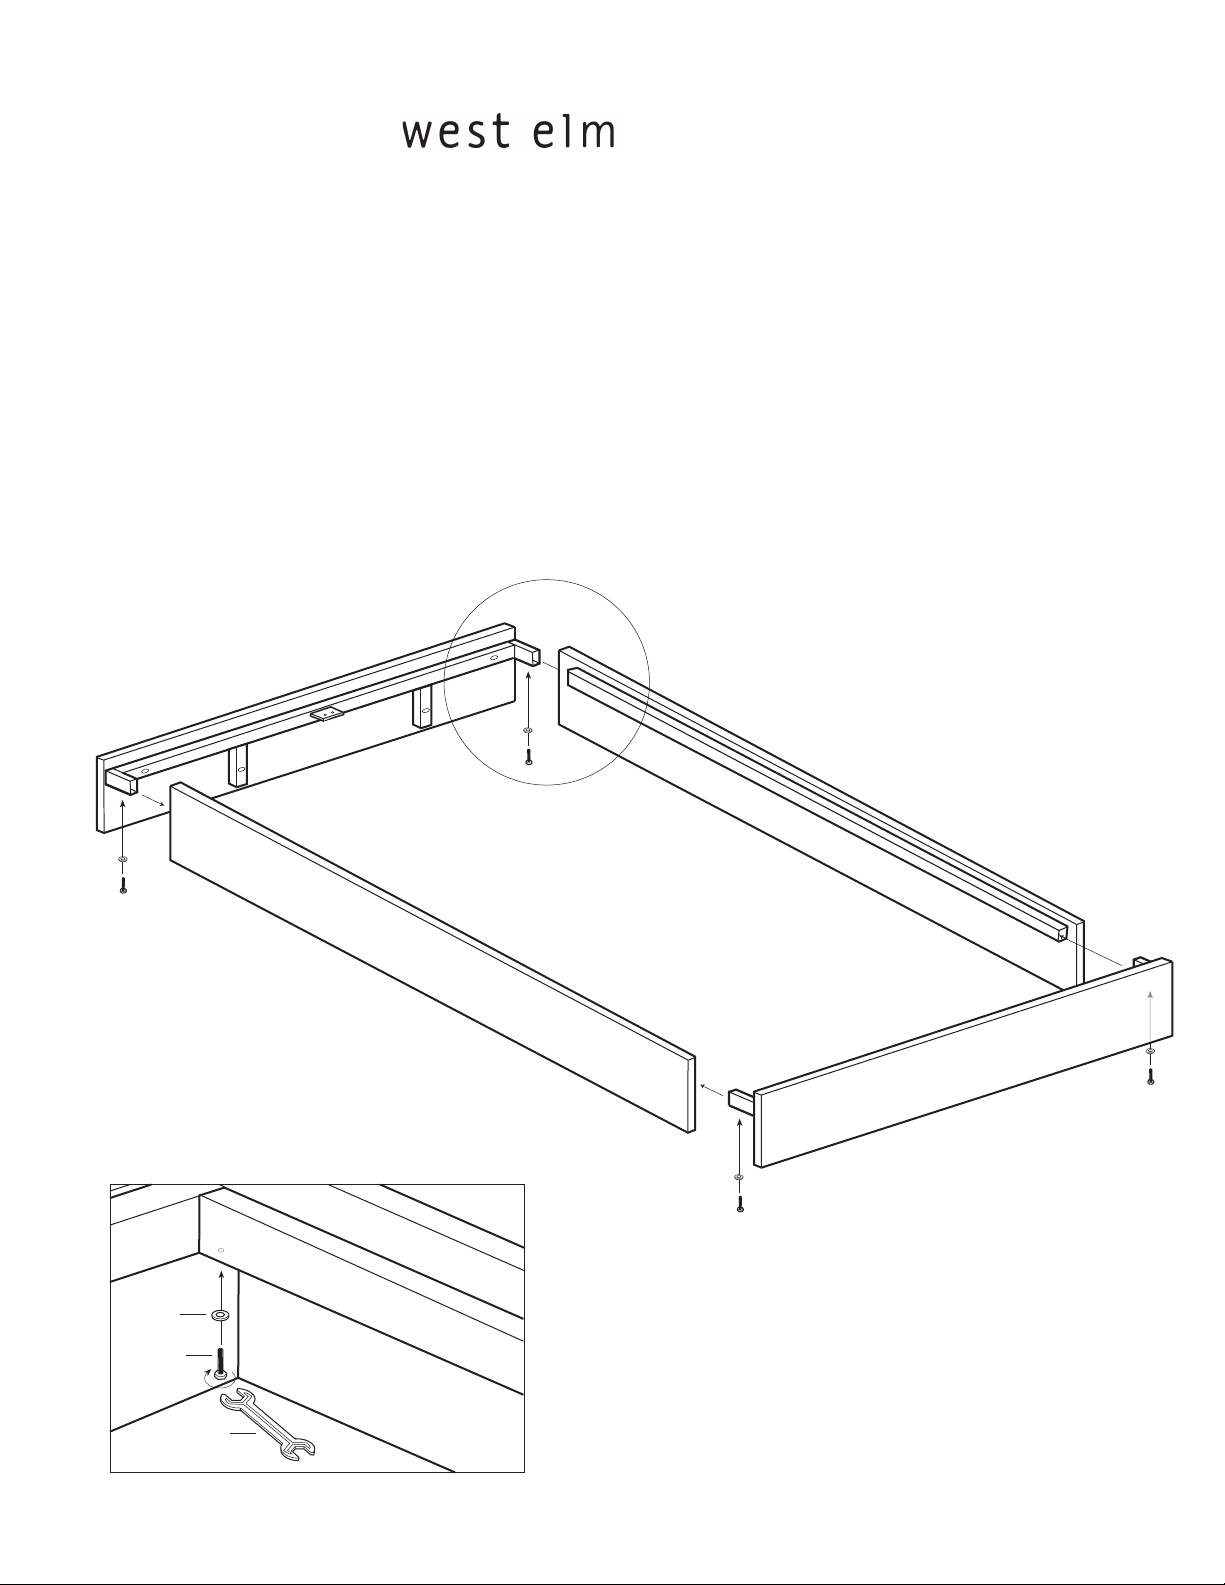
1. Insert the connectors on the footboard into the side rails. To attach, insert small bolt (A) through small
washer (C) as shown. Tighten with small wrench (H).
2. Repeat step 1 with the headboard.
4x
C
A
H
8995672/6952048/6952022/6951941/8996217/8995623/7322753/8995276/8995201/8995037/8986127/
8986036/8986069/8986085/8985962 - 10/05
page 3 of 8
Page 4

: upholstered bedframe
assembly instructions
3. (For cal king, king, queen, and full sizes only) To attach the midbeam, insert small bolt (A) with small
washer (C) through the holes at the ends of the midbeam, through the pre-drilled holes on the ledges on
the inside center of the headboard and footboard and into small nut (F). Tighten with small wrench (H).
4x
H
A
C
F
H
8995672/6952048/6952022/6951941/8996217/8995623/7322753/8995276/8995201/8995037/8986127/
8986036/8986069/8986085/8985962 - 10/05
page 4 of 8
Page 5

: upholstered bedframe
assembly instructions
4. With help from another person, turn bedframe upside down.
5. To attach corner braces, insert large bolt (B) through lock washer (G), through holes in corner braces and into
pre-drilled holes in frame as shown. Tighten with large wrench (I).
8x
I
B
G
8995672/6952048/6952022/6951941/8996217/8995623/7322753/8995276/8995201/8995037/8986127/
8986036/8986069/8986085/8985962 - 10/05
page 5 of 8
Page 6

: upholstered bedframe
assembly instructions
6. Attach corner legs by inserting post of corner leg through pre-drilled hole in center of corner brace, through
lock washer (G) and into large nut (E). Tighten using large wrench (I).
7. (For cal king, king, queen, and full sizes only) Attach center legs by inserting large bolt (B) through large metal
washer (D), through holes in center leg mouting plate, through pre-drilled holes in mid-beam, through small
washer (D), and into large nut (E) as shown. Tighten using small wrench (H) and large wrench (I). Levelers on
center legs can be adjusted.
4x
I
E
D
I
G
E
H
D
B
8995672/6952048/6952022/6951941/8996217/8995623/7322753/8995276/8995201/8995037/8986127/
8986036/8986069/8986085/8985962 - 10/05
2x
page 6 of 8
Page 7

: upholstered bedframe
assembly instructions
8. With help from another person, turn bedframe right-side up so that legs rest on the floor.
9. To attach slipcover, start at the two footboard corners and wrap slip cover over top and bottom edges and
secure velcro fastners. Take care to align seams with the corners of the bed before securing velcro. Using
this technique, work your way along both sides towards the headboard.
8995672/6952048/6952022/6951941/8996217/8995623/7322753/8995276/8995201/8995037/8986127/
8986036/8986069/8986085/8985962 - 10/05
page 7 of 8
Page 8

: upholstered bedframe
assembly instructions
10. Install slats. Position the bed slats as shown. There are stoppers attached at each end of the bed to prevent the bed slats
from shifting. Twin beds will only have one set of slats. Cal king, king, queen, and full will have two as shown.
CARE INSTRUCTIONS. Hardware may loosen over time. Periodically check that all connections are tight.
Wipe with a soft, dry cloth. To protect the finish, avoid the use of all chemicals and
household cleaners.
8995672/6952048/6952022/6951941/8996217/8995623/7322753/8995276/8995201/8995037/8986127/
8986036/8986069/8986085/8985962 - 10/05
page 8 of 8
 Loading...