

Page 1

! Tools Required
! Do not throw away packaging materials until assembly is complete.
! Assemble this item on a soft surface, such as cardboard or carpet, to protect nish.
! Professional Installation is suggested.
teak bath console
assembly Instructions
A. Side frame 2x
F. Maxix 4x
K. Pan head screw ¾” 8x
B. Apron 2x G. Maxix bolt 4x L. Countersunk head screw 2”
2x
C. Stretcher 1x H. Bolt 4x M. Allen key #4 1x
D. Shelf 1x I. L- Bracket 4x
N. Allen key #6 1x
E. Table top 1x J. Washer 4x
7626740 11/08 Page 1 of 3
Page 2
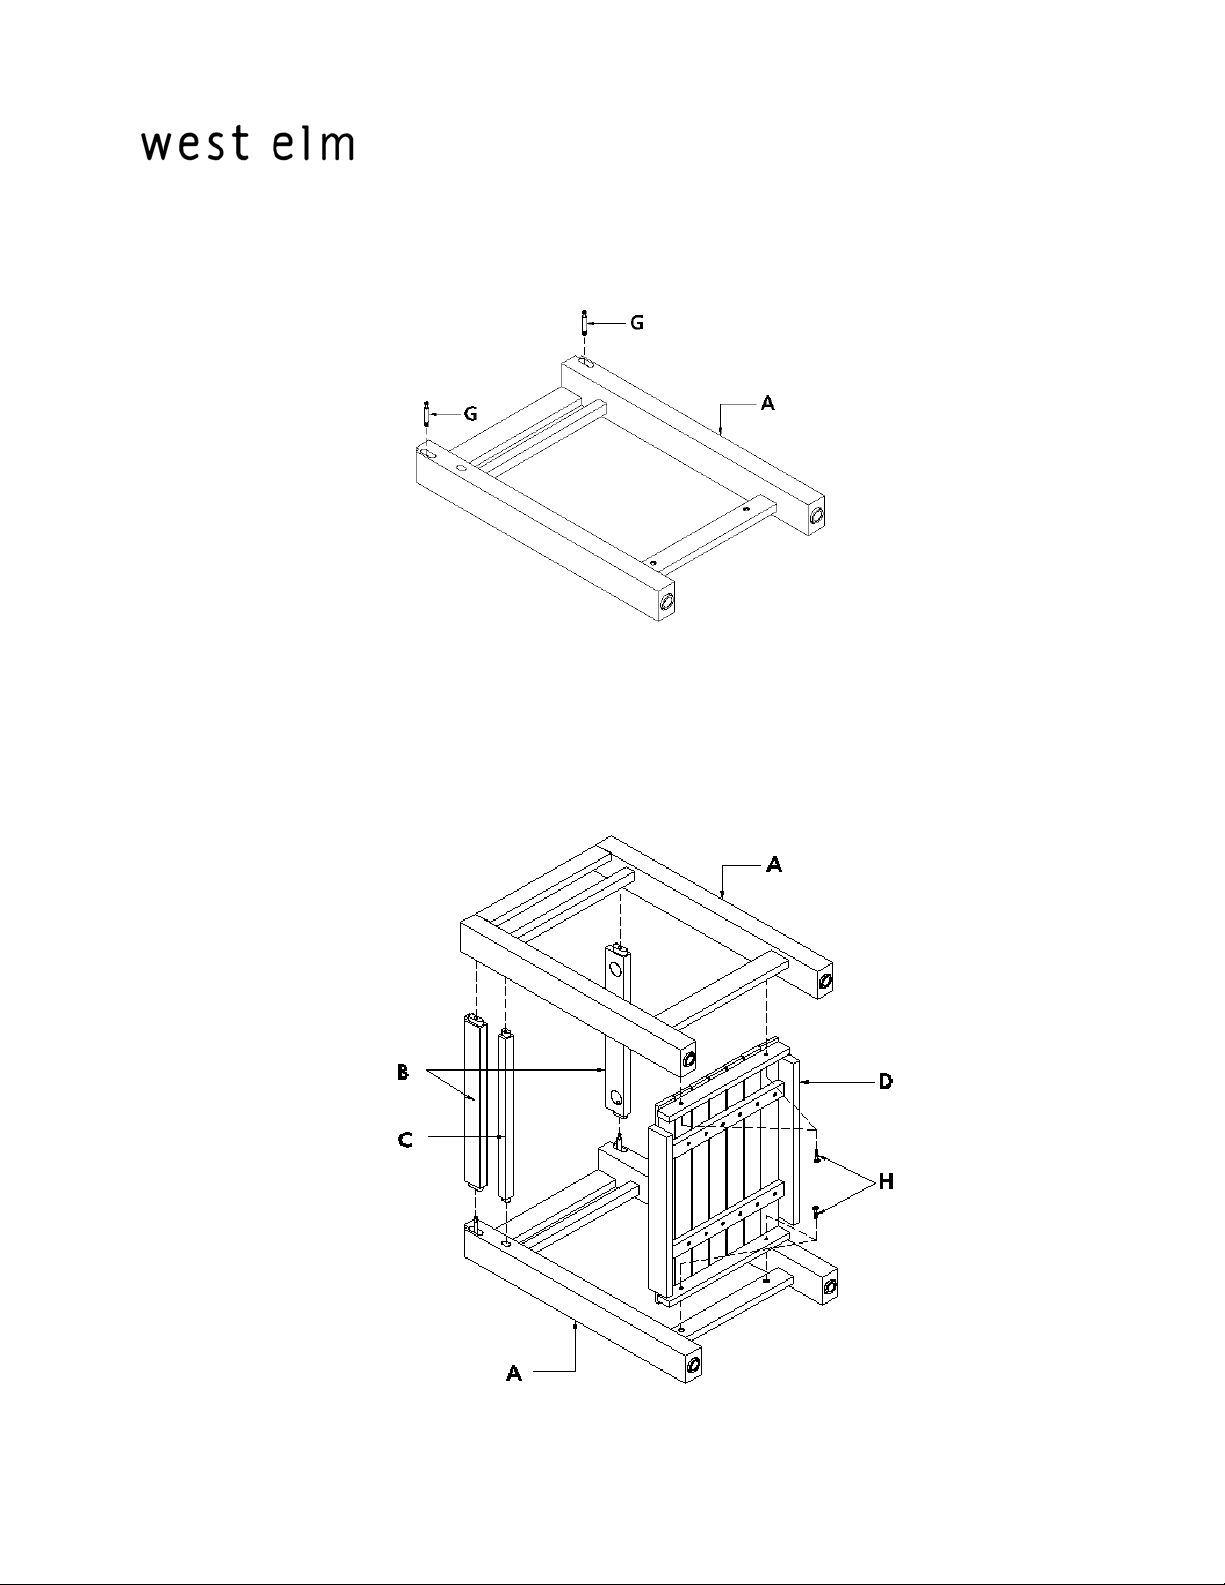
1. Insert the 4 maxix bolts (G) into the holes located on the 2 side frames (A).
teak bath console
assembly instructions
2. Position the 2 side frames (A) as shown. Insert the 2 aprons (B), stretcher(C), and shelf (D). Insert the bolts (H)
into the hole of shelf bracing as shown and tighten fully using the enclosed allen key #4 (M).
7626740 11/08 Page 2 of 3
Page 3

teak bath console
assembly instructions
3. Insert the 4 maxix (F) into the hole of the apron as shown. Tighten fully using the enclosed allen key #6 (N).
Insert the 2 countersunk head screws (L) into the holes of stretcher.
4. Position the top table (E) as shown. Apply the 4 L- bracketS (I) and secure using screws (K)
CARE INSTRUCTIONS
Hardware may loosen over time. Periodically check that all connections are tight. Wipe with a soft, dry cloth.
To protect nish, avoid the use of chemicals and household cleaners.
Over time, the original color of teak will weather and soften to a silver gray patina. To remove the silver-gray
appearance and day to day dirt, wash with warm soapy water using a sti scrubbing brush. Stroke lightly in
the direction of the grain. Allow to dry completely. Commercial teak cleaner may be used to restore the
natural color and luster of the wood. Natural stone is porous and can stain. Wipe spills immediately. For
regular care, use a soft closth slightly dampened with lukewarm water and immediately wipe with a clean cloth.
7626740 Page 3 of 3
 Loading...